
Introduction
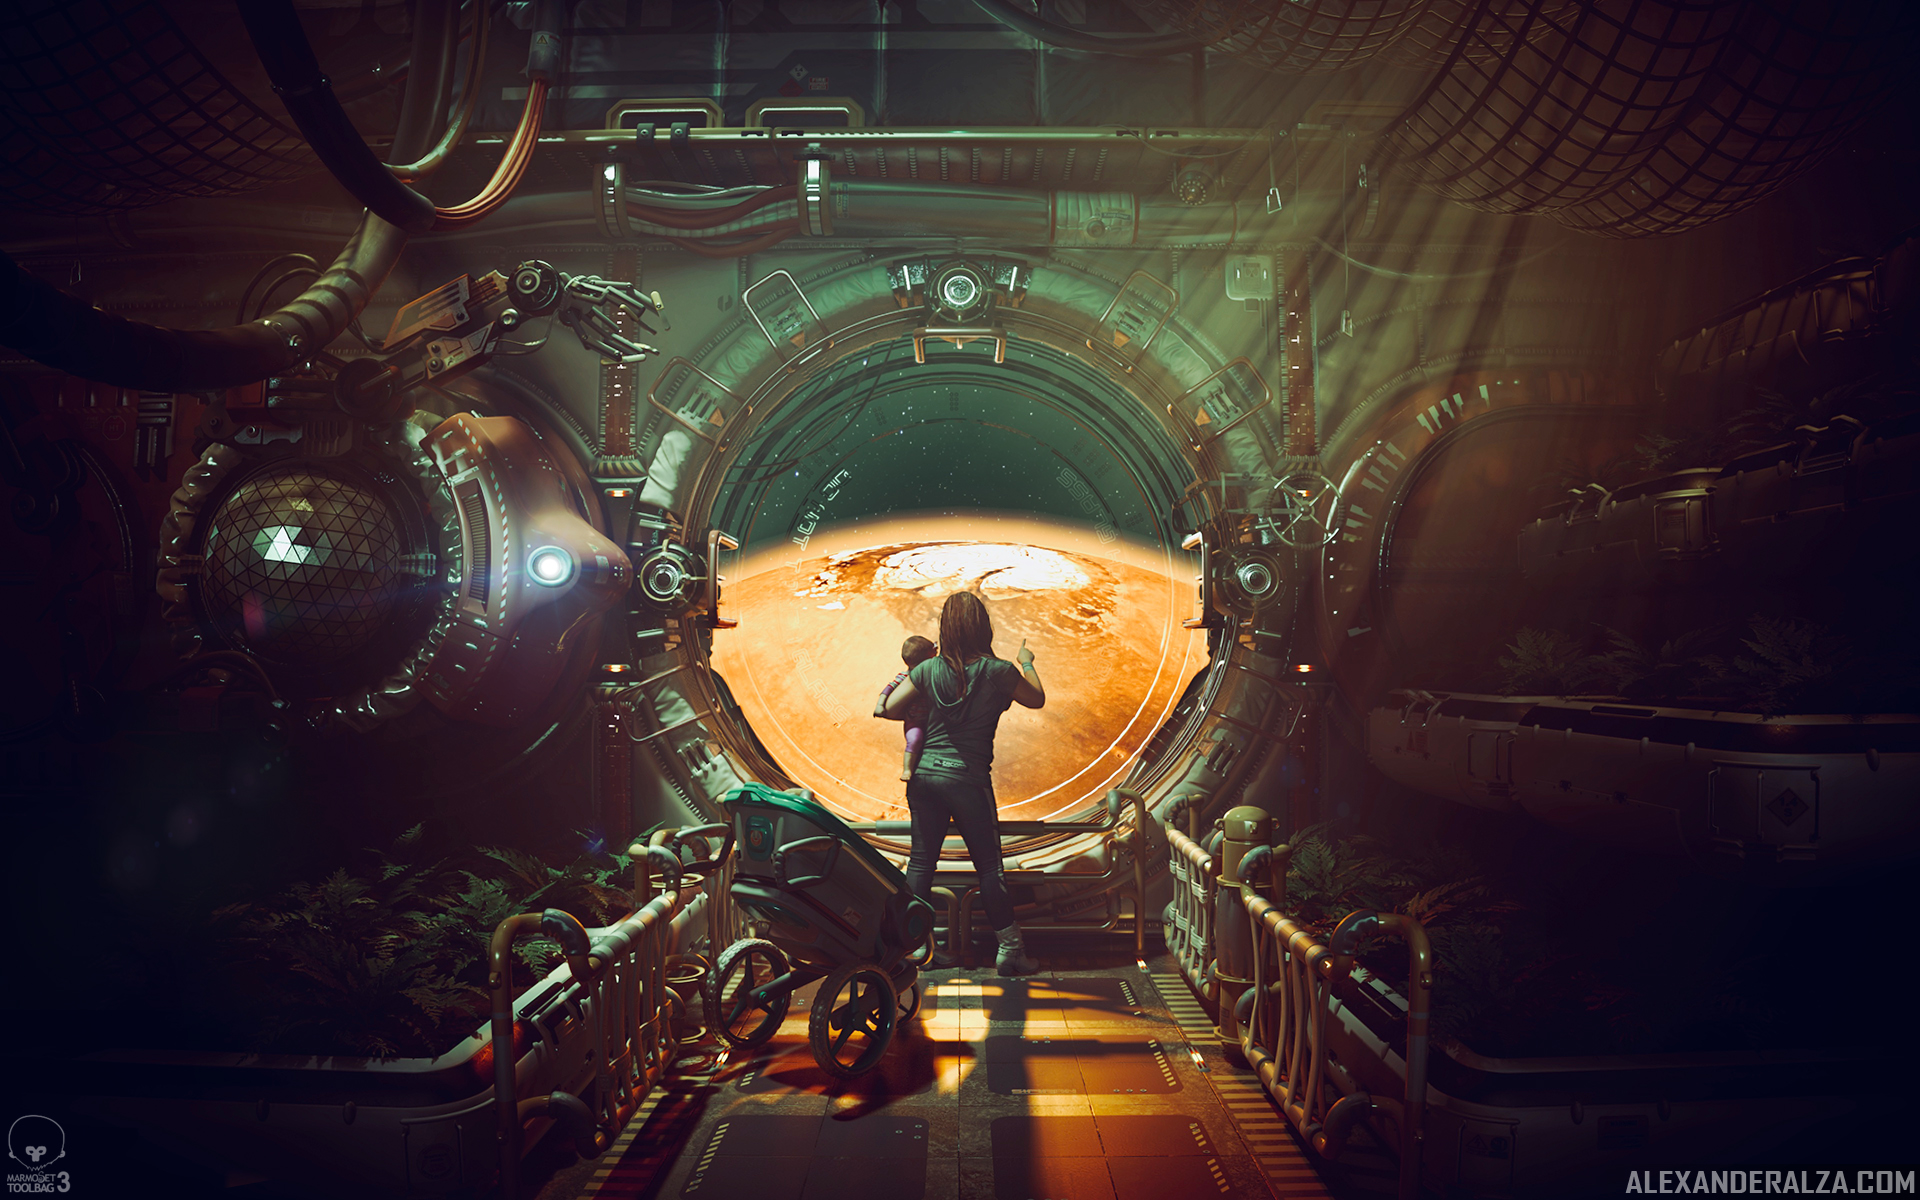
Greetings everyone! My name is Alexander Alza, I’m a Senior Environment Artist at High Moon Studios and I’ve been in the games industry for over 12 years. I love the work I do in professional teams, but I also enjoy doing personal work in my spare time. This write up will show you how I approached the mood and lighting of my latest mini-scene titled, Jezero. I will touch upon composition, lighting, and post-processing. Most of my focus will be on how Marmoset Toolbag 3 helped me achieve what I was aiming for with great speed and quality. If you’re looking for a less technical look into my scene, I invite you to check out my accompanying blog entry titled “The Making of Jezero” on ArtStation.
Composition
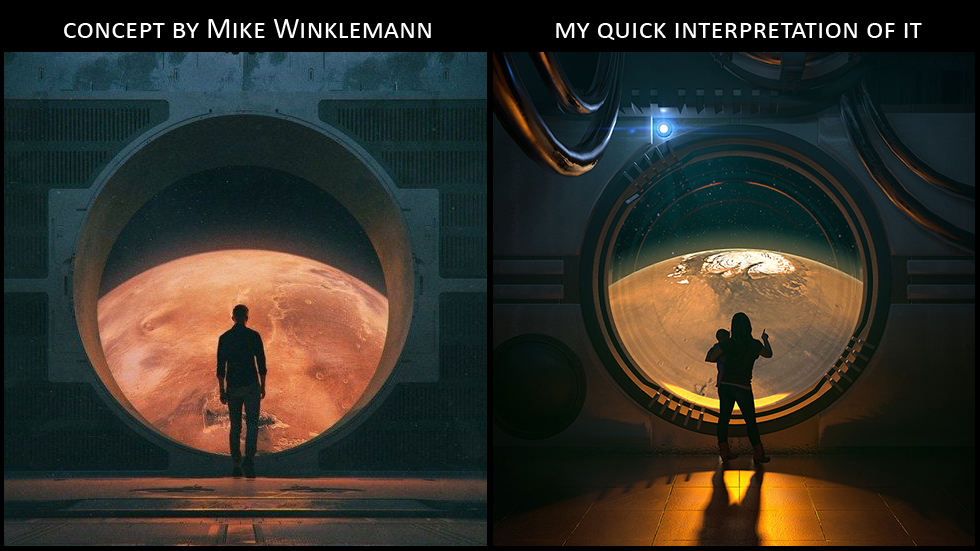
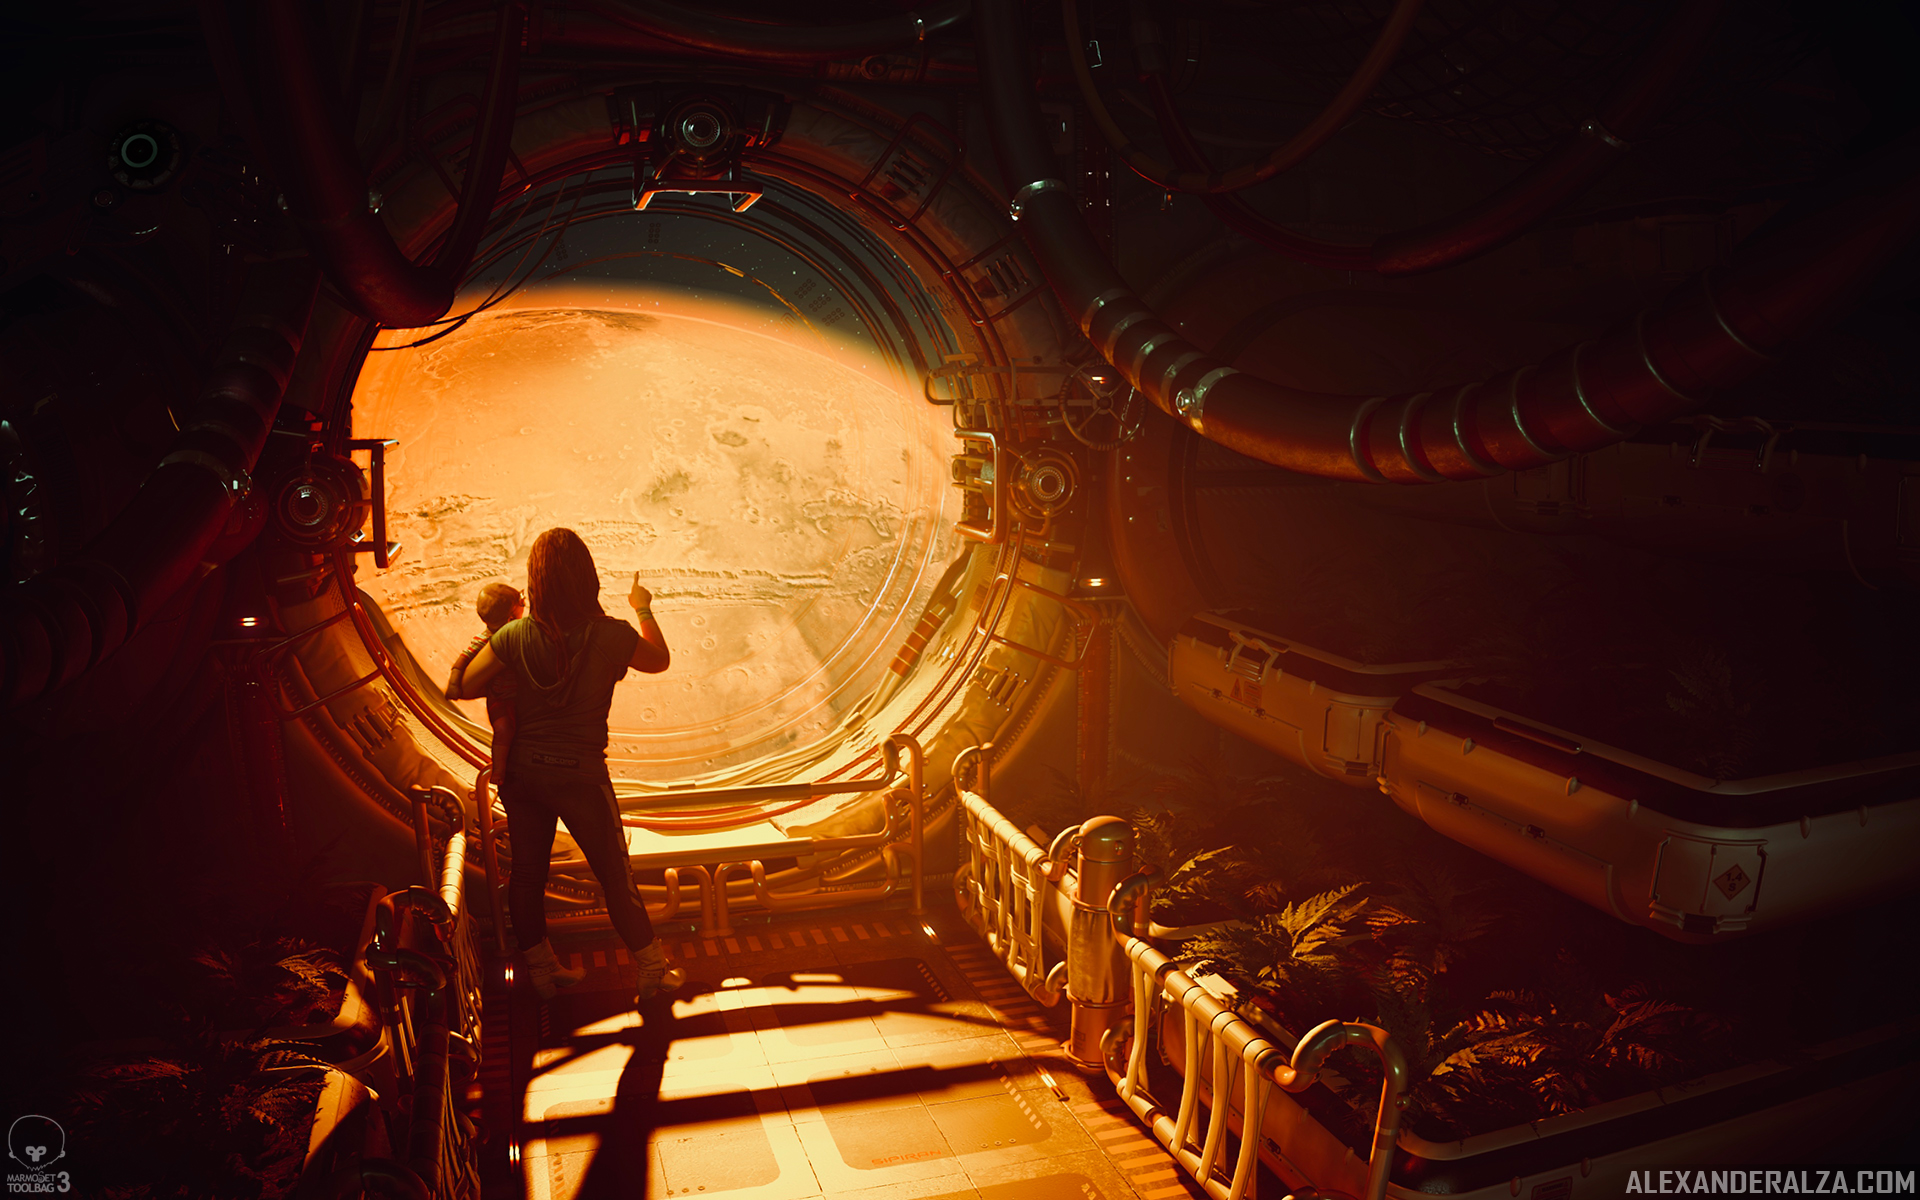
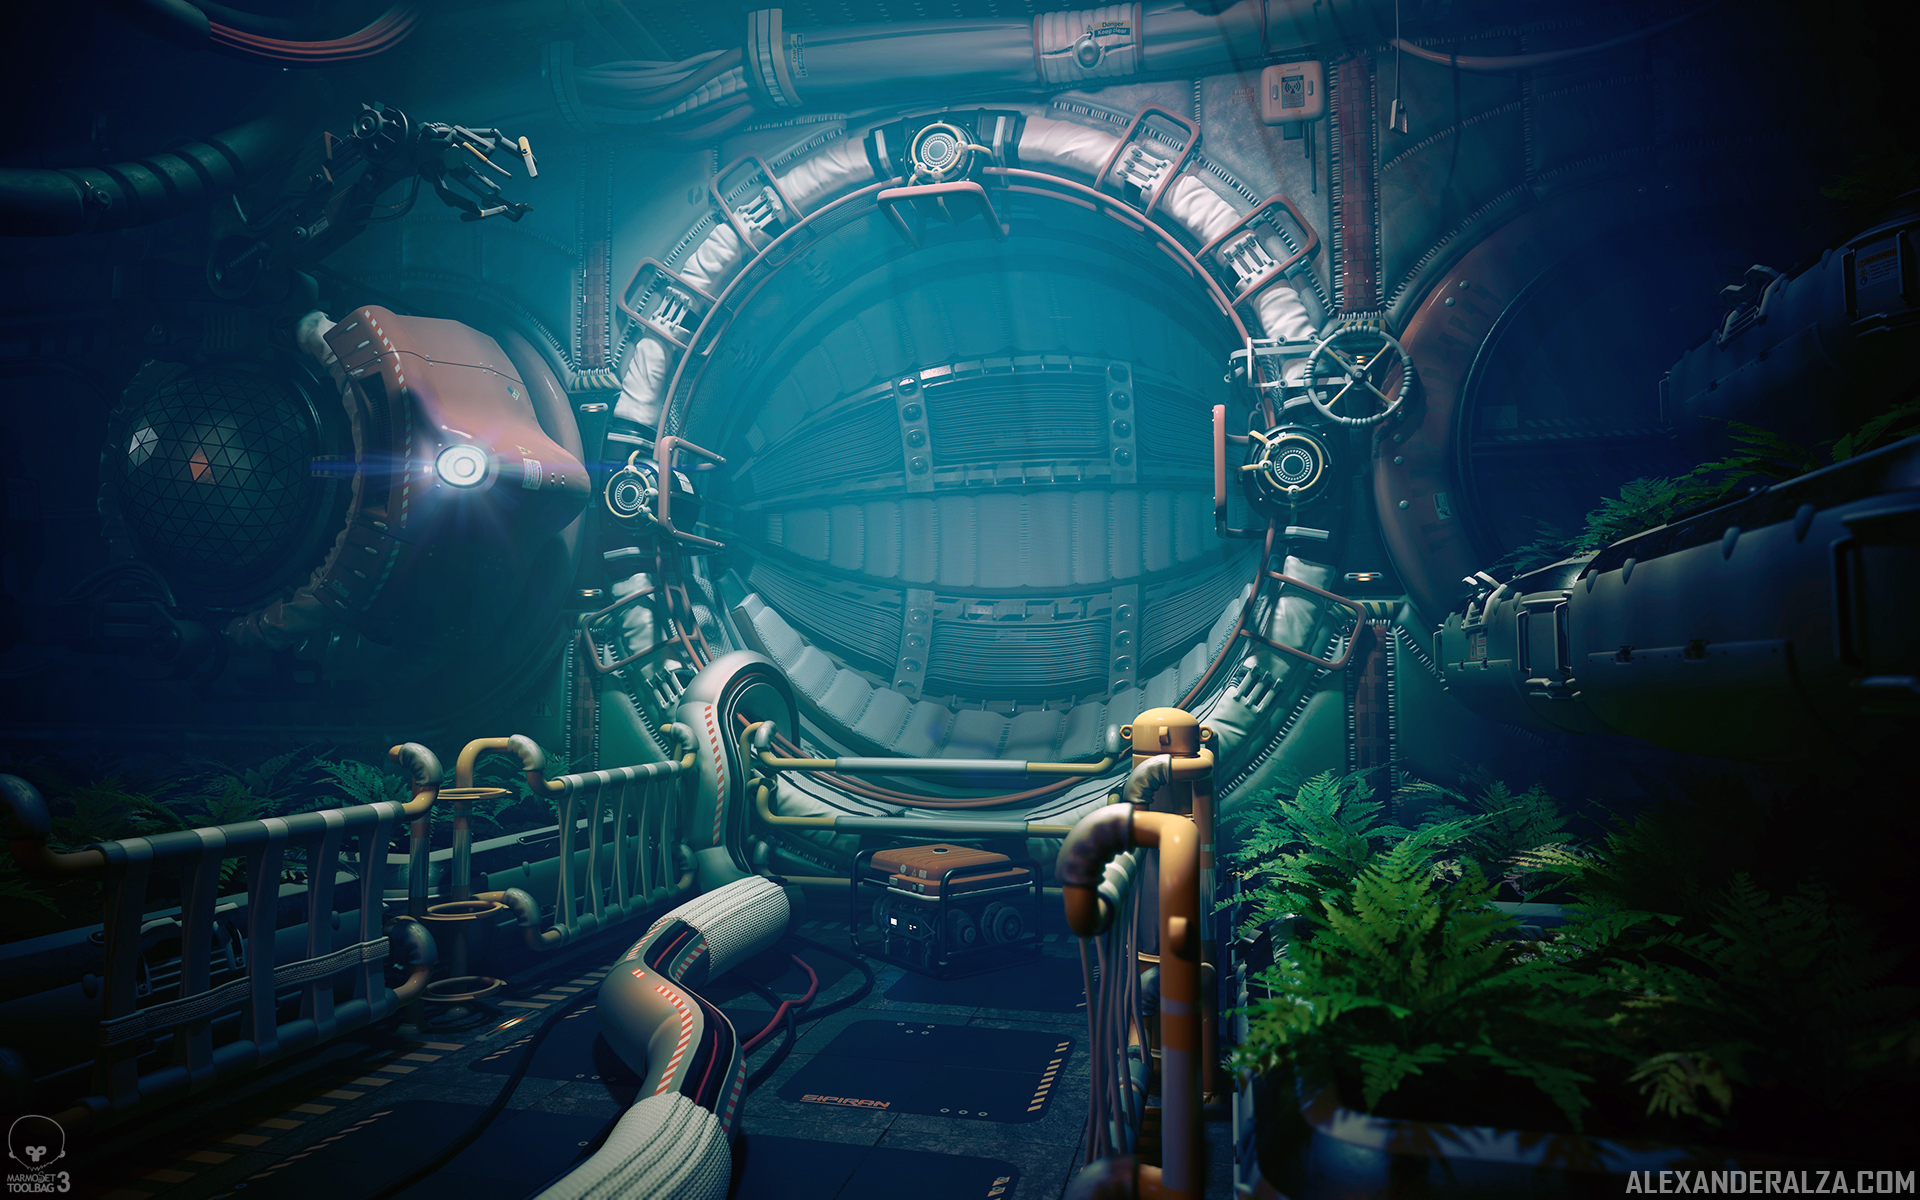
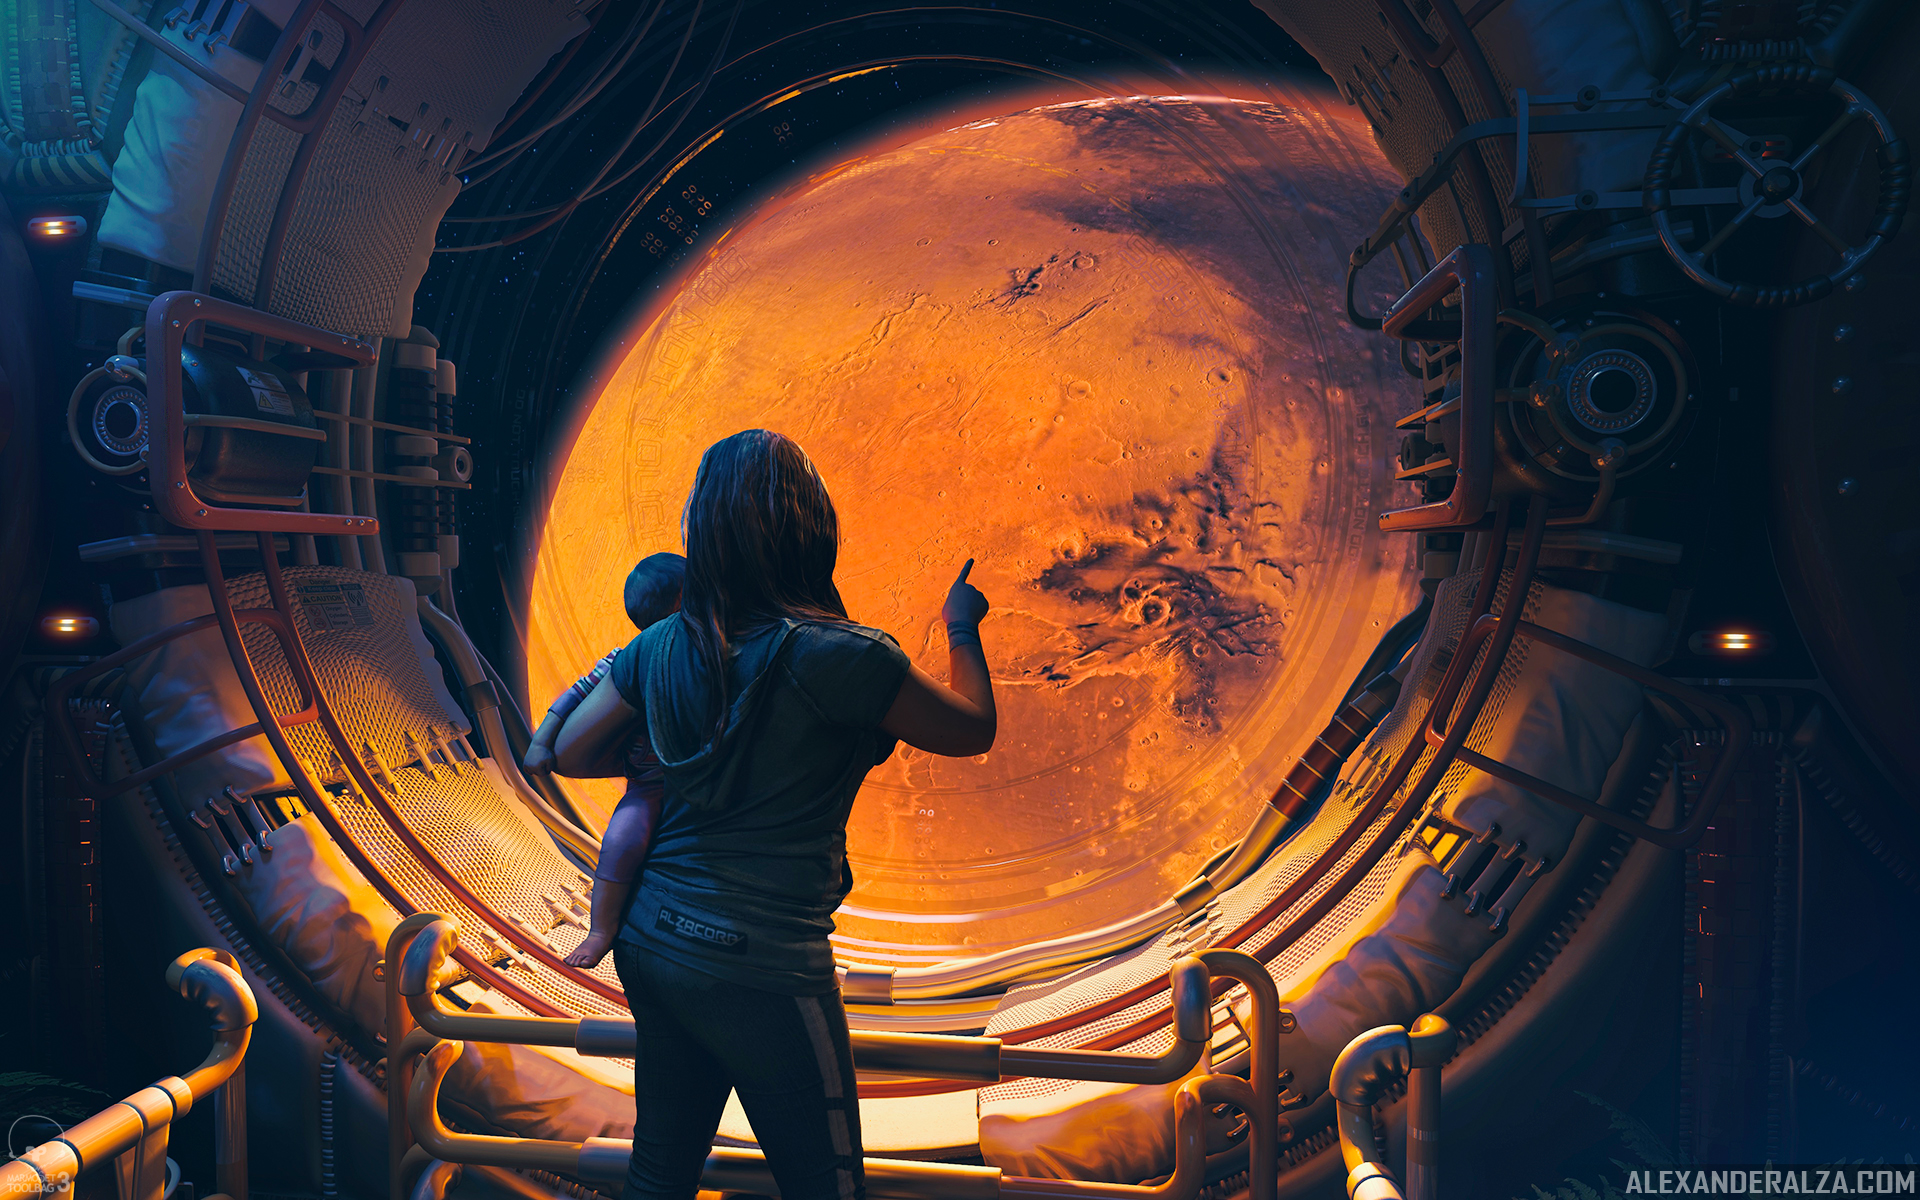
I’ve always been fascinated with space exploration. Mars related discoveries have been in the news as of late and I stumbled on the concept image above. Jezero started out as a single beauty shot, however, while having fun playing with Toolbag’s lighting, I decided to have four distinct lighting variants and camera angles in the same scene. Although I ended up with four different beauty shots, I will focus this breakdown on my main shot. Most of the same principles are applicable to the rest of the final beauty shots.
Modeling & Texturing
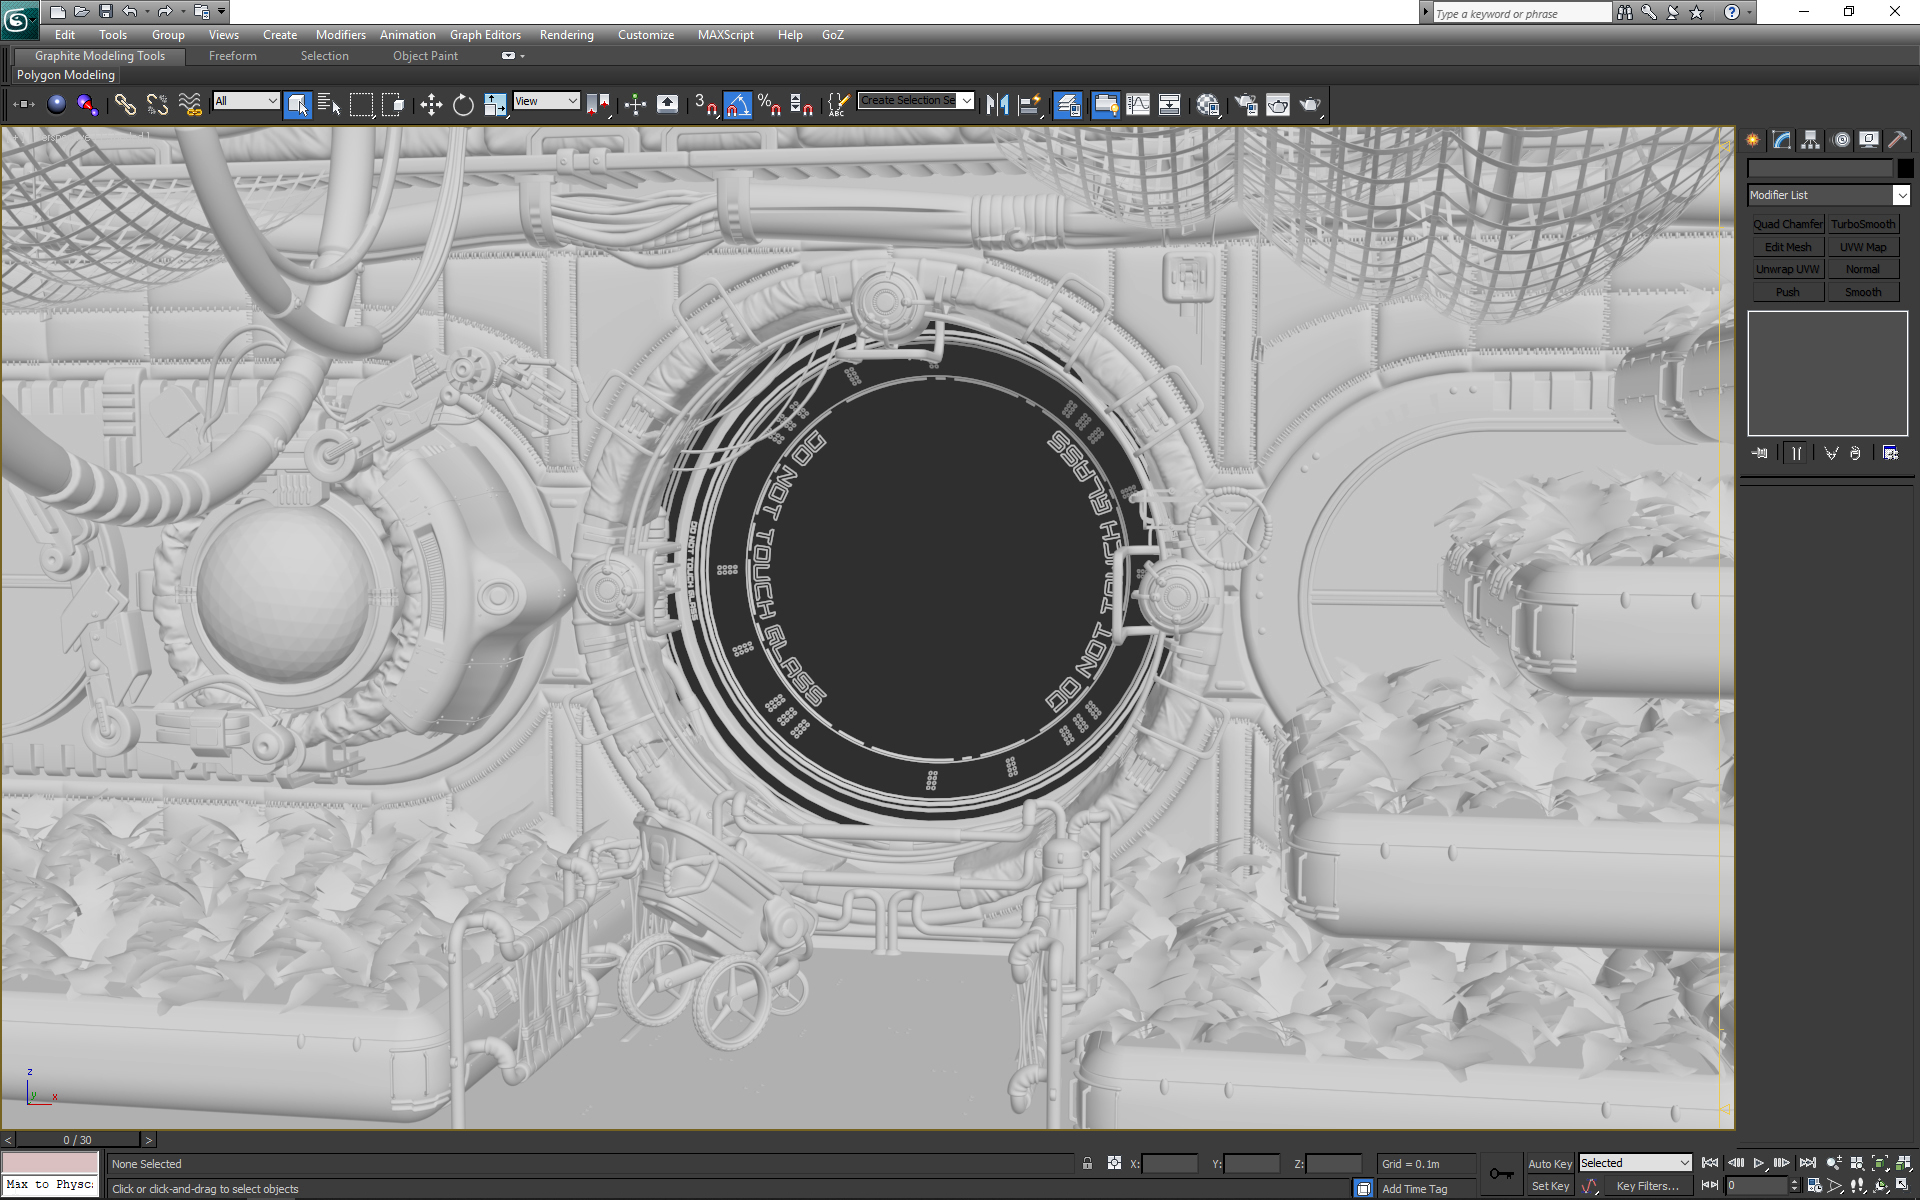
All of the geometry was created and staged in 3ds Max. I also used Zbrush and Marvelous Designer for some aspects. The cameras and lighting were done in Toolbag. Having less than zero free time in my life, getting quality materials that I could just plug and play was essential, so I gathered most of my textures from Quixel Megascans. On that same note, the mother and child characters were initially going to be black silhouettes, but that quickly became distracting. Instead, I acquired characters from AXYZ Labs and slightly modified the textures. Lastly, I found a nice, high-resolution image of Mars from NASA’s awesome gallery.
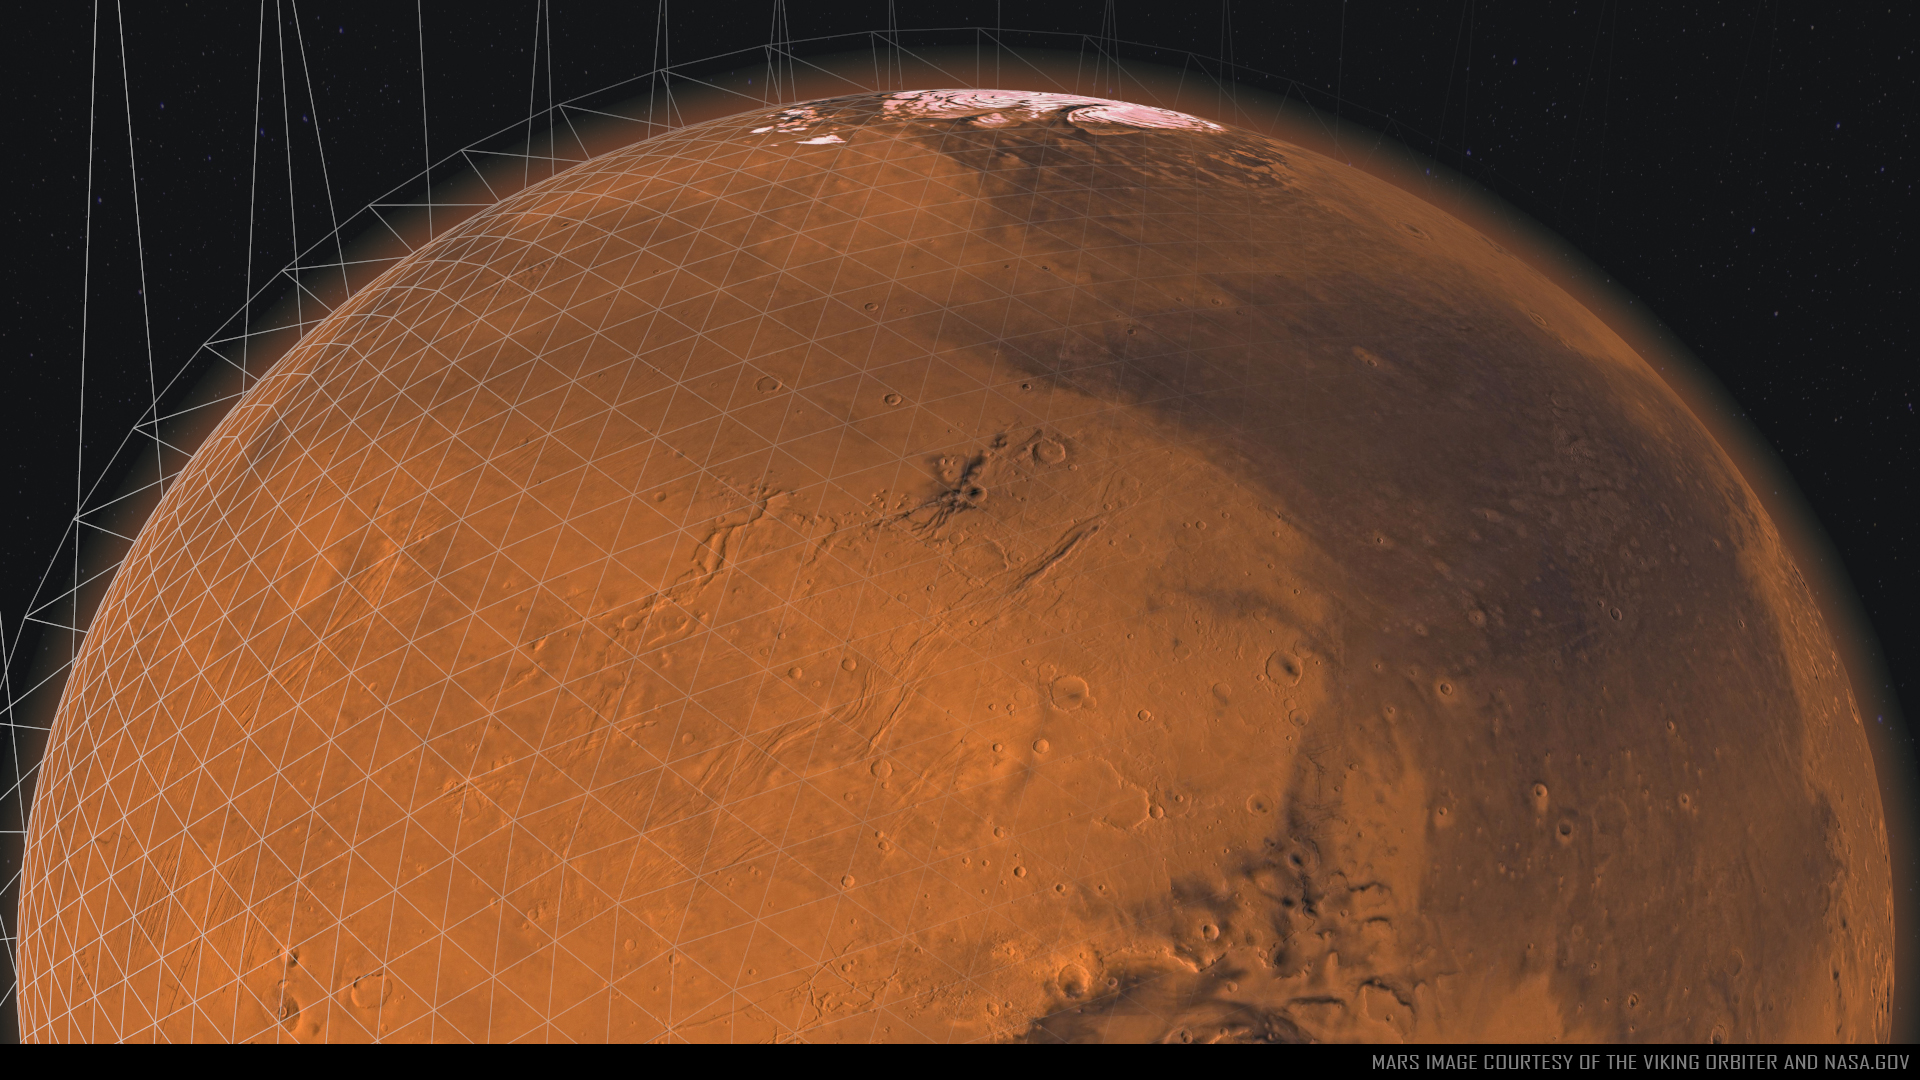
The giant Mars texture was projected on a sphere, and the thin atmosphere of Mars was an additive alpha halo plane wrapping around the circumference of the planet. It was turned into billboard, depending on the angle of my beauty shot.
Scene Setup & Render Settings
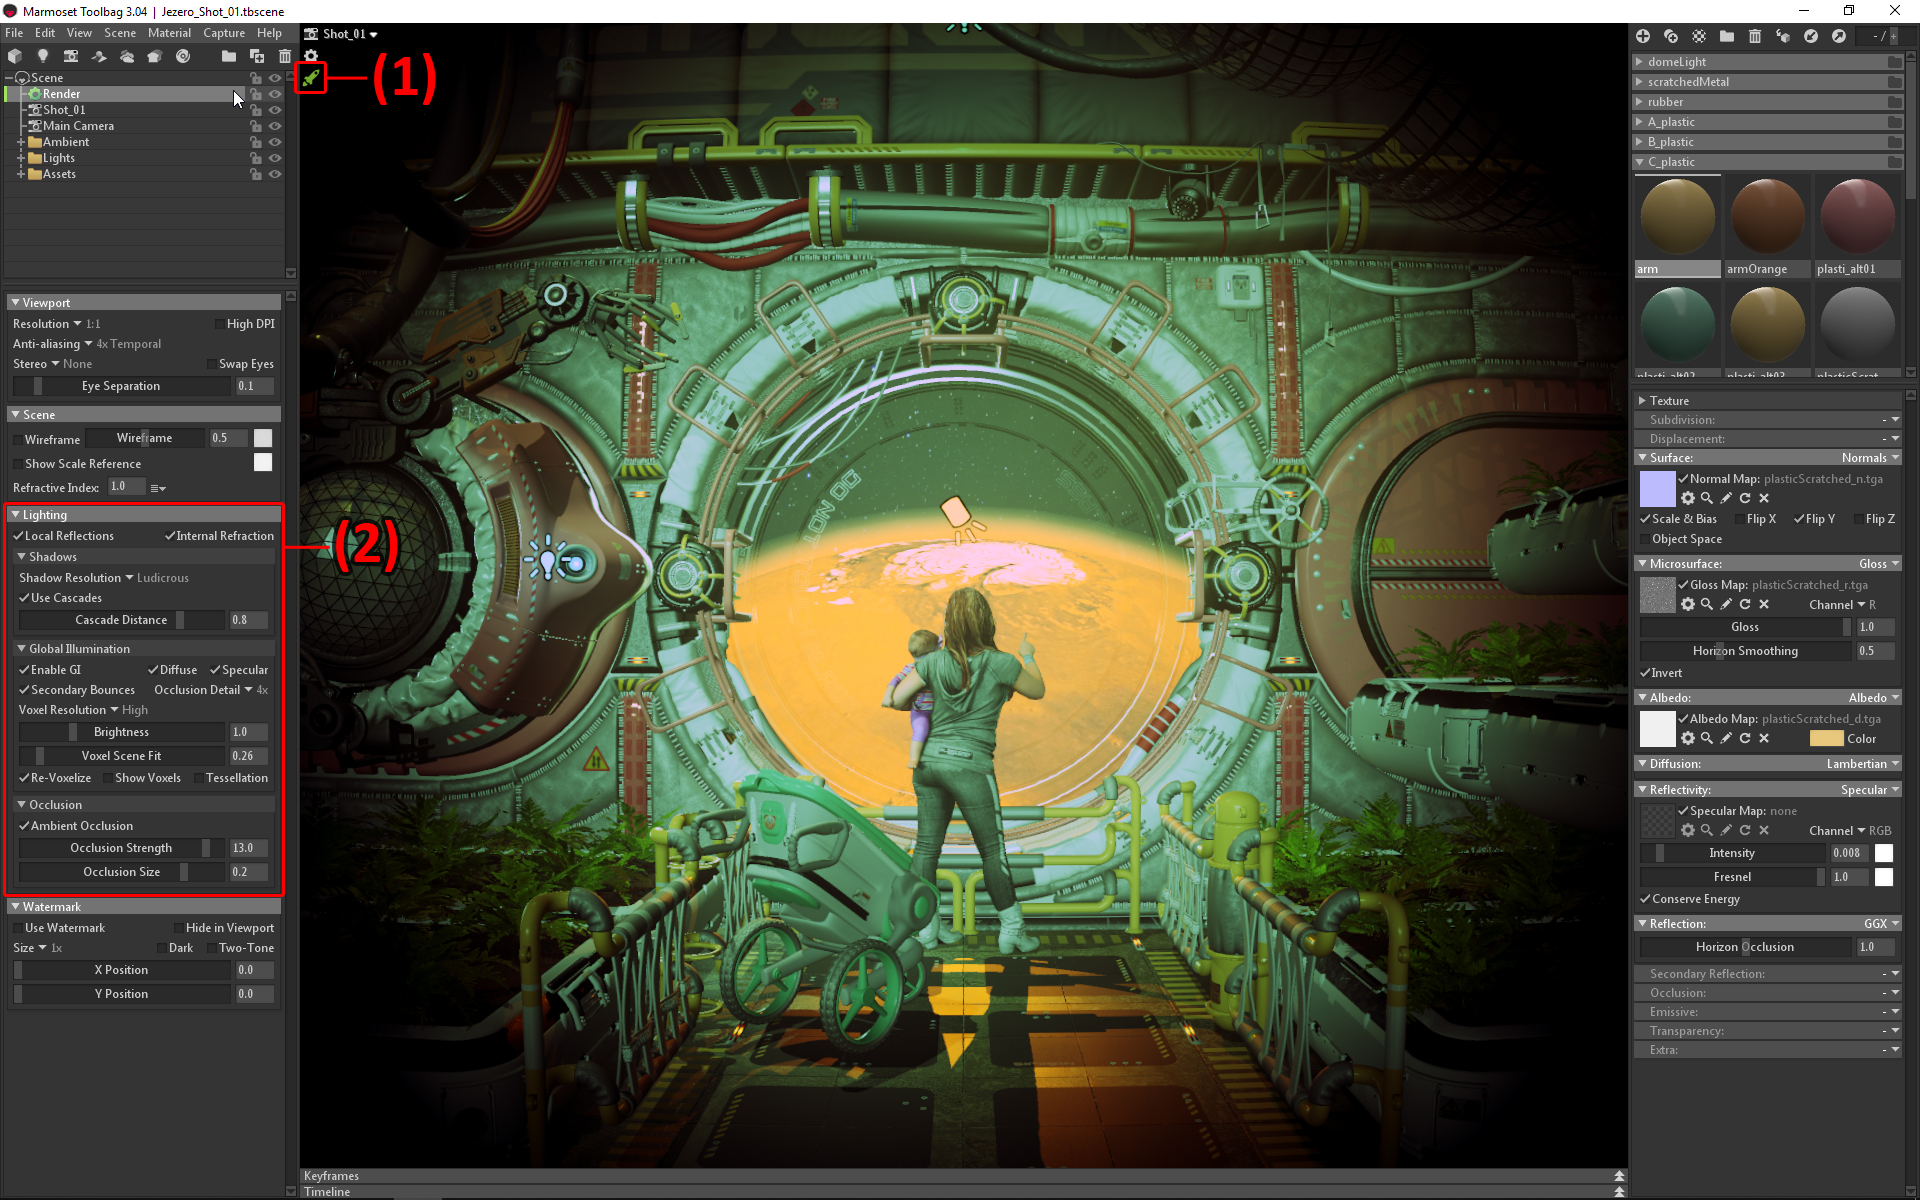
The image above shows my basic scene setup and render settings in Toolbag. One thing I love about Toolbag is the instant gratification of seeing an almost final render of your work in the viewport. Such power does come at the cost of performance, so the Speedy Viewport Mode (1) option was in full effect, making it a breeze to navigate the scene. I enabled or ramped up most things in the Shadows, Global Illumination, and Occlusion sections (2).
Lighting Setup
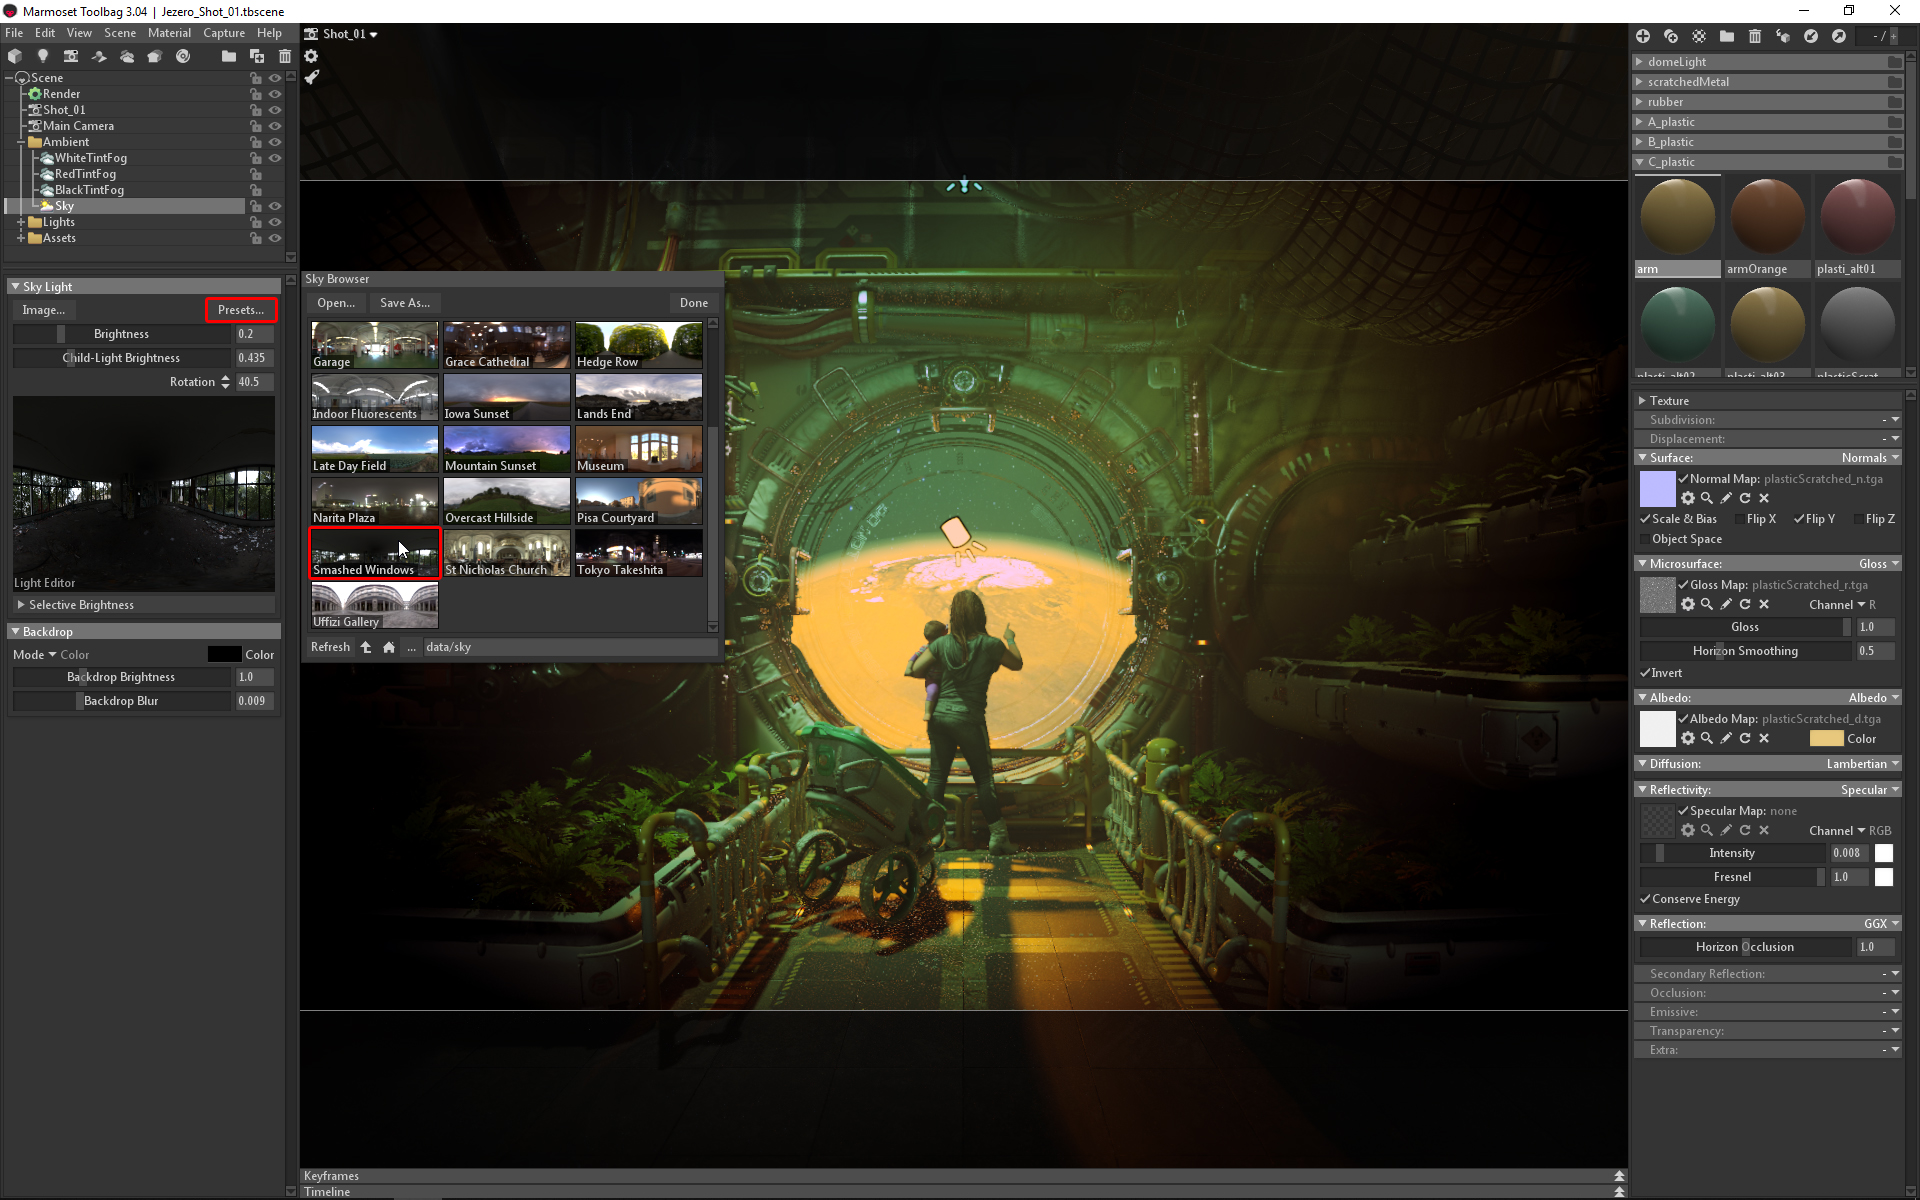
Picking the right Sky Light Preset for your scene is like picking the first coat of paint that you can build upon. I knew that for this particular shot, I wanted something mostly dark but with some nice highlights. This lead to me using the Smashed Windows preset in Toolbag, with some value tweaks.
The second, and perhaps most time consuming step, is adding lights and playing with their Brightness, Color, Distance and Spot Angle. I do not fancy myself an expert lighter, so some of this is basic key and fill light experimentation.
My lighting is mostly made up of a few Spot Lights and some small Omni Lights. The placement of the lights is determined by the composition of my beauty shot and what I want accentuated. In most of my shots, the main light source could be considered the focal point, that being Mars. One detail I wanted to keep from the original concept was the way the Martian glow bounces off the surfaces. Considering the gloss on most of my materials, I knew that would play nicely on my renders.
Camera Settings
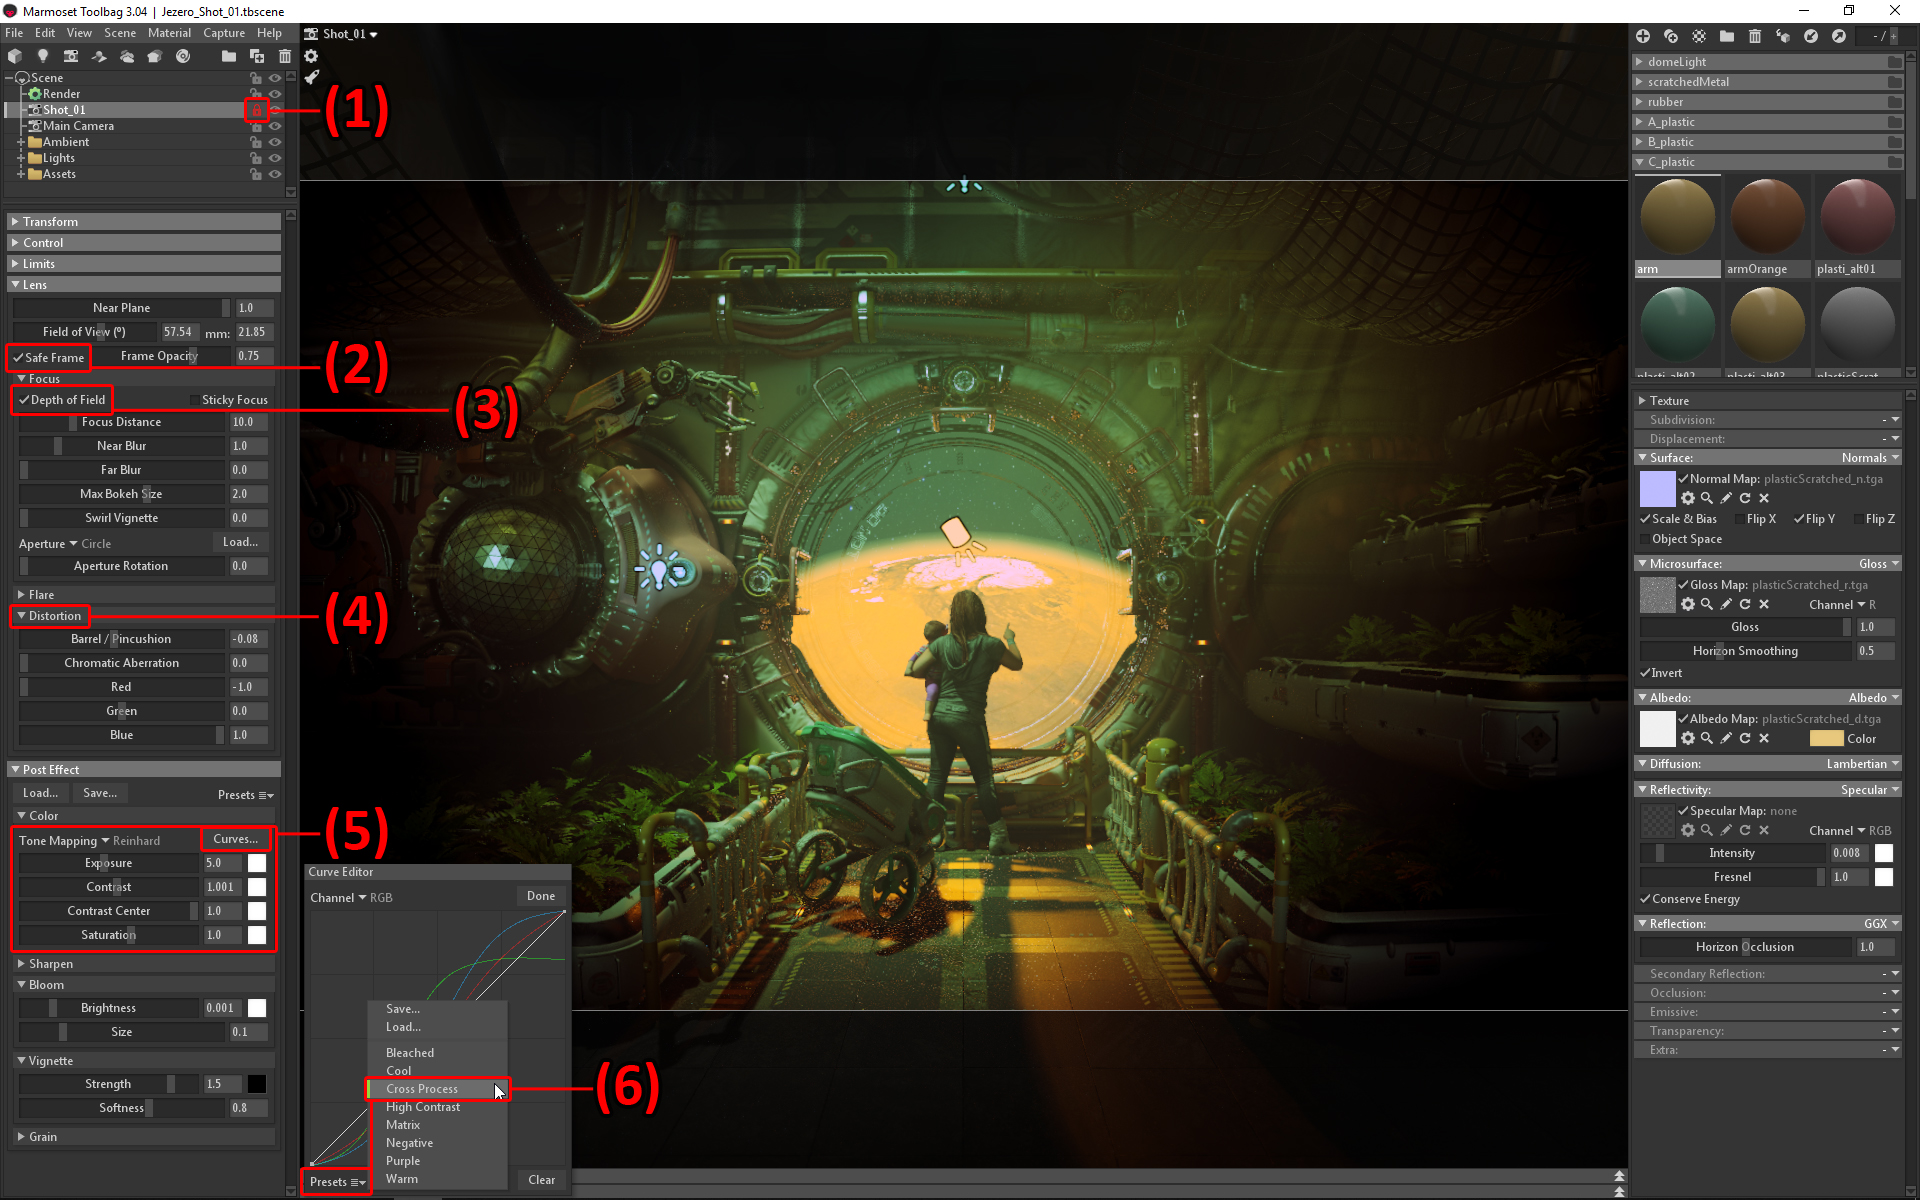
I tend to use the Main Camera to navigate the scene freely. I create a new camera for each unique beauty shot, as each one will have their own camera settings. Once I find the perfect framing for one of my beauty shots, I play it safe and lock the camera (1) so I don’t accidentally nudge it off place. To get a better idea of my final output, I like to work with Safe Frame (2) enabled on my beauty shot cameras. Playing with Depth of Field (3) and having a minimal amount of Barrel/Pincushion under Distortion (4) is a great way to focus the attention where desired. In the case of my main shot, I set my Tone Mapping (5) from Linear to Reinhard, played with some values and set my Curves to the Cross Process preset (6). I then set a very minimal Bloom value and quite a pronounced Vignette. Flare, Sharpen and Grain are set to zero.
I like giving the viewer some peripheral treats, but also reinforcing where I want the eye to ultimately rest. The camera and post process options in Toolbag are great for making your work truly shine.
When iterating and doing trial and error renders, my rig is good enough to quickly pump out 1920×1200 test renders at 100x sampling. When I’m ready to create the final renders, I typically go twice as big as my intended resolution. In this case, I would render a 3840×2400 .png at 400x sampling. I then resize my image back down to 1920×1200. Since ArtStation is my current go-to site for posting work, they recommend posting at 1920px width to get the most identical and desired results.
Render Passes
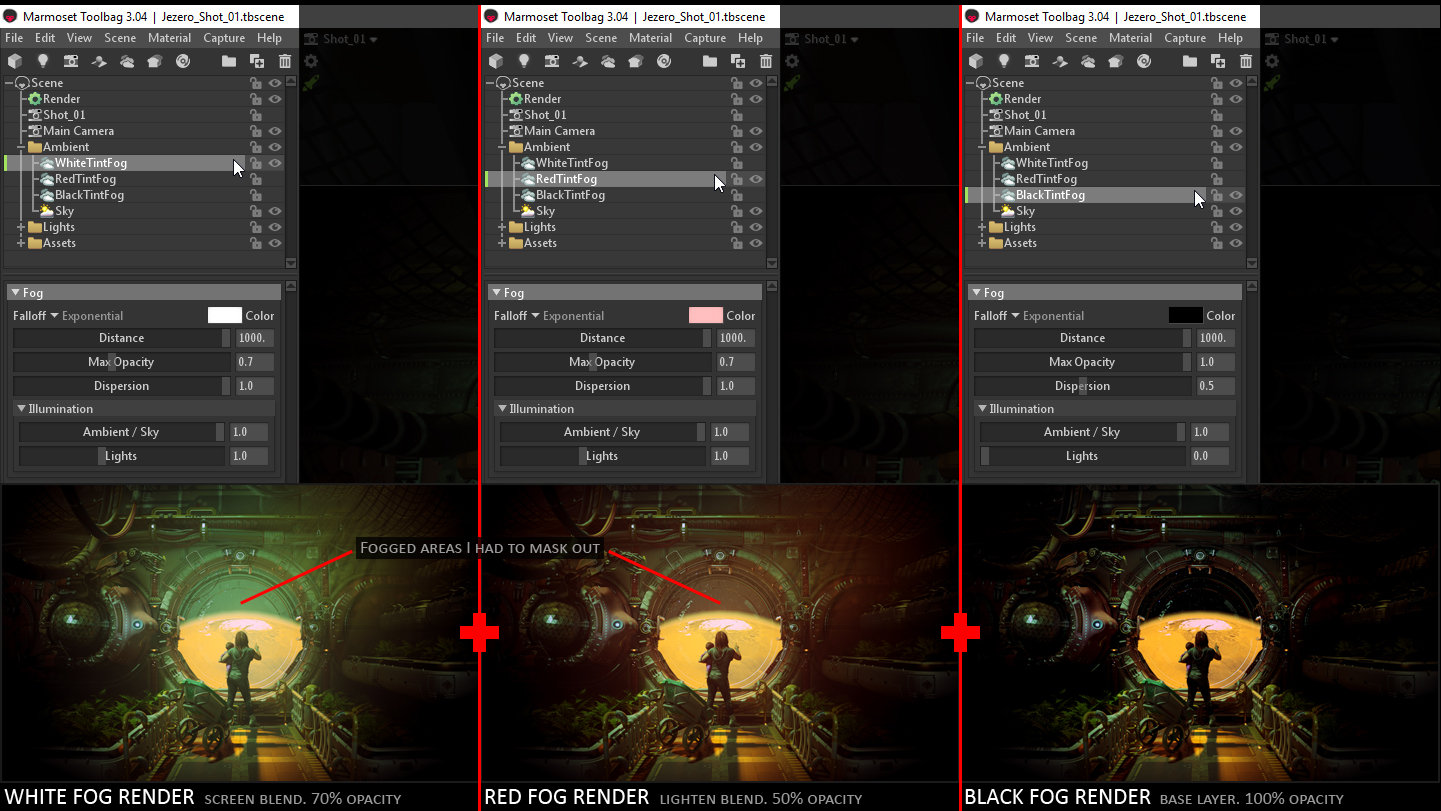
In the case of my main beauty shot, I needed to do a few renders and composite them in Photoshop due to some limitations in Toolbag. As far as I know, you cannot exclude a material or mesh from receiving fog in Toolbag at the moment. While I liked the volumetric effects I was seeing in my foreground, I did not wish to have the background washed out in fog. This lead to me having to create render passes with and without fog and mask them out in Photoshop.
In the end, rendering out multiple passes actually turned out to be a good thing. I could have a pass with my strong white fog (tinted on the green side due to the aforementioned curves), a pass with my red tinted fog, and then play with their blending style to get interesting results.
Conclusion
I hope this behind-the-scenes look into my Jezero scene encourages you to experiment with Toolbag in new ways. Huge thanks to the people at Marmoset for giving me the opportunity to share my process and for creating and continuing to improve such an awesome piece of software.
We would like to thank Alexander Alza for creating this article. You can find more of Alexander’s work on Artstation. Find out how you can create polished, atmospheric environment art presentations with Toolbag using the free 30-day trial, and visit our Tutorials section to see more breakdowns.


