
Introduction
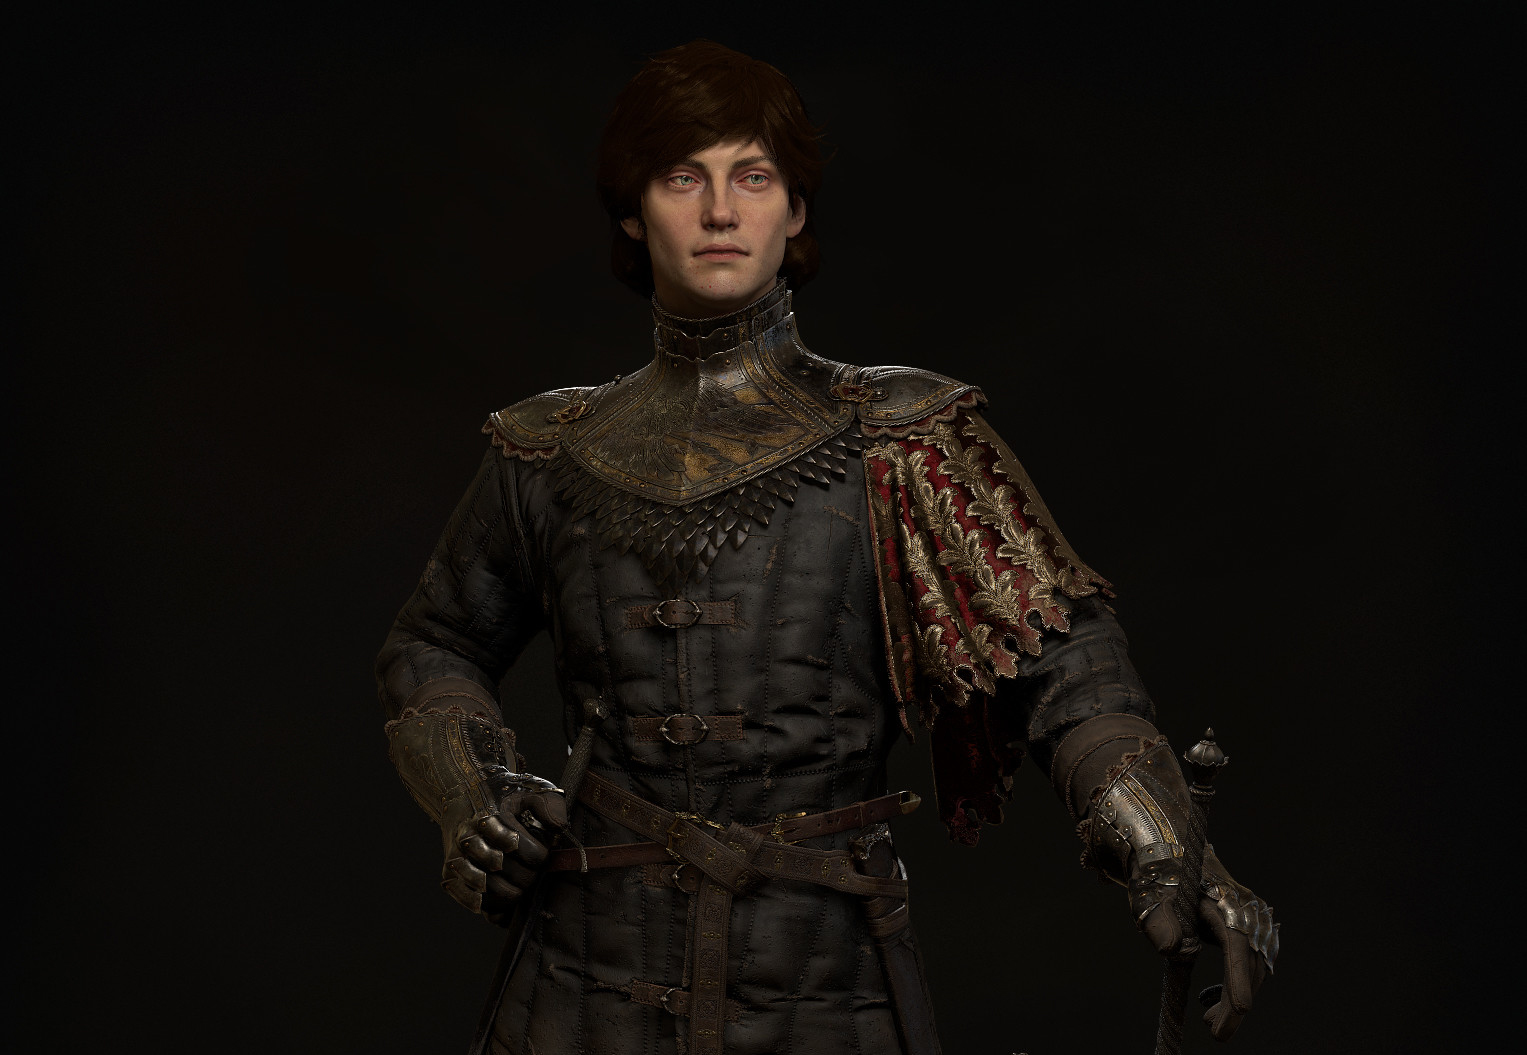
Hello, my name is Paul Widelski and I’m a Senior Character Artist at Splash Damage. In this breakdown article, I’ll be going over some of the materials I created for my recent piece, “Lordling”, and the overall presentation in Toolbag 3. The art direction of the project was to create a realistic character from a miserable, dirty world, such as Dark Souls or Game of Thrones, presented in the pompous style of a royal portrait. Having materials that matched this idea was key to achieving my goals.
Sculpting & Modelling
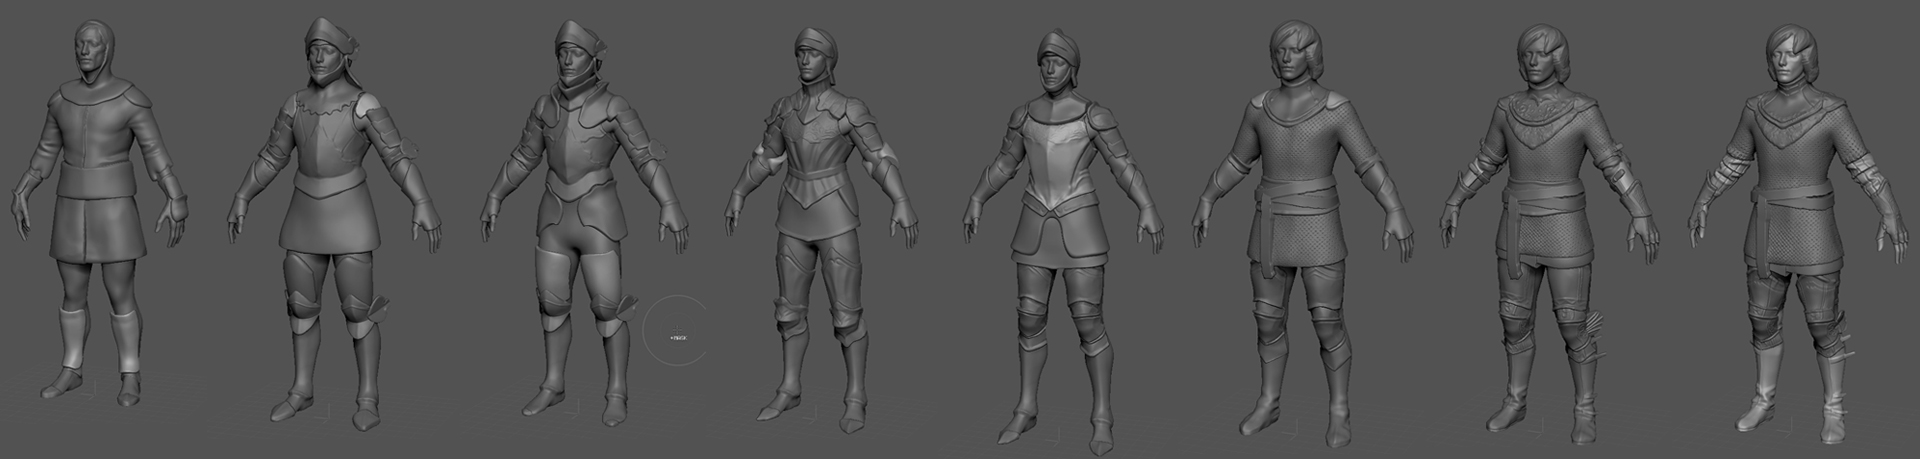
I created several iterations of the concept in Zbrush, with some sketches and overpainting to support it. I sculpted him using ZBrush and 3ds Max, switching back and forth between both programs. I would create a rough proxy sculpt in Zbrush, decimate it, then model over it in 3ds Max. This allowed for quick iteration and a cleanly modelled result.
The fabric materials were sculpted inside of Zbrush using a lot of real world reference. The retopology, low poly, and UVs were done inside of 3ds Max. Baking and texturing was done in Substance Painter. Below are my breakdowns for each material used.
Material Creation & Setup
Leather Material
Leather is probably one of the most fun materials to create as there are many fine details. To get a realistic feeling, I used a lot of layers with subtle details and colour variation within each one.
The video above shows the following steps:
- Base and Base Alt: This layer is for establishing different base colours, such as the bag.
- Grunge layers: This is where the main variation comes from. Each layer has a colour set to very low opacity with a slight shift in roughness.
- Cavity Dirt, Splatter, Scratches: General wear and tear layers give the material a sense of history.
- Edgewear group: Edgewear is essential in any material to make it look used and for popping details.
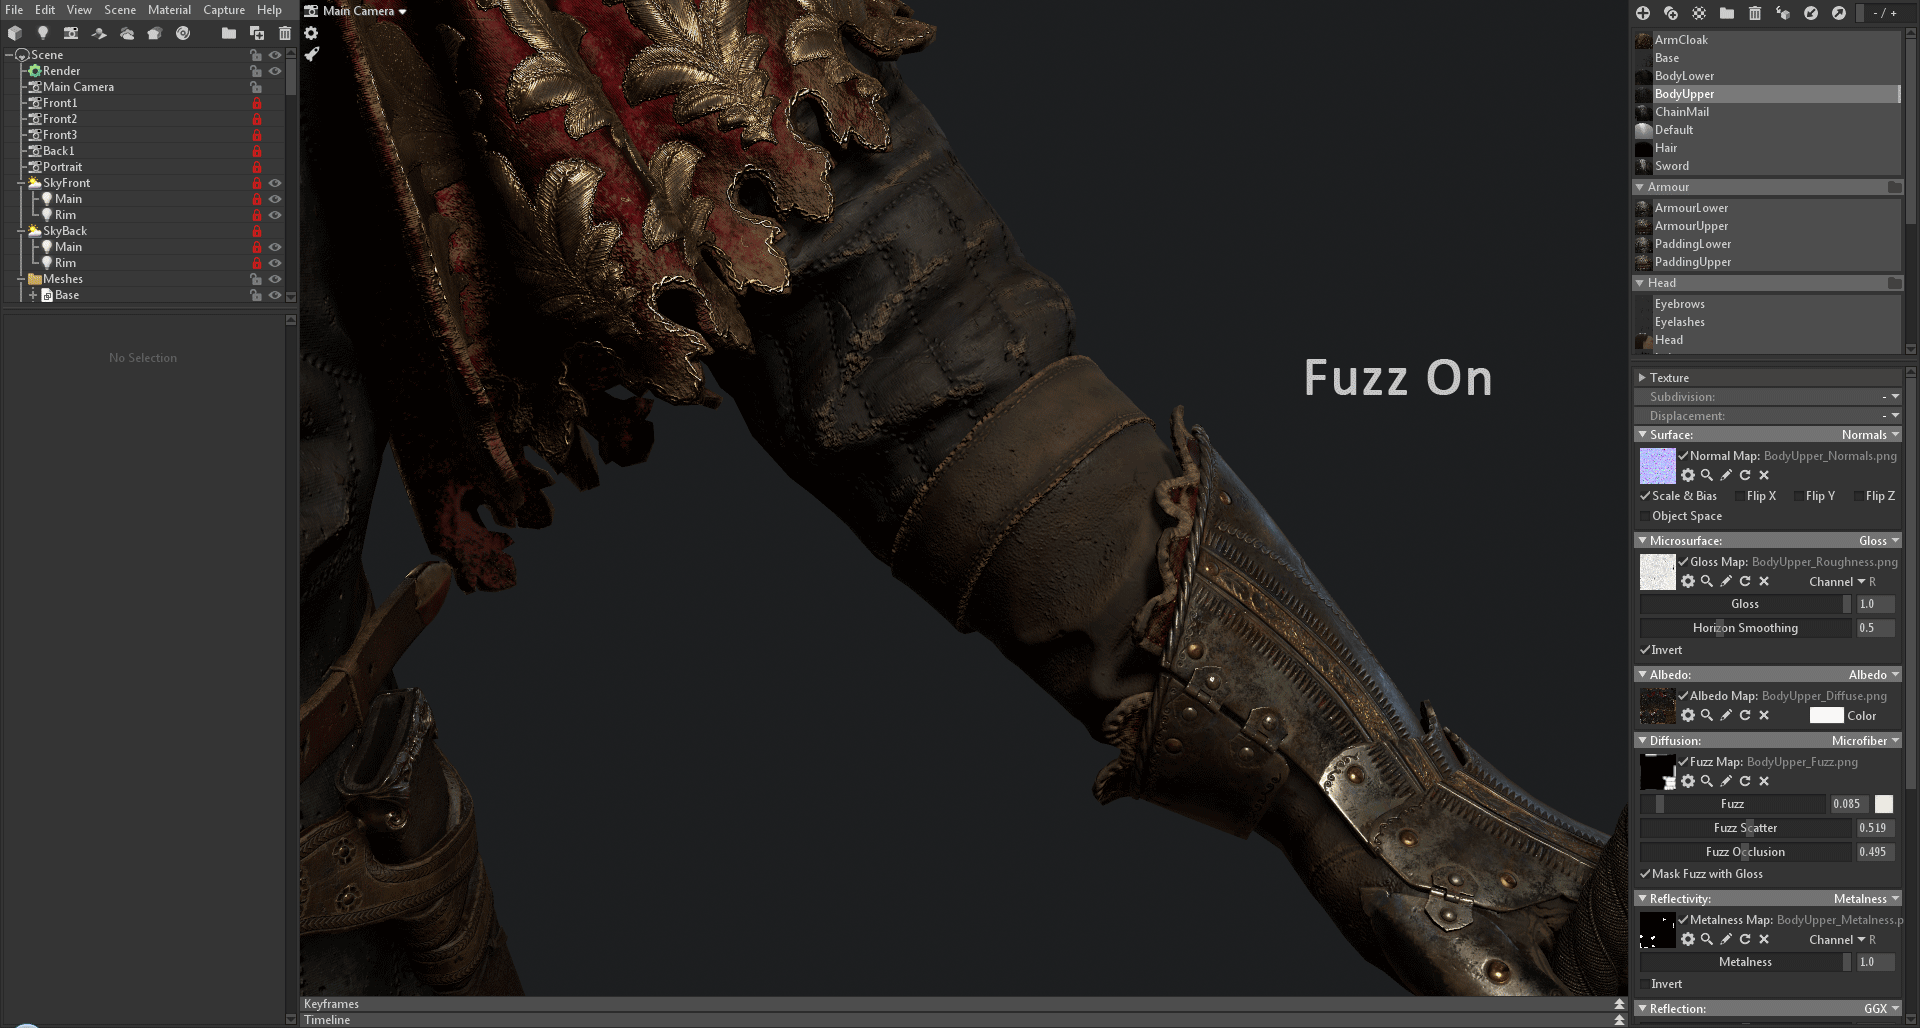
I’ve also created suede leather, which required making use of the Fuzz component of the Microfiber Diffusion model in Toolbag. This helps create a sense of softness for the fabric. I used a fuzz mask here so that only the gloves are affected.
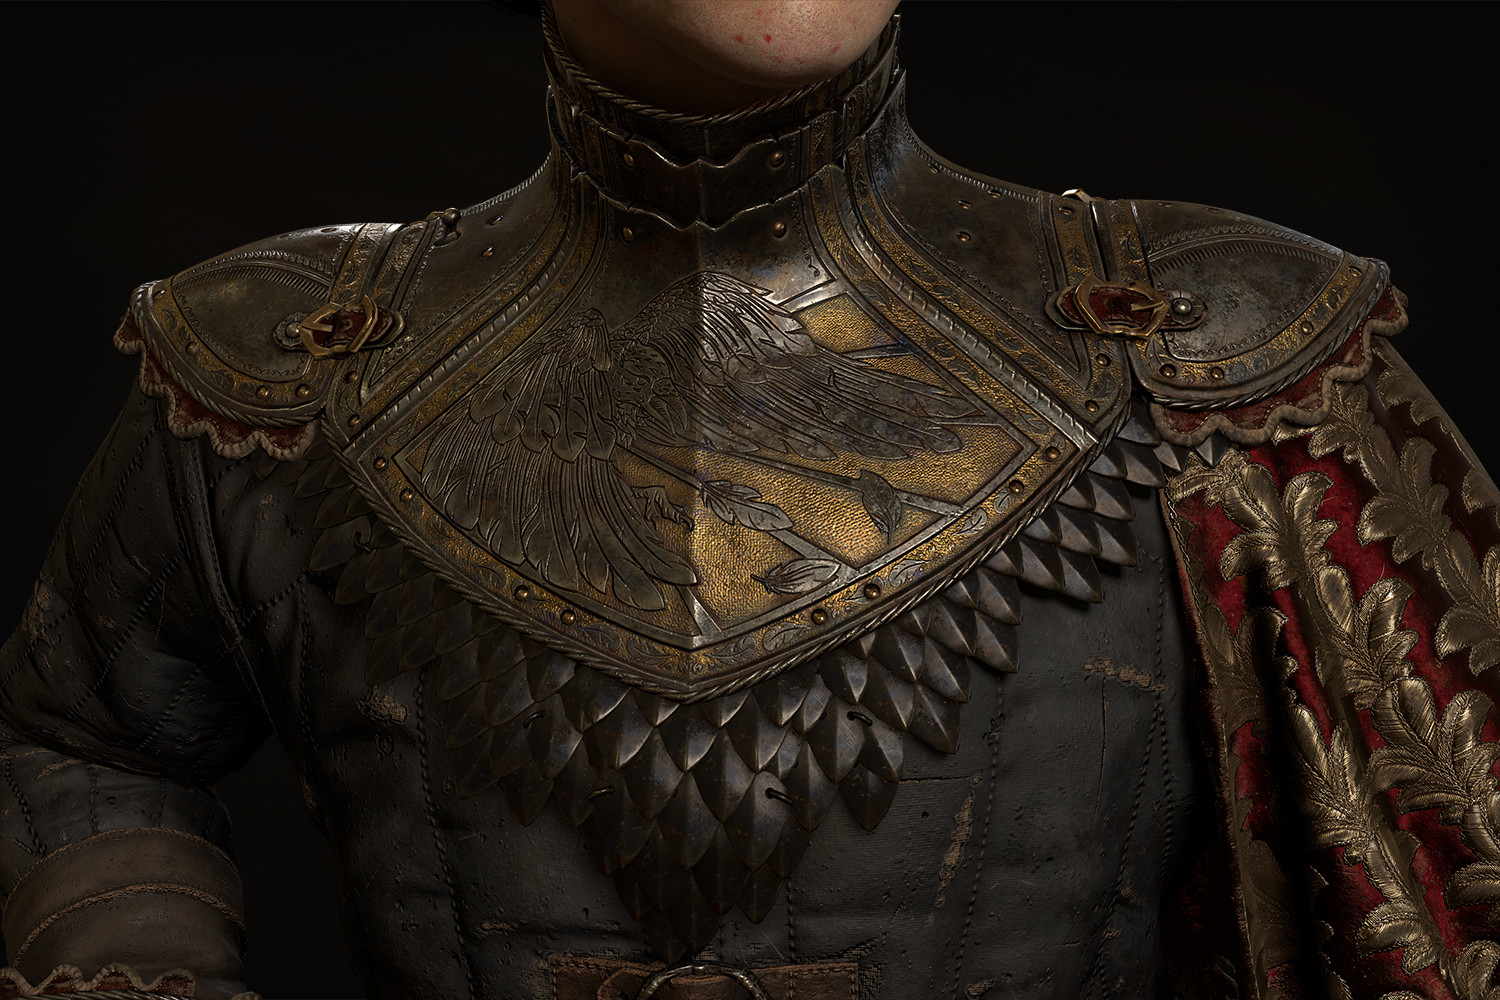
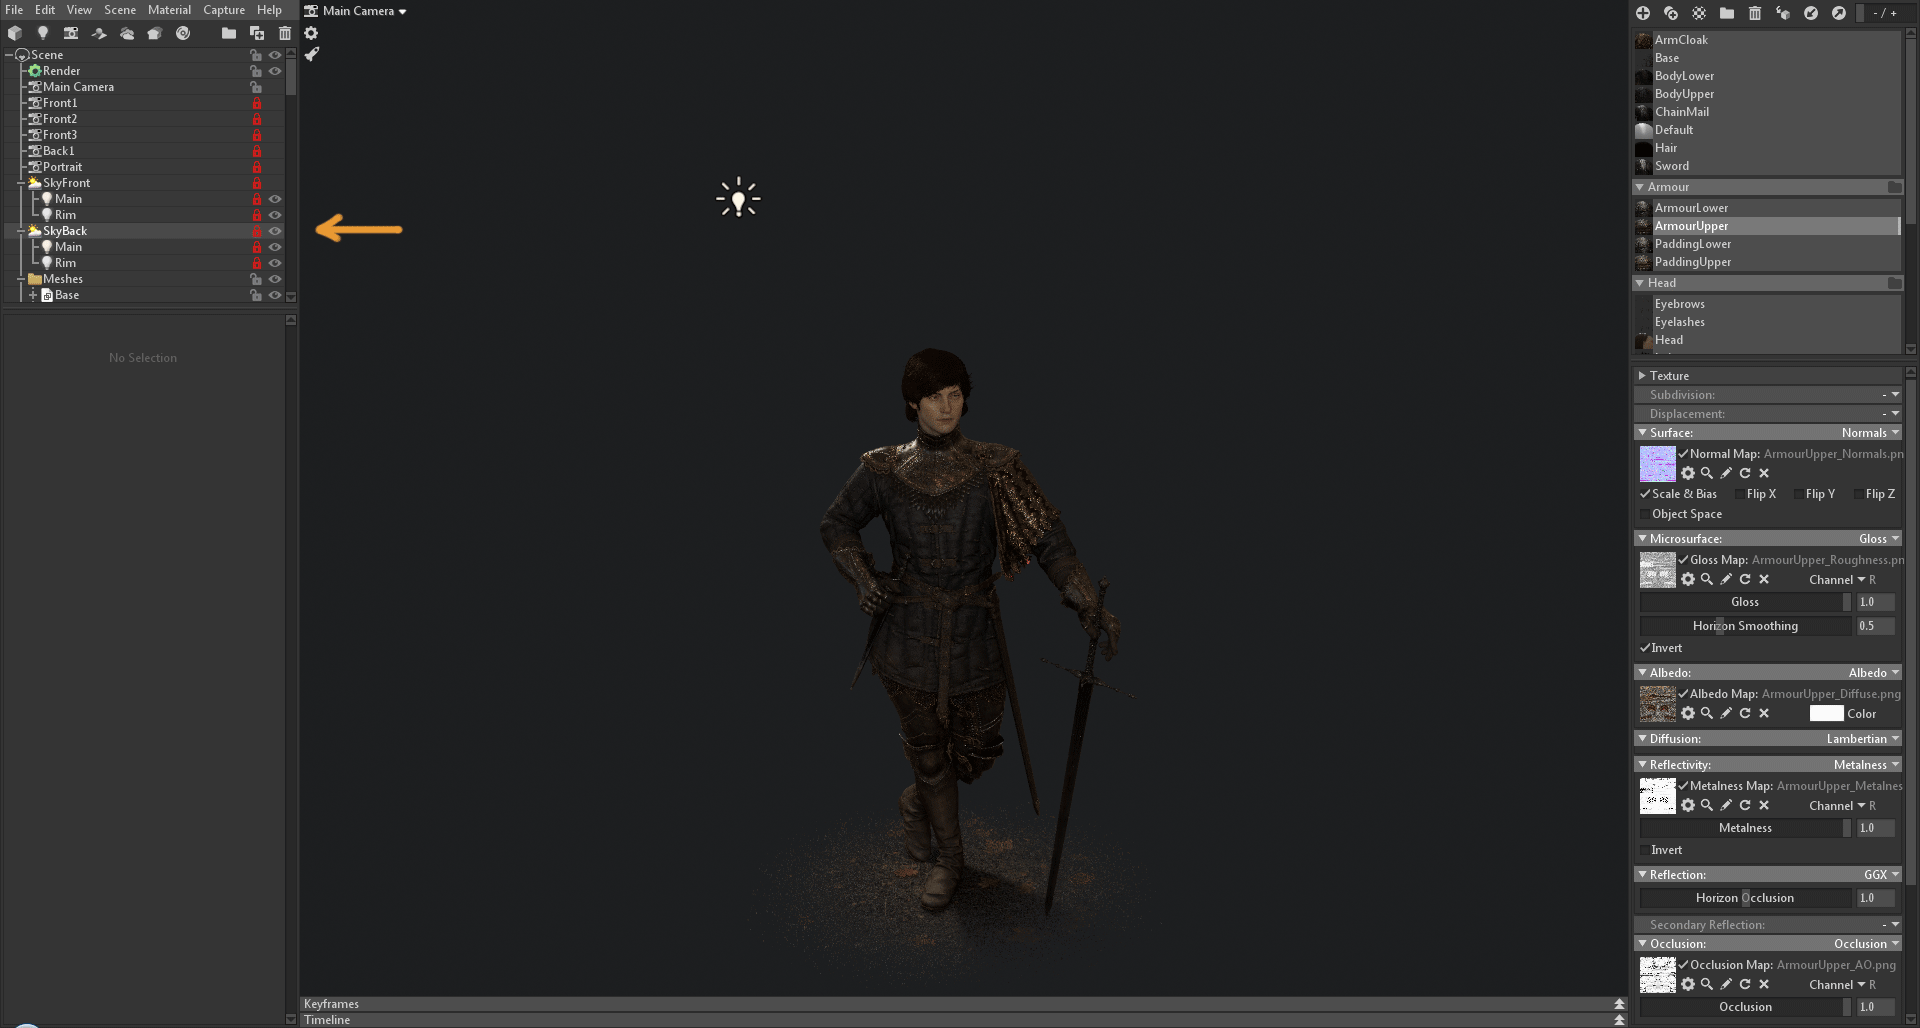
Metal Material
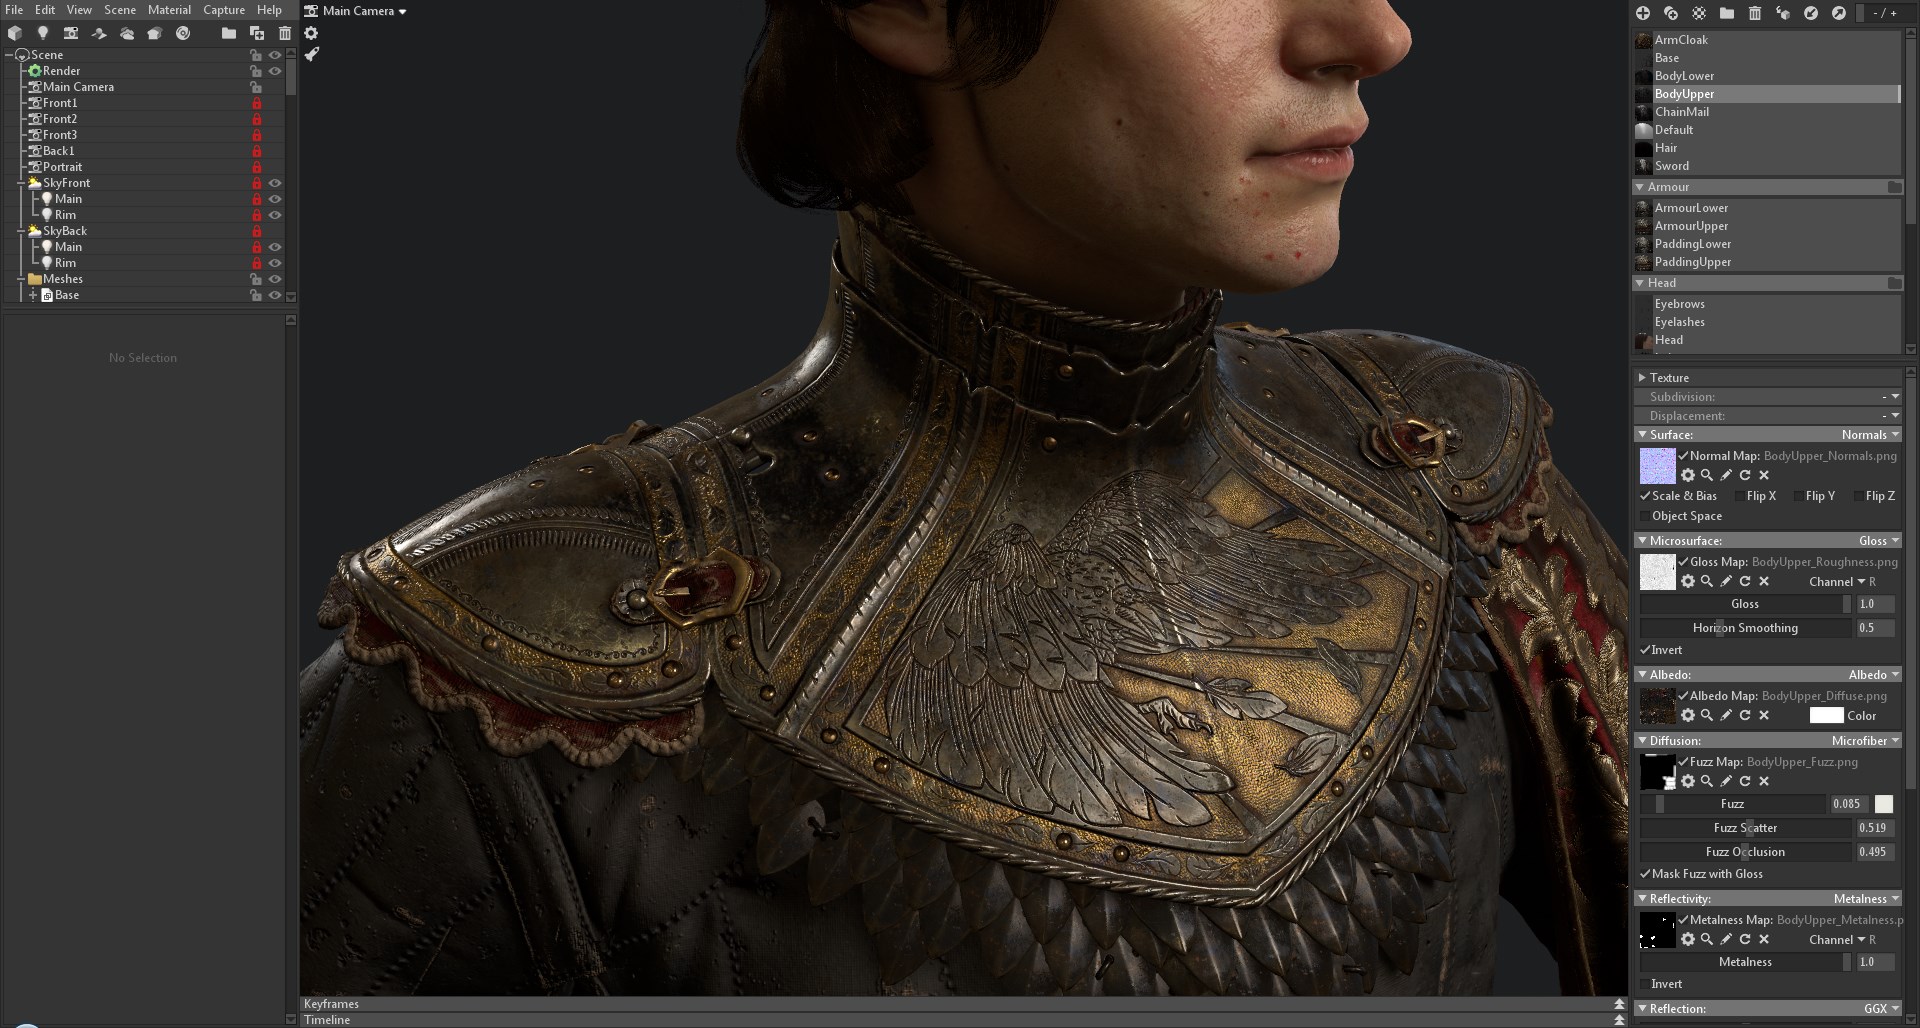
For the armour, I wanted to create a decorative custom made set that has some wear and tear. When making materials, I like to come up with a backstory. How old is it? How was it used? Have they been picked up, dropped, damaged and repaired? This informs what details I need to add to tell the story. For example, Lordling would have had his squires attached onto him, so there will be oily finger marks all over it. There would be scratches, light dents, dirt, grime, and discoloration from where it’s been knocked around, either in battle or from travelling.
I like to research what techniques are used to make armour, swords, and engravings. The video above shows how I built up the material with various layers.
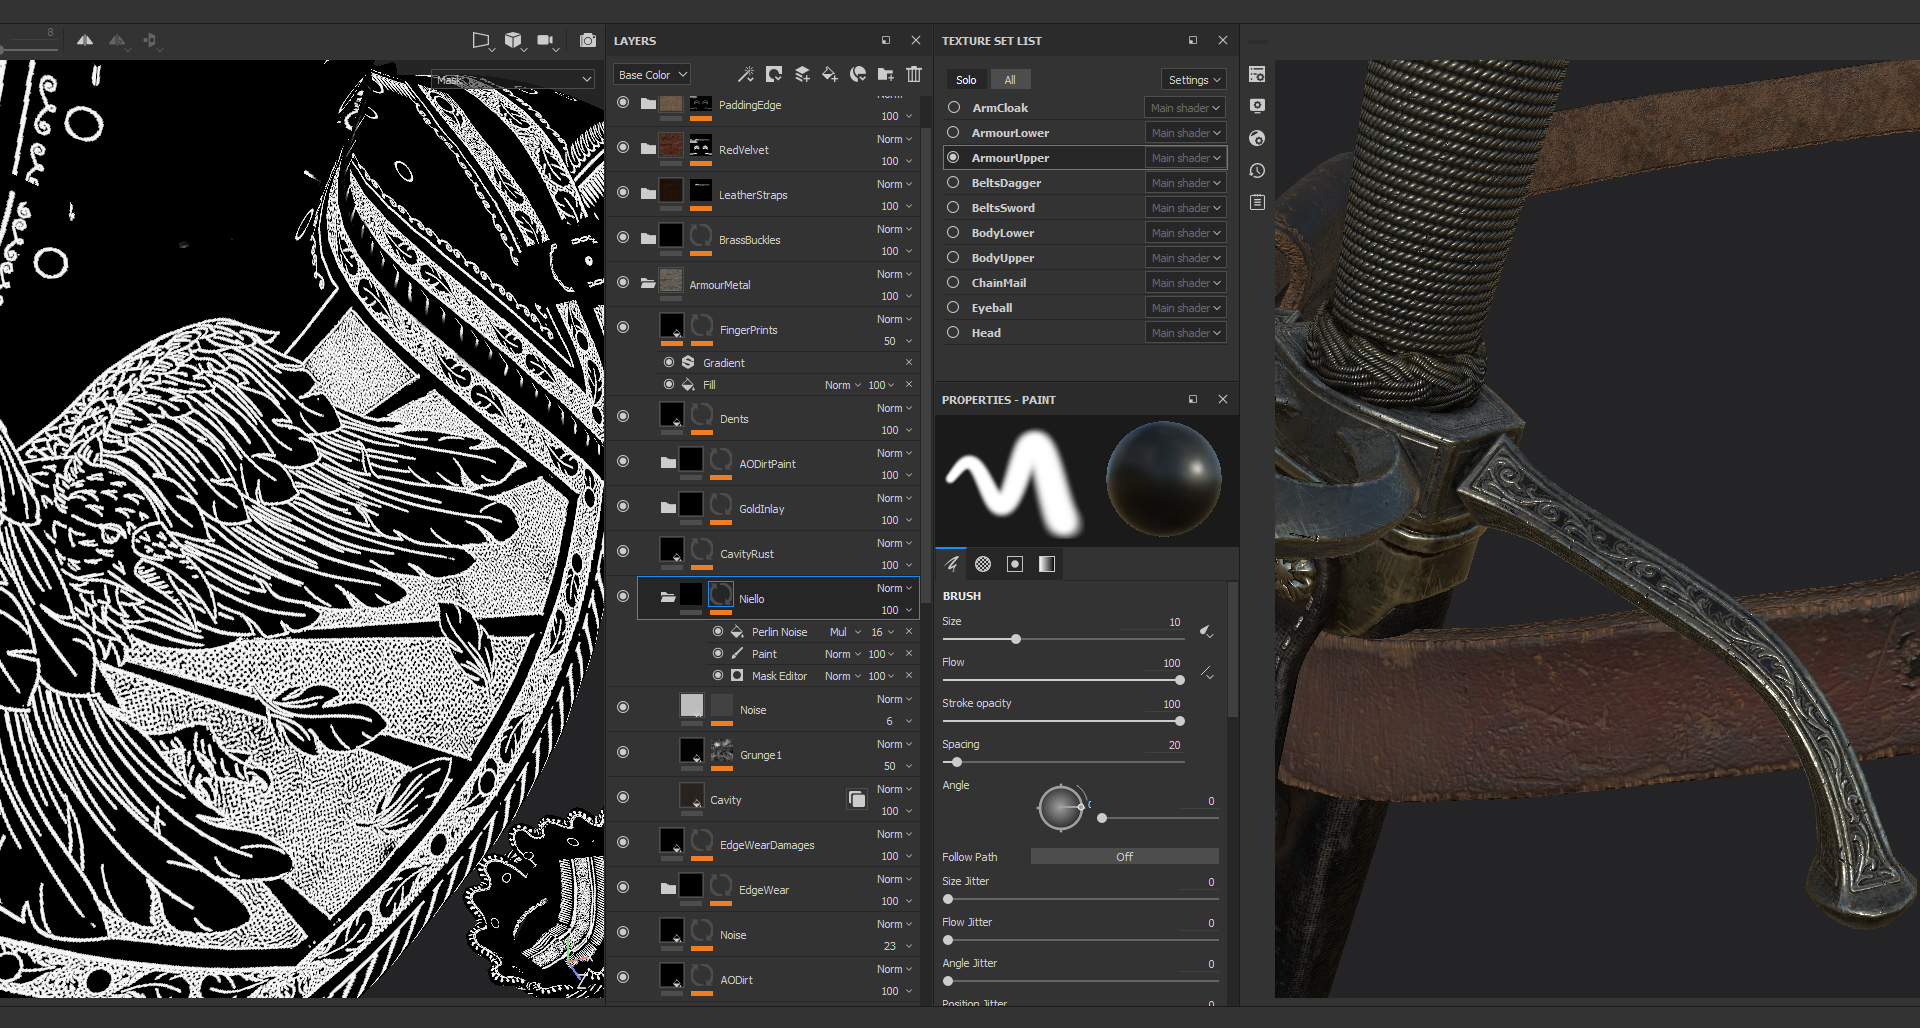
For example, I found that armourers would use Niello to pronounce details in engravings. In this instance, I used a Cavity map to achieve this effect.
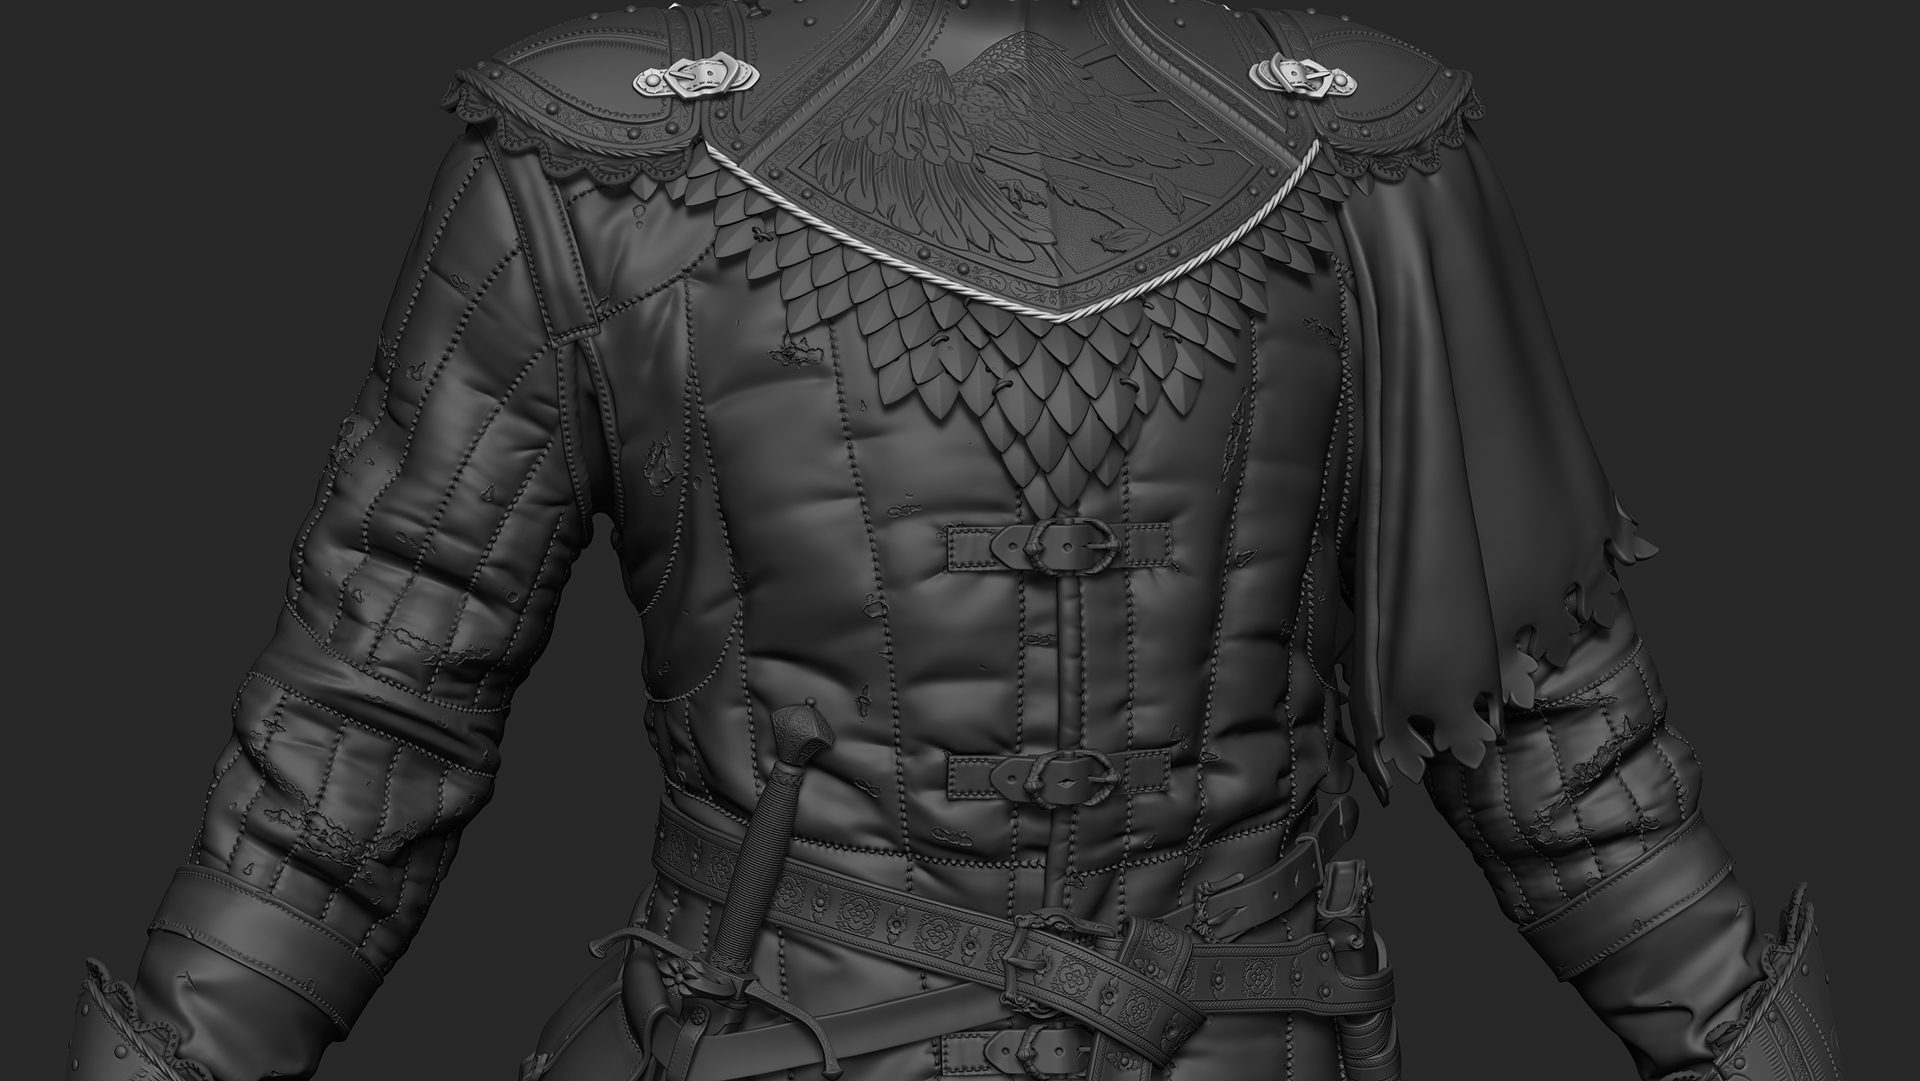
Cloth Material
When it comes to clothing in character art, it can be hard to make simple clothing look interesting. Since Lordling is returning from a muddy battlefield, we can add detail to break up the monotony of clothing. His gambeson has been weather worn from travelling and battles, so we can add layers of small details such as dirt, mud splatter, holes, raindrops, and even things like strands of horse hair! Try to really think of the environment the character is inhabiting
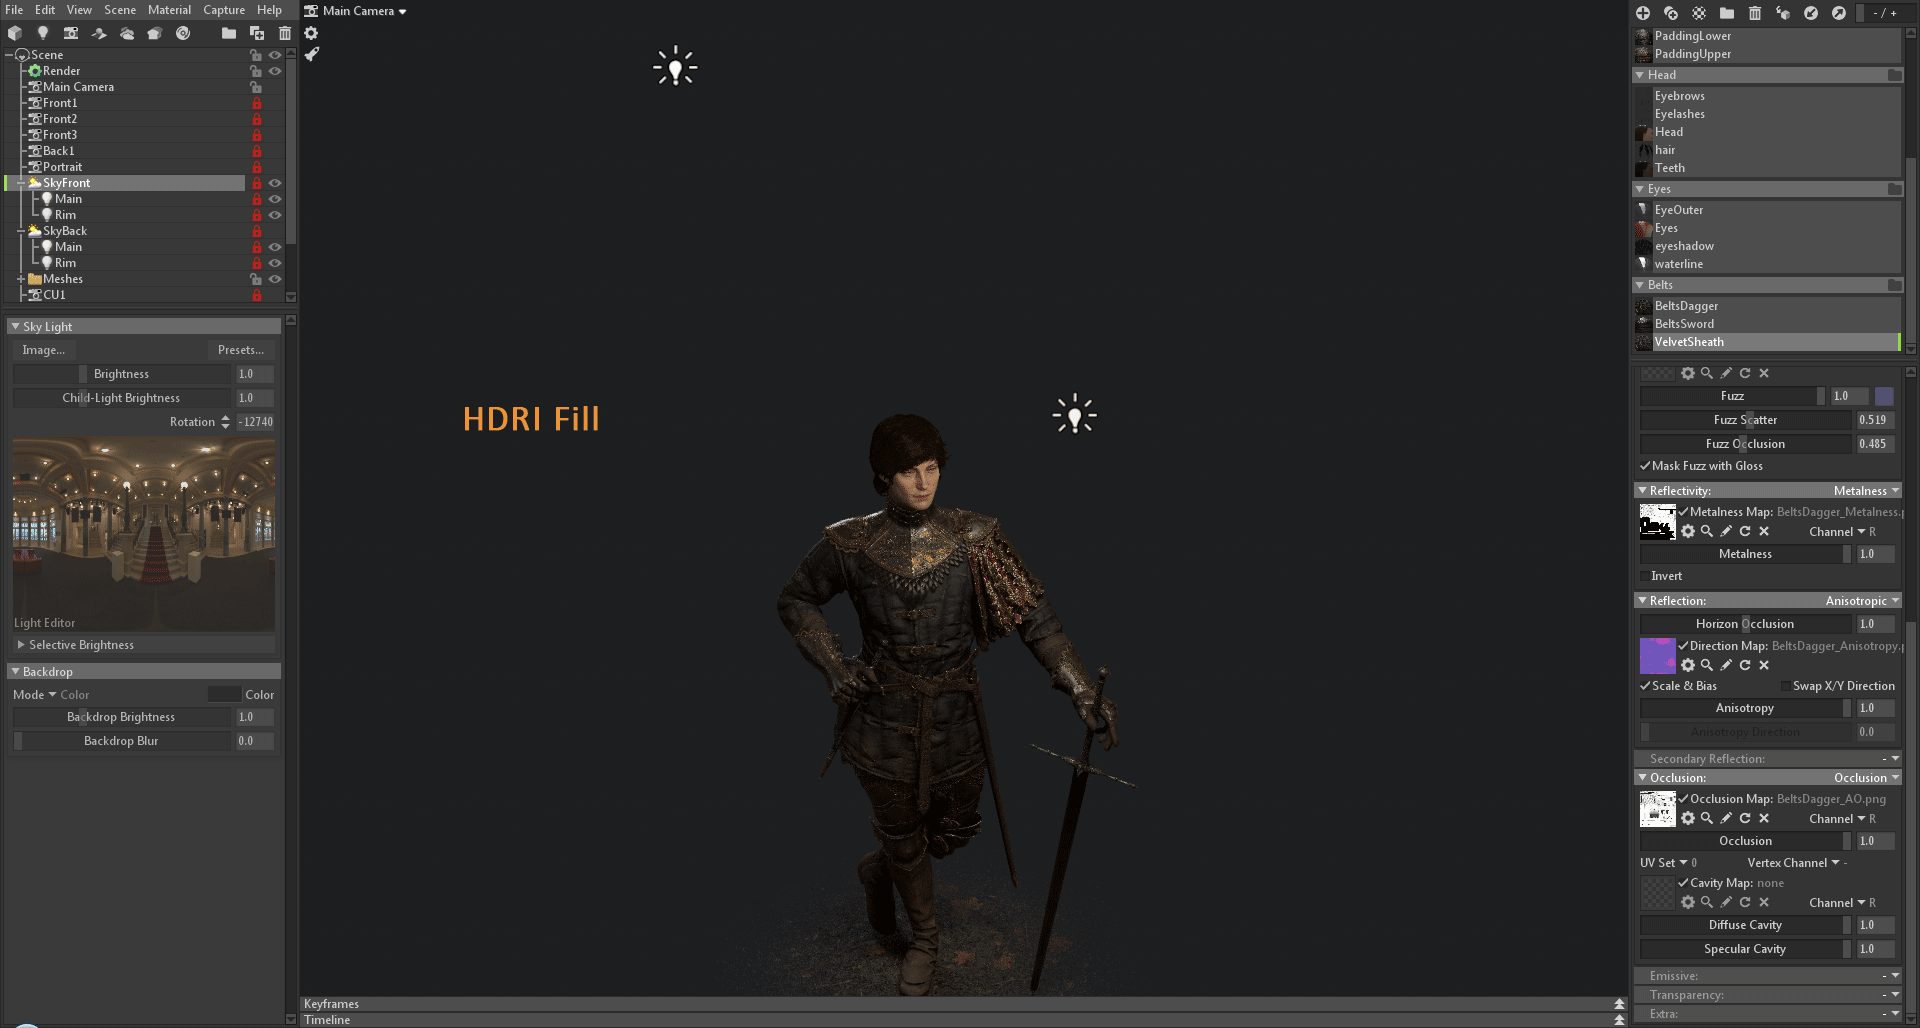
Velvet Material
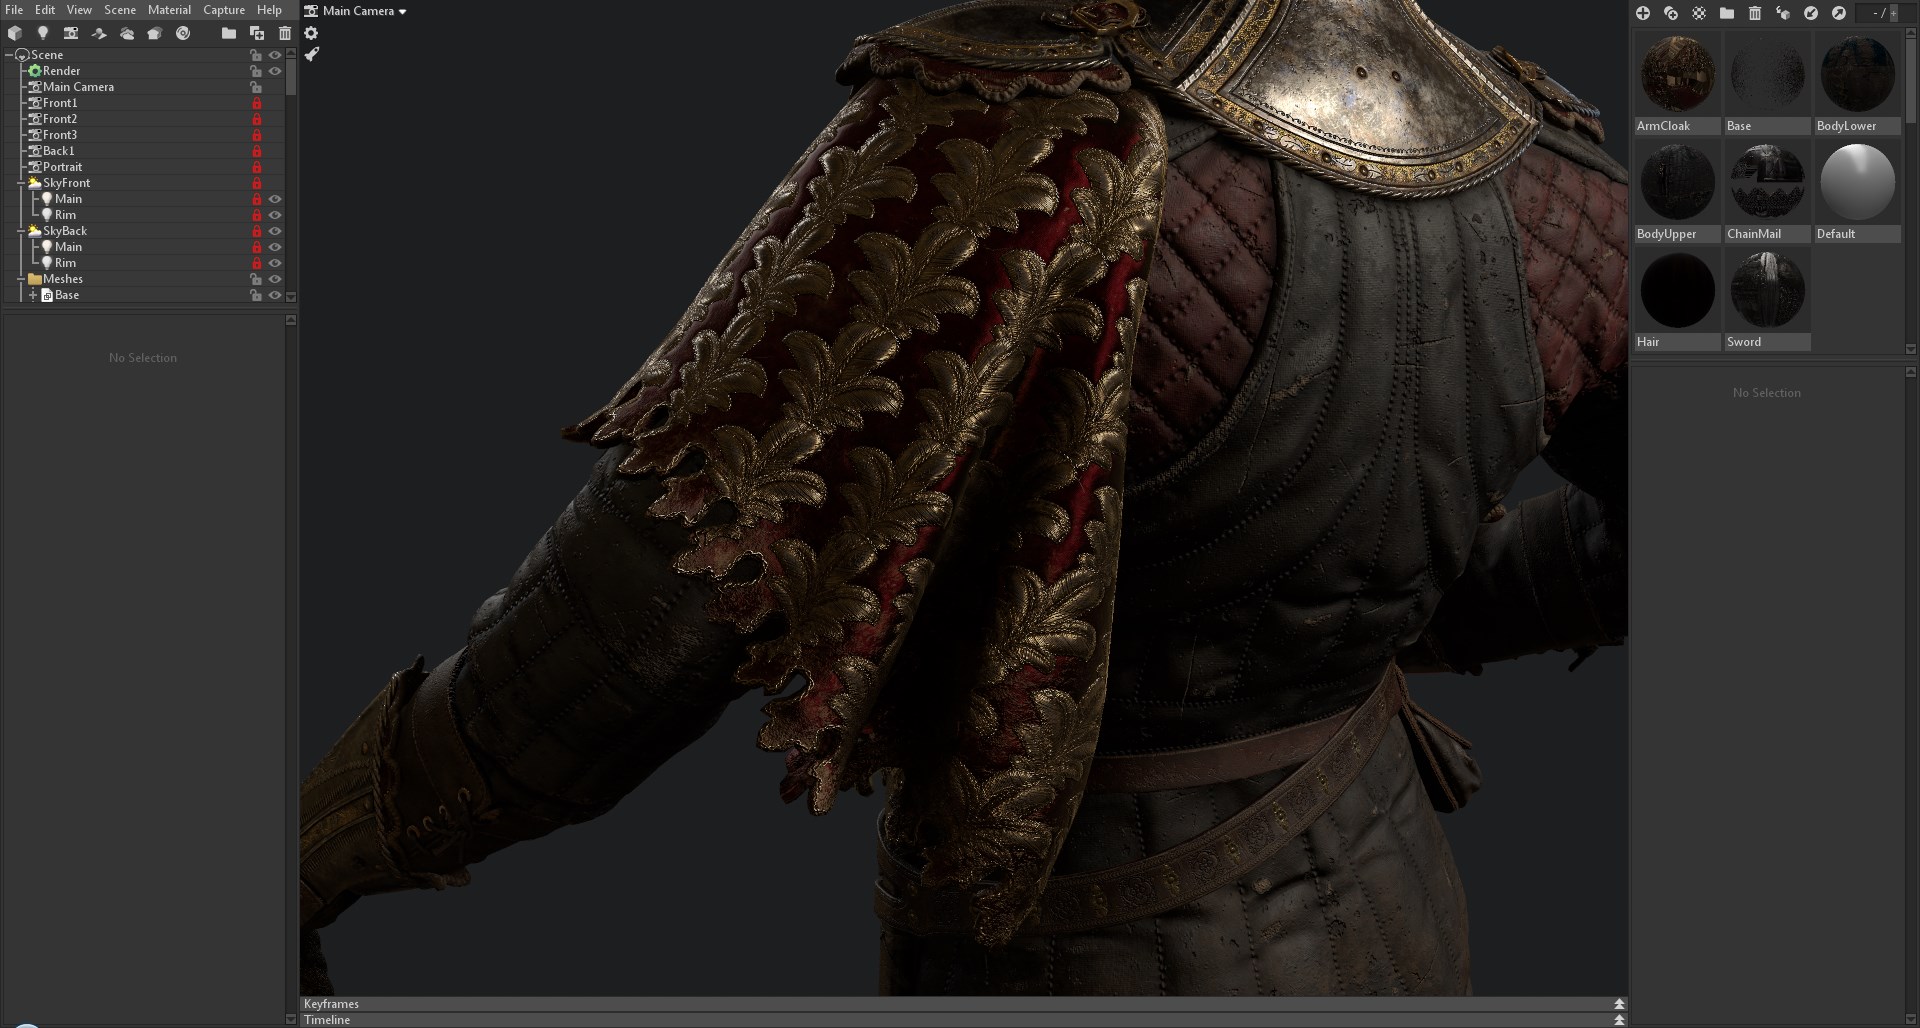
To give Lordling an air of royalty and pomp, I added this velvet cloak with a gold threaded pattern. It took some experimenting to get a convincing result.
First, I took it as close as I could to velvet in Substance Painter. Making it deep red and bright gold helped it stand out against the rather muted colour scheme of the rest of the character. I created the feather pattern in Zbrush and tiled it in Substance Designer before exporting the masks into Substance Painter. I imagined it would catch some dirt and dust from brushing against trees or castle walls, so I added some wear to the ends. Having a very high metalness value on the cloth helps give it the velvety feel. In this case, I have it set to full metalness.
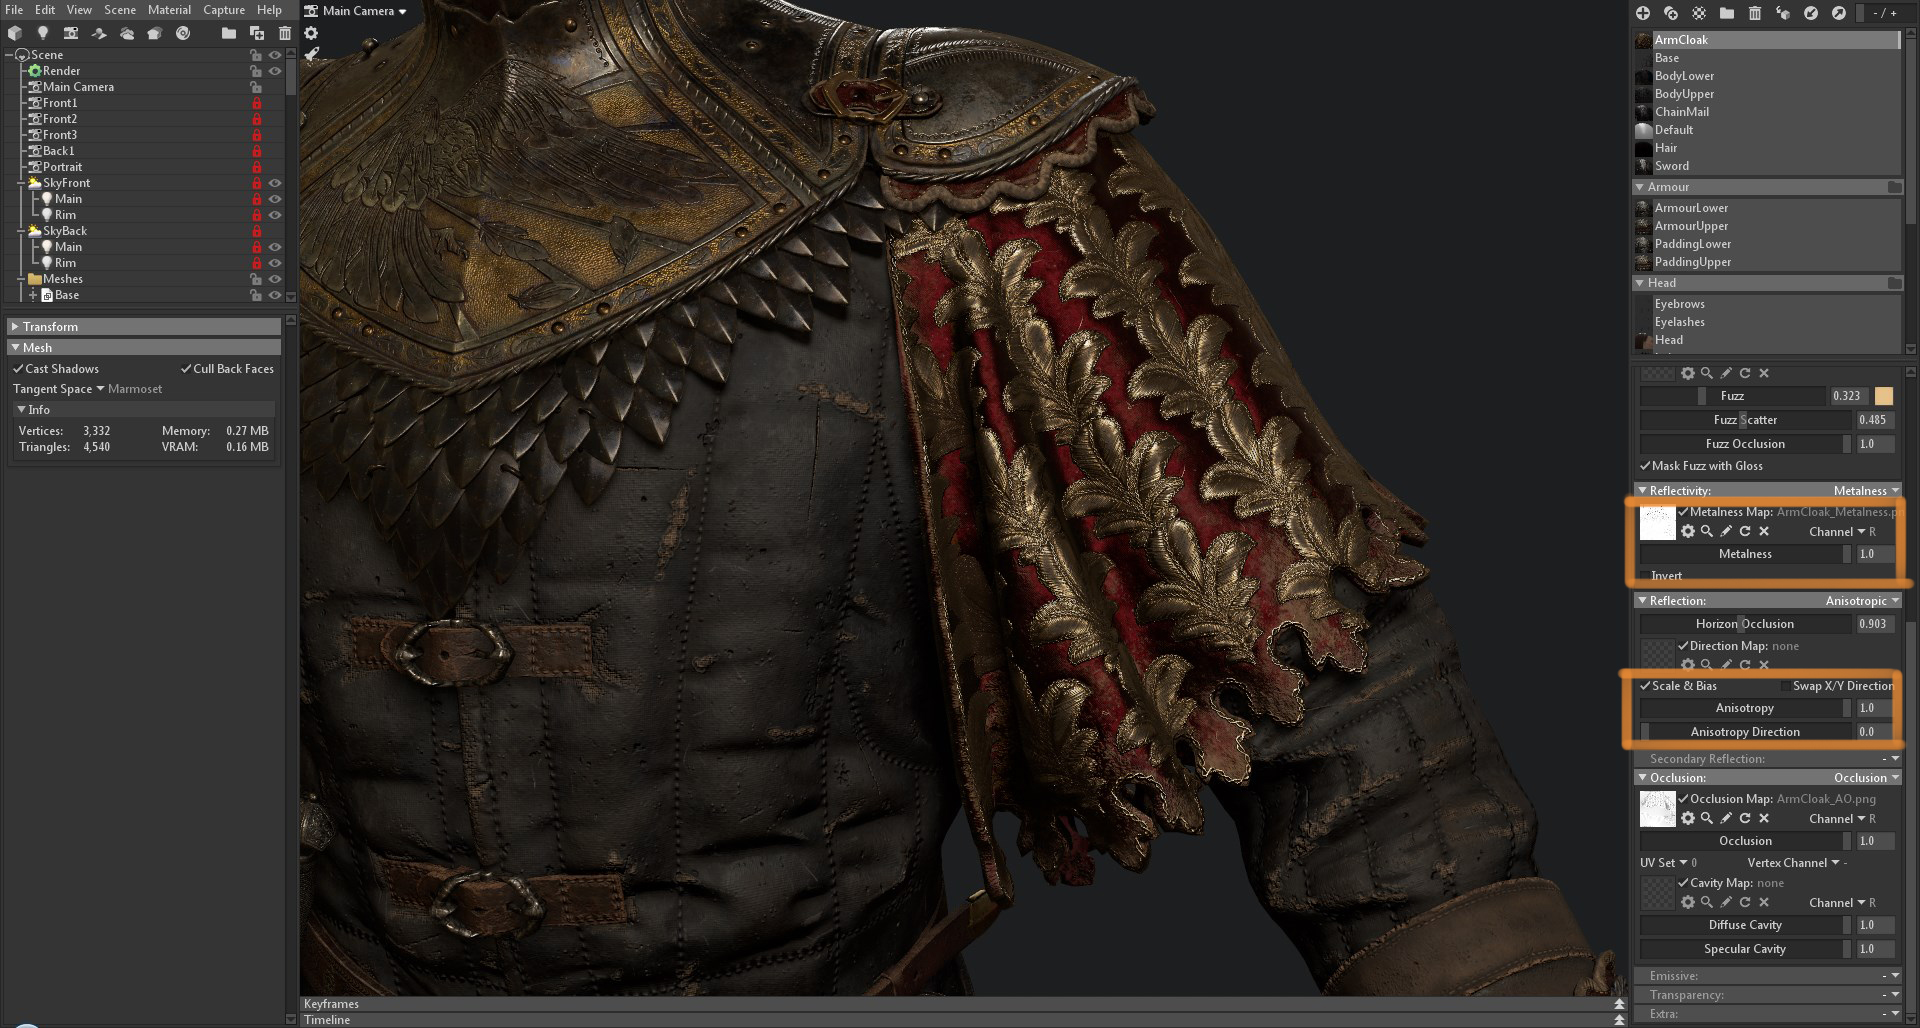
I later used the Anisotropic Reflection shader in Toolbag, which gave me a really great result. Since the arm cloak is on its own material and is mapped to one large UV island, I didn’t need to create a map for the Anisotropy Direction. Instead, I used the settings pictured above.
Sheath Material
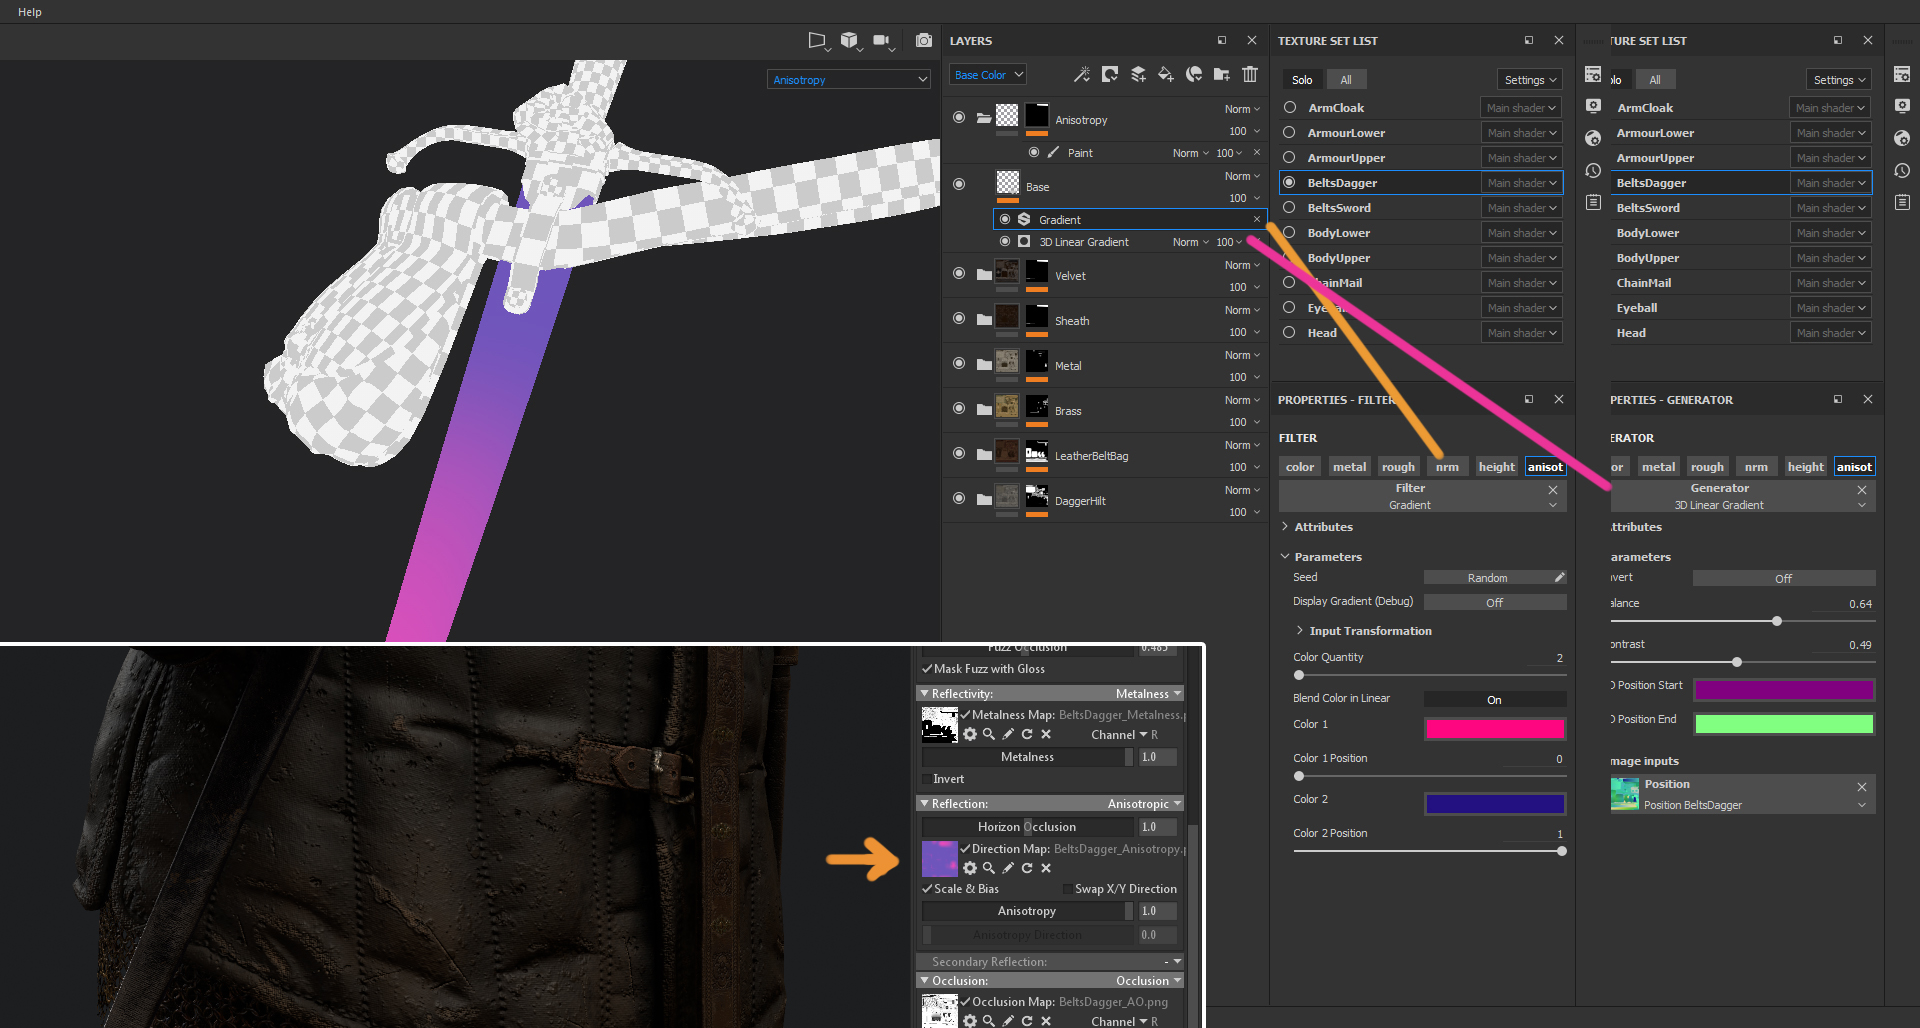
The dagger sheath is also velvet. However, for this piece, I needed to tell Toolbag which direction the anisotropic reflection should shine across. Since it had multiple UV islands that were not aligned in the same direction, I created a simple gradient using the Position Map generated from Substance Painter. I then assigned it to the Direction Map slot in Toolbag.
Material Setup
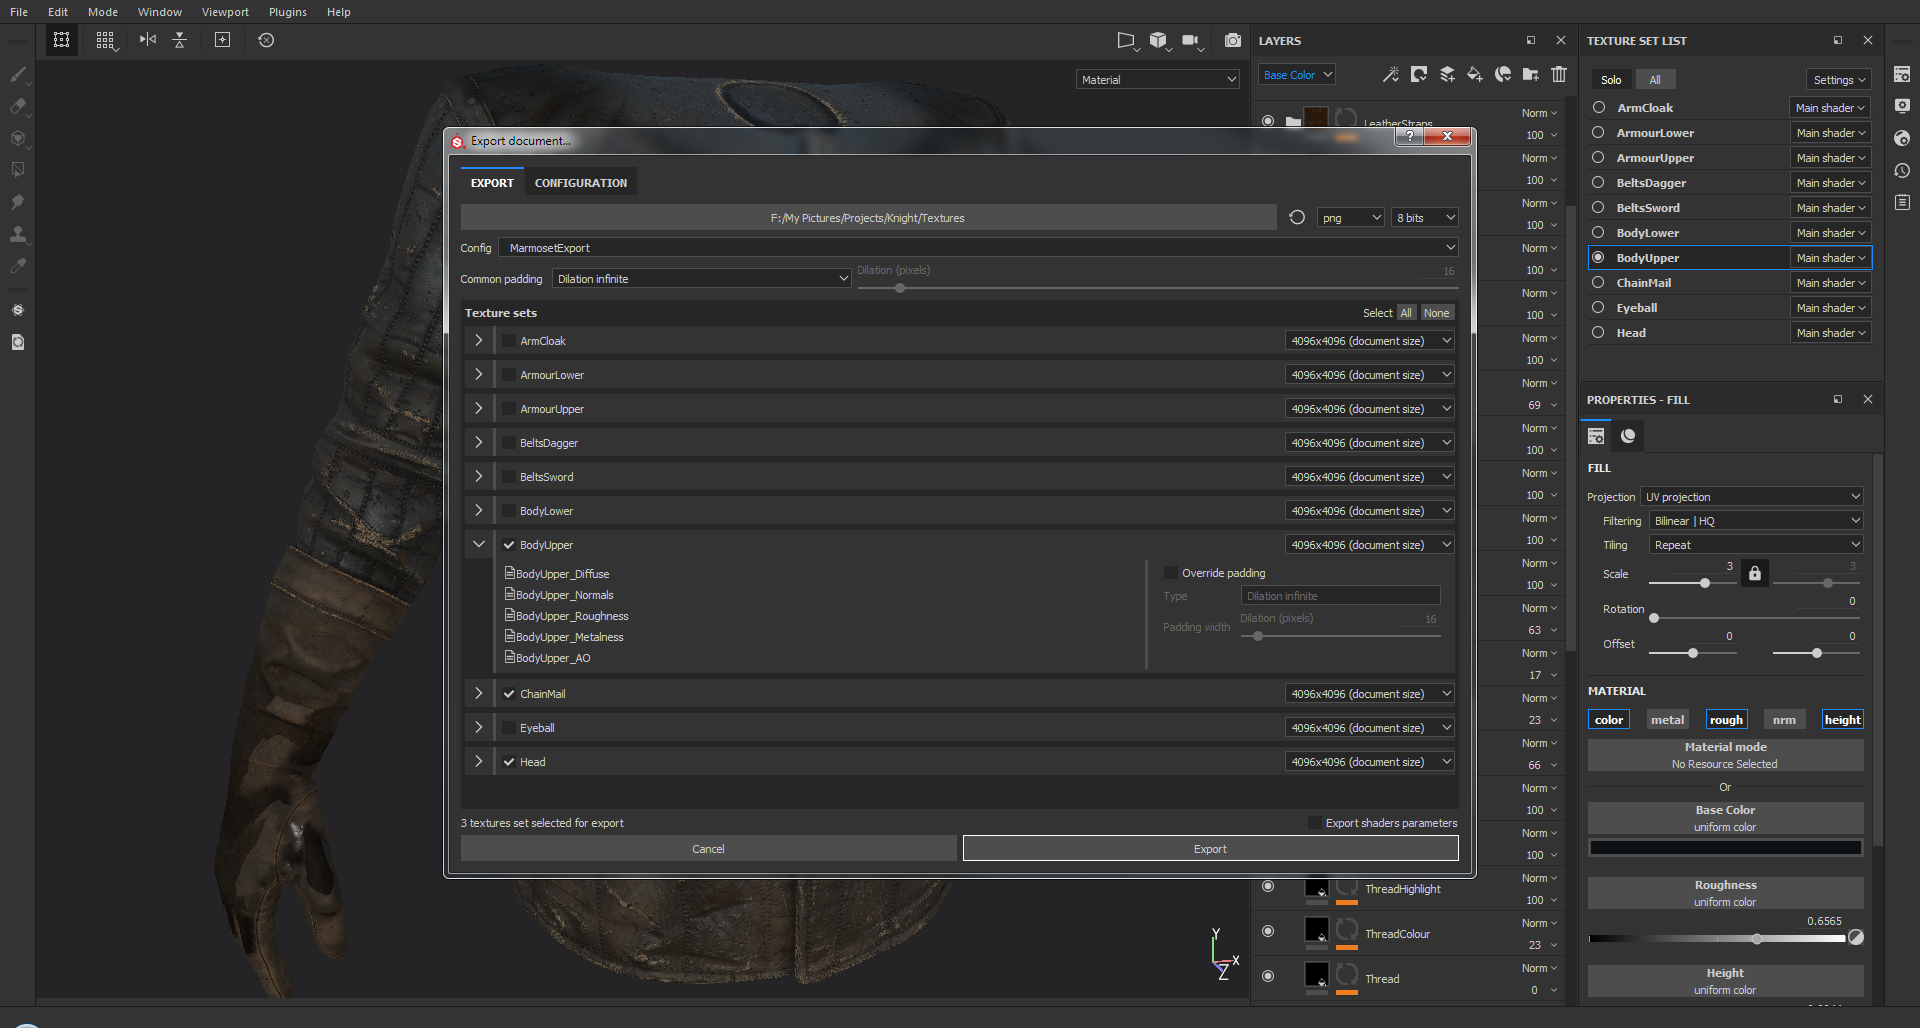
Aside from the Anisotropic settings, my texture setup was simple. I created a preset in Substance Painter, which meant I could export it immediately and hook it up to Toolbag. Since Toolbag auto detects changes to the .pngs, I didn’t need to manually update my textures everytime I exported.
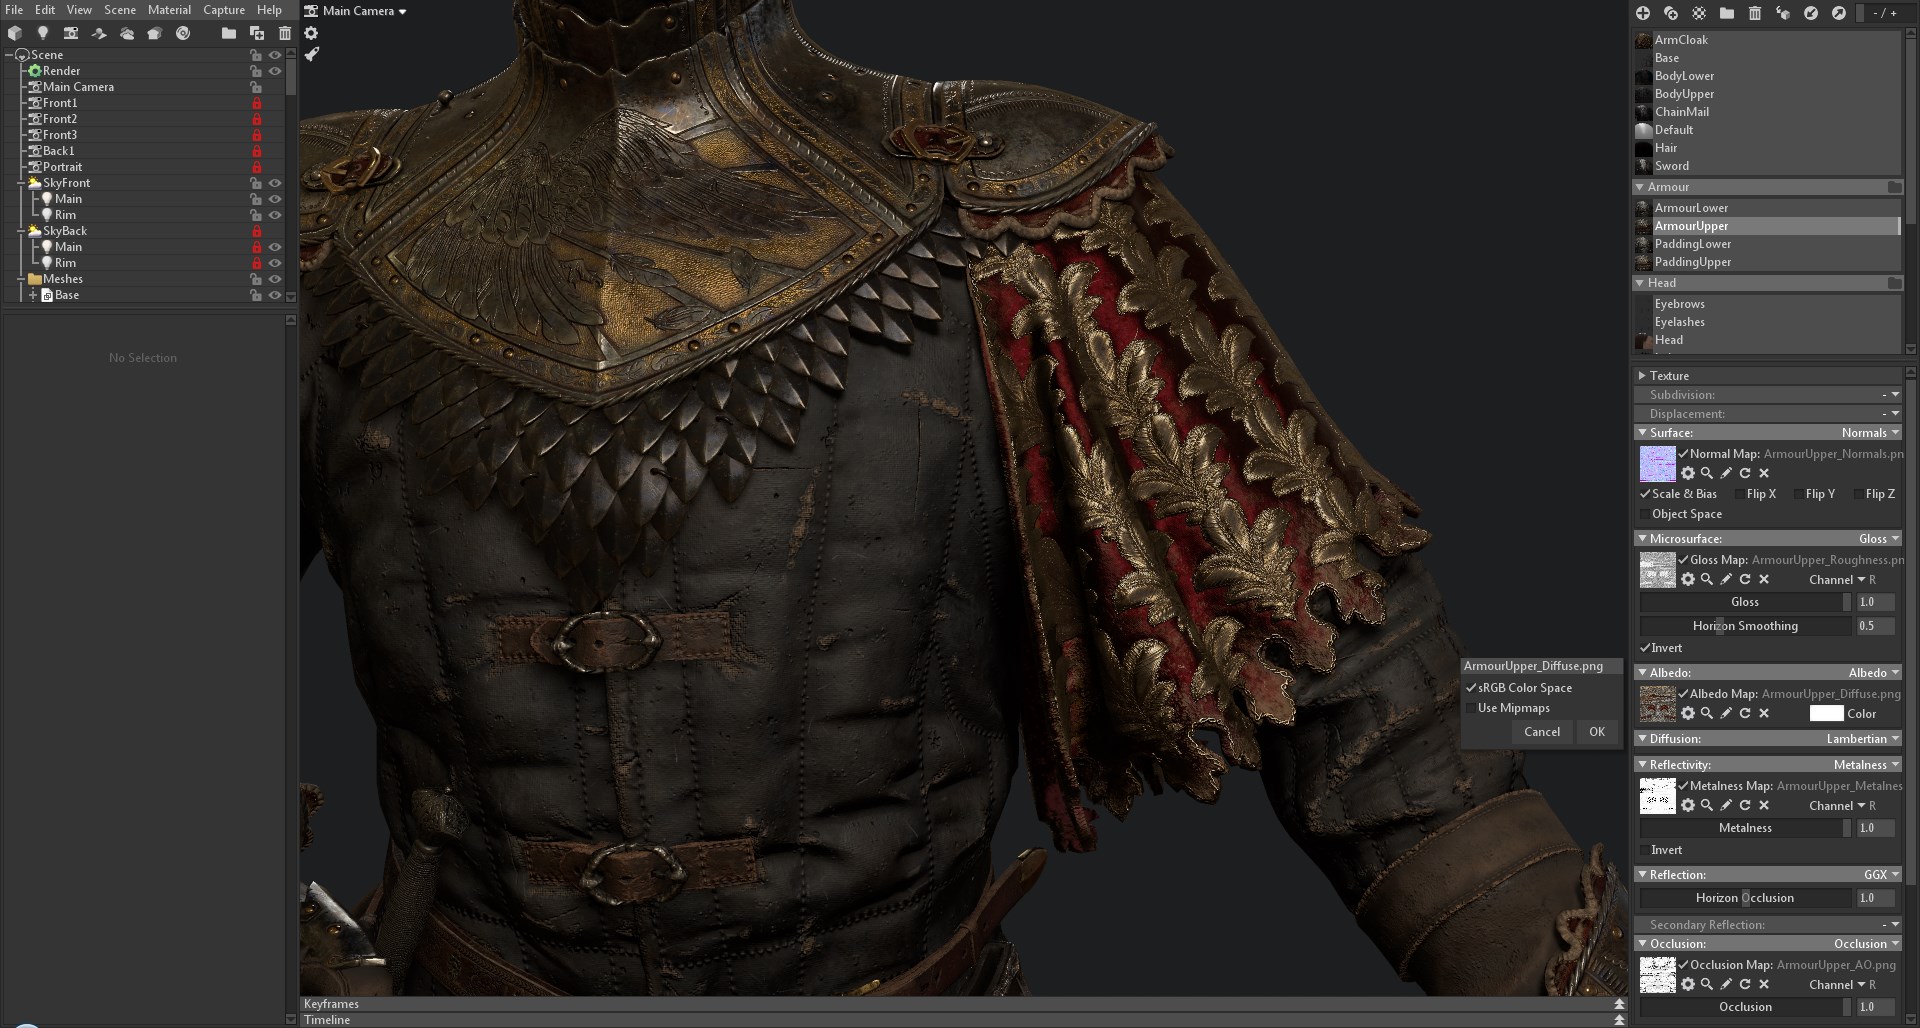
To make sure my textures looked sharp in the final render, I turned off Use Mipmaps for each texture and set my Diffuse to sRGB. The rest were kept as linear.
Lighting and Presentation
To emulate the lighting style of a classical portrait, I used a simple 3 point lighting setup.
- The Sky Light acts as a fill light. I used an HDRI from this great free pack by Joost.
- A warm Omni light just above and off center from the head. This behaves as the main light, highlighting the head.
- A cool Omni in the back is used as a rim light. This is used to compliment the silhouette.
I created and saved multiple camera angles that were used for my final renders. This allowed me to easily go back and re-render a shot in case I have to fix anything in the mesh or textures. In the Camera object properties, I set the Field of View to around 45.
Since my lights were initially set up for front views, I duplicated the Sky with the lights and rotated them for my back views. I can quickly switch between them by turning the visibility of the Sky on and off. This means I don’t have to reconfigure my lighting setup every time I want to render at different angles.
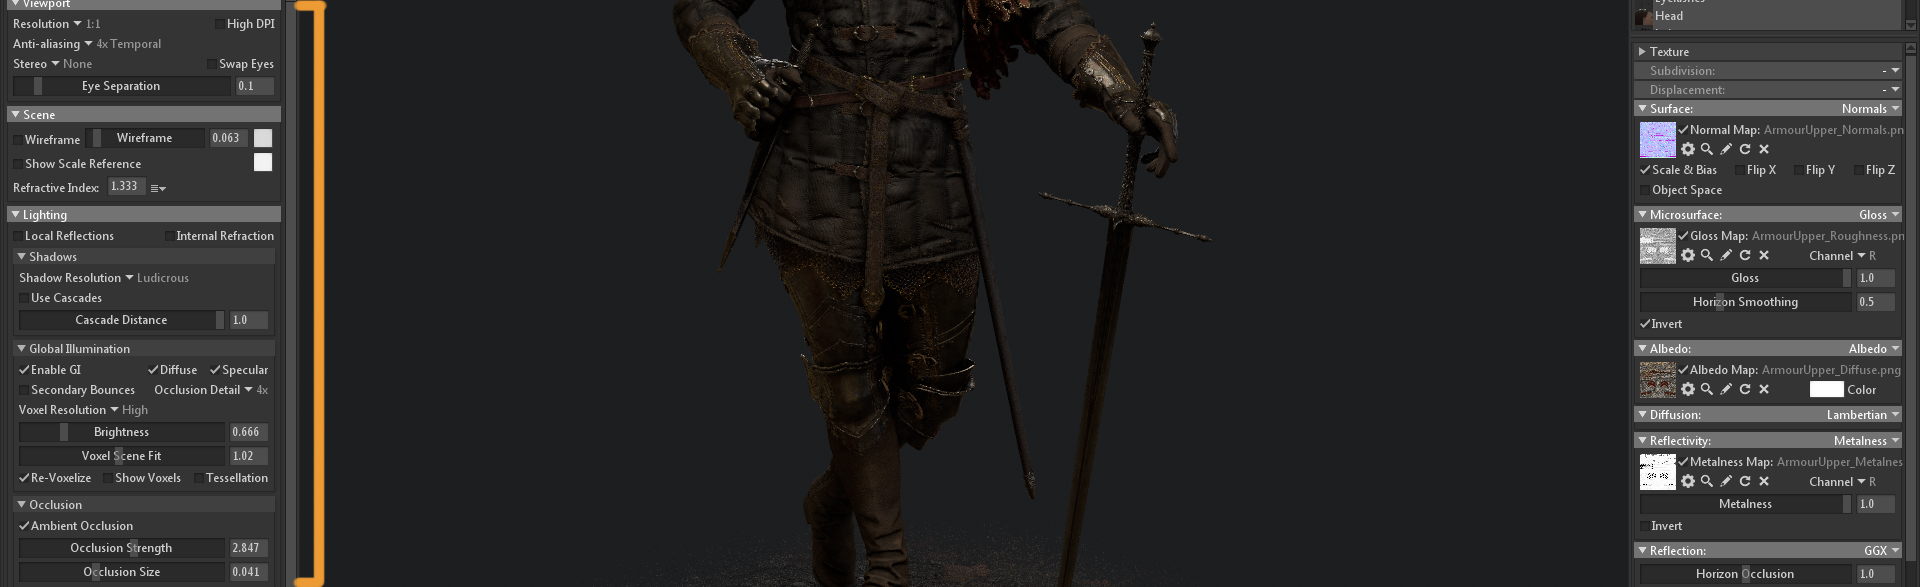
When I was happy with the lighting and materials, I enabled Global Illumination and set the Shadows to Ludicrous to really push the realism of the character. Even though this can be taxing for my machine, I can quickly switch in and out of the Speedy Viewport mode to tweak my cameras.
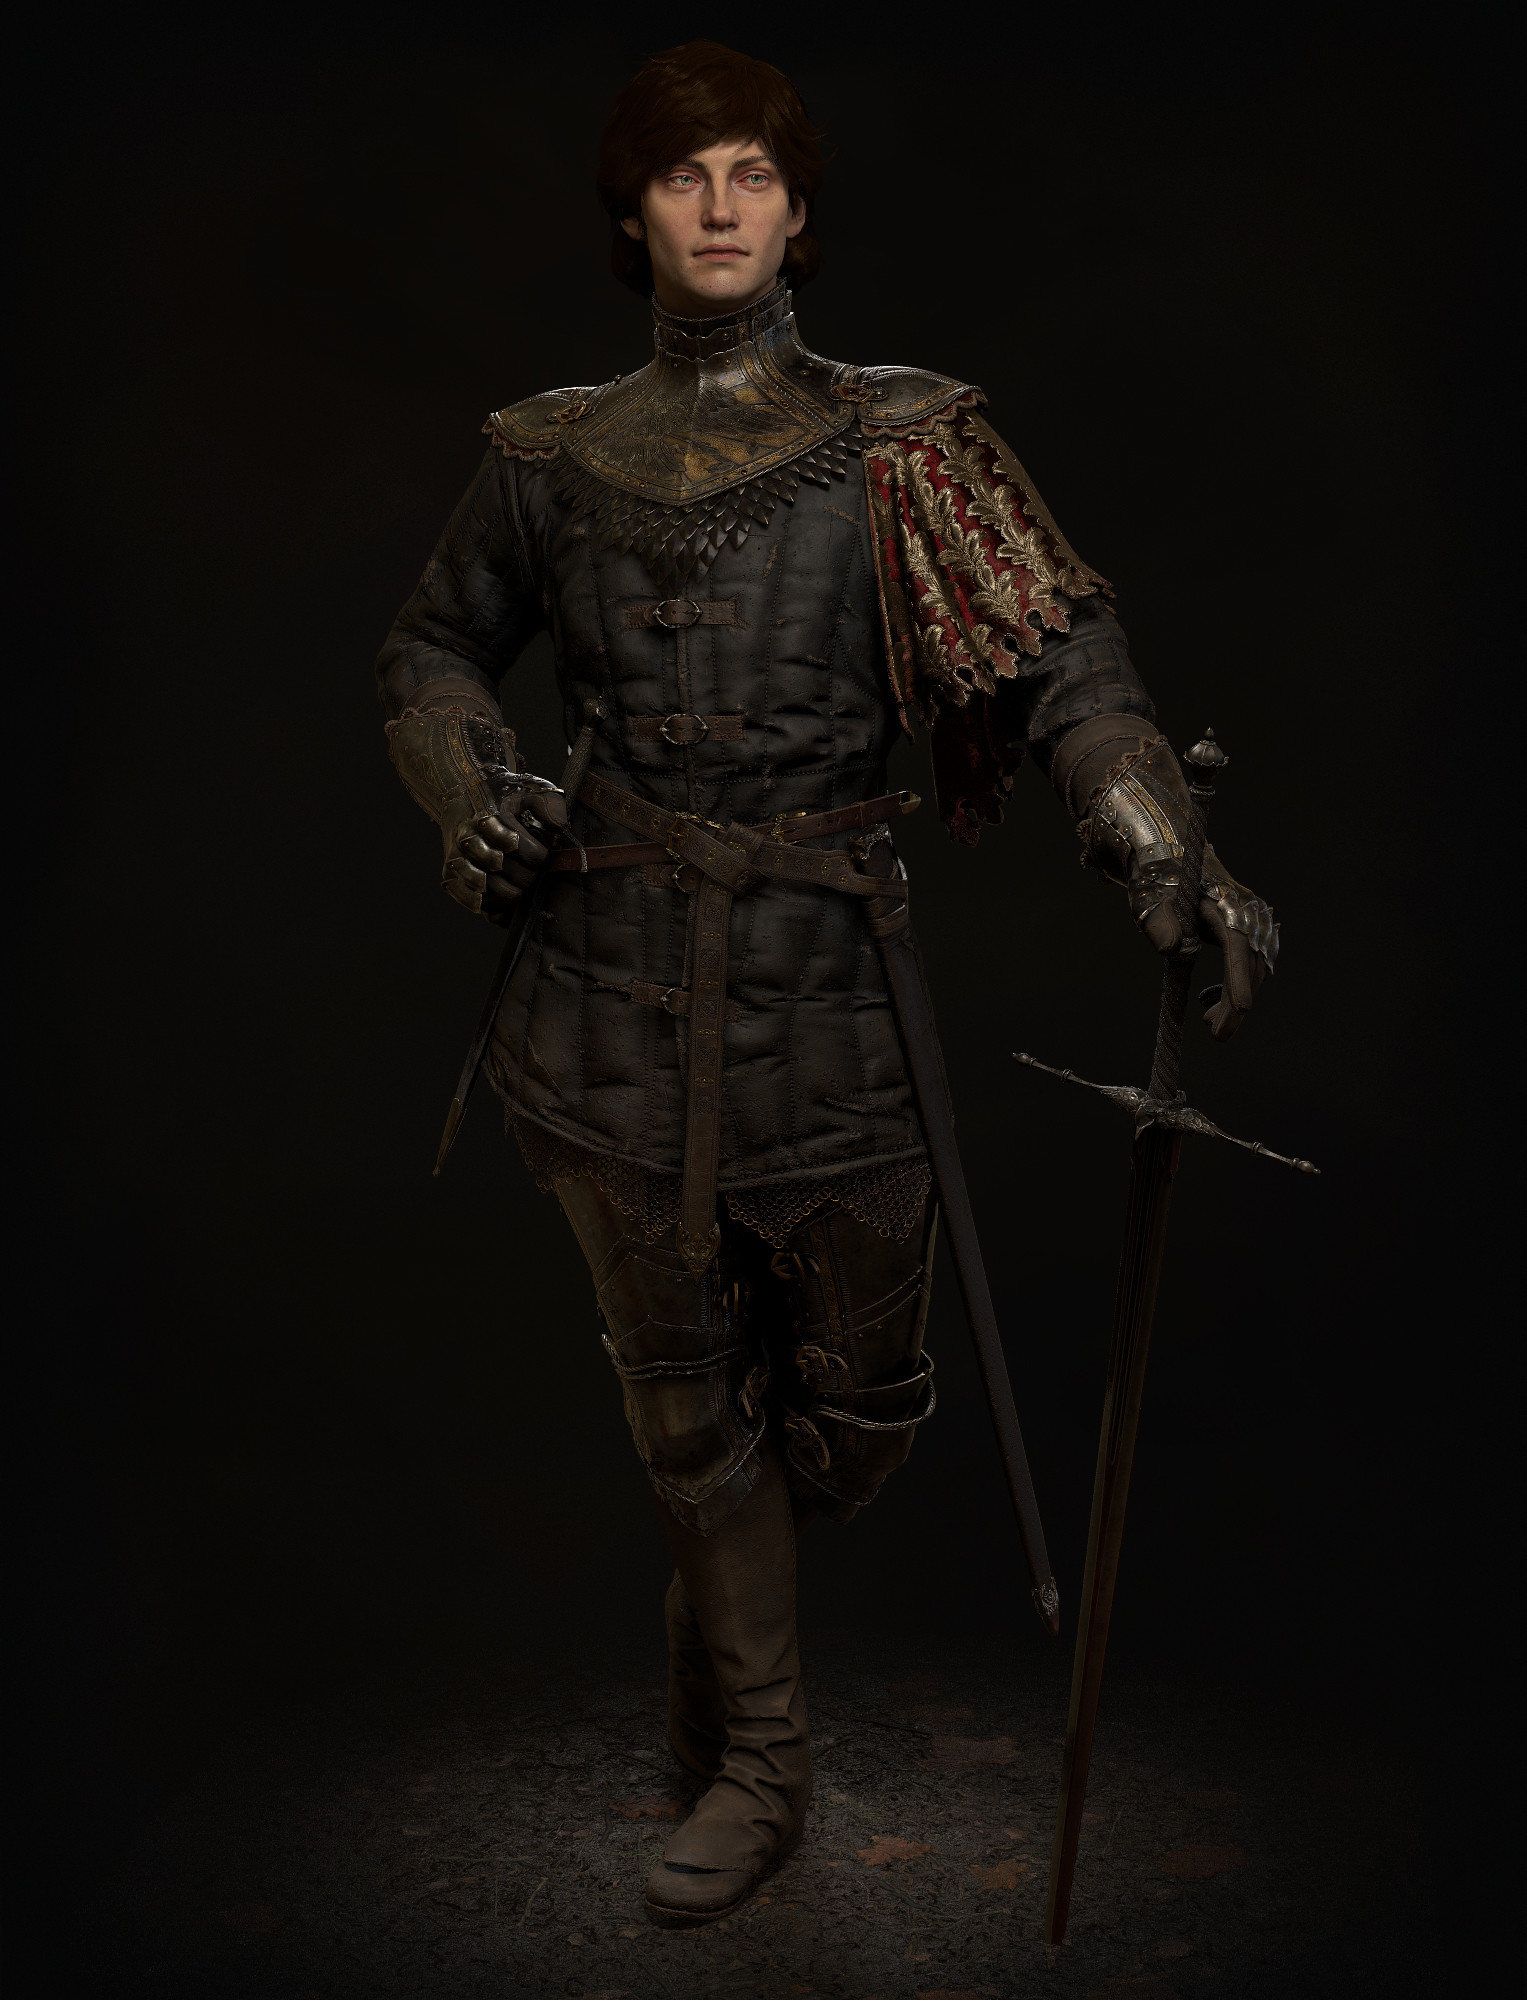
After capturing this image, I added a simple background in Photoshop, a slight Sharpen filter, and he was done!
Thank you for reading, and a huge thanks to the Marmoset team for asking me to write this article.
We would like to thank Paul Widelski for creating this article. You can find more of Paul’s work on Artstation. Learn more about how you can level up your material presentation with the free 30-day trial of Toolbag, and visit our Tutorials section to find more breakdowns.


