
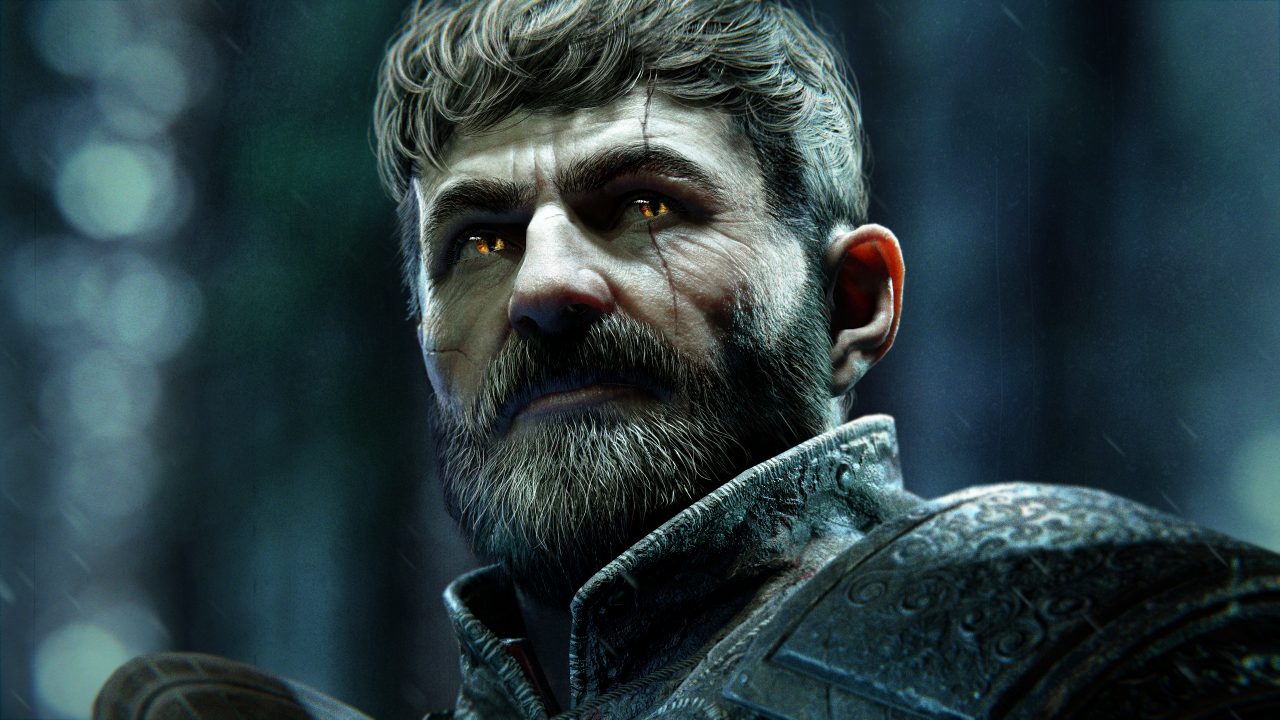
Introduction
Hello, my name is William Paré-Jobin and I’m a Character Artist at Ubisoft Montreal. In this breakdown I will show my process of sculpting, modeling, lighting and presenting a real-time character. I hope you’ll absorb some tips and tricks along the way.
Reference Collection
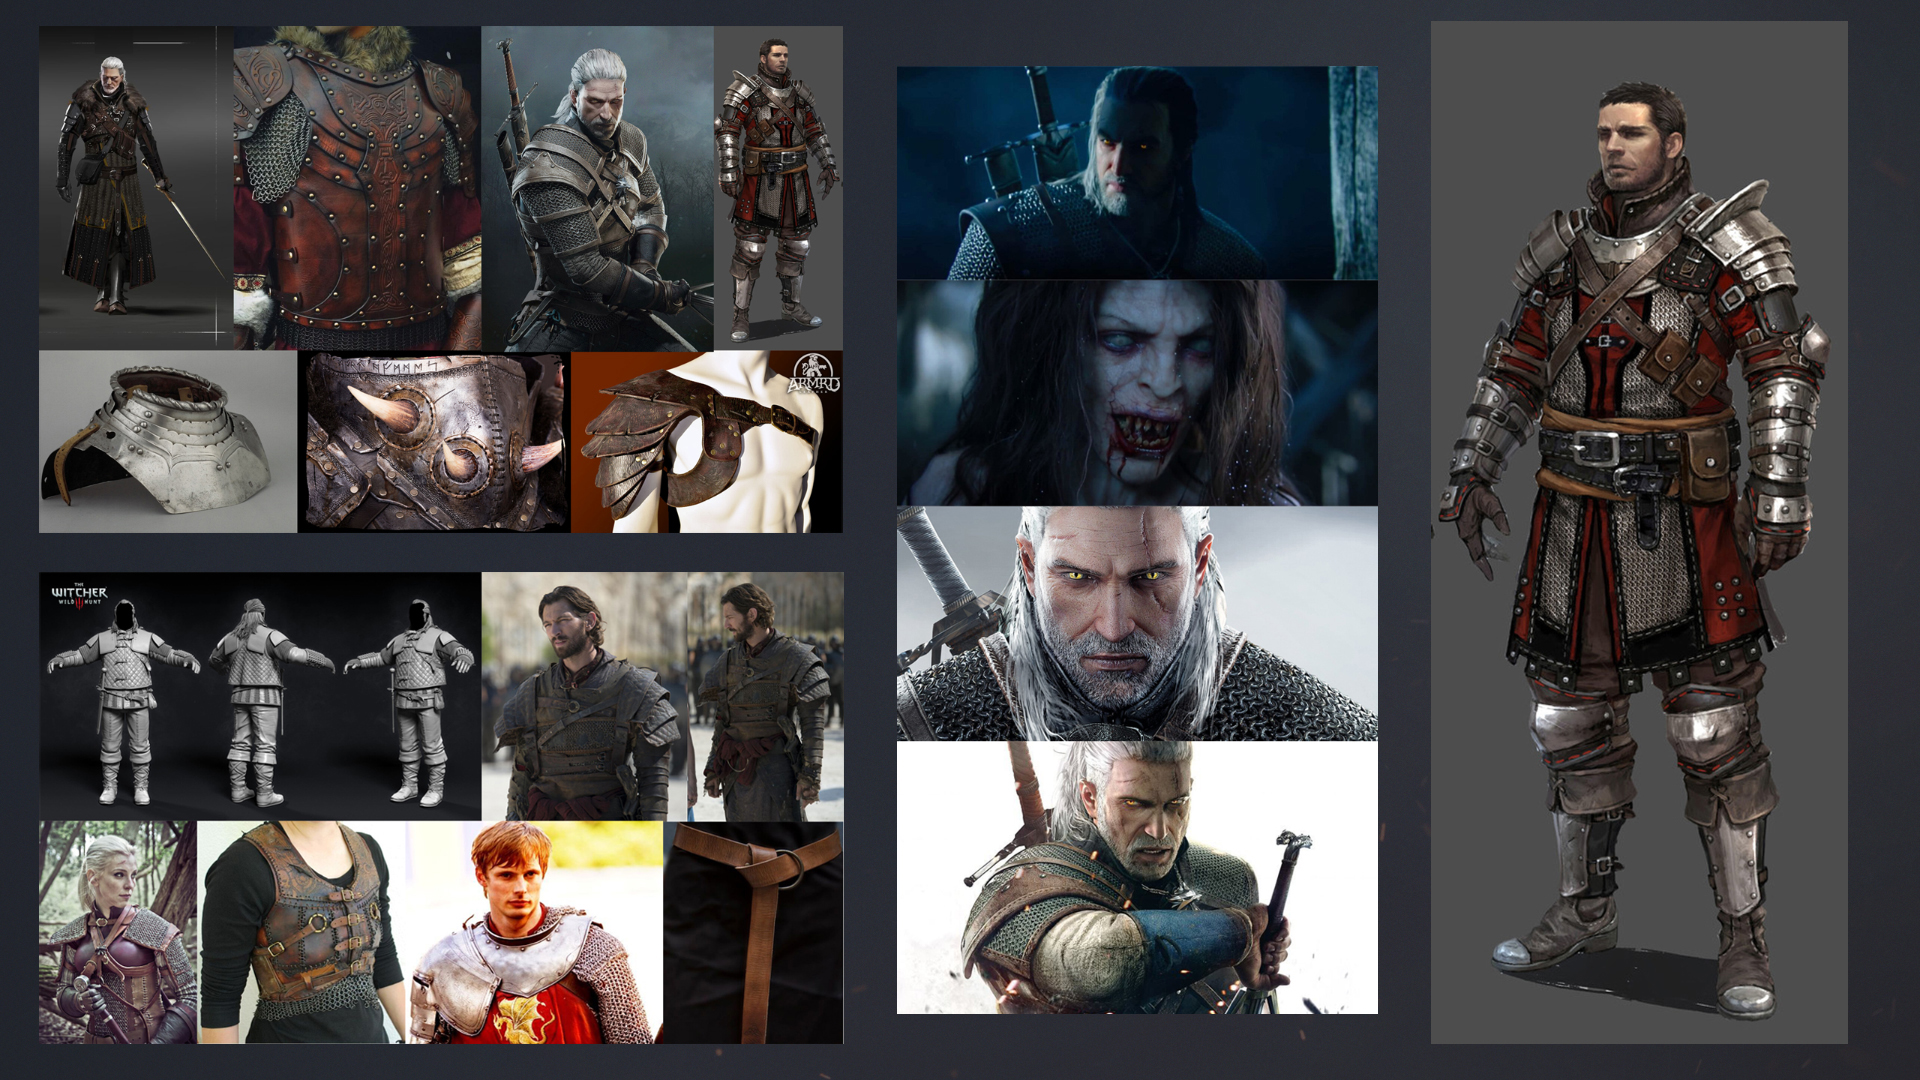
Collecting reference is probably one of the most important steps that is often overlooked. It’s always important to gather as much reference as you can from every angle. For my Witcher, I picked up reference from history books, the internet, and from The Witcher’s art books. You can also use scan data and 2D reference from 3d.sk, since they have a huge library. Creating mood boards for colors, lights and the mood you want to achieve for your character is very helpful, too. It might be a pain to do all of this extra work, but it’s definitely worth it!
Sculpting & High Poly
All projects start with a good idea and then a good sculpt. A mistake I see often is artists creating a rough base and making a quick jump to finer details. Don’t do this! Don’t get me wrong, details are fun, however, the base and the silhouette are the most noticeable aspects of a small character on the screen.
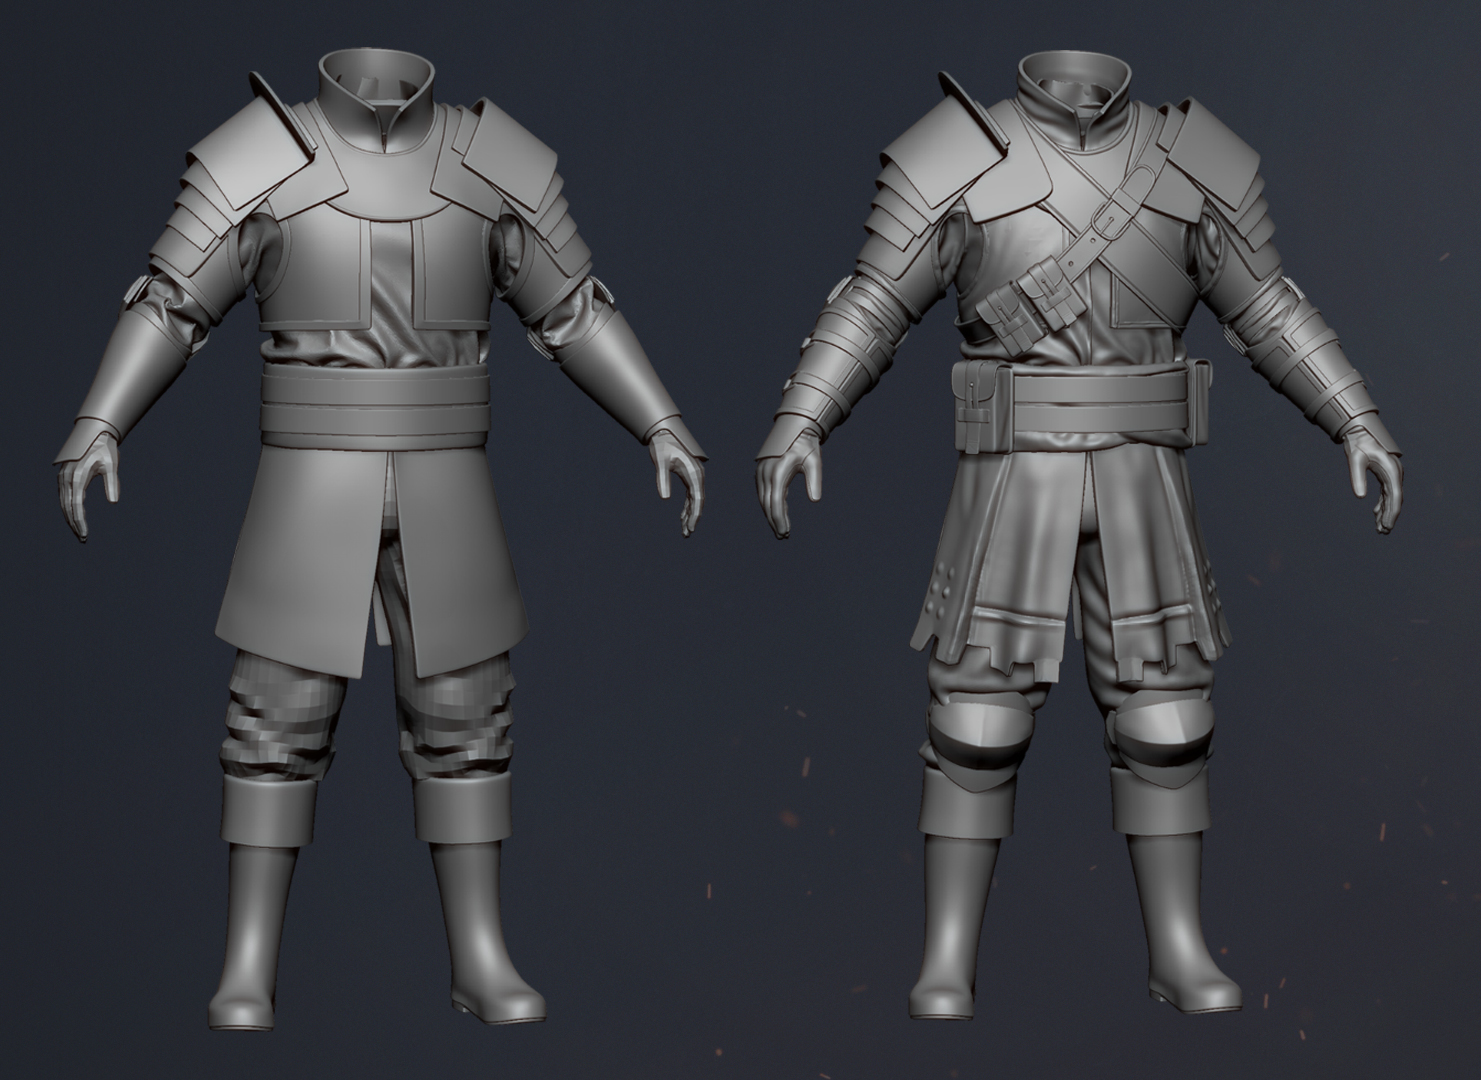
At this stage, I was testing proportions and design. I always start with the primary forms that define the silhouette and the base of my character. I usually use basic shapes to define every aspect of the concept. This is the part where you want to focus on anatomy, work efficiently and get as much feedback as possible from friends or art directors to make sure the base is good. It’s easier to modify things during this step. The base folds are sculpted as well, and I reused patches and gloves from other projects to save time.

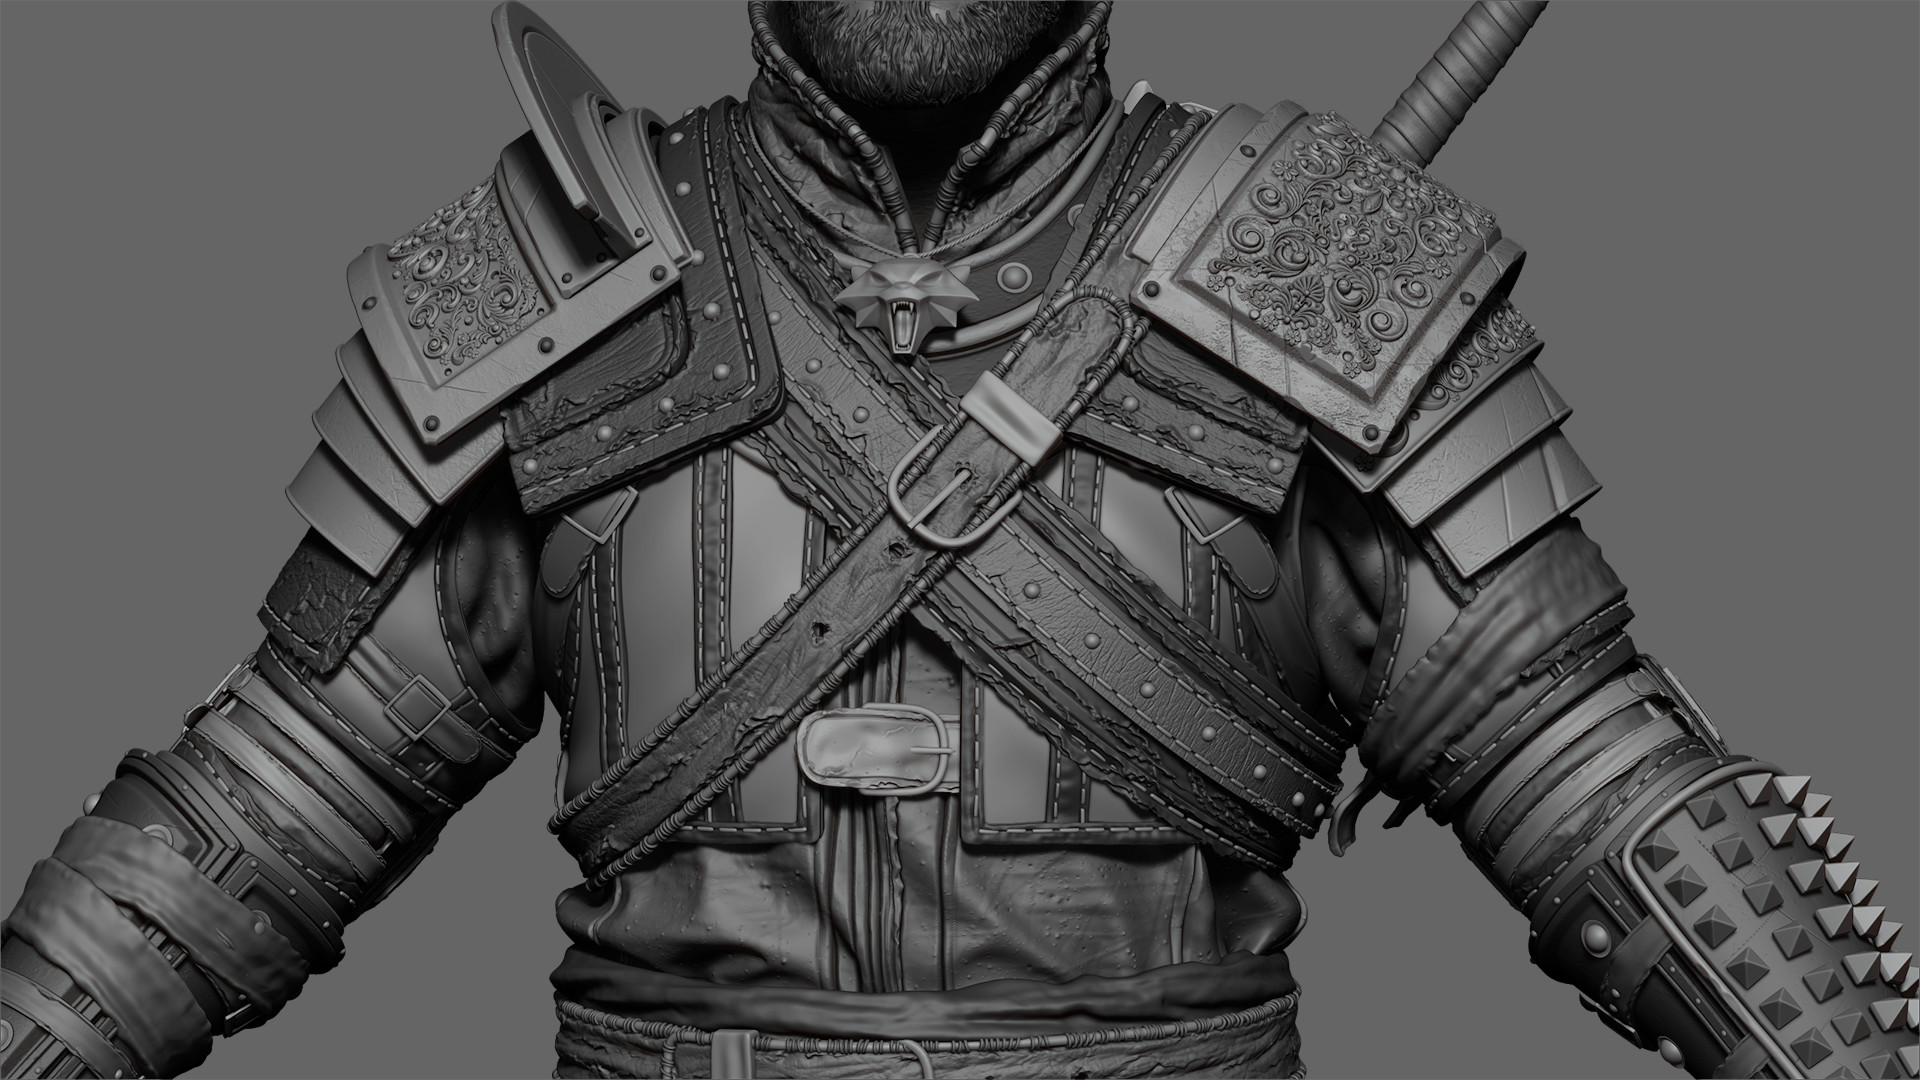
Once the base of your character is approved, you can have fun and sculpt the secondary forms! This means you can add folds, big wrinkles, muscles, and everything else that will define the character.
Try to make the mesh look interesting from every angle and add as much material definition as you can. This will help sell the concept and create possibilities for color variation.
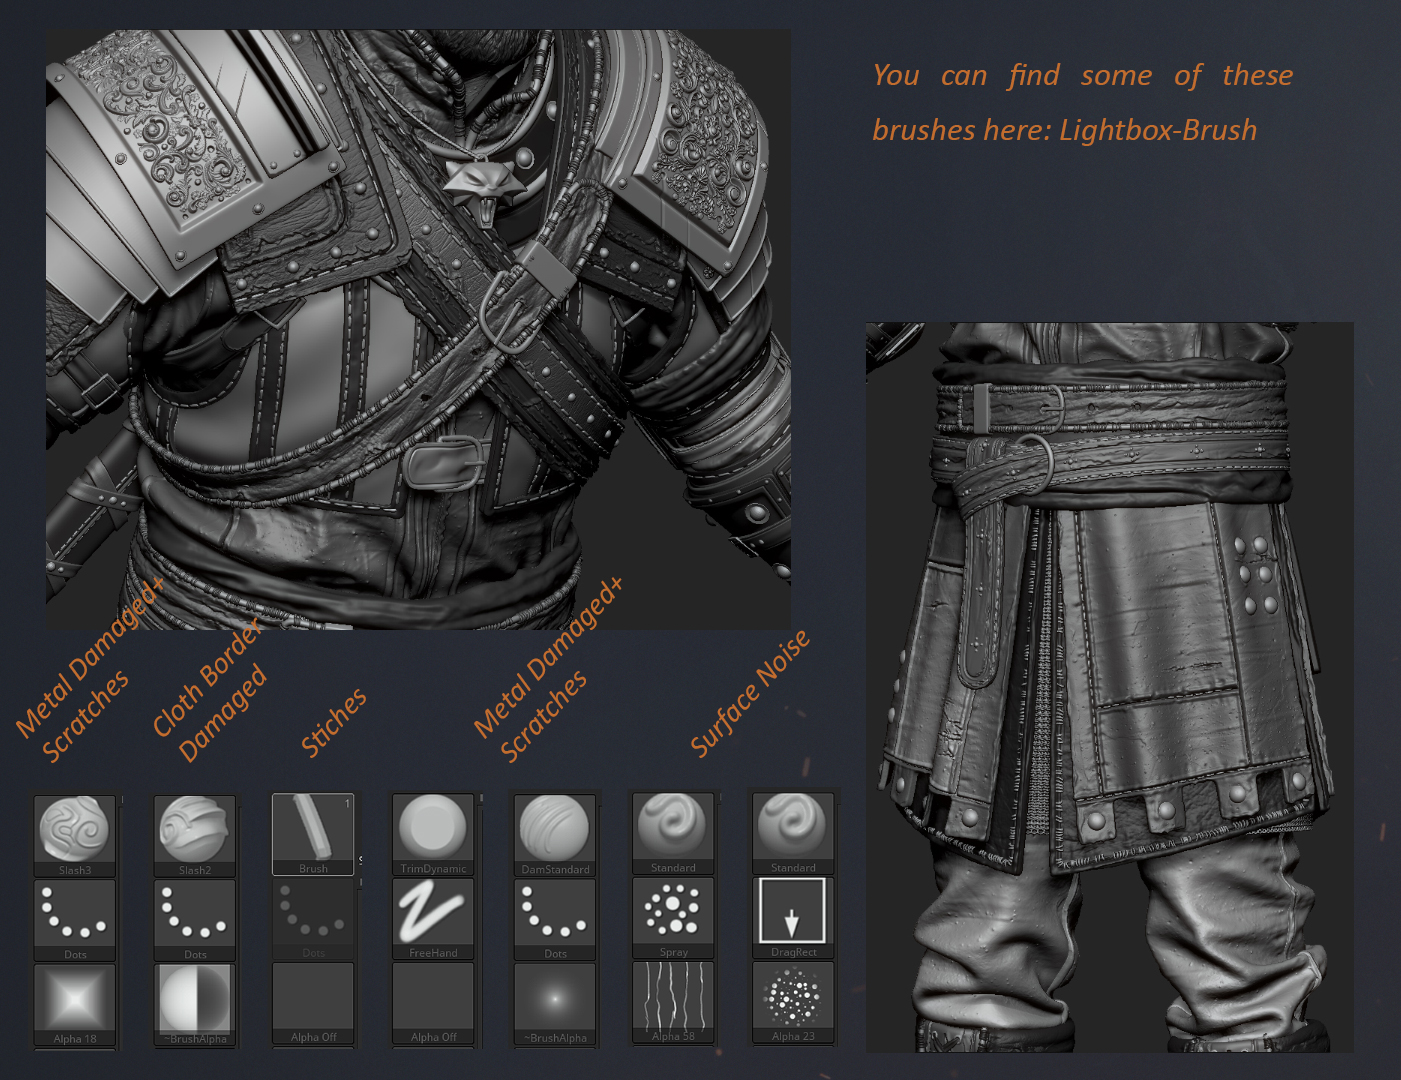
These are some default brushes used for details that can be found in Zbrush. You can use them with some random alphas or project details using maps from Texturing.xyz. I like to sculpt the details in layers so I can modify the intensity on the fly. For the ornaments, I used some of JRO’s awesome alphas.
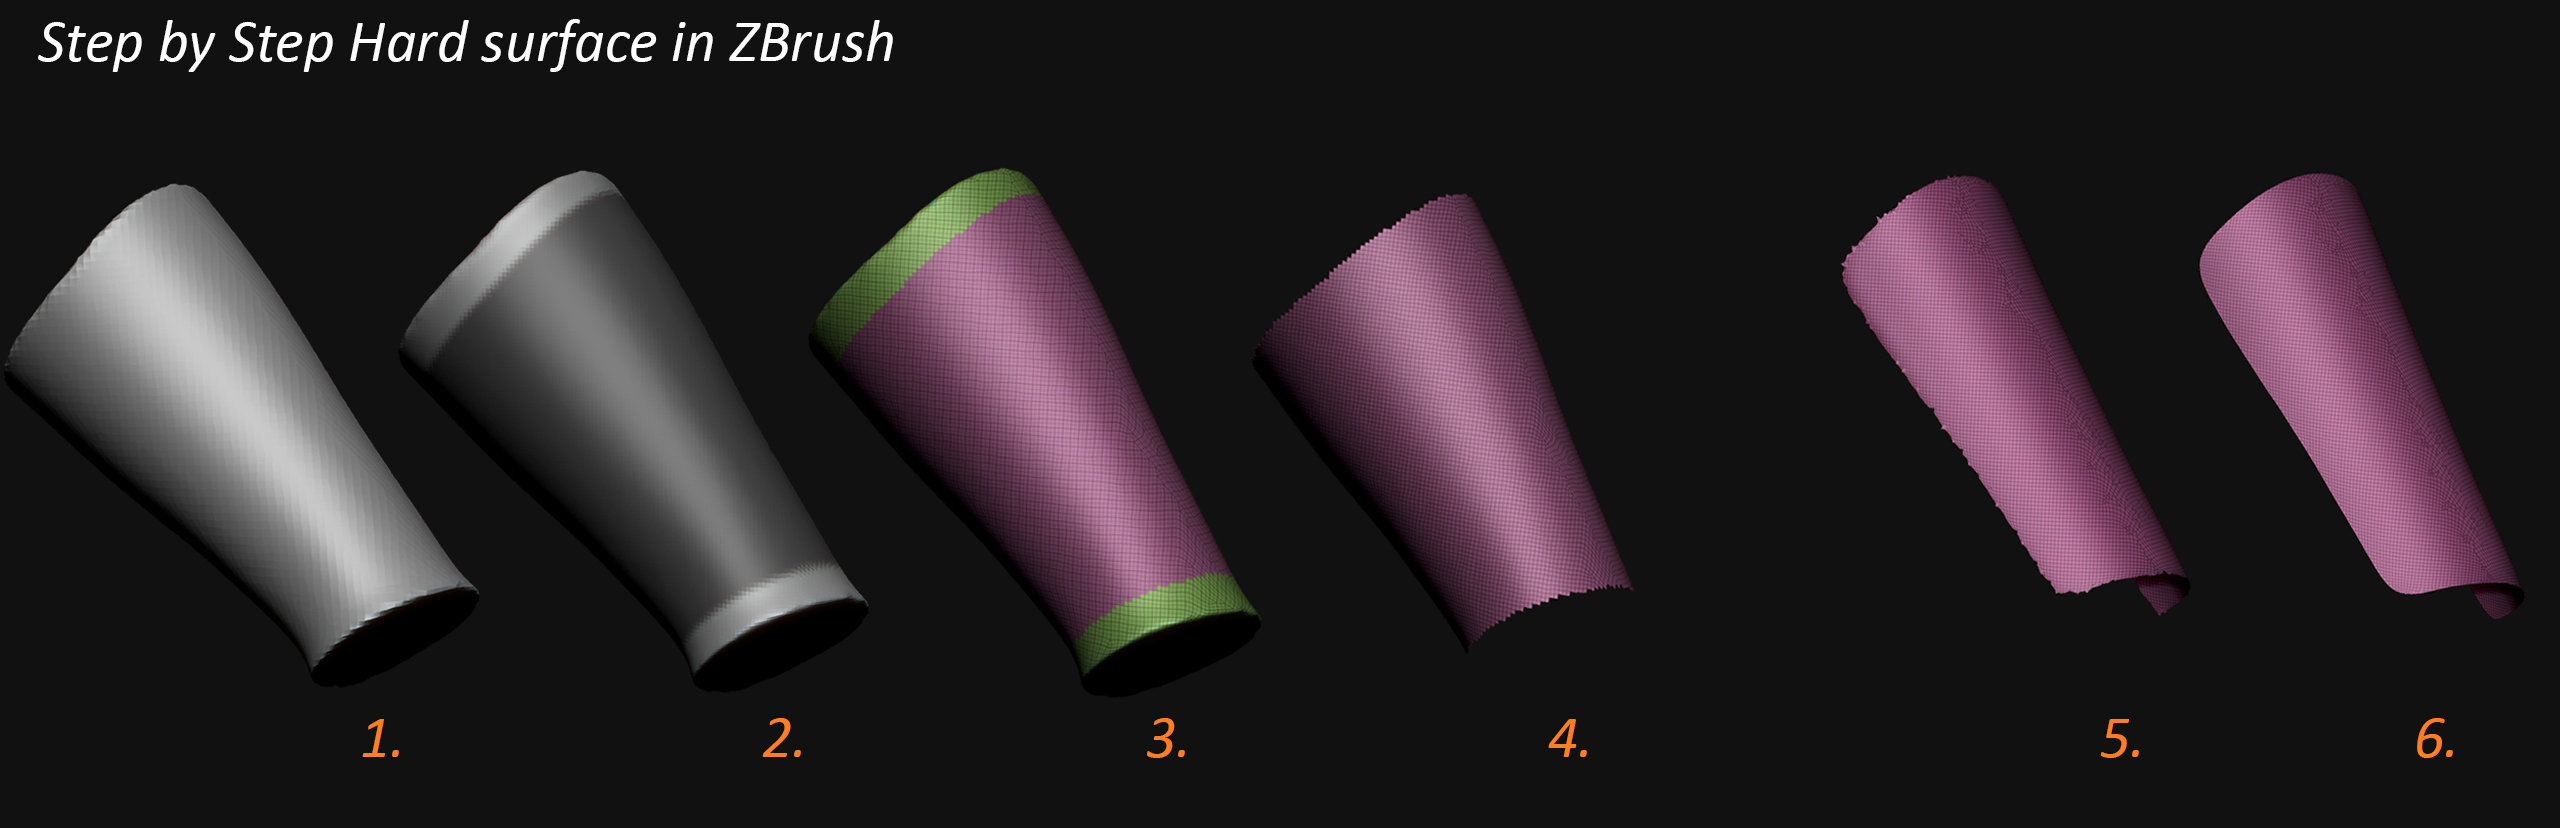
Here’s a brief demo on how to create some hard surface armour in Zbrush.
-
-
- Create a base sketch using Dynamesh.
- Mask a section.
- Polygroup the mask (Ctrl+W).
- Isolate the polygroup (Ctrl+RMB) and delete hidden (Tool-Geometry-Modify Topology).
- Repeat the process to create the upper part.
- Clean the border of the mesh (Tool-Deformation-Polish by Features).
-
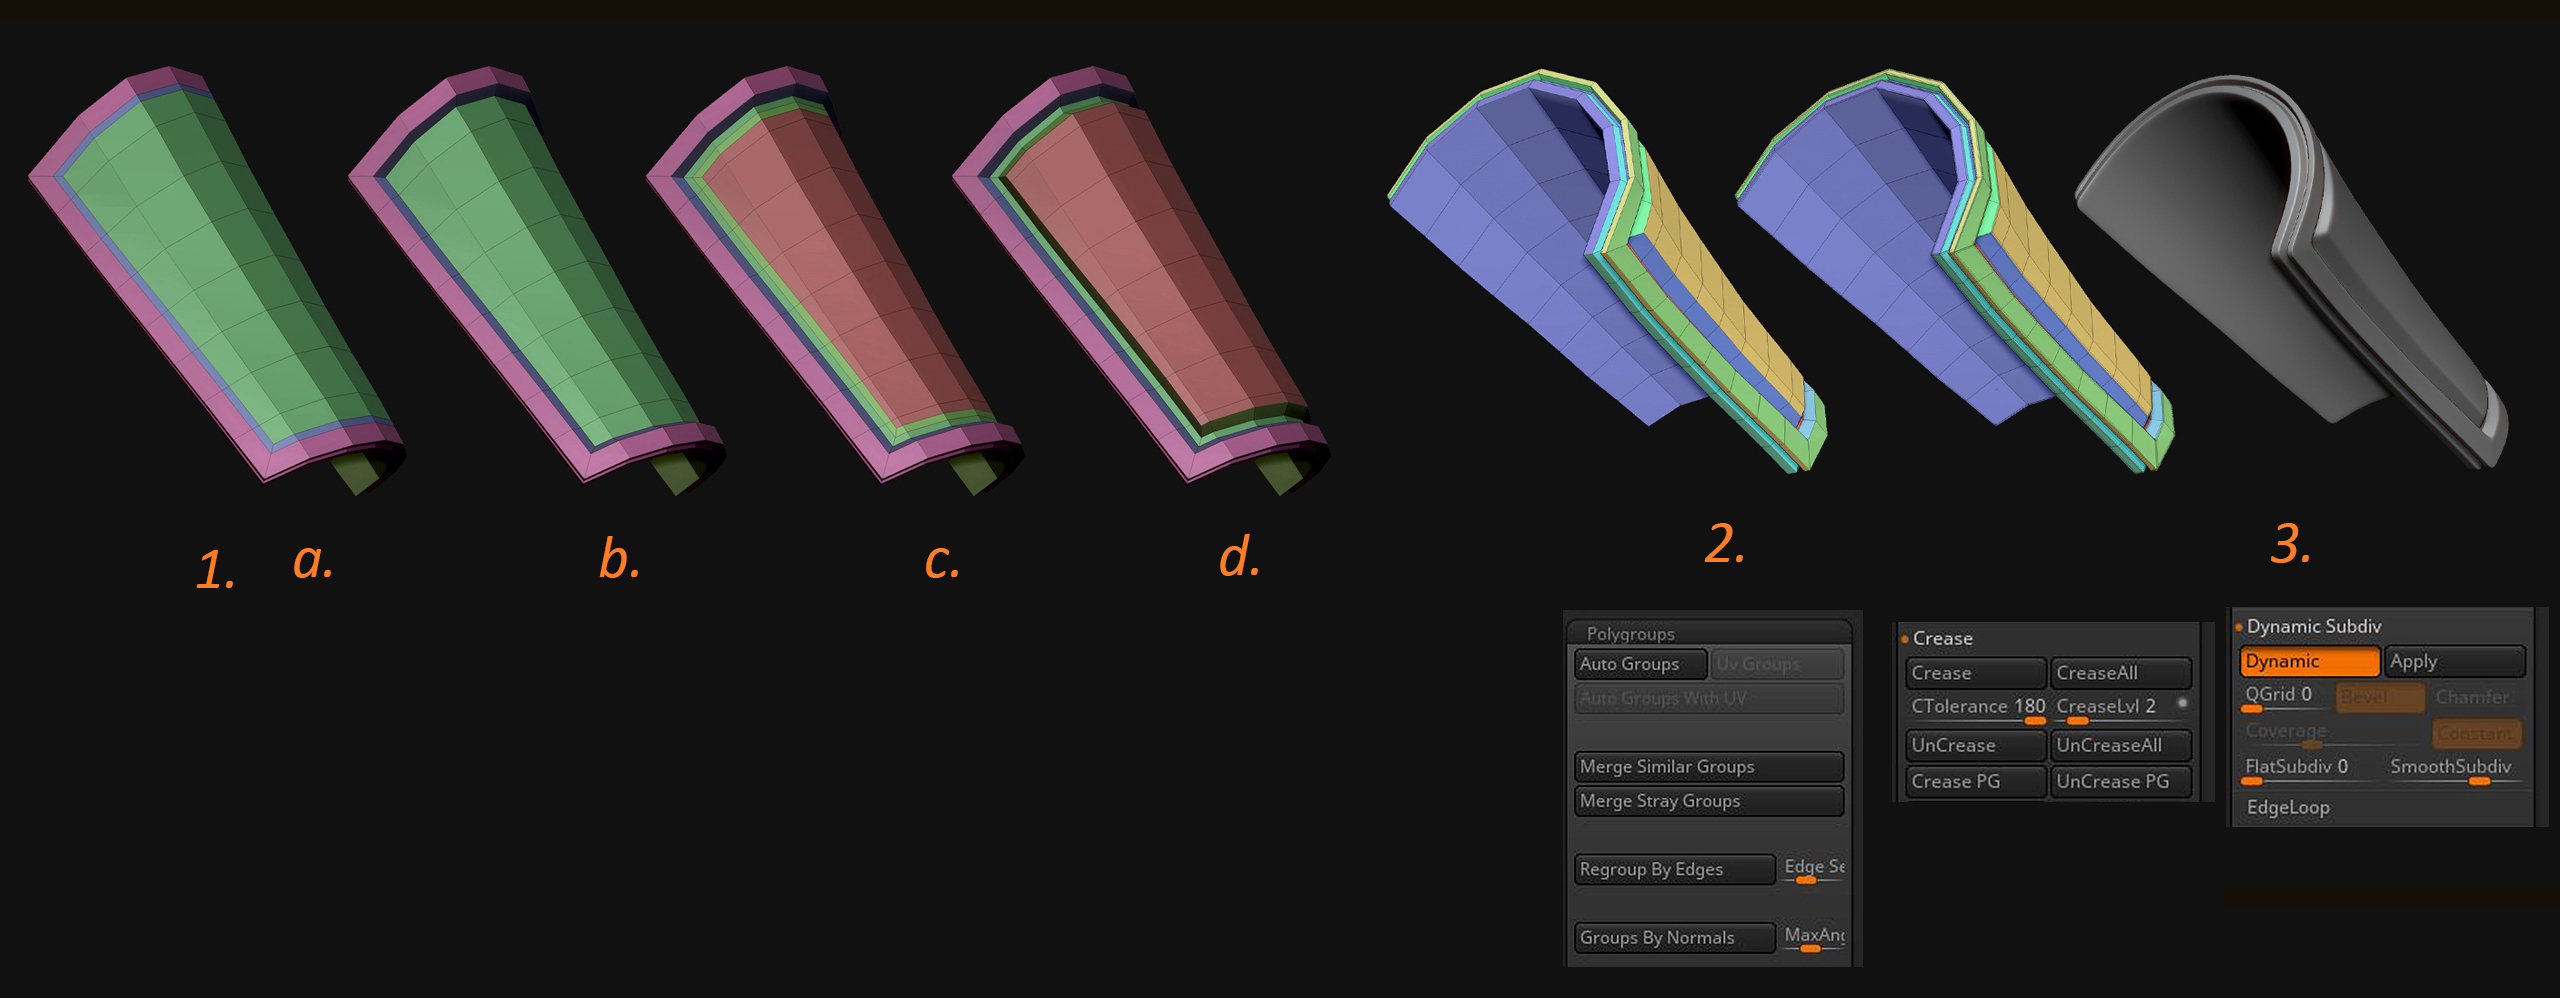
- Use ZModeler to:
- Inset the polygroup island twice.
- Inflate (inward) the new polygroup island.
- Inset the polygroup island twice again.
- Inflate (outwards) the new polygroup island.
- Polygroup by Normal.
- Crease the Polygroup and turn on Dynamic Subdivision. Play with the crease level for a smoother result.
In Zbrush, Dynamic Subdivision will only give you a preview of the subdivision, meaning you can still modify the mesh and use ZModeler while previewing the mesh at a higher subdivision level. You can control the number of previewed subdivisions with Smooth Subdivision, and you can control the crease smoothness with Crease Level. For this example, I used 5 Smooth Subdivision which means that my mesh will subdivide 5 times (preview). I set my Crease Level to 2, which means that my crease will only have an effects on the first 2 subdivisions of my mesh. The goal of this is to create a bevel on the edges of my model.
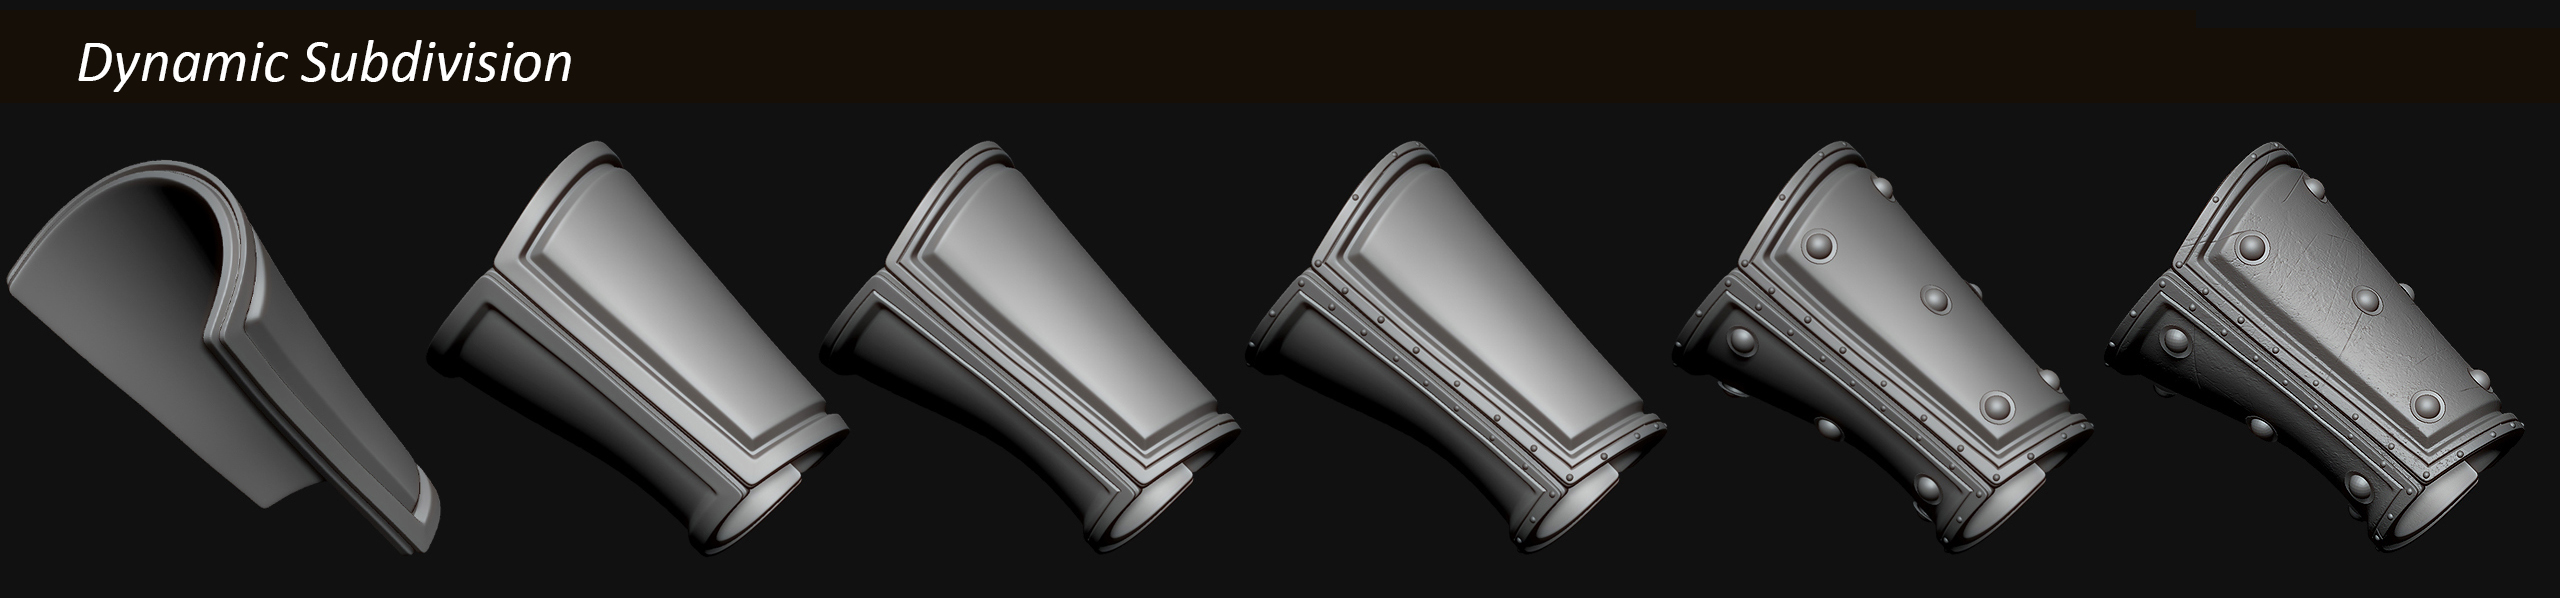
Once you’re done, you can apply the Dynamic Subdivision. This converts the preview to actual topology that allows you to sculpt over. Finally, you can add smaller details and scratches using alphas. For this example, I used the Dam_Standard brush to cut more shapes. The small spheres were duplicated and placed by hand.
Hair Creation
Hair creation is boring for me, but it’s a really important step of character creation. A character without any facial hair can feel lacking (Yeah, I made that mistake in the past! Check out some of my older projects :P).
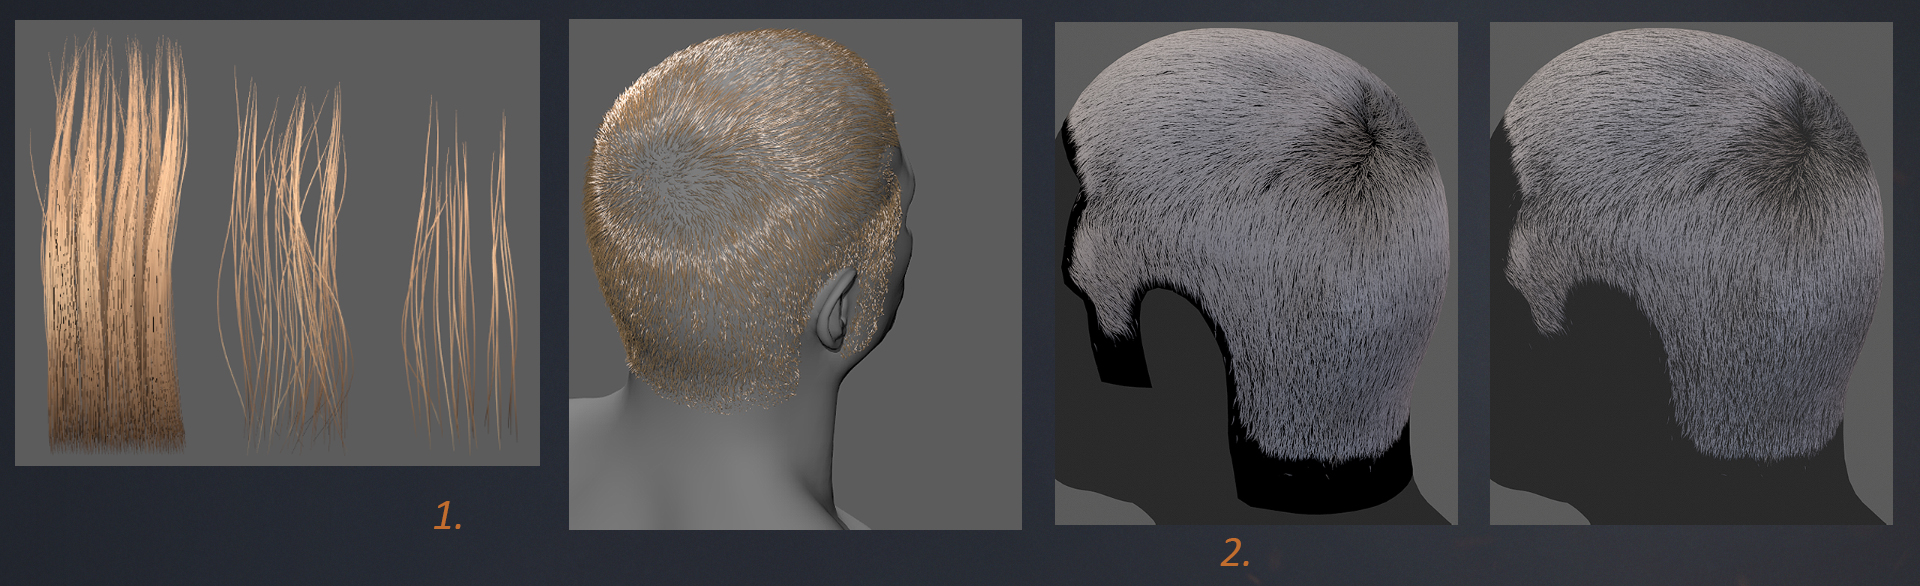
- I used XGen in Maya to generate my high poly hair and rendered different passes with Arnold (Flat color, AO, Spec, and Shadow) and combined all the textures in Photoshop.
- For the short hair, I decided to create a hair cap. I used the same process, but instead of rendering the textures, I baked the hair onto a cap that I had extracted from the original head mesh. I then added cards on top of the cap to add depth. The image on the left is with alpha turned off and the image on the right is with alpha turned on. After this step, I painted the texture of the hair cap in Substance to make the transition between the skin and hair better.
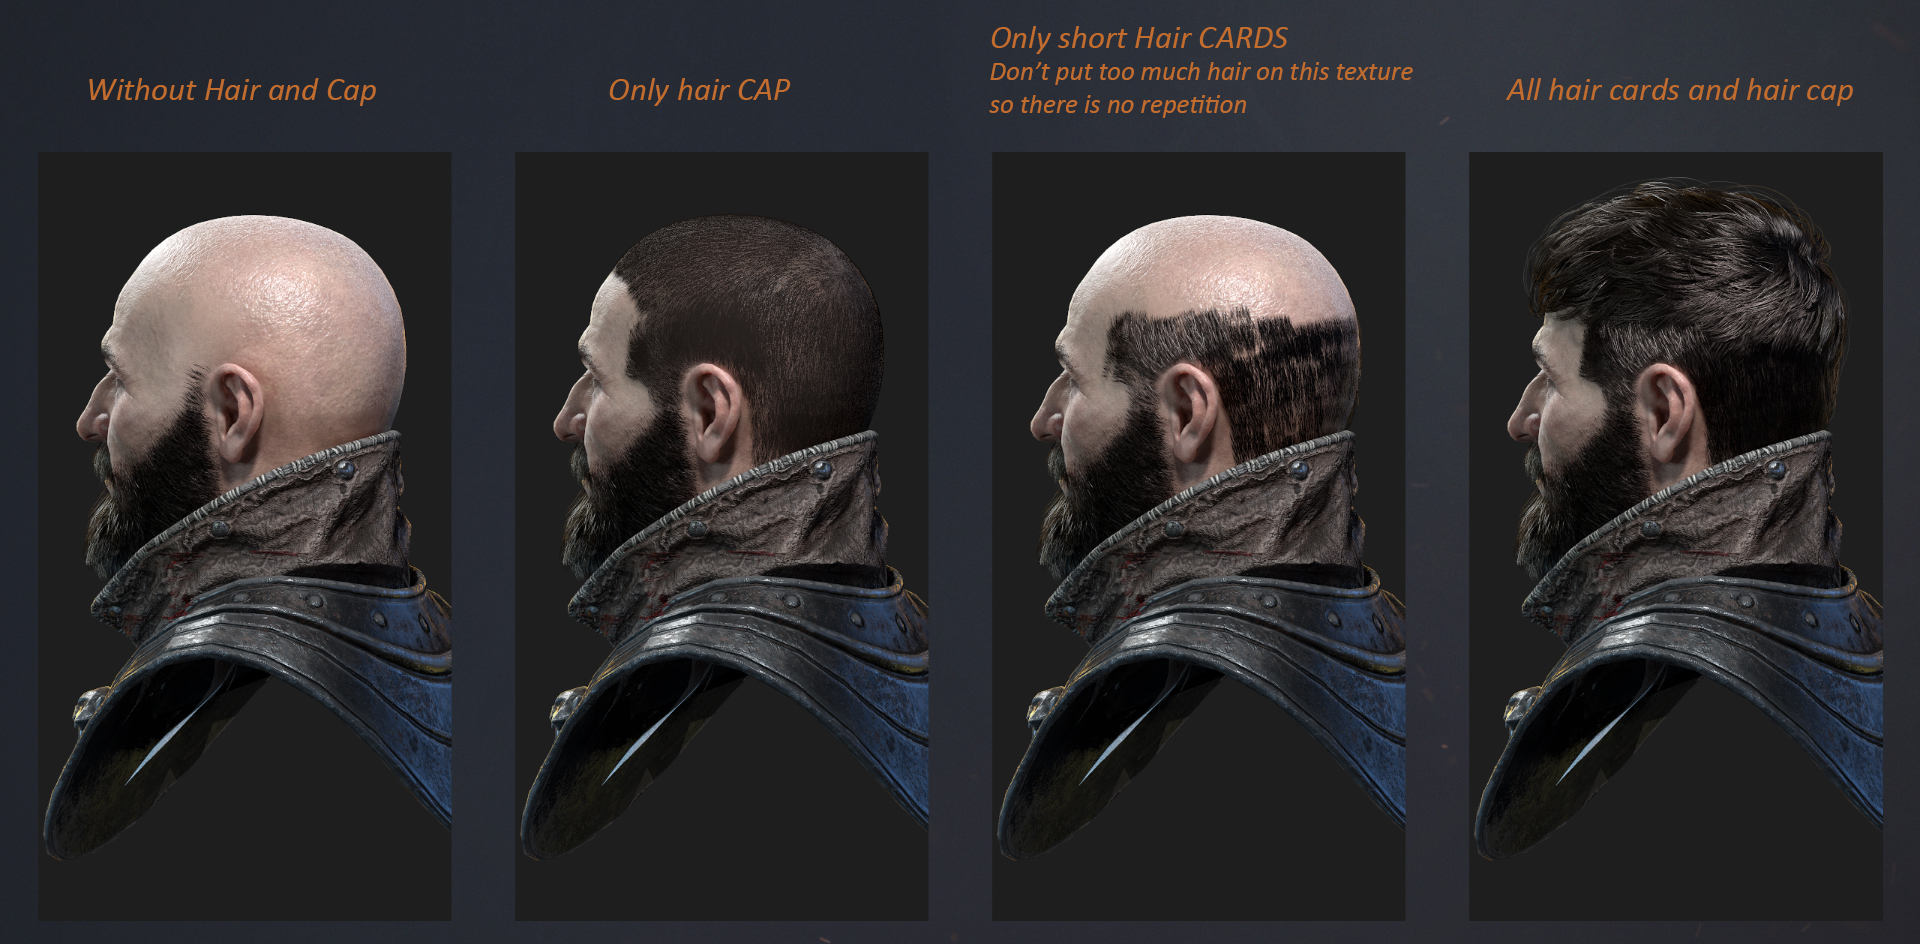
A hair cap is really important, especially when creating short hair. Without a cap, it would take many cards and a lot of texture variation to create believable short hair. In my case, the cap is doing all the work and the cards were added on top to create depth.
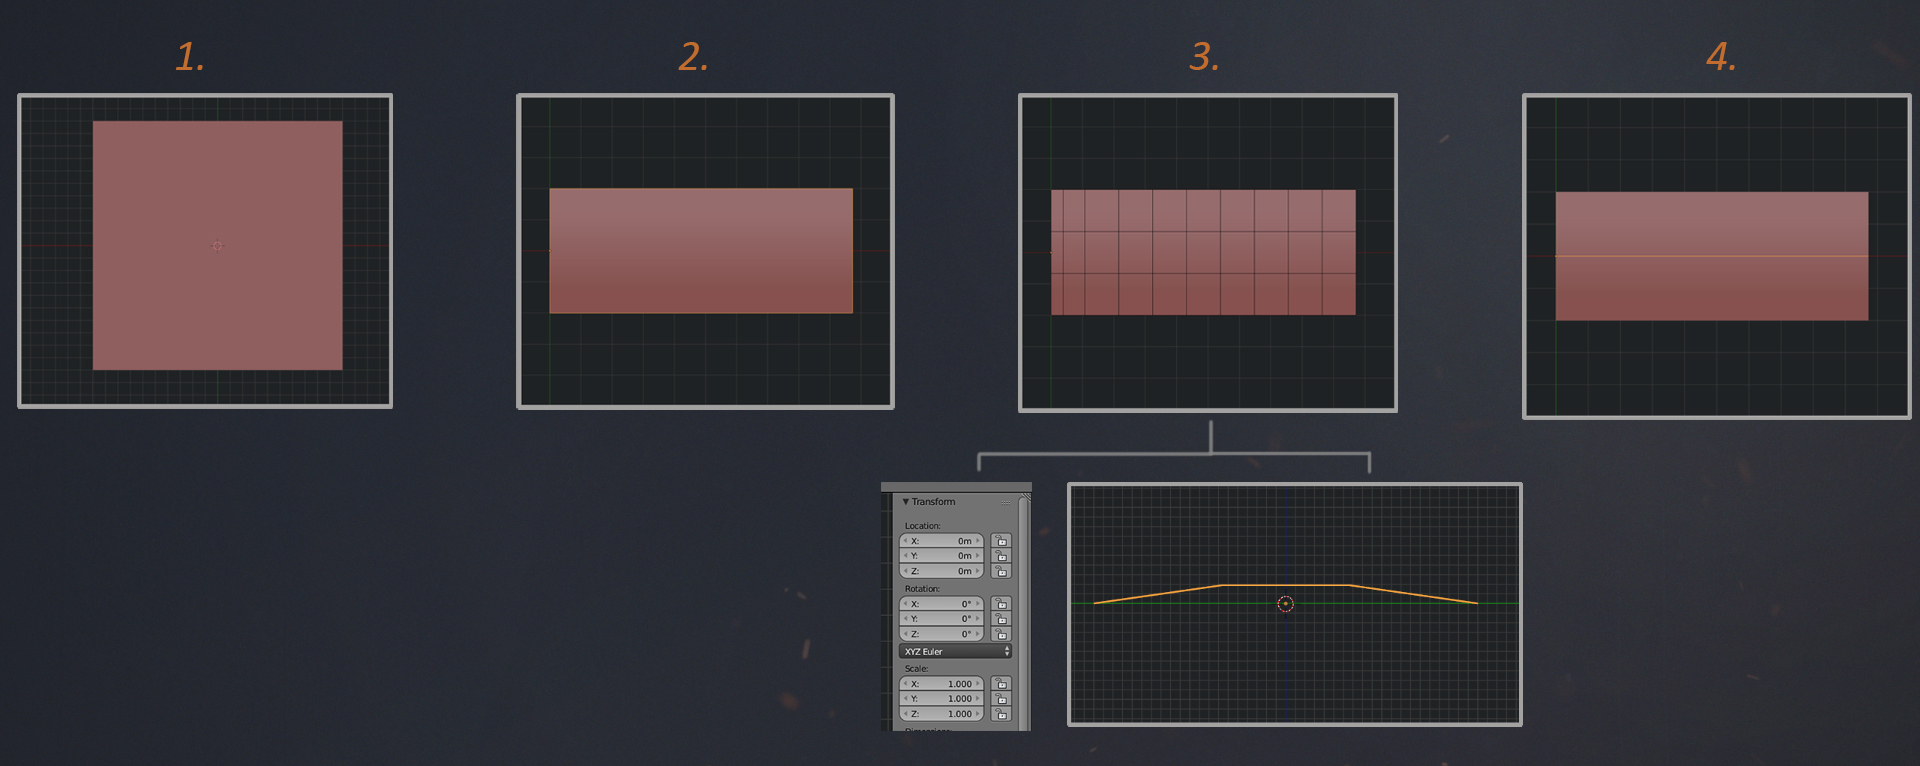
To place the hair cards, I used Blender’s curve system which I found easier to manipulate than placing the cards by moving the verts with soft selection enabled. Here’s my method:
- Create a plane.
- Go into Edit Mode and move the vertex until you have a rectangle in the size you want. Make sure the origin is placed at the bottom of your card.
- You can add more topology to your card for better deformation. I also like to curve the rectangle a little bit. Check to make sure that the transformation of the rectangle is all reset in Object Mode.
- Add a Path curve in Edit Mode, make it the same length as the card and make sure the origin of the curve is in the same place as the rectangle’s origin.

- Select the card and apply a Curve Modifier. In the modifier, select the curve you just created. This will parent the curve to the card.
- This is where the magic happens! Instead of moving the verts with soft selection enabled (which can be a pain if you have several cards), you just have to move the verts of the curve. You can also press Alt+S to play with the radius of the cards.
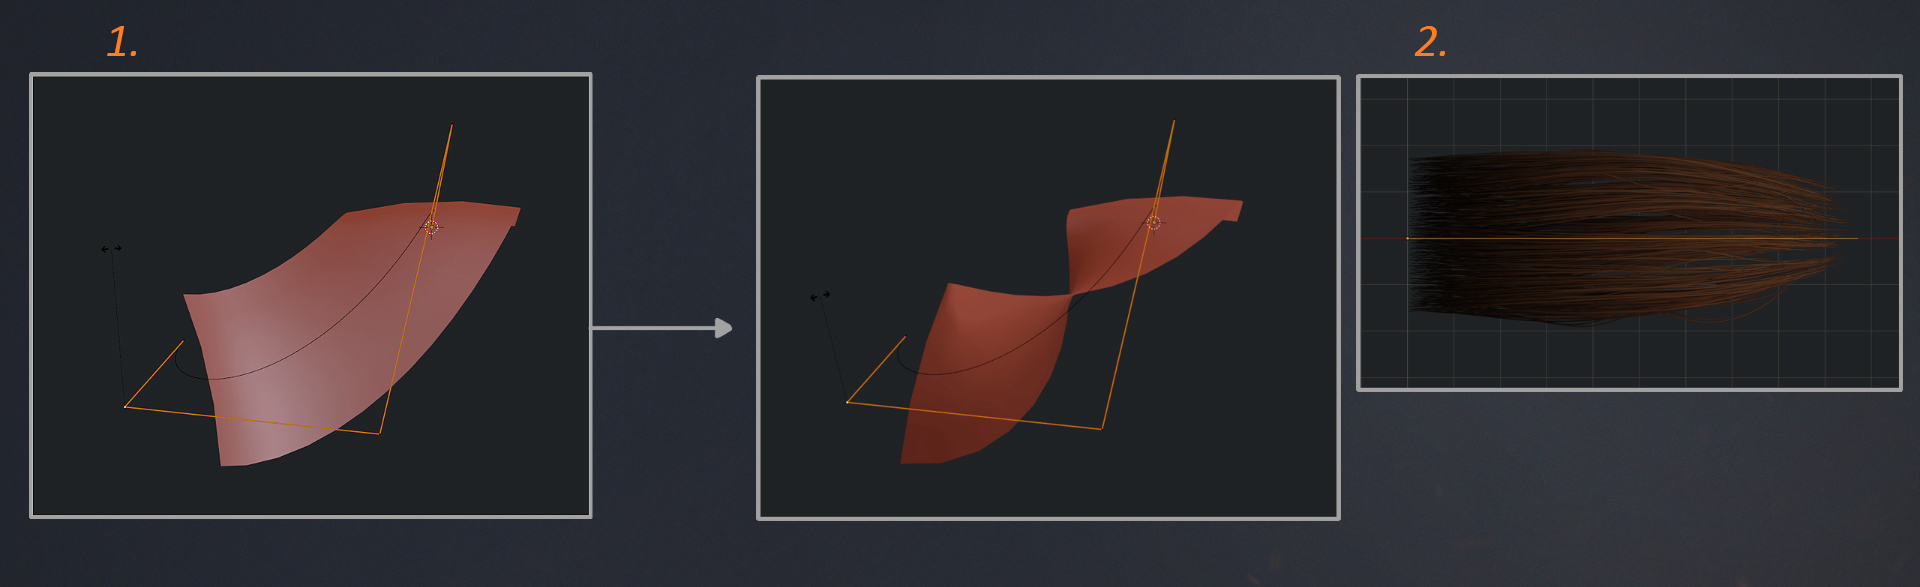
- Additionally, you can tilt each vertex. To transform the cards in the viewport without deforming the geometry, you have to select the card and the curve parent and move them together the normal way in object mode.
- Apply a material and a texture to the card since it’s easier to place them this way. If you have any artifacts, you can turn off mipmaps and tweak the “Clip Alpha” setting found under Blender User Preference – System.
There is no magic trick for creating real-time hair. You just have to be patient and look at a lot of reference. I strongly suggest creating a base texture before placing the hair cards. Try to always test the cards inside your chosen renderer (in my case, this was Toolbag 3) and tweak the cards and textures until the end.
Scene Setup & Rendering

Once the low topology, baking and textures are done, you can render the character! This step is really important since it’s what you are showing in your portfolio and what your audience will see. For this step, I always take the time to create solid lighting setup and test different camera angles. You can also create a backplane or supporting scenery for your character to give it context.
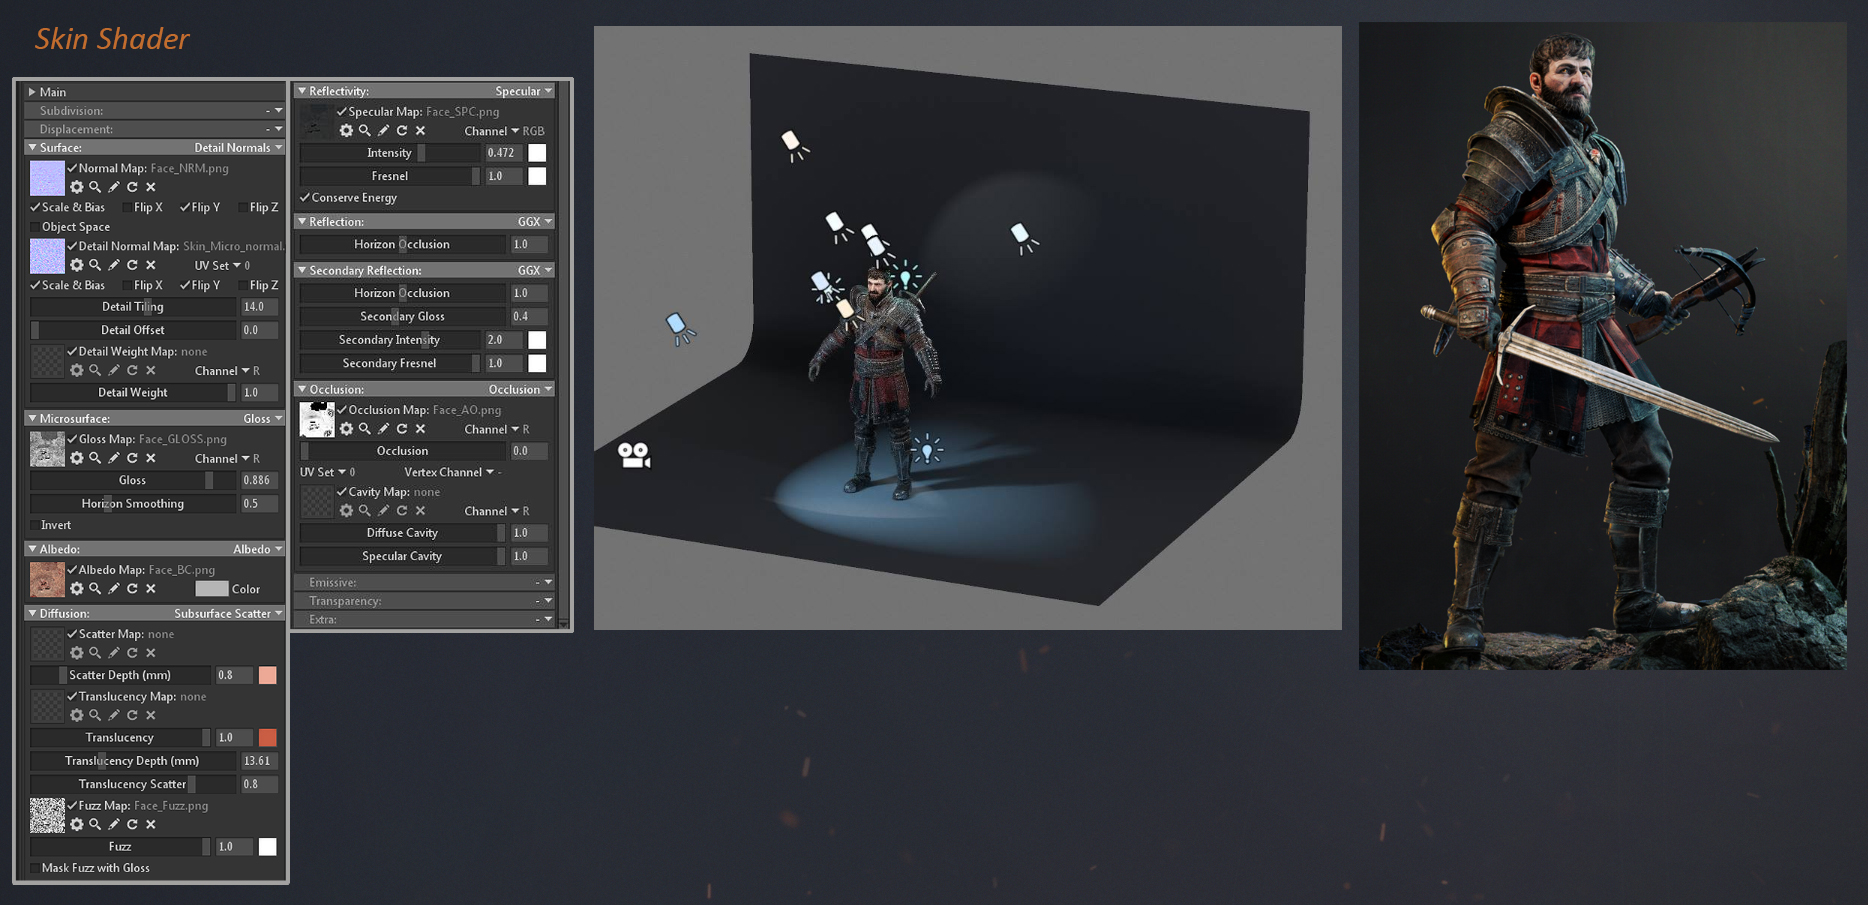
For the Skin shader in Toolbag, I changed the mode to Subsurface Scatter and exported a tileable skin normal map from Substance Painter for the Detail Normal Map. The fuzz map is a noise texture that I made in Photoshop. Finally, the secondary reflection is really important to achieve realistic skin. It’s also important to test the materials under different lighting conditions by changing lights and trying different HDRI’s.

Thanks for staying with me till the end! I hope you had fun reading 😊 Don’t hesitate to follow me for any update or breakdown!
We would like to thank William Paré-Jobin for creating this article. You can find more of William’s work on Artstation. See how Toolbag can bring your character art presentation to the next level with the free 30-day trial, and visit our Tutorials section to find more breakdowns.


