Introduction
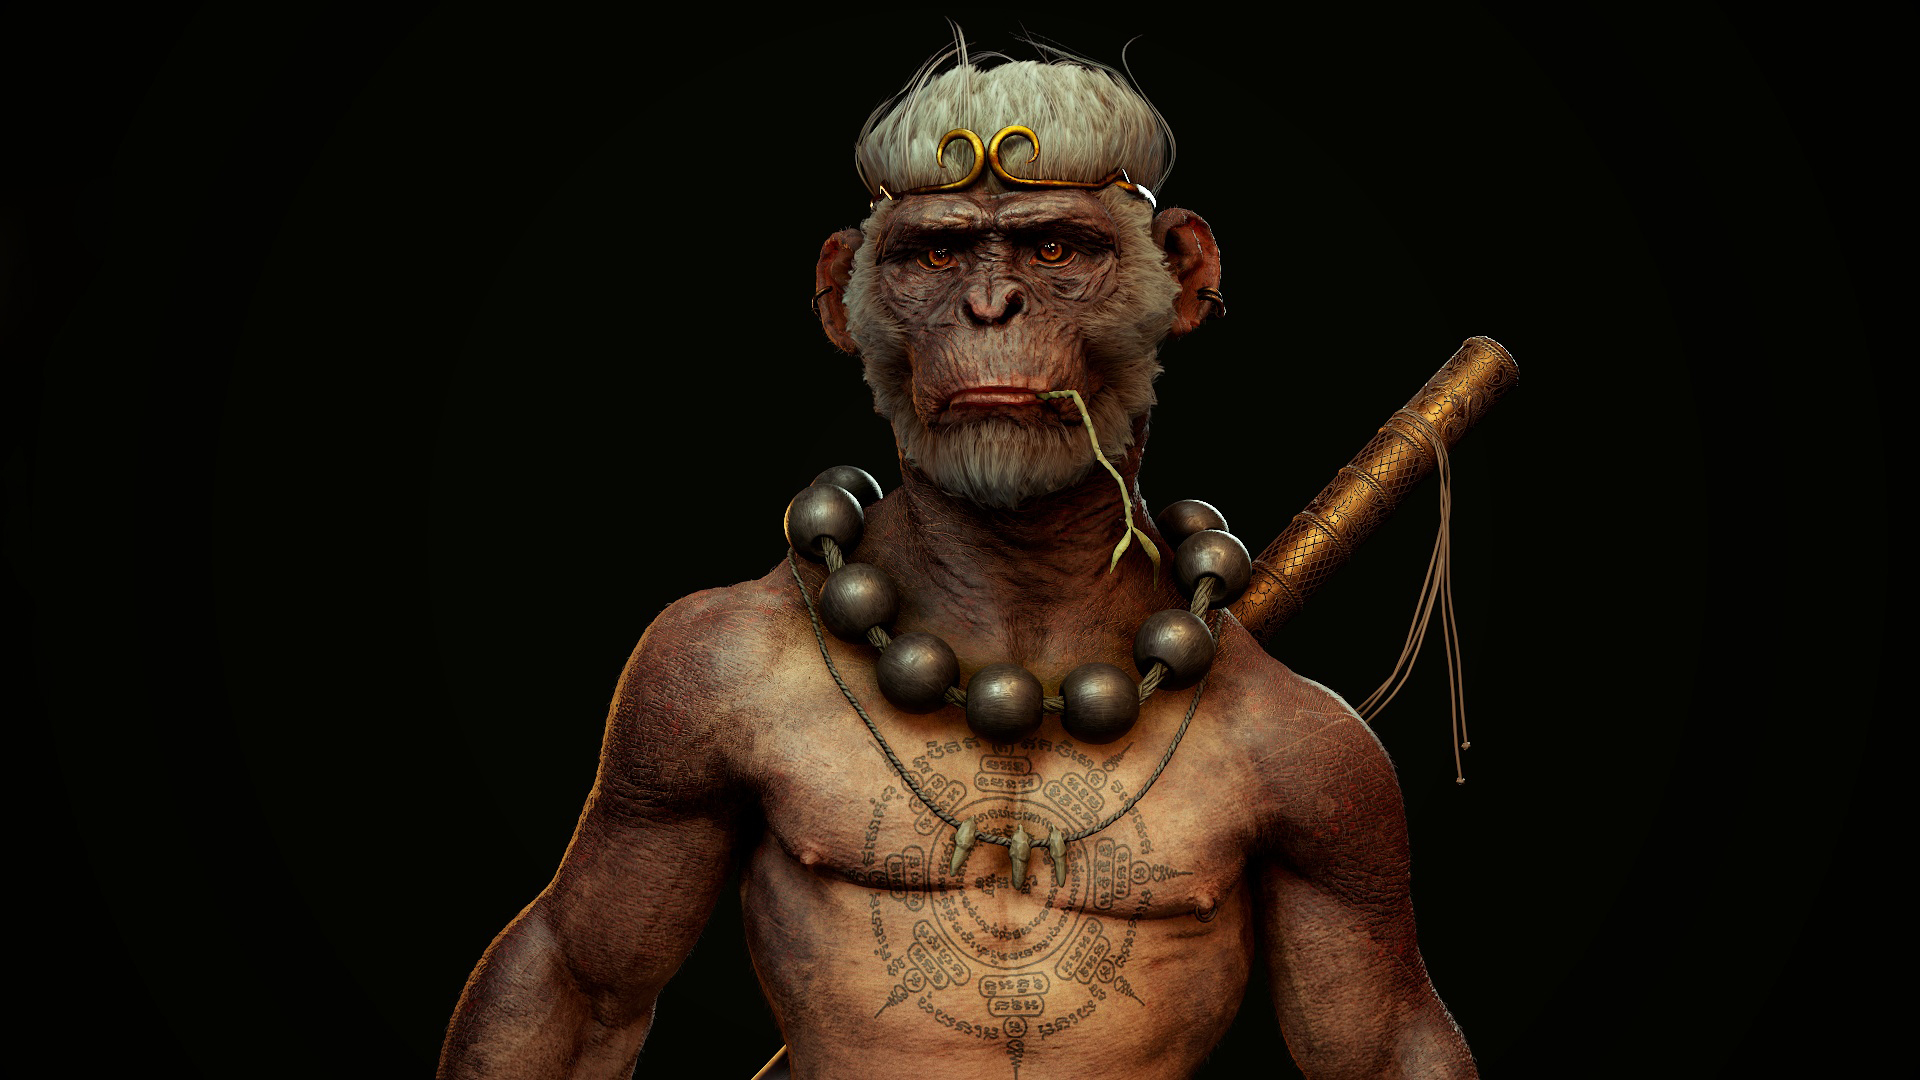
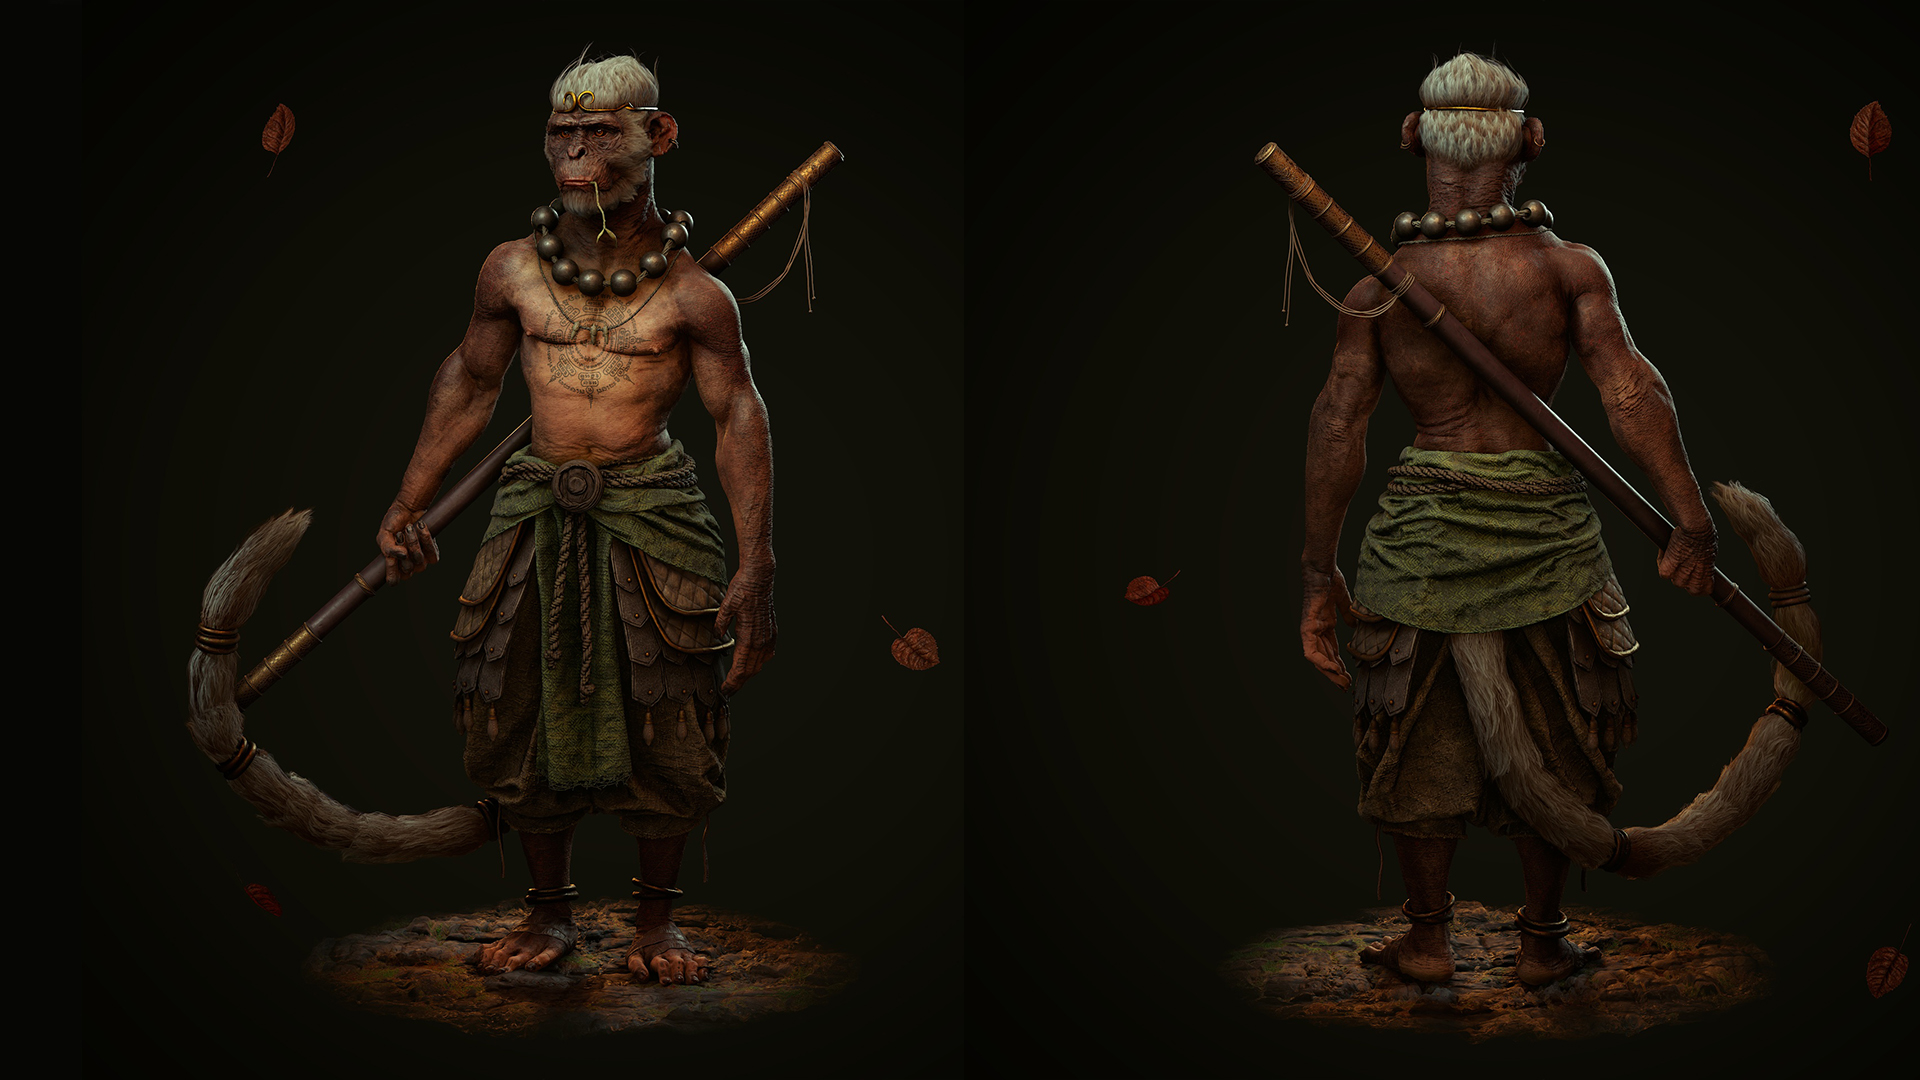
Hello! I’m Alex Aznar, a junior character artist living in Valencia, Spain, and working at elite3d. In this breakdown, I’ll be talking about the process of texturing my monkey character using Toolbag 4 and demonstrate I used the new Texture Projects system to create skin, fabric, and foliage.
Preparing the Scene
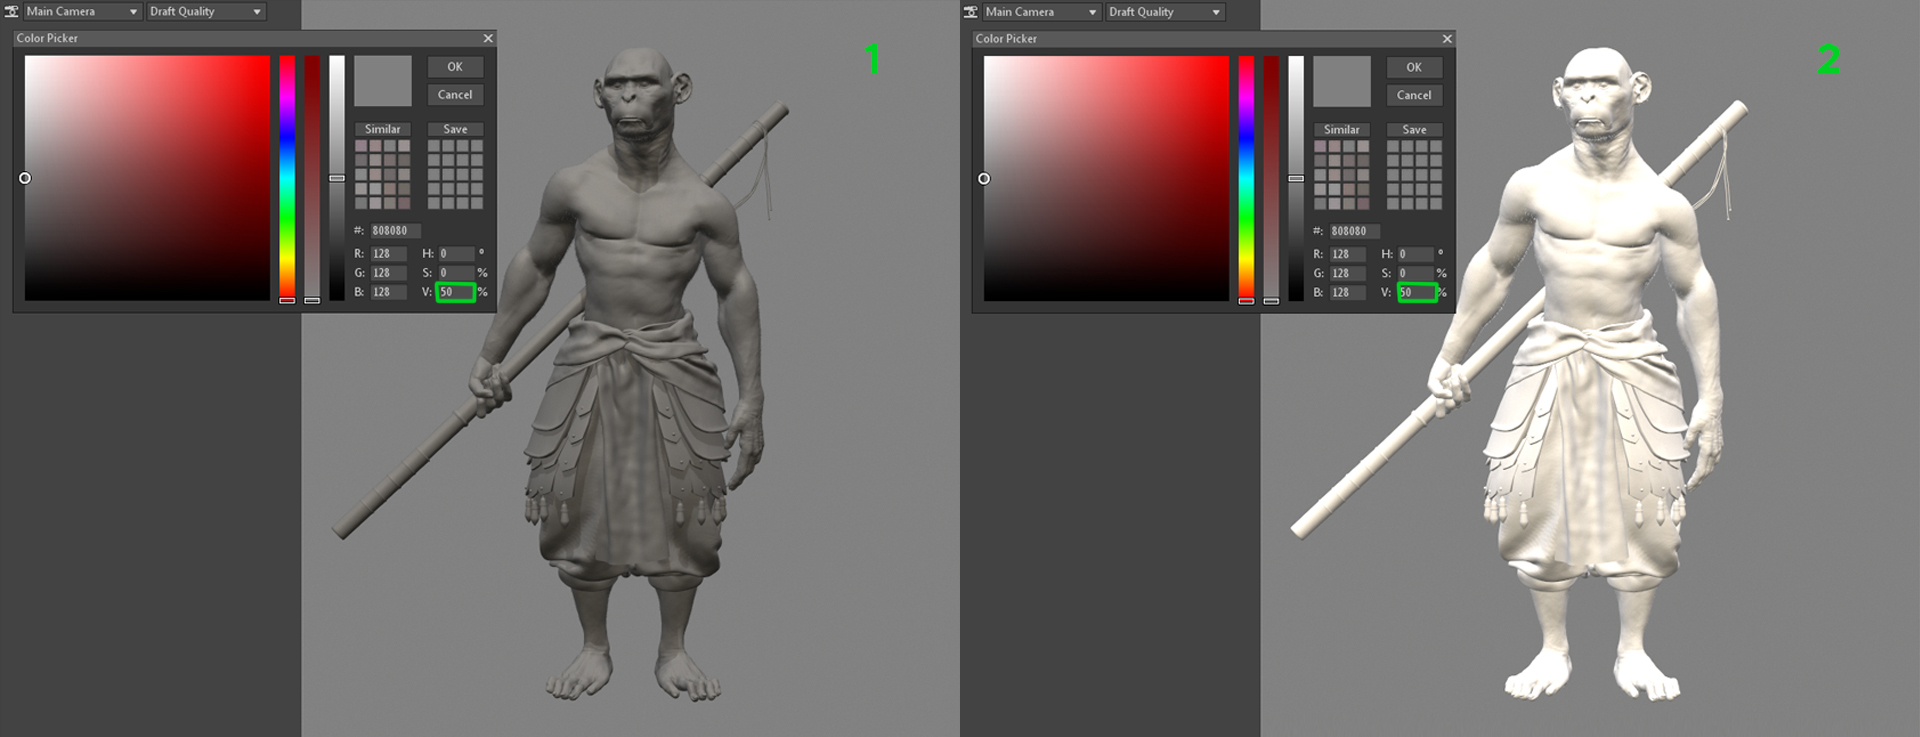
For starters, I would recommend creating a neutral lighting setup. This means you should have a setup that allows you to see your textures’ colors properly.
The best-case scenario would be to choose a neutral sky from the Library and create a Spot Light on the character’s focal area. This helps give you an idea of what the final render will look like. For the moment, I would not go further than this stage.
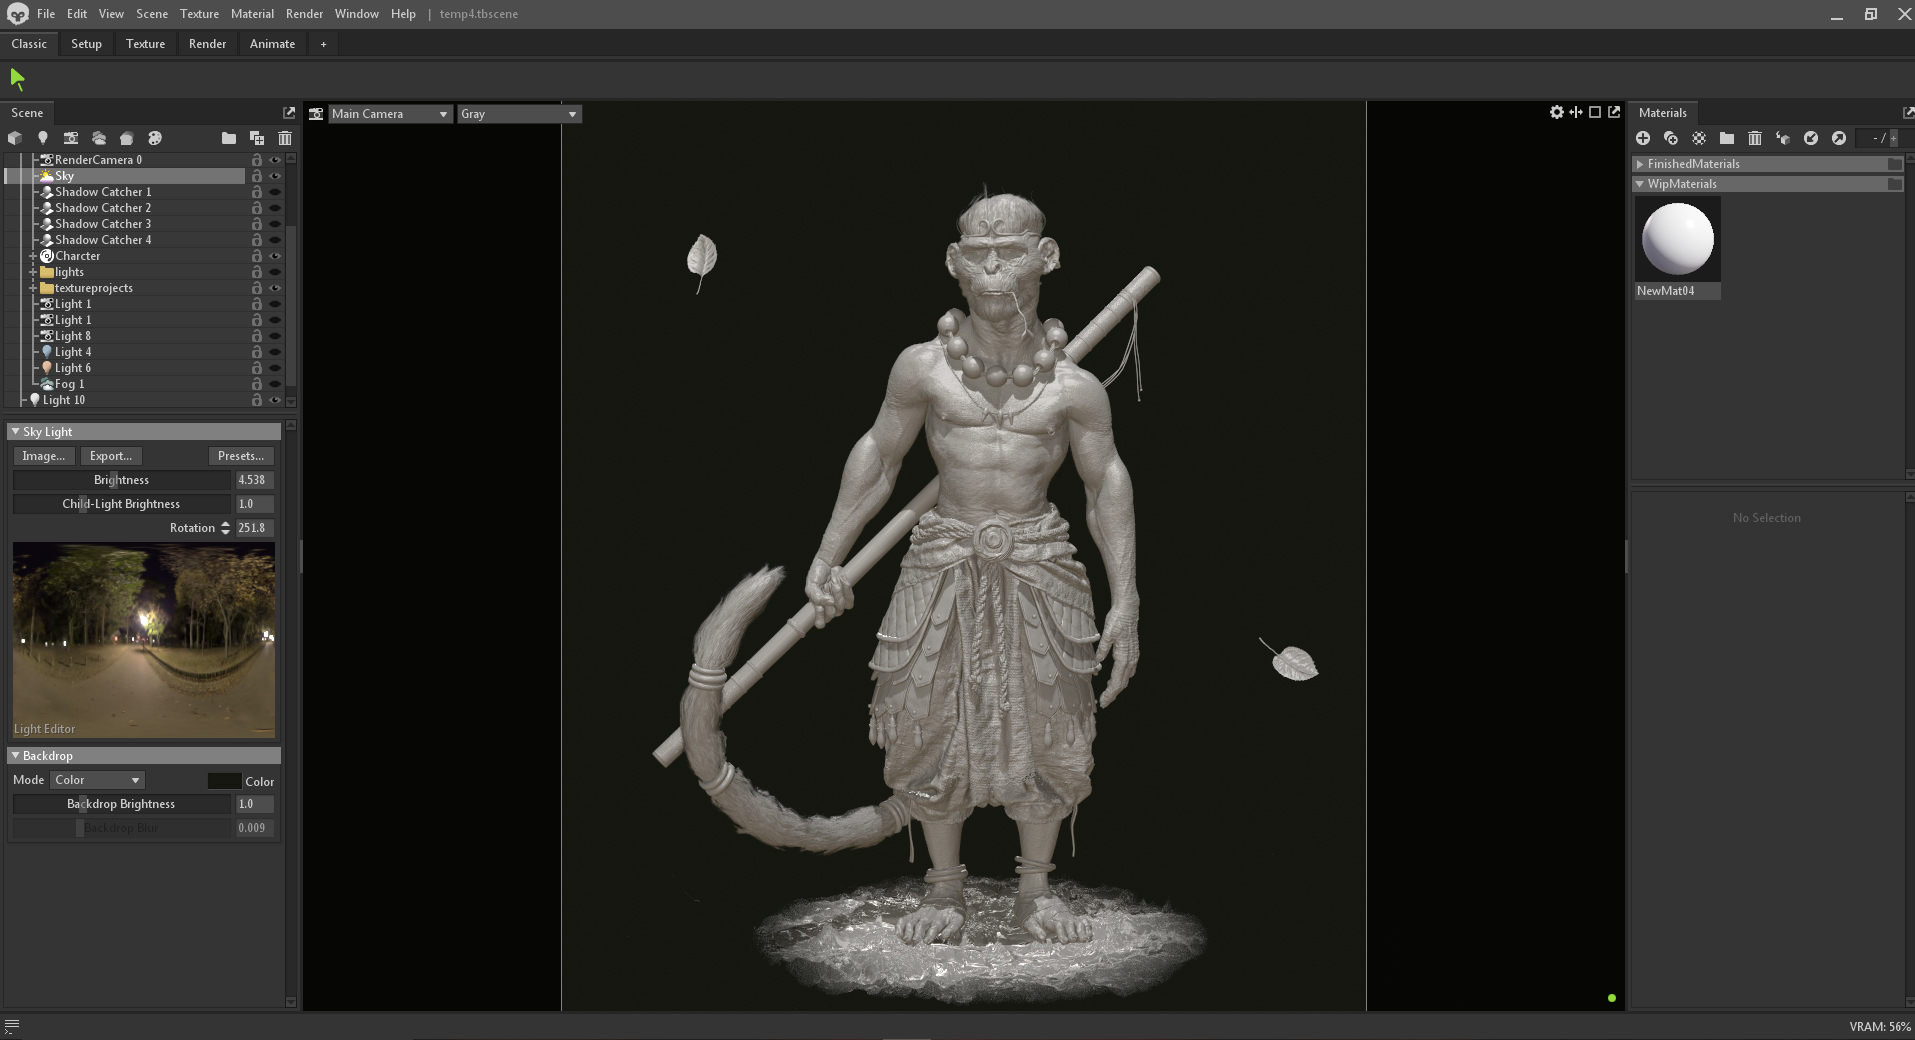
In the image below, you can see two examples with a 50% grey material applied to the character. The lighting in the first example is fairly neutral, while the second example has much stronger lighting which gives the material a brighter appearance. This means your dark values could become brighter, and in some instances, saturation can get washed out.
Creating Texture Projects
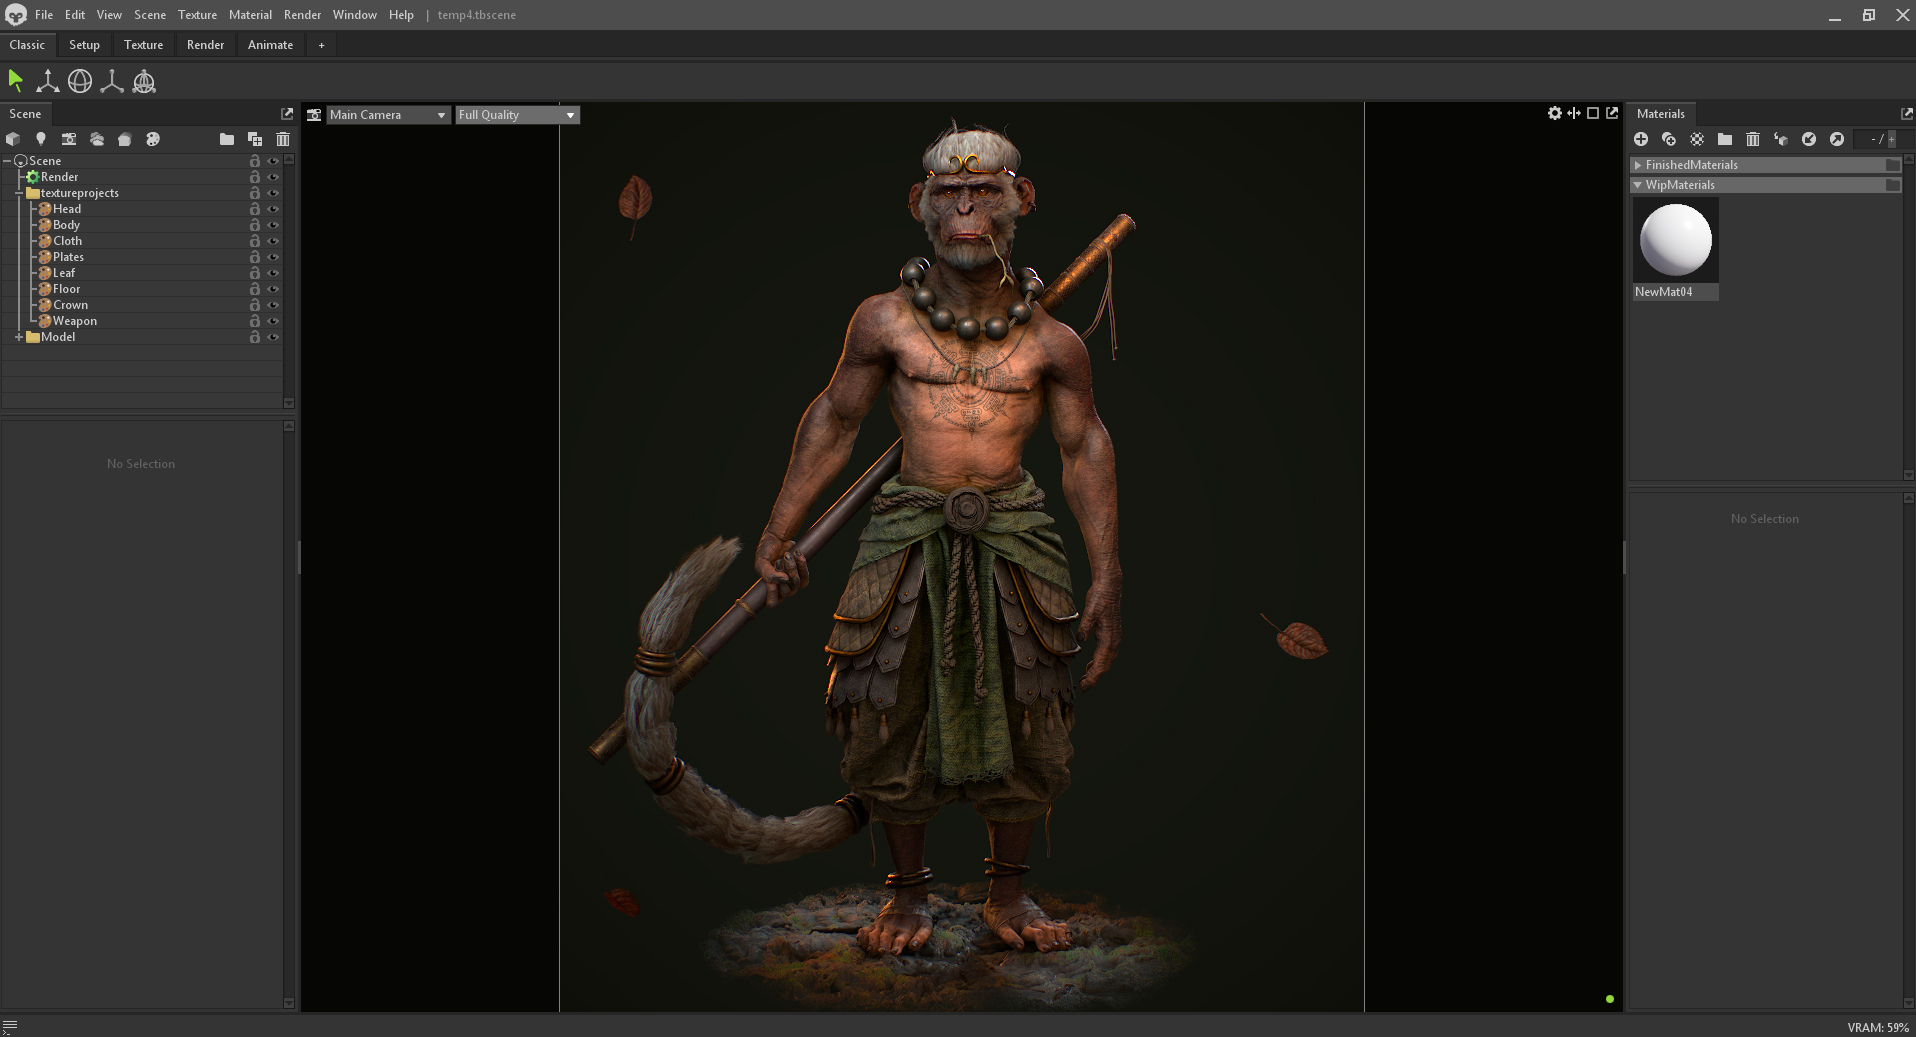
To start texturing, you’ll need to create a New Texture Project. I used a texture project for each texture set, which made it quick and easy to change between them in the scene hierarchy. The character’s design was in constant iteration, so it’s not the best example of managing texture sets. However, just for reference, I made two texture sets for the skin (head, body), another for fabric, leather parts, weaponry, hair, eyes, floor, and leaves.
Learn how to use Texture Projects in Toolbag
Skin Creation
I approached creating the skin of my monkey similarly to how I would approach creating human skin. Most of my texture maps (AO, Normal, Curvature, Normal Object, etc.) were added to each texture set’s Project Maps. Project Maps define which textures are being authored, and will feed into the final material. Make sure to set these up at the beginning of the project and enable all map types that are relevant to your shader setup.
I used a displacement map to exaggerate wrinkles and chose the Volumetric Scattering shader with no Fuzz since I used actual geometry created with ZBrush’s Fibermesh. Alongside a standard Roughness Map, I enabled all of the clearcoat shader modules to achieve an oily look all over the skin. This is something I recommend experimenting with. Done properly, it can greatly aid in bringing your character to life.
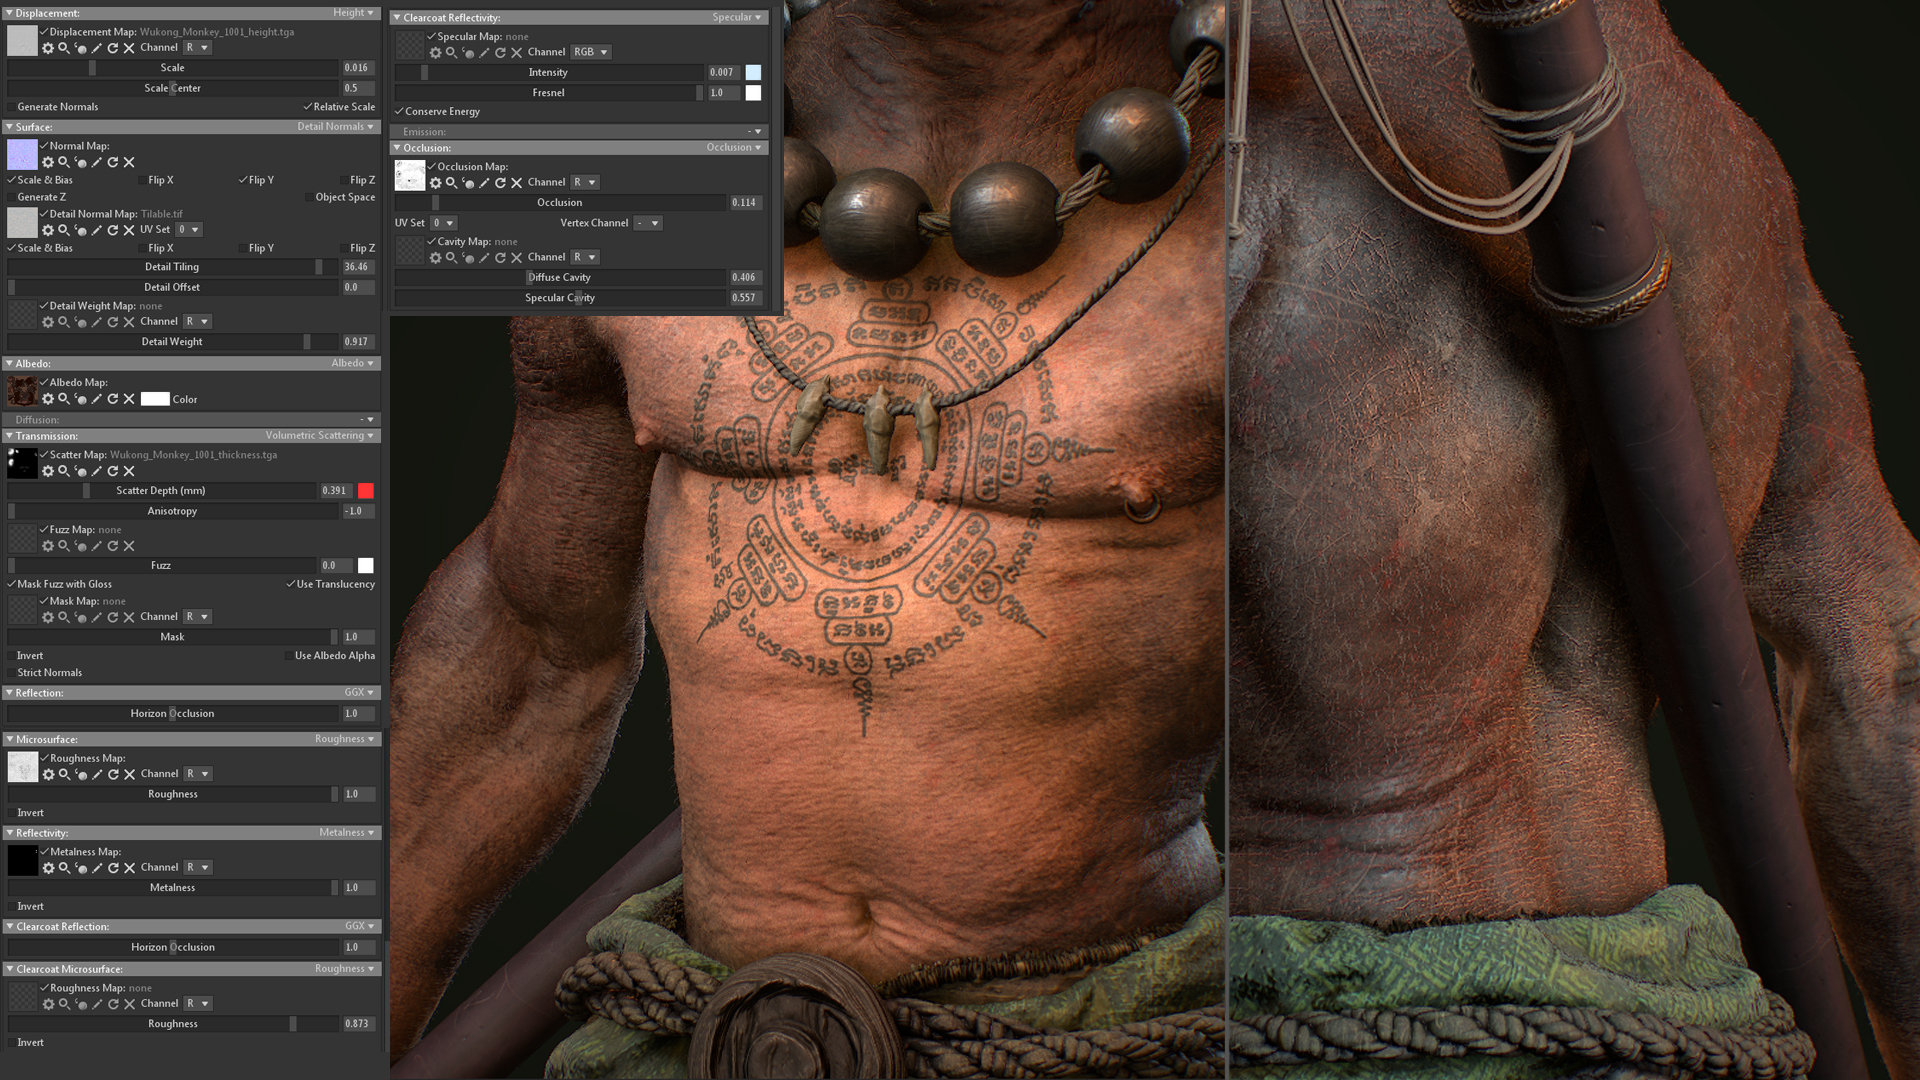
Starting with a flesh-like base color, I layered saturated reds in the bloody and yellow in the boney regions. I made sure to make it look as natural as possible by painting cloud-like effects and avoided making simple gradients. By nature, skin can have damage and defects that break any monotony of a gradient, so this effort will already have you off to a good start.
Once I achieved this, I tried to get a dark tone similar to what most monkeys have. The ability to layer masks in the texturing system came in handy when I wanted to do this. To start, I created a layer with a dark brown color, layered a series of grunge maps from the Library, and set their Blending to either Subtract or Add. This gave the impression of old scars and wounds on the skin. I also took some time to paint this detail by hand using paint layers.
Over this, I worked on roughness detail. Starting with a base layer with only the Roughness map active, I hand-painted greasy areas and layered some grunge masks to create organic detail. To generate more surface information, I added some skin materials from the Library, layered some red fill layers with the albedo and roughness maps active, and manually added a cavity map to the Mask Map slot in a Fill Mask. This was done to fake micro ambient occlusion detail such as pores and wrinkles. Alternatively, you could load a curvature input map, add a curvature processor layer, and turn the Edge Intensity to 0 in Layer Settings.
Using Brushes to Your Advantage
A few things can be done with Tool Settings to make your life easier and give you nice results.
You can save custom brushes simply by clicking the + icon and import/export custom brushes using the arrow icons.
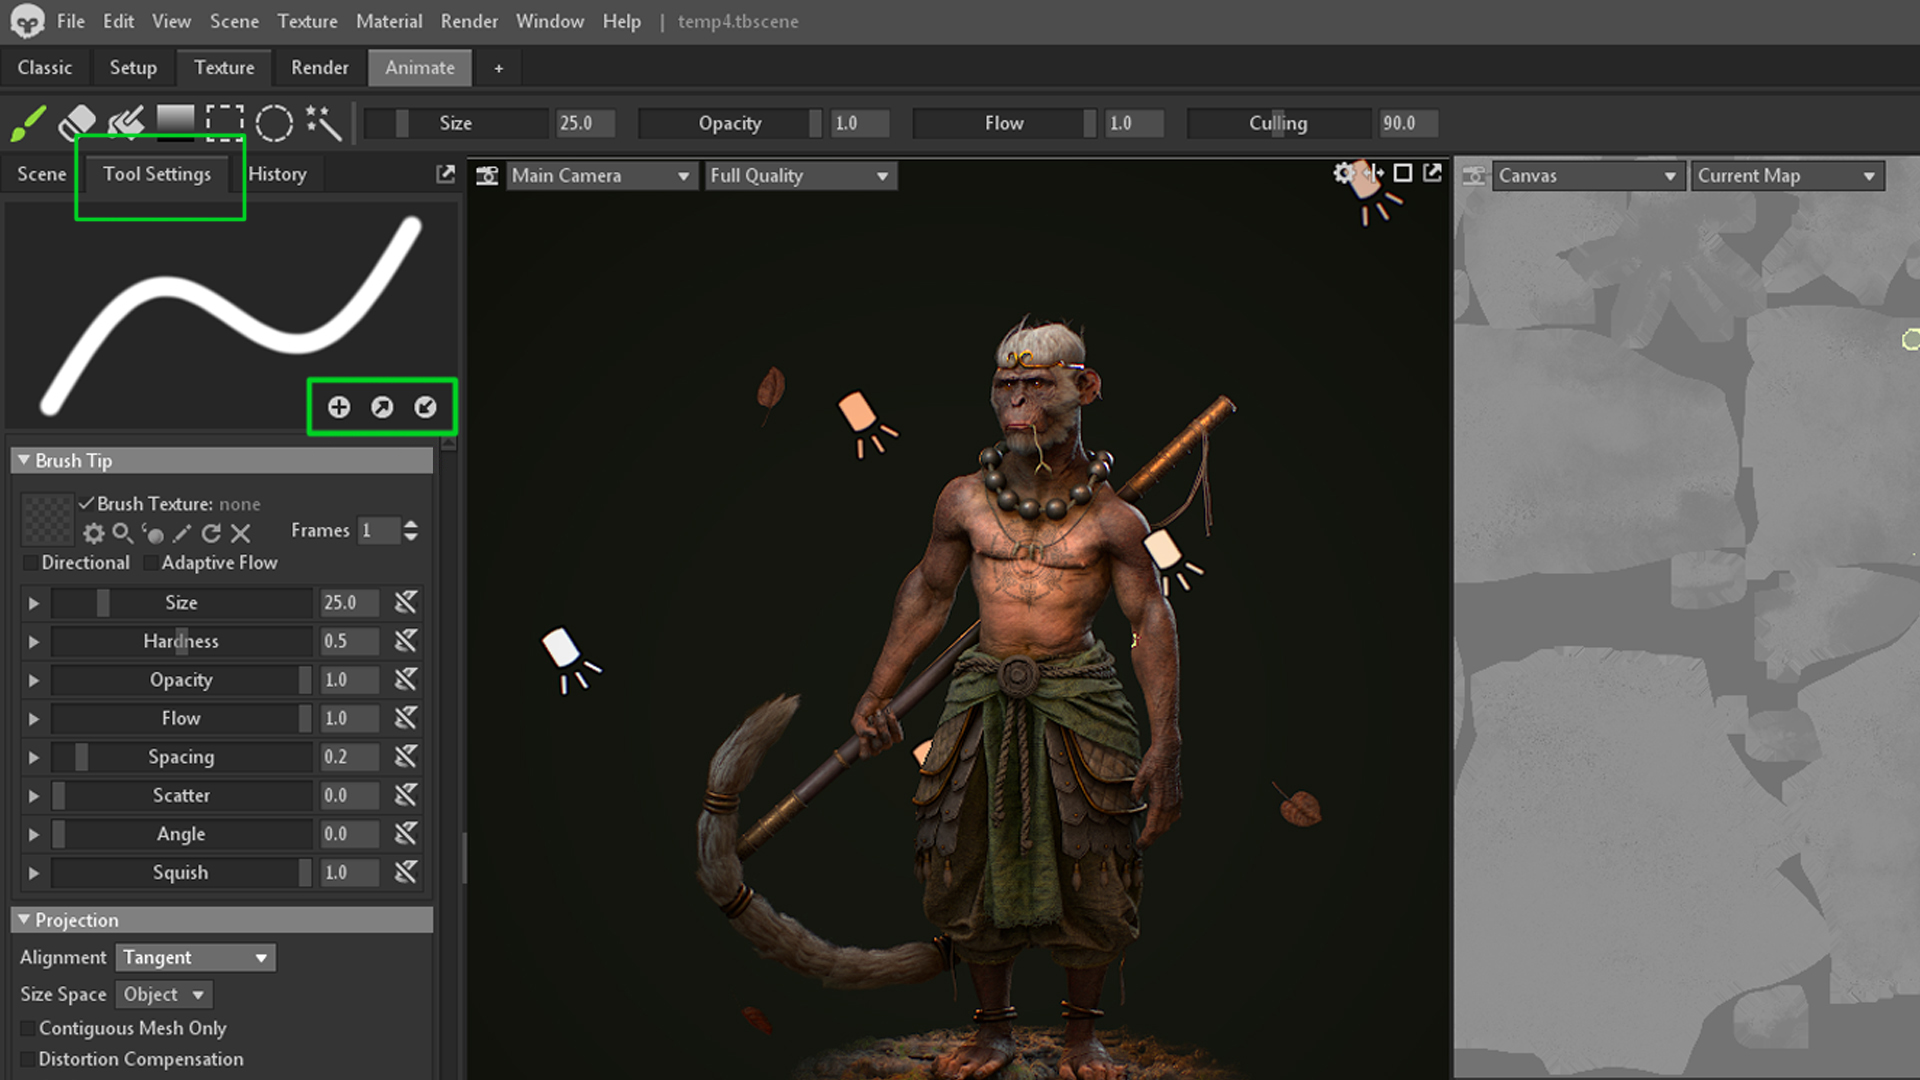
Adjusting the Backface Culling slider allows you to create organic effects while painting with the brush. It caught me a bit off guard at first, but it became beneficial when I got used to it. I used it to create wear, dirt, and painting detail without affecting the cavity (i.e., hand-painting wear in the skirt’s light green pattern) and vice versa. Since each layer saves tool settings respectively, it meant I could come back to a layer at any given time and change its settings swiftly.
To quickly generate cavity detail, you can use a Curvature processor with its Blending set to Subtract. This can create too much of an impact since it’s applied to the whole model, but it can be useful when used well in combination with Backface Culling.
Fabric Material Creation
When working with fabric materials, Toolbag’s microfiber shader is incredibly handy to use. I enabled the Microfiber shader in the Diffusion module and turned down the Sheen value to 0.226. Keep in mind that a higher sheen value can translate to a velvet-like material.
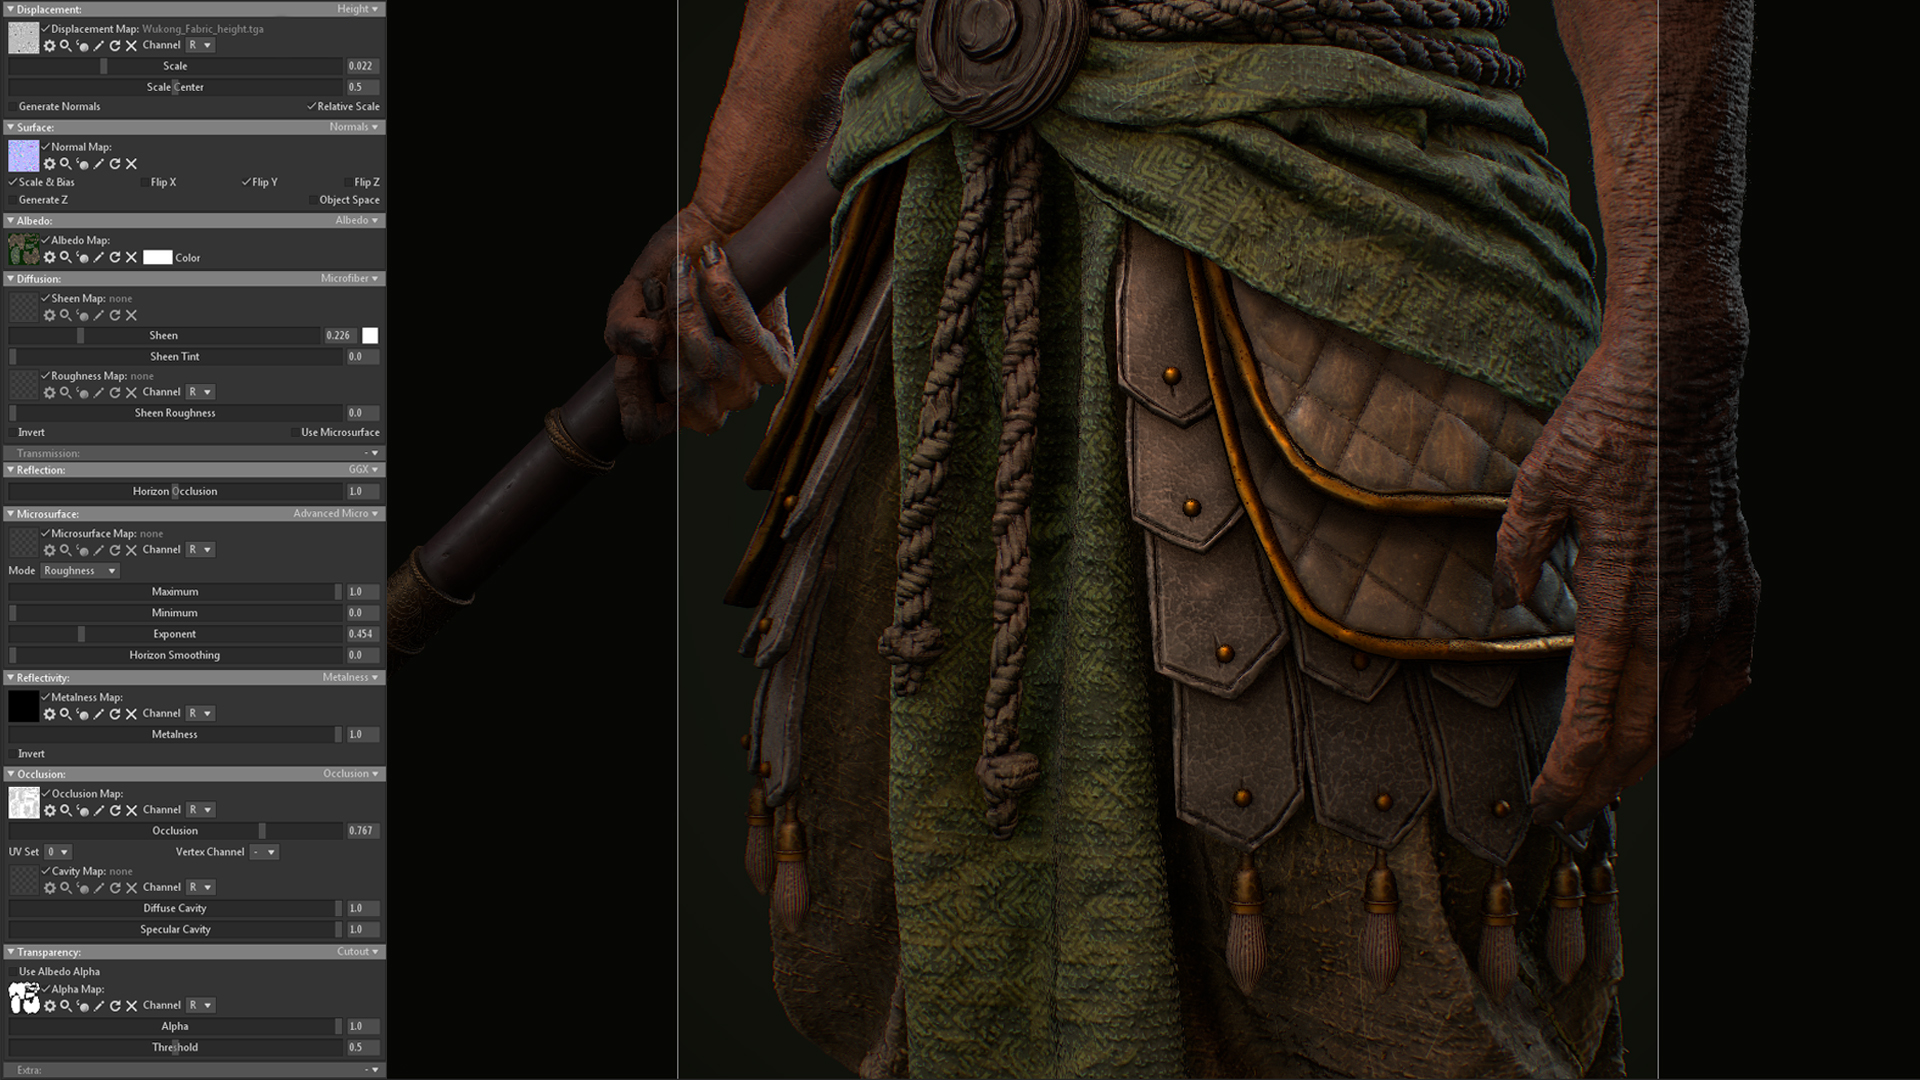
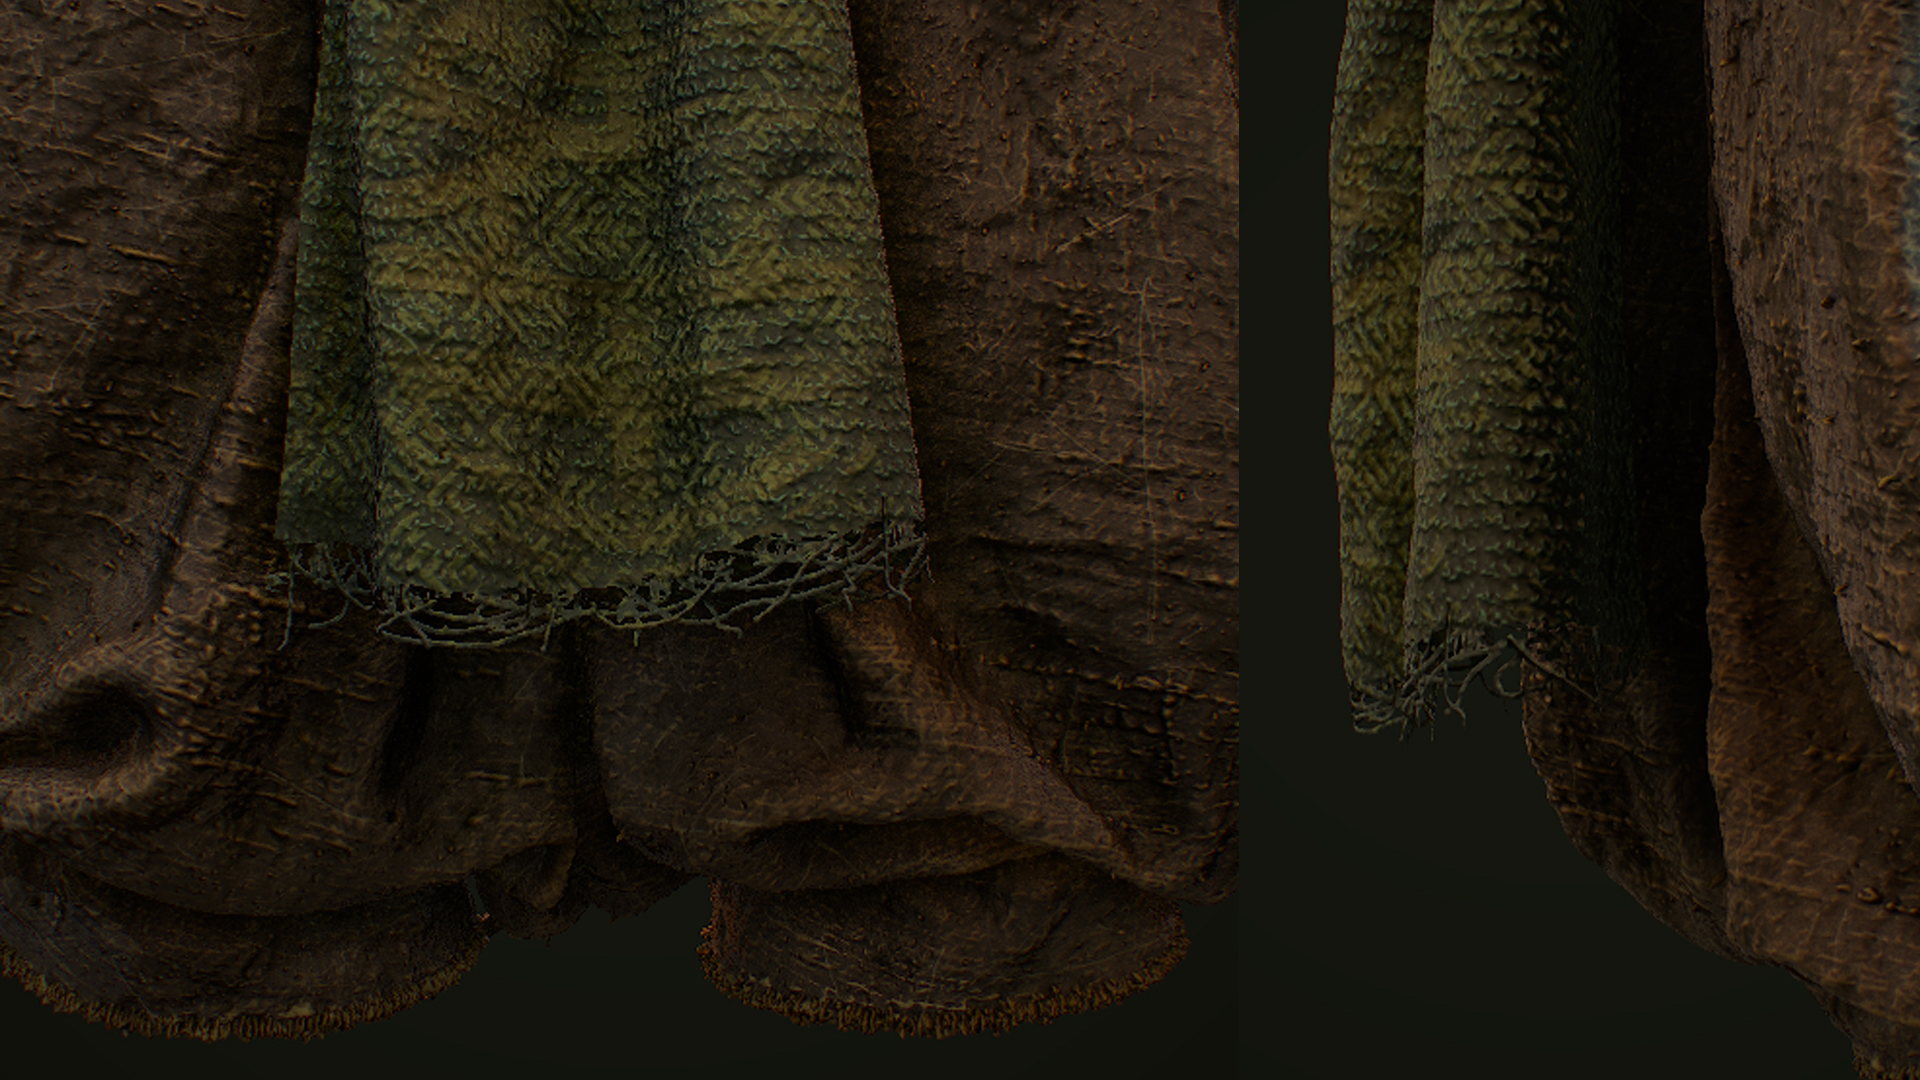
The final touch was to add a Transparency map that included the frayed detail at the bottom. This helps to break up the silhouette and adds believability. I also adjusted the Bump value to a negative value in the Layer Settings to add some volume.
Creating a Ground
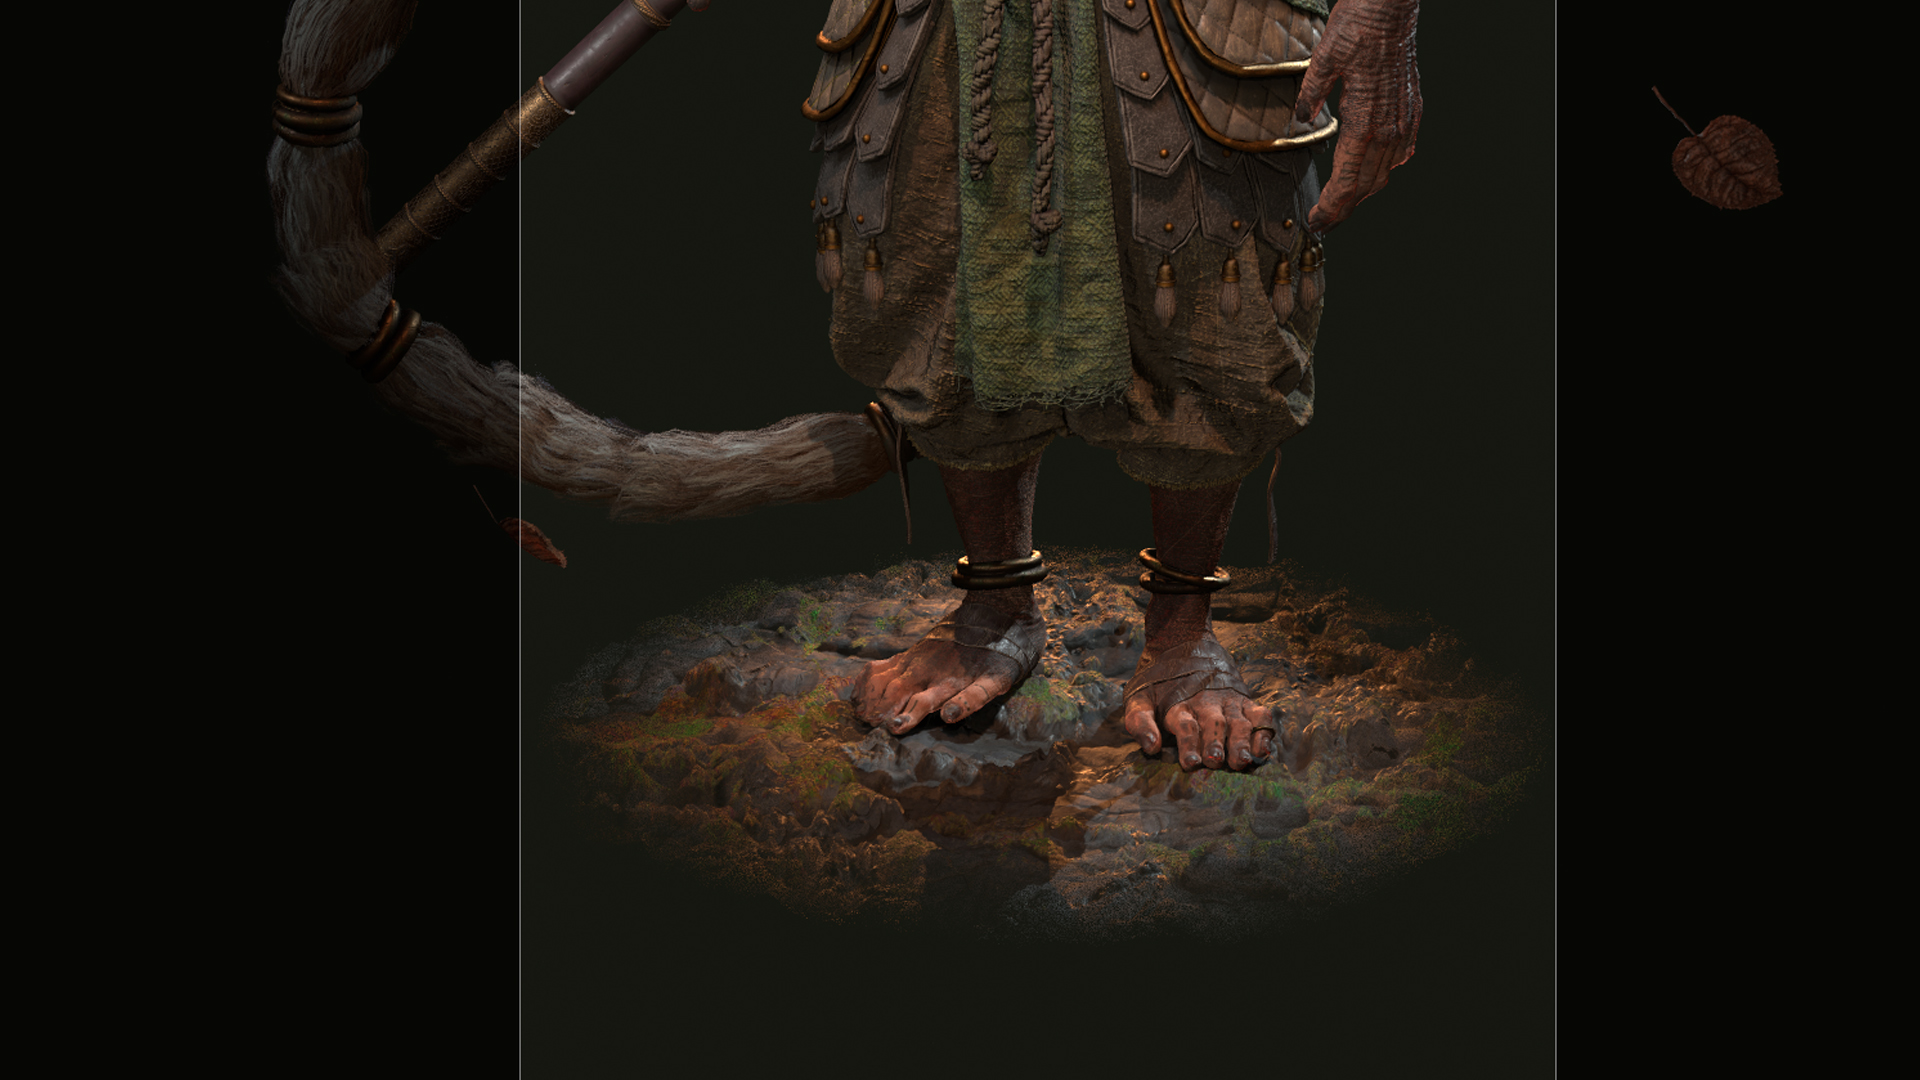
The ground is another area where the Library came in handy and helped save some time. I started by generating a plane using Edit > Plugins > Generate Primitives. I then created a Texture Project, added a Fill Layer, and applied the Mud Uniform material from the Library. The rest of the process involved mixing more materials, masking out wanted/unwanted detail, and playing with blend modes. This technique was used for the mossy effect on the rocks.
Activating Subdivision
To activate subdivision, click on your Mesh Object in the Scene hierarchy and check Subdivide. Once you apply a material to the mesh, adjust the Subdivision Level counter until you achieve a result you like.
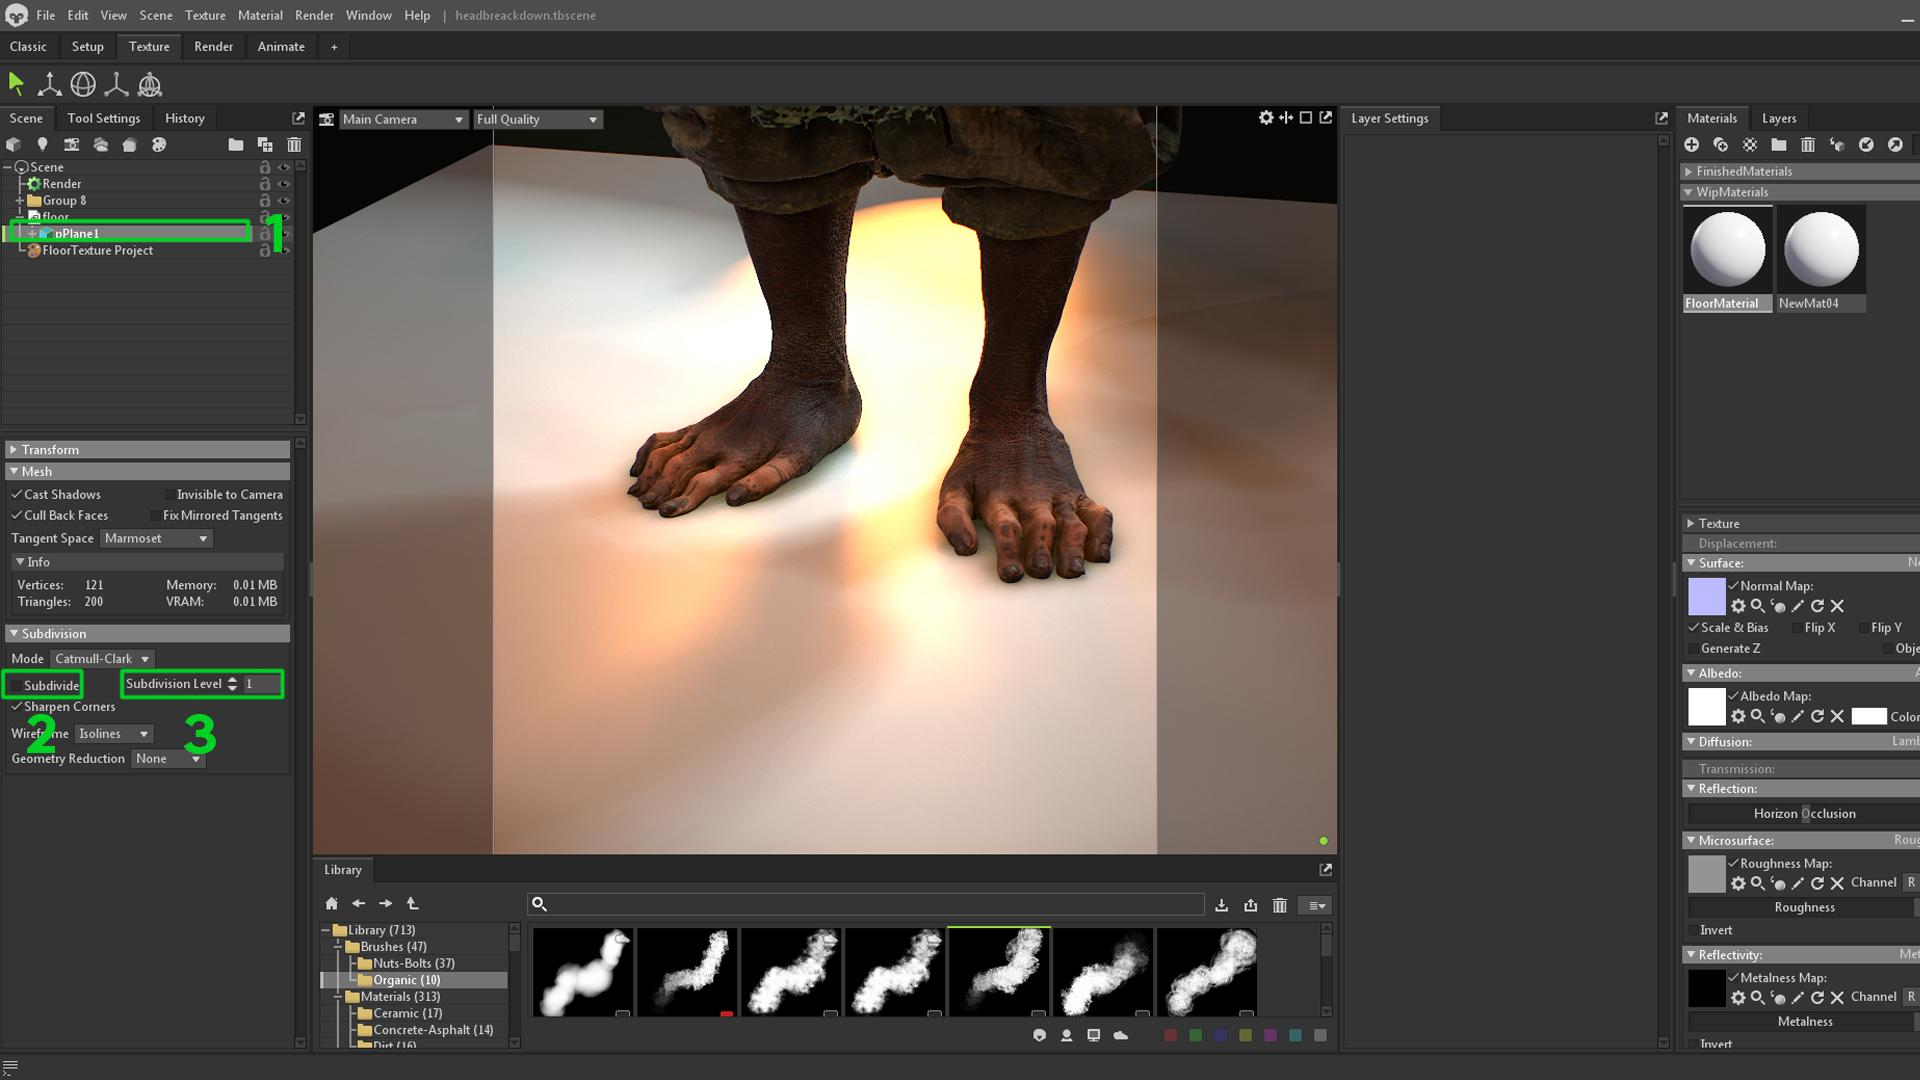
I used the Lava Blocky Cooled material as the base material of my floor. To give the rocks some volume, I added a displacement map to my Project Maps, activated Subdivision in the mesh properties, and increased the Subdivision Level counter to 4.
Mixing Materials
I layered in the Moss material and lowered the Displacement Map’s Opacity to tone down its height detail. Then I increased the Tiling values and added a Color Mask (Black) to begin masking the moss back in. I layered some grunge maps using Fill Masks, set their Displacement blending to Add, and adjusted the Opacity. I repeated this process a few times until I was happy with the result. Finally, I layered in the Leaves Fallen material to help set the scene.
Fading the Ground
To make the ground a faded round platform, I added a Fill Layer with only its Transparency Map activated and turned Transparency down to zero. I added another Fill Layer and repeated the process, only this time I left Transparency set to 1.0. The second fill layer will act as my mask to paint a big round shape for the ground using a mask. I then used a Levels Adjustment Layer to fine-tune the shape.
Creating Leaves
The geometry for the leaves was handled like hair cards. I used a single plane with 4 leaves, sculpted in Zbrush, and baked in Toolbag. I created four different textures and bent instances of the planes for variation.
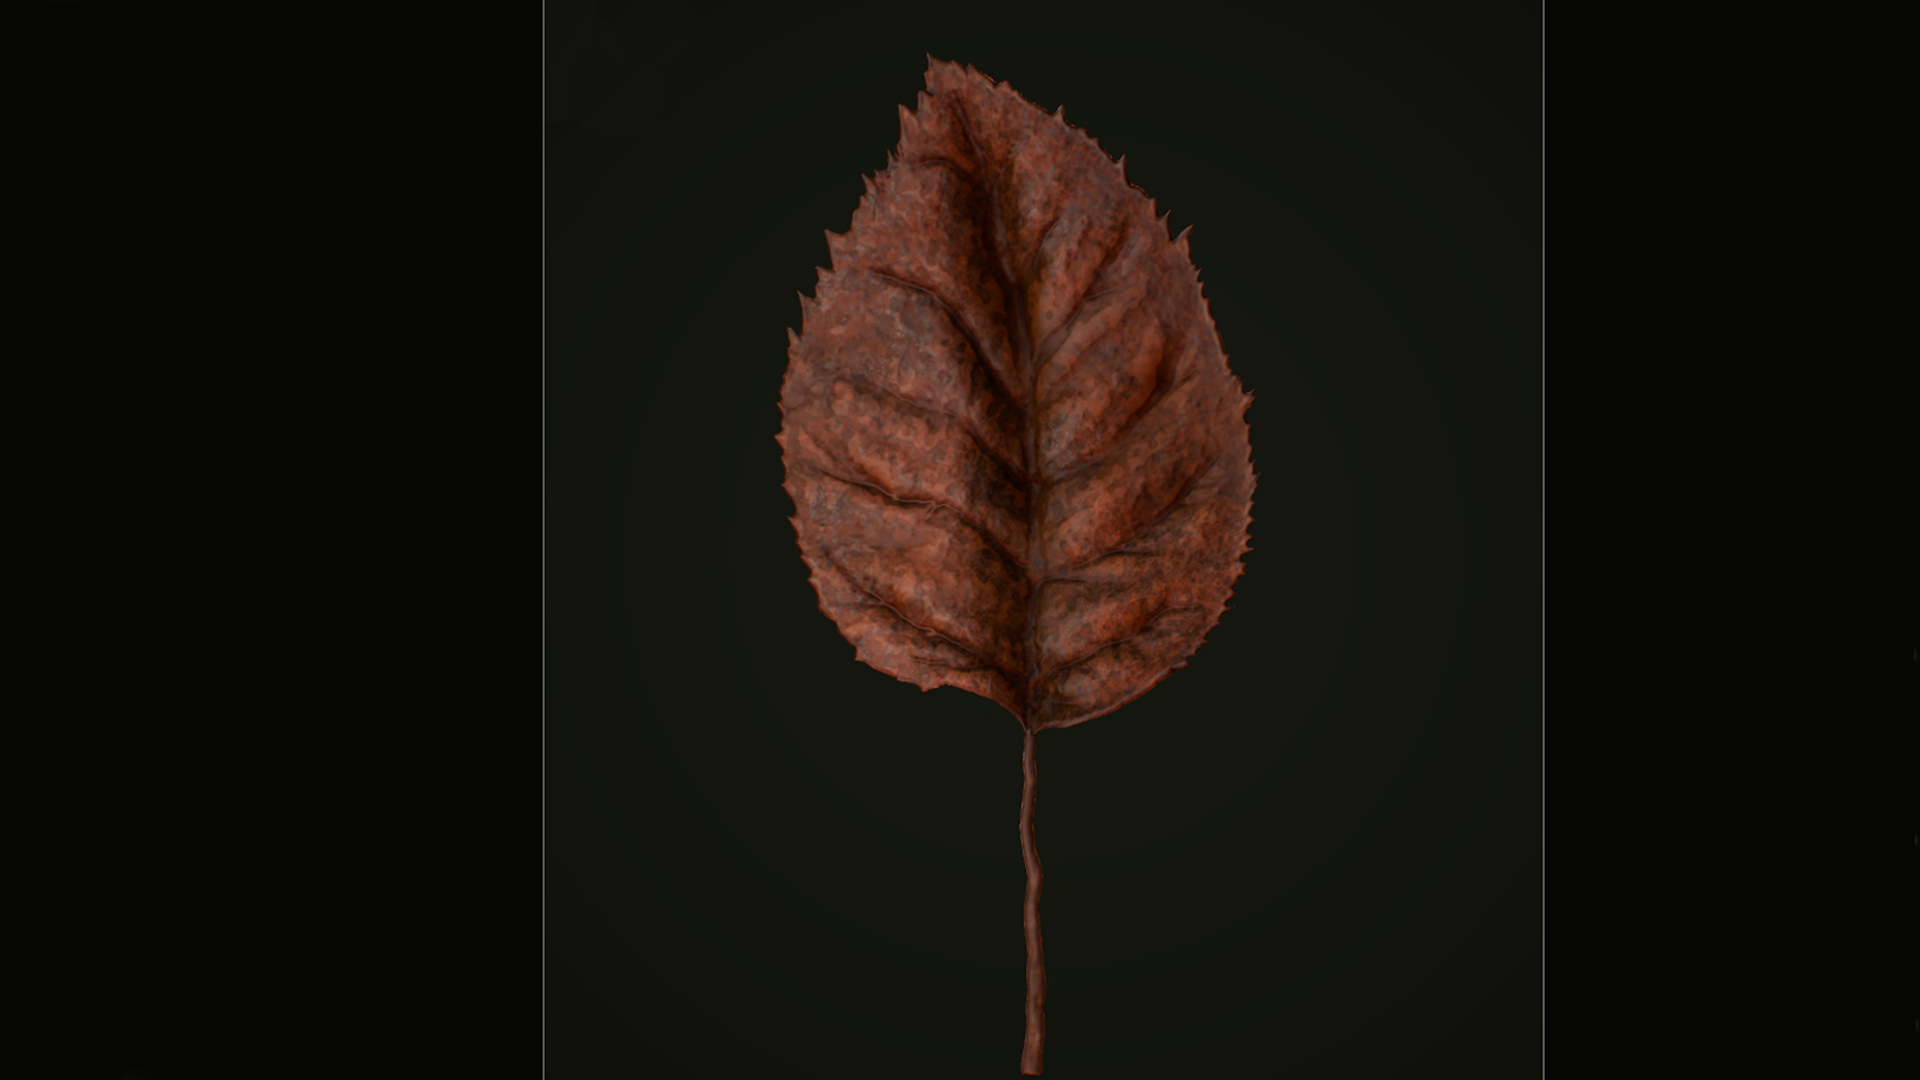
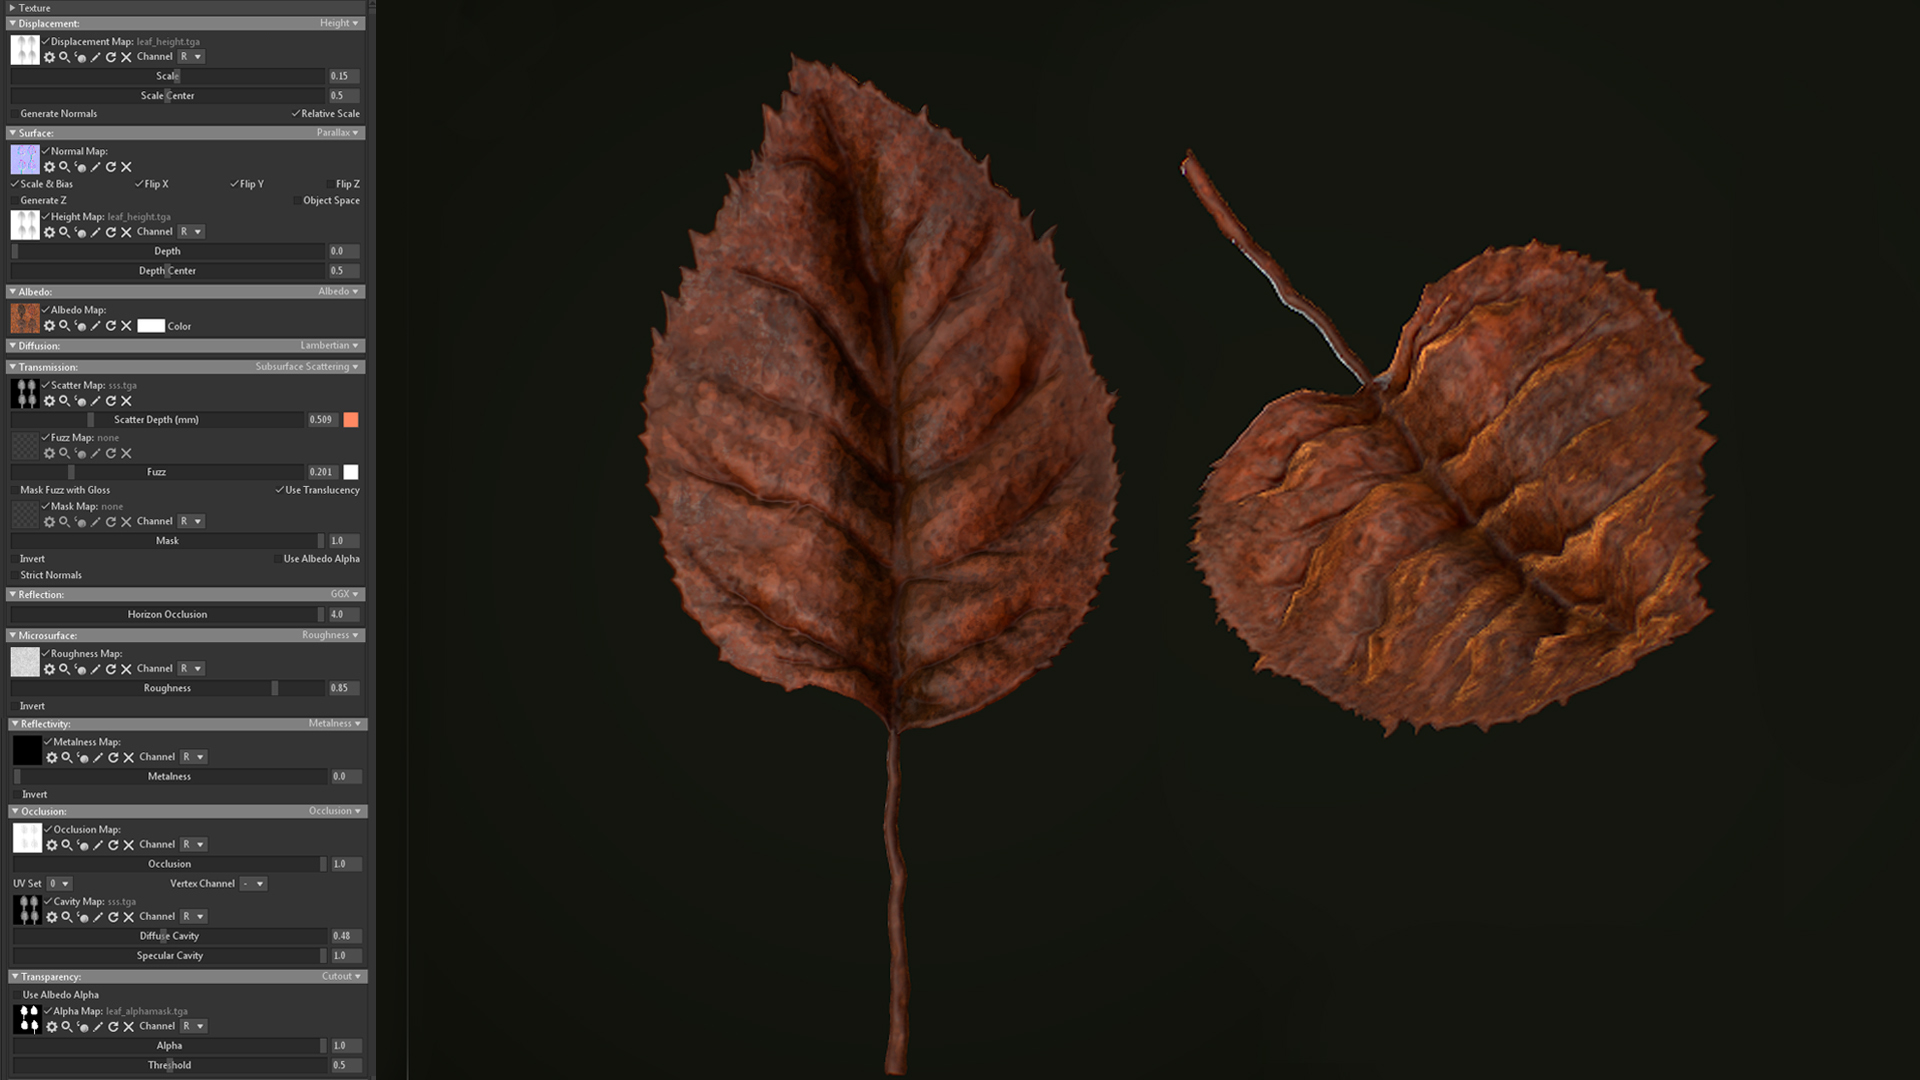
In my Texture Project, I created a base color fill layer followed by some Albedo/Roughness masks of different sizes and patterns to achieve discoloration and imperfections found on leaves. Then I made a vein-like pattern to emulate a leaf and later added wear on top and varied the colors using the Hue/Saturation Adjustment Layer. Throughout this process, I made sure to look at references to create a convincing result.
Like my skin creation process, most of the work goes into the displacement map to eliminate the planar look. I chose to use Volumetric Scattering in the Transmission module, but any of these modes should work. I also added some fuzz to give it a velvet look that some leaves have. For Transparency, I chose Cutout and applied an alpha map. Adding a cavity map in the Occlusion module can also help show finer details in the texture.
Conclusion
All in all, texturing in Toolbag is quite powerful, even at this initial phase of release. The Library also provides you with plenty of resources to make it fun, easy, and artist-friendly. I really look forward to seeing how Toolbag 4 continues to develop.
We would like to thank Alex Aznar Samperi for writing this breakdown. You can find more of Alex’s work on Artstation. Check out Texture Projects in Toolbag 4 using the 30-day trial.
If you’re interested in collaborating on a tutorial or breakdown article, please send us your pitch, along with a link to your artwork, to submissions@marmoset.co.

