Introduction
Hey guys, my name is Enrico Tammekänd and I am a self taught Environment and Texture Artist from Estonia. In this breakdown article, I will be giving insight on how I render my materials in Marmoset Toolbag. I’ll use my Spanish Building material as an example. You can watch a previous livestream version of this breakdown article below or continue scrolling to read the text version. I’ve uploaded my mesh files so you can follow along.
Project Setup
Before we start, I want to point out that the presentation of your art is crucial. Even with the best models and textures, if your presentation is lacking, then you’ll lose recognition for all of your hard work. I would honestly say that the way you present your work has the same level of importance as the project itself. I tend to spend as much time on presentation and post processing as I do creating the artwork. That way, I ensure that I will capture the feeling I want to share with the audience.
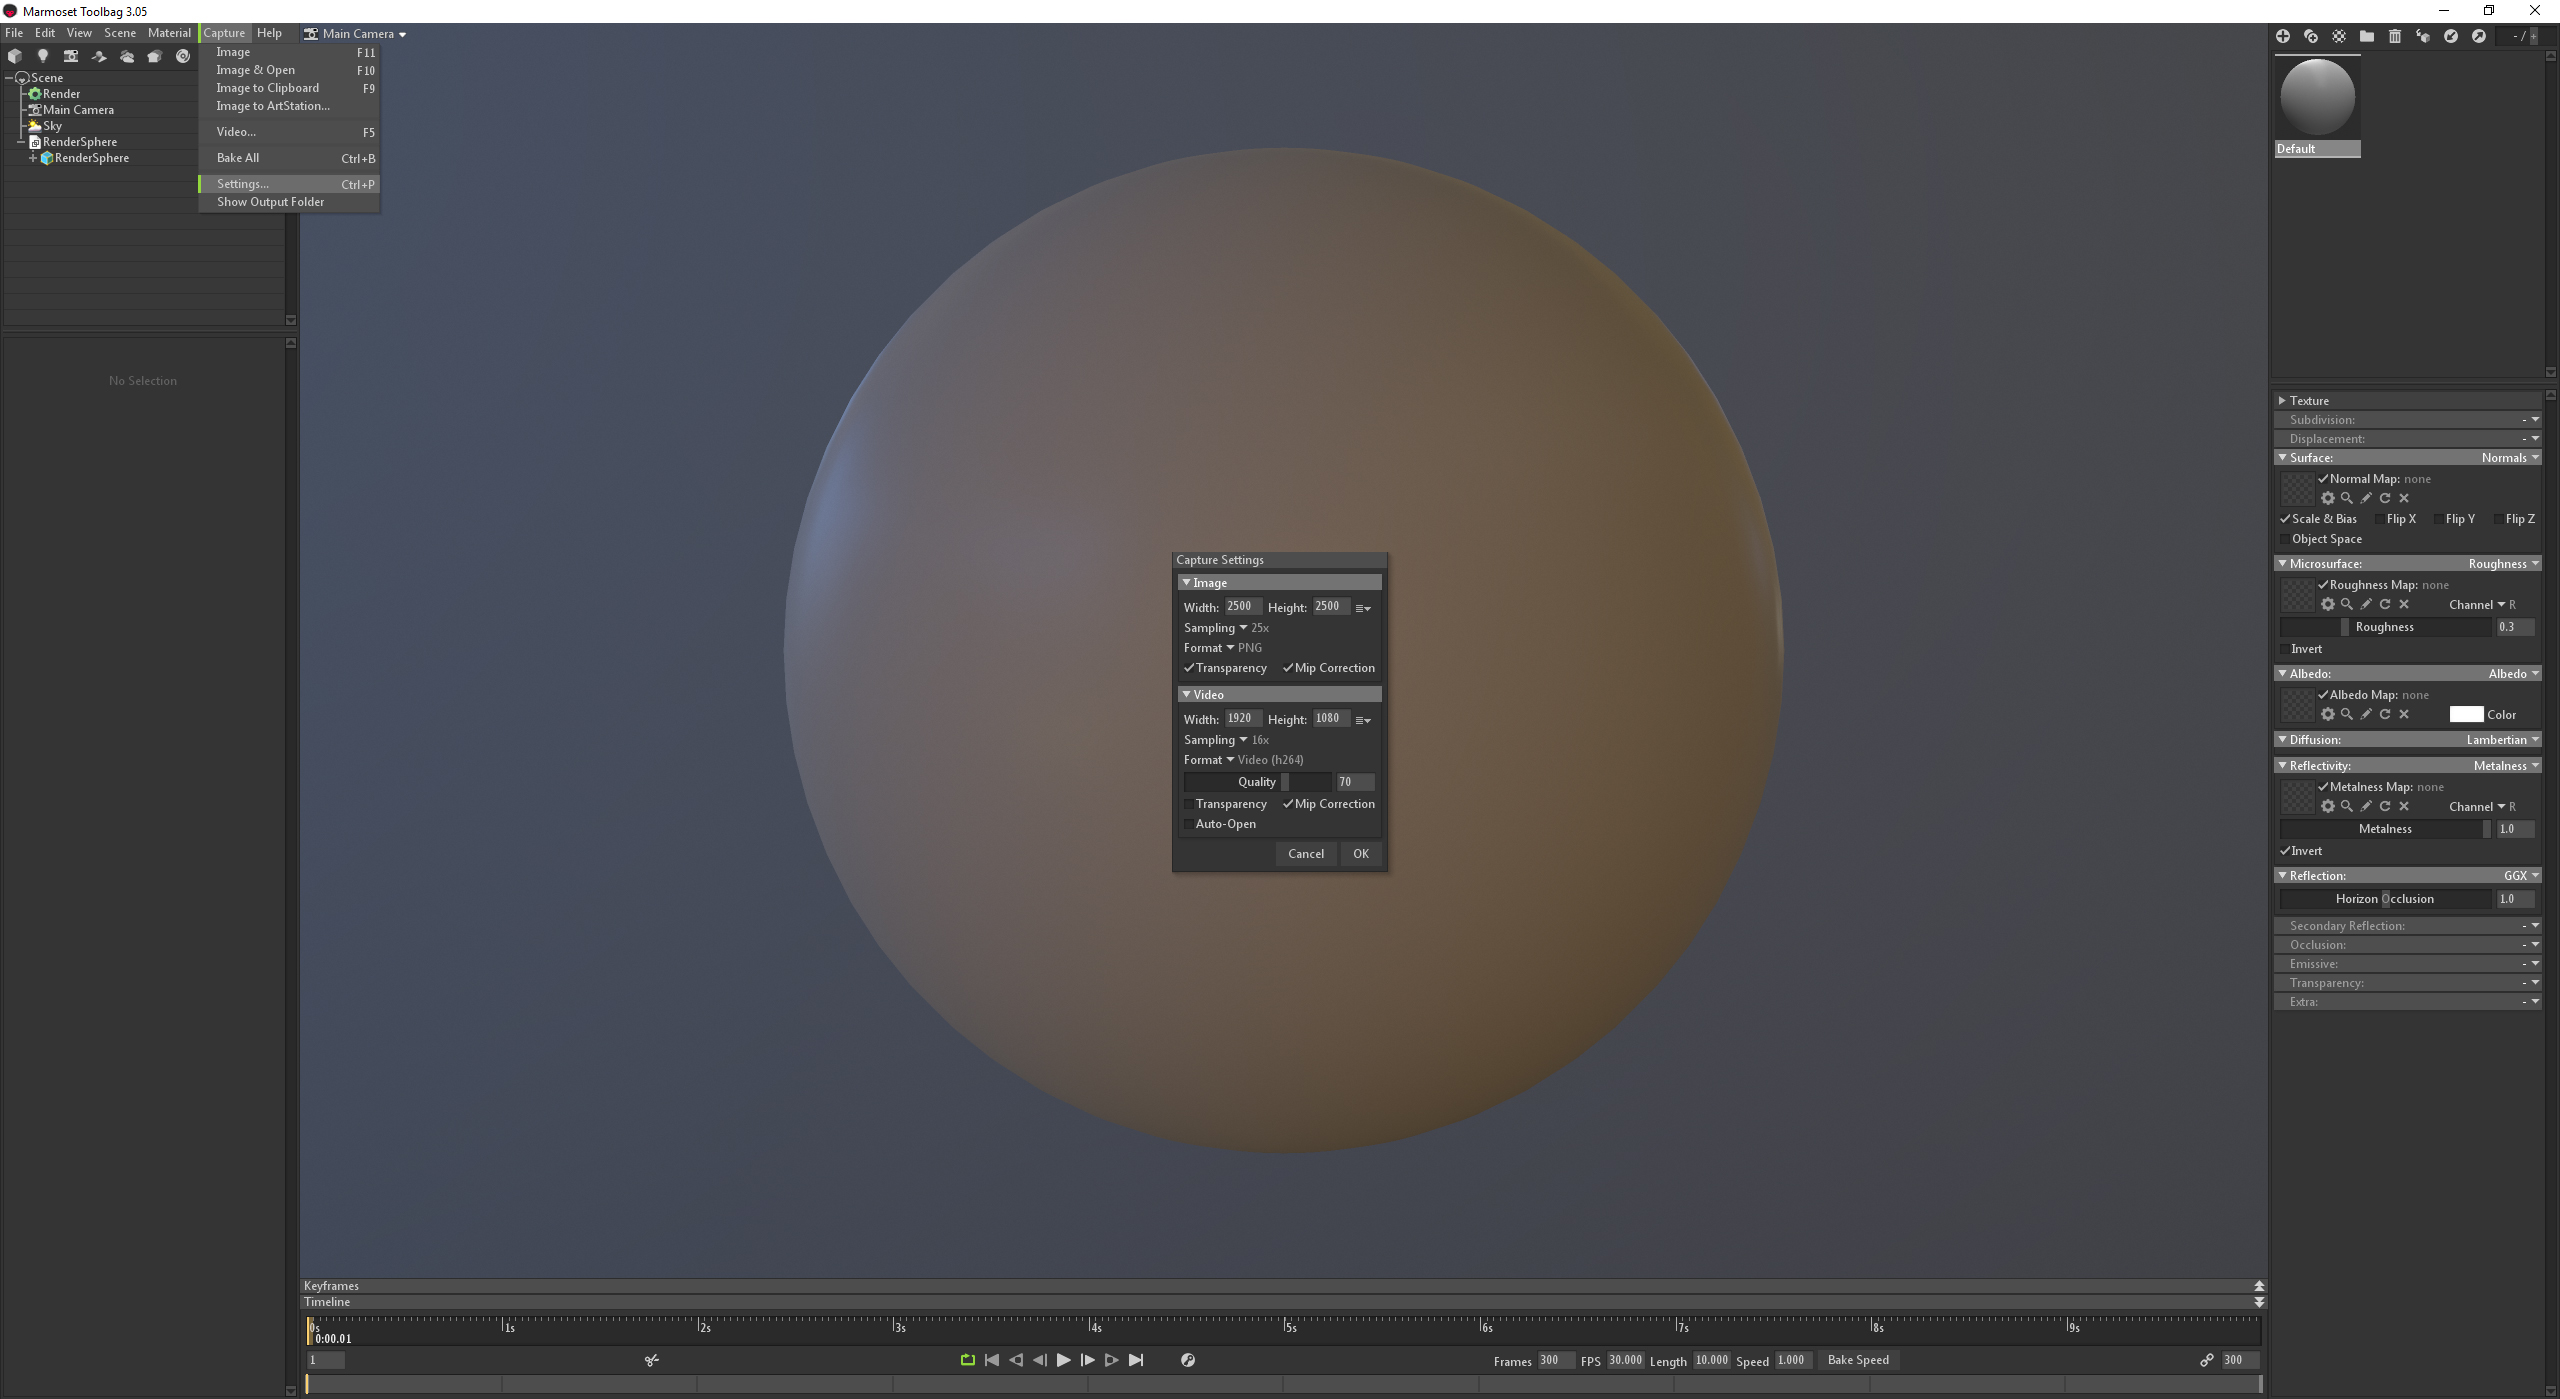
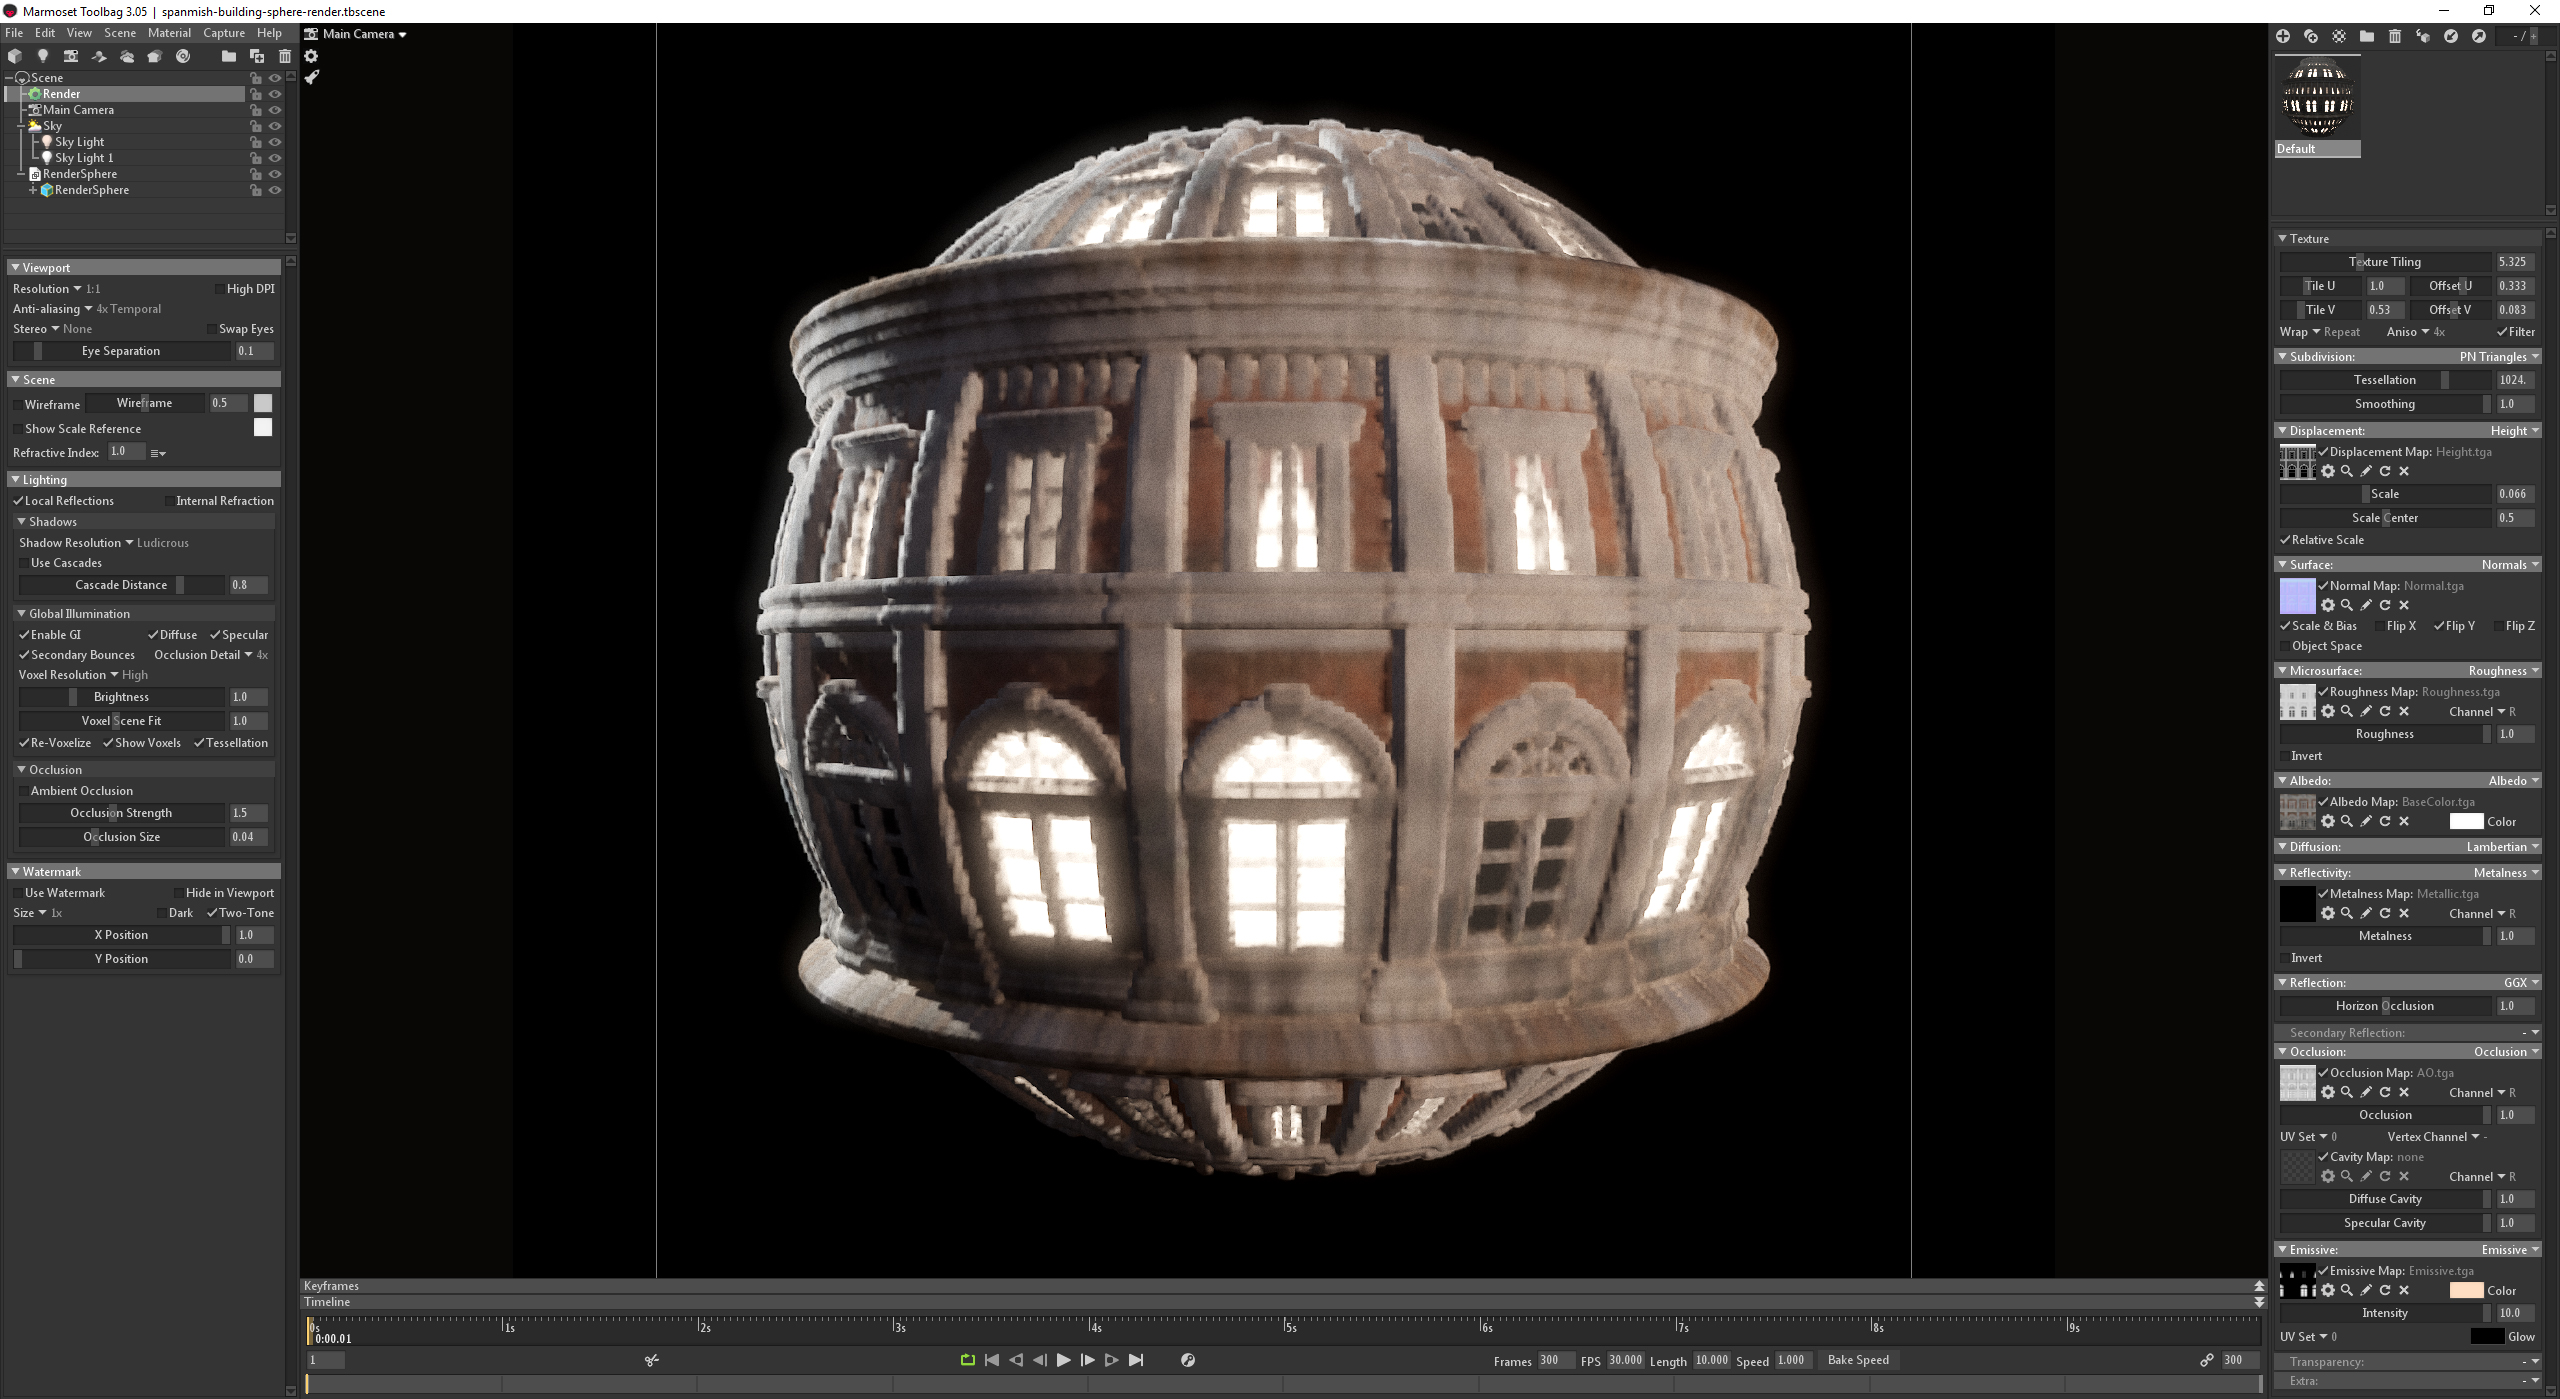
The first step I take is to import a properly unwrapped sphere model. Next, I set my Image size to 2500x2500px and the Sampling to 25x in Capture Settings. Increasing the Sampling value will add to the rendering time, so make sure not to set this higher than you need. We can always scale the image down later, but I like to use a very high resolution for the main render. If you want to add your own background, you can enable Transparency which will render out the sphere without the Sky backdrop. This is what I usually like to do, as it enables me to add different colored backgrounds or subtle gradients instead of relying on the background.

Enabling Safe Frame in the Camera settings visualizes the final render area. Adjust your framing after you’ve applied your Height map and make sure to keep enough breathing room around the sphere for the viewer. Often times, there are renders that display the sphere from edge to edge which makes the render feel wrong since the eyes can’t rest on the focal point.
Material Setup:
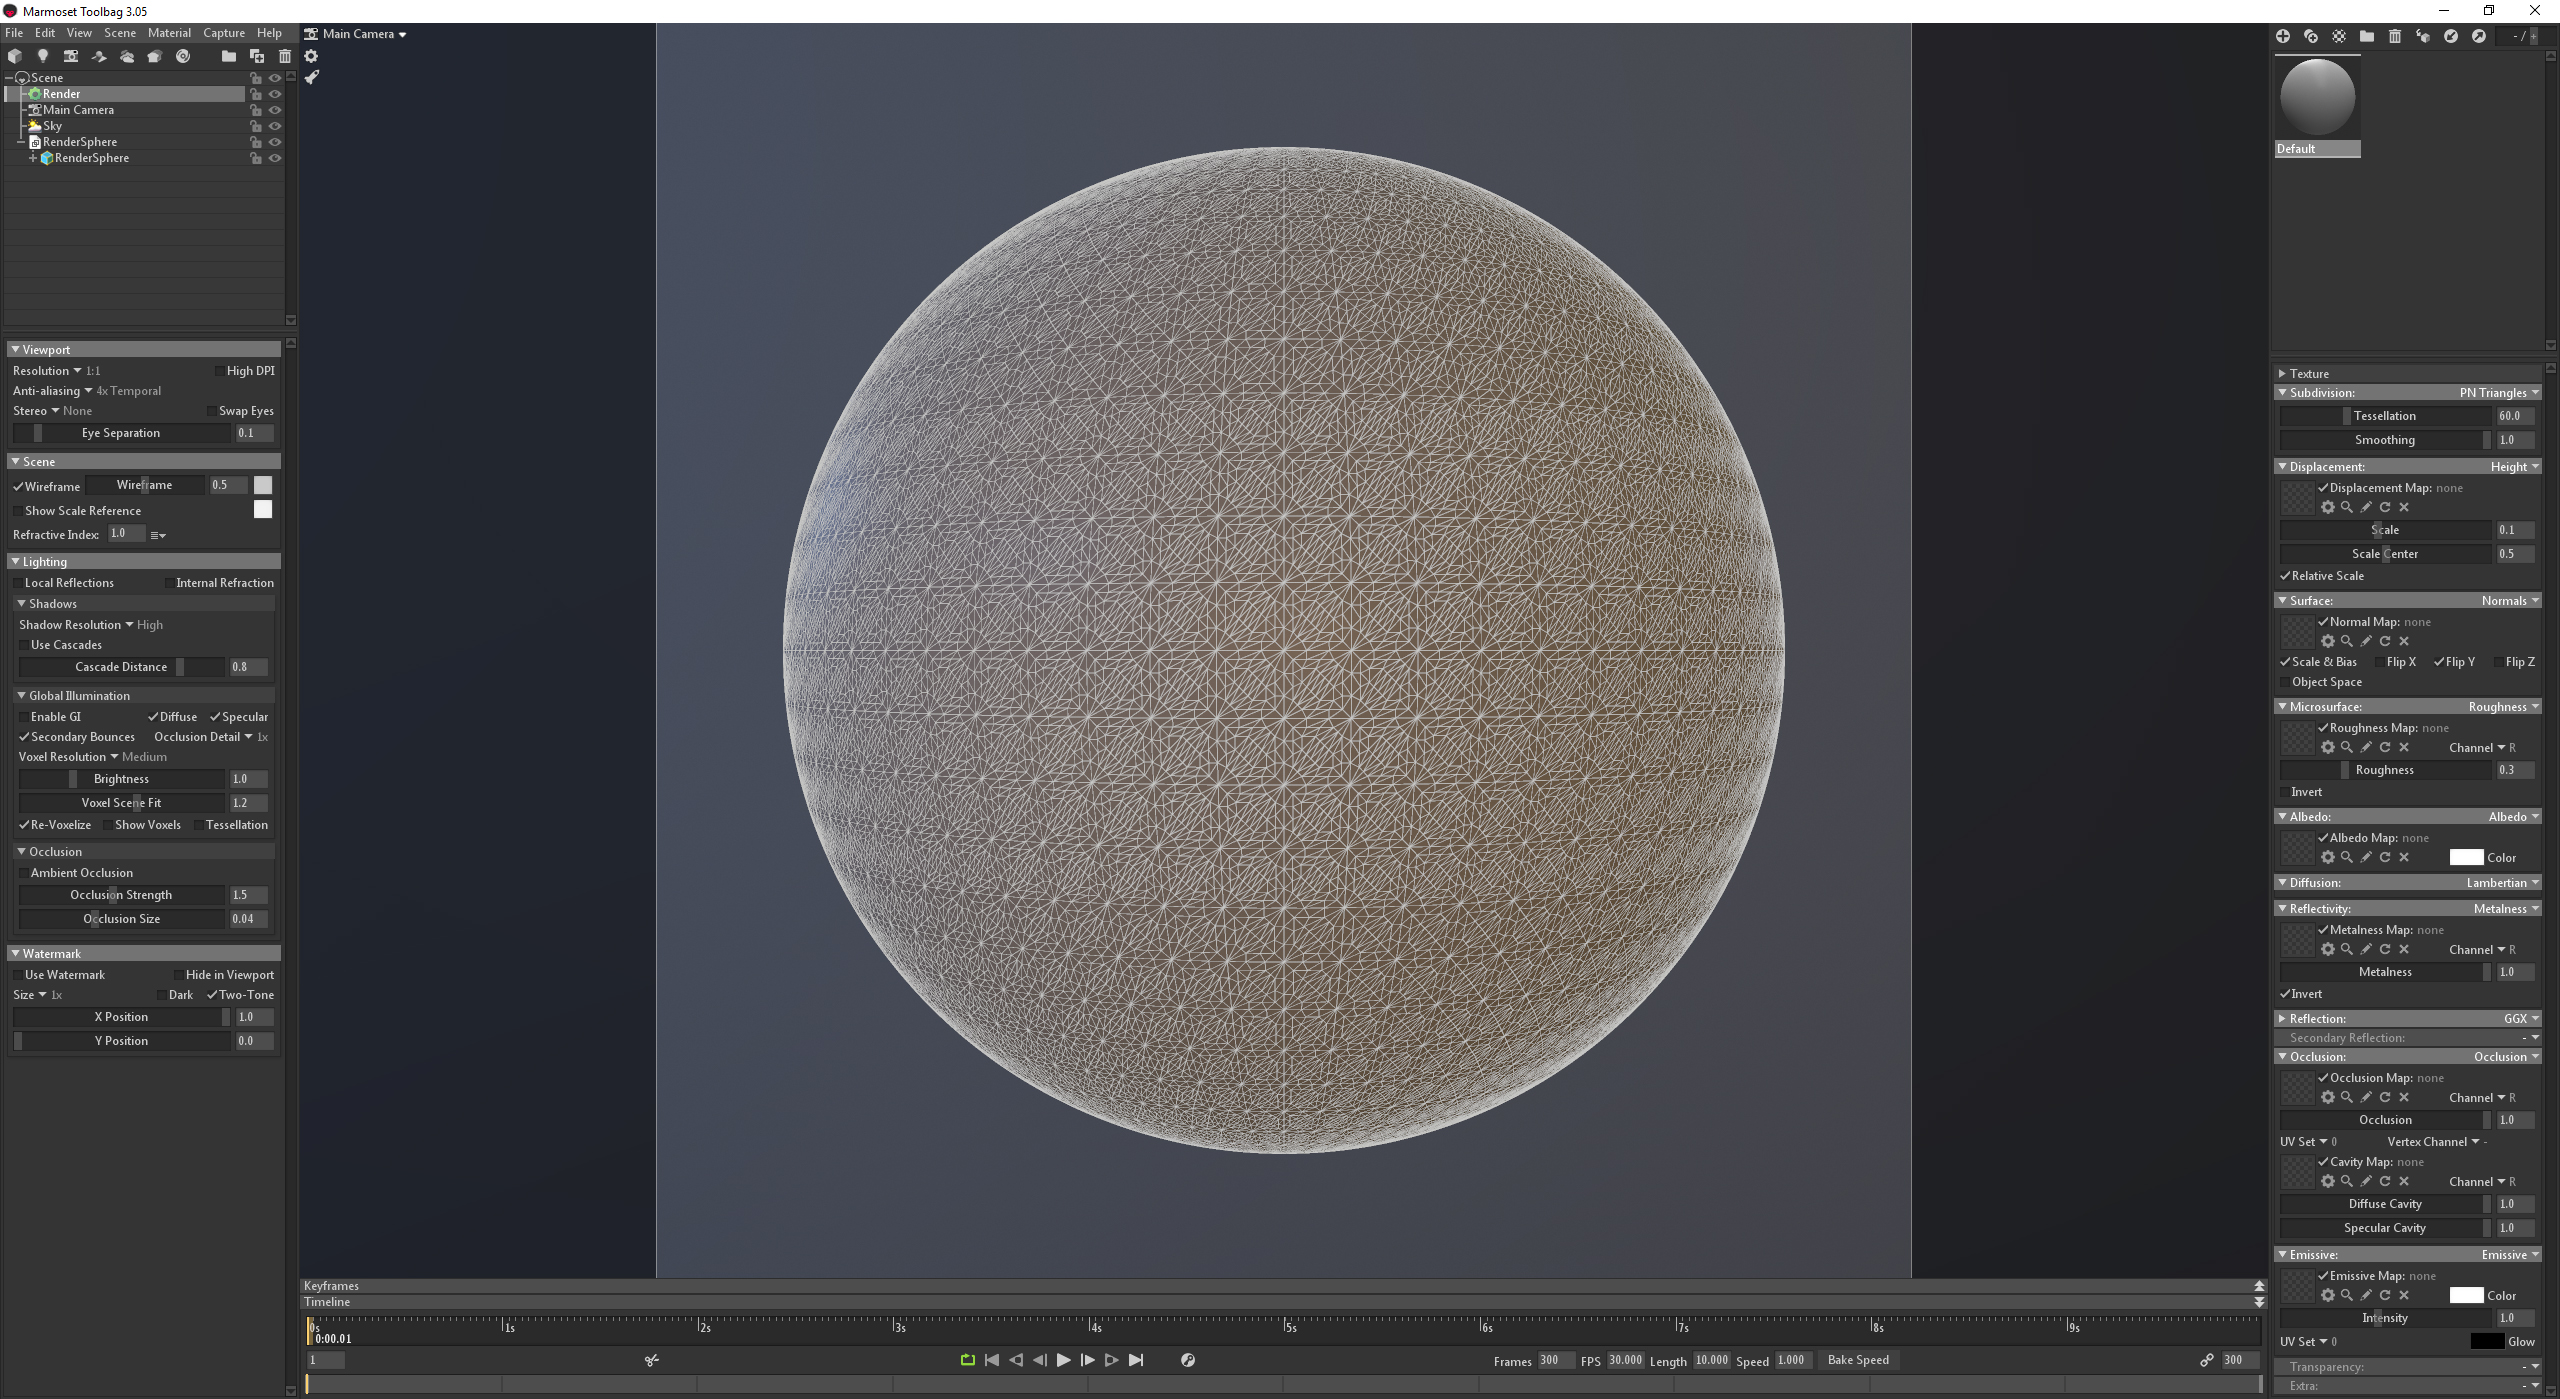
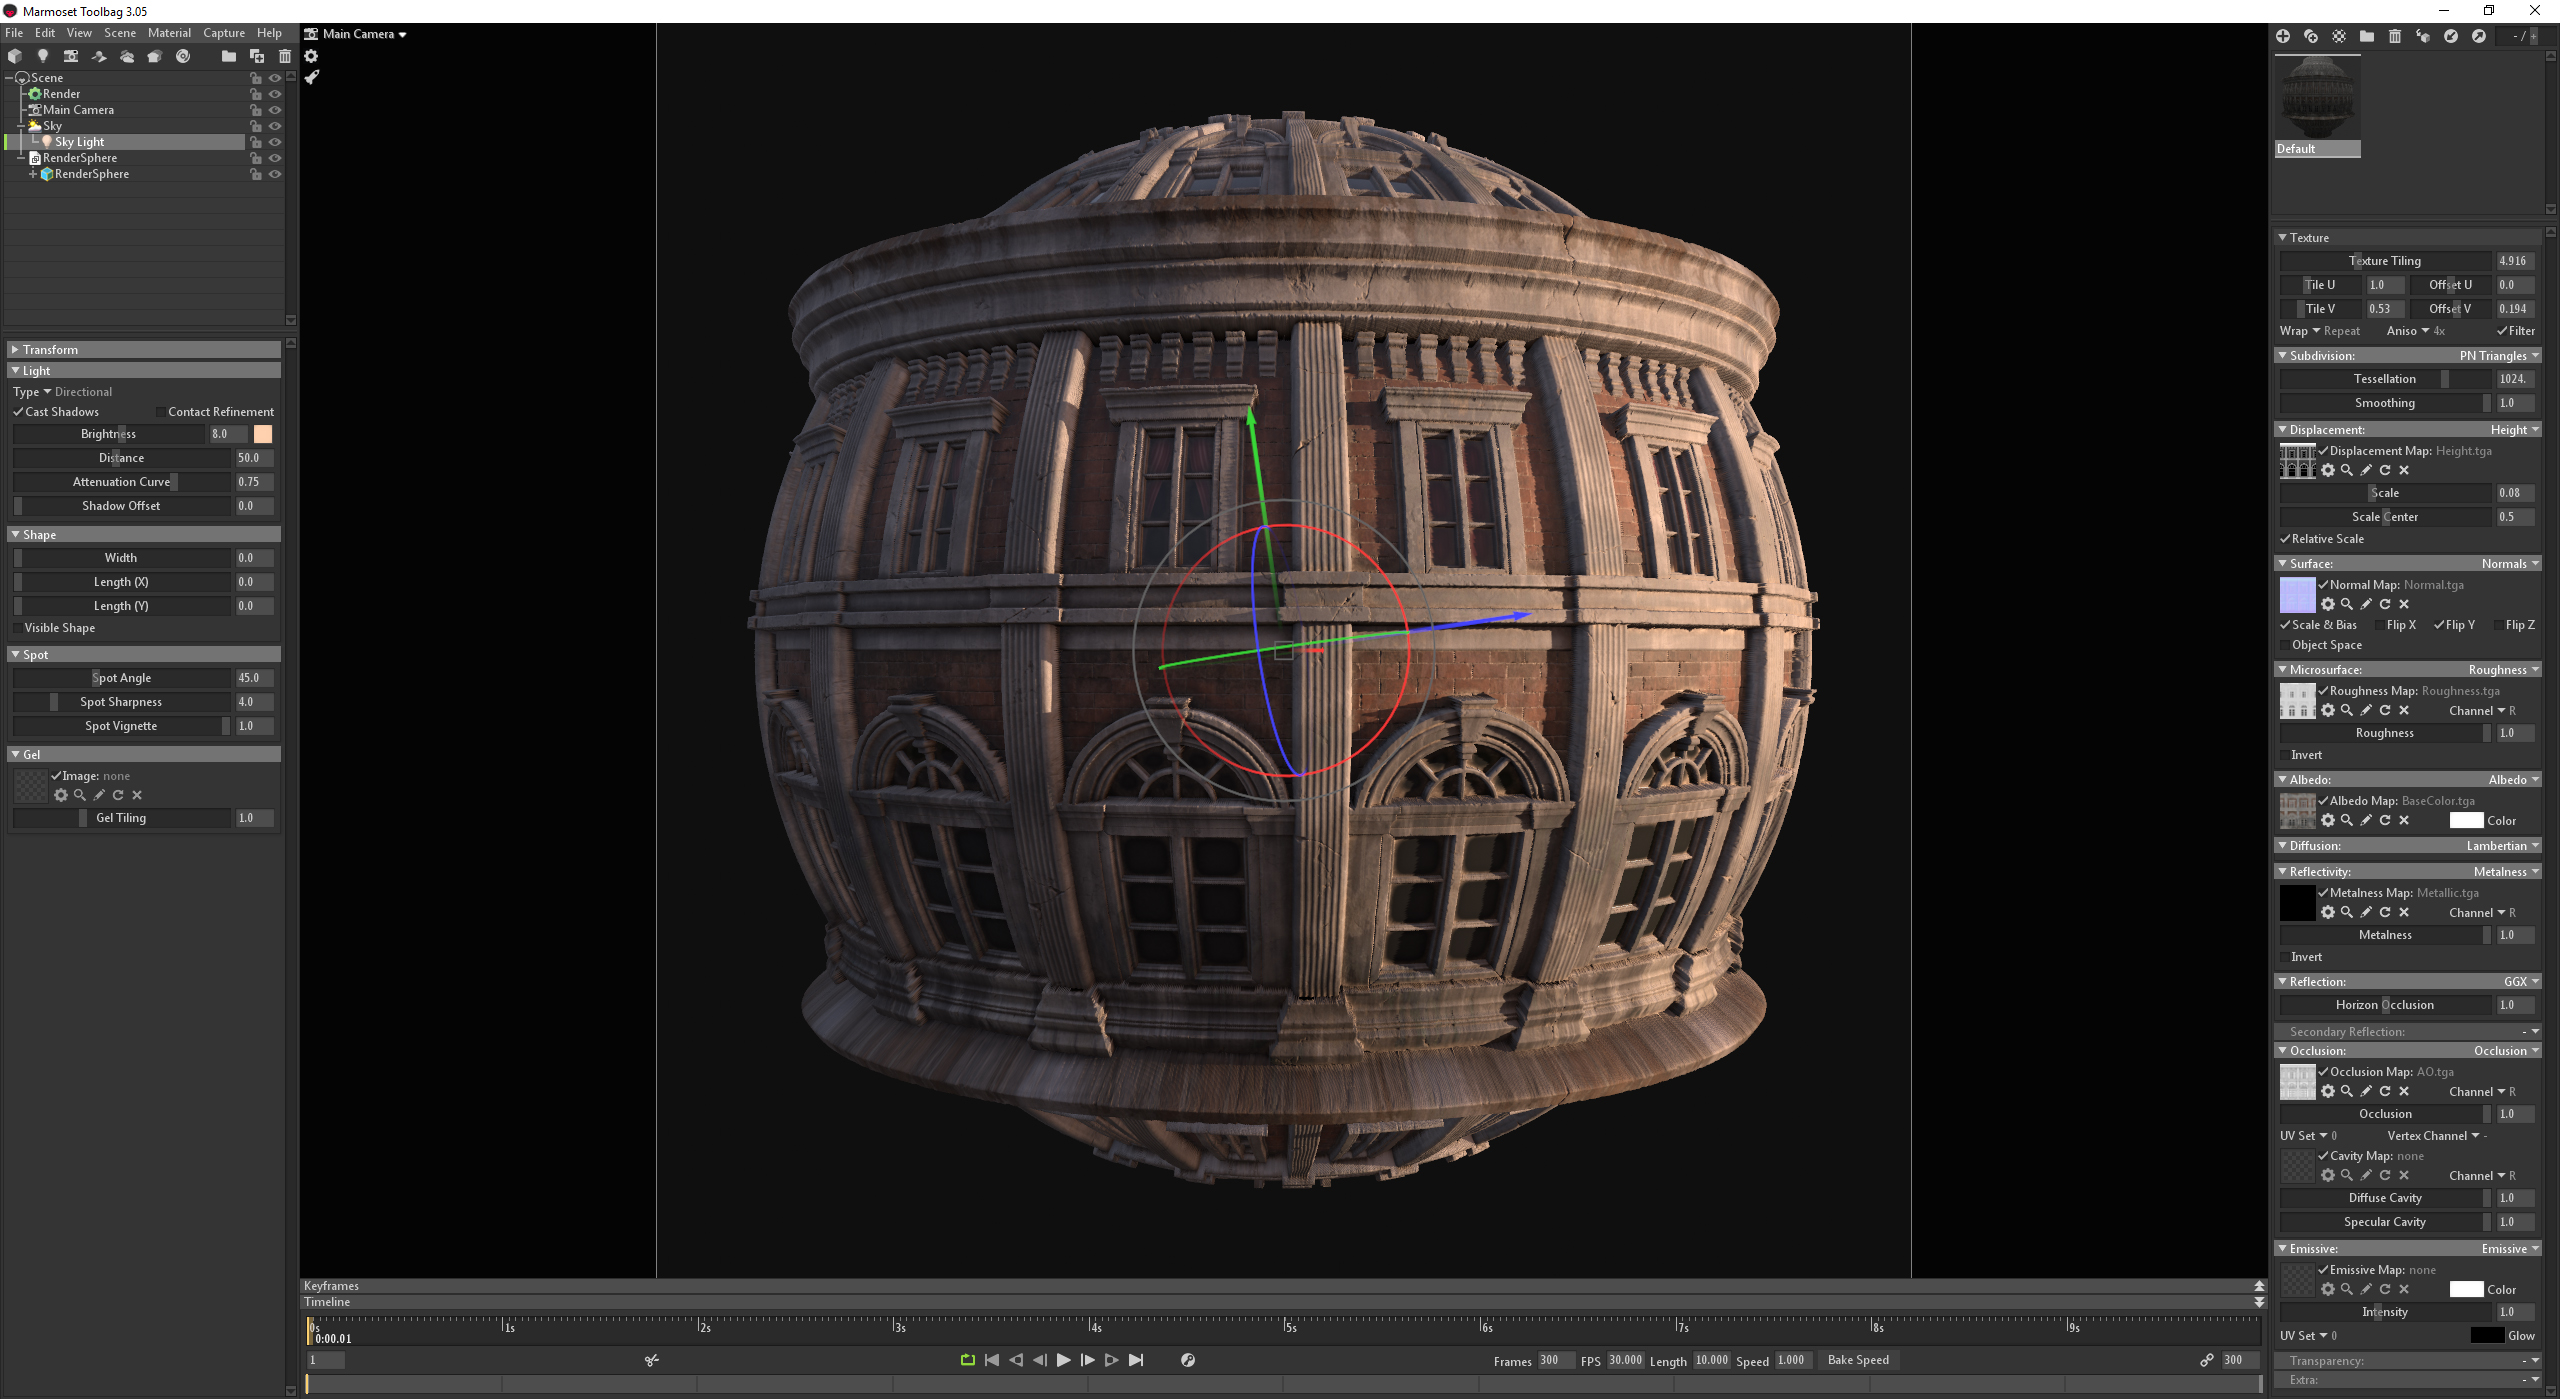
To keep performance at an optimum level, I set the Subdivision module to PN Triangles and leave the Tessellation set to a halfway point. This way, I can work on other things (such as lighting) while still seeing a decent version of the final result.
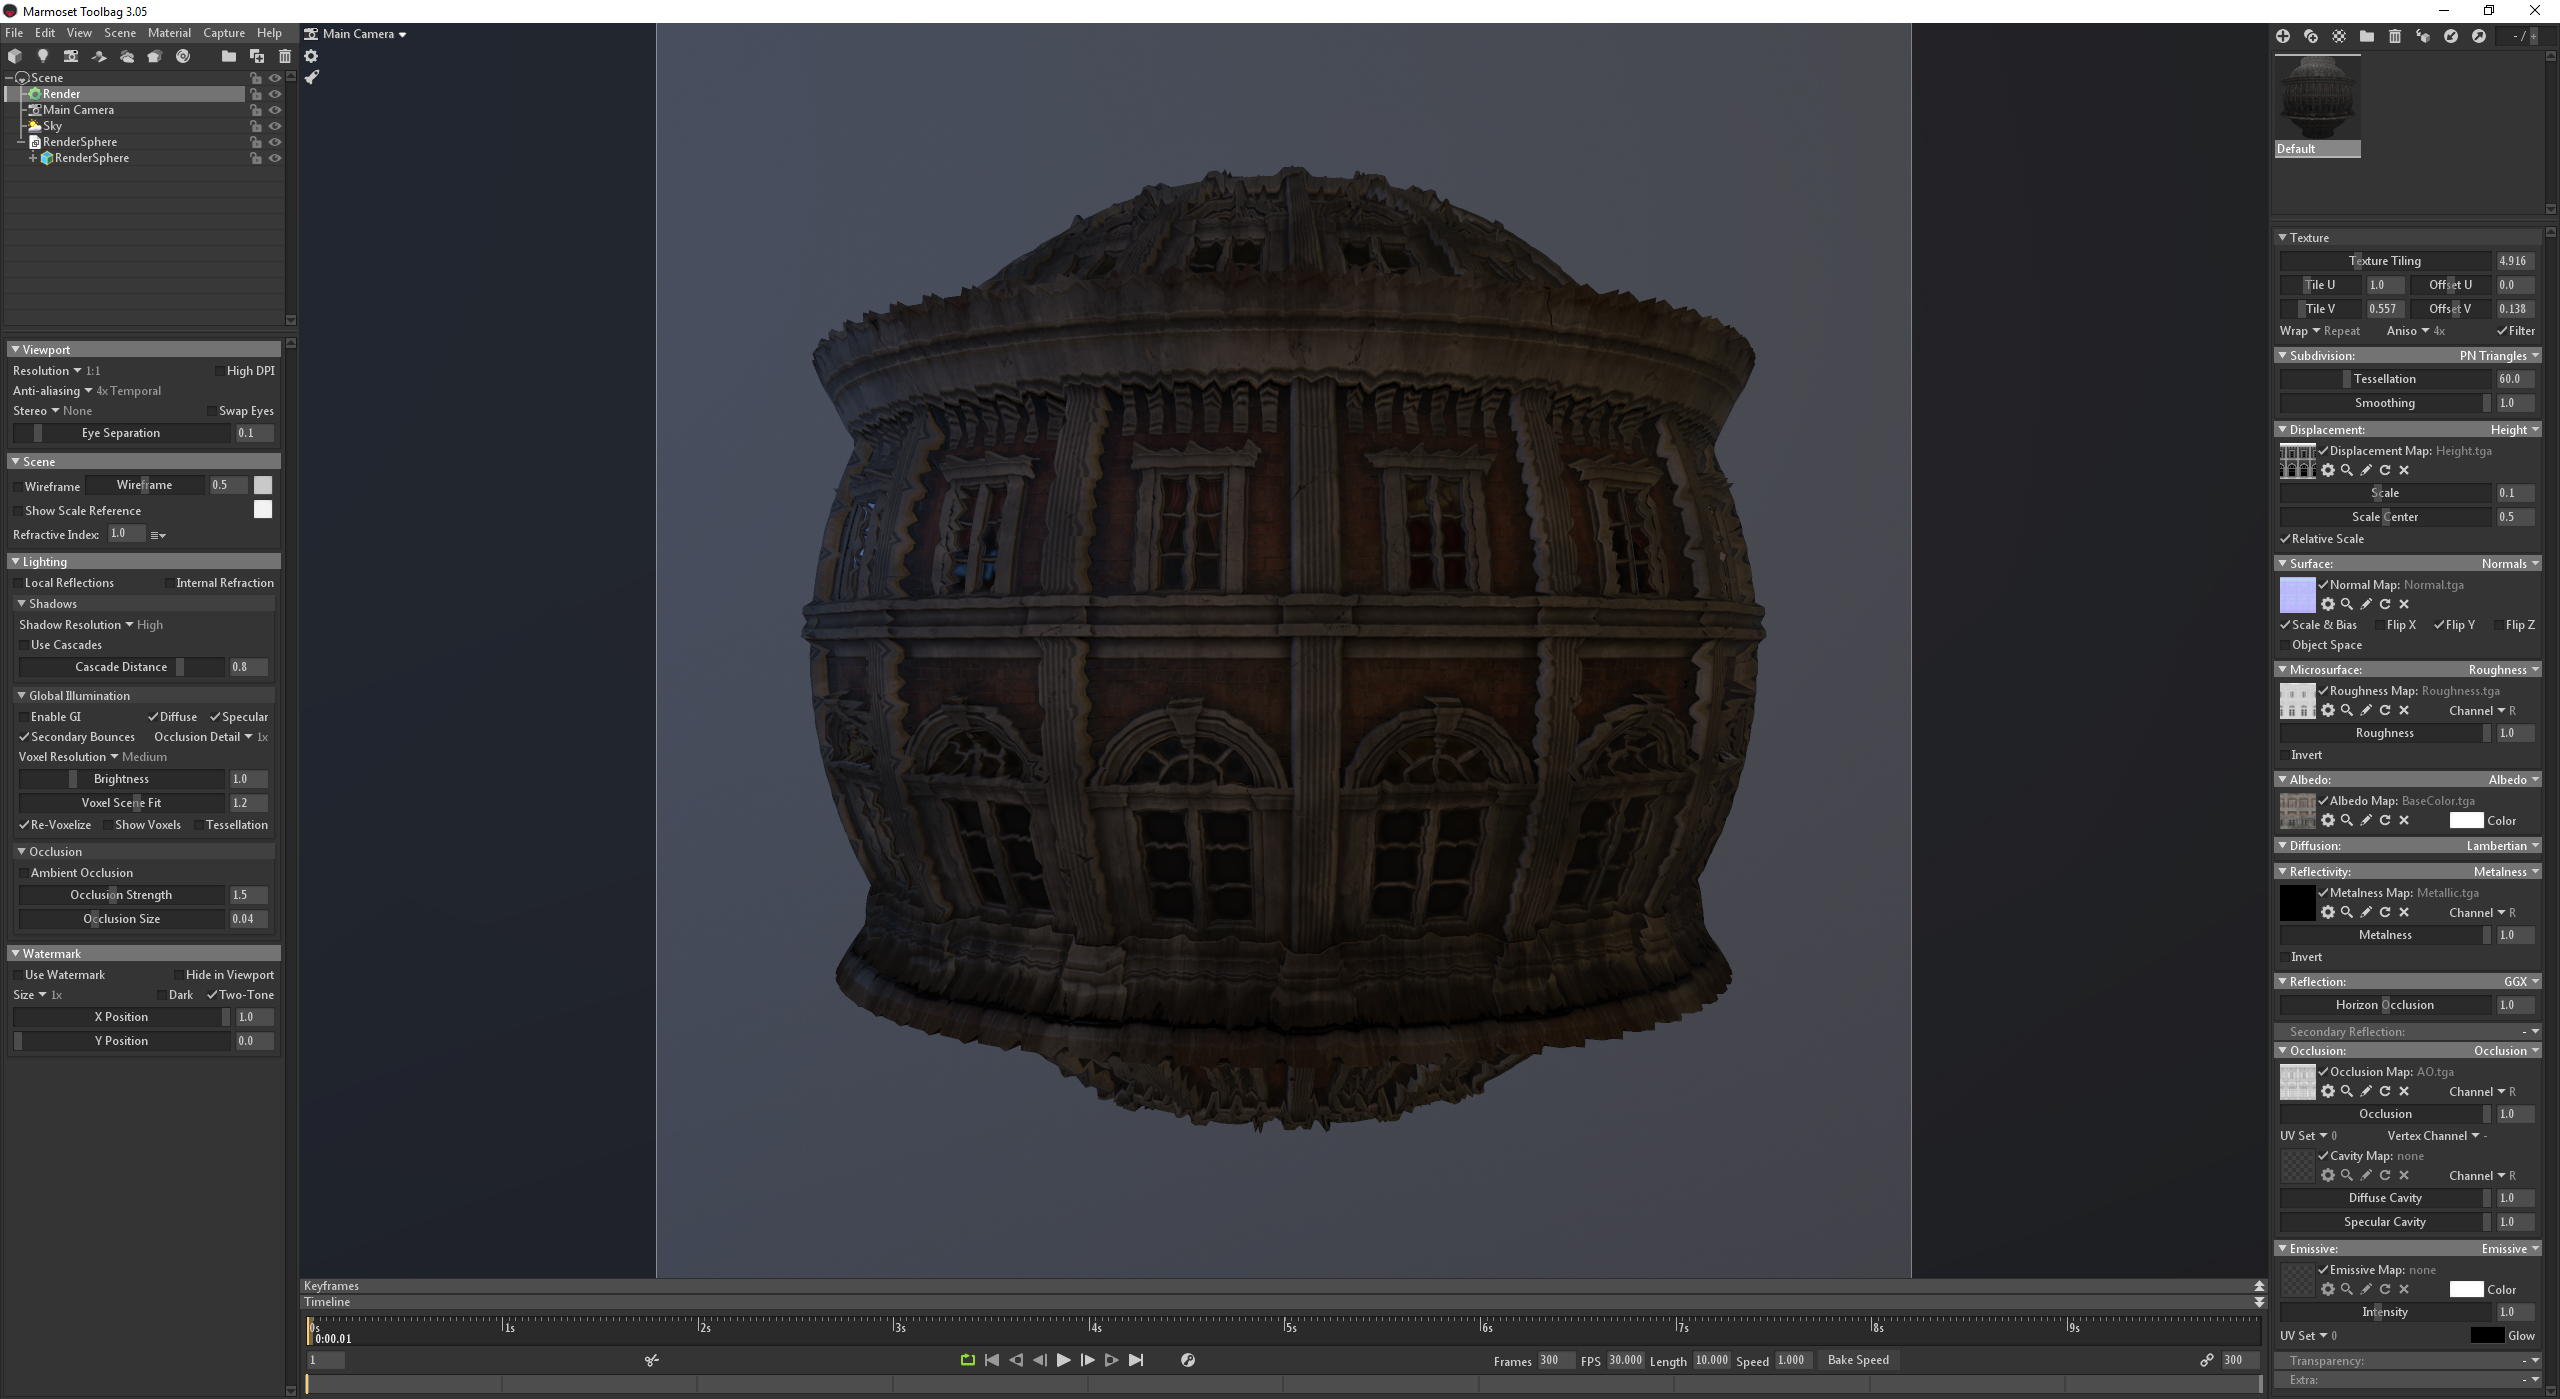
To displace the mesh, I set my Displacement module to Height and import a Height map. At import, the scale is set to 1 which distorts the entire sphere, so I suggest lowering the value. You might also see a UV seam (along the UV border) on the sphere when using displacement, so rotate the model until the seam is not visible. If you’re using DirectX (3ds Max Style) normal maps, remember that you’ll need to check the Flip Y option in the material to flip the green channel. Otherwise, if you’re using OpenGl (Maya style), then you’re good to go as is. I’d like to point out that my material creation workflow uses the Metallic/Roughness workflow, but I will do my best to explain how to use the Specular/Glossiness workflow as well. Import your Roughness map in Microsurface model and set to Roughness. If you’re using a Gloss map, make sure the model is set to Gloss. A Roughness map is essentially an inverted Gloss map, and vice versa. You also have the channel option on the right side, so you can use packaged textures for UE4, and tell the material which channel to use for the specific map. The other maps are pretty self explanatory and will simply require importing. After all of that is done, you can tile and offset your material so it fits the curved surface of the sphere.
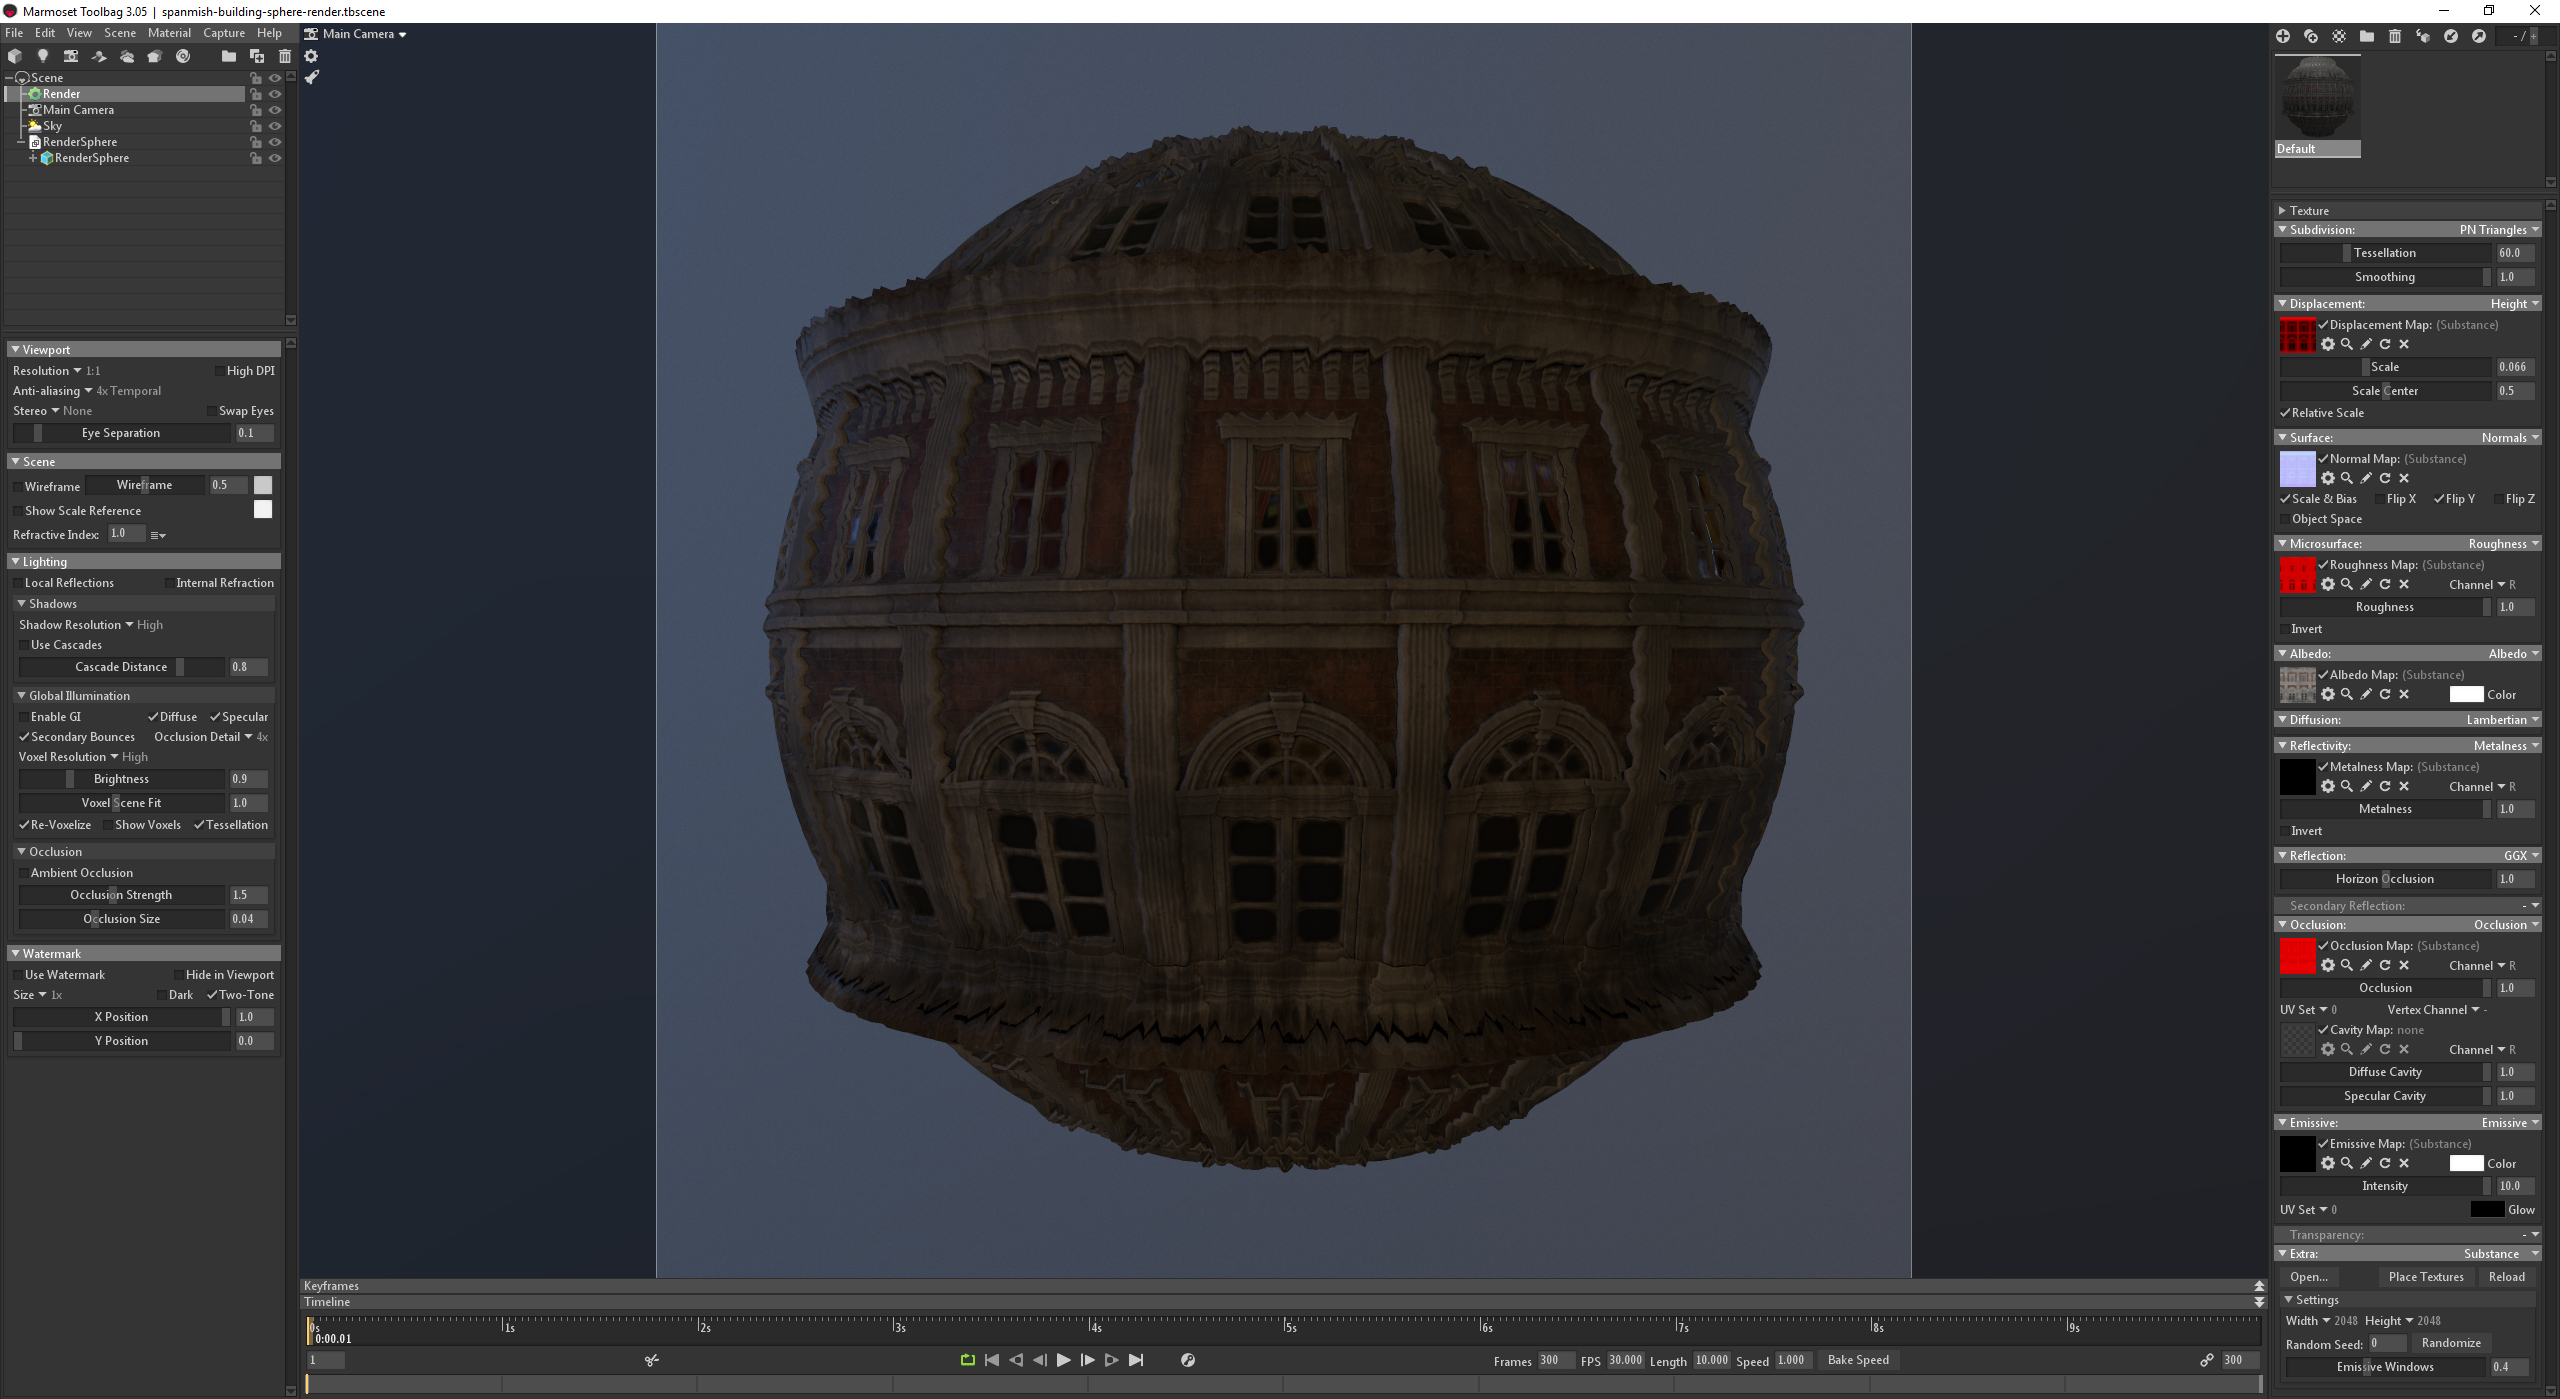
If you’re using Substance Designer and would like to skip the material setup, you can always import the .SBSAR file instead. This allows you to dynamically change Substance textures in Toolbag, which is a fast way to iterate and render different versions of your material. Substance Designer files can be loading by selecting Substance from the Extra module located at the bottom of the Material Editor.
Lighting Setup
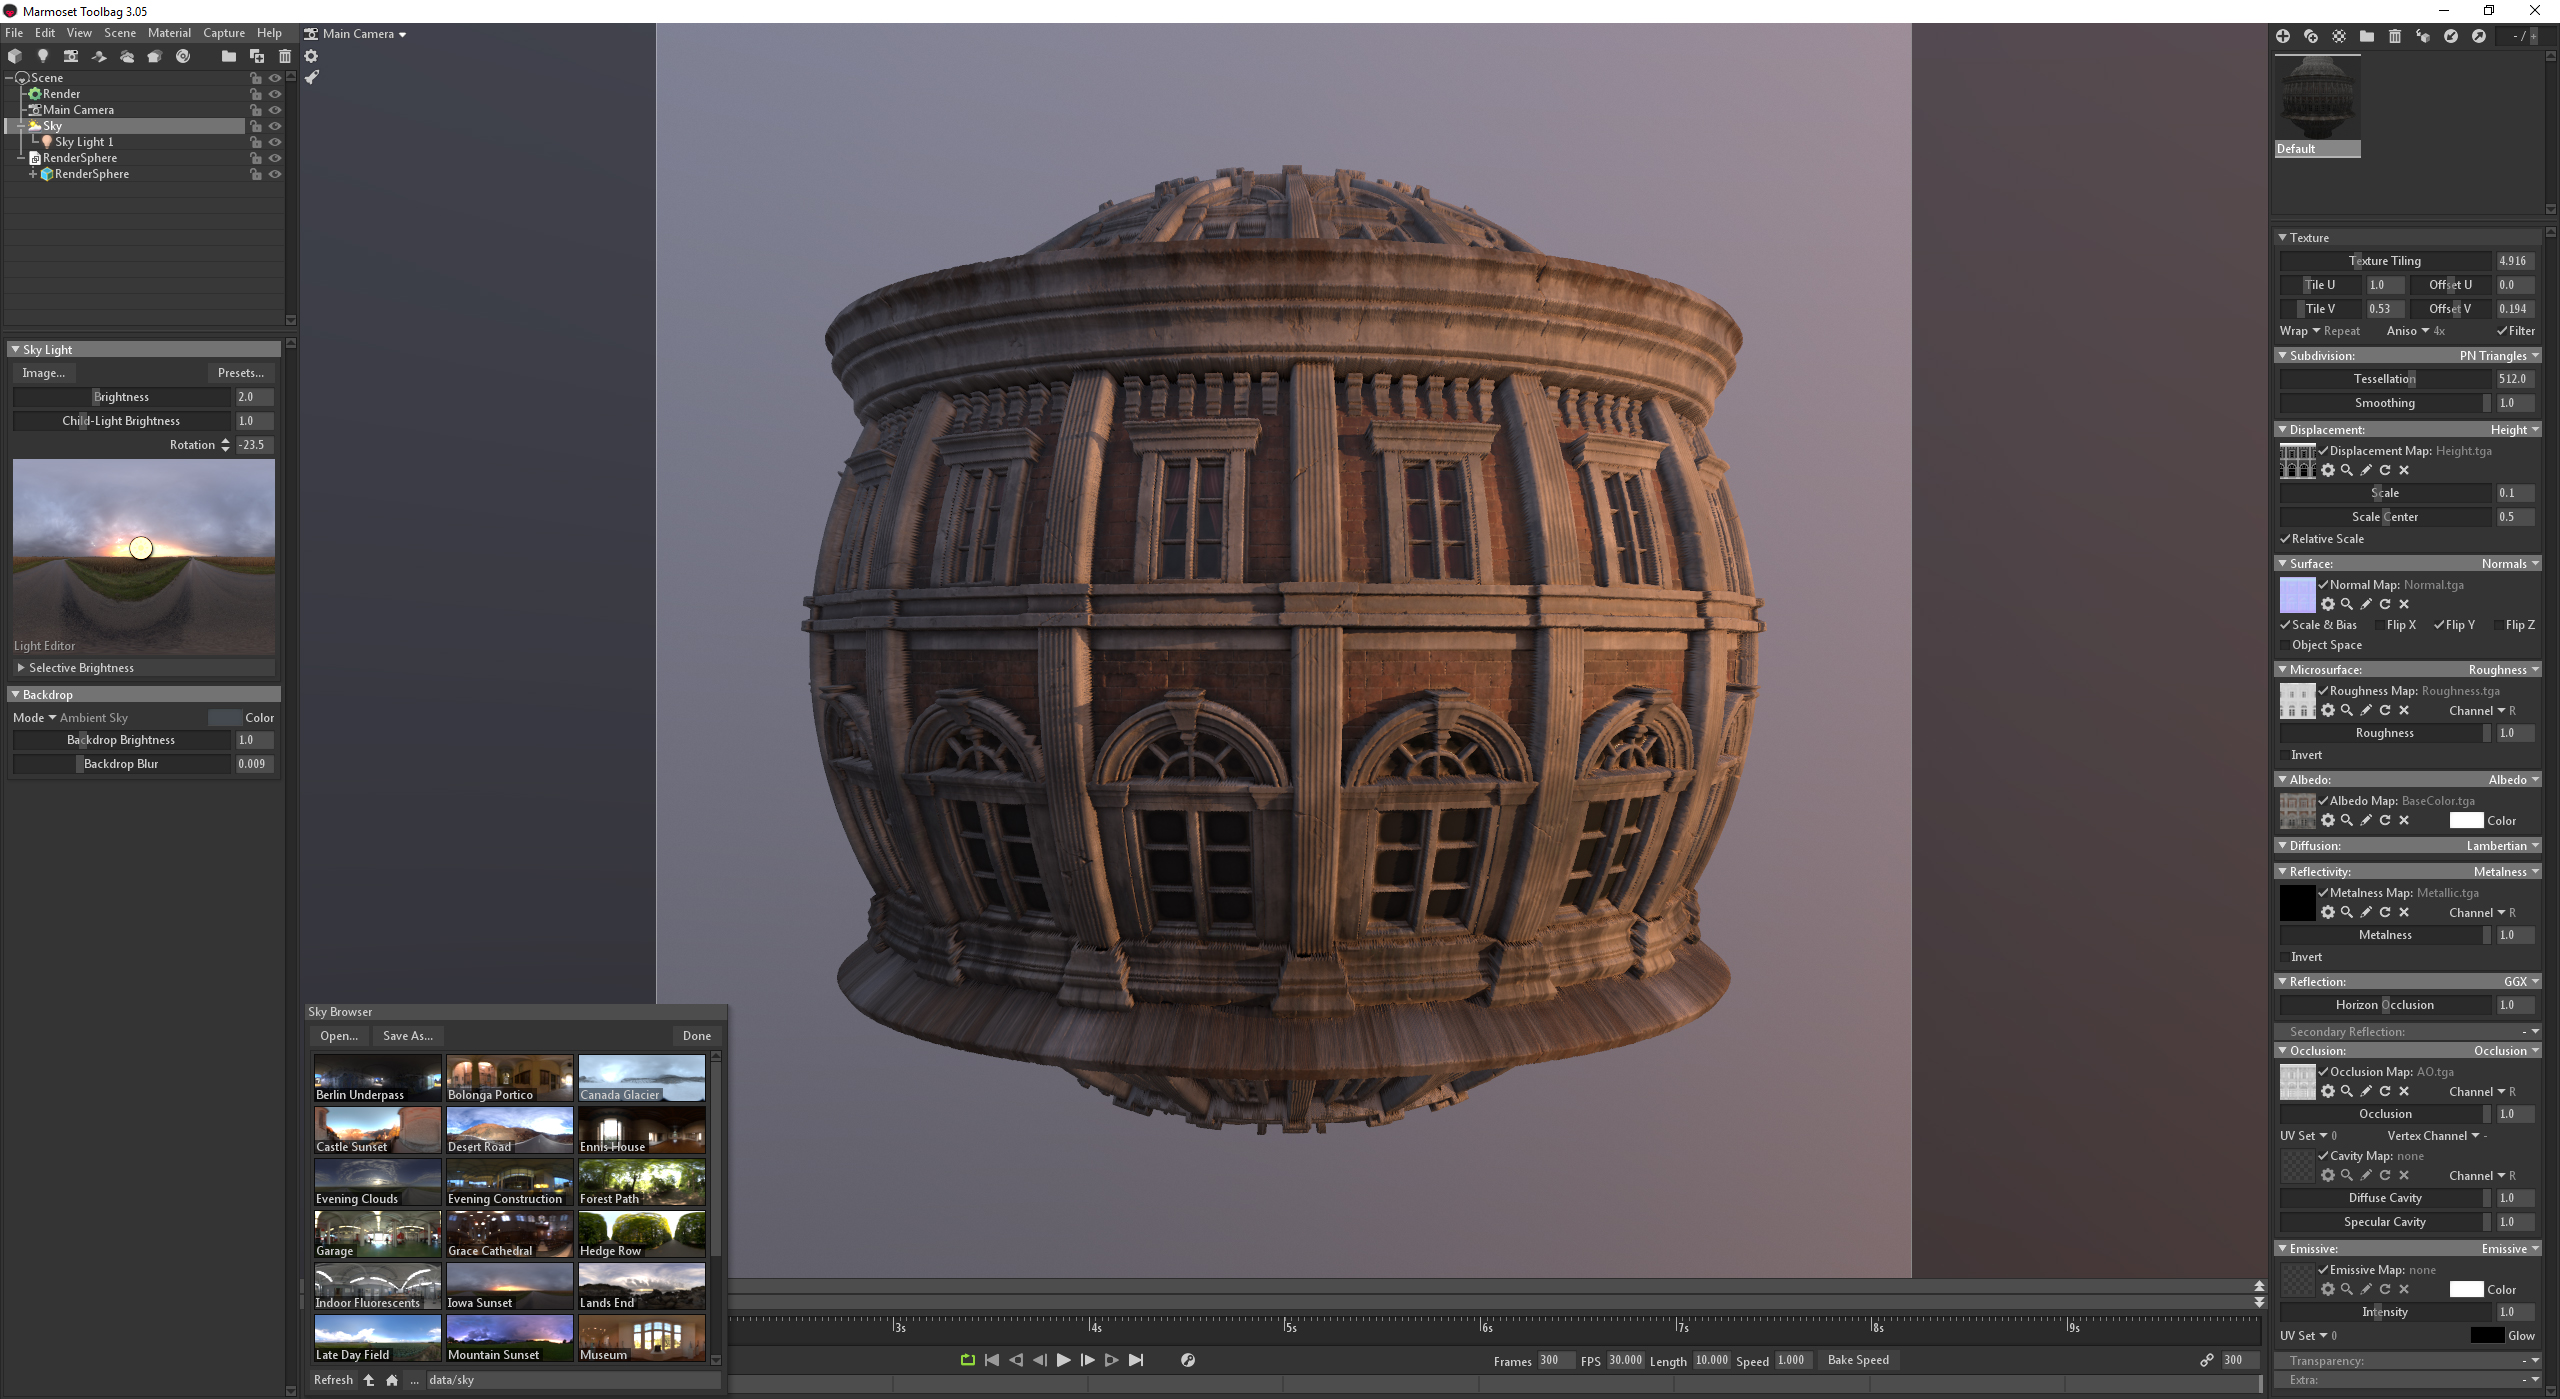
In this section, I will cover my lighting process from start to finish. The first step is to pick a good looking Sky Preset and add a Directional Light. You can do this by clicking on the Light Editor (which can be found in the Sky object properties) to add a light. You can also click and drag your mouse to move lights to any position. It’s a good idea to add a light where the primary light source is (for instance, the sun). That way, you will get lighting that is consistent with the Sky.
I will also increase the Brightness of the Sky and the Child Light, and change the Backdrop Color to a dark grey. Be sure to set the Sky Mode to Color if you want to use a custom background color. When lighting your materials, you shouldn’t be afraid to boost the intensity of the lights. Reflections and highlights play a key part in presenting your textures. This means that we’ll need to increase the Brightness and rotate the Directional light to one side to create some shadows too.
Having small, soft shadows helps to sell the realism, especially with a proper Height map that can cast those shadows. Personally, I think that the lights by default tend to have too hard of shadows. In this instance, I’ll usually increase the Width to soften them a bit. Choosing the right Width setting will depend on your scene scale, so you should experiment with this value. For example, lighting a cliff material could use a higher Width value so the shadows are softer, giving it a more natural sunlight feeling. The downside of this is that the light won’t capture all the small details, so you will definitely need to add a supporting light here.
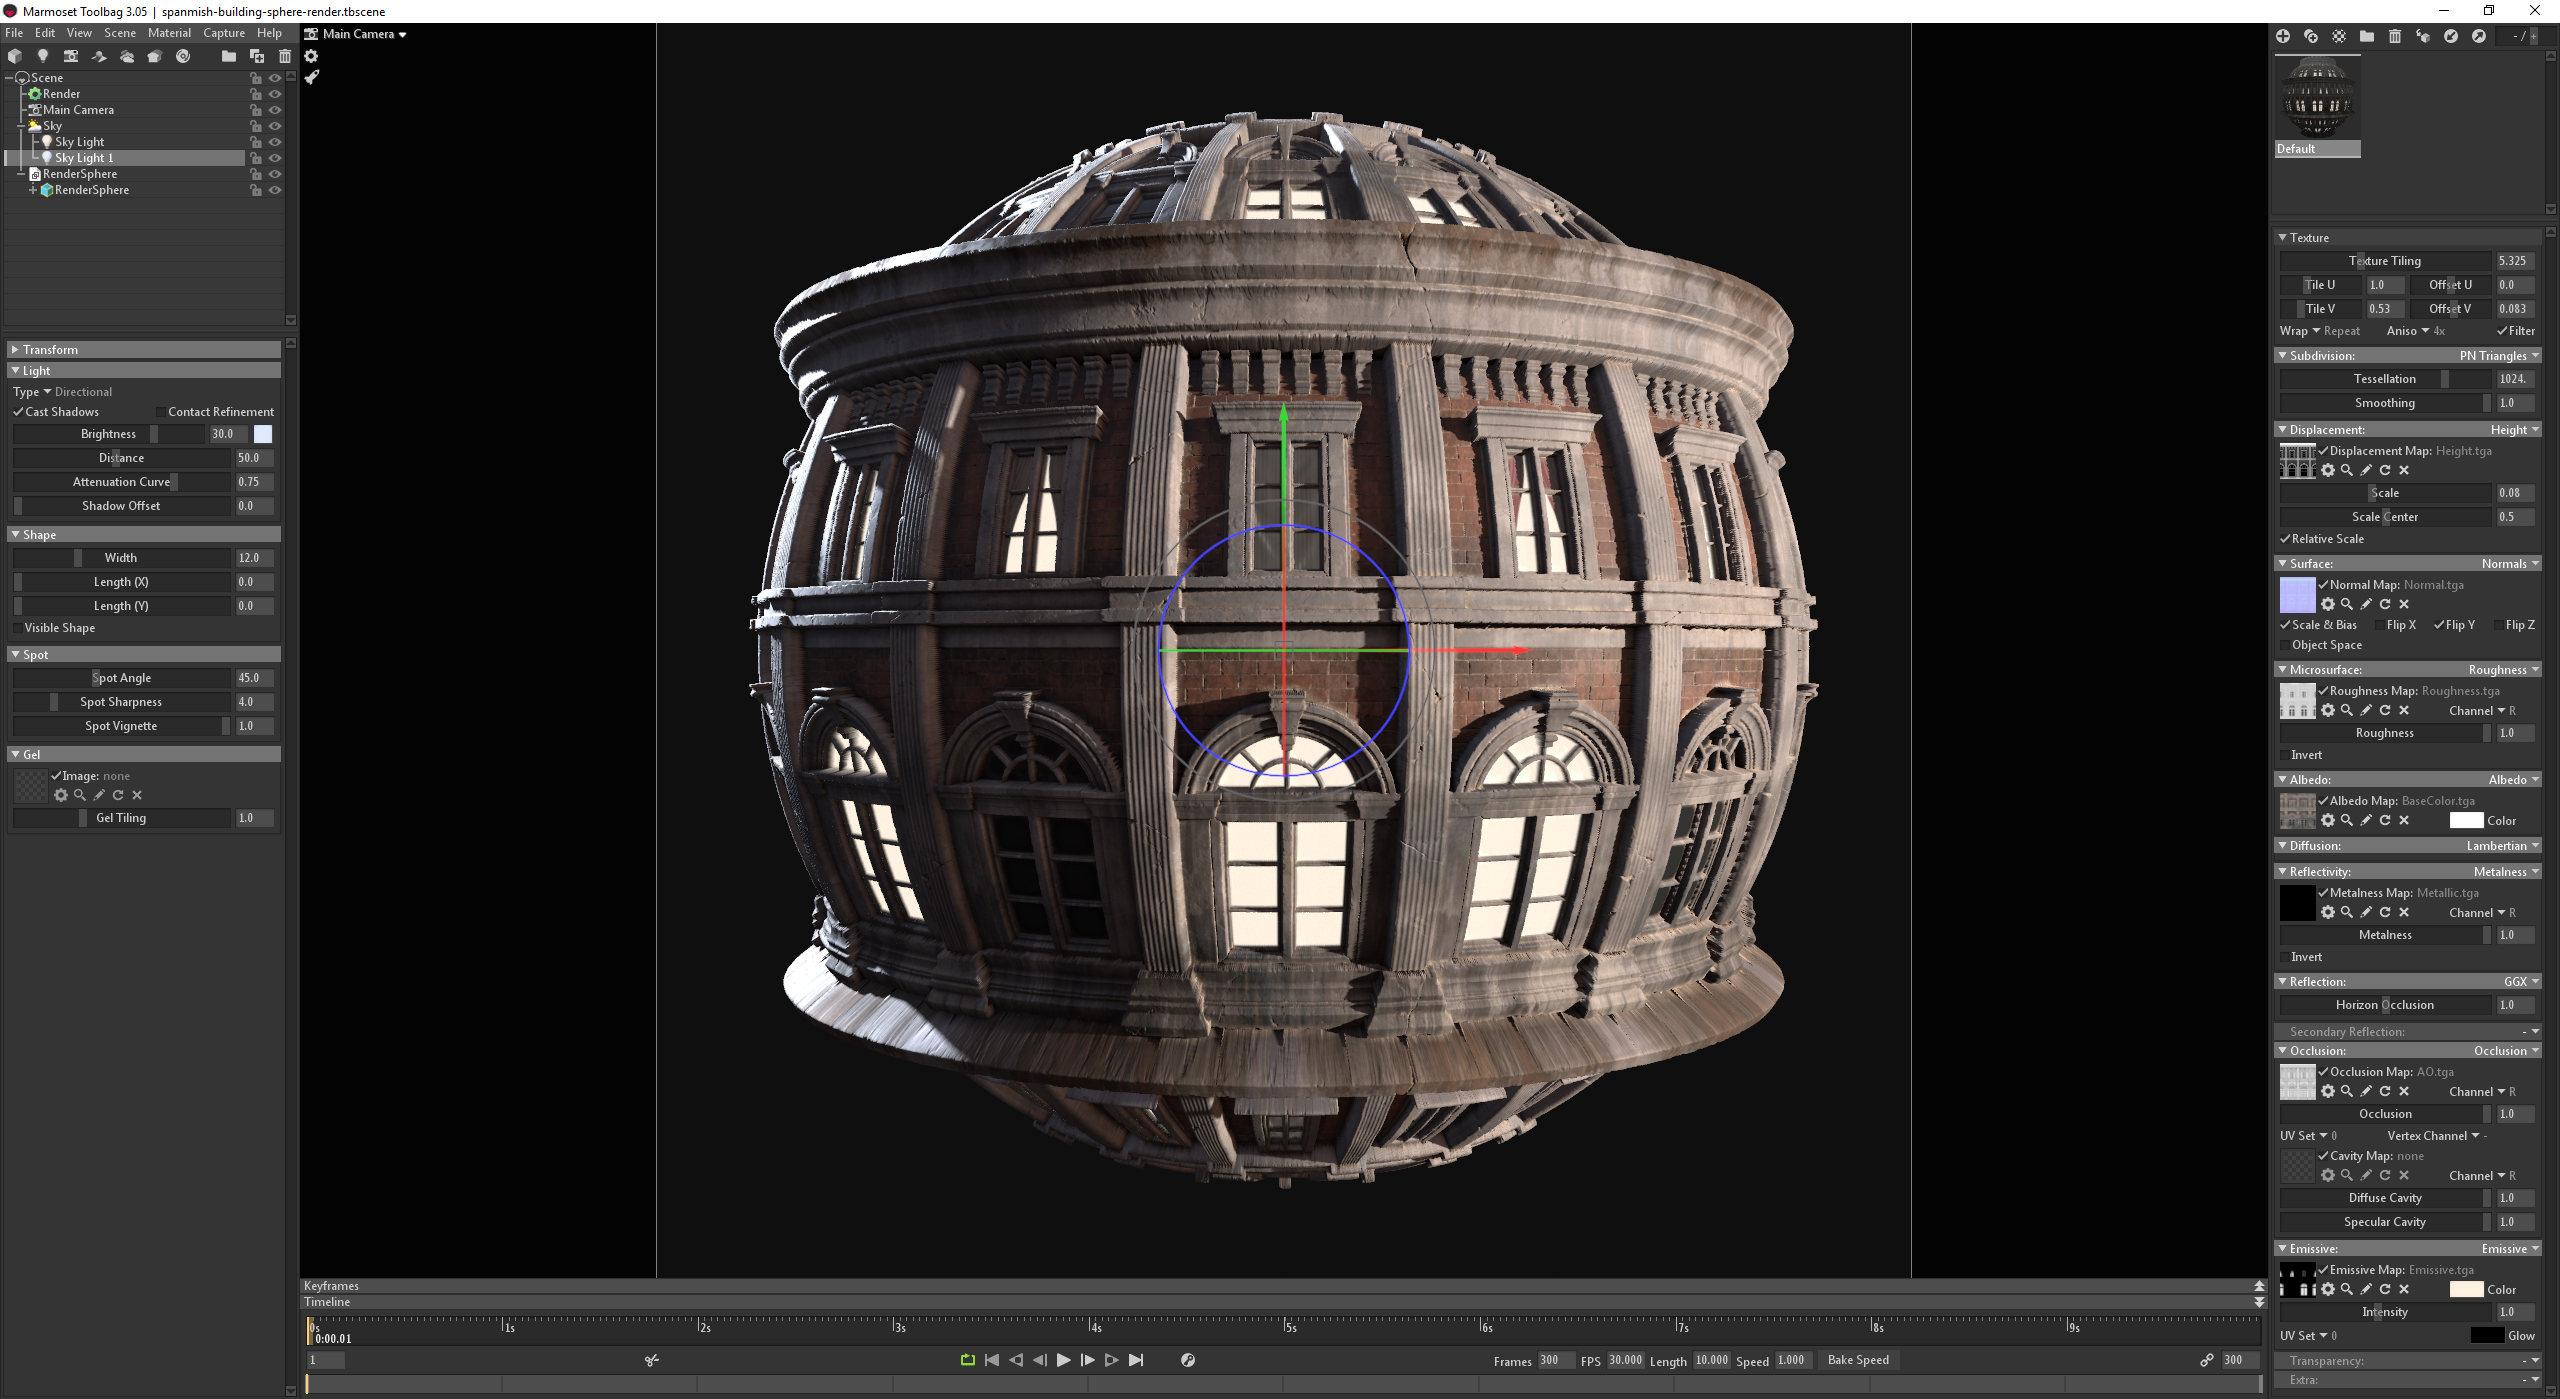
Now we need to add a highlight. This is what really helps to sell your material and make it stand out. Usually, I just add another Light to the Sky as we did before, place it behind the material to create a rim light effect, and then I increase the Brightness a lot! If your material still looks a bit dark, you can always add supporting lights that shine at a downward angle, which add bit of extra contrast to the material. Play around with the Brightness here since the look can change while tweaking post processing settings. At this point, I add an Emissive map which will look much better once I enable Bloom in Post Effect.
Render & Post Process (Filmic)
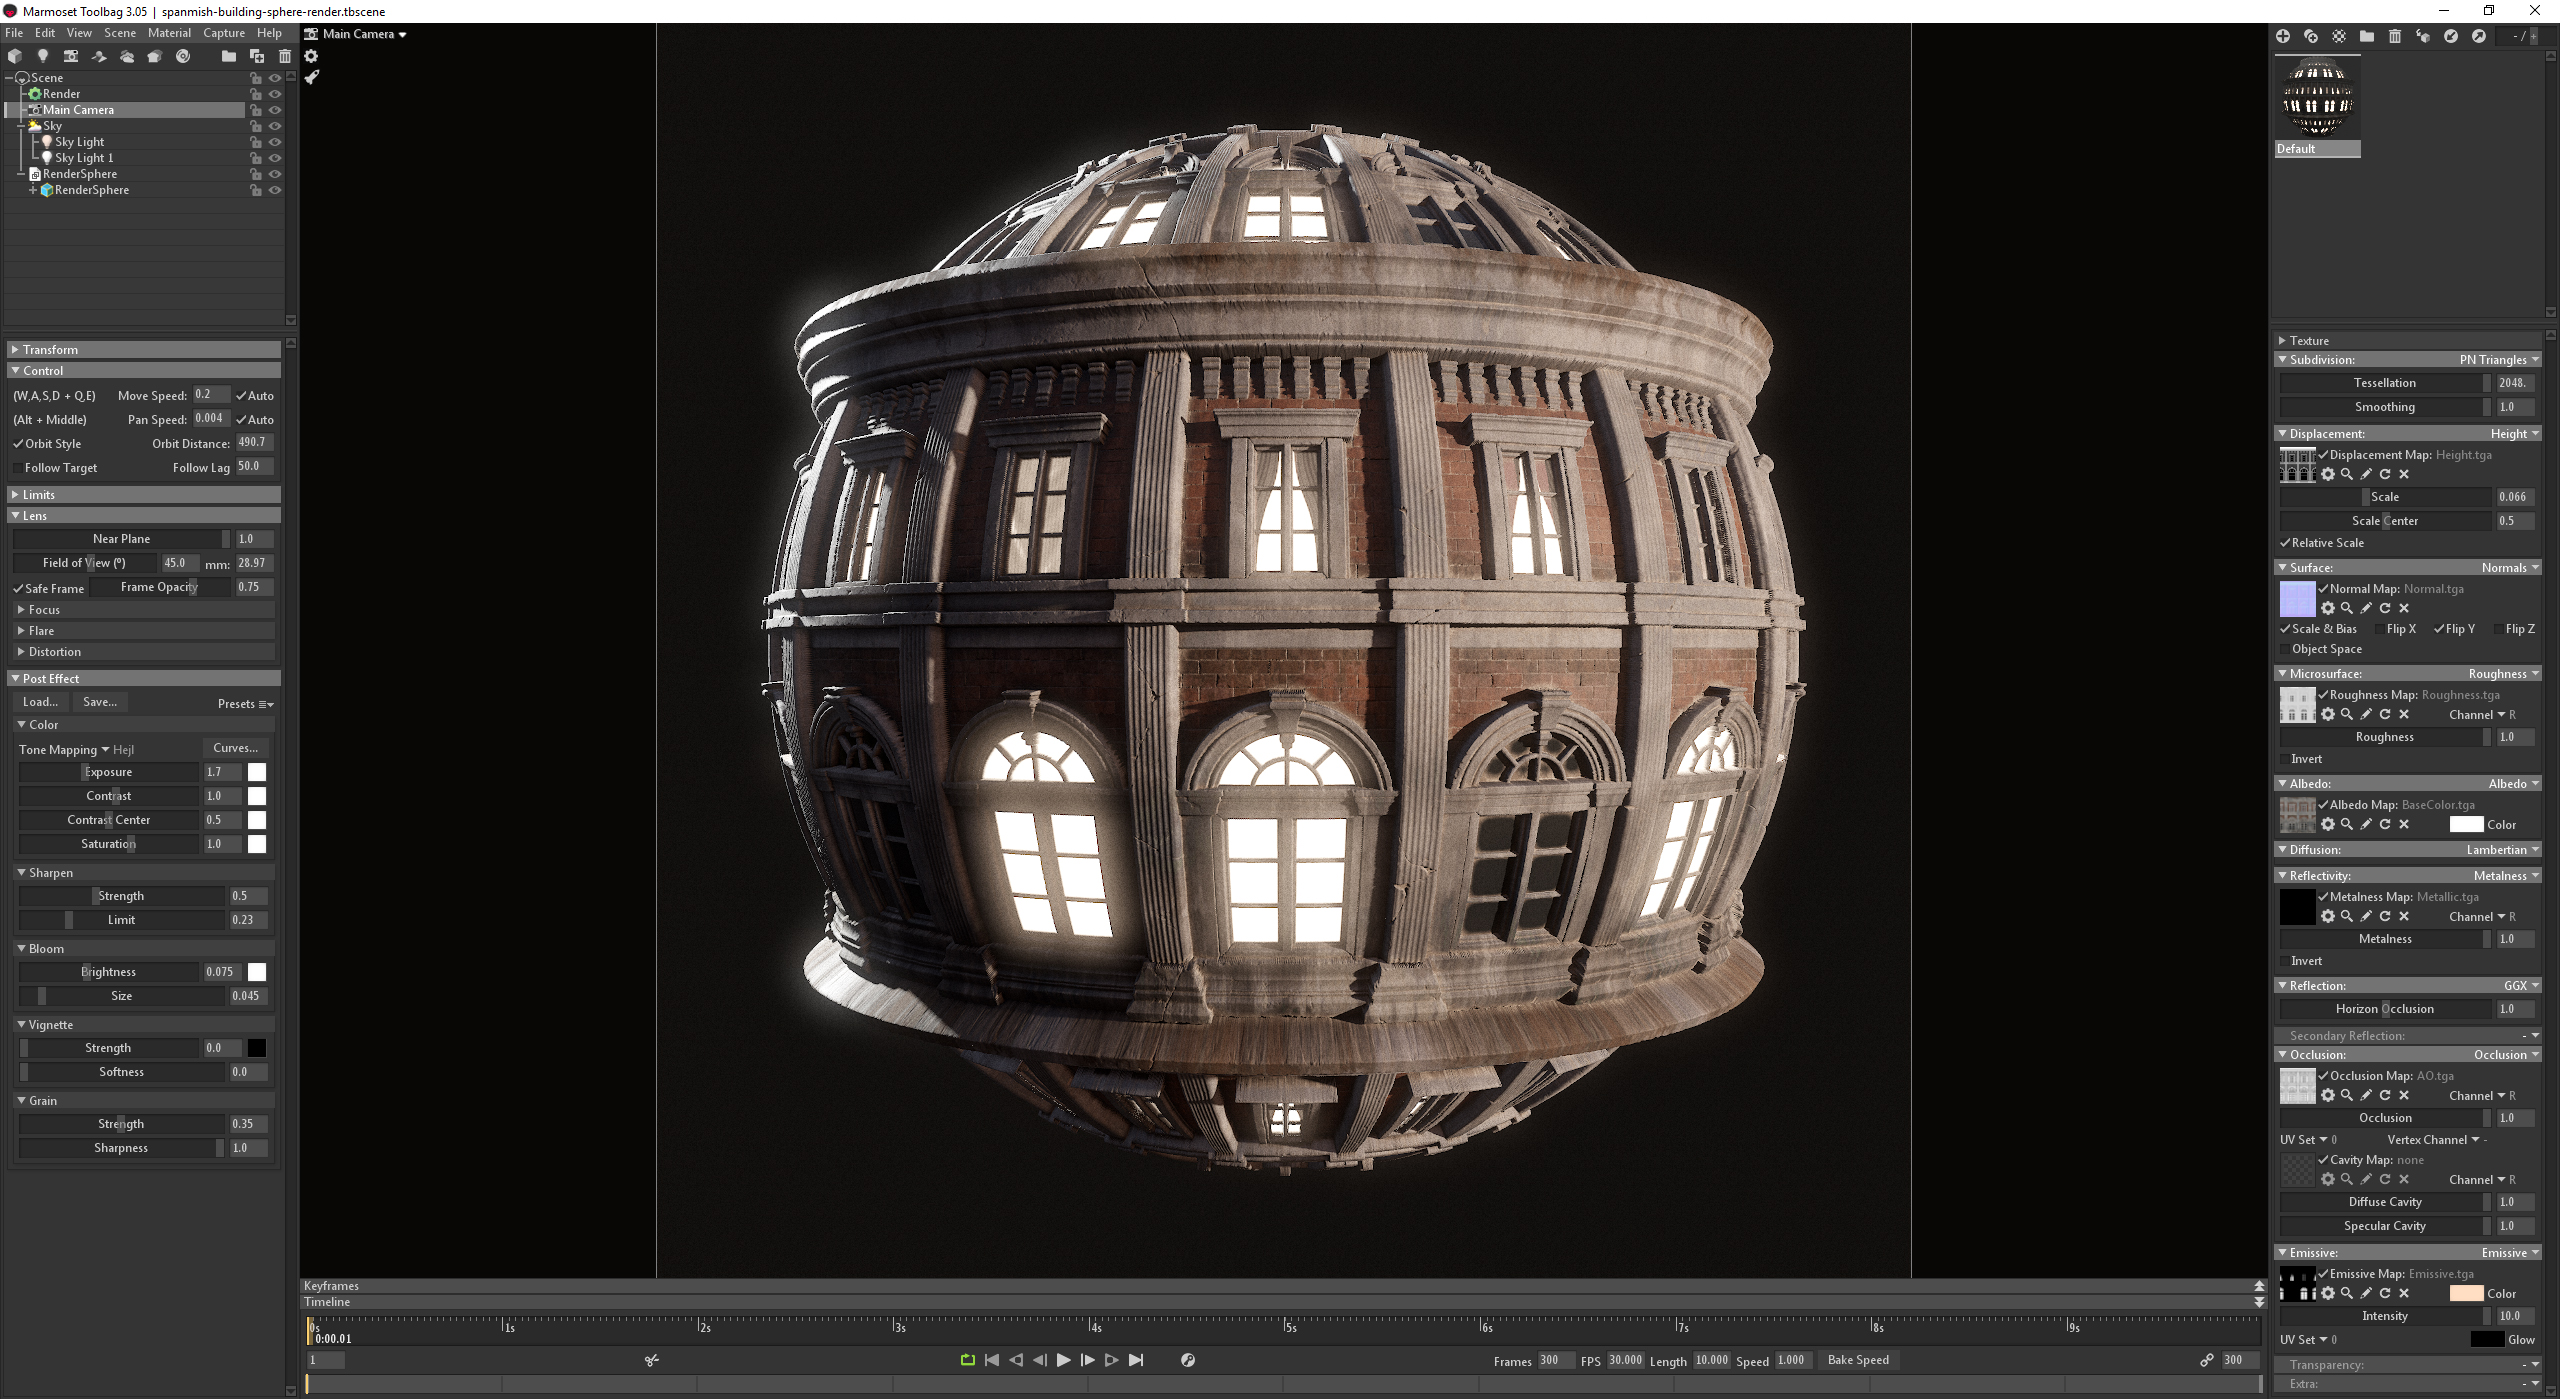
For the Camera settings, I change the Tone Mapping to Hejl and increase the Exposure. I boost Sharpen Strength slightly, as well as add some Grain and Bloom. This gives us much better results for the window lighting and makes it look as if light is actually shining from the windows. These settings usually depend on the material, but overall, these are the settings that I like to use. I also tweaked the Height map and the Brightness of the lights to work better with the post processing.
In the Render settings, I always use the highest settings for Shadow Resolution and I enable Local Reflections as well. Local Reflections will create reflections for your displaced material. Notice how the light from the windows reflects onto the facade.
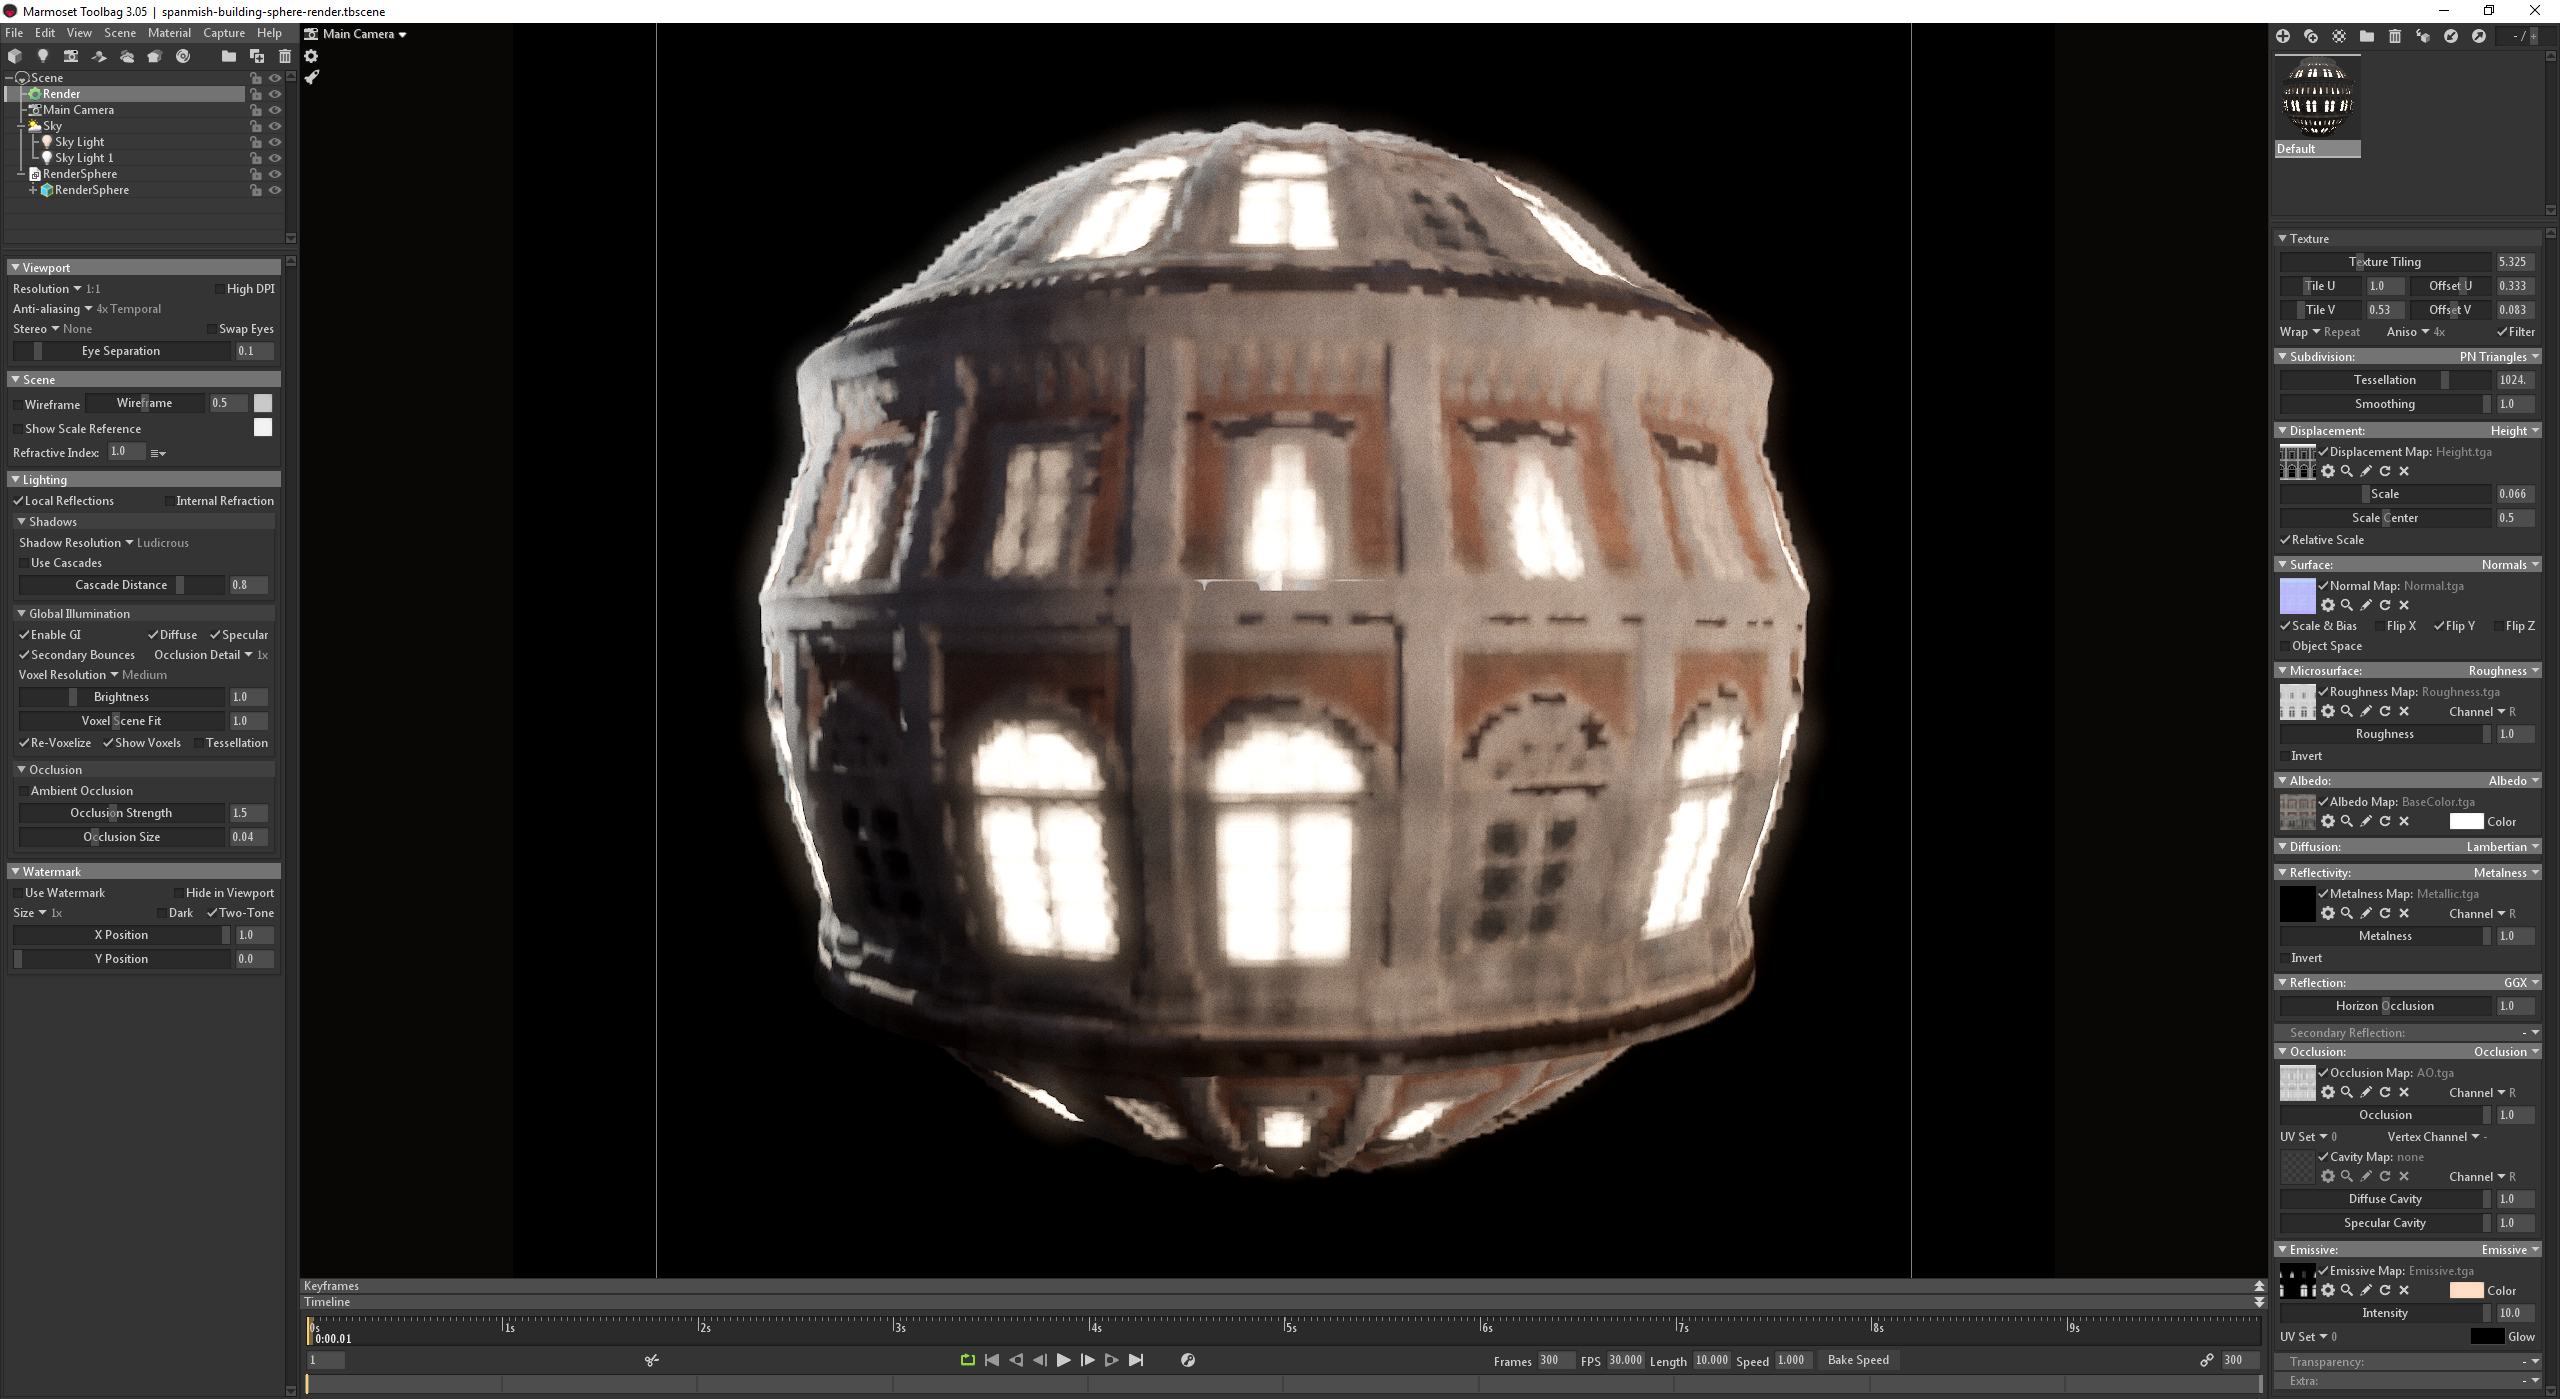
And now for the Global Illumination. GI works by creating a simplified, voxelized version of the scene, which is used for ray tracing bounced lighting and reflections. You can enable Show Voxels to see the voxelized version, but if you’re using a Height map, you’ll need to enable Tessellation to make sure the displaced mesh is taken into account. Again, depending on the material, you may need to play around with the Brightness, since every surface reflects differently and takes into account the Sky lighting that you’re using. A good range is generally from 0.2 to 1.5. Above is a comparison image between the default settings and what we get after pushing the settings to the highest quality.
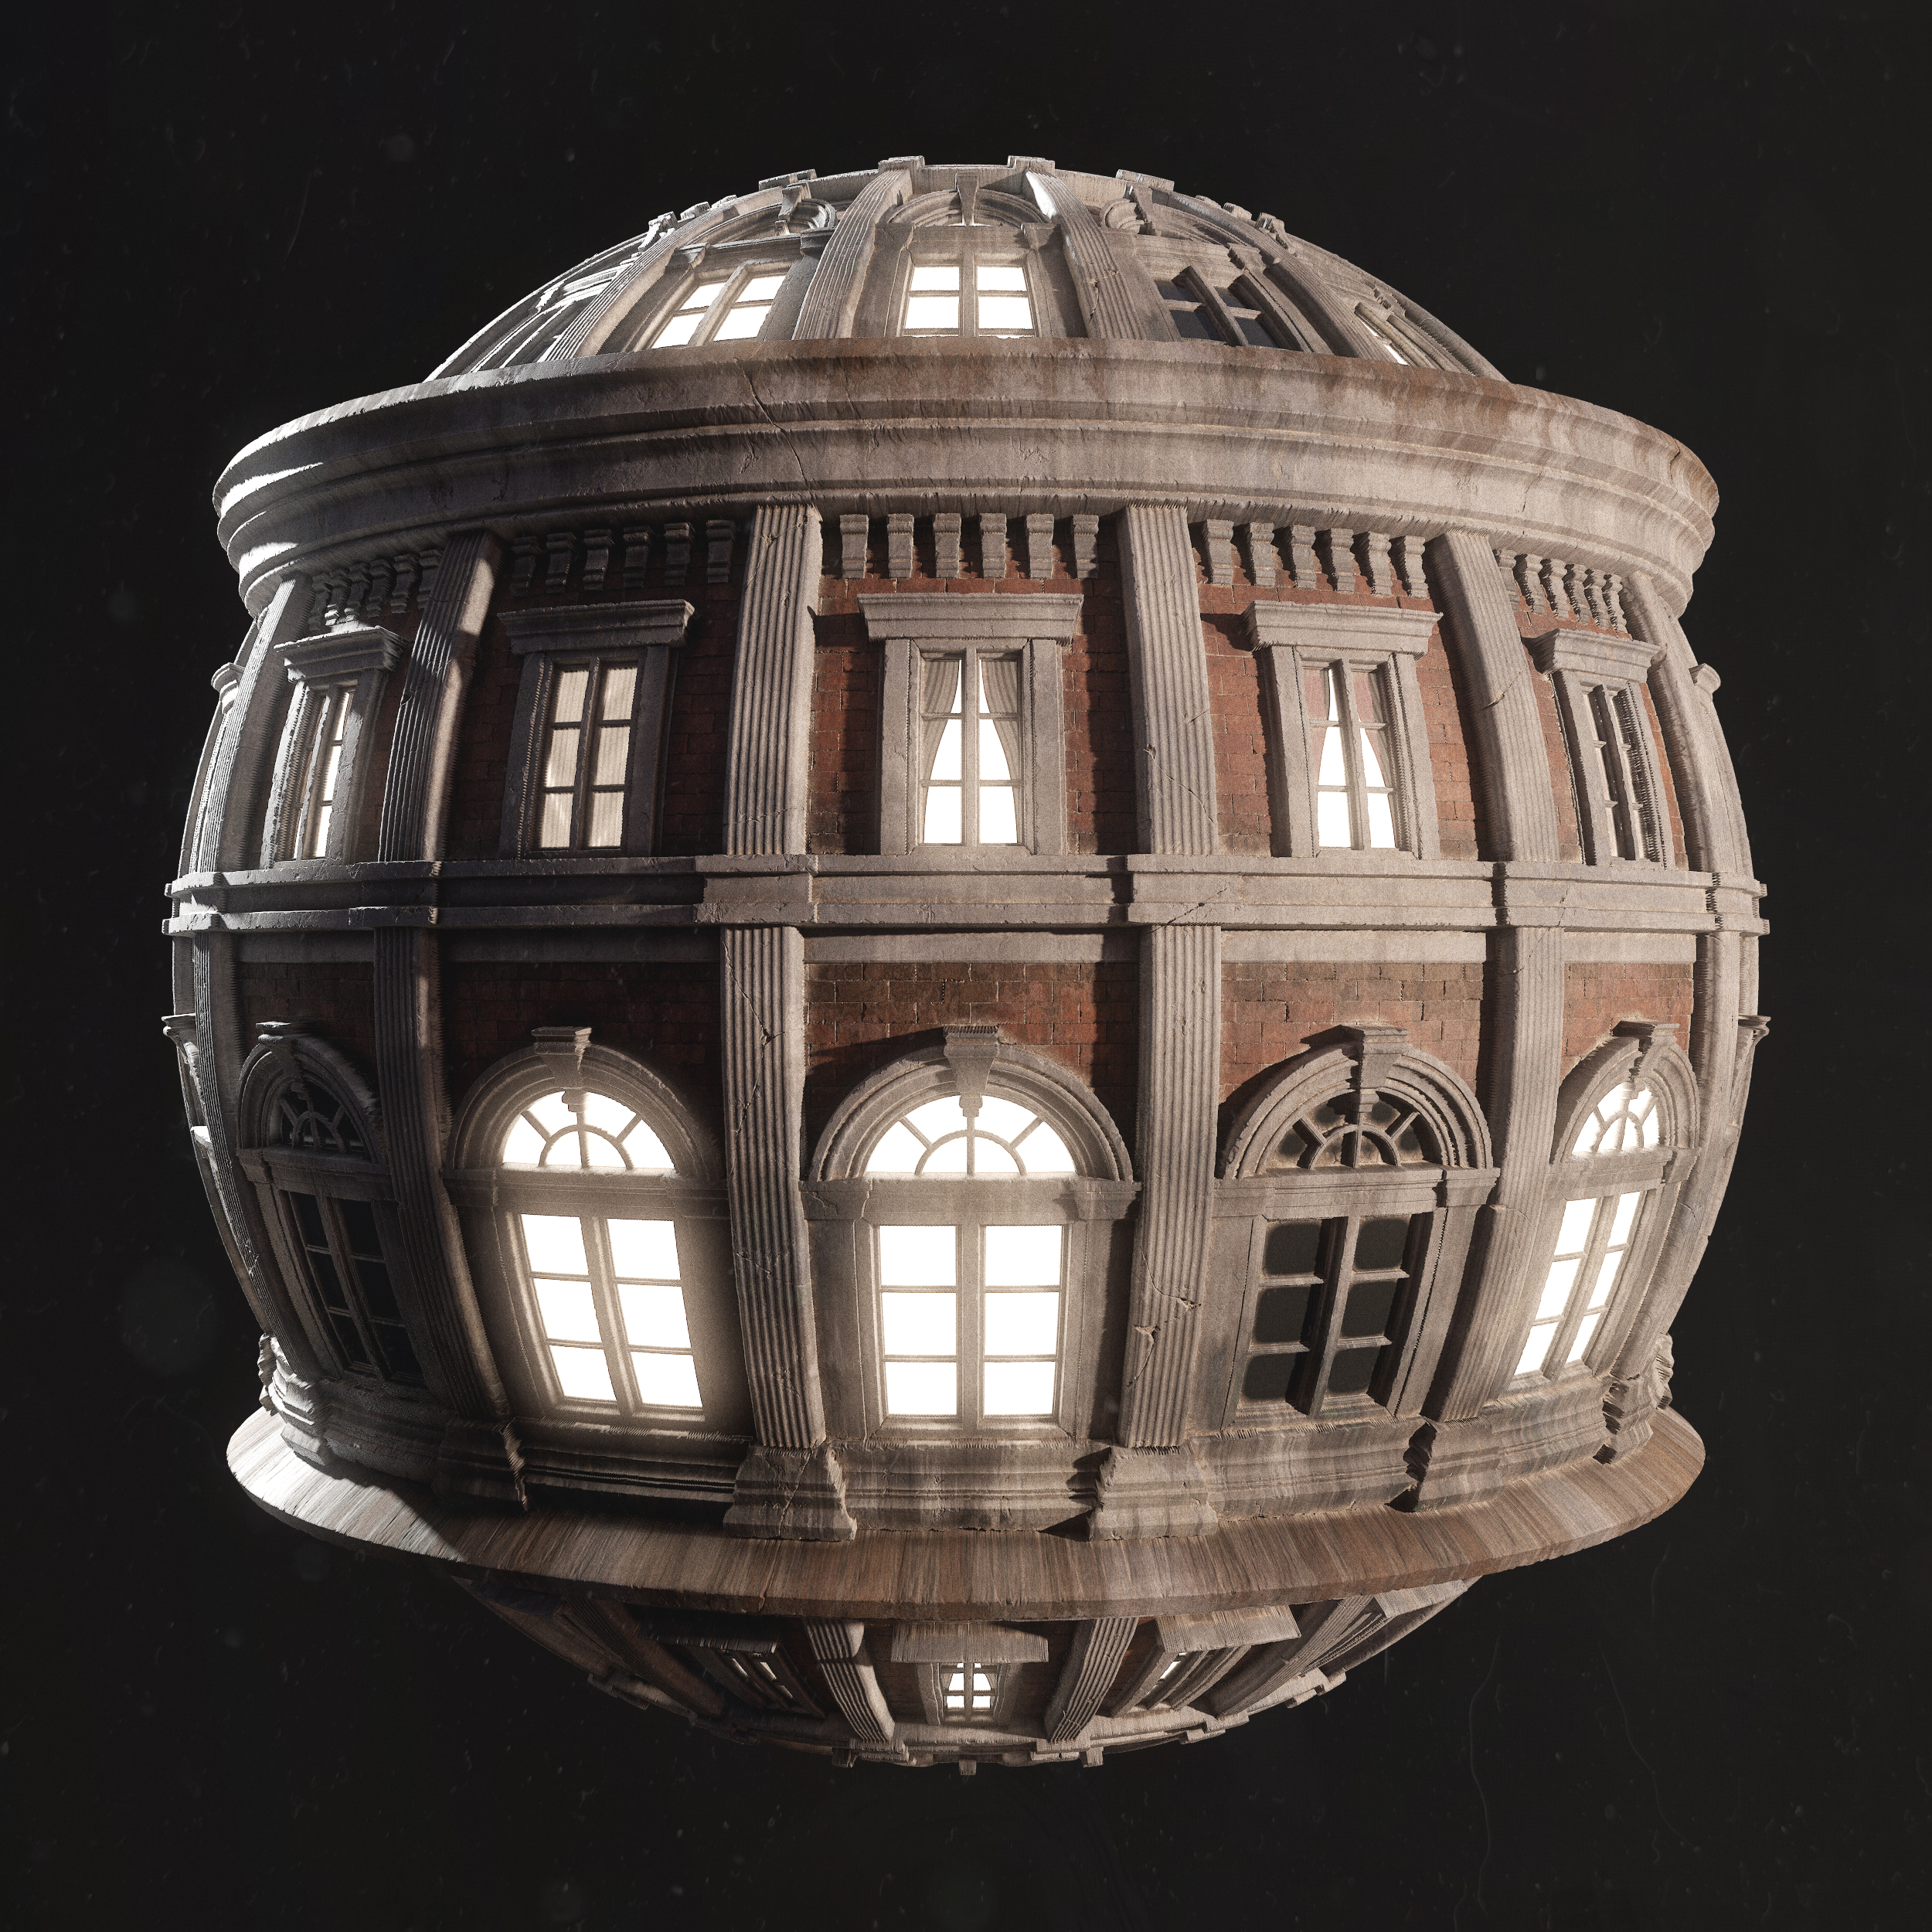
And here is our final render with some very small Photoshop tweaks, which you can get creative with.
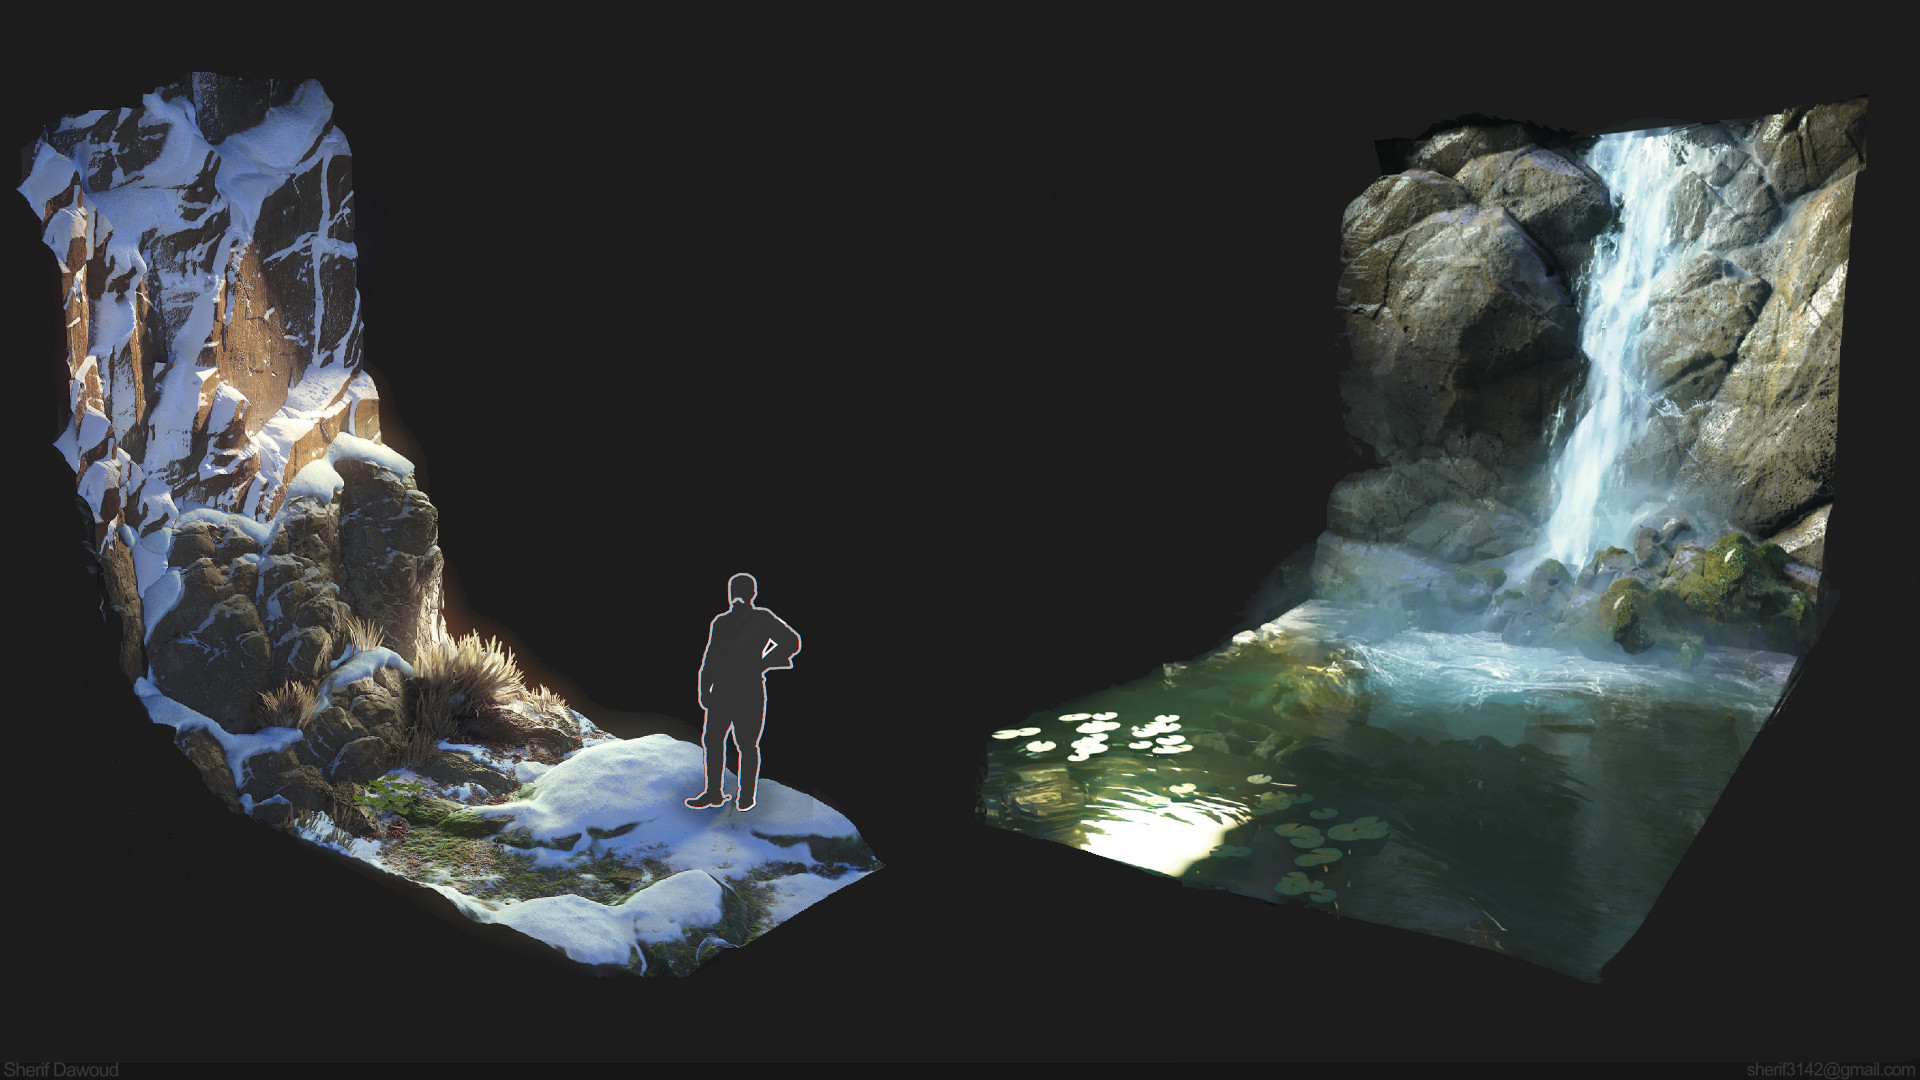
Lighting: Environment Scene Setup
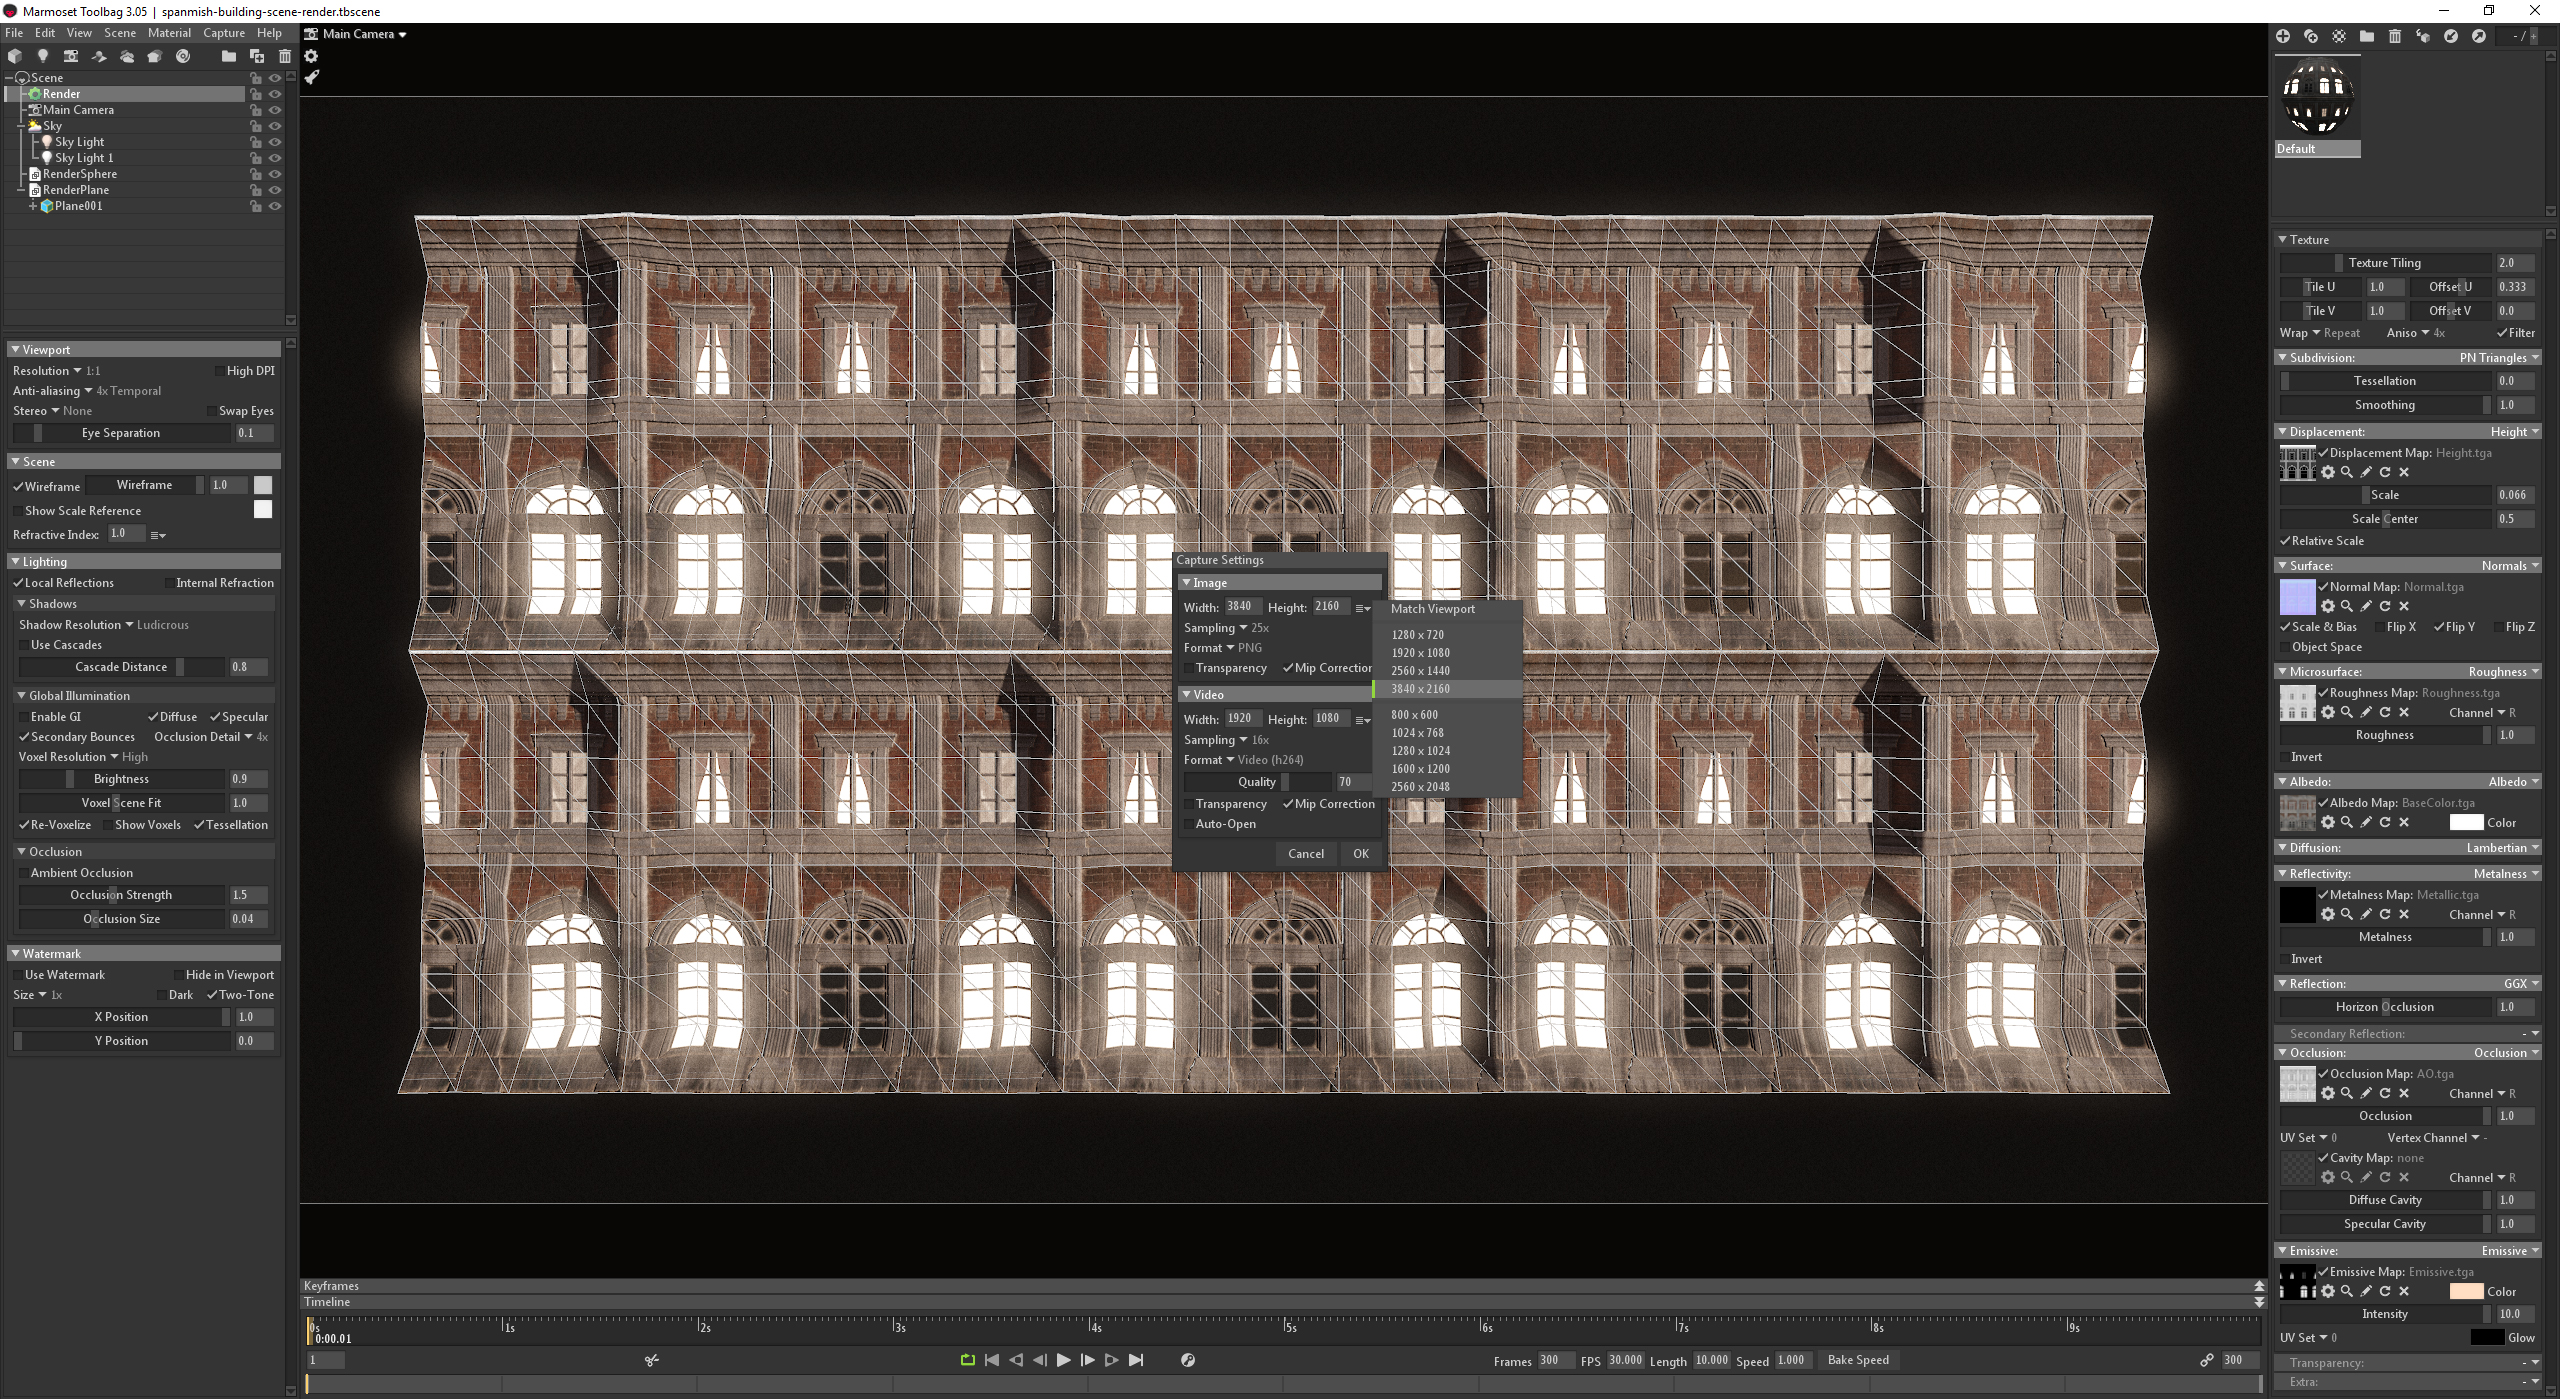
For this section, I’ll be rendering a full scene made up of planes with the same material applied and copy over my Post Effects from the sphere scene. I use a regular, mildly tessellated plane. However, you can use any given mesh. For example, curved planes work very well for rocks and add interesting macro shapes when using a height map and tessellation. Be sure not to distort the mesh too much and keep the UV’s straight so the texture can tile properly. This ensures that the mesh won’t break when using displacement. When copying over the settings from our sphere project, make sure to change the resolution in Capture Settings to a 16:9 ratio by setting it to 3840x2160px. The Texture Tiling for the plane should be set to a value of 1 in both Tile U and Tile V, whereas this can vary on a sphere since the curved surface will distort the shapes.
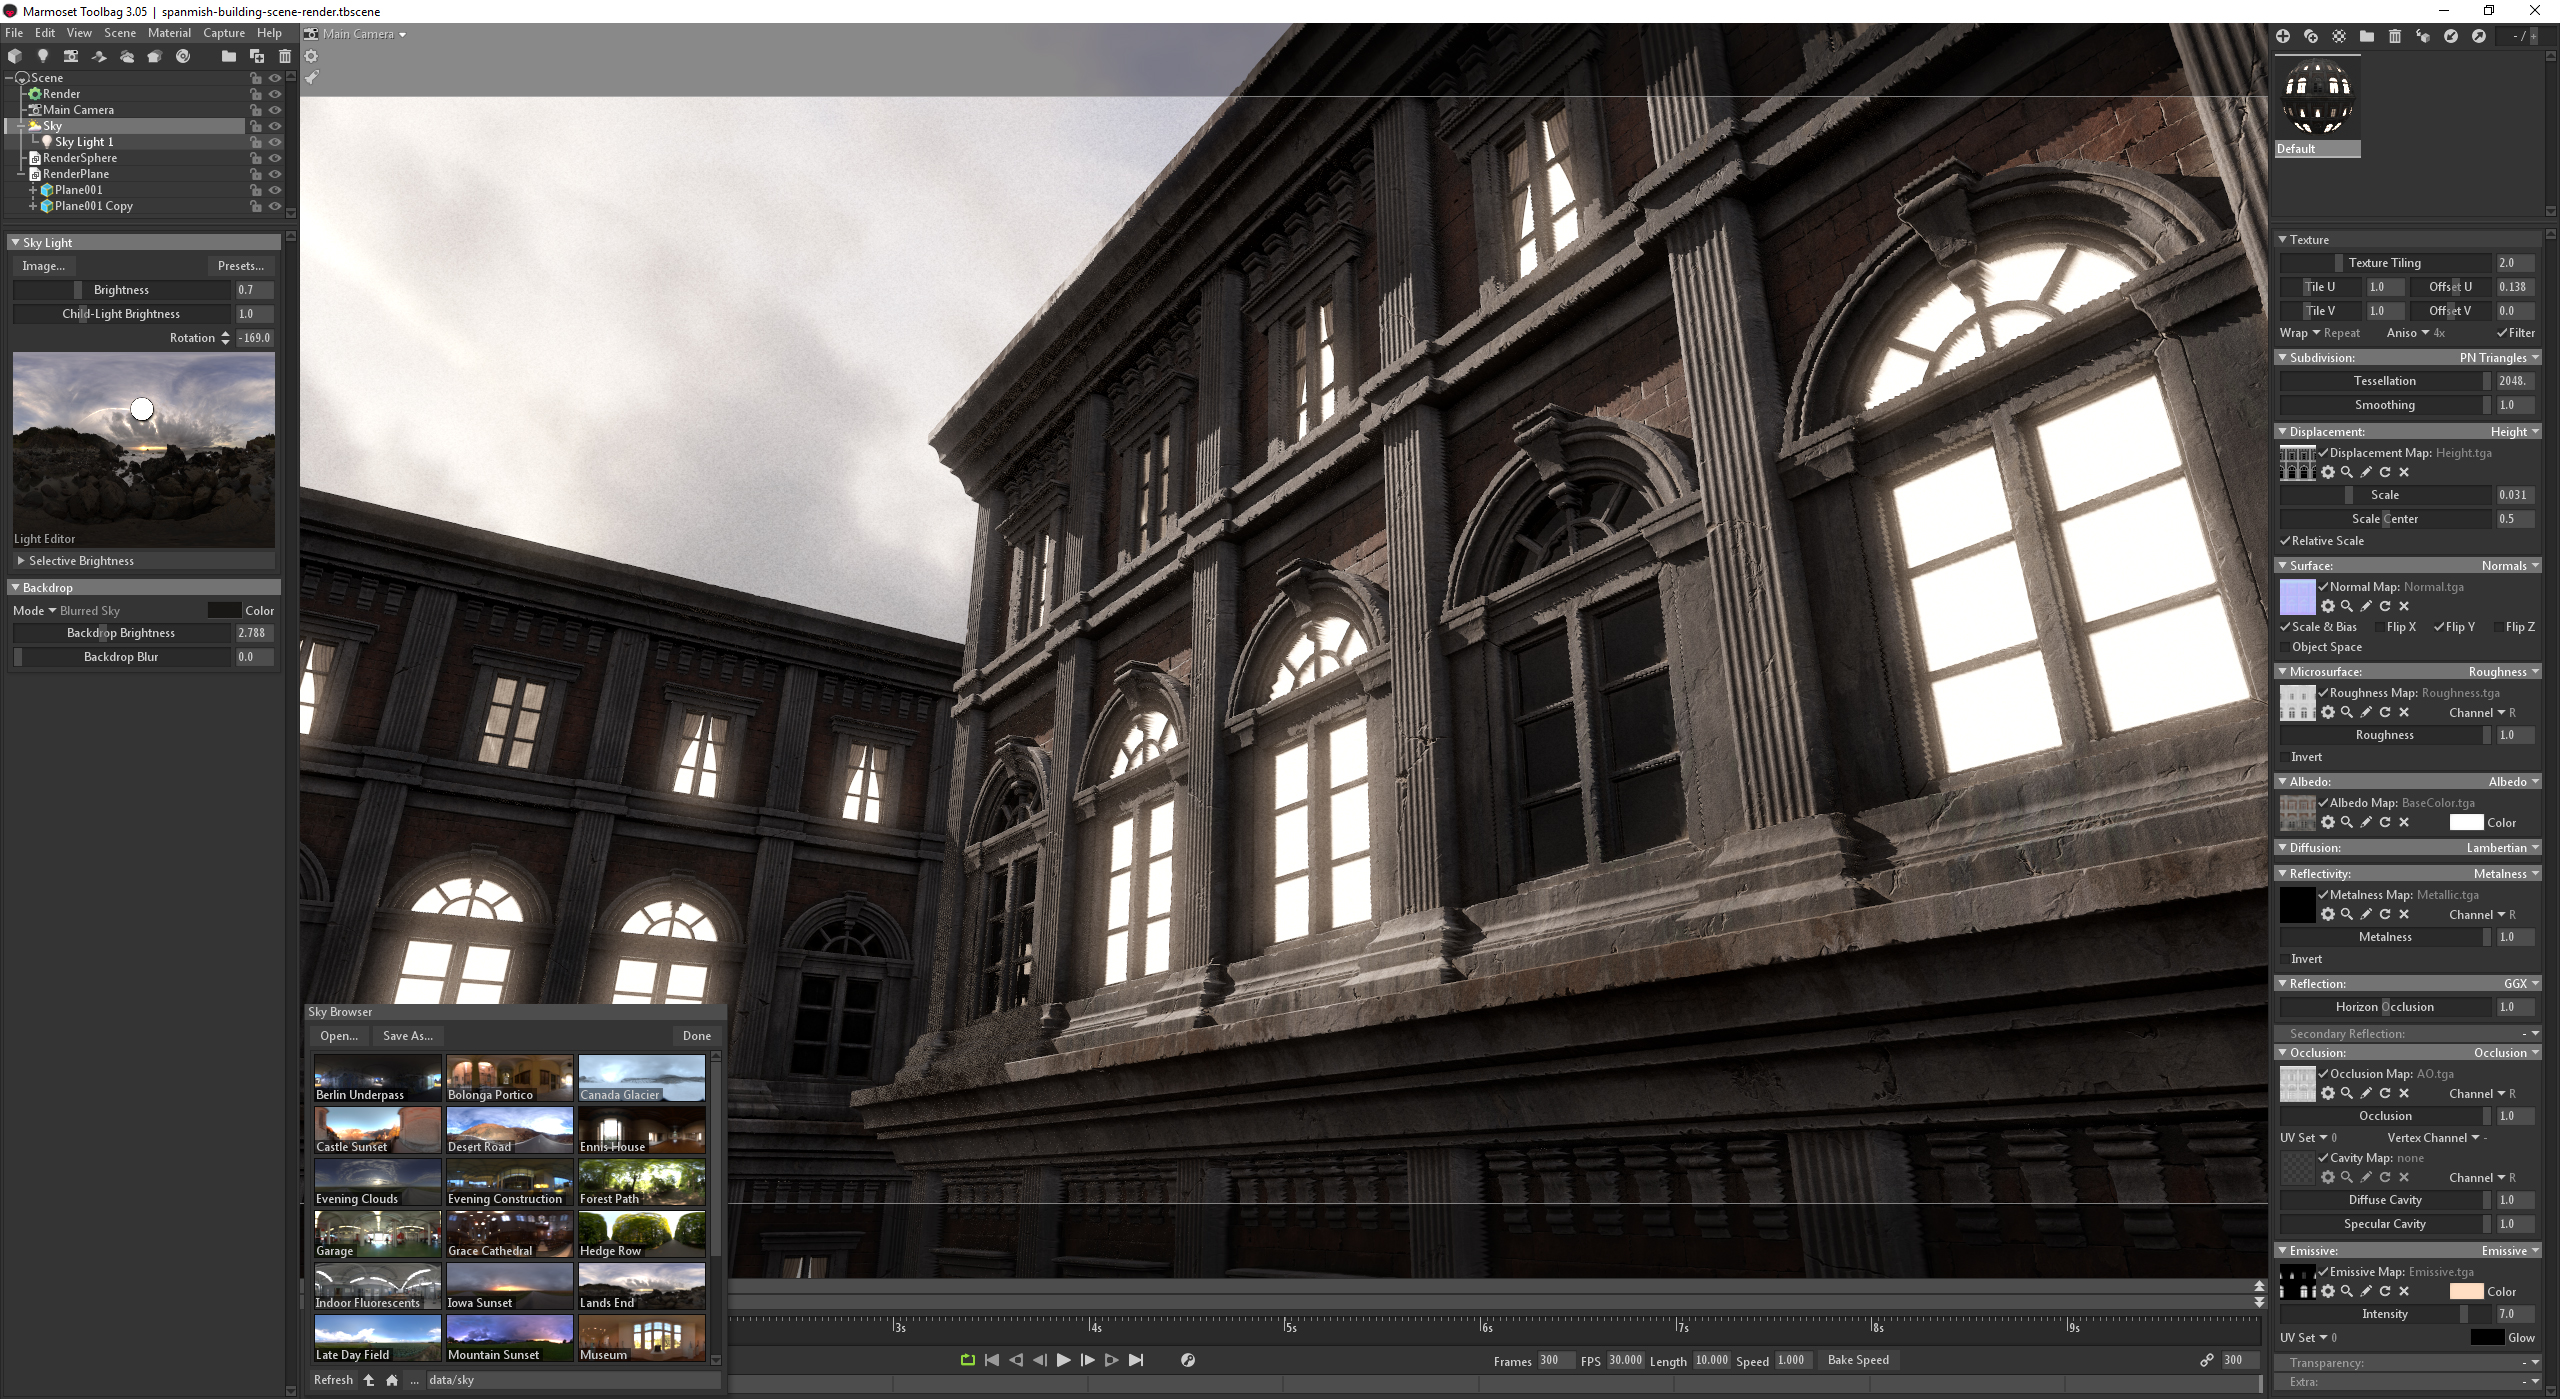
In this case, I changed the Sky Preset to Lands End and set the Backdrop to Sky while repeating the same workflow with the Directional lights. This Sky will work better for our scene since the sun is higher. Be sure to uncheck Cull Back Faces in the Mesh settings to get proper shadows when projecting the light behind one-sided planes.
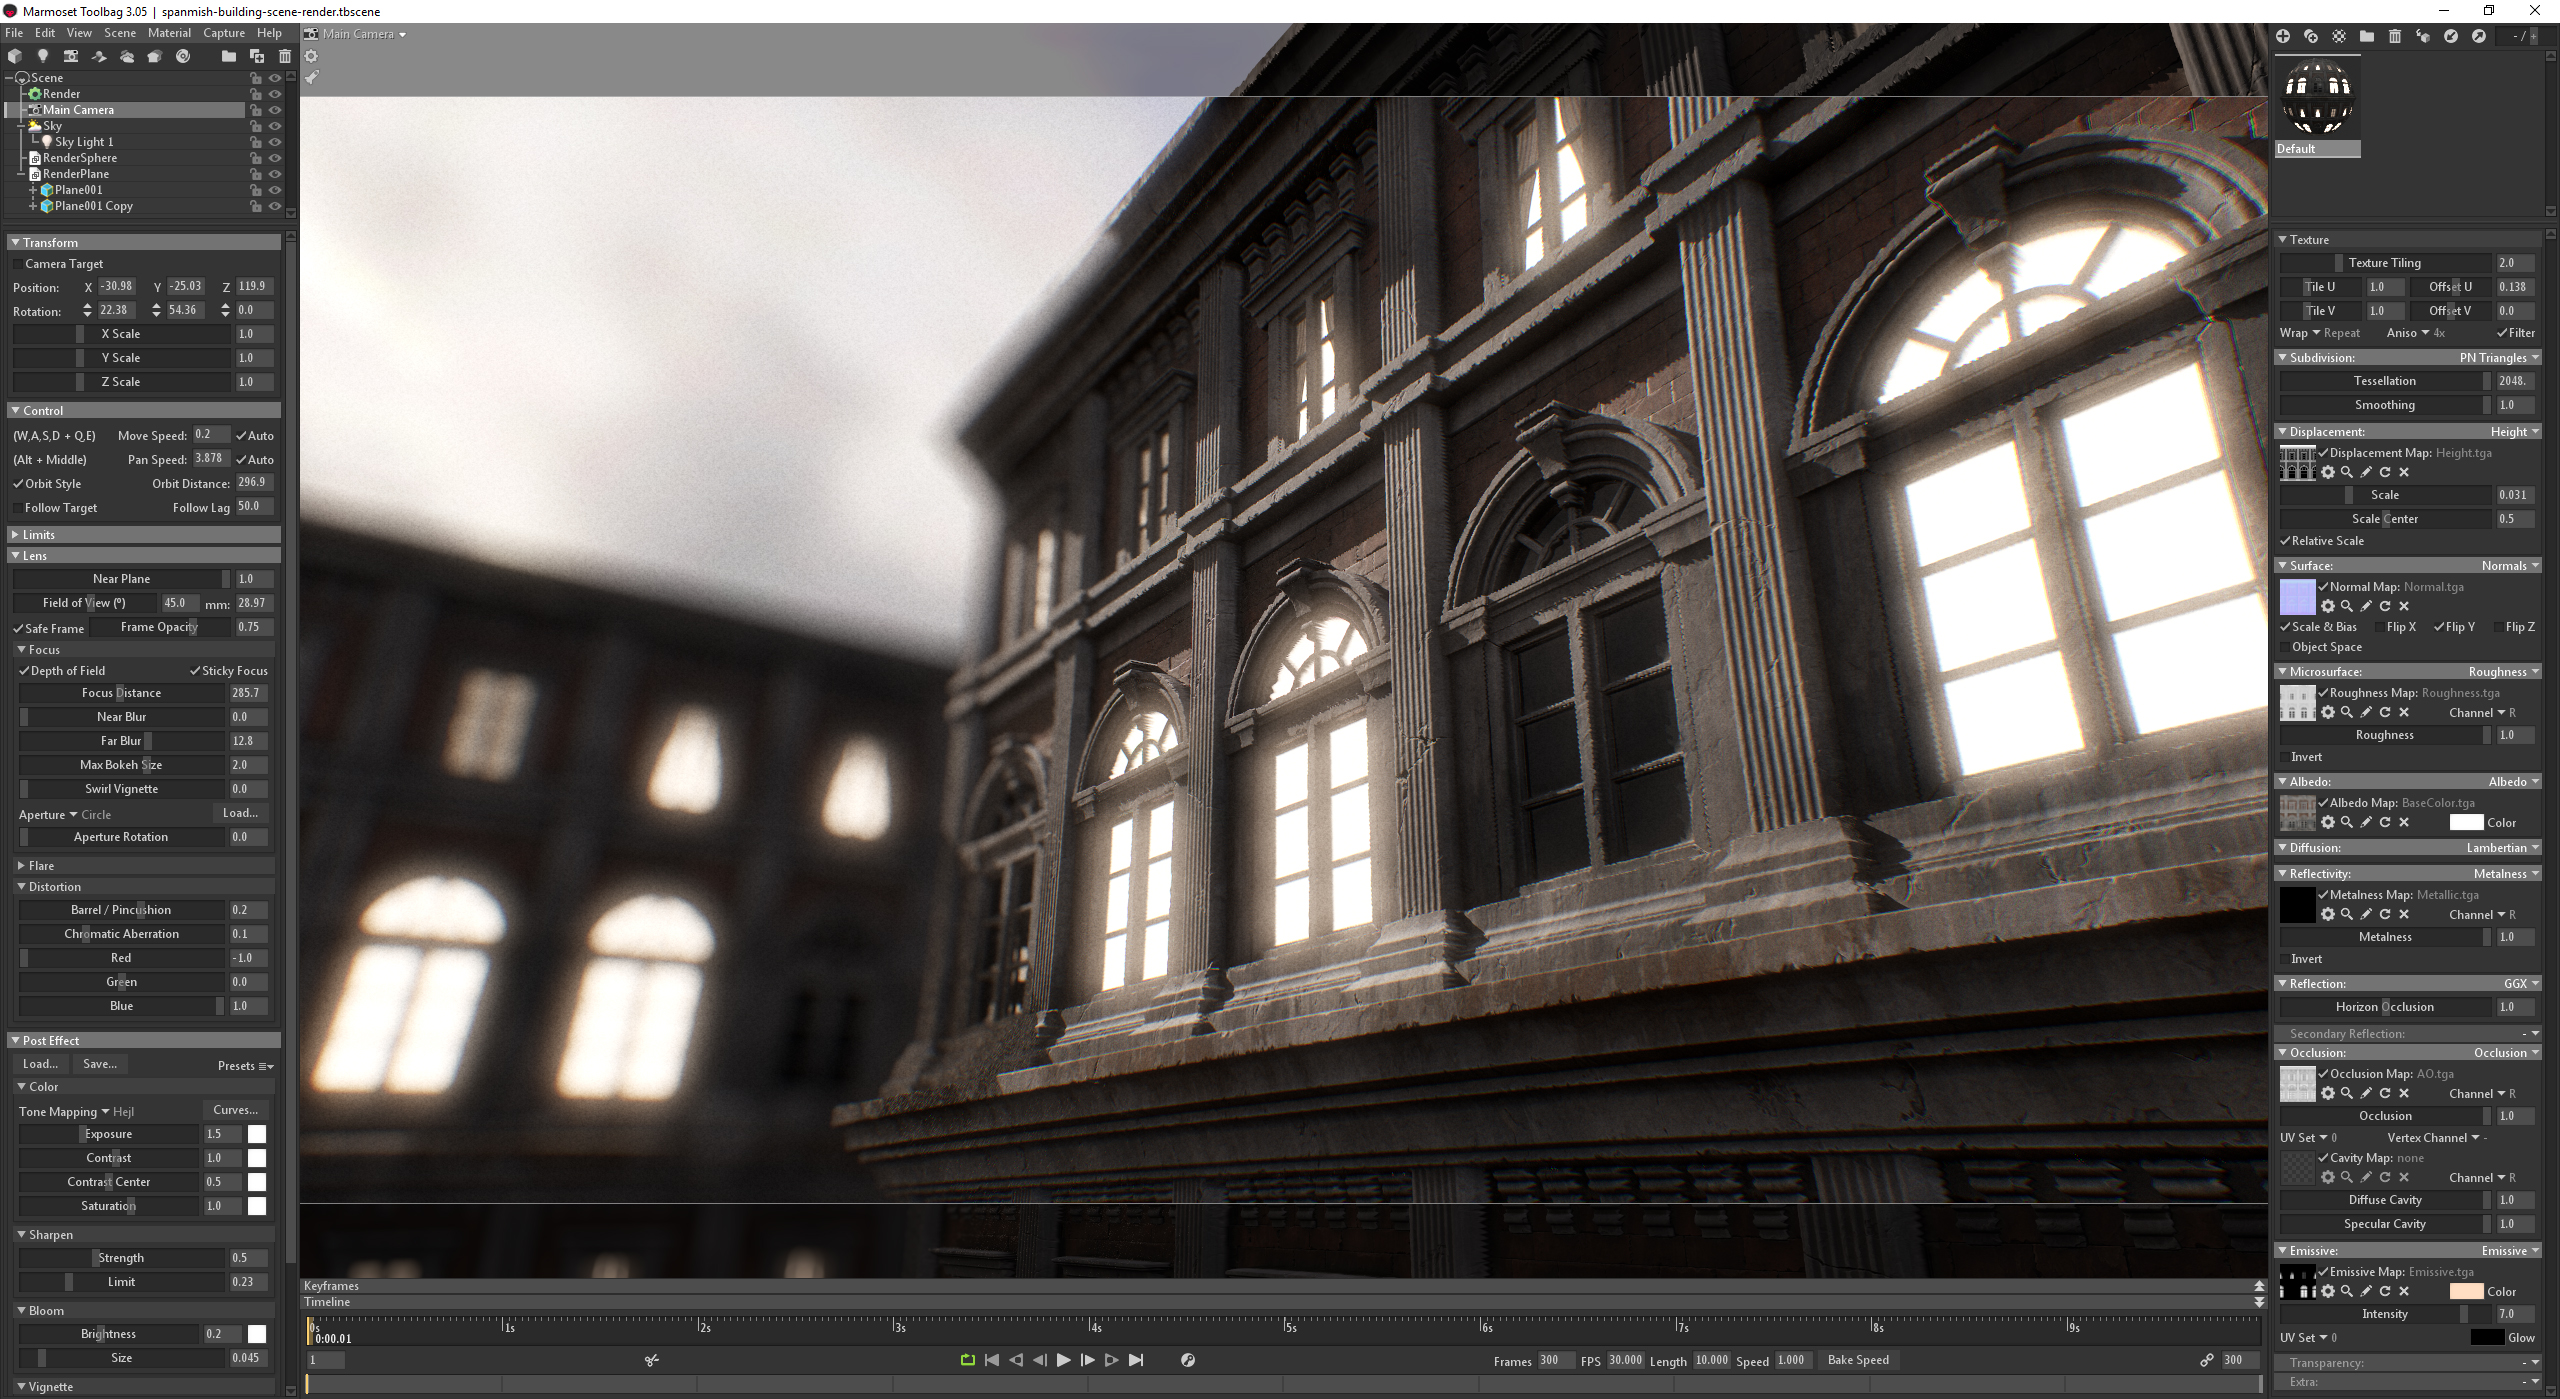
For this scene, the Render settings stay the same, only with Global Illumination reduced to 0.8. I enabled Depth of Field under Focus in the Camera settings. You can middle-mouse click where you want your camera to focus and check the Sticky Focus option if you want to keep the focal point fixed on that location. Otherwise, the focus will follow the camera once you move it. Under Distortion, I added a small amount of Pincushion and Chromatic Aberration. Lastly, I added a little bit more Bloom.
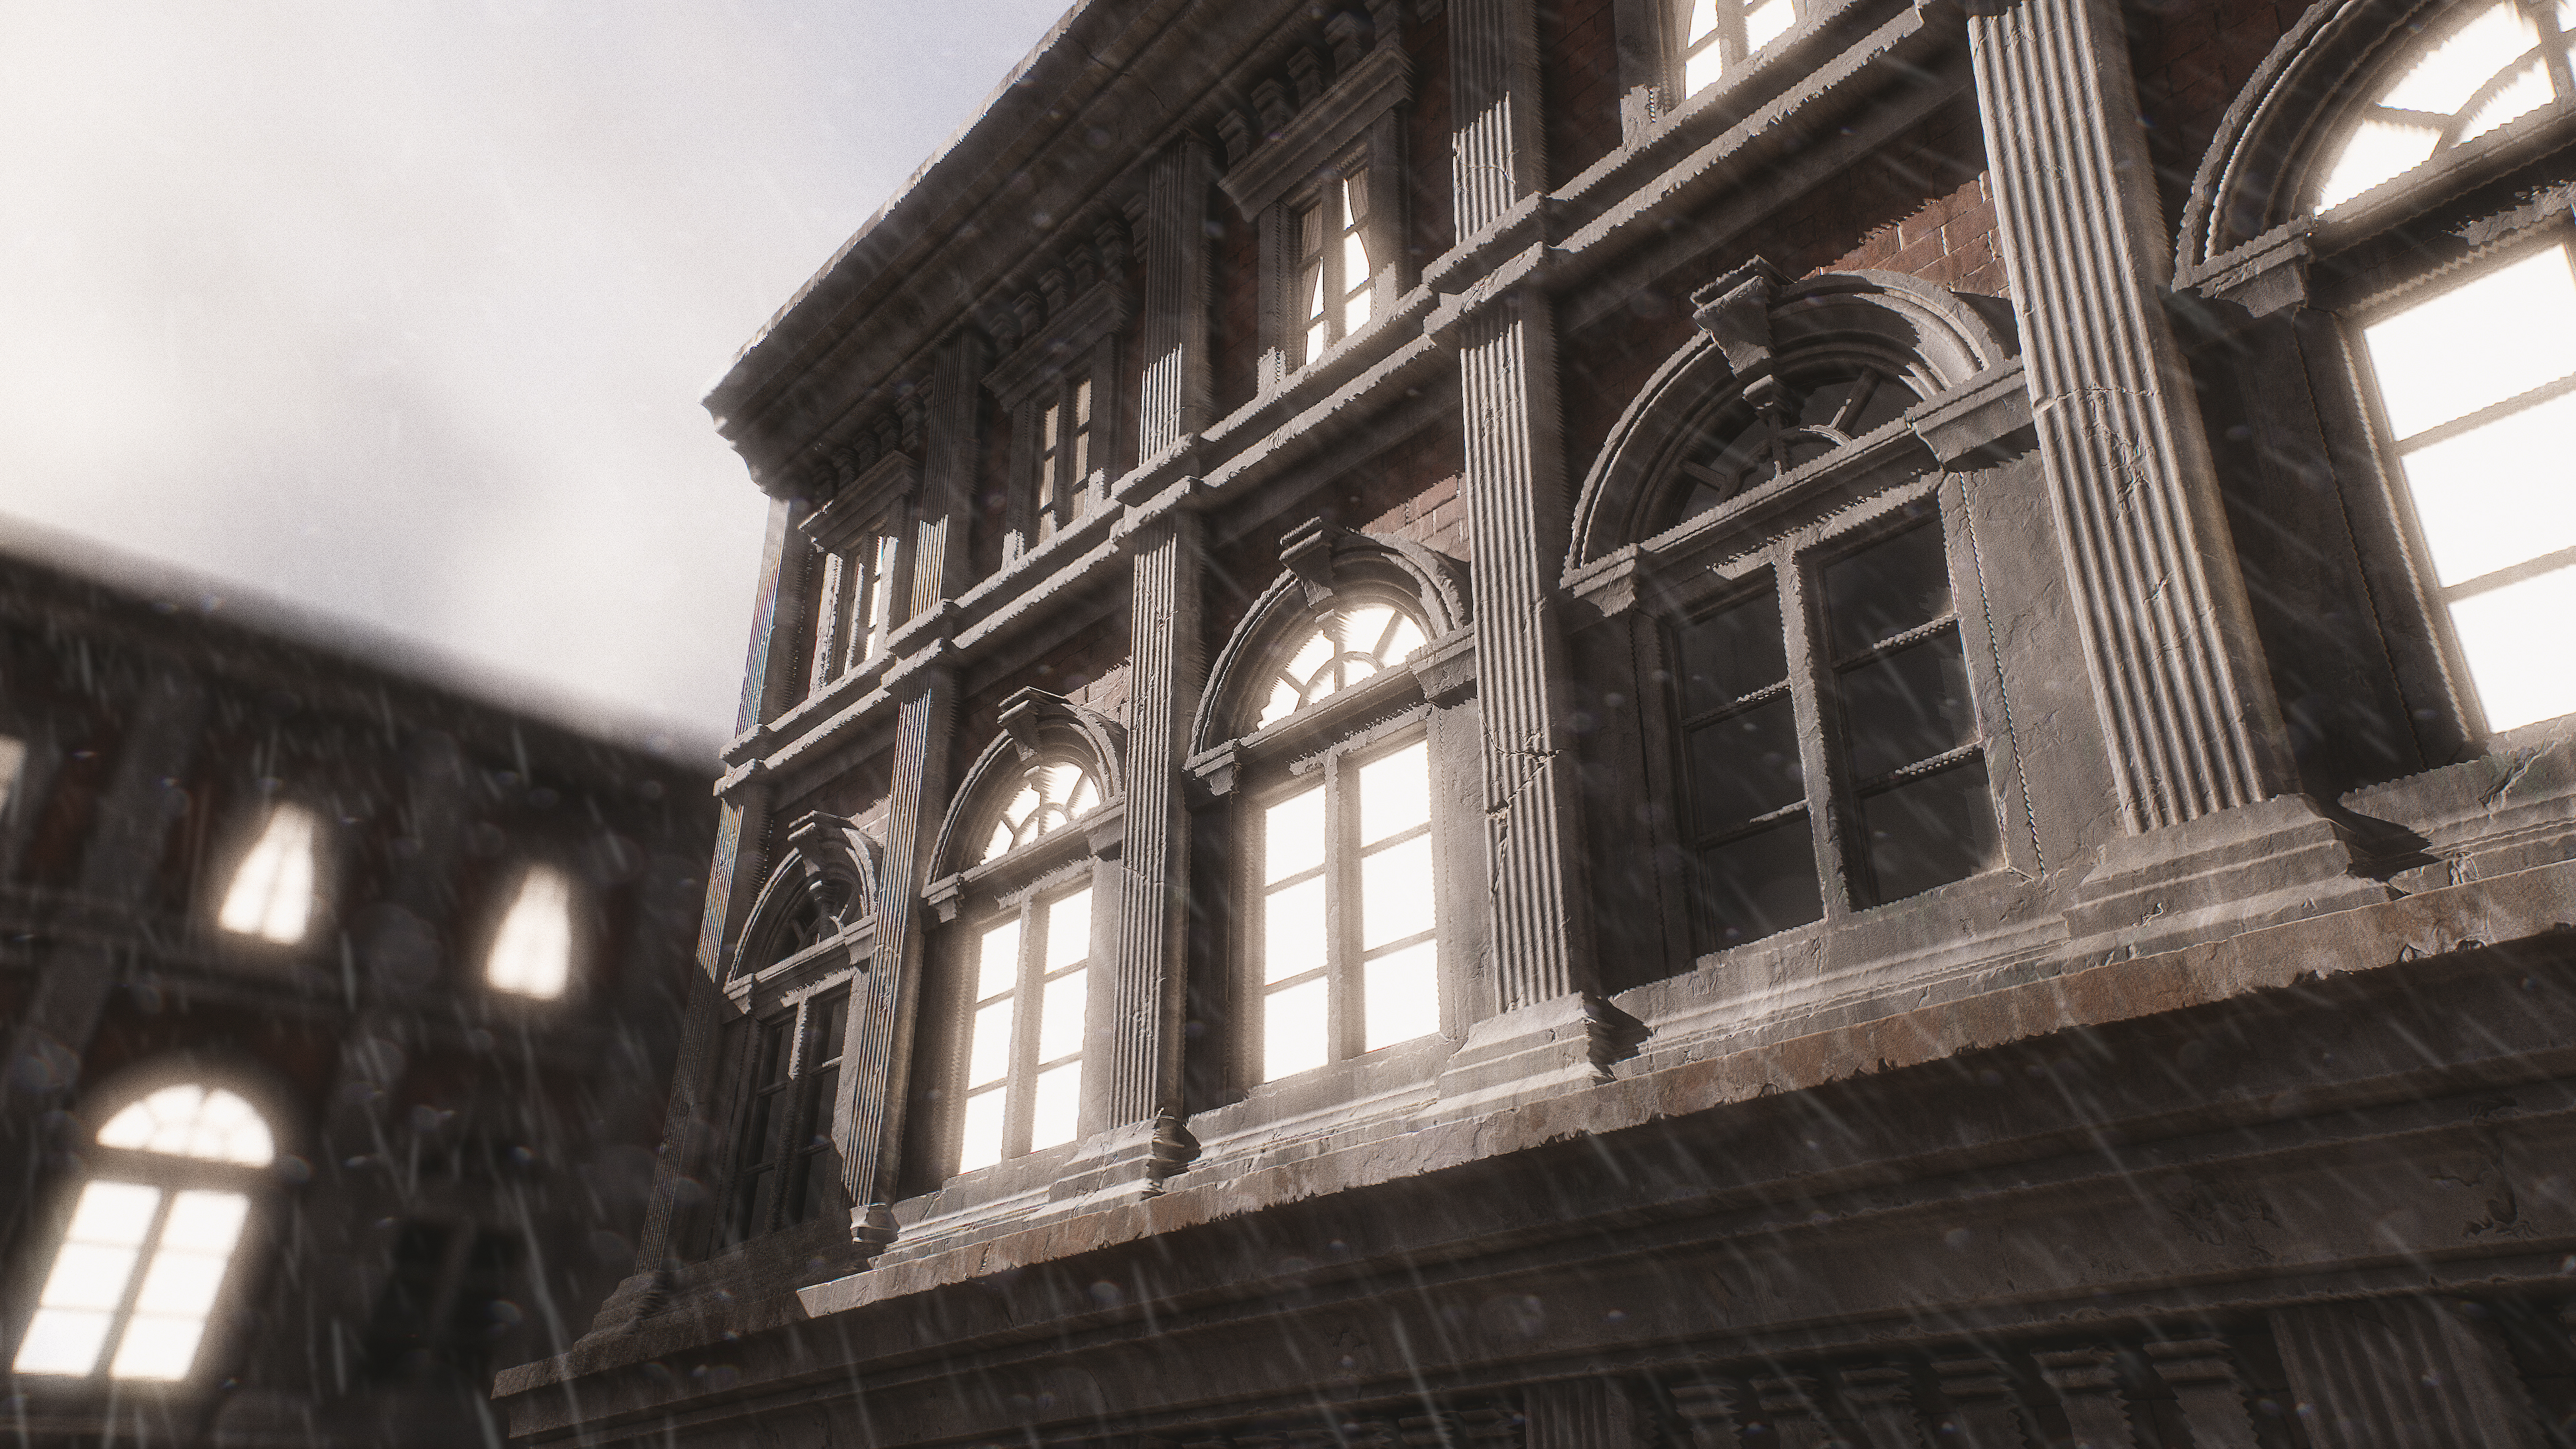
And that’s it! We have everything set up, so now we just need to increase the quality to the maximum and render out our final image. Once again, I’ll make some small corrections in Photoshop like adding a rain effect and some lens dirt.
I hope you found this tutorial useful! A huge thanks to the Marmoset team for letting me do this and thank you for reading it!
We would like to thank Enrico Tammekänd for writing this article. You can watch Enrico’s previous livestream on rendering the Spanish Building material in Toolbag and find more of Enrico’s fantastic materials on Artstation.
Learn how you can create your own elaborate material renders using Toolbag’s free 30 day trial. If you’re interested in collaborating on a tutorial or breakdown article, please send us your pitch, along with a link to your artwork, to submissions@marmoset.co.