
Introduction
Hello, my name is Mikhail Toropov and I’m a 3D Character Artist at a game outsourcing studio. During work hours, I mostly specialize in 3D sculpting. However, during my spare time, I really like to go through the full cycle of creating 3d art, encompassing high poly, optimization, texturing, and rendering. In this article, I’d like to share with you my new, funny artwork and demonstrate some tips and tricks about how I set up and rendered the character using Toolbag.
CONCEPT ART
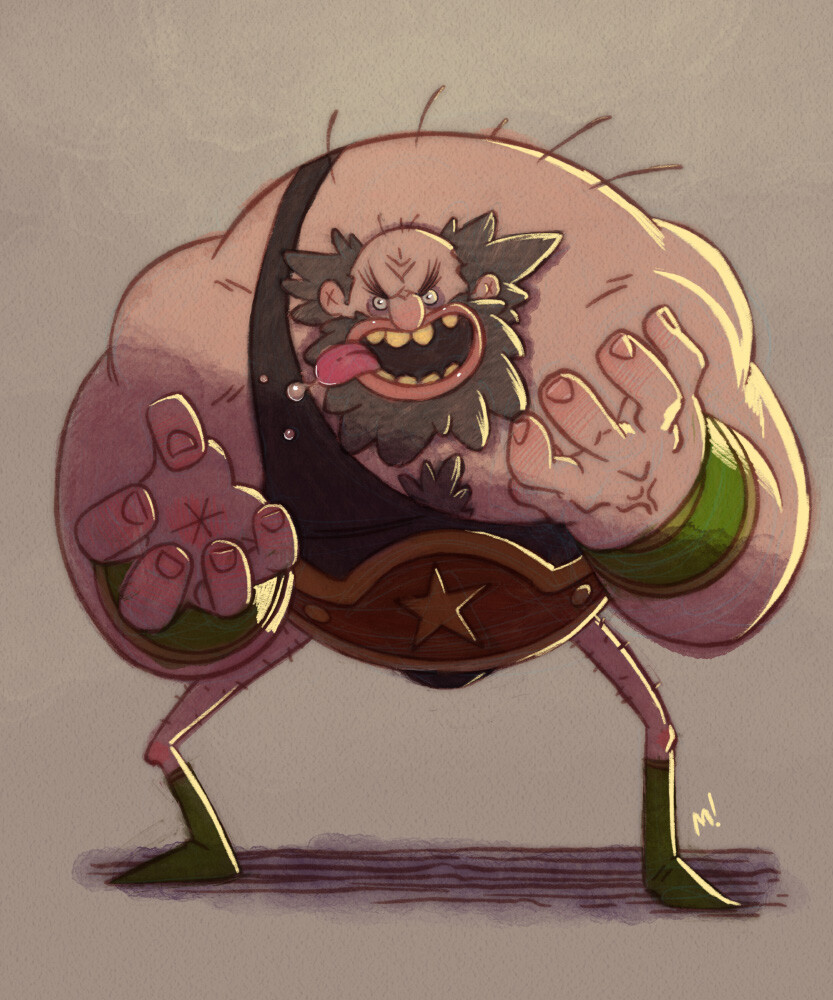
One day, I saw this amazing concept by Mike Henry on Artstation and just fell in love. I wanted to create him in 3D immediately!
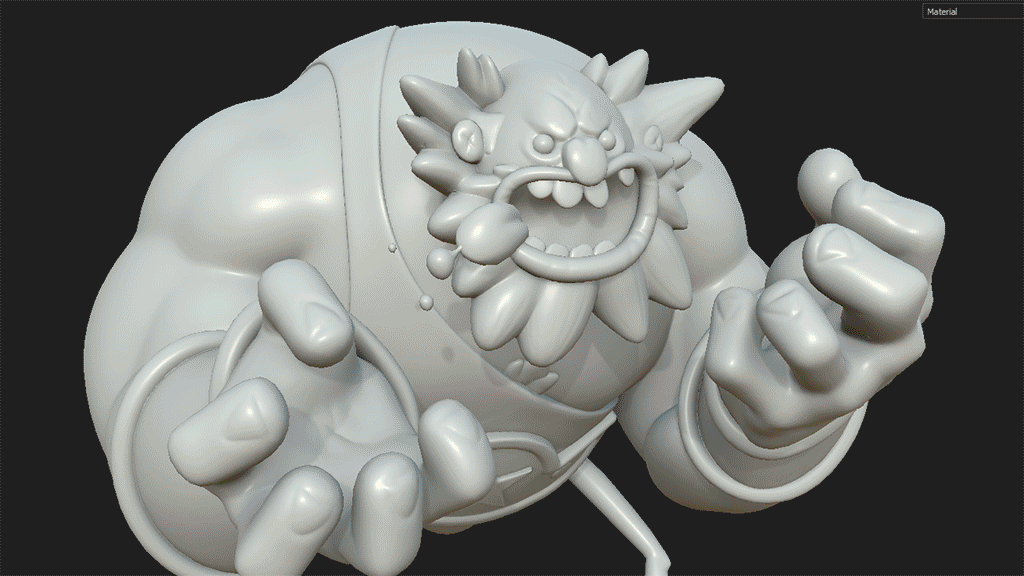
SCULPTING
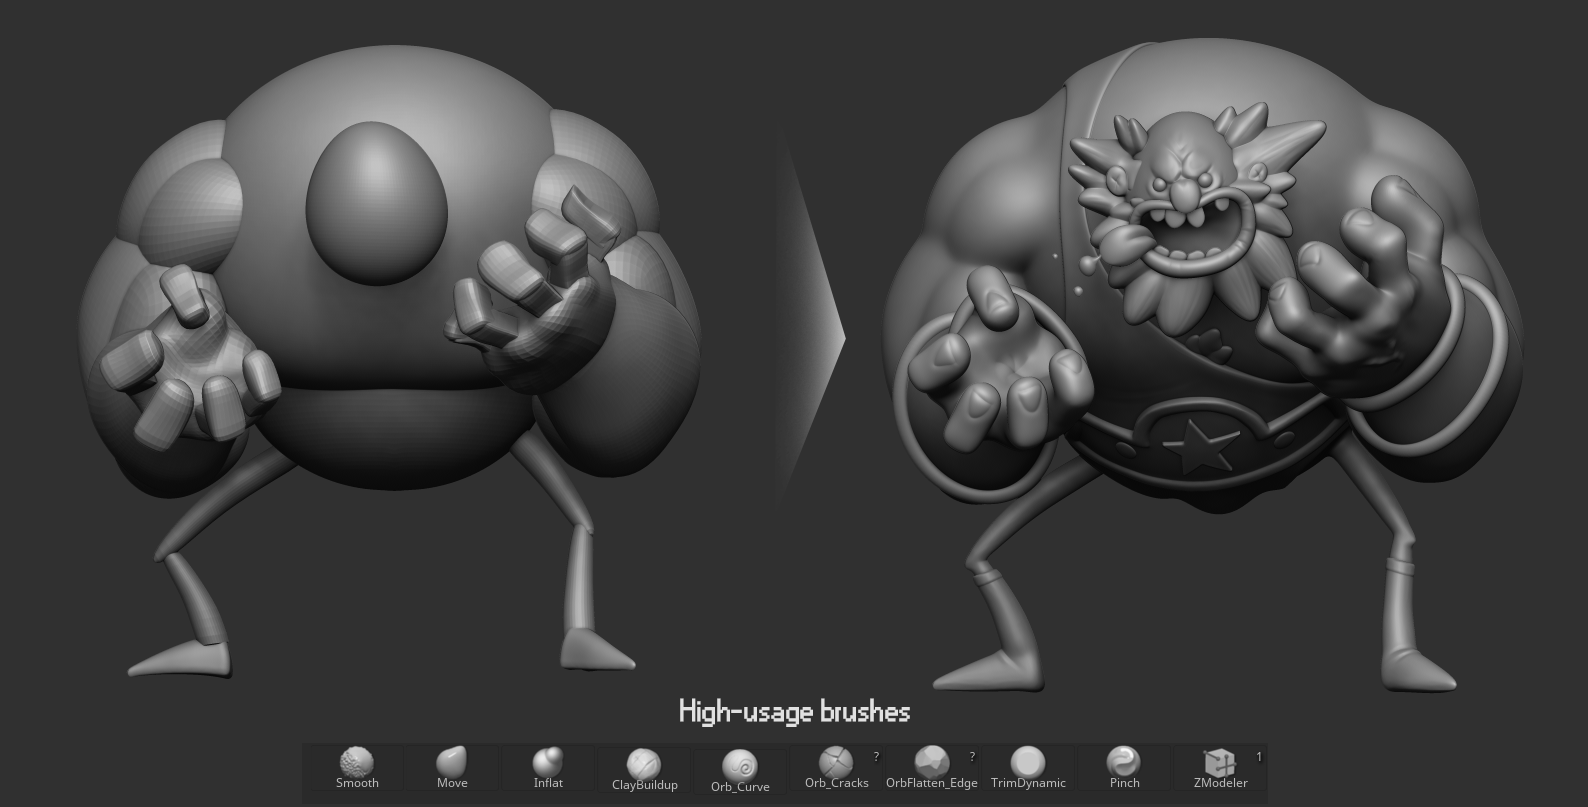
I use ZBrush to sculpt my characters. The character is made up of a bunch of simple forms, so I created a base using some sphere and box meshes. This stage of creating basic forms and a readable silhouette are very important and will be the best part of the result. At this stage, I used the Move Brush, Transpose Brush, and the Smoothing Brush to help shape the character. Then, I merged some objects and used Dynamesh to start adding detail.
RETOPOLOGY & UVs
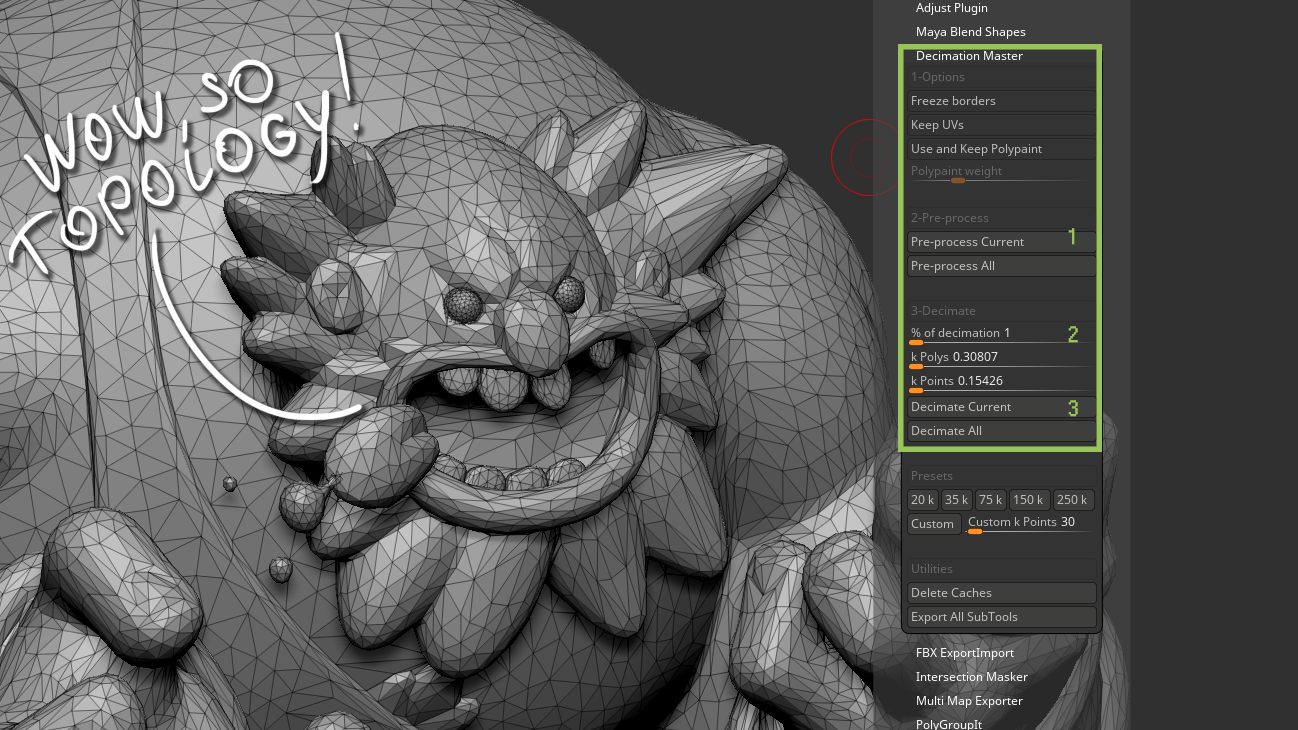
Since I didn’t want to create my model for animation or a game, I decided to save time and use Decimation Master. This helped me to create a low poly version in just a few clicks. It’s true that the generated result was a mess, but in my case, it would not affect the final render. The UV mapping process was auto generated as well using RizomUV. I baked the default maps in Substance Painter: Normal, World Space Normal, ID (from vertex color), Ambient Occlusion, Curvature, Position, and Thickness.
TEXTURING
Working on stylized art is more attractive to me, though I often create realistic styled art for work. For this project I wanted to blend the two styles, combining simple, cartoonish forms with realistic materials. My aim was to create materials similar to old plastic, clay, ceramics, and painted wood. The main rule was to use a heavily modified mask based on a Curvature map, and use the Metal Edge Wear Generator in Substance Painter to create damaged surfaces on protruding areas. My primary point of reference for this stage was the fantastic work of Borislav Kechashki.
RENDER SETUP
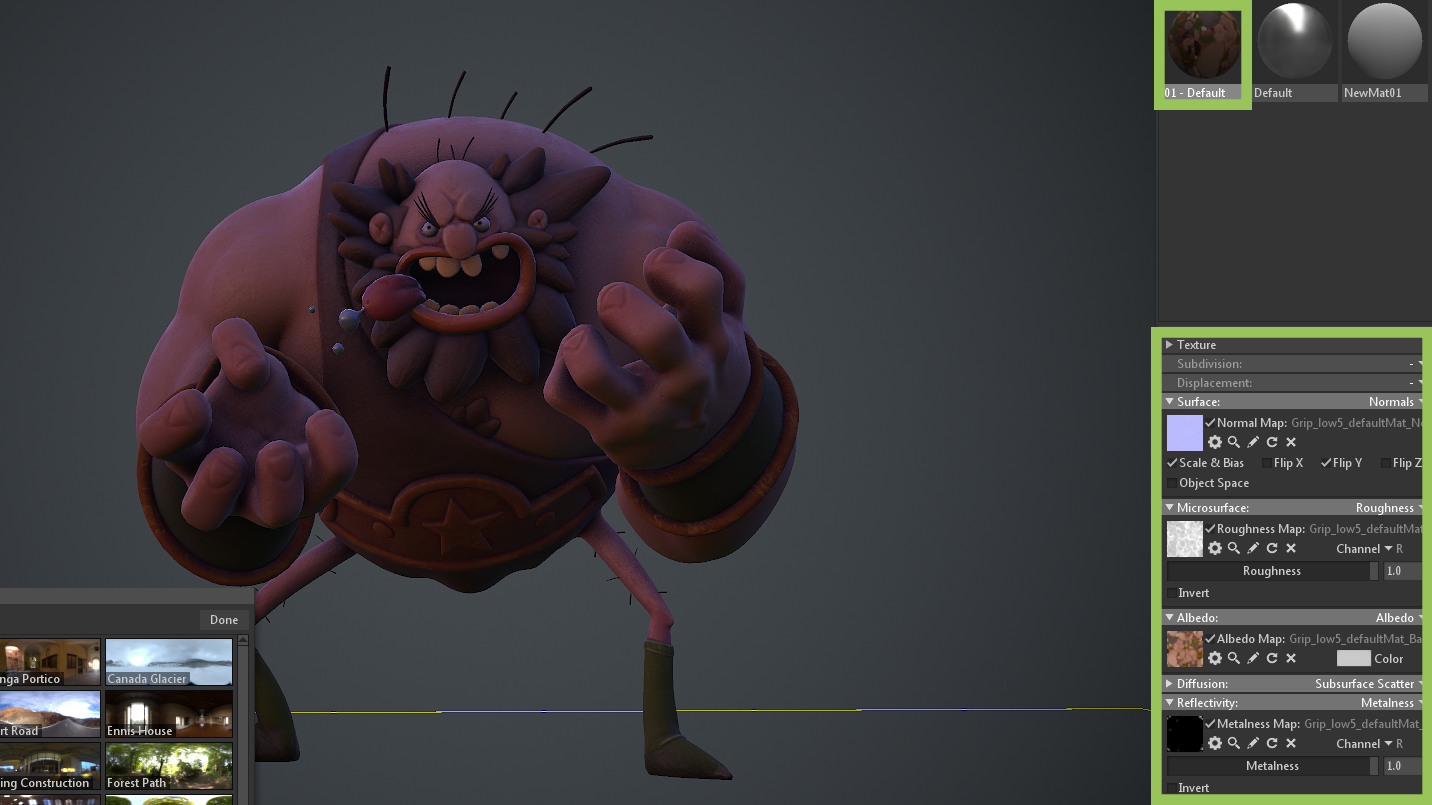
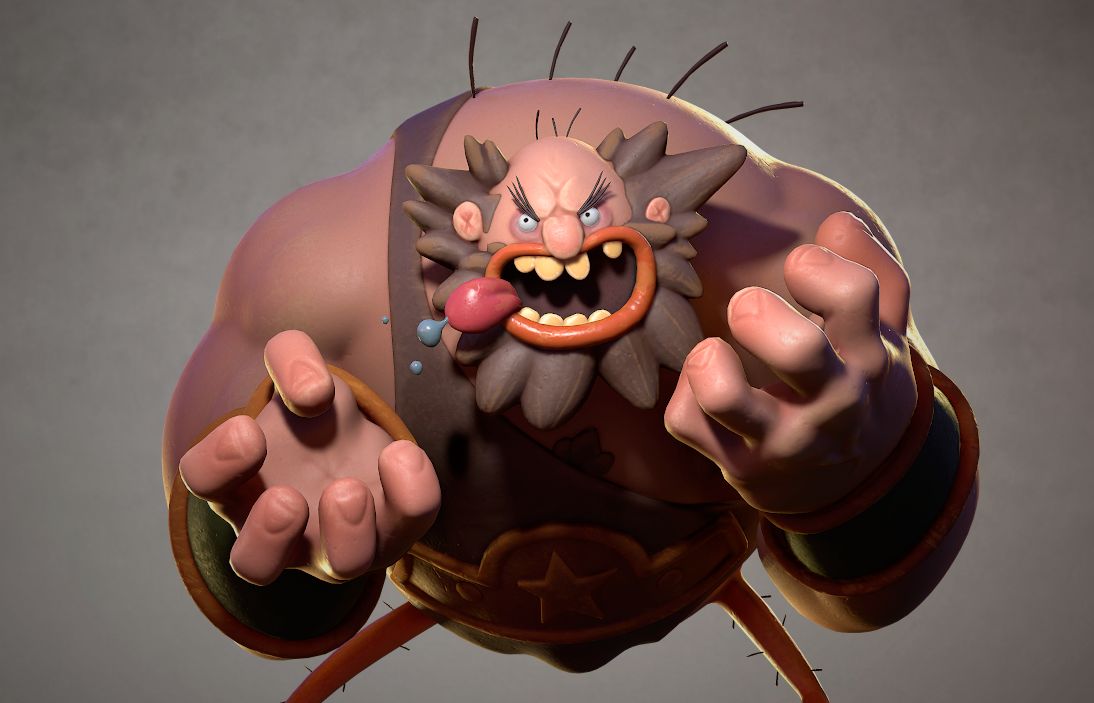
This is my final and favourite stage in the process. I find it really interesting to play with lights and shadows to come up with as many cool results as possible. After importing my model, I dragged and dropped my Albedo, Roughness, Normal Map, and Metalness textures into the material slots.
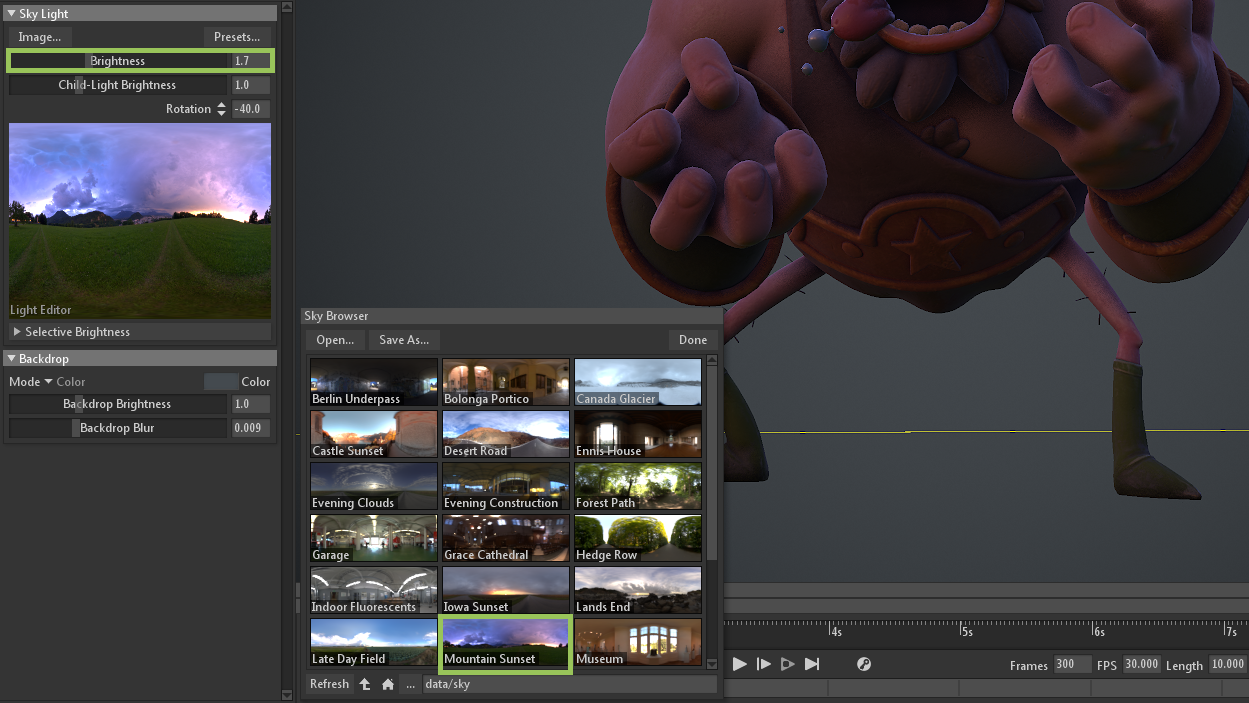
I selected the Mountain Sunset Sky Preset and set the Brightness to 1.7. I like this Sky Preset because it has a nice balance of cool and warm tones.
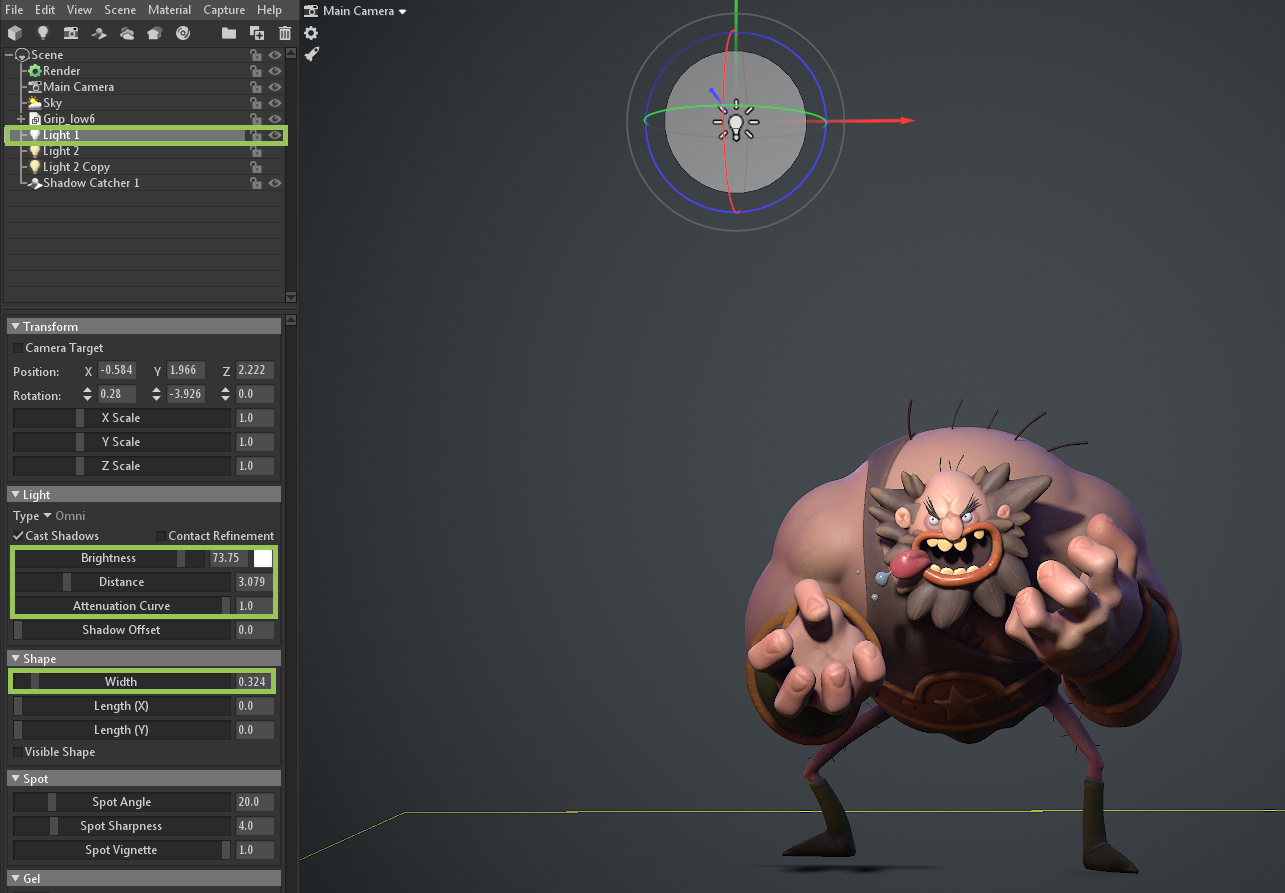
Next, I added an Omni Light to act as the main source of light and increased the Attenuation Curve to focus the attention on the character’s face and create stronger lighting at the top of the model.
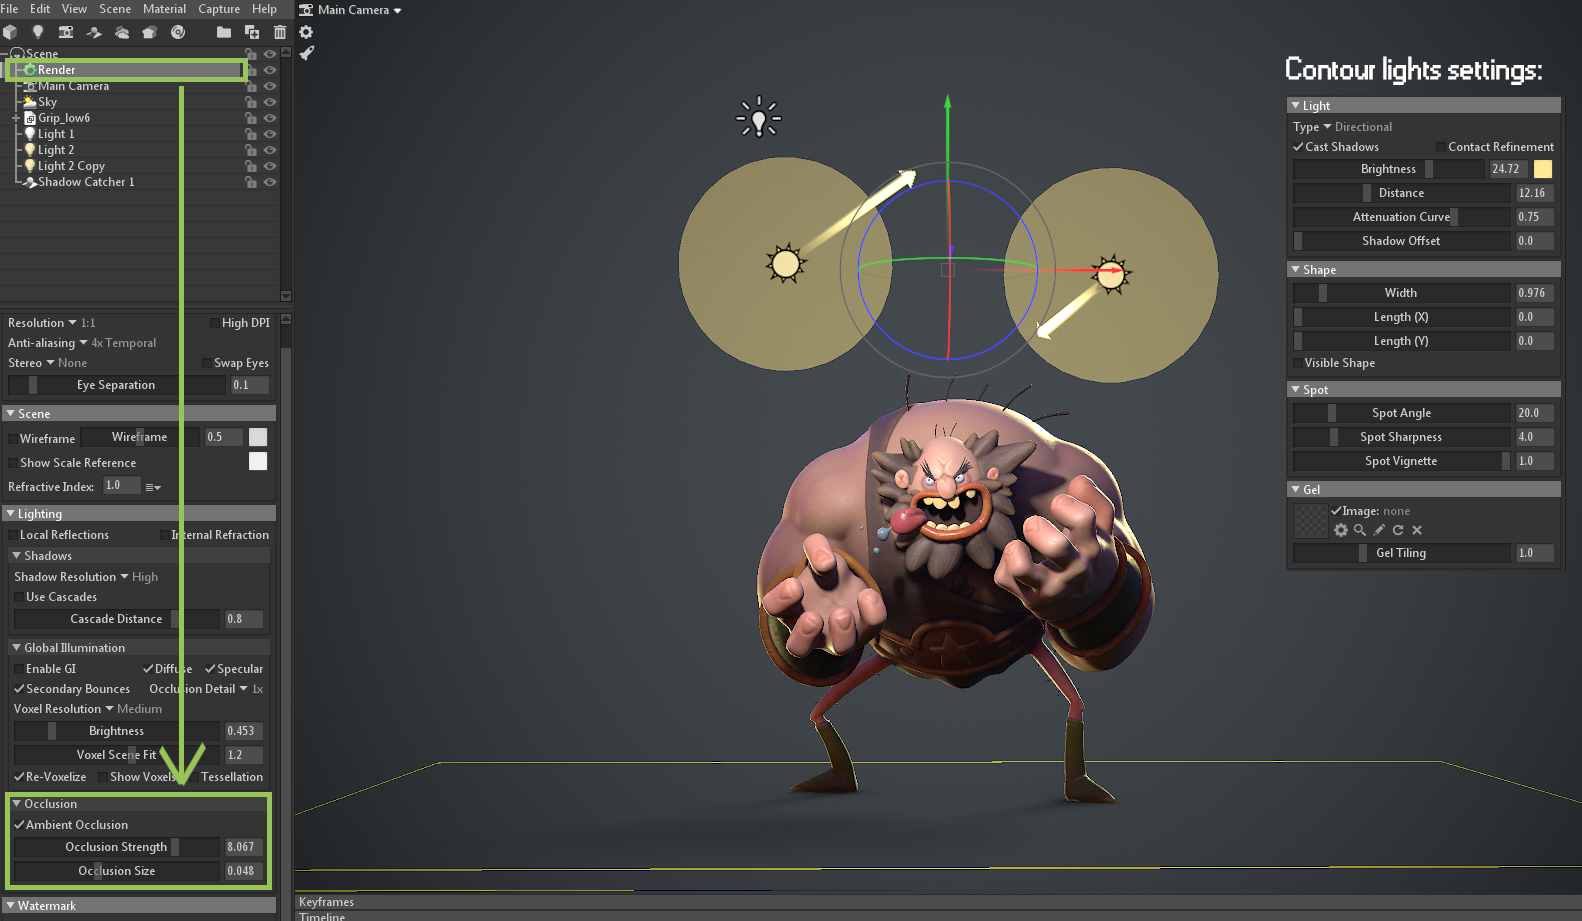
I turned on Ambient Occlusion in the Render properties, added a Shadow Catcher to the scene, and set up two Directional Lights to act as rim lights. These helped to accentuate the forms.
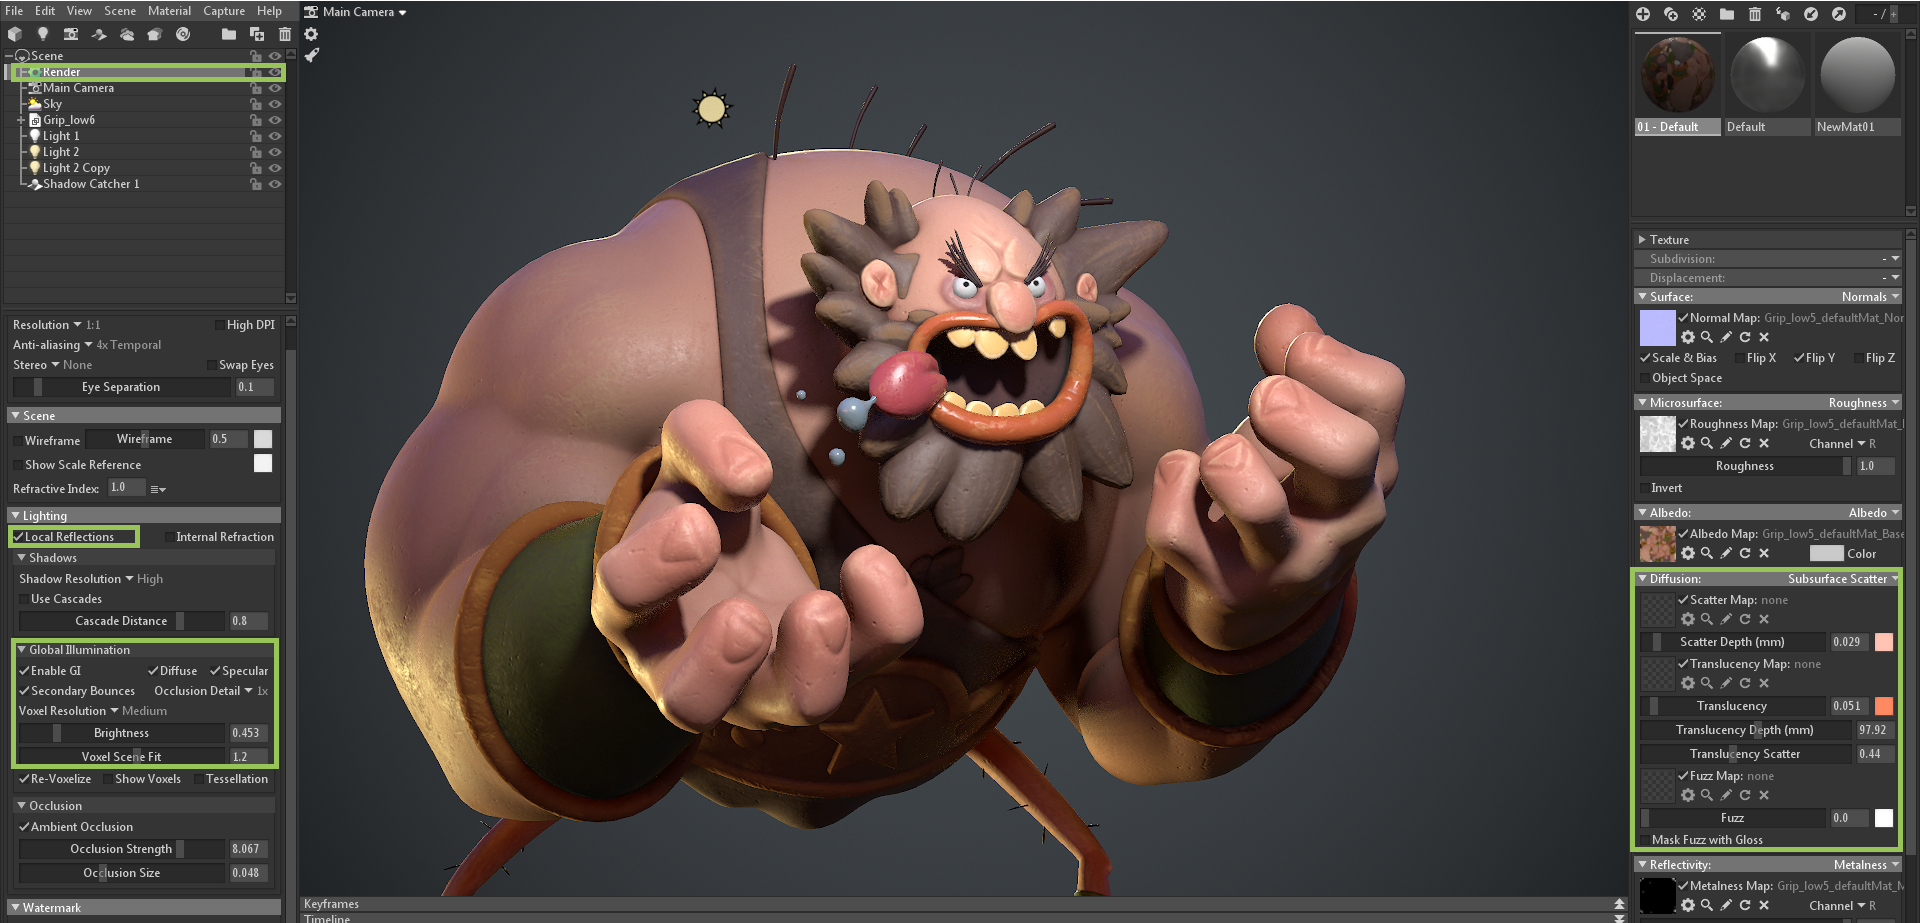
Global Illumination and Subsurface Scatter helped add vivacity to the renders. You can find the Subsurface Scatter settings in the Diffusion module. I only used two parameters: Scatter Depth and Translucency.
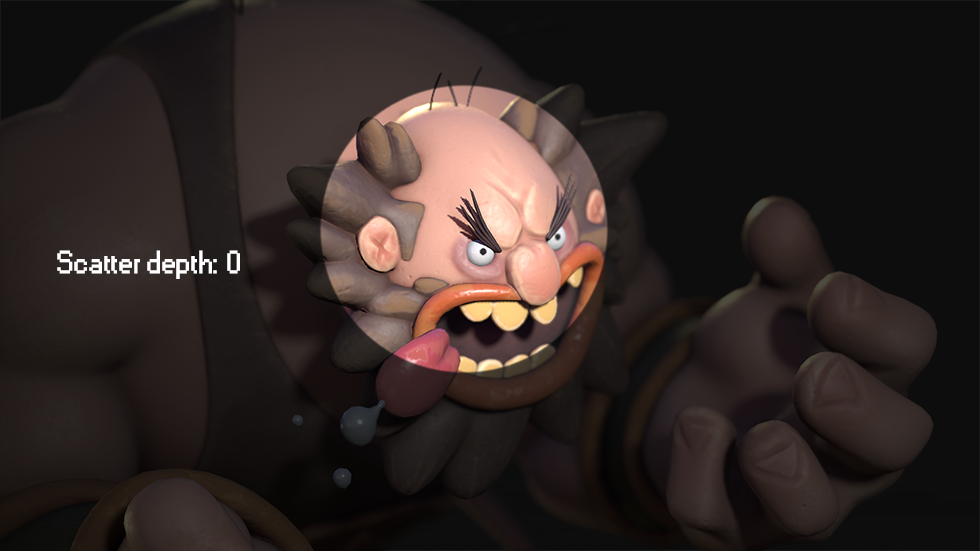
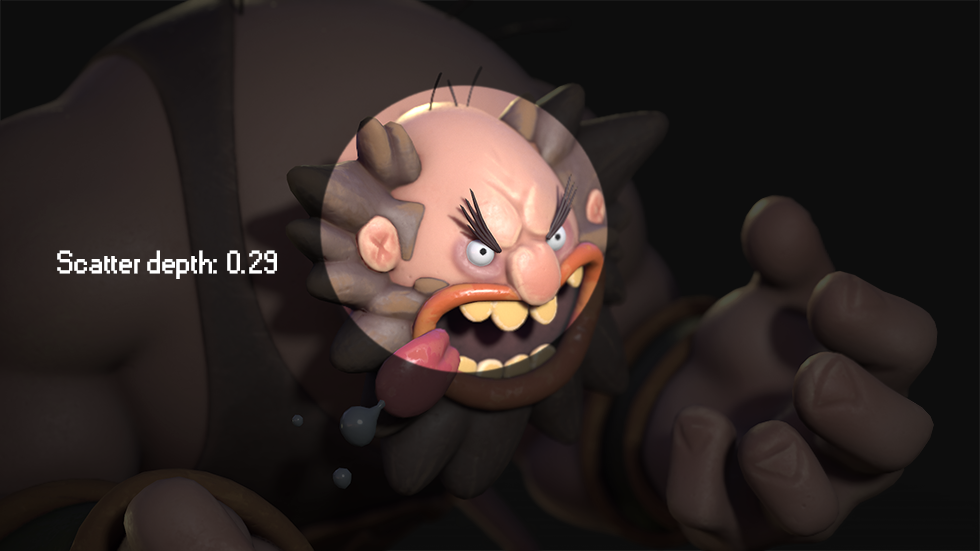
Scatter Depth helped make my materials softer and look similar to wax, and it blurred any hard shadows. I set this parameter to a value of 0.29.
The Translucency parameter allowed light to pass through the thinner parts of my mesh, similar to shining a light behind ears. I set this to 0.15 and selected the Color of the light that would pass through the model. Alternatively, you can load a texture or a mask.
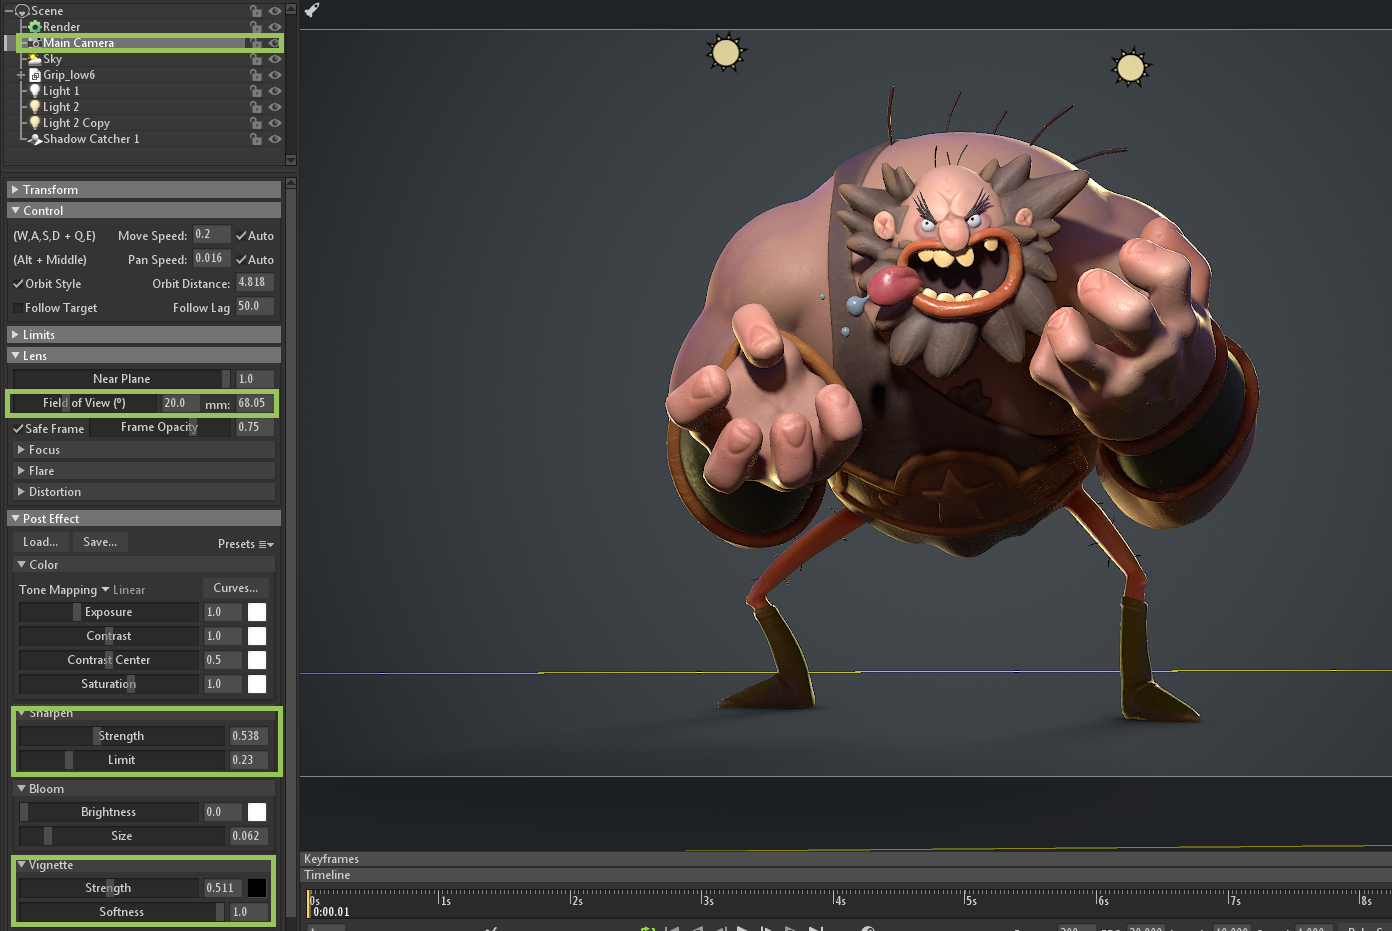
These were my Camera settings. I changed the Field of View value, added some Sharpen and Vignette.
COMPOSING THE FINAL RENDER
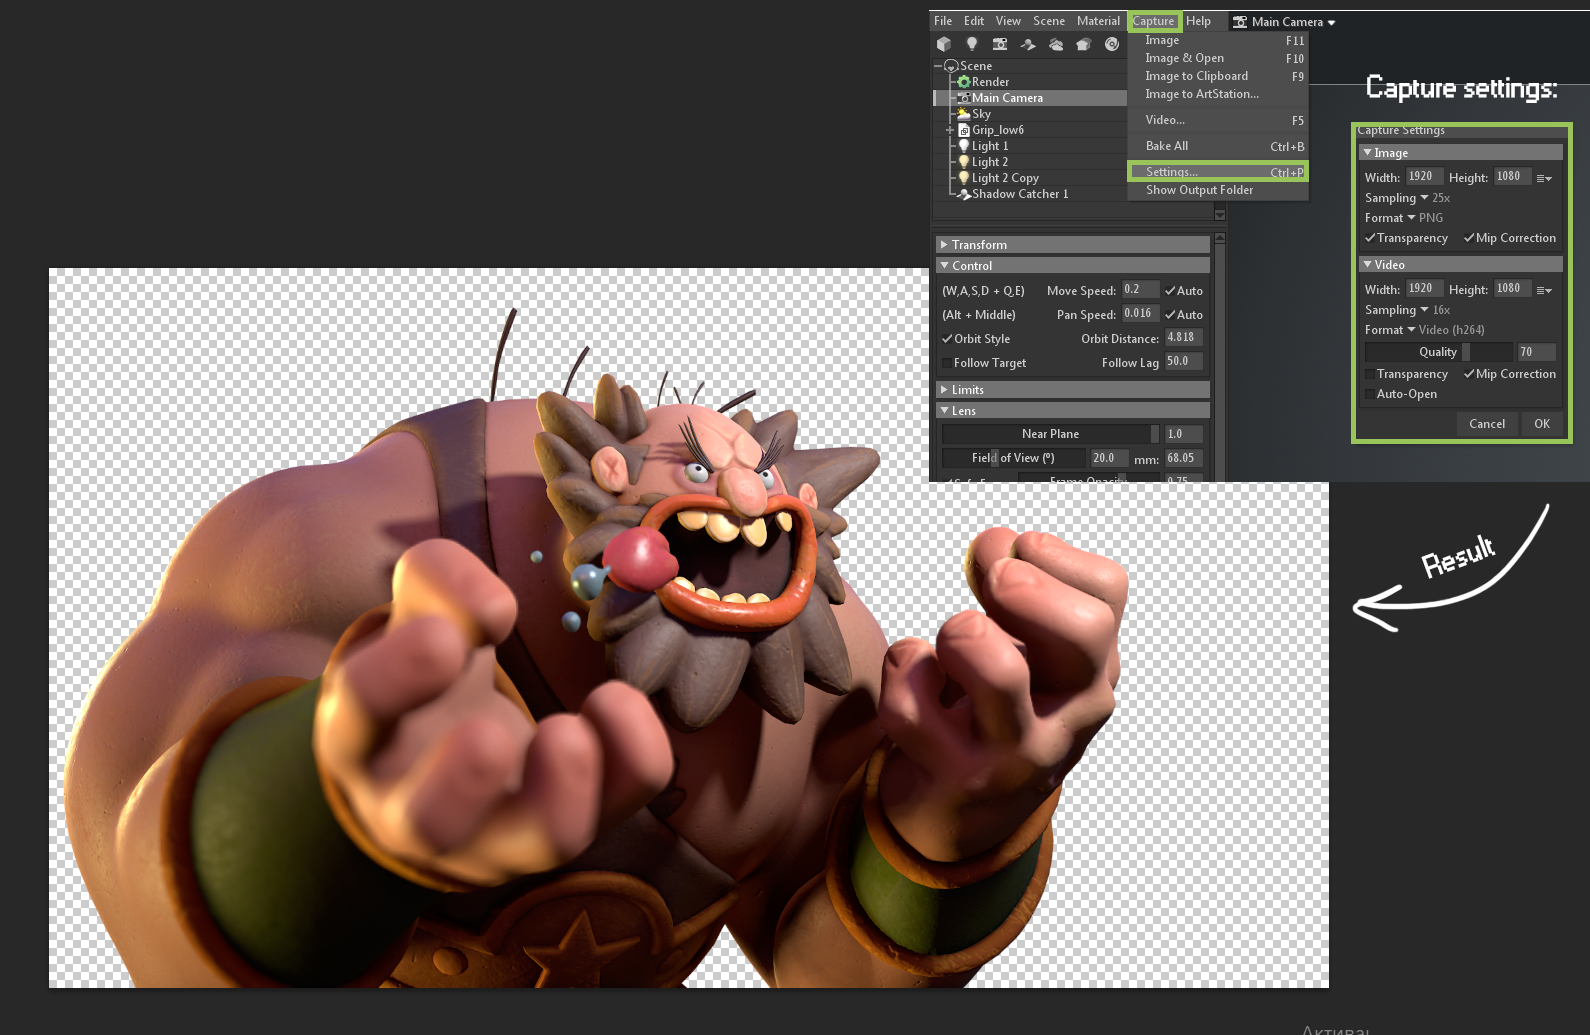
I rendered out my final images with Transparency checked, since I wanted to make my own backgrounds in Photoshop.

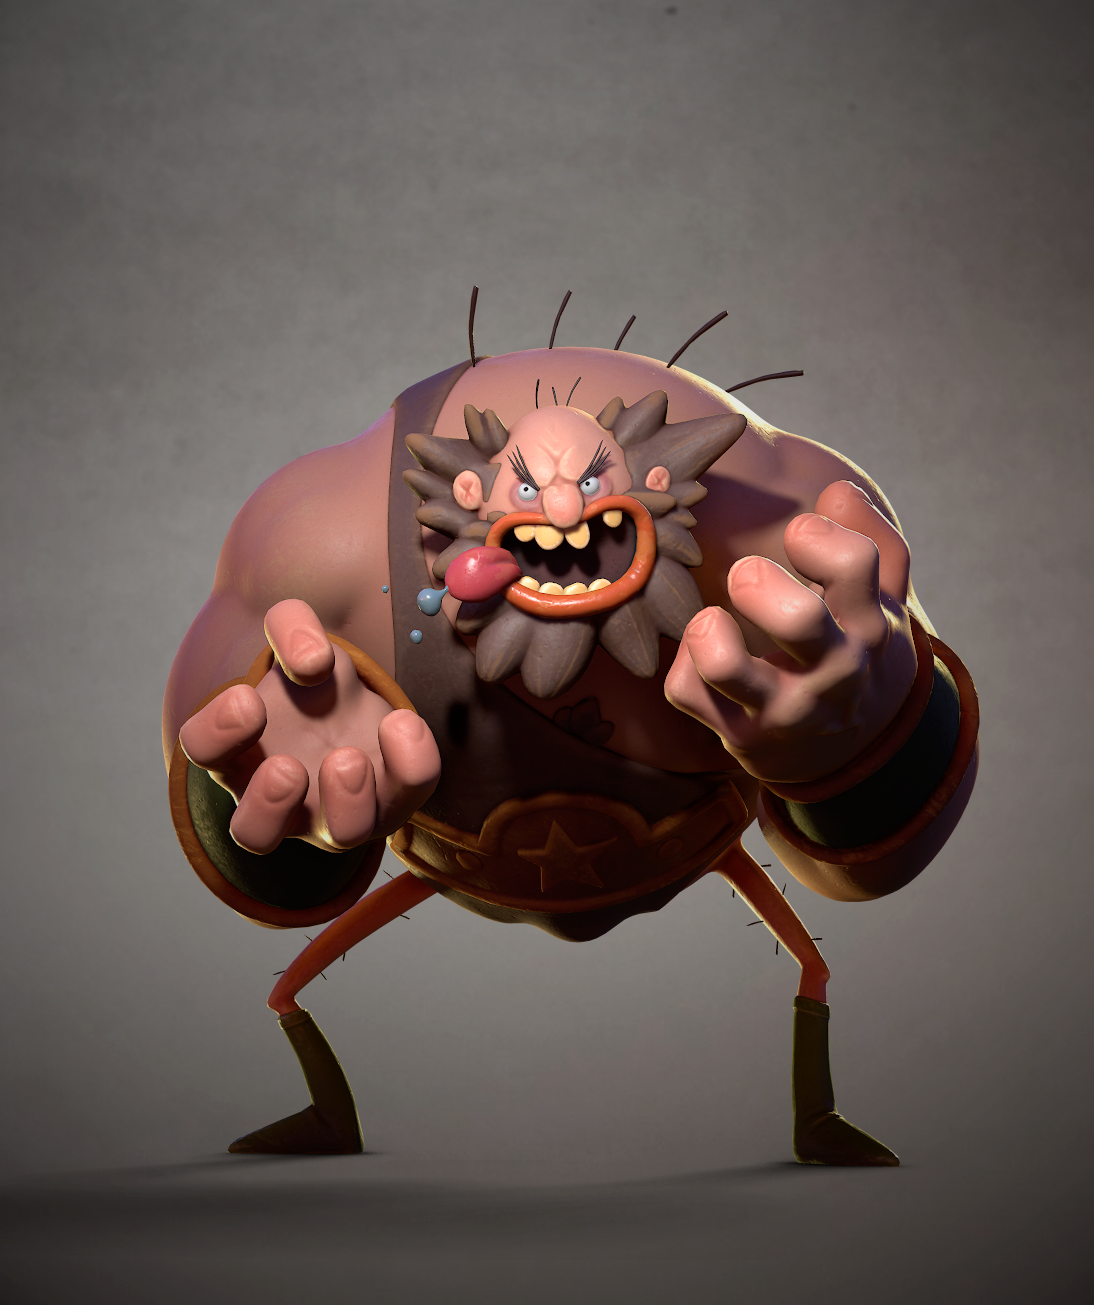
I used a slightly textured, off-white background from a paper in my sketchbook. The background for the close-up renders was derived from a photo I took in my house.
CONCLUSION
That’s all! I enjoyed working on this project, and I hope you liked it too. Thank you for reading this breakdown, and thanks to the Marmoset team for sharing it and creating such beautiful software!
We’d like to thank Mikhail Toropov for writing this breakdown article. You can find more of Mikhail’s work on Artstation.
Create fabulous renders of your characters using the 30 day trial of Toolbag. If you’re interested in collaborating on a tutorial or breakdown article, please send us your pitch, along with a link to your artwork, to submissions@marmoset.co.


