
Introduction
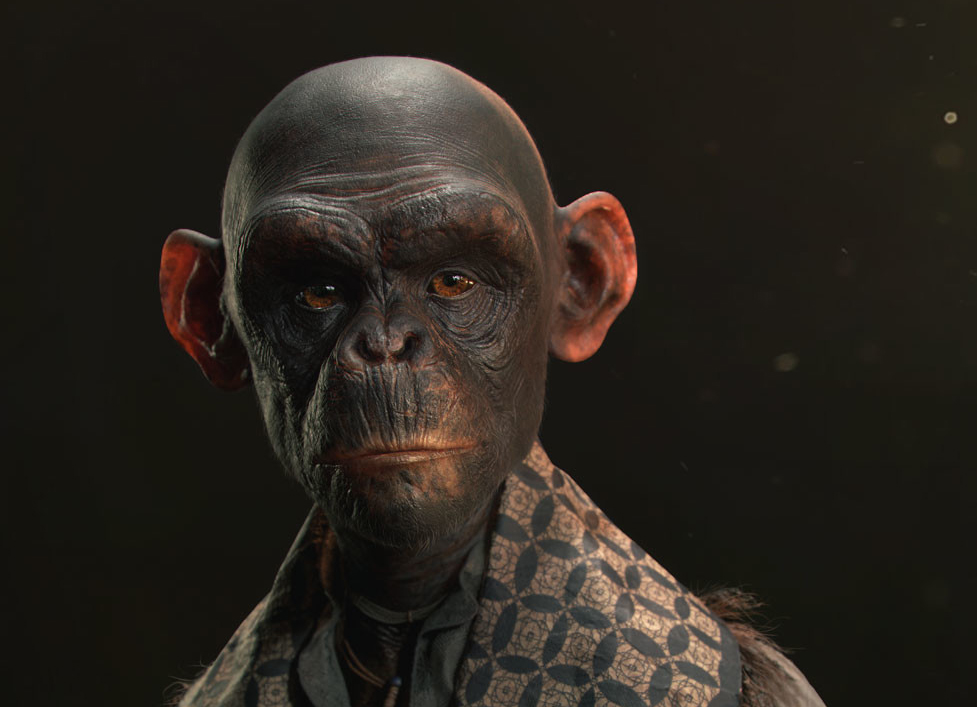
Hello, my name is Pablo Munoz Gomez. I’m a concept and character artist based in Melbourne, Australia and I run the ZBrushGuides website. In this article, I’m going to give you an overview of how I created my Humanzee character, from the ZBrush sculpt to the final render in Toolbag 3.
Starting the project
When starting the project, I go through the usual drill of collecting a bunch of references that I find useful and put them together in PureRef. For this project, I was originally studying the subtle changes of human expression, so my reference images were mostly of human faces and anatomy. However, the direction of the study changed to become a chimp character with human-like expressions and body posture.
Modeling
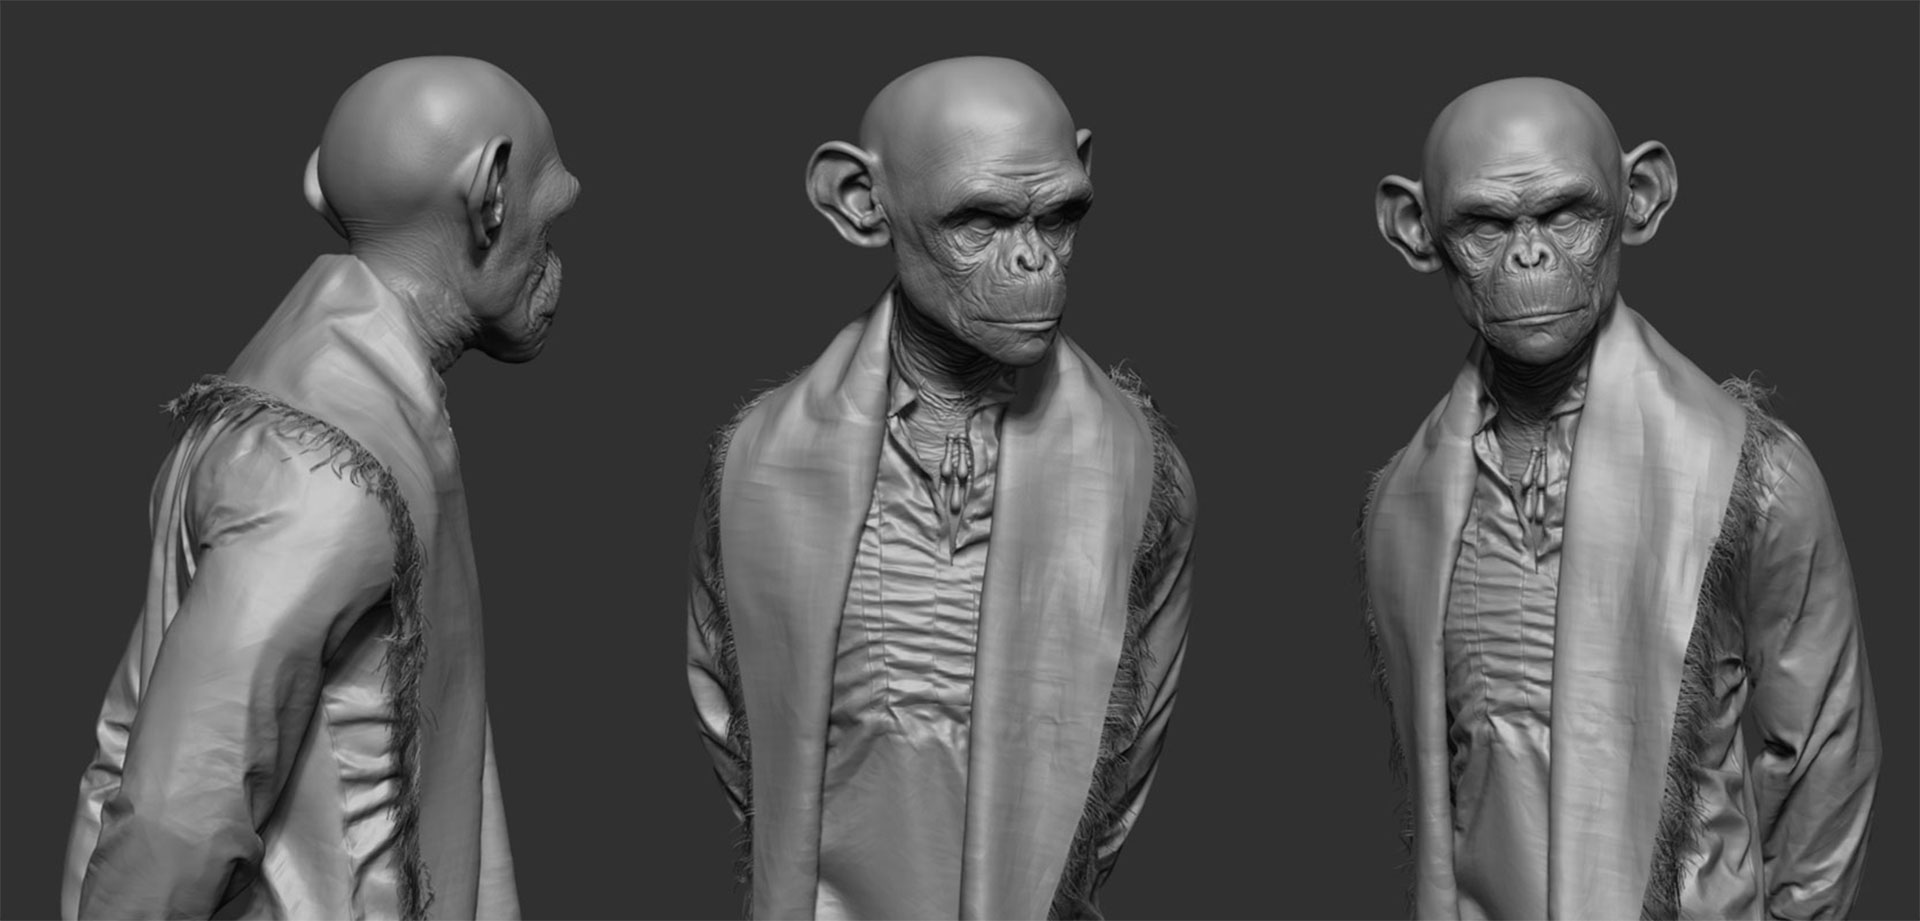
The modeling of the Humanzee was done in Zbrush. I created the base meshes for the shirt and scarf, then projected some details from an old shirt model done in Marvelous Designer to get the main folds. The smaller wrinkles and details were created with custom brushes, alphas, NoiseMaker, and VDM’s.
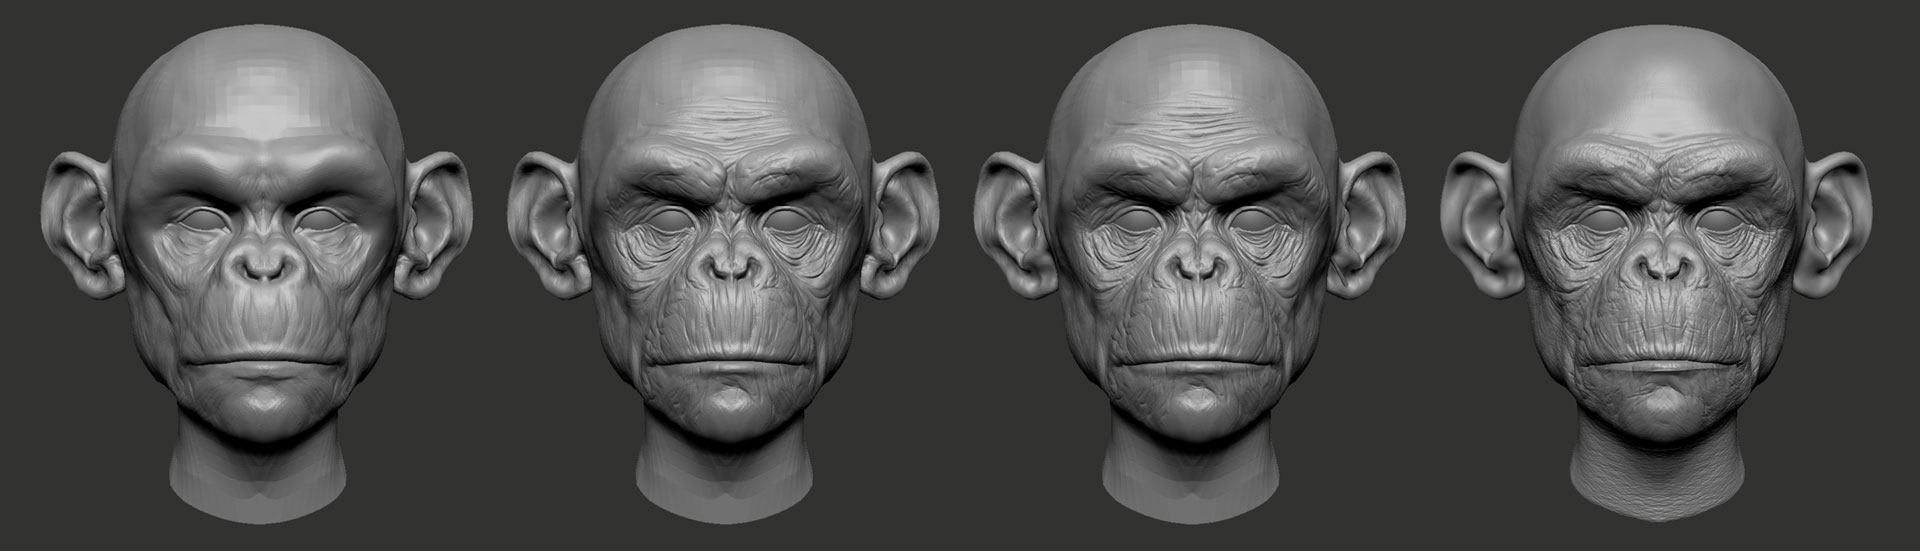
I used Dynamesh to block in the primary and secondary forms of the head and used Sculptris Pro for the first detail pass. I ran a quick retopology pass with ZRemesher, subdivided the model a few times, then projected details on the highest subdivision level.
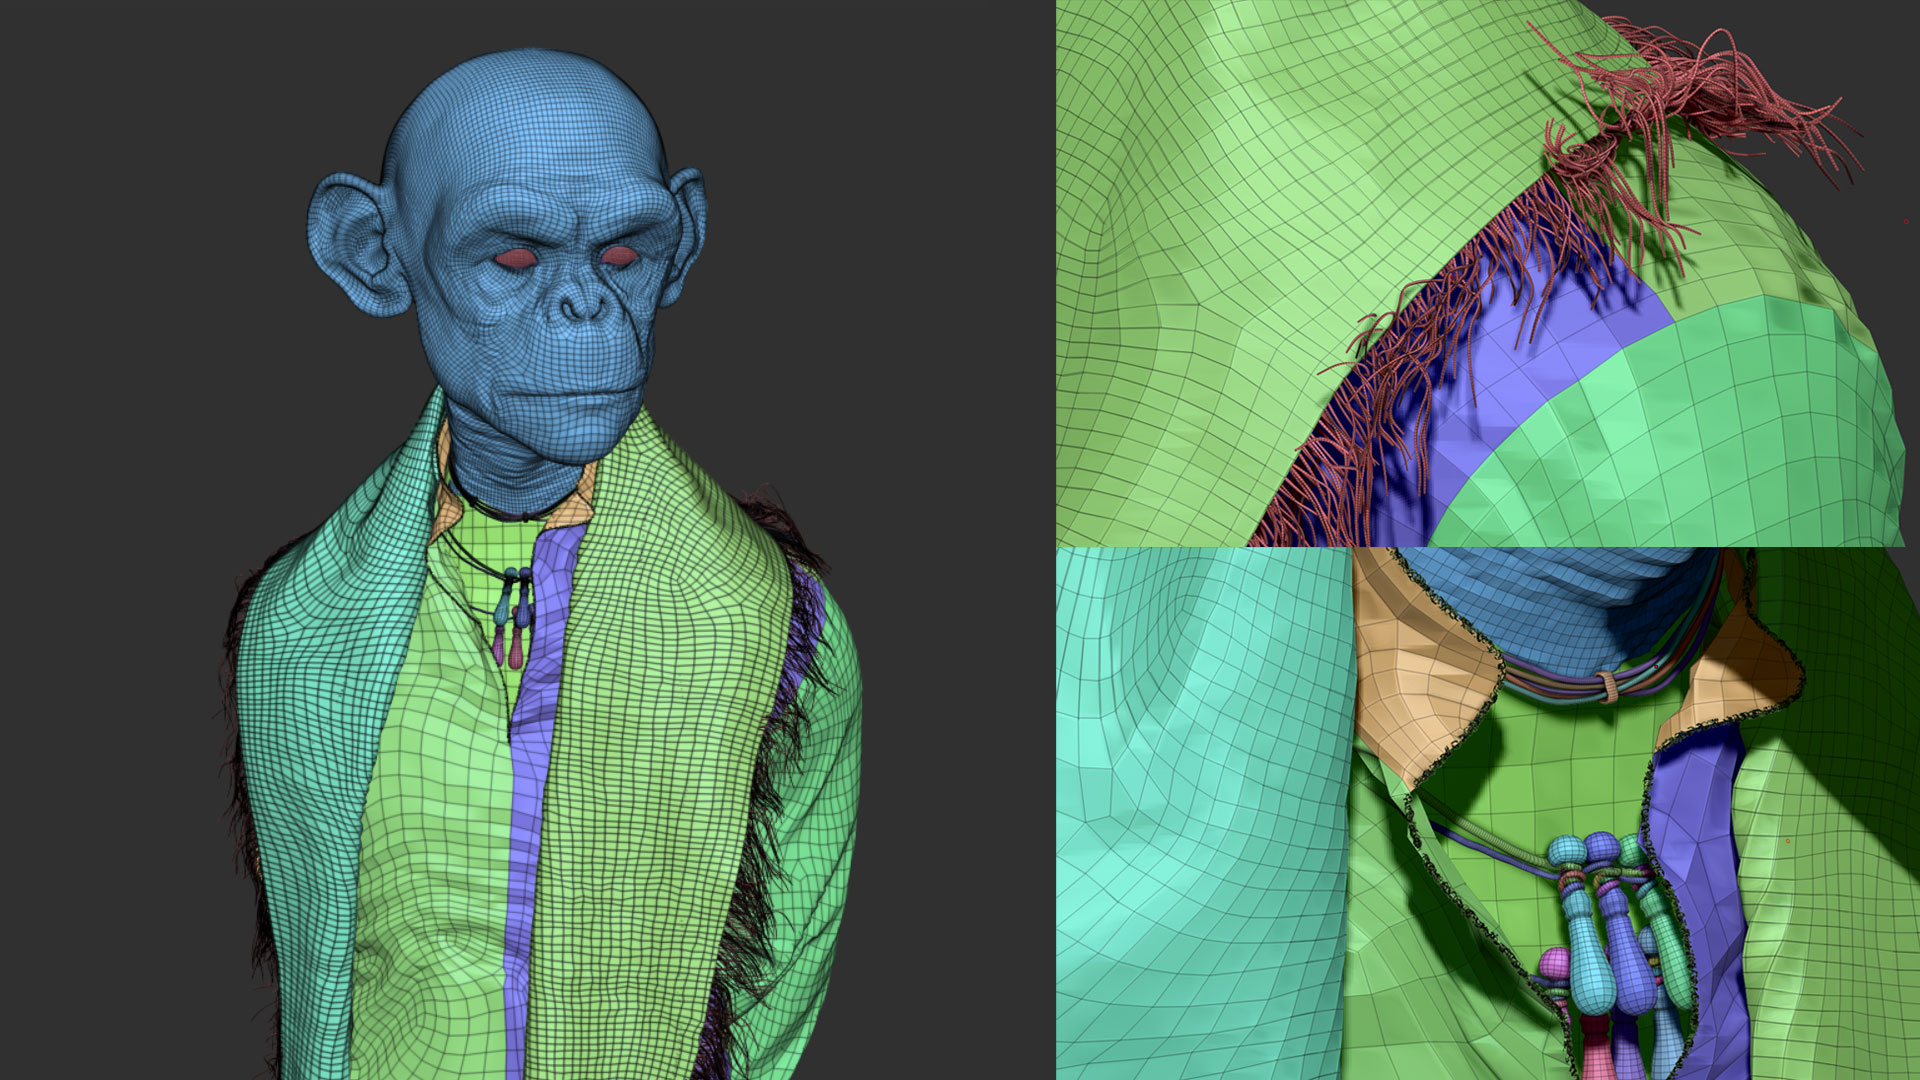
After making the low poly mesh, I like to create some polygroups before starting to add more details and surface noise. I wasn’t too concerned with the poly count, since Toolbag handles heavy geometry quite well and the intention of this project was conceptual. I used FiberMesh to create the loose threads at the edges of the scarf.
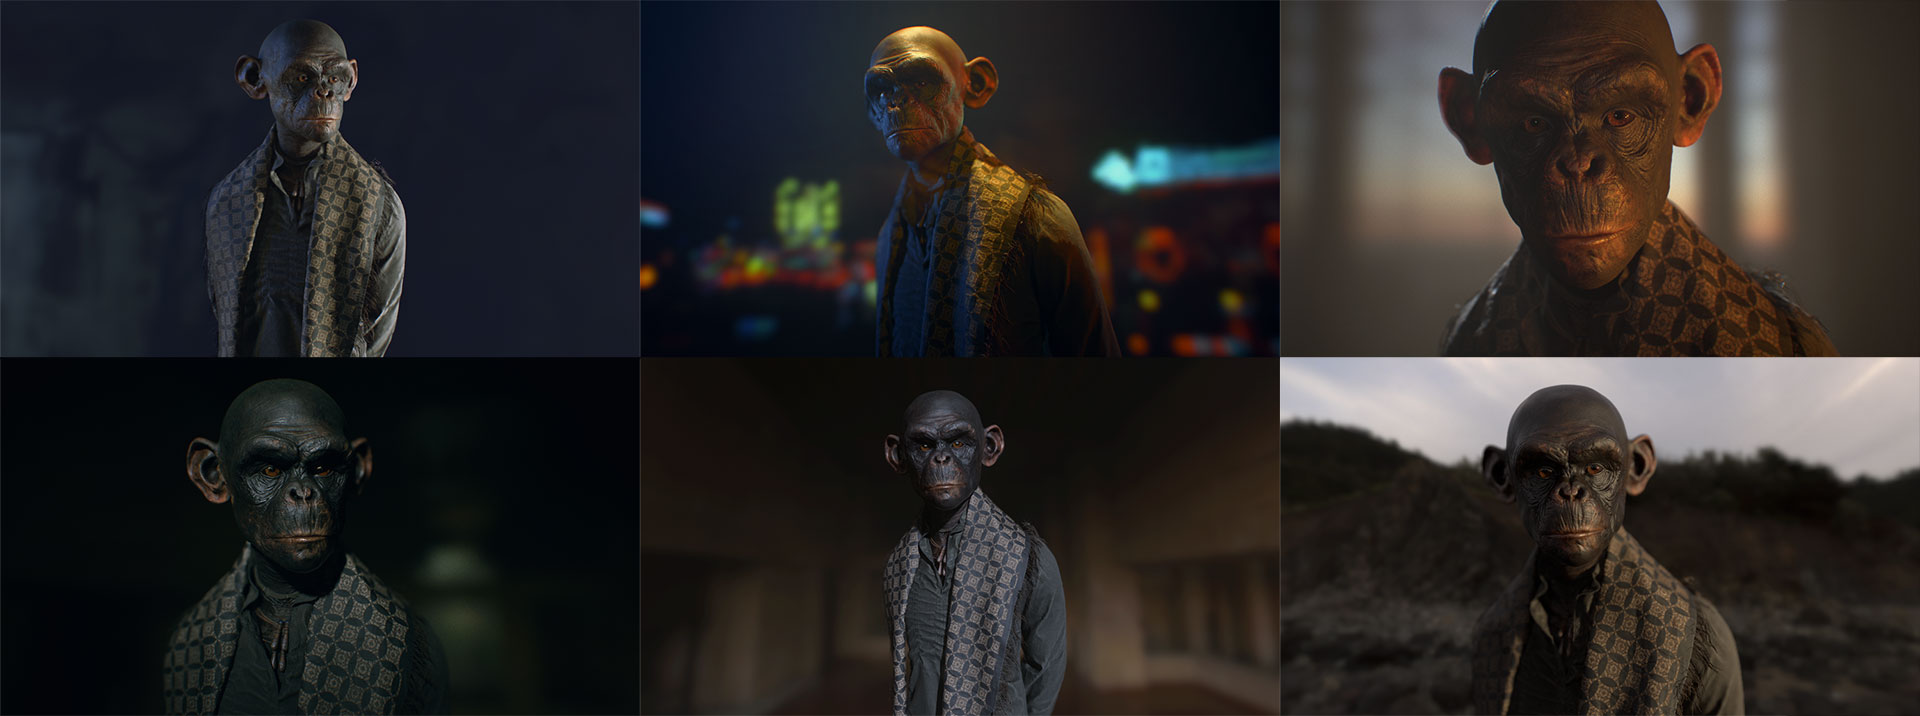
I like to use Toolbag early on in development for prototyping and iterating a concept, even before having created any texture maps. I go through a very rough polypaint pass in Zbrush and import an .fbx to Toolbag. This allows me to quickly establish the mood of a piece and have a more informed vision of what to aim for. I can run quick tests of different color palettes and patterns for the face, as well as test them against my lighting conditions.
Texturing
I like to use Substance Painter for my textures, since I can export all of my maps directly into Toolbag. I really enjoy hand painting and building up the texture from the ground up, so I tried to avoid using pre-made substances or use too many generators here. This also helps maintain a little bit of stylization in the final piece.
Setting up Materials
I exported the high res maps from Substance Painter and set up my Normal, Cavity, Ambient Occlusion, Thickness, Roughness, Albedo, and Metalness shaders in Toolbag.
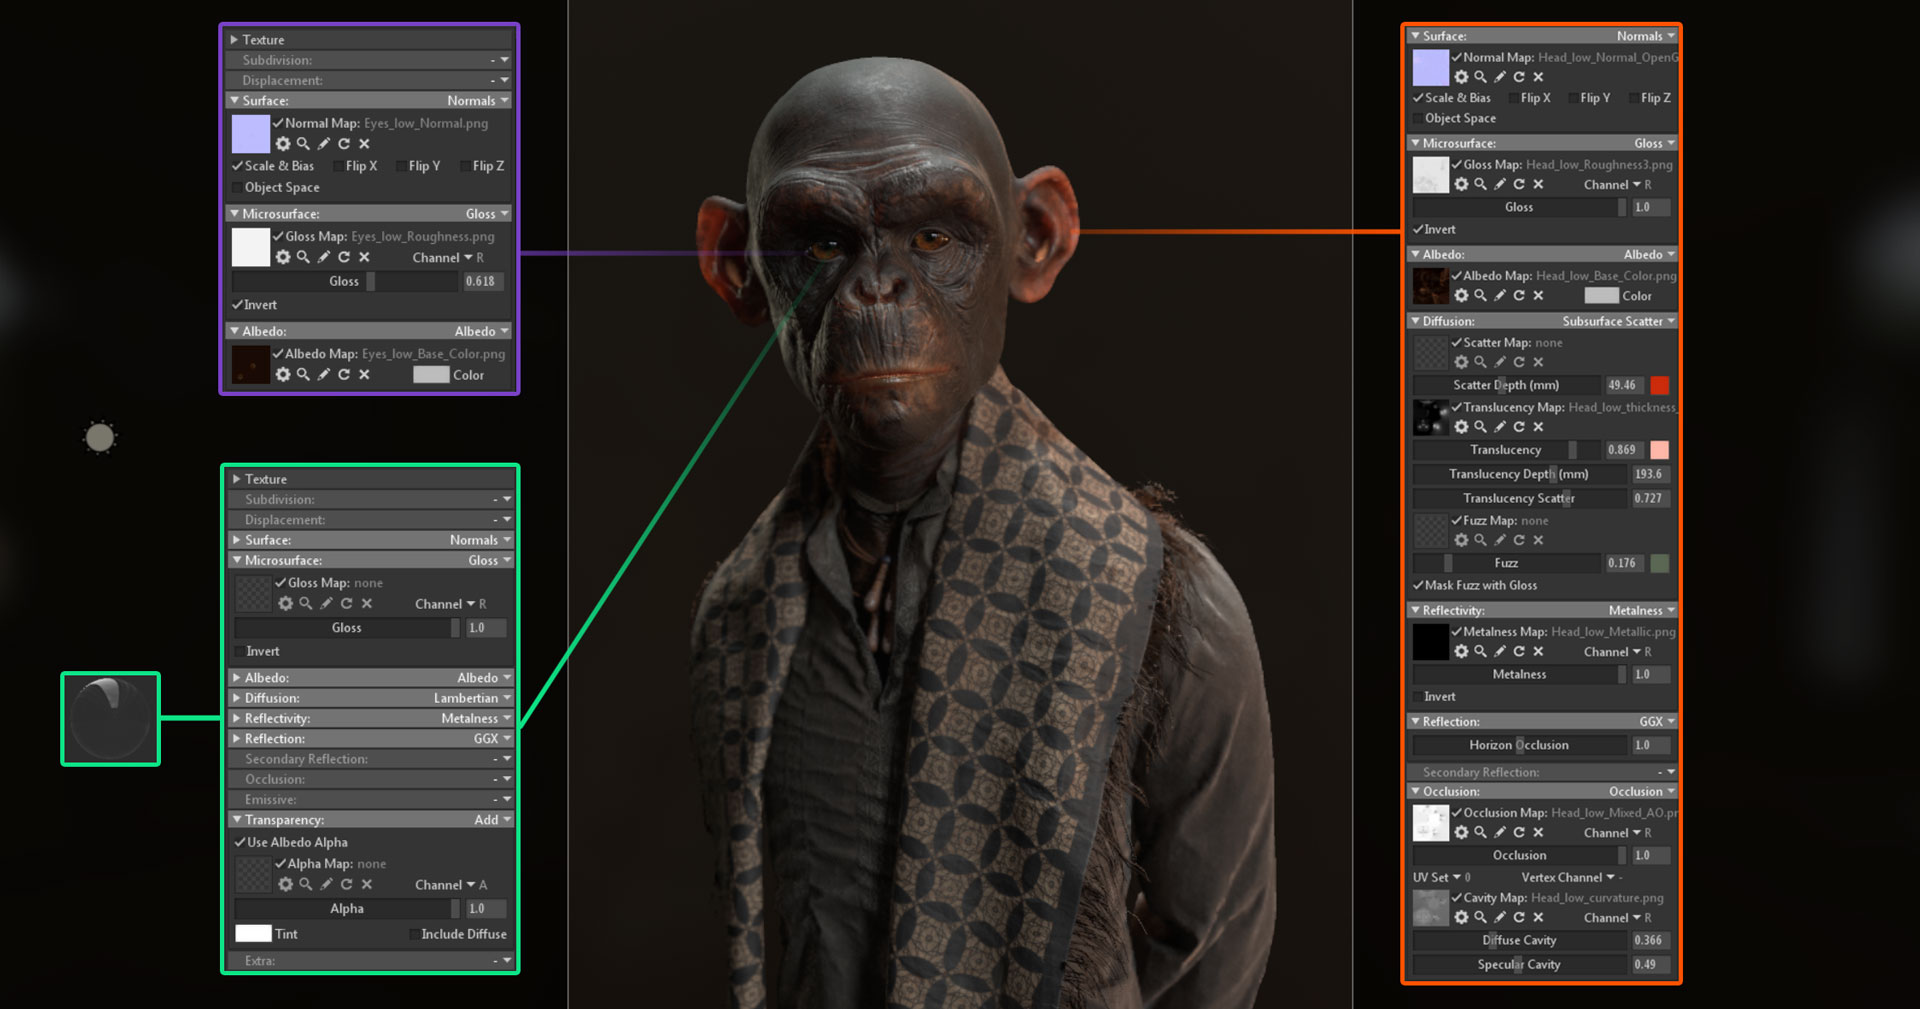
The thing I like the most about the Substance Painter to Marmoset Toolbag workflow is that setting up materials is pretty much a drag and drop process. For instance, the skin material for the head was set up by dragging and dropping my textures from the Substance Painter export folder into Toolbag’s Material Editor. I only had to fine tune the Translucency sliders in the Subsurface Scatter shader slightly, as well as add a bit of Fuzz with a custom color. I reduced the contribution of the Cavity Map in the shader.
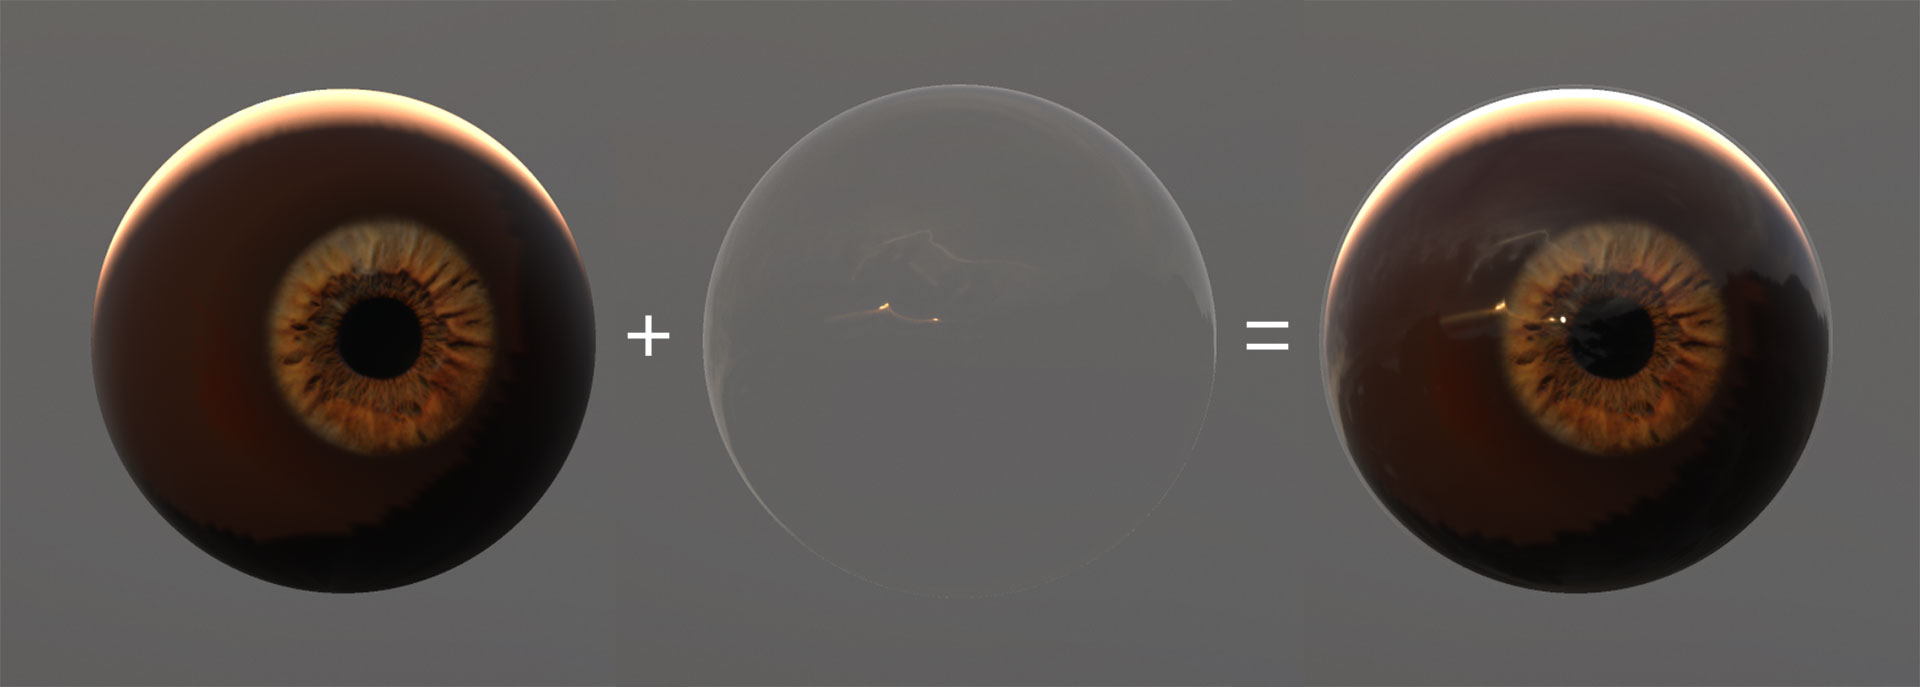
The setup for the eyes was a very simple one. I used two meshes; one with Albedo and Normal maps applied and added gloss, while the other one was scaled up slightly to cover the first mesh. The second mesh uses Additive blending in the Transparency module for eye reflections with a plain, glossy material.
Finding the light

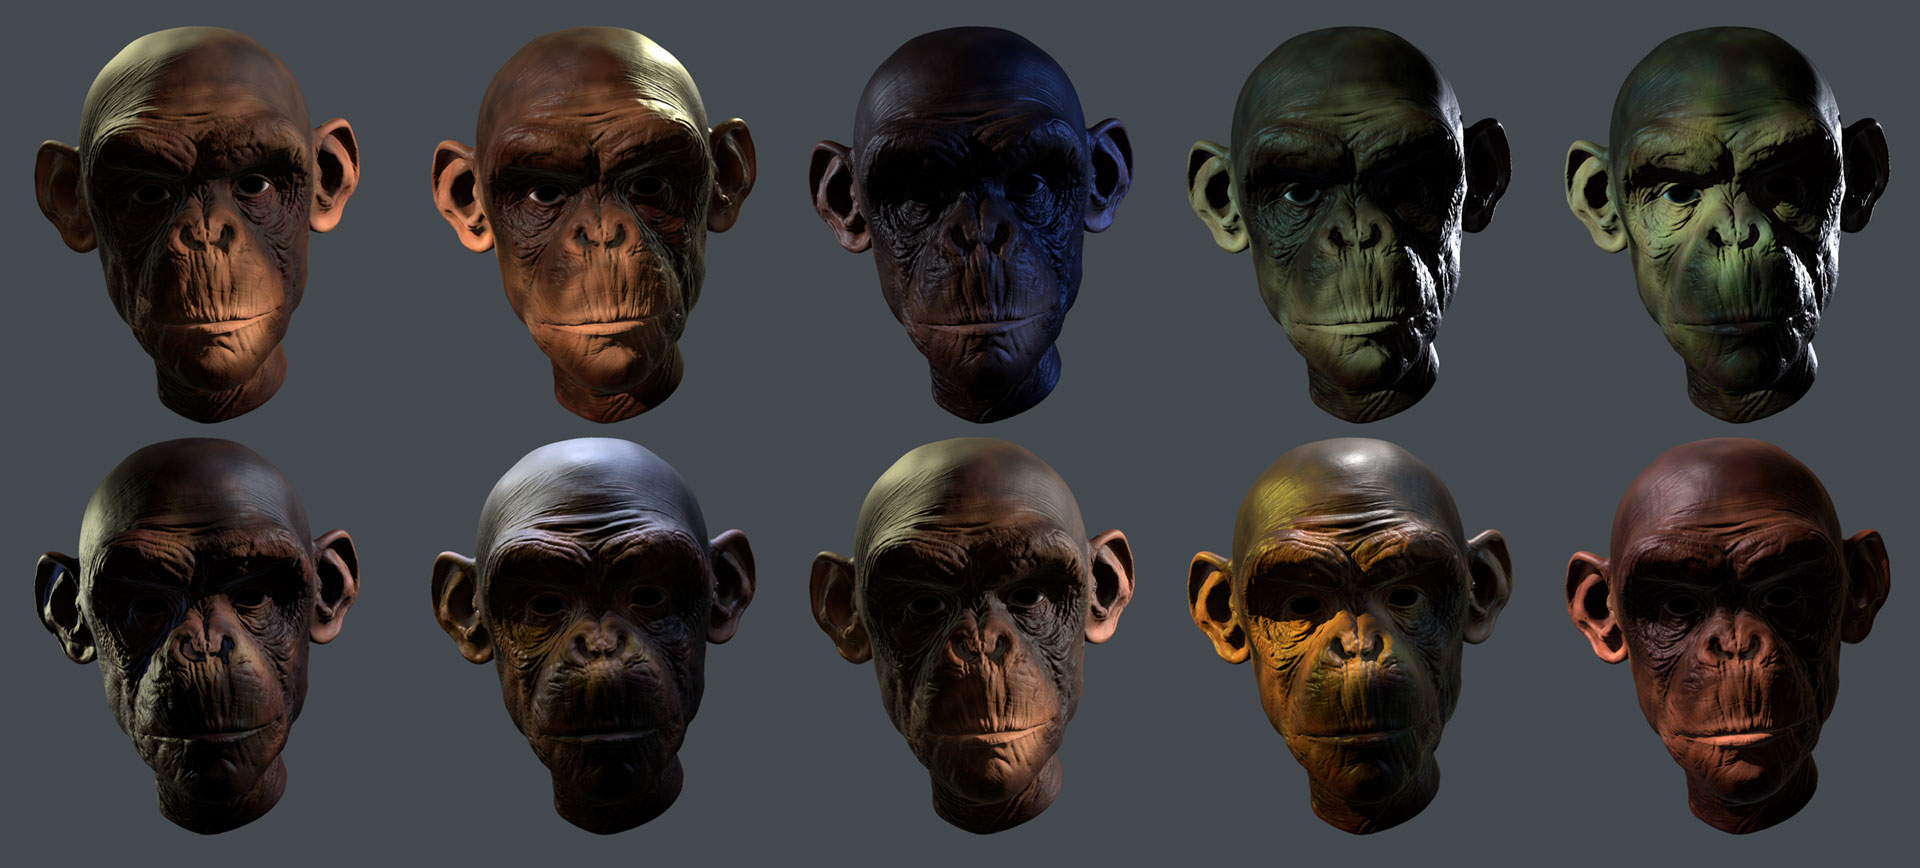
The speediness of my material setup process allowed me to spend more time setting up the lighting scenario and coming up with the best presentation for my character. Aside from the actual sculpting stage, this is the part of the process where I spend most of my time. I tested lights, tweaked light properties, positioning, and tried out different Sky Presets until I found what I liked.
To create a variation of my scene, I add a new Sky Preset and add a few Child Lights in the Light Editor. If I got a good idea while trying out a certain Sky, I would spend some time tweaking lights, but if it didn’t feel right, I would move on to the next option. This only takes a few seconds, but the advantage of frequent iteration means you’re more confident with the best options.
My lighting setup consisted of the following:
- Key light.
- Orange bounce light to warm up tones and strengthen SSS.
- Sharp bounce/fill light.
- Top-down bright light (rim/hair light)
- Additional warm rim light for enhanced SSS
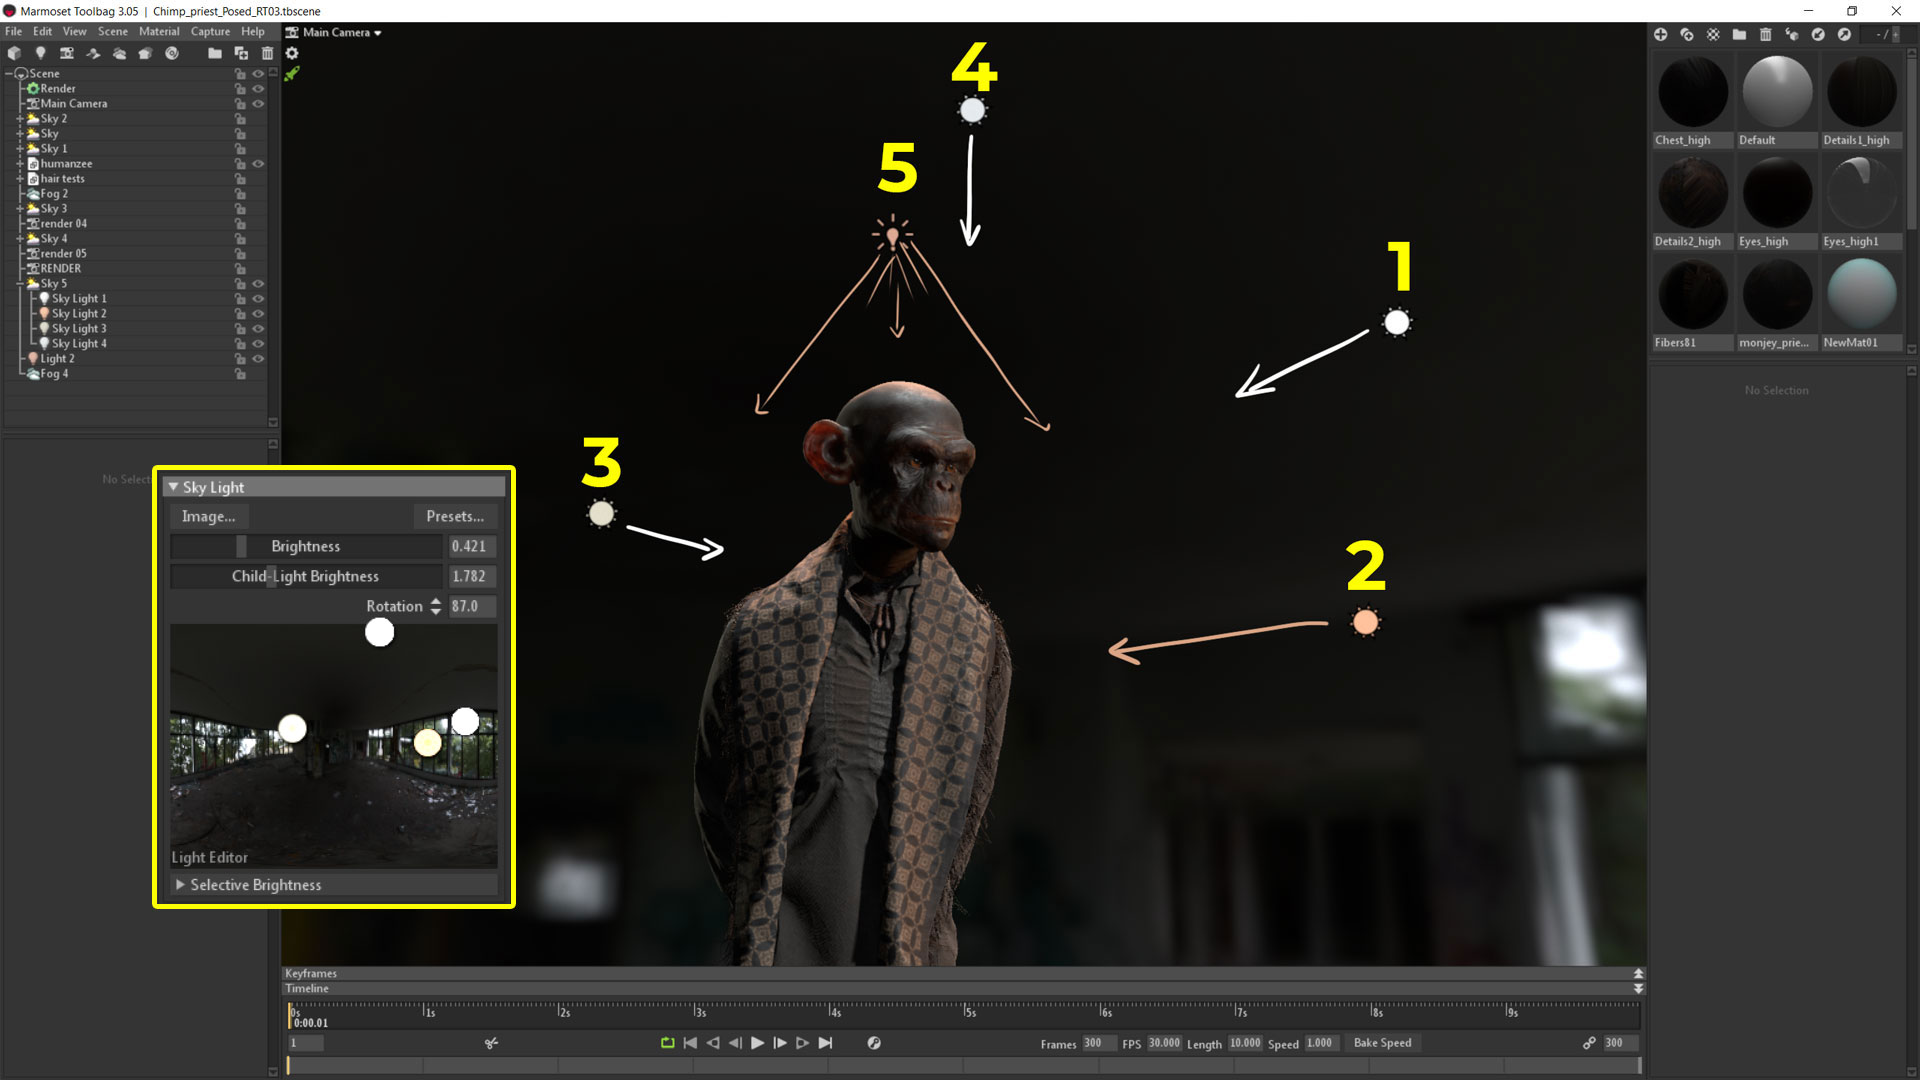
I used the Light Editor to set up these lights. Clicking and dragging on a bright area of the Light Editor generated a Sky Light that I could tweak and position according to my needs. I created an additional Spot Light that was not influenced by the Sky and manually placed it behind the character. Spot Lights are great for allowing control over lighting very specific areas.
The image above shows my final lighting setup including the Sky settings. I ended up settling for a more portrait-like shot with a simple lighting setup. I often get carried away with lights, effects, and all the camera options. So I always try to remind myself to pull back and tone everything down. The final shot felt more like the character was consciously posing for the shot, which, to me, felt more in line with the human aspect I was going for. I chose to have my Backdrop Mode set to Blurred Sky and played with the Backdrop Blur slider so the details don’t distract the viewer from the character. I toned down the Backdrop Brightness so that the contribution of the HDRI is minor. Additionally, doing this will bring out some subtle reflections.
Rendering and compositing
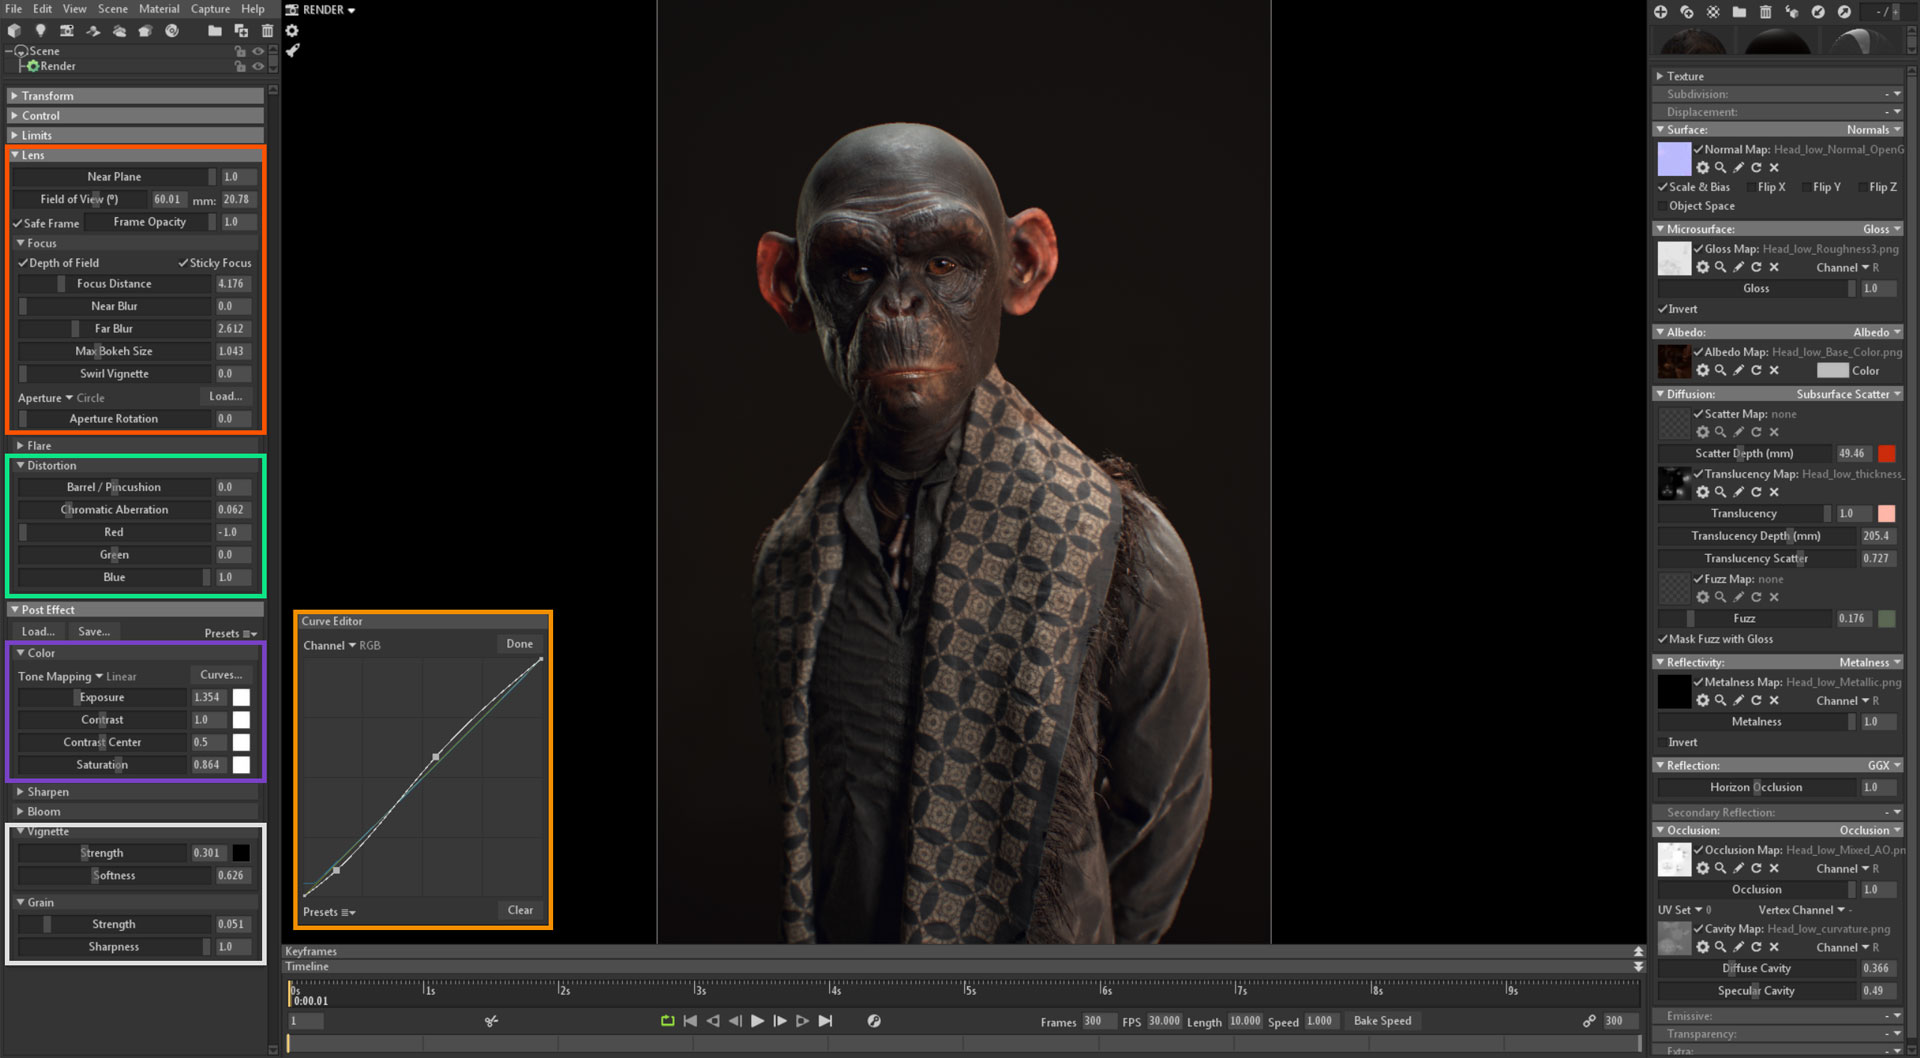
I enabled Global Illumination and set a high resolution value in Capture Settings (Ctrl + P). I added some Camera effects like Depth of Field, Chromatic Aberration to help sell the photographic effect, and very subtle adjustments to the Color and Exposure. I added a bit of Vignette and Grain as well.
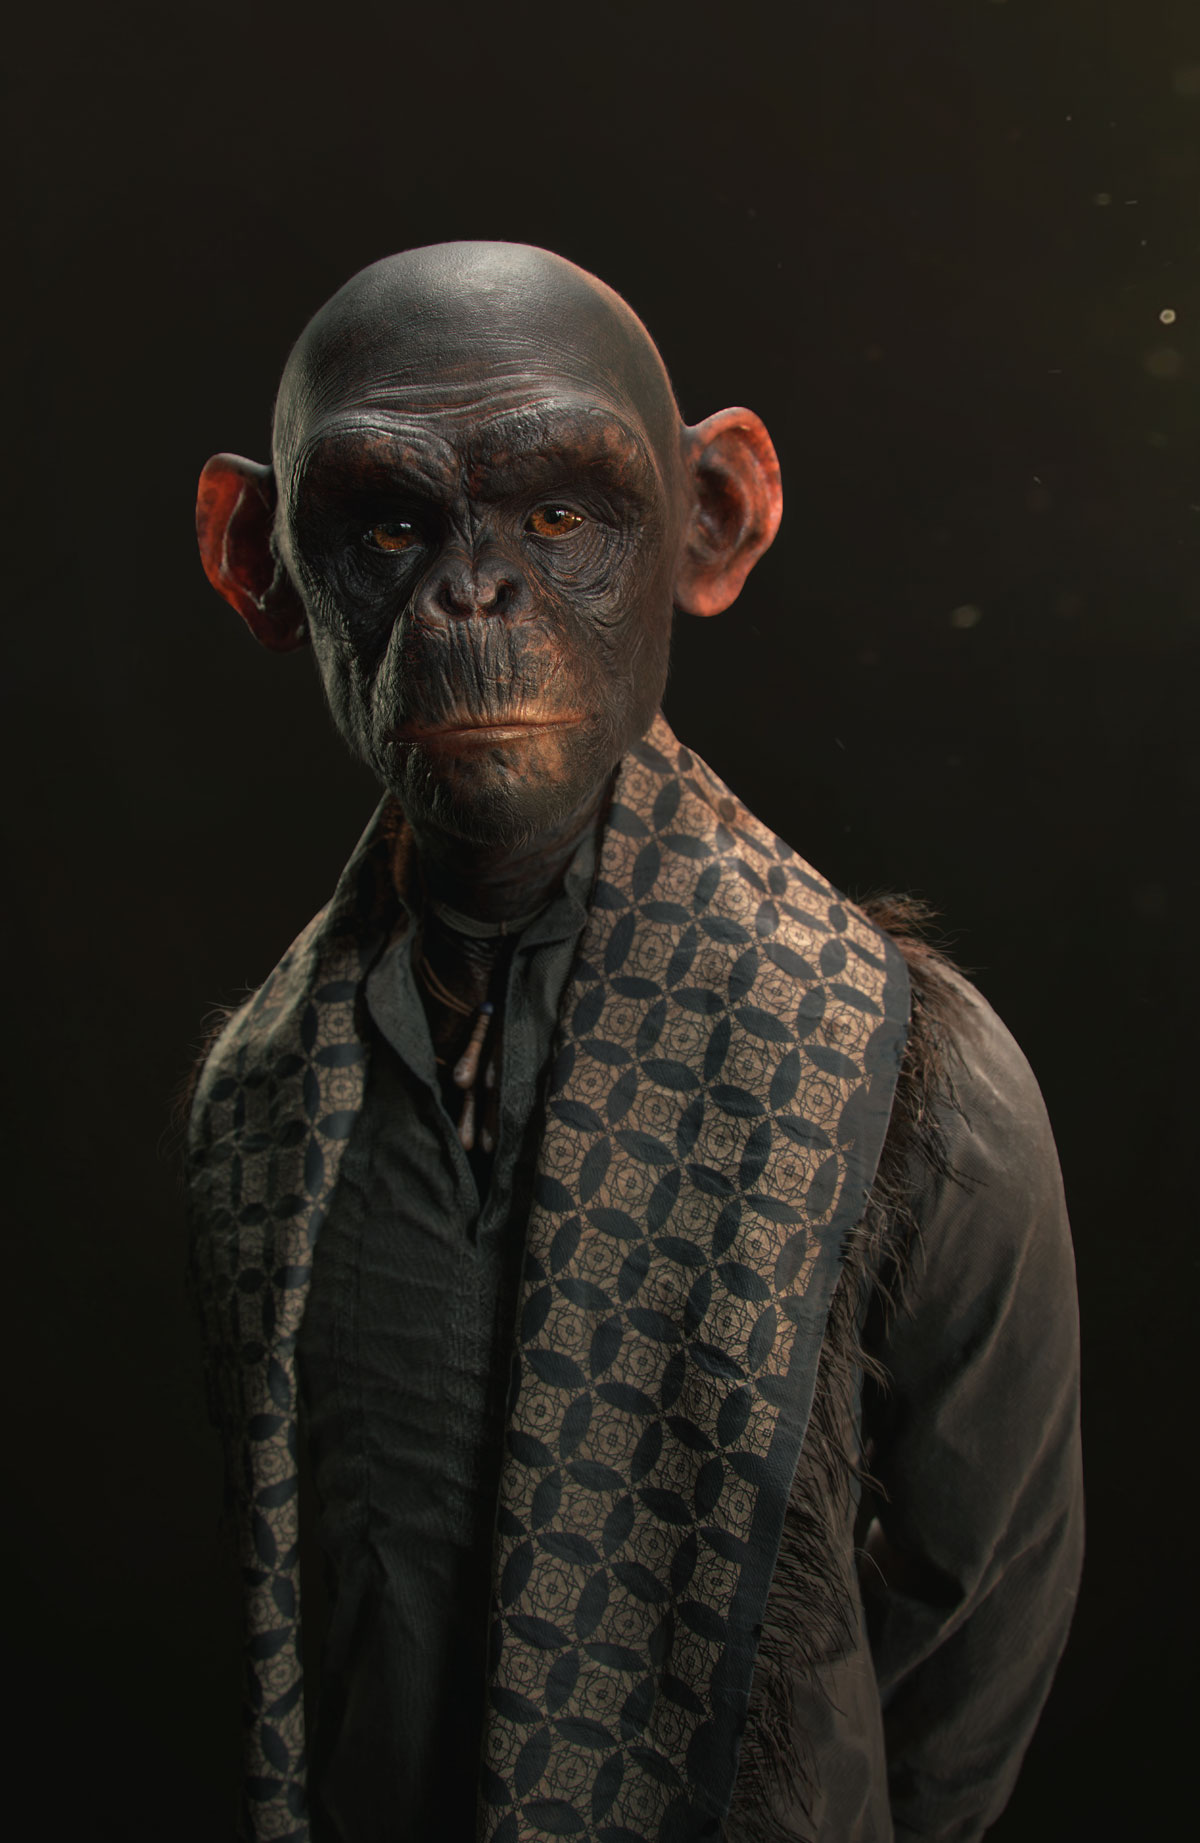
Rendering the final image took about 3 minutes. I took the image into Photoshop for some further tweaking and added a subtle gradient from the bottom and a Levels adjustment layer with masking to brighten up the area around the face. I added some particles and refined the overall image using Curves and Color Balance.
Conclusion
That’s it! Thank you for taking the time to read this breakdown. I hope you’ve enjoyed it and that this little insight into my creative process has been informative.
Cheers!
We’d like to thank Pablo Munoz Gomez for writing this breakdown article. You can check out more of Pablo’s work on Artstation.
Create your own interesting character renders with ease using the 30 day trial of Toolbag. If you’re interested in collaborating on a tutorial or breakdown article, please send us your pitch, along with a link to your artwork, to submissions@marmoset.co.


