

Introduction
Hi everyone! My name is Cian O’Reilly, and I’m a 3D Graphics Artist from Dublin, Ireland. I have around 18 years of experience working in various capacities in games and television production, both in the UK and here in Ireland. Outside of the structured work environment, I like to go where my interests take me. In the case of this project, ‘Unsinkable’, Toolbag became a central tool. This project was my first use of Toolbag in any significant capacity, though I had briefly encountered it for viewing game assets. The project itself centered around my efforts to get to grips with photogrammetry, which again, was a first for me. From there, things expanded in an unplanned, and frankly, fun way.
The Photogrammetry Process
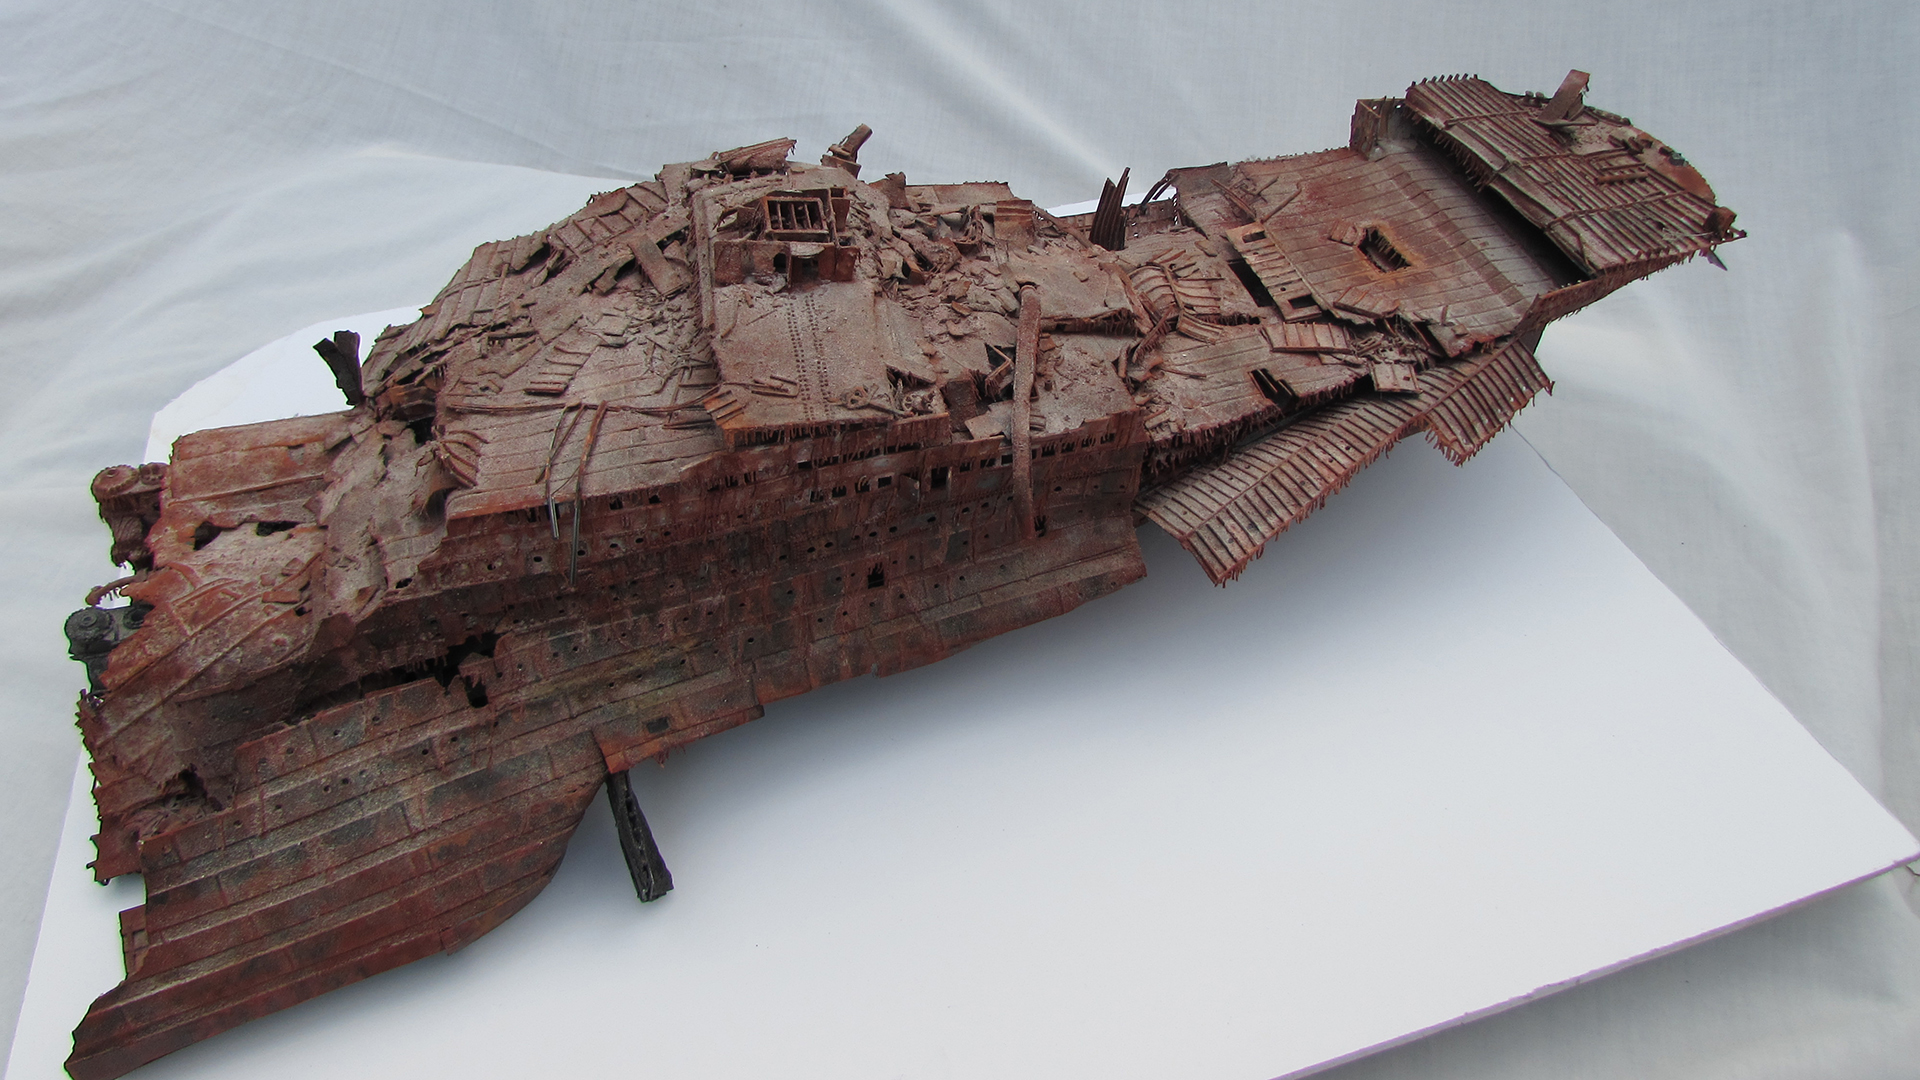
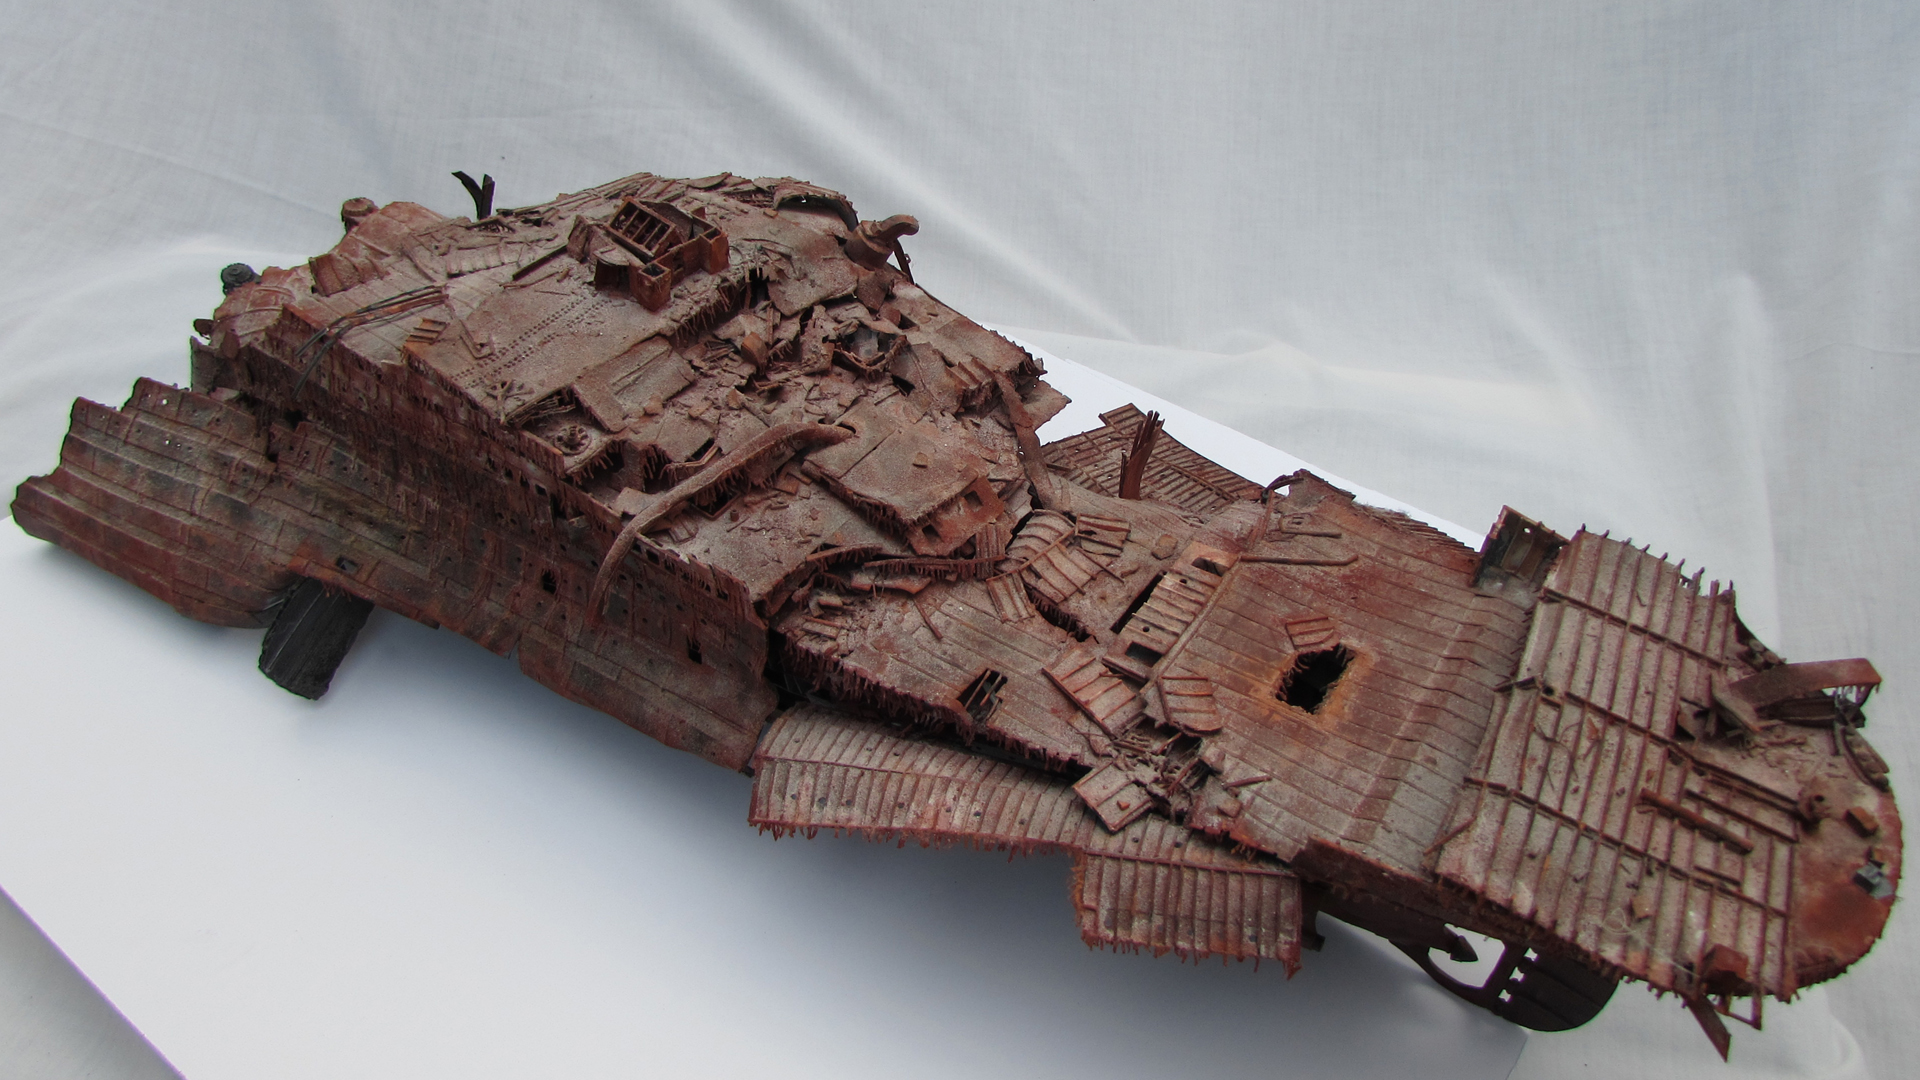
The project was intended as nothing more than a first step into photogrammetry, so I felt no pressure to be precious about the results. I was simply looking to get a feel for the processes involved. I looked around for a subject matter – rocks seemed like an interesting choice. Then I had a more personal interest – the Titanic. Over the course of a few years, I’ve hand built a high detail model of the wreckage, in particular of the Stern section. So I chose to scan this Titanic model. I decided to try Agisoft Photoscan, as the trial version was a complete, fully functional version of the package. In addition to this, there is a wealth of excellent training material online. Youtube is very much your friend and the Agisoft Photoscan online manual can be found here.
Next, I photographed the ship thoroughly. I placed the model on a turntable in front of a white cloth backdrop. This allowed me to rotate the model 360 degrees and the white backdrop reduced the problem of background noise. Lighting conditions are important when photographing your model. Direct sunlight is to be avoided, as strong shadows will affect not only the construction of point clouds, but the texture output as well. The ideal condition is overcast – this provides a more ambient light with the least amount of harsh shadows. The image above gives an idea of the set-up for the photoshoot and the lighting conditions. If you’re photographing outdoors, you have to hope that the weather will cooperate. I had to pause occasionally in order to wait for the lighting to become ambient again. Even moderate differences in lighting can result in some shots looking different to preceding ones. One thing to note is to not use a camera zoom. If you want to capture close up shots, you will have to move closer to the model. If Photoscan detects images that are zoomed in relative to others, you will end up with a chunk of your image collection being rejected later in the workflow.
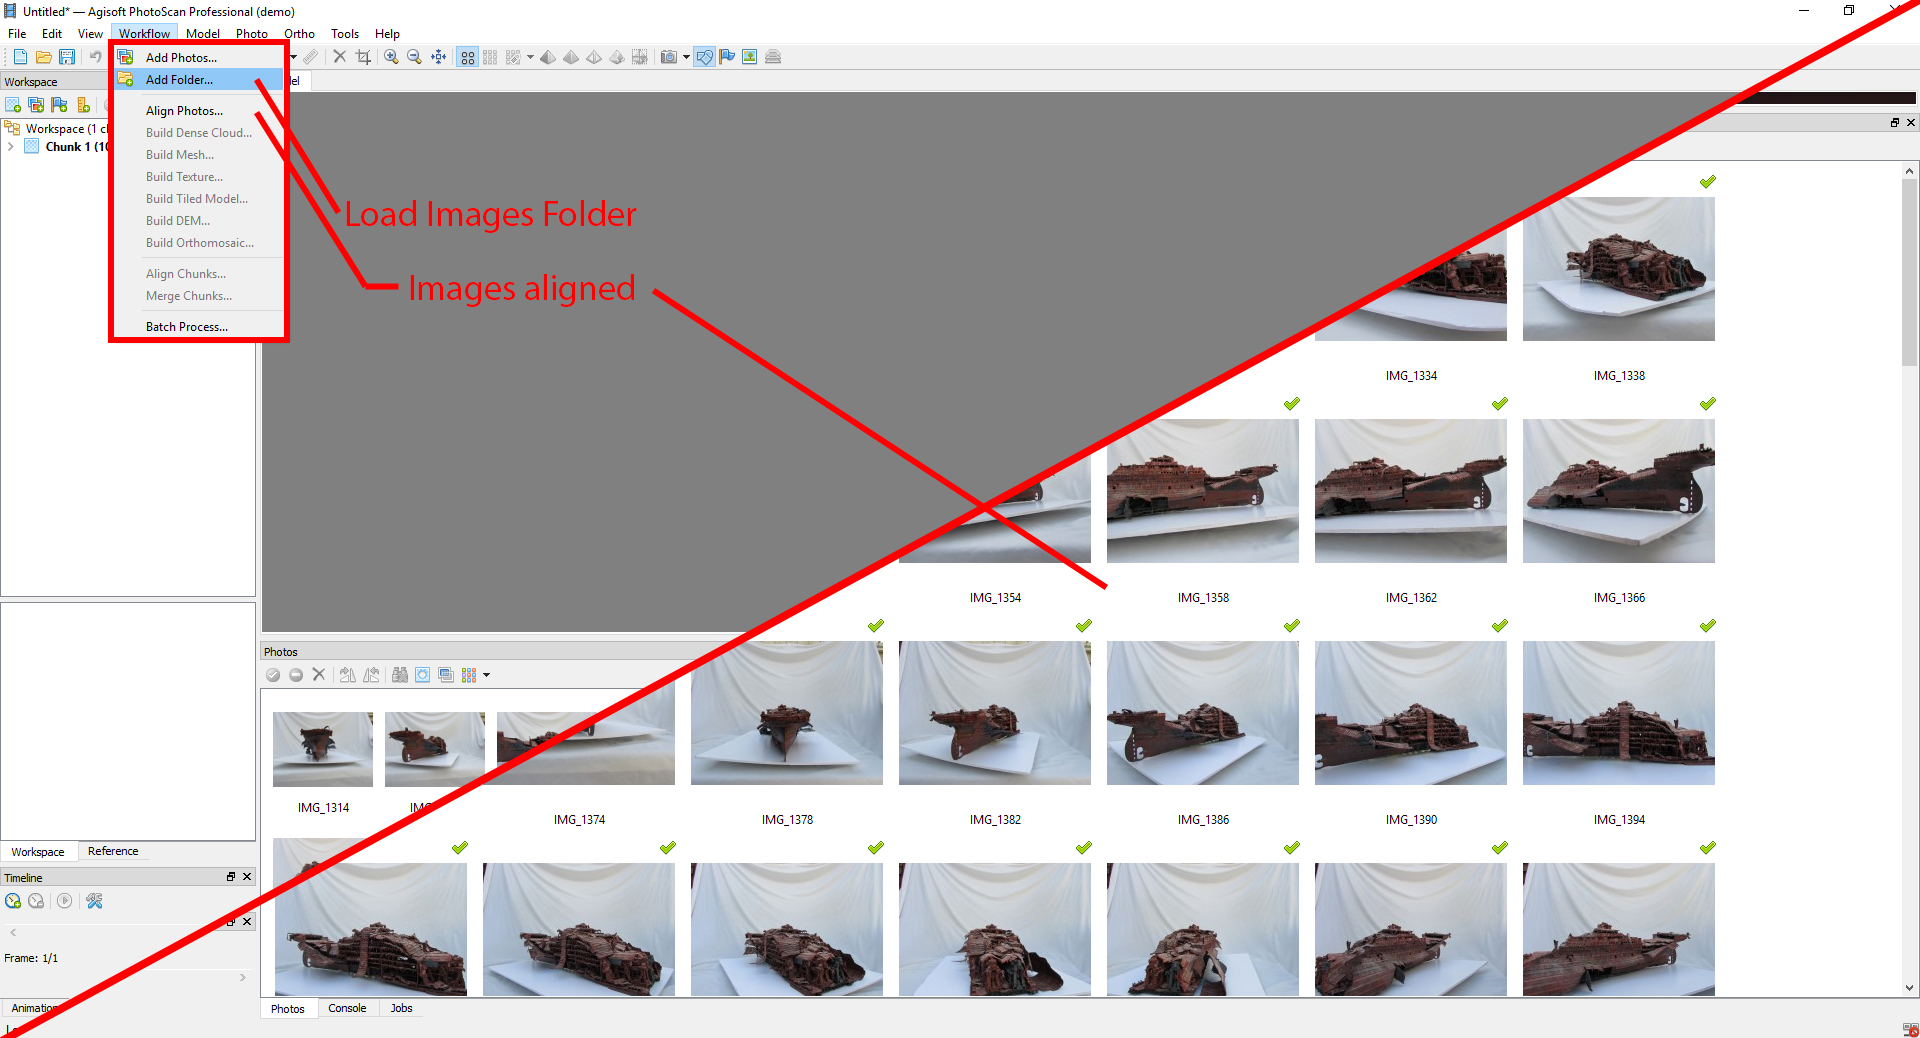
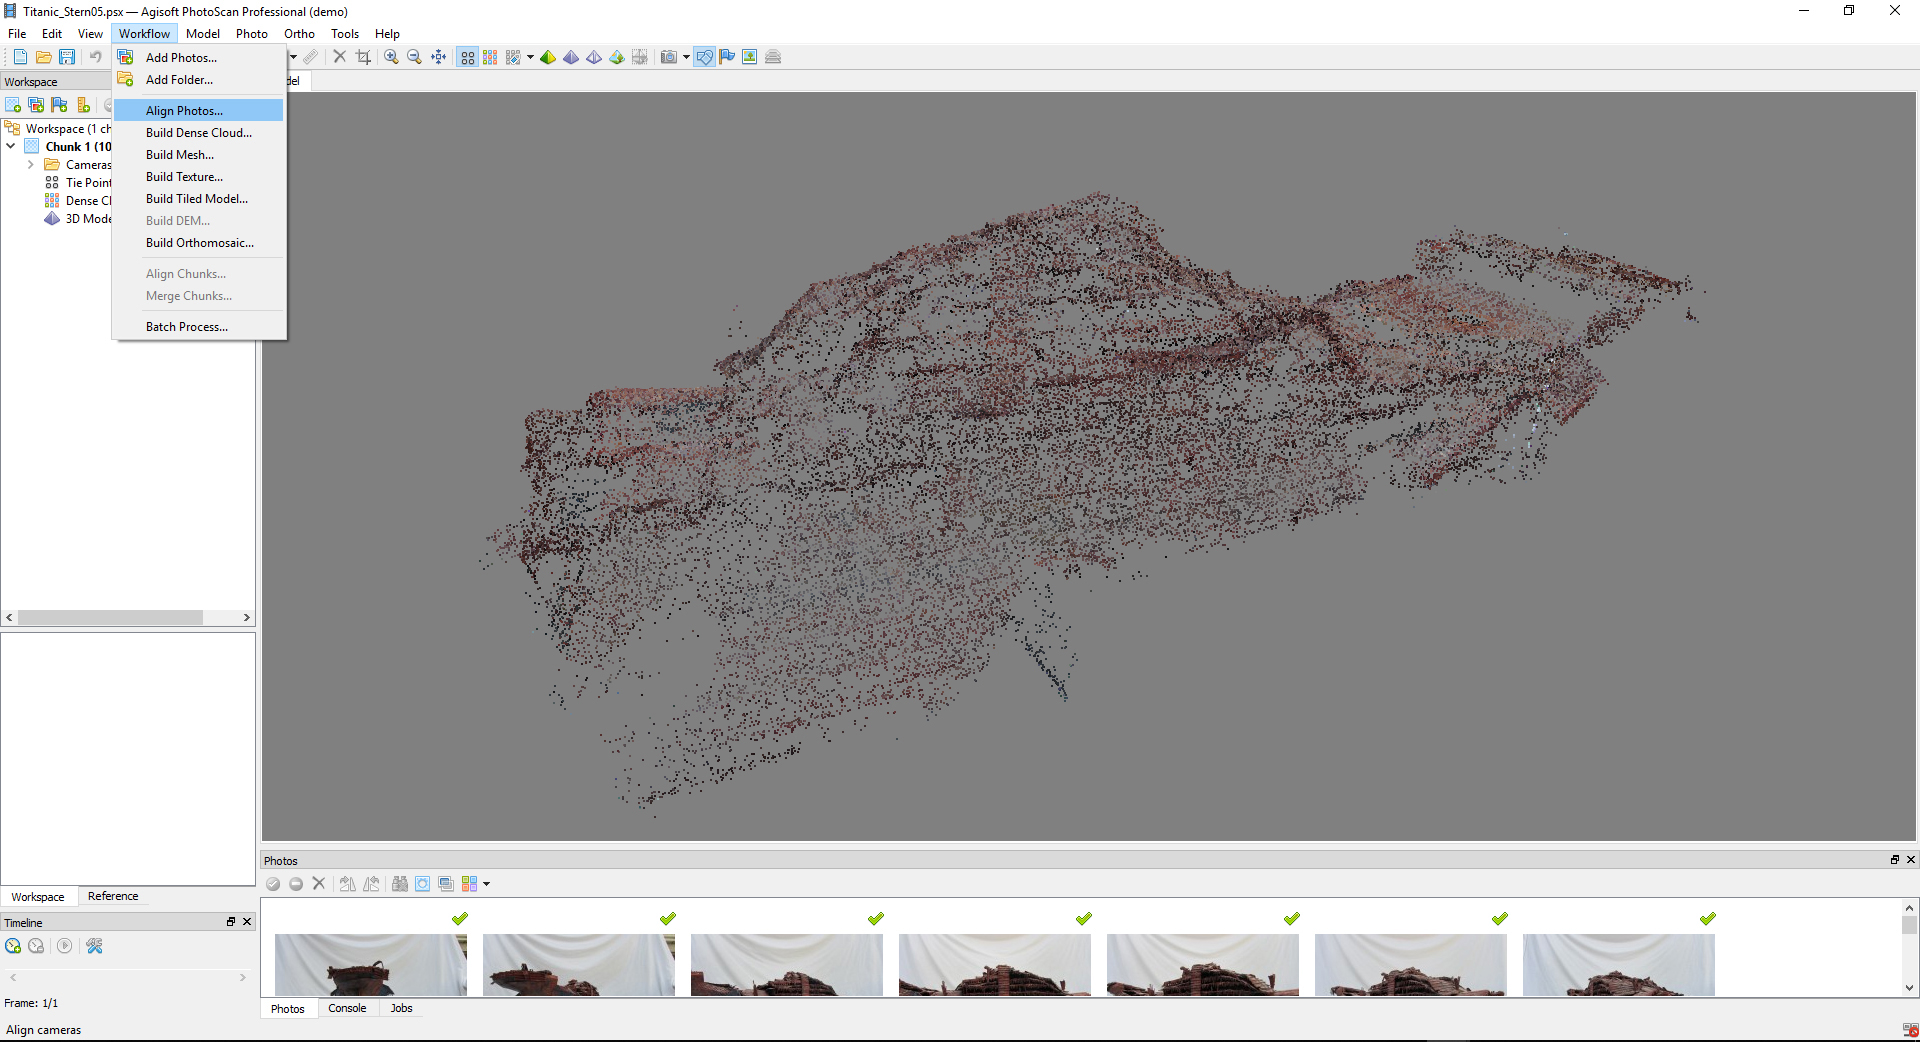
Once you’ve launched Photoscan, you can load your photos by going to the Workflow tab, clicking Add Folder, selecting Create Camera from Each File, and hitting OK. Your photo collection will load into the Photos field. The Workflow tab is essentially a step by step guide to building your final asset, with easy to follow sub-steps along the way. The next step is to align your photos. Photoscan checks photos against subsequent ones to determine points of similarity and matches them across the image set. Additionally, it determines the position of the cameras and builds a Sparse Point Cloud. This Sparse Cloud is only a representation of a photo alignment and will not be used in mesh generation. The image above shows the Workflow menu along with the loaded and aligned photos. ‘Good’ photos are indicated with a green check mark.
As mentioned above, the Sparse Point Cloud represents camera positions and will not be used in mesh generation. Instead, to generate meshes, you’ll need to use the Dense Point Cloud. To build the Dense Point Cloud, go to the Workflow menu and select ‘Build Dense Cloud’. A dialogue will appear and display quality and filtering parameters. The settings you apply here affect build times – so experiment till you find a setting that works for you.
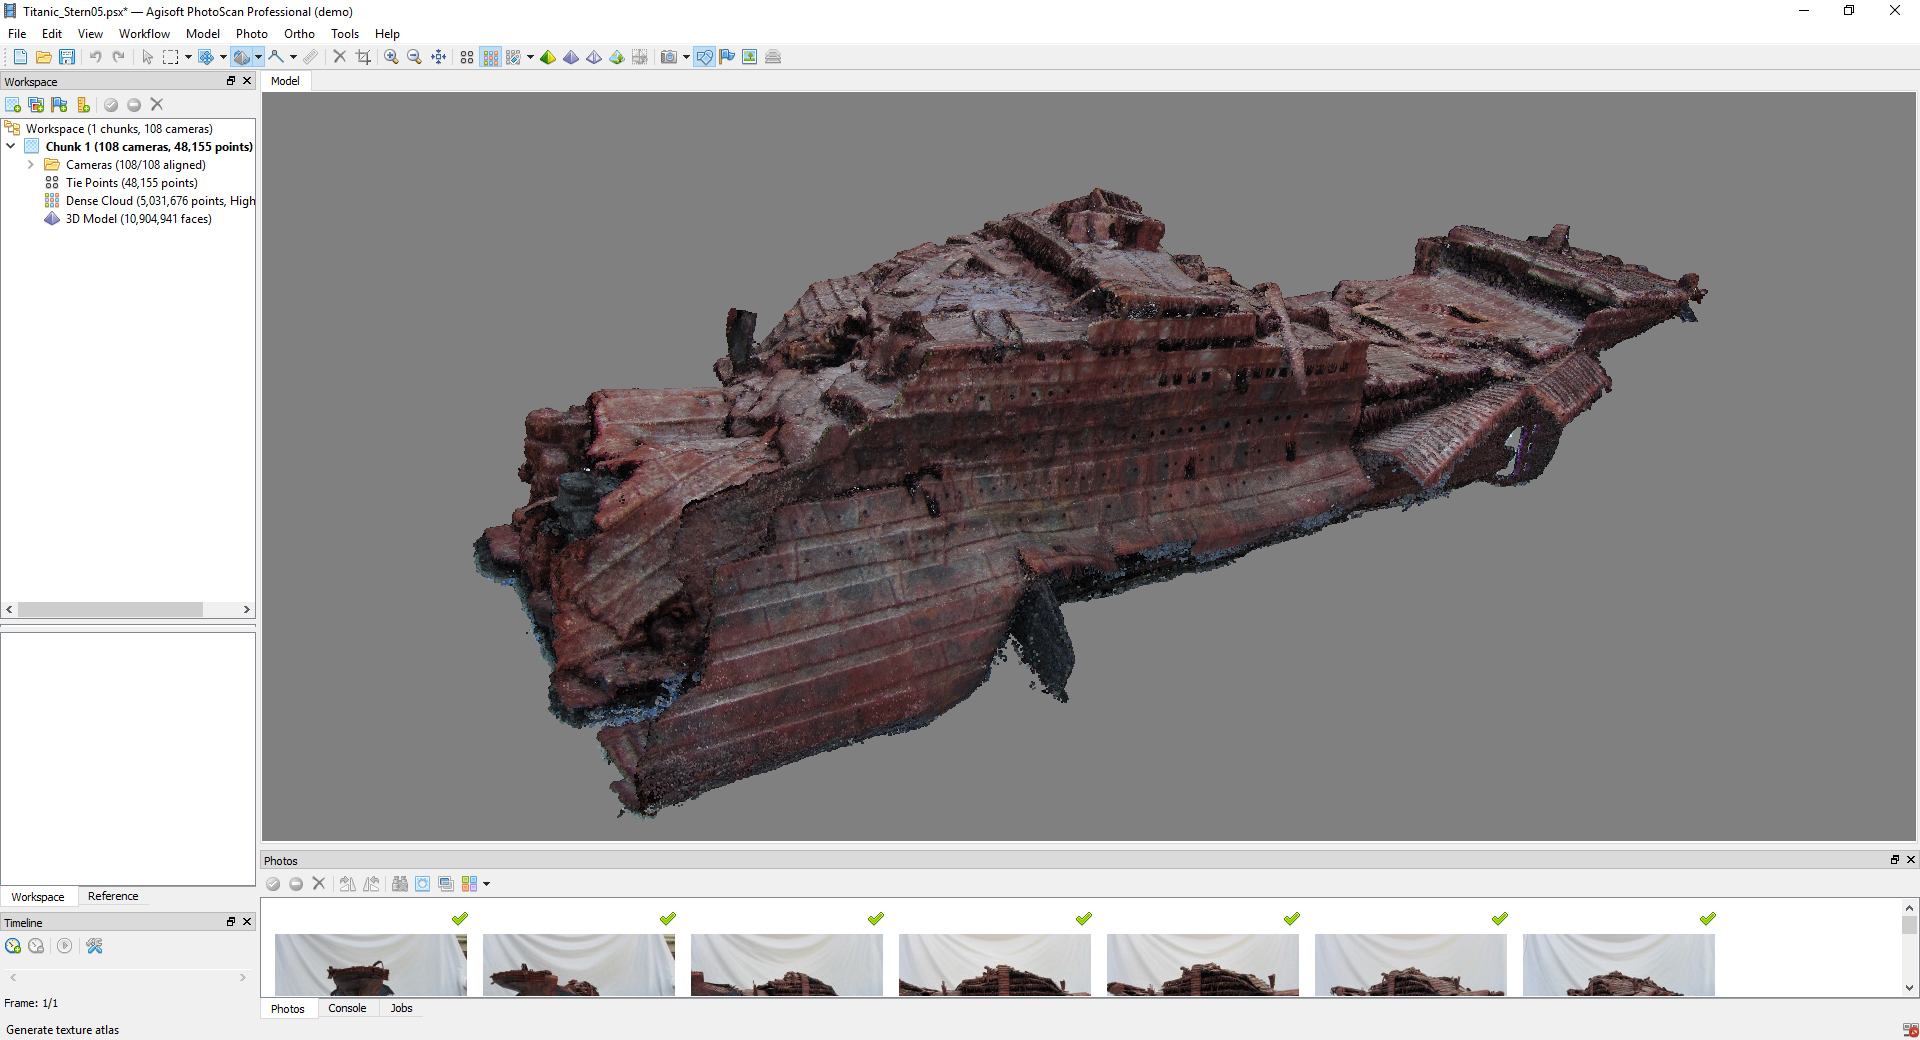
This image shows the generated Dense Point Cloud with removal of stray points underway. There is a lot more detail generated for the Dense Cloud in comparison to the Sparse Cloud. You can do a considerable amount of manual editing to the Dense Point Cloud by deleting stray point clusters and cleaning up larger areas of unwanted points.
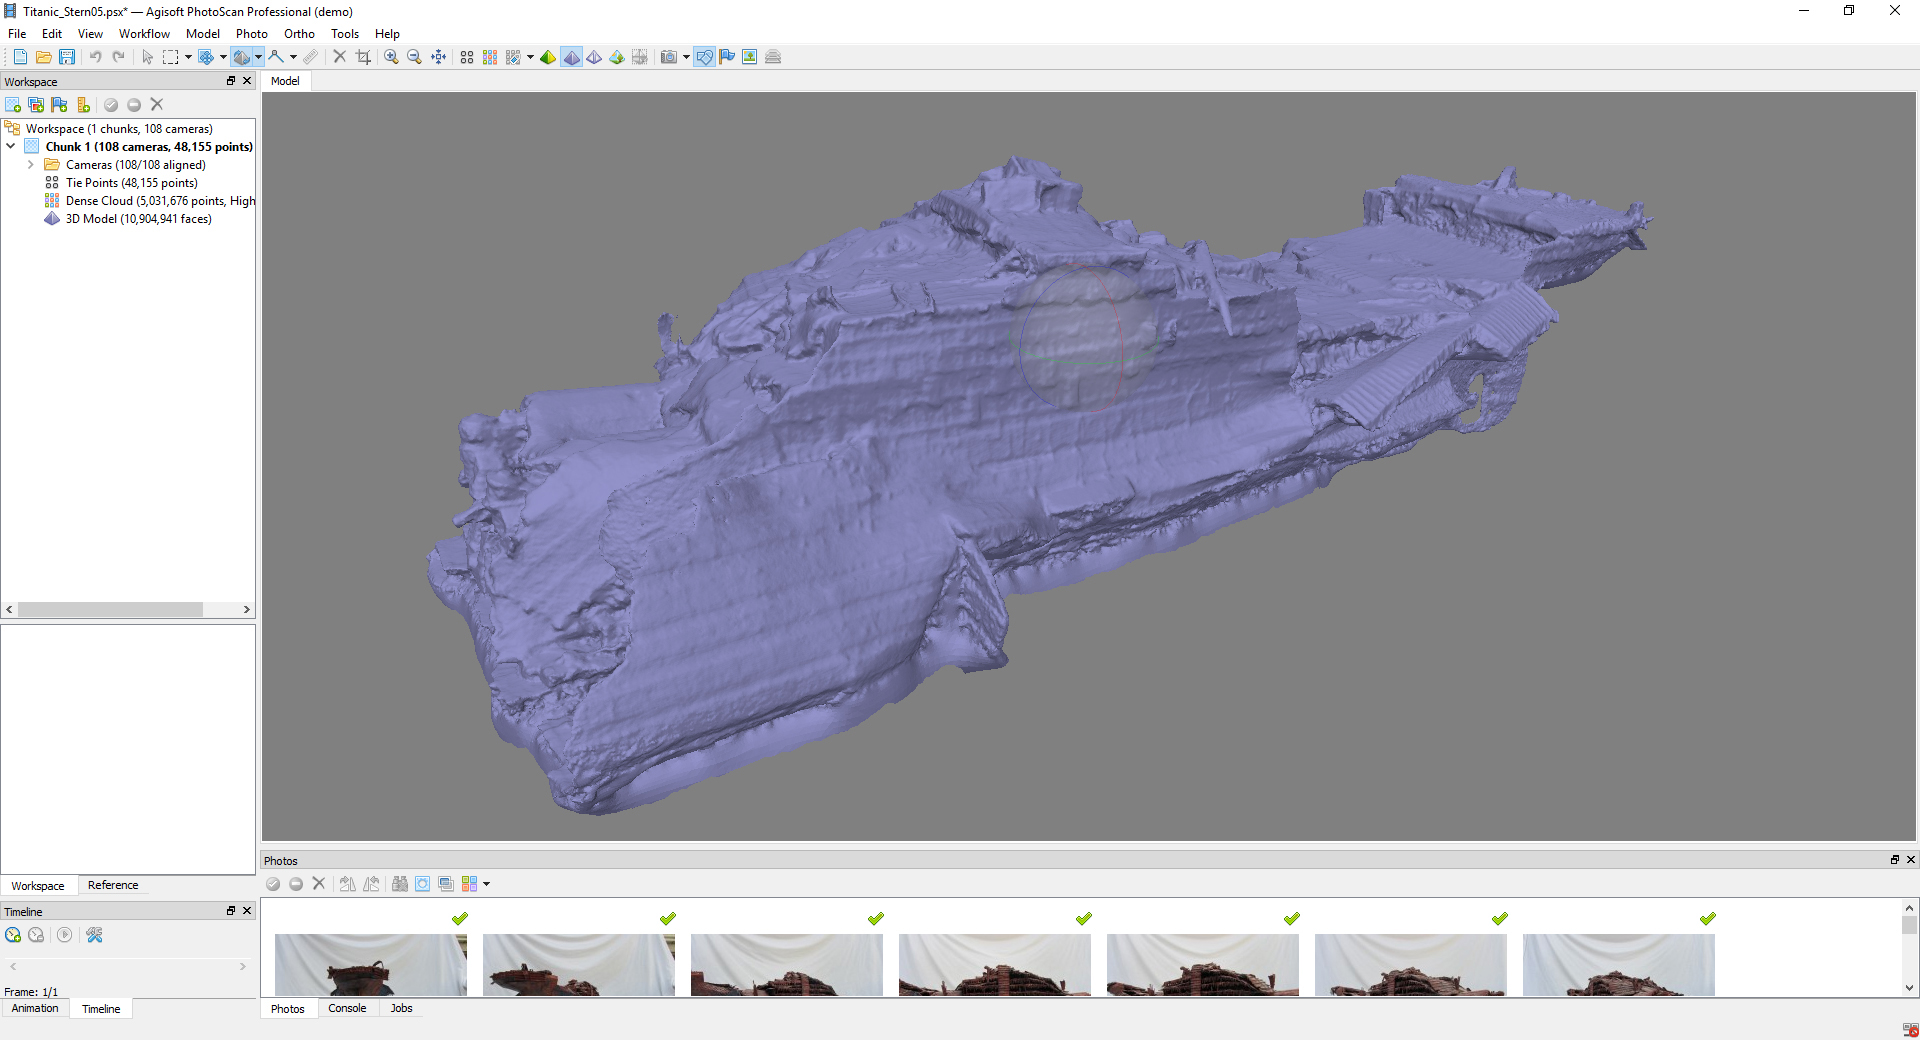
We’ve reached the mesh building stage. The process is relatively simple – go to the Workflow tab and click Build Mesh. This step may require some trial and error, as poly count and higher quality settings will impact build times. It’s good to have a fair amount of control over these settings prior to committing the build. This image displays the final raw base mesh at approximately 10 million tris. While there was a lot that can be done to improve the mesh, I wasn’t worried about it’s flaws at this stage. With only vertex colors applied, I could clearly see that the overall quality was good and given that I was doing this to get a feel for the process, I was happy with the result. I moved on to the next and final production stage – building the textures.
These images show the ship with the textures created and applied. Once again, it’s a simple process. Go to Workflow – Build Textures and set your preferred options (such as output size, format, etc.). I chose to build four 4k textures for the model. Mapping for these textures is automatic and can be messy, but the textures were readable.

At this stage, I was ready to export the model for viewing and optimization in 3ds Max. Pro-Optimizer took the poly count down to 2.2 million tris. Further optimization ran the risk of breaking the UV mapping. It was at this point that the possibility of using Toolbag came up, having seen it used to great effect in my workplace. I finished preparing the mesh in Max and created very crude Roughness and Normal maps in Photoshop from the Albedo texture. The ship is buried deep at the back and leans towards her left slightly, so I positioned the ship accordingly in Max and imported it into Toolbag as an .FBX. The image above shows the final optimized model and it’s positioning in 3ds Max.
Presenting in Marmoset Toolbag
The next phase of the project was to present it using Toolbag. This was an unplanned shot in the dark, and I was fairly surprised with its speed and ease-of-use from the get-go. Once the ship was imported, it was great to see how Toolbag handled what is a fairly heavy asset at 2 million tris with twelve 4k textures (4 Albedo, 4 Normal, and 4 Roughness maps). To give myself some wriggle room, I reduced the Albedo and Roughness maps to 2k and kept the Normal maps at 4k to retain detail.

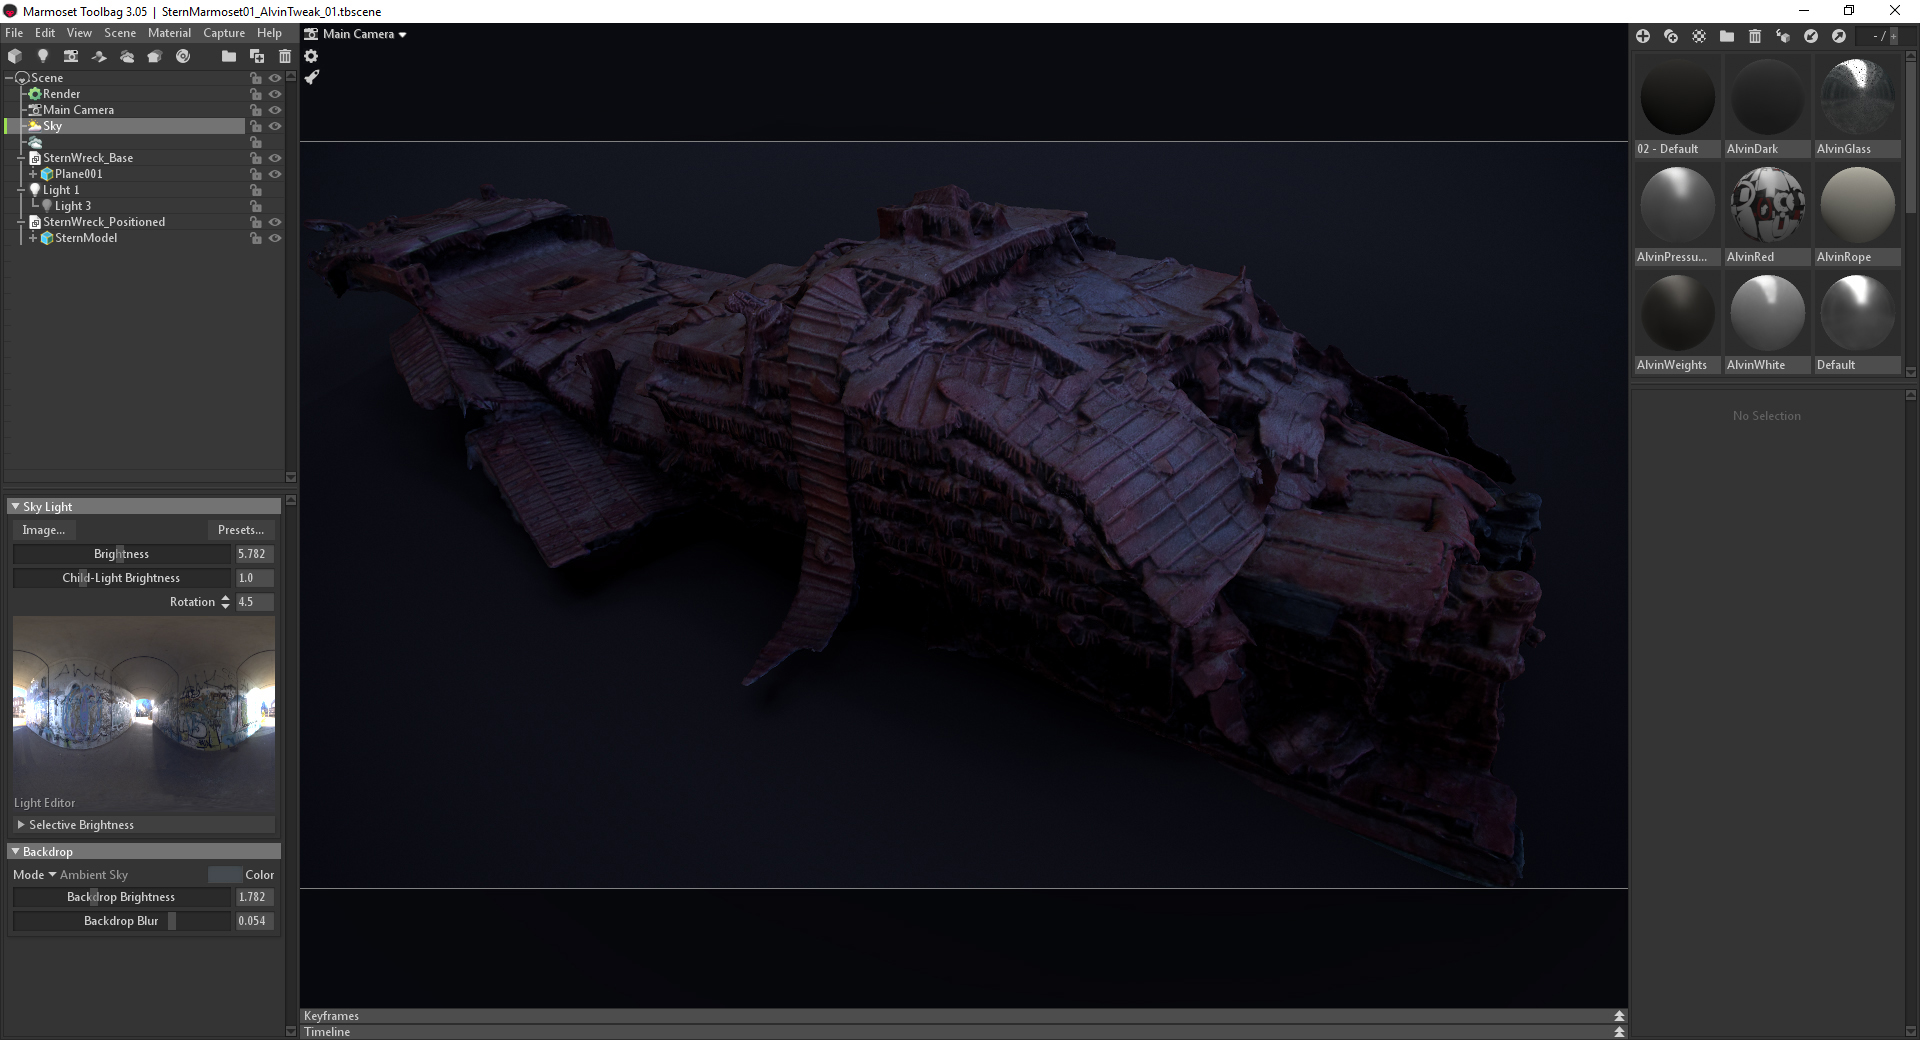
I applied all of the materials and found that I was easily able to get an initial lighting setup that I liked without any tutorials or guidance. It was that intuitive. I selected the Berlin Underpass Sky Preset, switched on Global Illumination in my Render settings, and proceeded to tweak the Occlusion Detail and Voxel Resolution settings. Further tweaks were in place, but this is what the scene looked like initially.
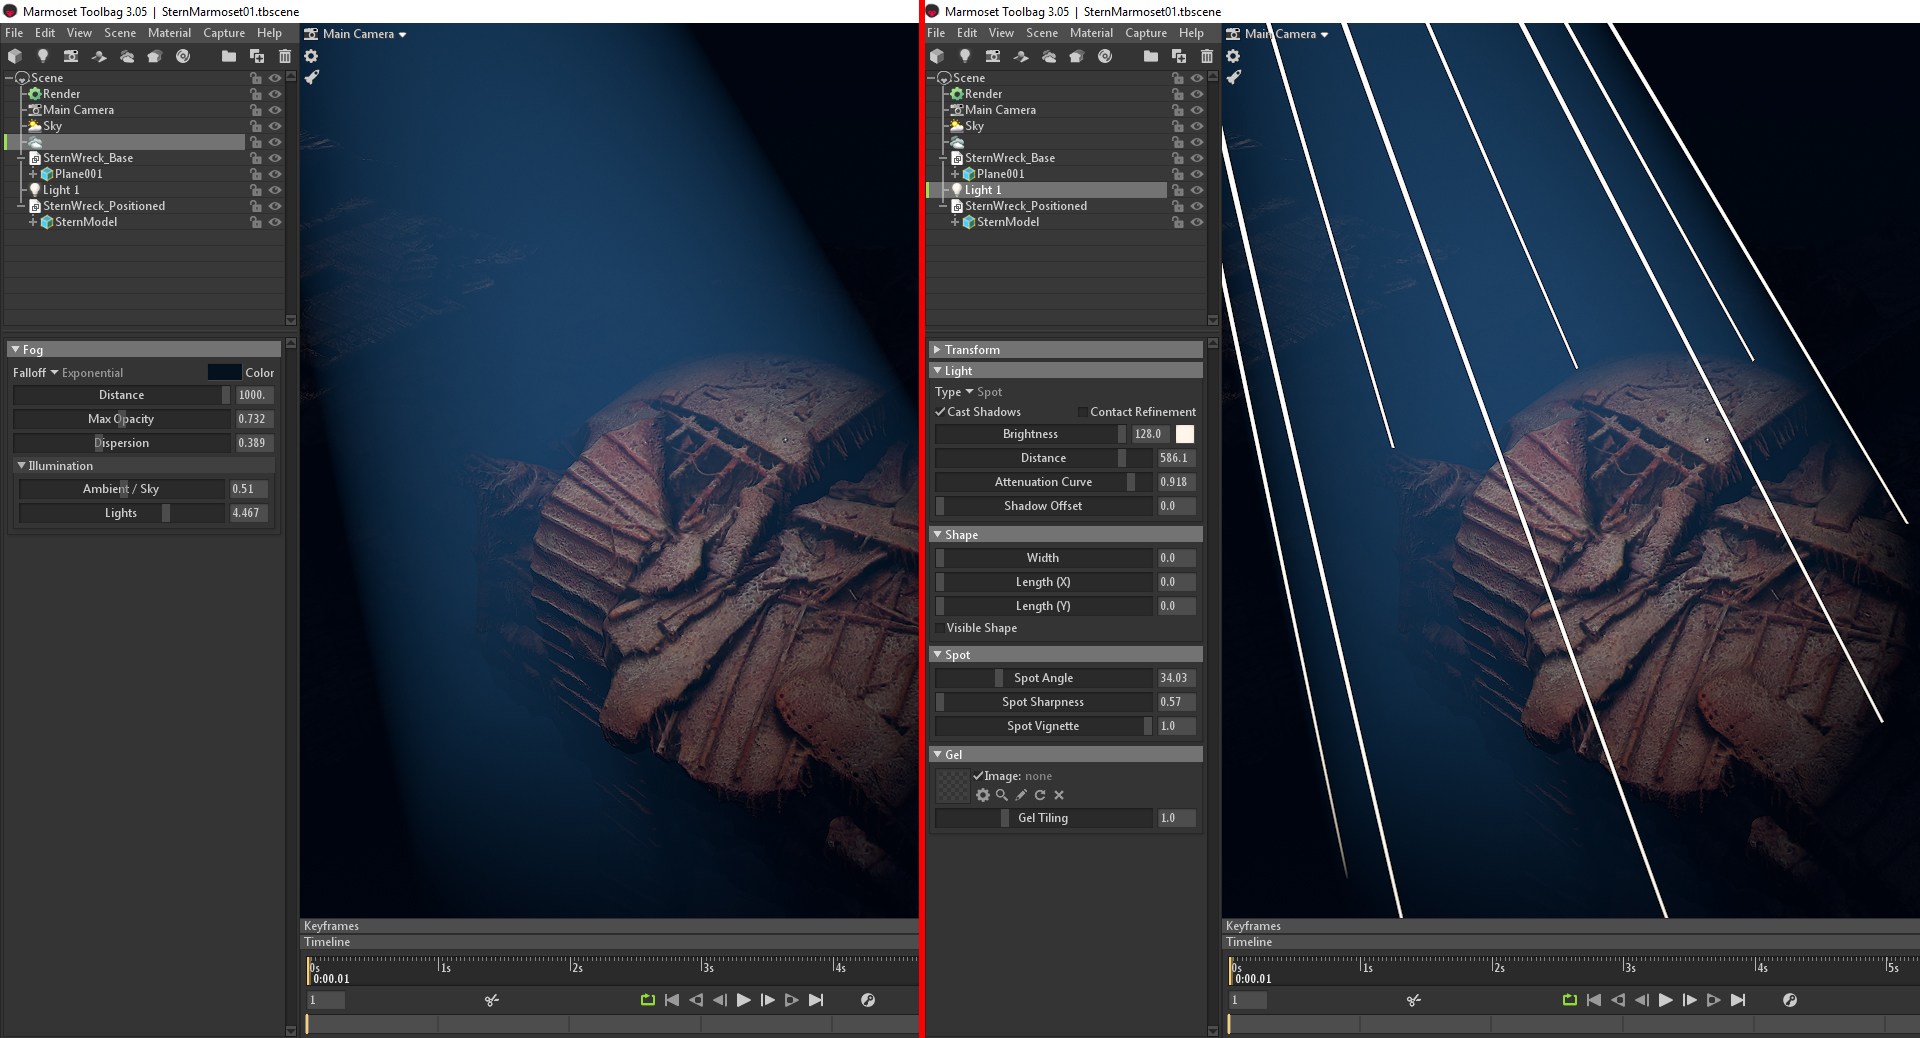
My next task was to simulate a deep sea environment, so I first added Fog. I wanted the ship to look like she was being lit from above by a camera and light sled, similar to ones used to explore the ship when she was first discovered. To achieve this, I added a downward shining Spot Light to the scene and played with its properties till I got the desired look. The image above shows other work that was done to the overall scene lighting. The amount of light in the scene was greatly reduced to simulate deep sea conditions. I didn’t create total darkness as I wanted to maintain the feeling of the ship fading into the distance. I was still unsure where I was going with the scene, so I took a render into Photoshop to do some look development and came up with the following image.
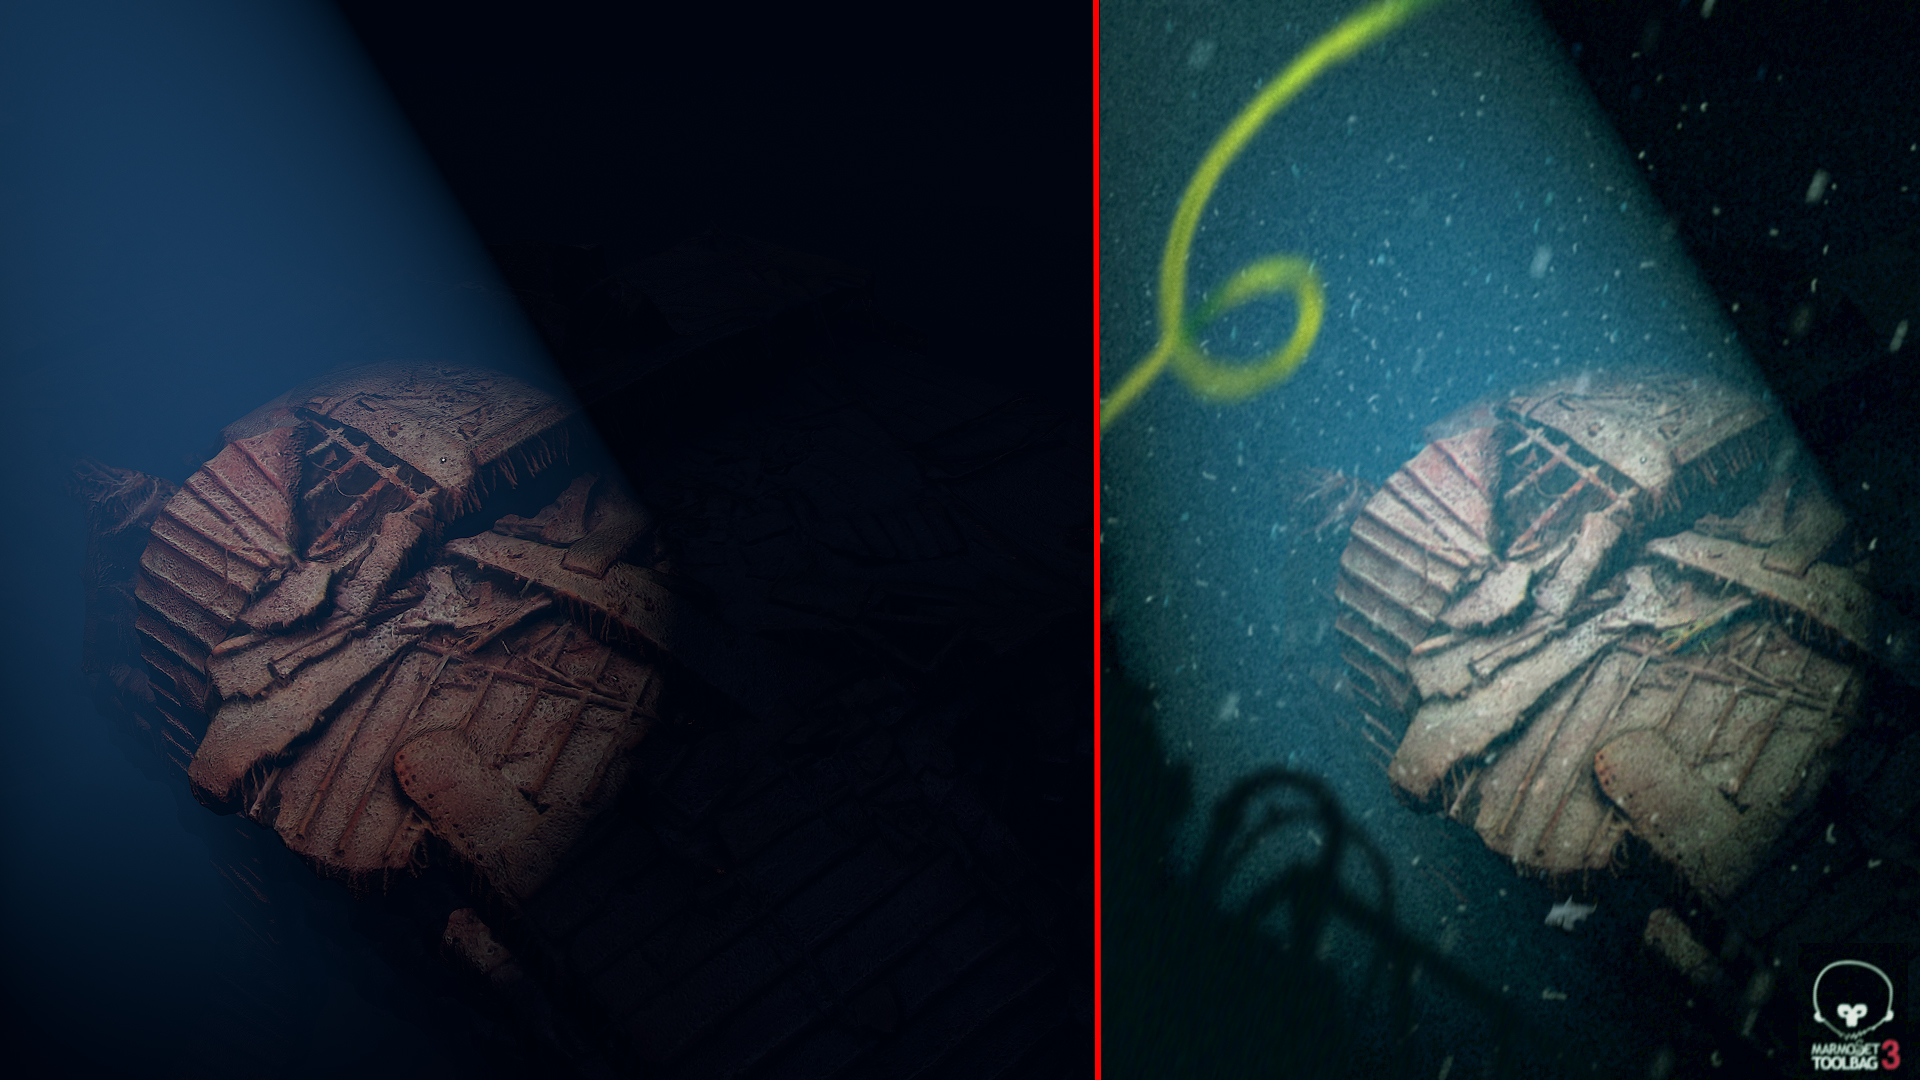
The image on the right gives an idea of what I wanted for a final result. I needed particulate matter drifting down throughout the scene and a mocked up viewport for a submersible. Toolbag doesn’t have a native particle system, but you can create particles in Maya or 3ds Max, convert them to animated geometry, and import them into Toolbag. I found an excellent tutorial detailing how to do this in Maya using nParticles and it includes a very handy script for converting the particles.
I needed to animate my camera in Toolbag, which is similar to animating in Max and the UI is familiar for anyone who is accustomed to the Graph Editor in Maya. Animating the camera first gave me an idea of how long the nParticle simulation in Maya needed to be, which was roughly 20 seconds. I experimented with exporting different particle densities and pulling them into Toolbag. Each particle is converted into a single quad mesh and includes an alpha map. A large amount of alphas can affect performance, even with file handling as good as Toolbag’s.
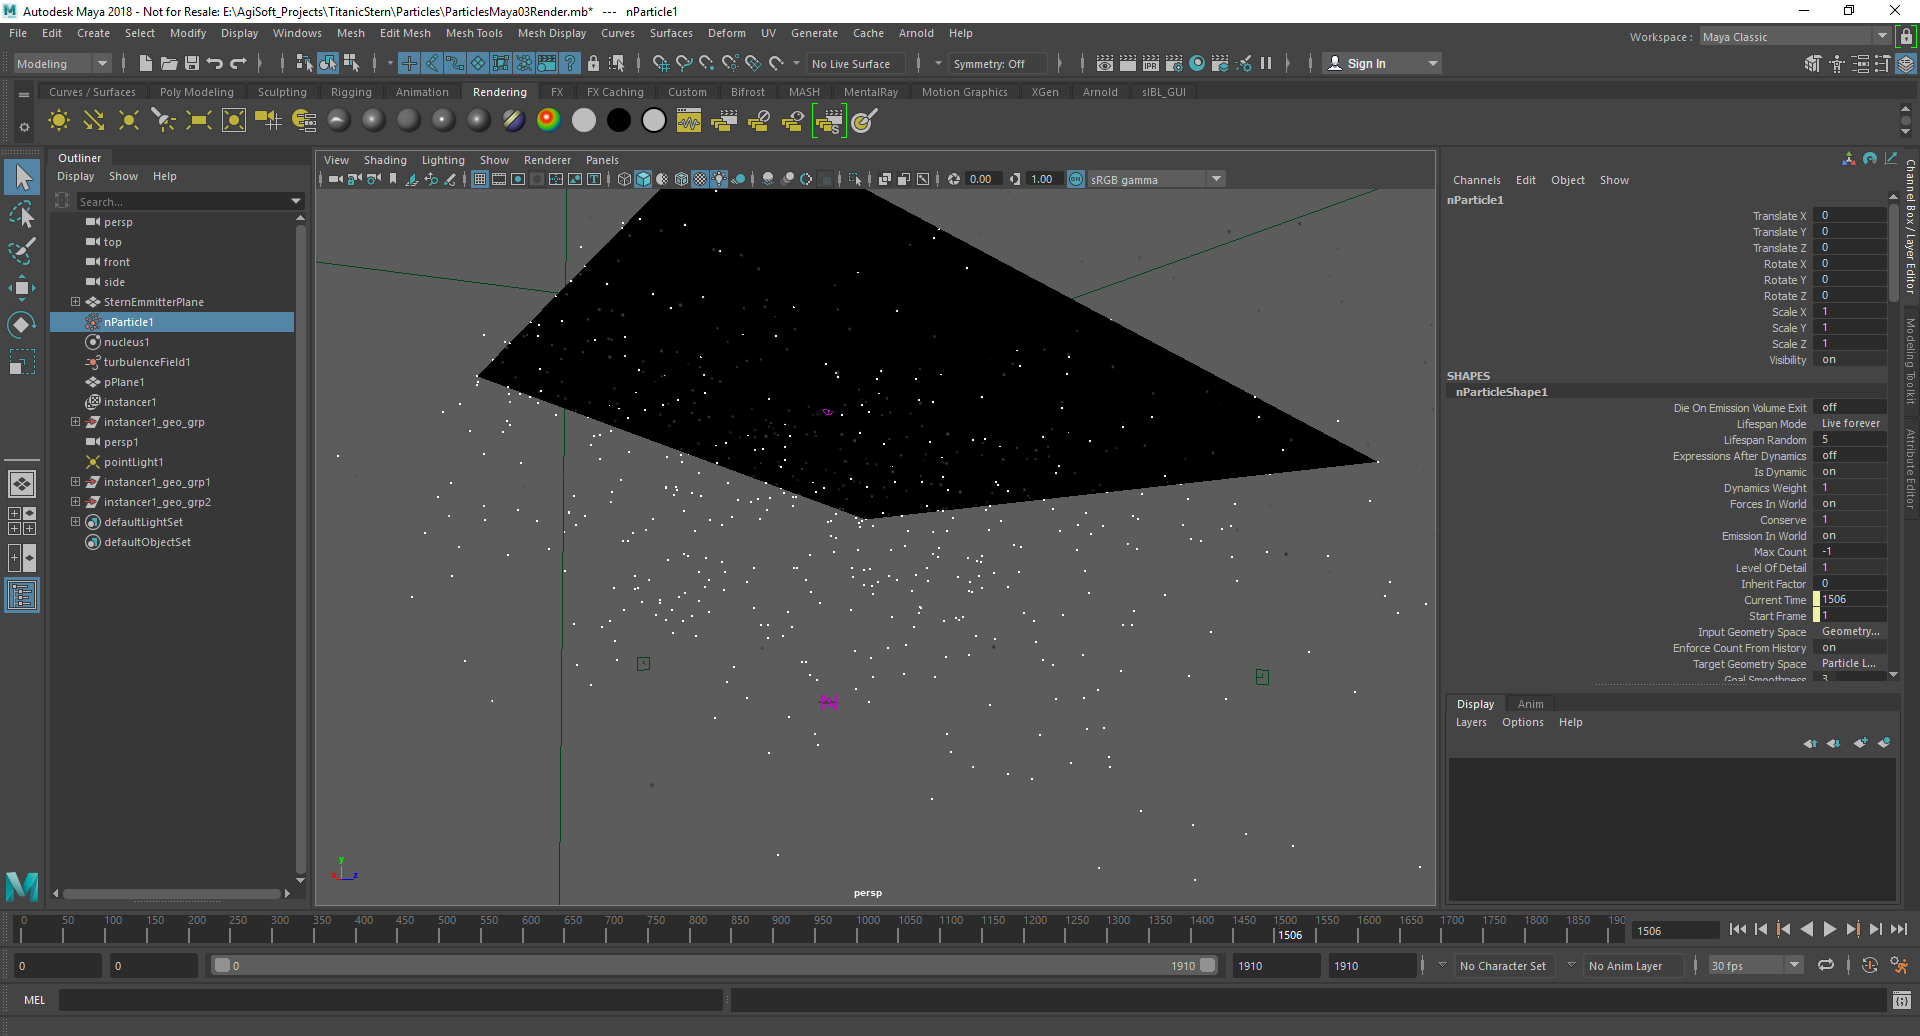
This was my particle setup in Maya, which shows the Emitter Plane. This plane was scaled to be slightly larger than the Titanic model and the particle density was not too high. I could duplicate the particles in Toolbag if needed, so I didn’t want to over-do the initial density count.
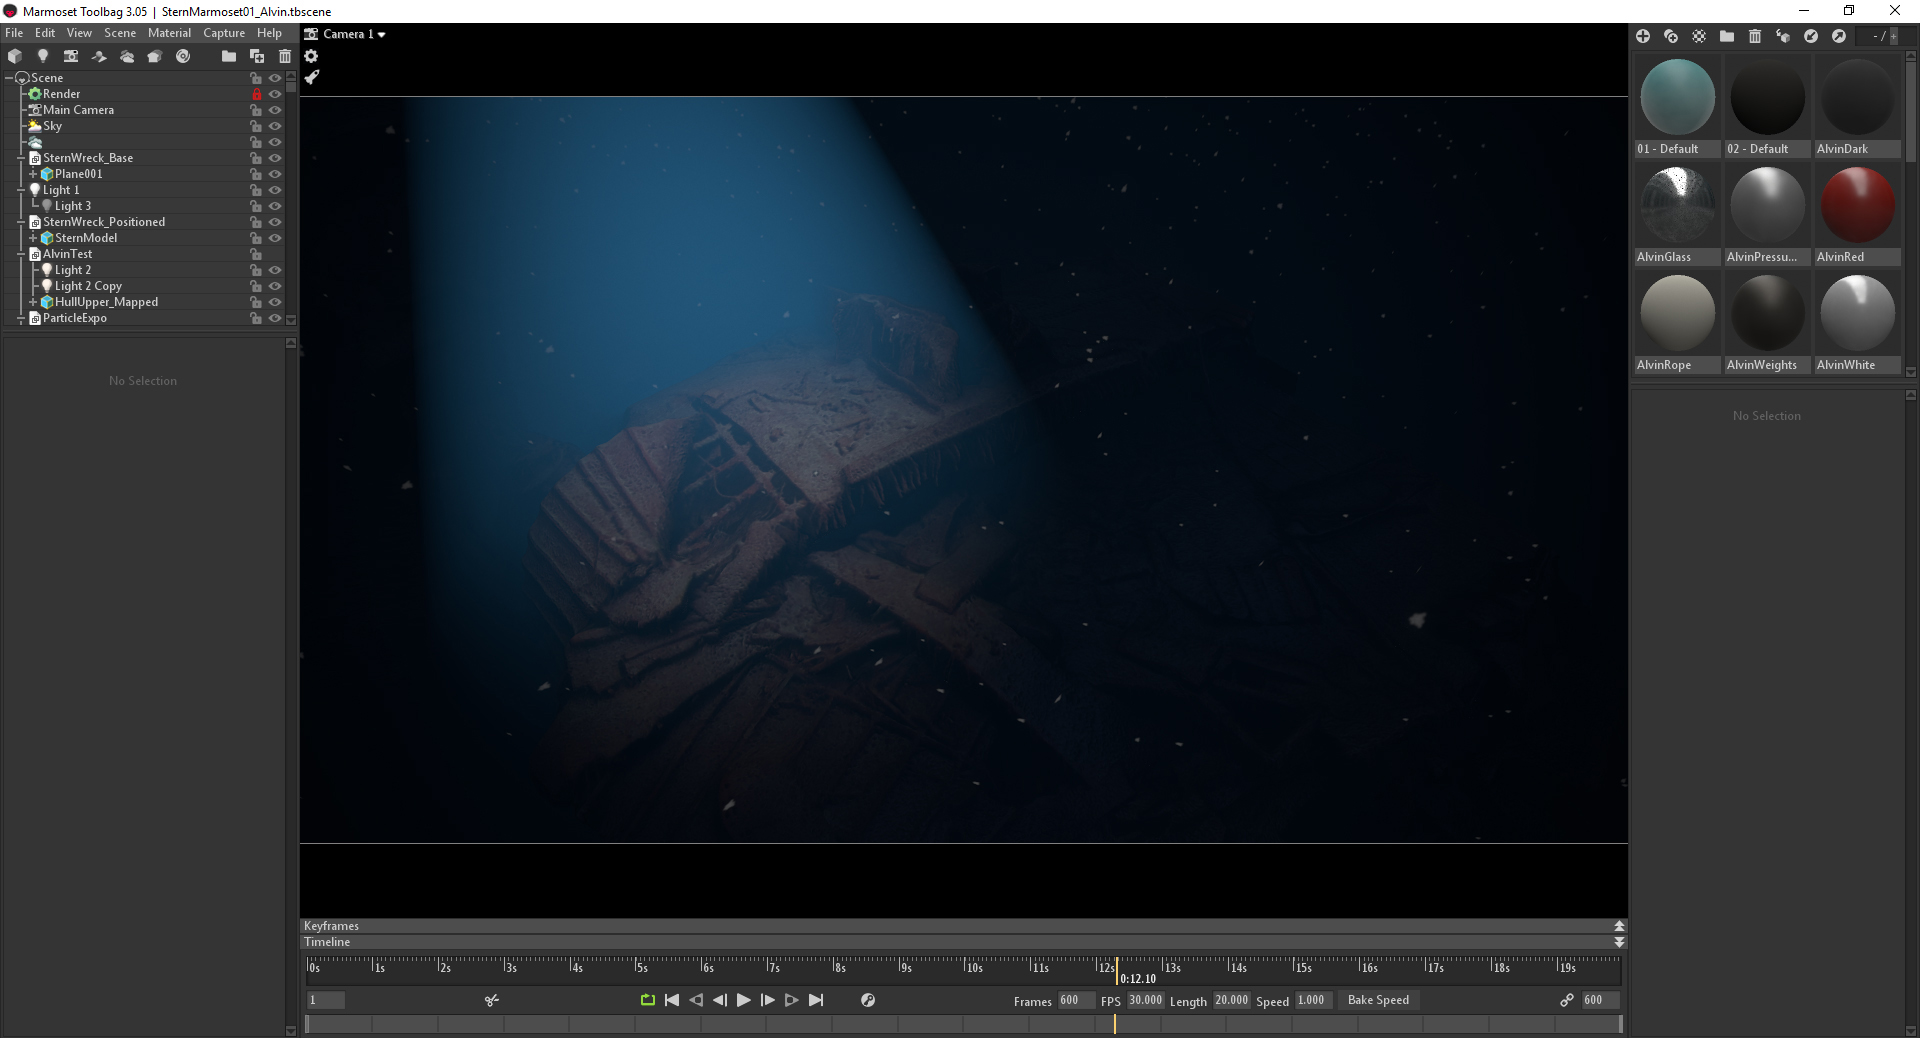
This is my scene in Toolbag with particles added.
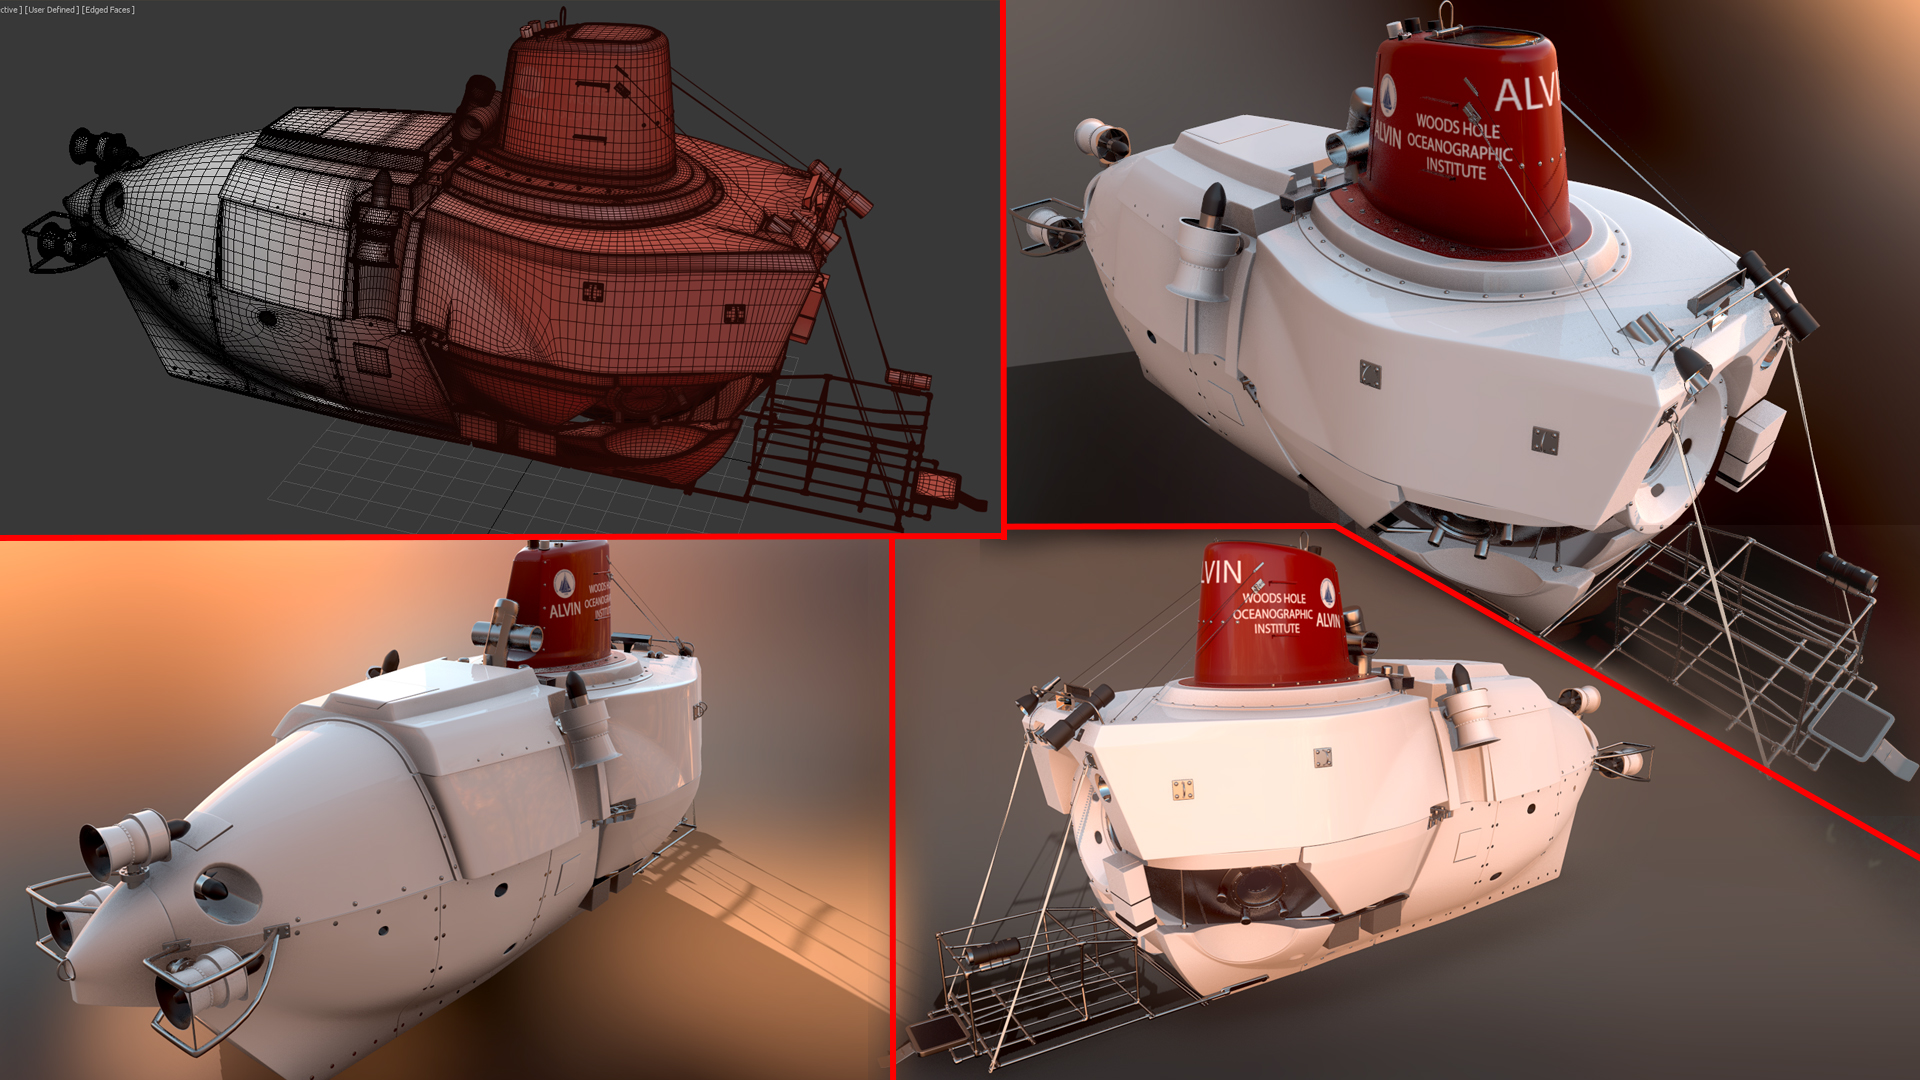
The next step was to mock up the submersible viewport. This was built in Max, and as with everything that had to do with this project, it expanded beyond my original intention. Once I’d started building the submersible viewport, I figured I might as well build it entirely. So I built the DSV Alvin, which was the sub that made the first manned dives to the Titanic in 1986.
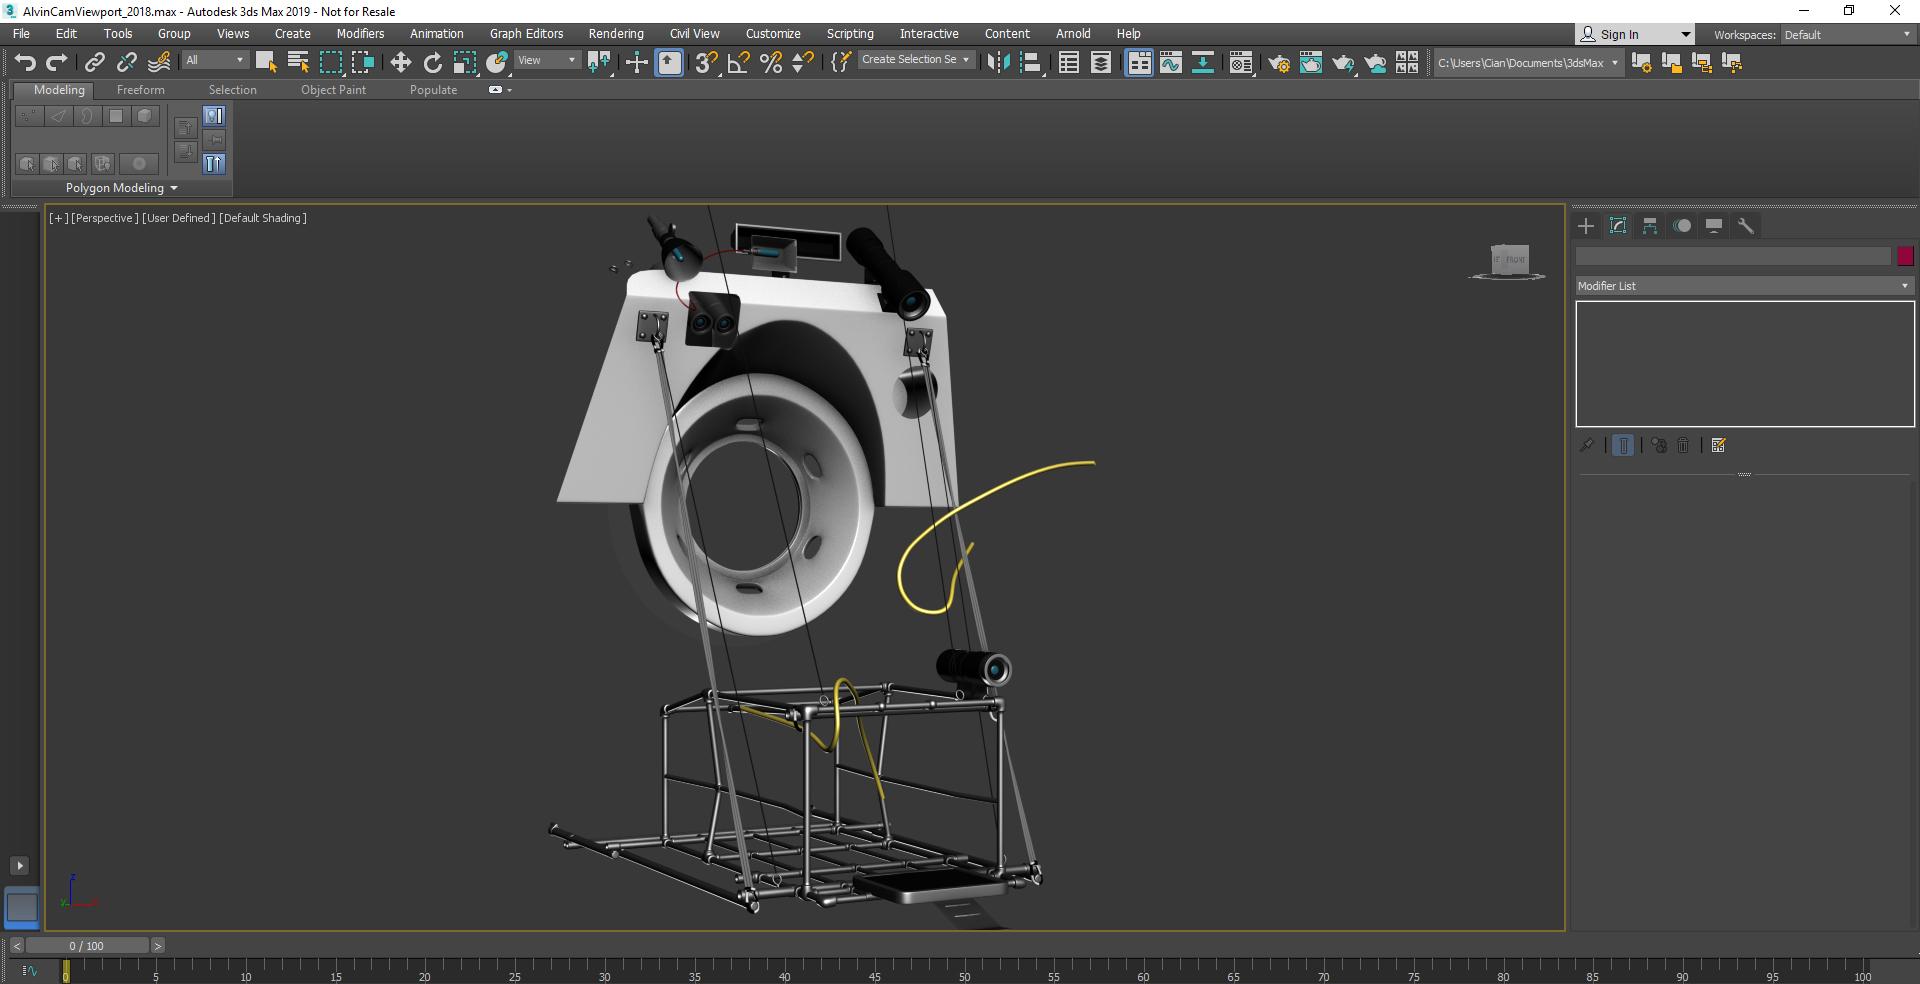
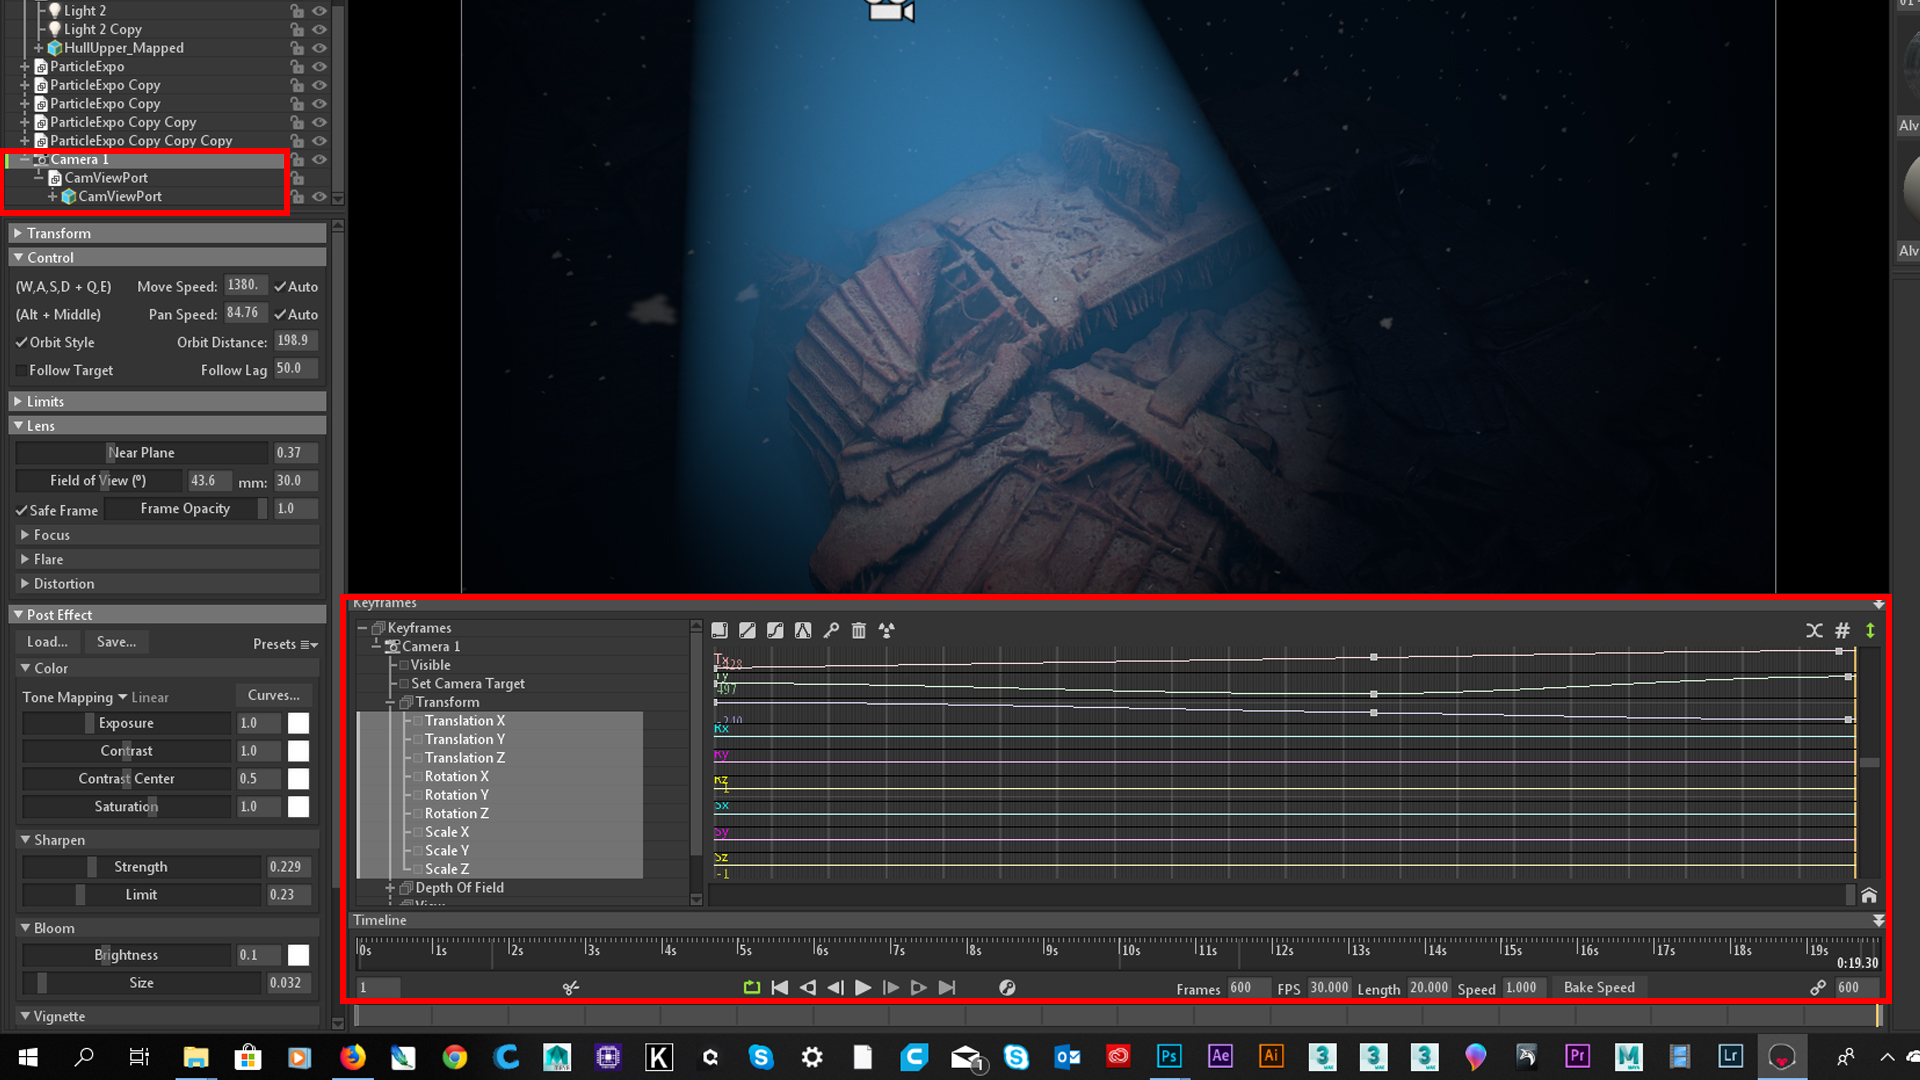
This is the mock up for the sub viewport rig, which would later be attached to the Animation/Render Camera. I created this Camera in Toolbag for animating and rendering and kept the Main Camera free for scene navigation.
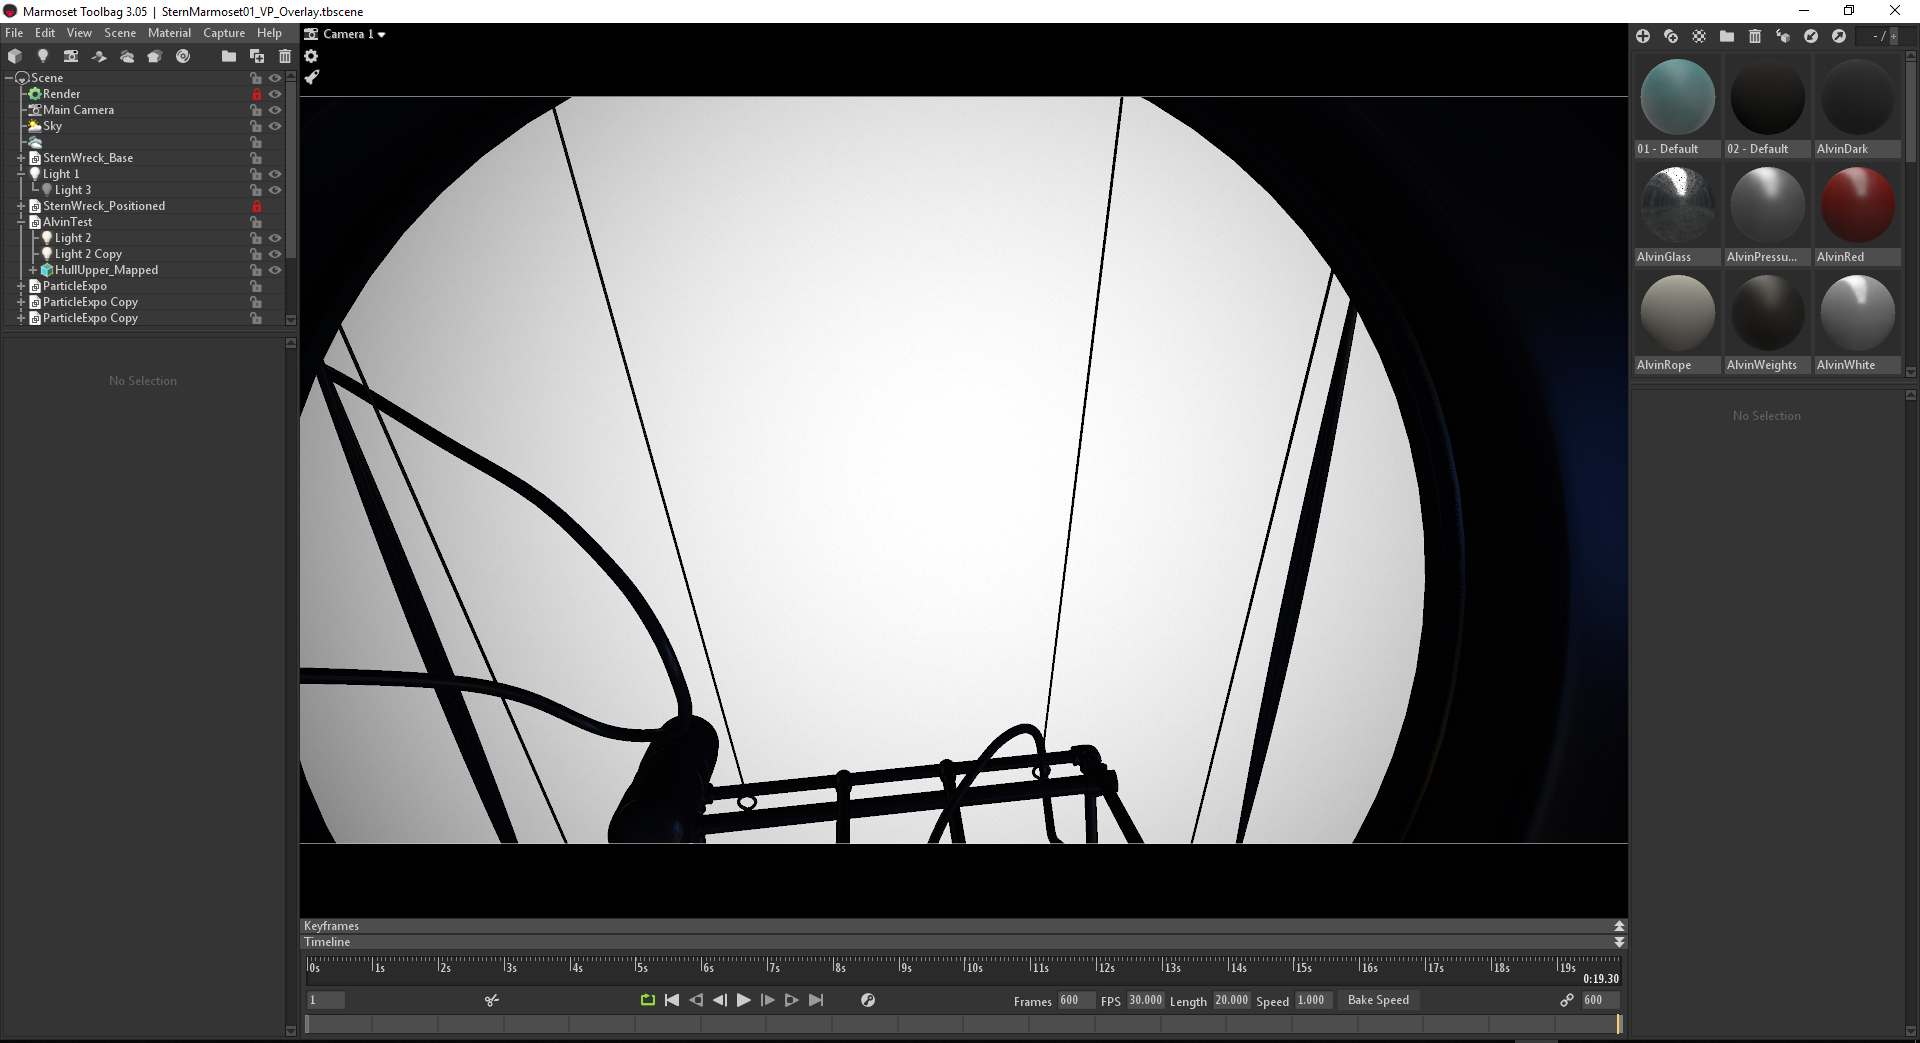
My intention was to render the sub viewport separately in Toolbag with an alpha channel, add it as an overlay in After Effects, and add a camera blur. With the overlay set up, the final task in Toolbag before rendering was to add the Alvin to the scene, set up it’s materials, lighting, and animations. As far as materials were concerned, I simply needed to create a texture for the red sail showing Alvin’s name and insignia and tweak some of it’s material properties. A spotlight was added to the front as well. After creating some simple animations, the Alvin setup was ready for rendering in Toolbag.
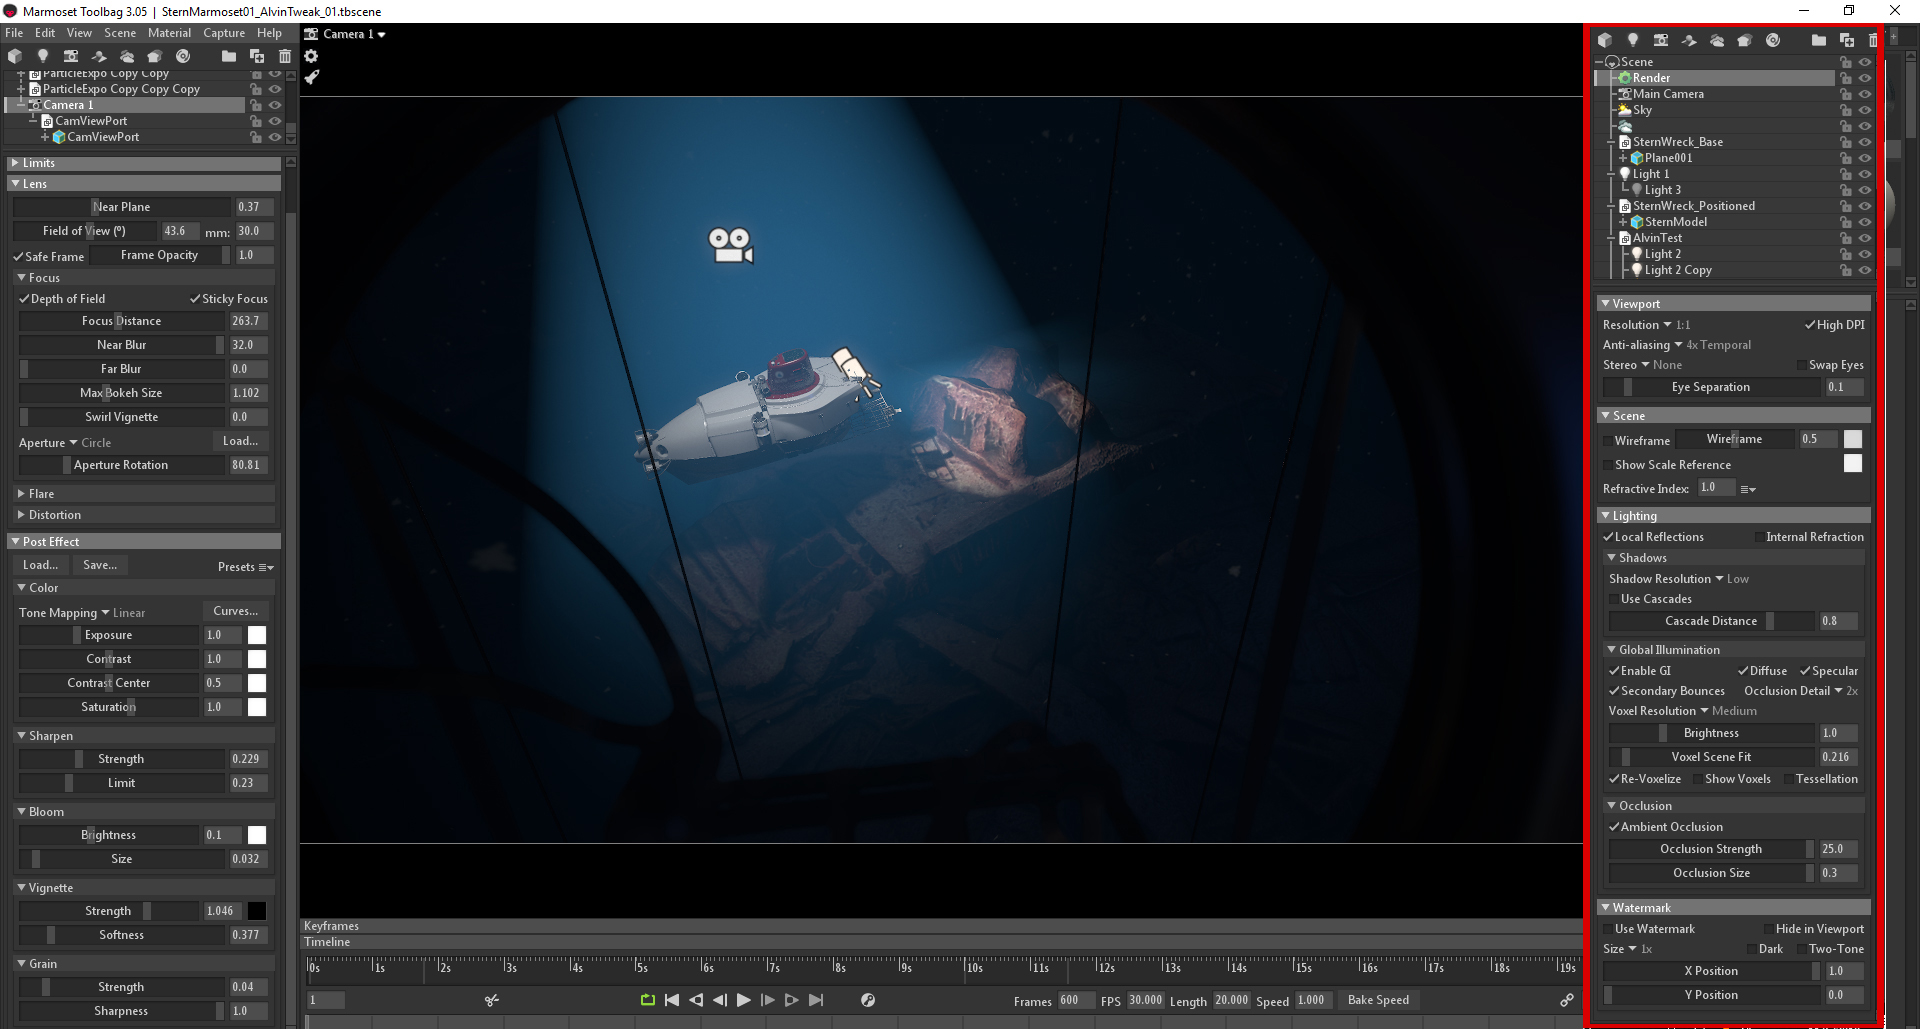
The image above shows the final appearance of the scene in Toolbag. I’ve overlayed the render settings on the right and the camera settings can be seen on the left. I kept the render and camera effects fairly subtle, as I knew I’d be finishing the scene in After Effects. I captured the scene in two passes, both rendered as image sequences with the second pass being the Sub Viewport overlay (as a .tga 32bit alpha sequence).
There was a final addition to the lighting that I wanted to create to enhance the authenticity of the scene: the main overhead light. This light is simulated by a downward looking Camera Sled, beaming at a constant intensity. However, these sleds typically contain high definition still cameras that capture a still image once every 8 seconds and they fire off a flash to do so. You’ll notice these bright flashes in the videos. This was a simple task, in which I added a second Spot light parented to the main Spot light. I ramped up the Intensity and changed the light color to black. In a tight series of keyframes, I changed the color from black to white, then back to black.
This was as far as I needed to take this project in Toolbag. The next stage of post production in After Effects would provide some much needed polish to achieve the end result. Using Toolbag as the primary production tool for the project provided ease and speed with which I could achieve satisfying results, all while learning the basics. I was able to go even further in subsequence scenes. ‘Unsinkable’ became the first of a series based around the photogrammetry Titanic asset. After creating just a few short scenes, I can’t imagine not using Toolbag for future projects.
The Post-Production Phase
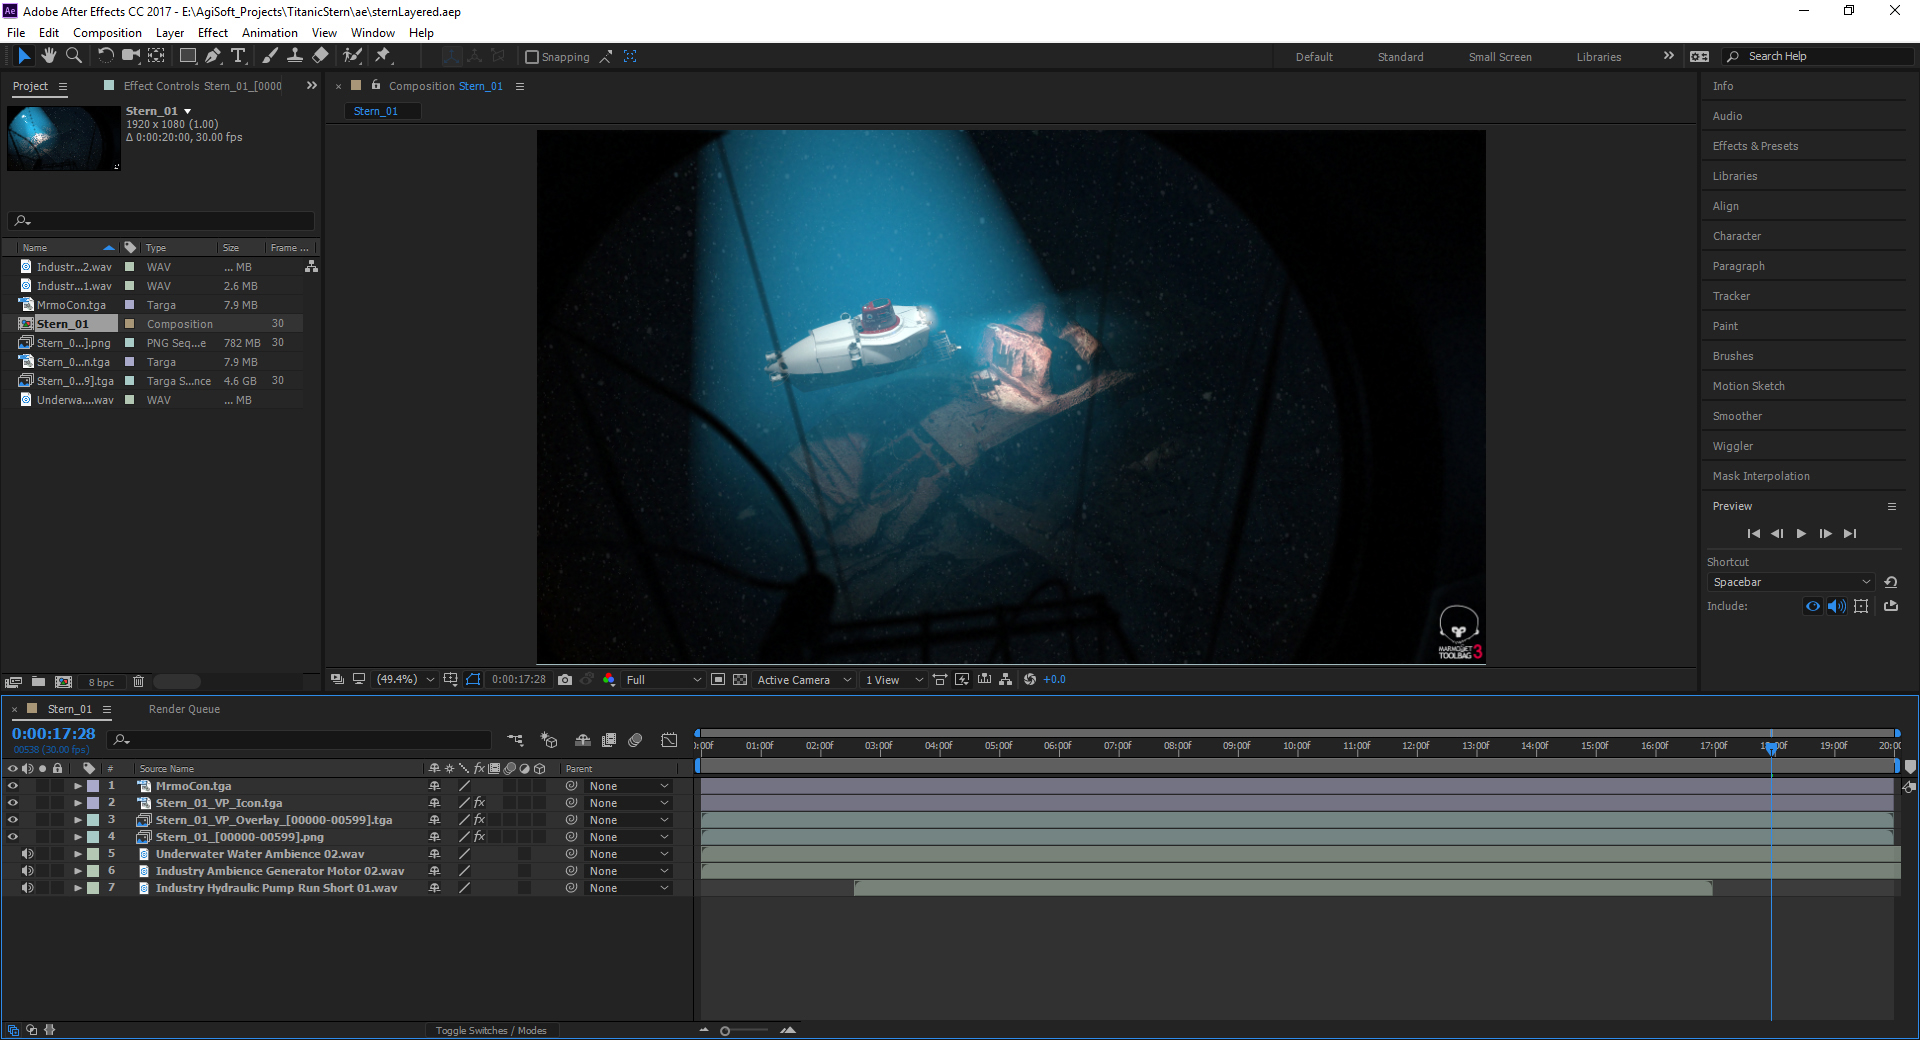
This section will touch briefly on the post production aspect of the project. First, I wanted to augment the particles added to the scene in Toolbag, and After Effects’ snow system proved to be an excellent tool for this. Among other work done, I did some color correction and added cyan and green filters to reduce the redness of the rust. At the Titanic’s depth, red does not show up well, even with the light of a submersible. It only shows up at any strength in the hottest points of the light beam. I had already added some very subtle grain to the scene in Toolbag, but I wanted to enhance this in AE to give an aged appearance to the footage. I added some underwater and machinery sounds which really improved the scene. Finally, I added the alpha Sub Viewport overlay that was captured in Toolbag and gave it a very subtle blur. With the post production finalized, I exported the scene as an .mp4.
Conclusion
This concludes my breakdown for ‘Unsinkable’. From beginning to end, the project was packed with firsts for me. And though this sequence is only 20 seconds (the first of many related shorts), it has significantly altered my workflow. I can foresee Marmoset Toolbag becoming a regular part of my production pipeline, especially for personal projects. I hope that this breakdown has provided interesting and useful insight into first time explorations of both Toolbag and photogrammetry workflows.
We would like to thank Cian O’Reilly for writing this article. Check out more of Cian’s work on Artstation and watch the first two productions of ‘Unsinkable’.
Learn how you can create your own elaborate material renders using Toolbag’s free 30 day trial. If you’re interested in collaborating on a tutorial or breakdown article, please send us your pitch, along with a link to your artwork, to submissions@marmoset.co.


