
Introduction
Hello, my name is Georgian Avasilcutei, and I’m a character artist from Romania. I’ve been in the 3D industry since 2003, although I spent the first few years working in multimedia production. I started working on games in 2008, and since then I worked on multiple titles such as Remember Me, Life is Strange, and Dishonored 2. I created props for half of my career and worked on characters during my free time. When my skills were decent enough, I fully transitioned into a character artist. It’s what I wanted to do since the first day I opened 3ds Max.
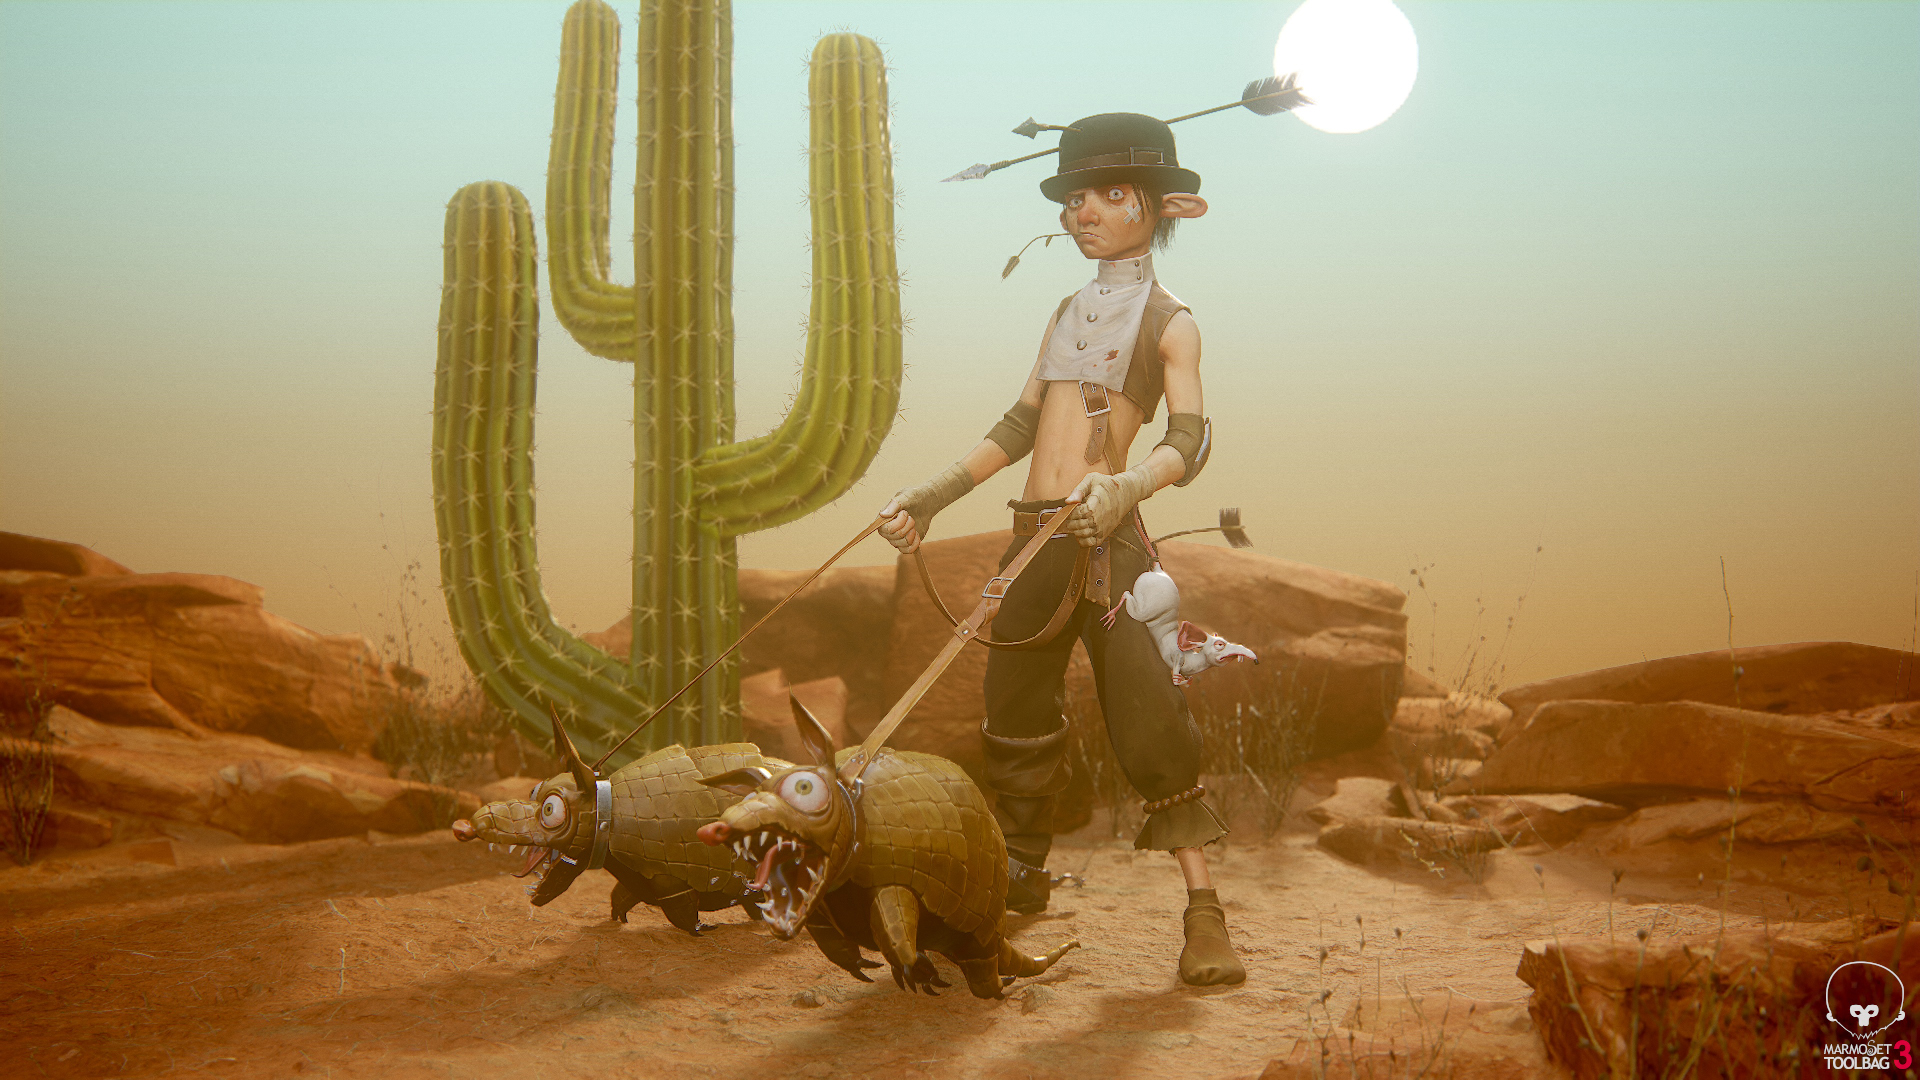
During this article, I’ll break down the scene setup of my Billy Three Arrows entry for Artstation’s Wild West Game Character Art challenge. I’ll start off by talking about the creation of the character. I would also like to thank Tony Sart for his amazing concept. You can check out his work here.
Modeling & Sculpting
The high poly was mostly created in Zbrush and Marvelous Designer, with a few interventions in 3ds Max. I started with a base body in Zbrush, trying to get as close as possible to the desired proportions. I decided from the beginning that I wanted to take a more realistic approach to the concept, so I tried to keep the proportions somewhat realistic with slight exaggerations here and there to stay true to Tony’s depiction of the character.
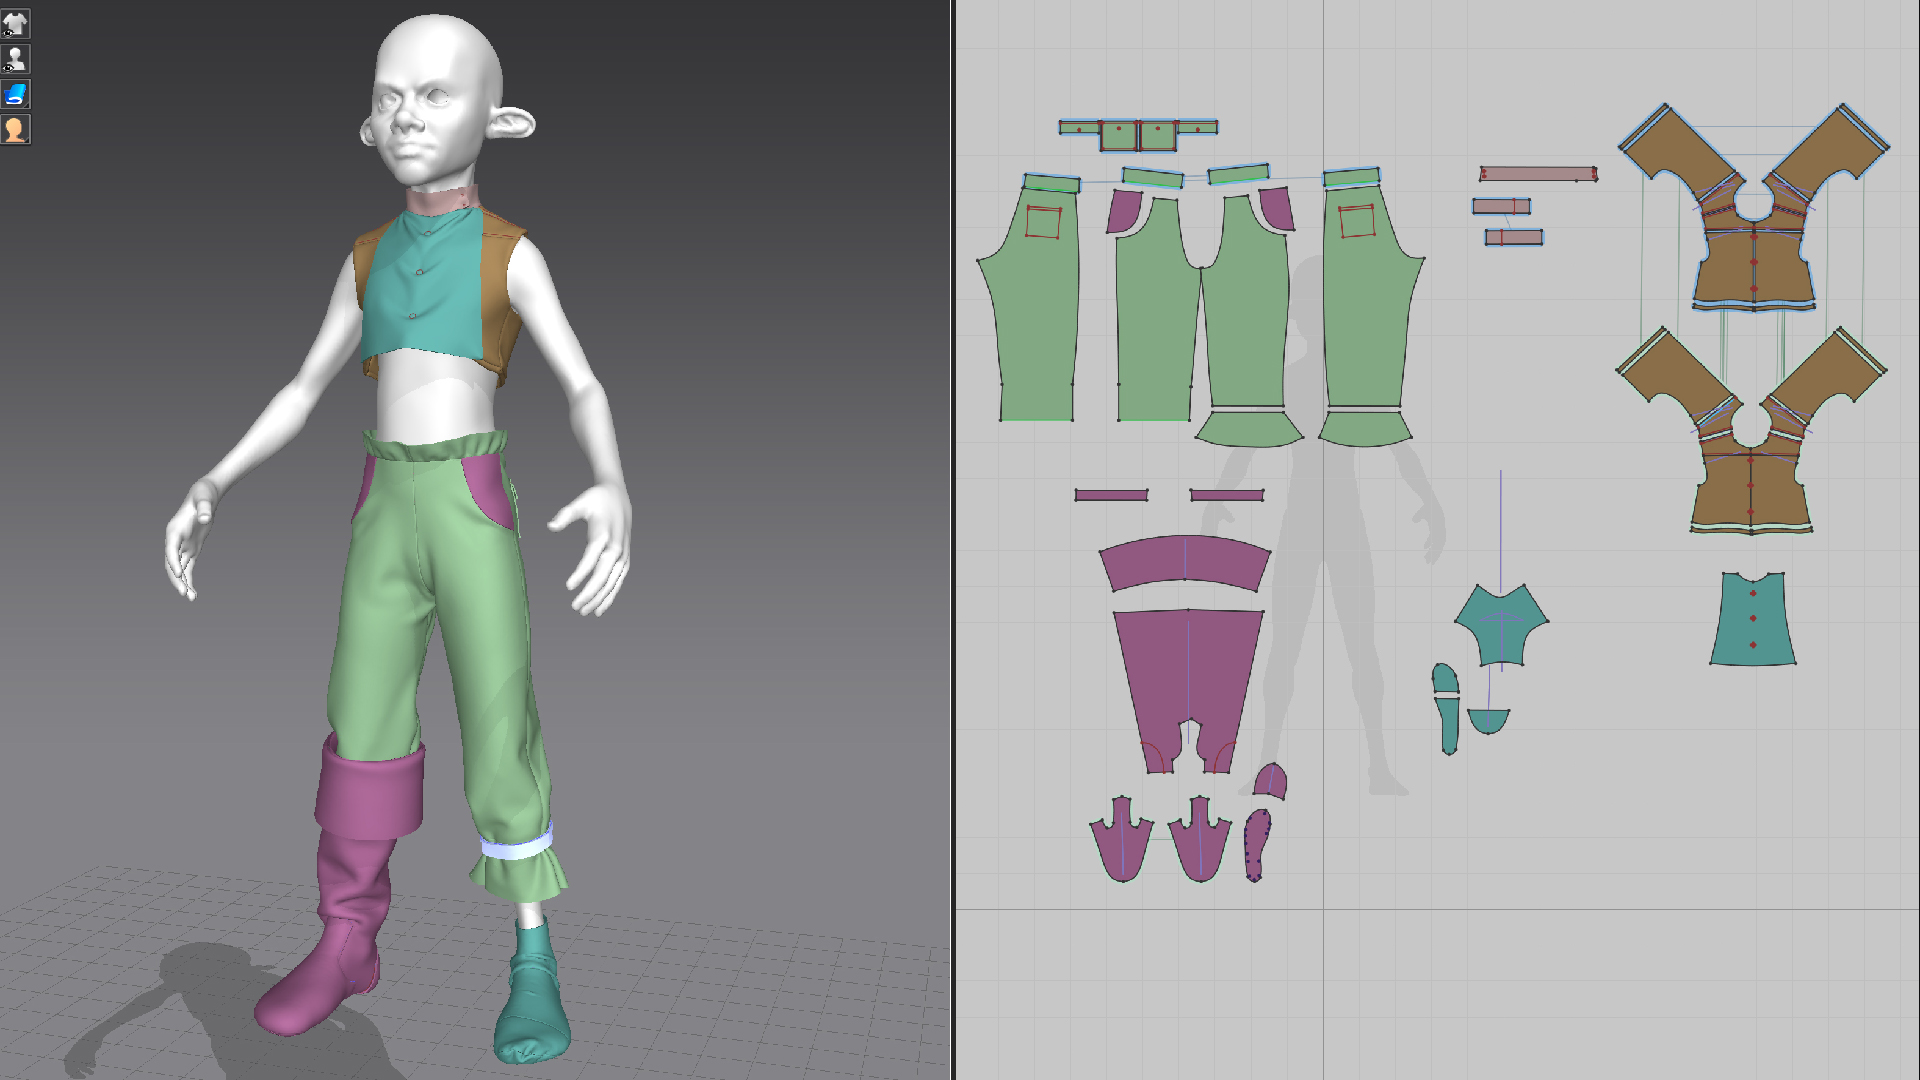
When I was happy with it, I went into Marvelous Designer and quickly created some clothes. I kept them quite simple and didn’t spend too much time in Marvelous Designer, knowing that I would heavily modify the garments in Zbrush. I focused mostly on the overall look of the clothes and made a few big folds to improve the silhouette, especially for the boots.
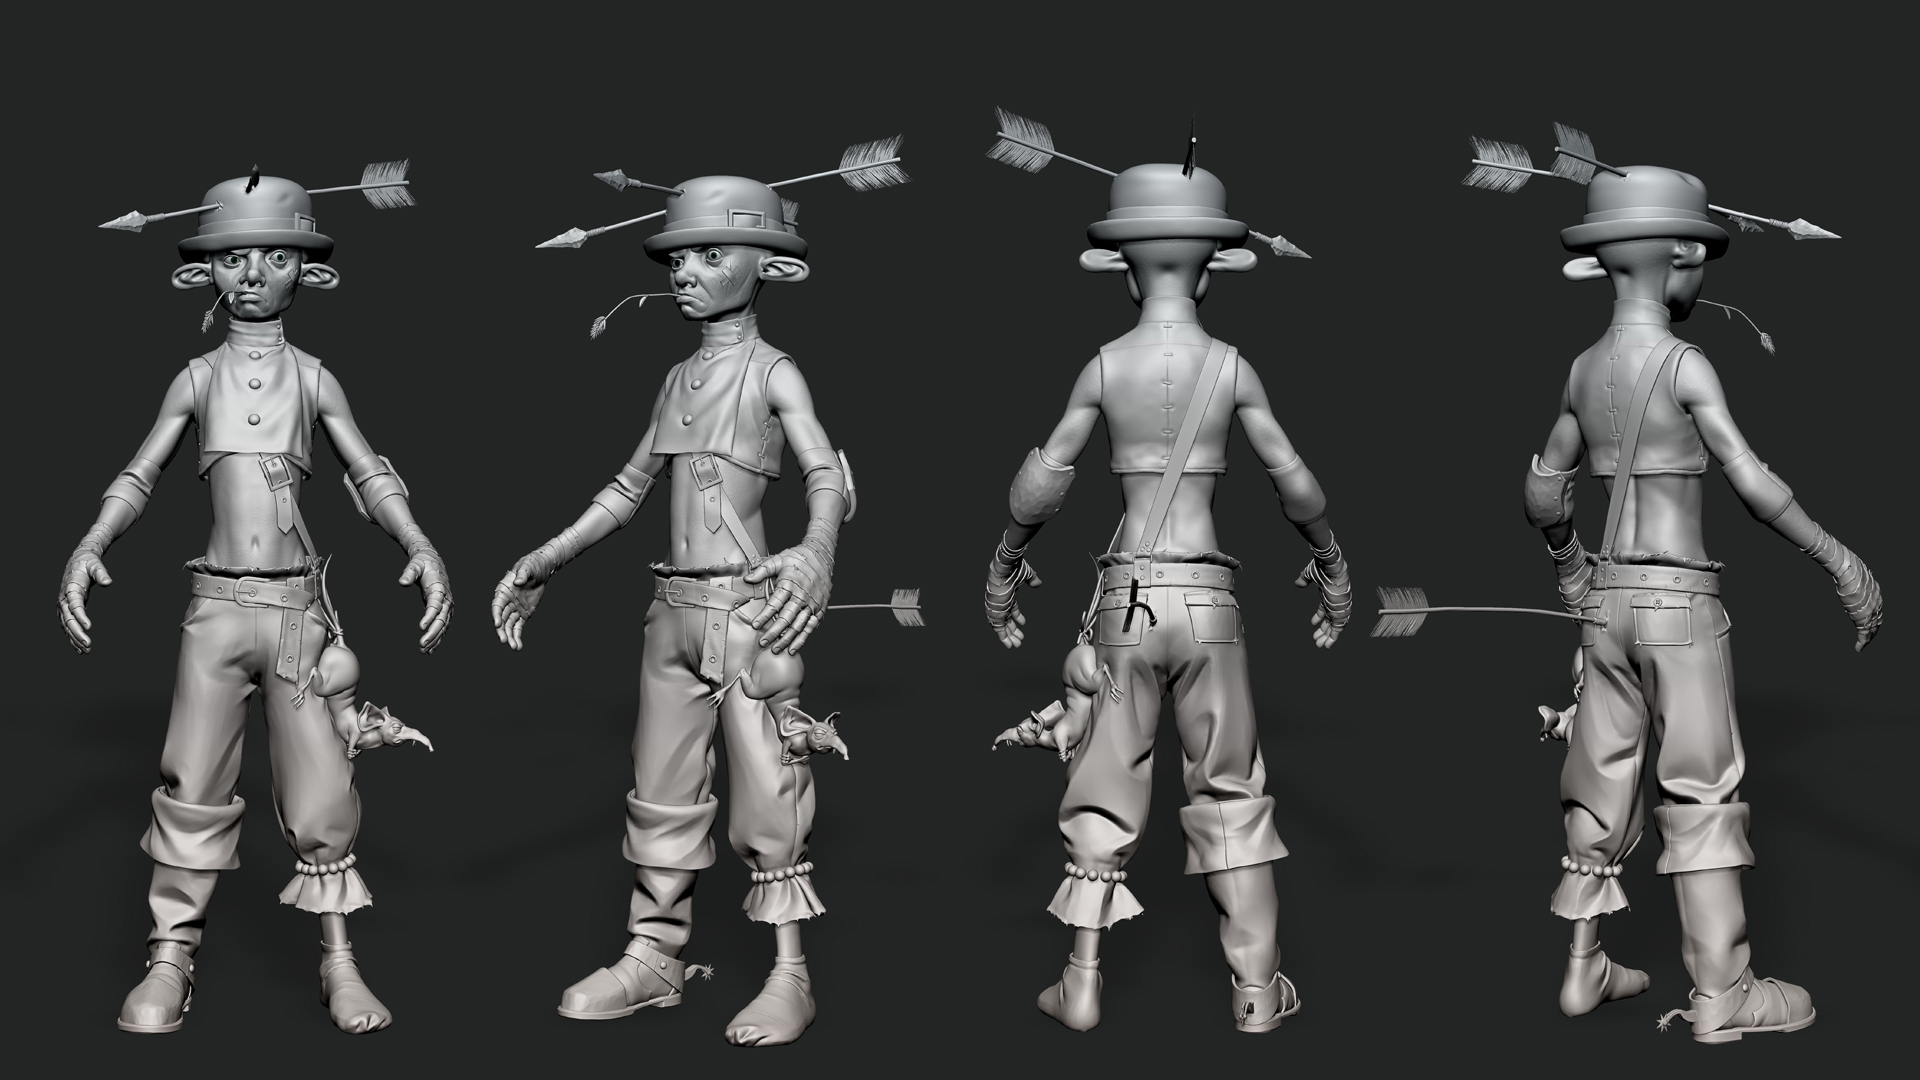
After importing the clothes into Zbrush, I started adding the other parts and worked on achieving the stylized aspect. Most of the stylization came from emphasizing the folds, giving them some sharpness and keeping the shapes as clean and as angular as possible. I changed the proportions during the sculpting phase until I was happy with his overall look.
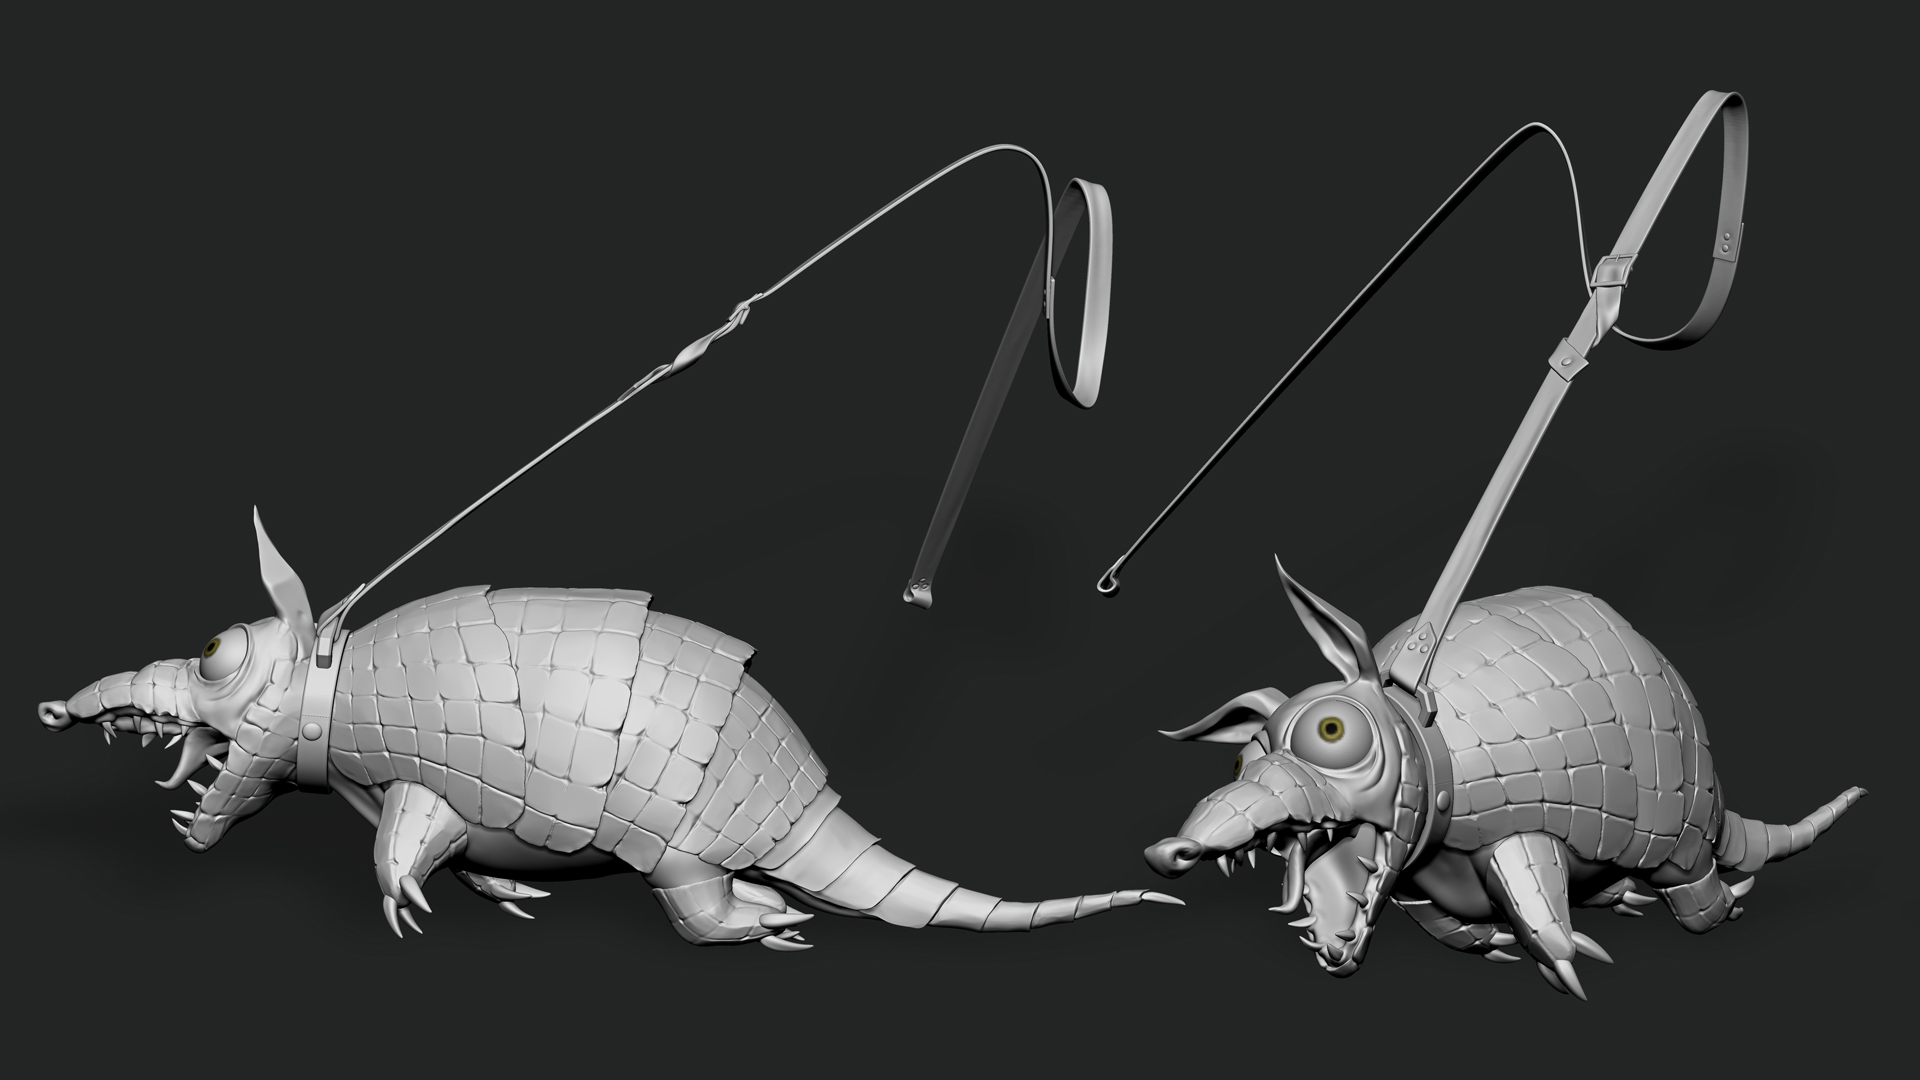
Even though the character was created in an A-pose, I decided that I won’t go too far into animating him. So I modeled the facial expression I wanted directly on the character. I also modeled the armadillo posed, since I knew I wouldn’t spend time rigging him.
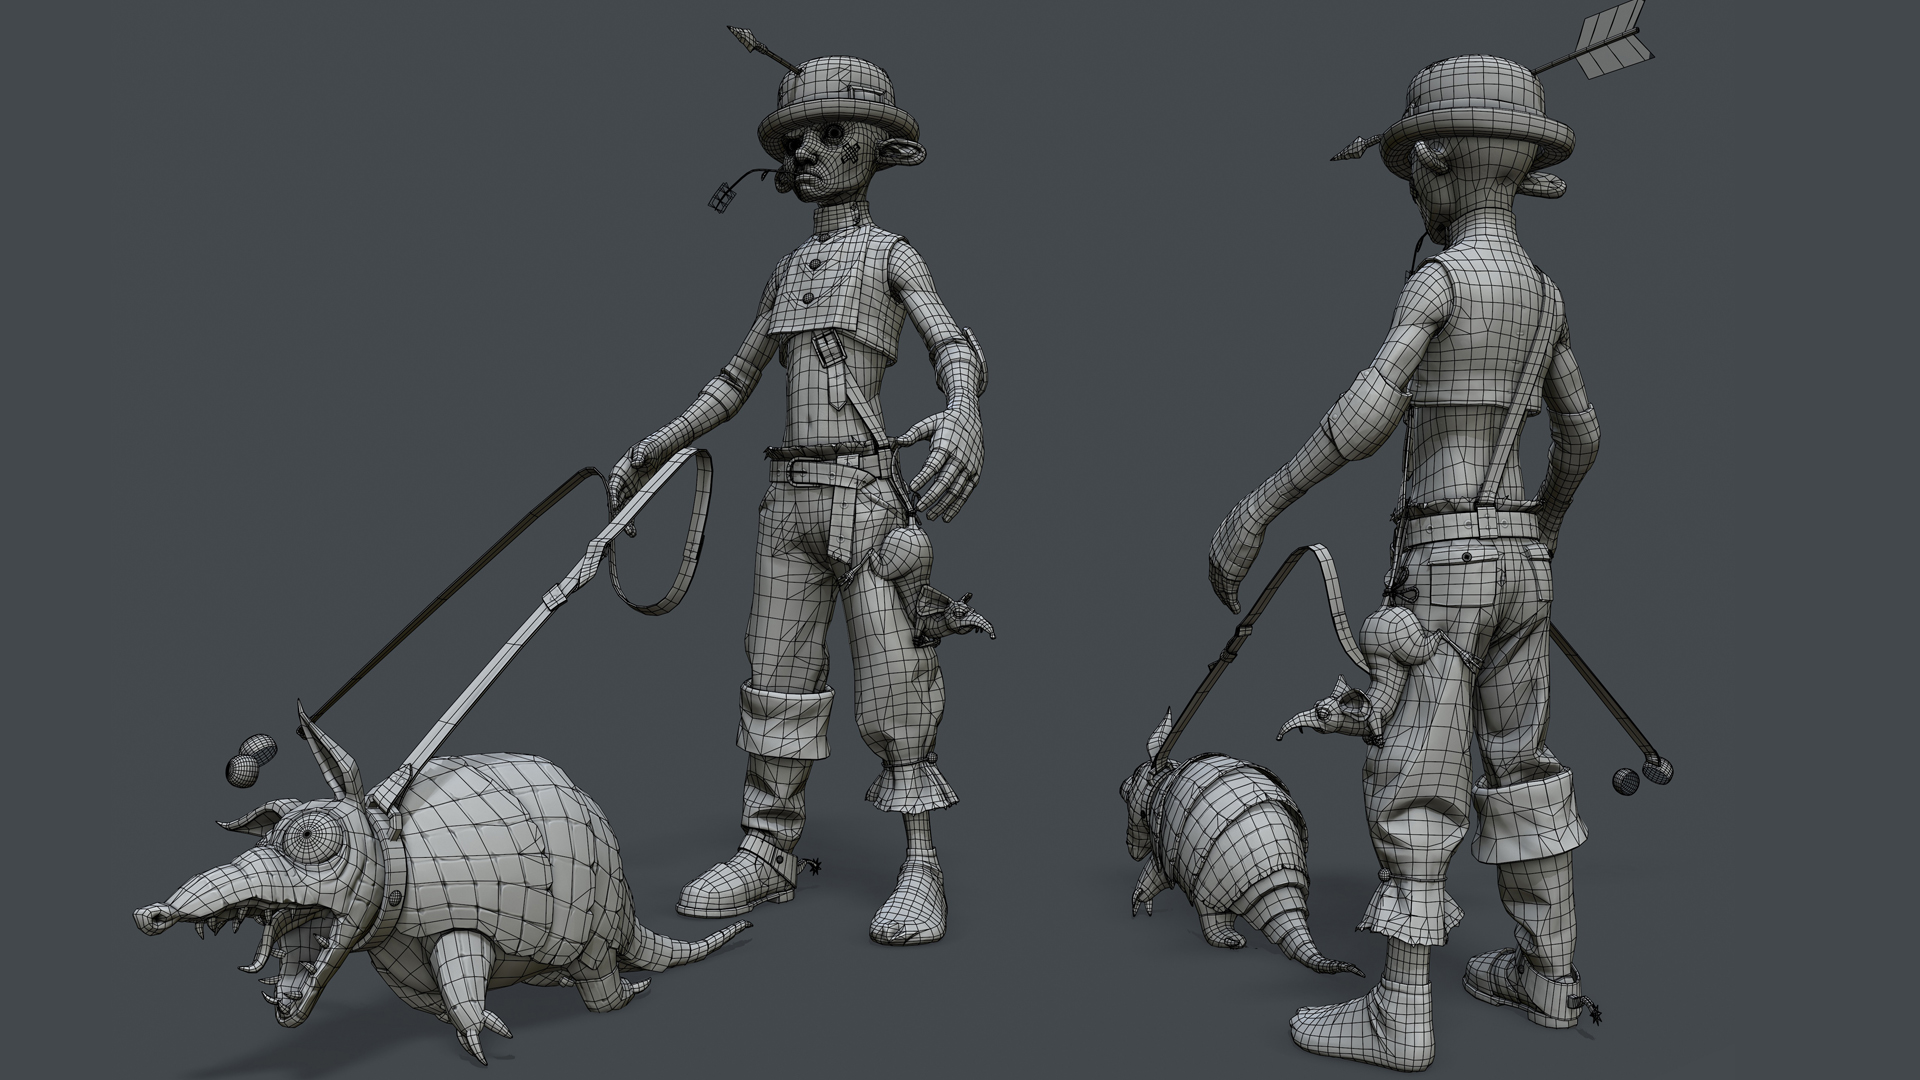
The lowpoly was mostly made in Topogun. I tried to keep it as simple as possible and used a technique I learned during my time working on Dishonored 2, which involves keeping the poly count low while having clean topology that flows with the cloth folds. The secret is to build nice, clean looped topology which makes it animation ready. Furthermore, a low poly count means easier skinning and rigging.
Rigging
I usually rig my characters quickly with Mixamo and run tests to see if I need to improve any aspects of the topology. All you have to do is import the Mixamo rig into 3ds Max, retouch it to fix any errors and export as an .fbx for Toolbag. In a matter of minutes, you can have a T-posed character come to life and see it in all of its glory in Marmoset Toolbag. The fact that you can now export animations for Marmoset Viewer is incredible. You get to see a fully animated character in real-time inside a browser. It’s absolutely amazing.
Baking & Shaders
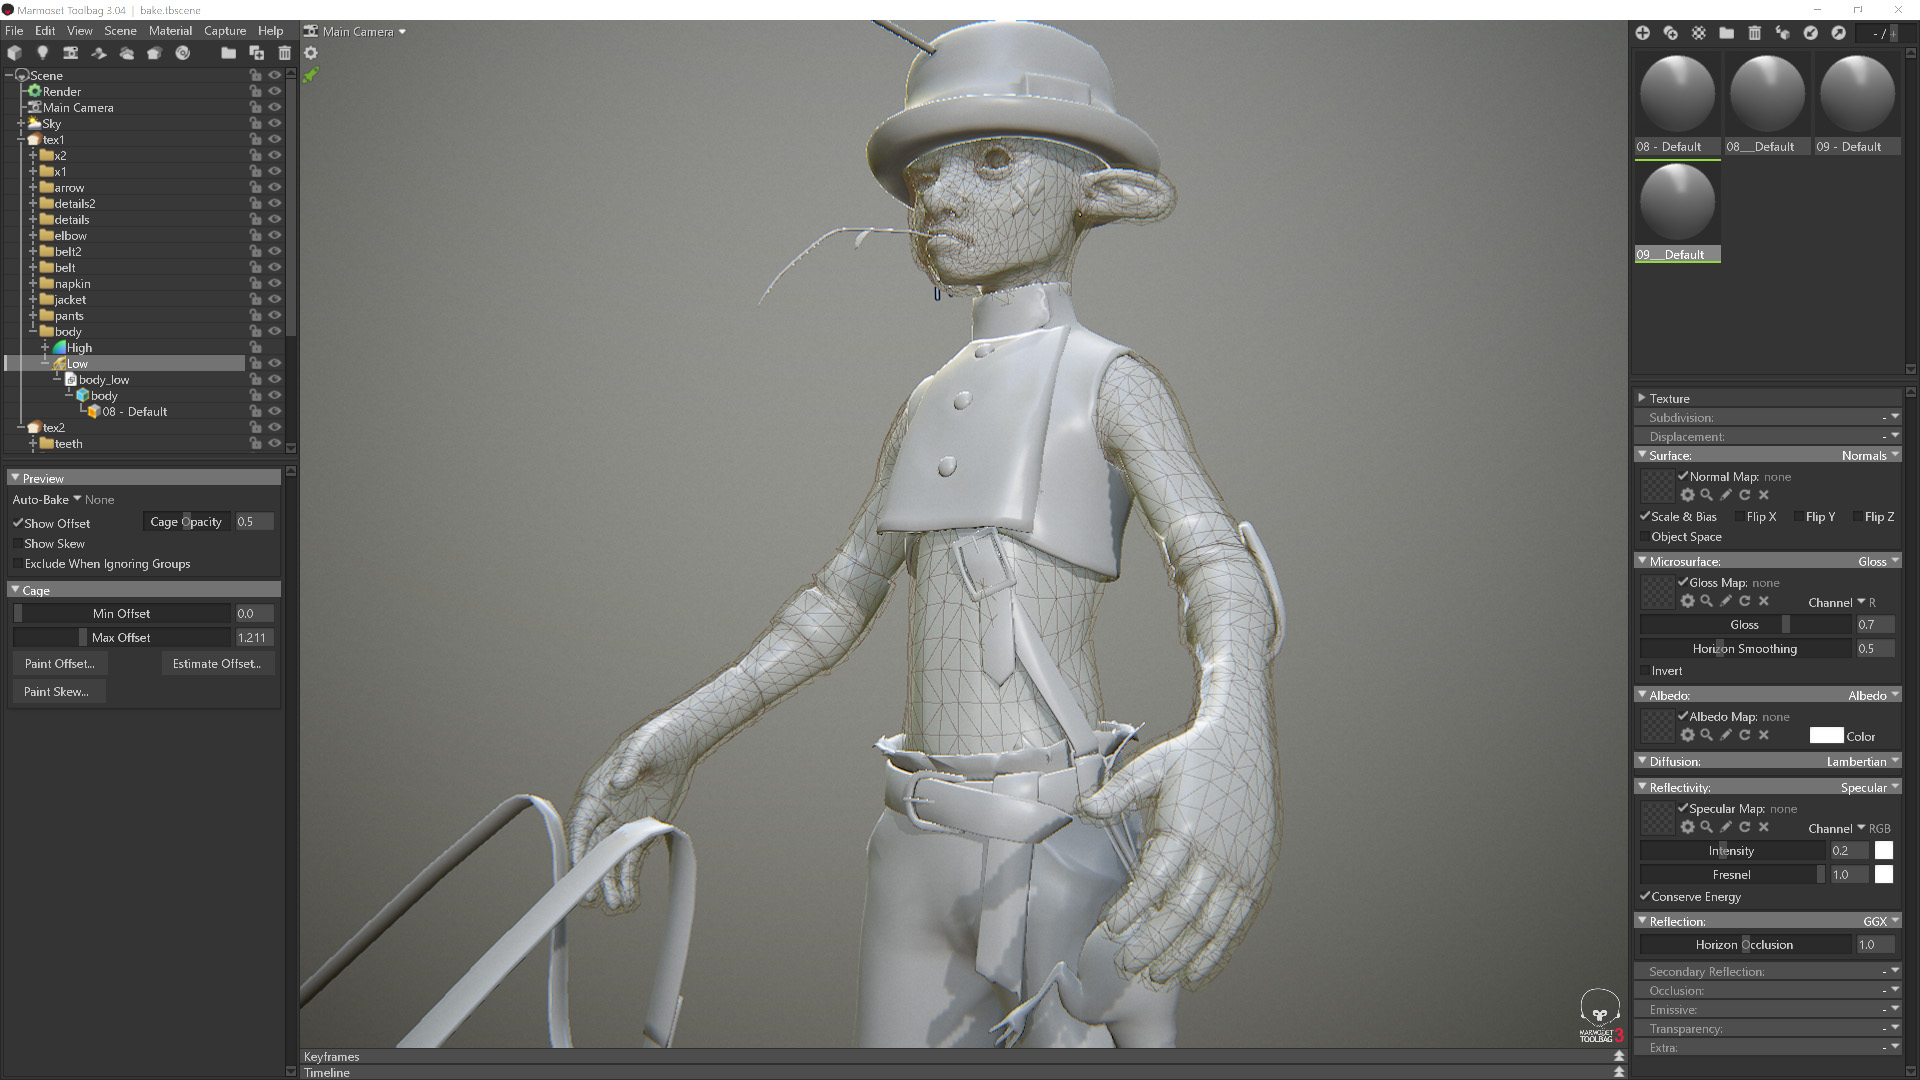
For baking, I used Marmoset Toolbag. In my opinion, there’s no better baker out there.
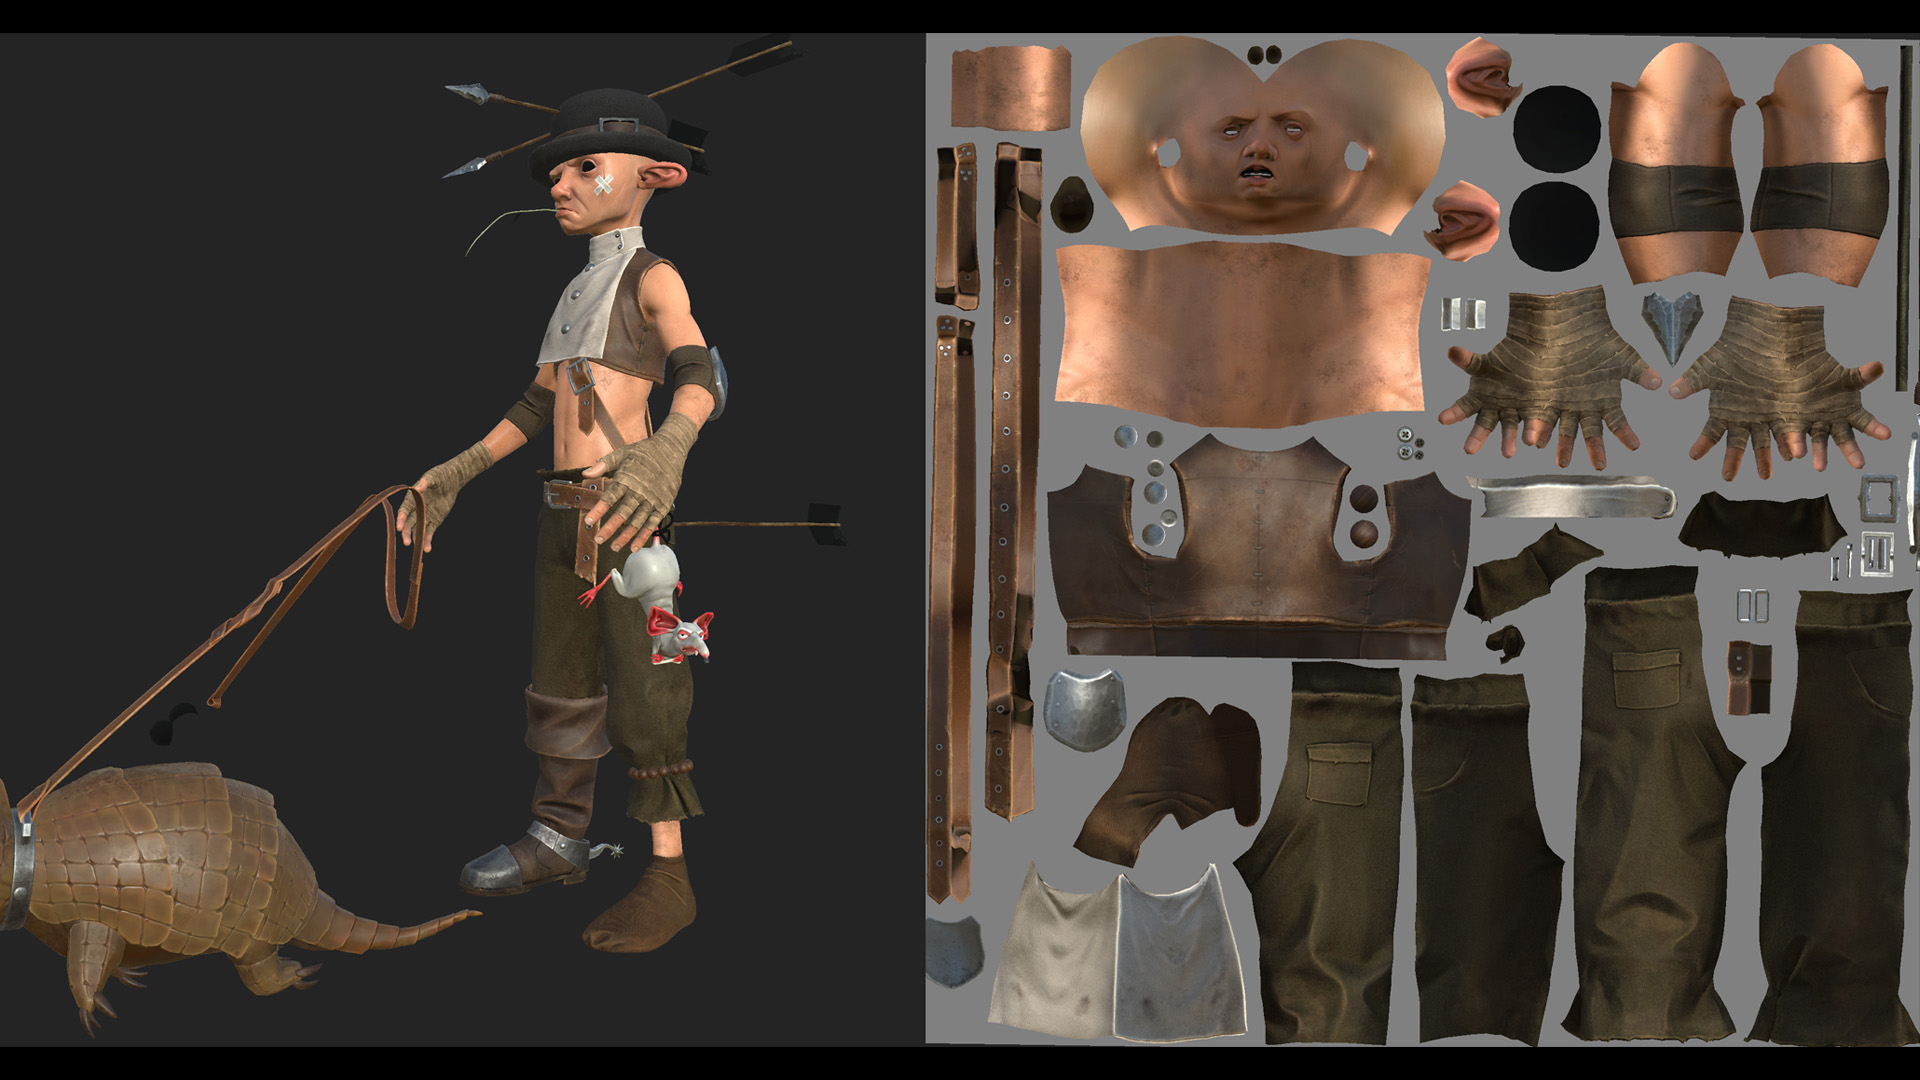
The biggest part of the stylized look of course came from texturing. I started with making some semi-realistic textures in Substance Painter.
I then went into Photoshop, overlaid the green channel from the world space normals with the Cutout filter applied to simplify the look. Later on, I began to hand paint details using a hard square brush with some Hue, Saturation and Brightness Jitter adjustments in the Color Dynamics modifier under the Brush tab.
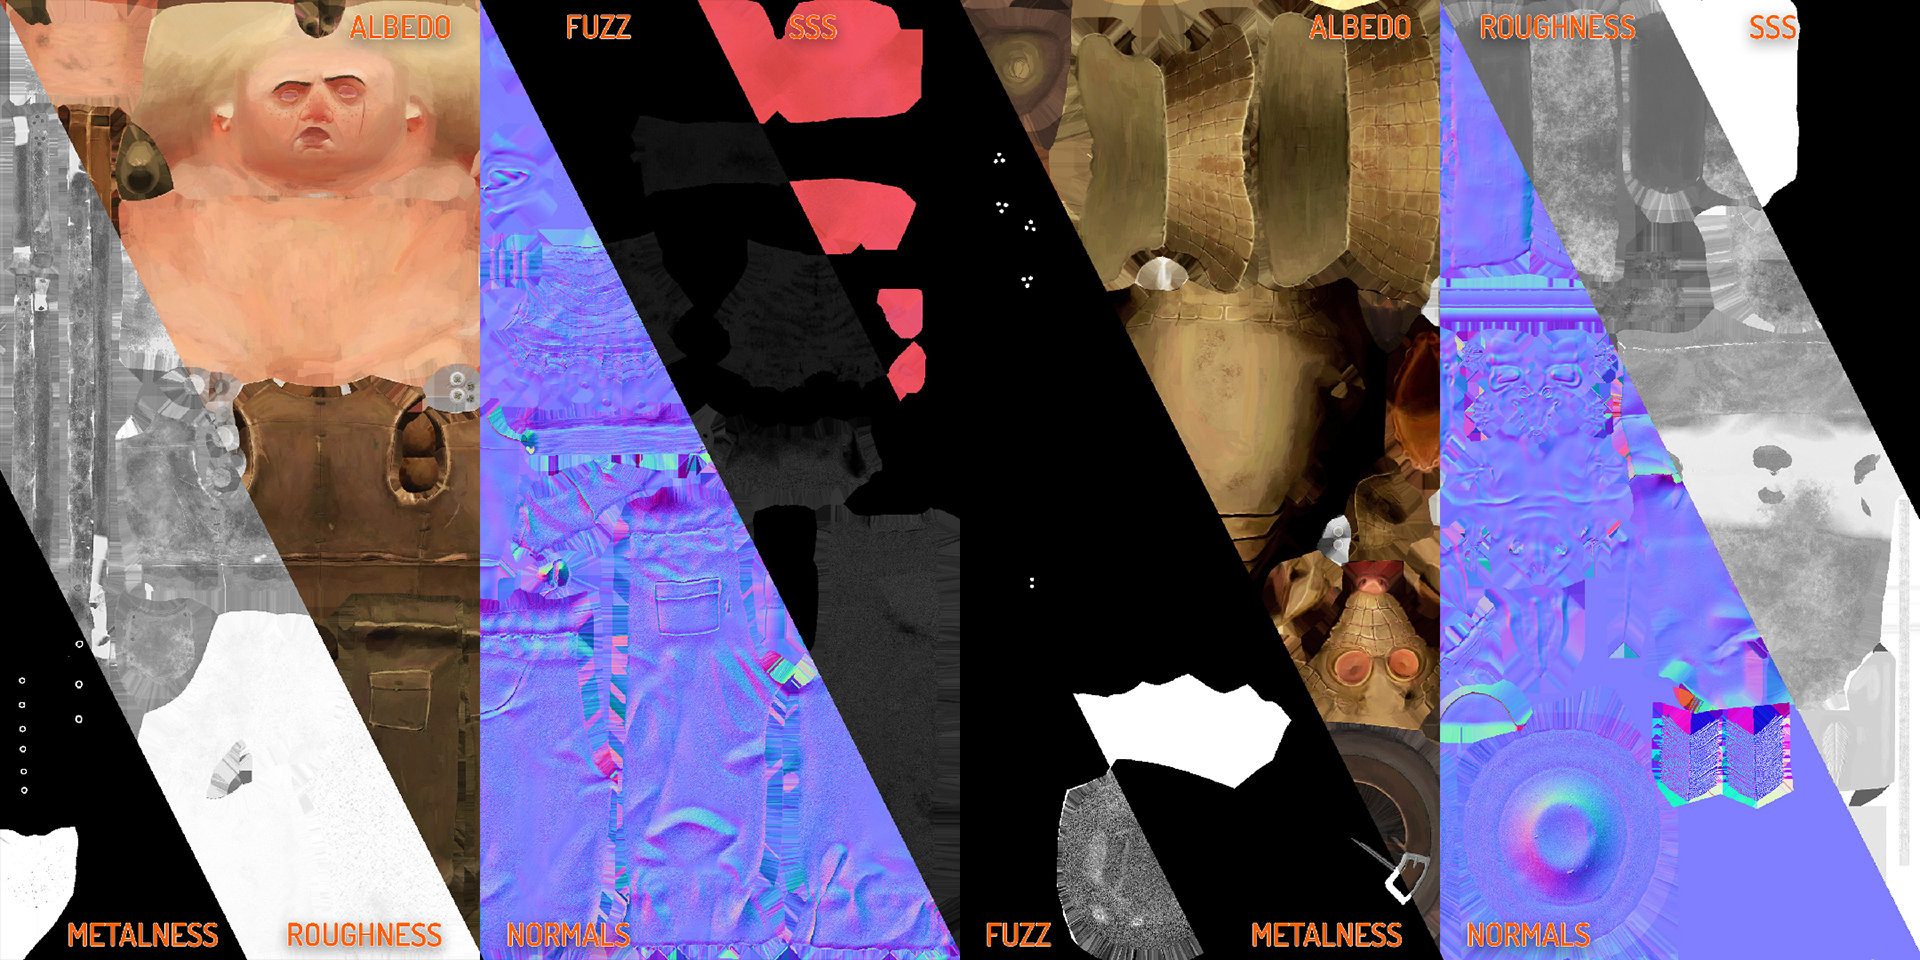
These are the final textures.
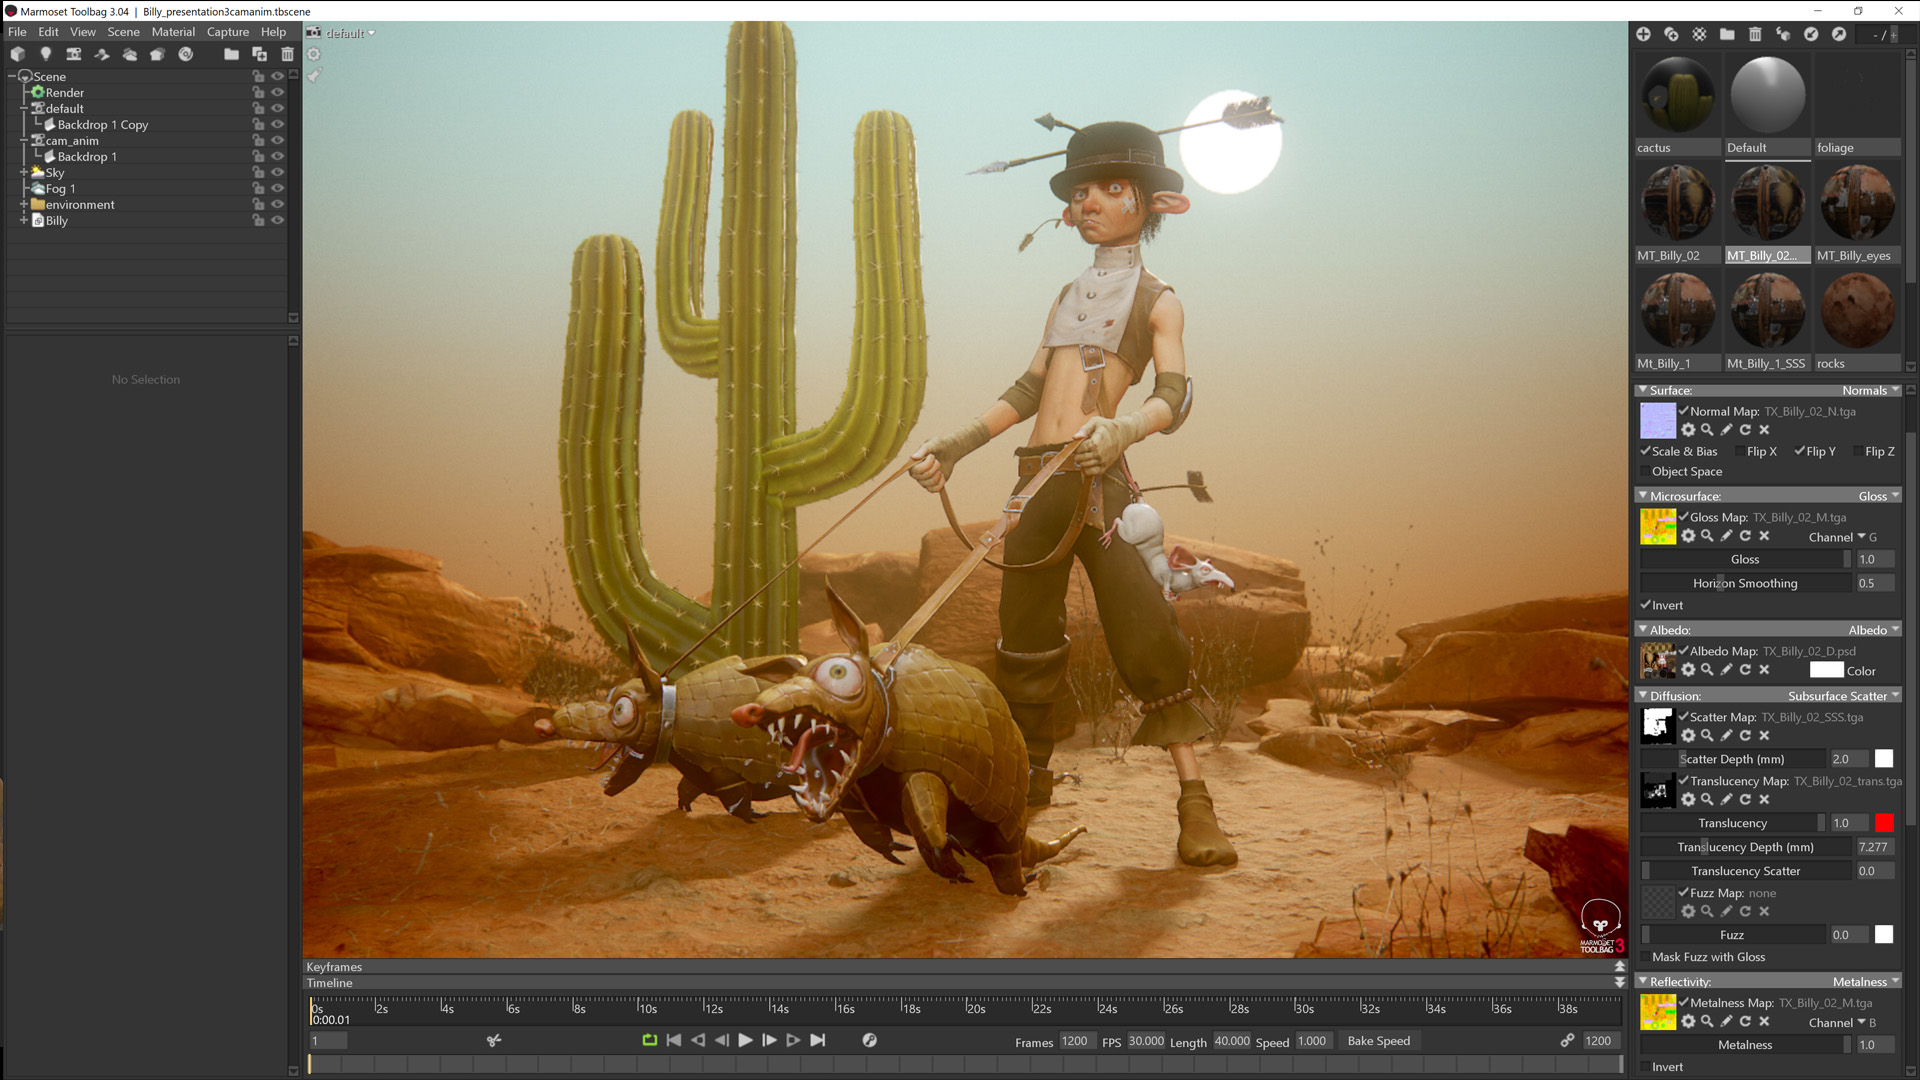
The shaders are pretty straightforward. I created the Subsurface Scatter Diffusion model for the skin and used Microfiber Diffusion for the fabrics to achieve a nice Fuzz.
Lighting & Scene Setup

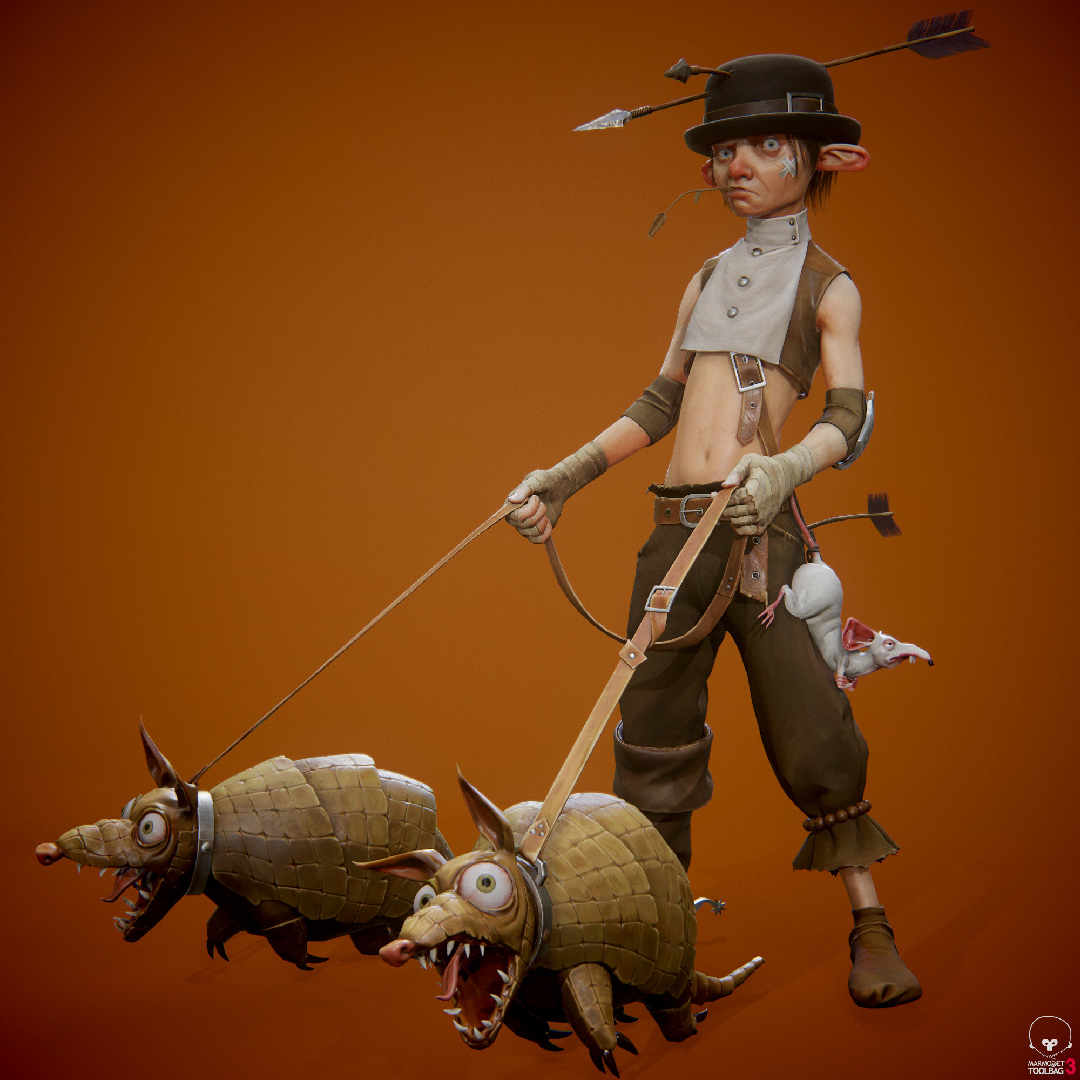
During the material creation process, I spent some time trying to set up a scene that will suit my character. Due to my day job, I initially thought that I wouldn’t have enough time to actually make a scene for him. So I started off with a simple 3 point lighting setup with an orange background.
Most of the time, I use the Hedge Row Sky Preset and add 3 Spot lights to create nice lighting for my characters. The majority of the fuzzy look comes from having Fog in the scene and post processing. I always use Filmic (Hejl) tone mapping since it resembles the feeling of a real camera in my scene. Of course, adding some Bloom, Vignette and Grain helps the overall look of your scene.
At this point I was not happy with this scene yet, so I started working on an environment for my character while fine tuning my scene and camera settings. I created some ground in Quixel Mixer, and grabbed a rock and some vegetation from Megascans to fill up the scene. I painted on top of their albedo maps in Photoshop to give them the same hand painted look and created a cactus. I also added a simple gradient from blue to orange in the backdrop to simulate a dusty environment.
Once I was happy with the placement of my assets, I completely changed the lights. I kept the same Hedge Row Sky and 3 light setup. However, I turned the backlight into the sun and set it to be a visible shape in the scene. Light 1 and Light 2 now behaved as fill lights to temper down the shadows from the sun and make my character visible.
Post Processing
The majority of the soft warm look of my render comes from the Fog and Bloom. I usually use Fog, Bloom, Chromatic Aberration, Vignette and Grain in all of my renders to achieve a realistic camera look instead of the sharp high contrast look found in game engines. Of course, getting the right feel you’re looking for might take a lot of fine tuning. I probably spent a full day playing with the settings before I was happy with the result.
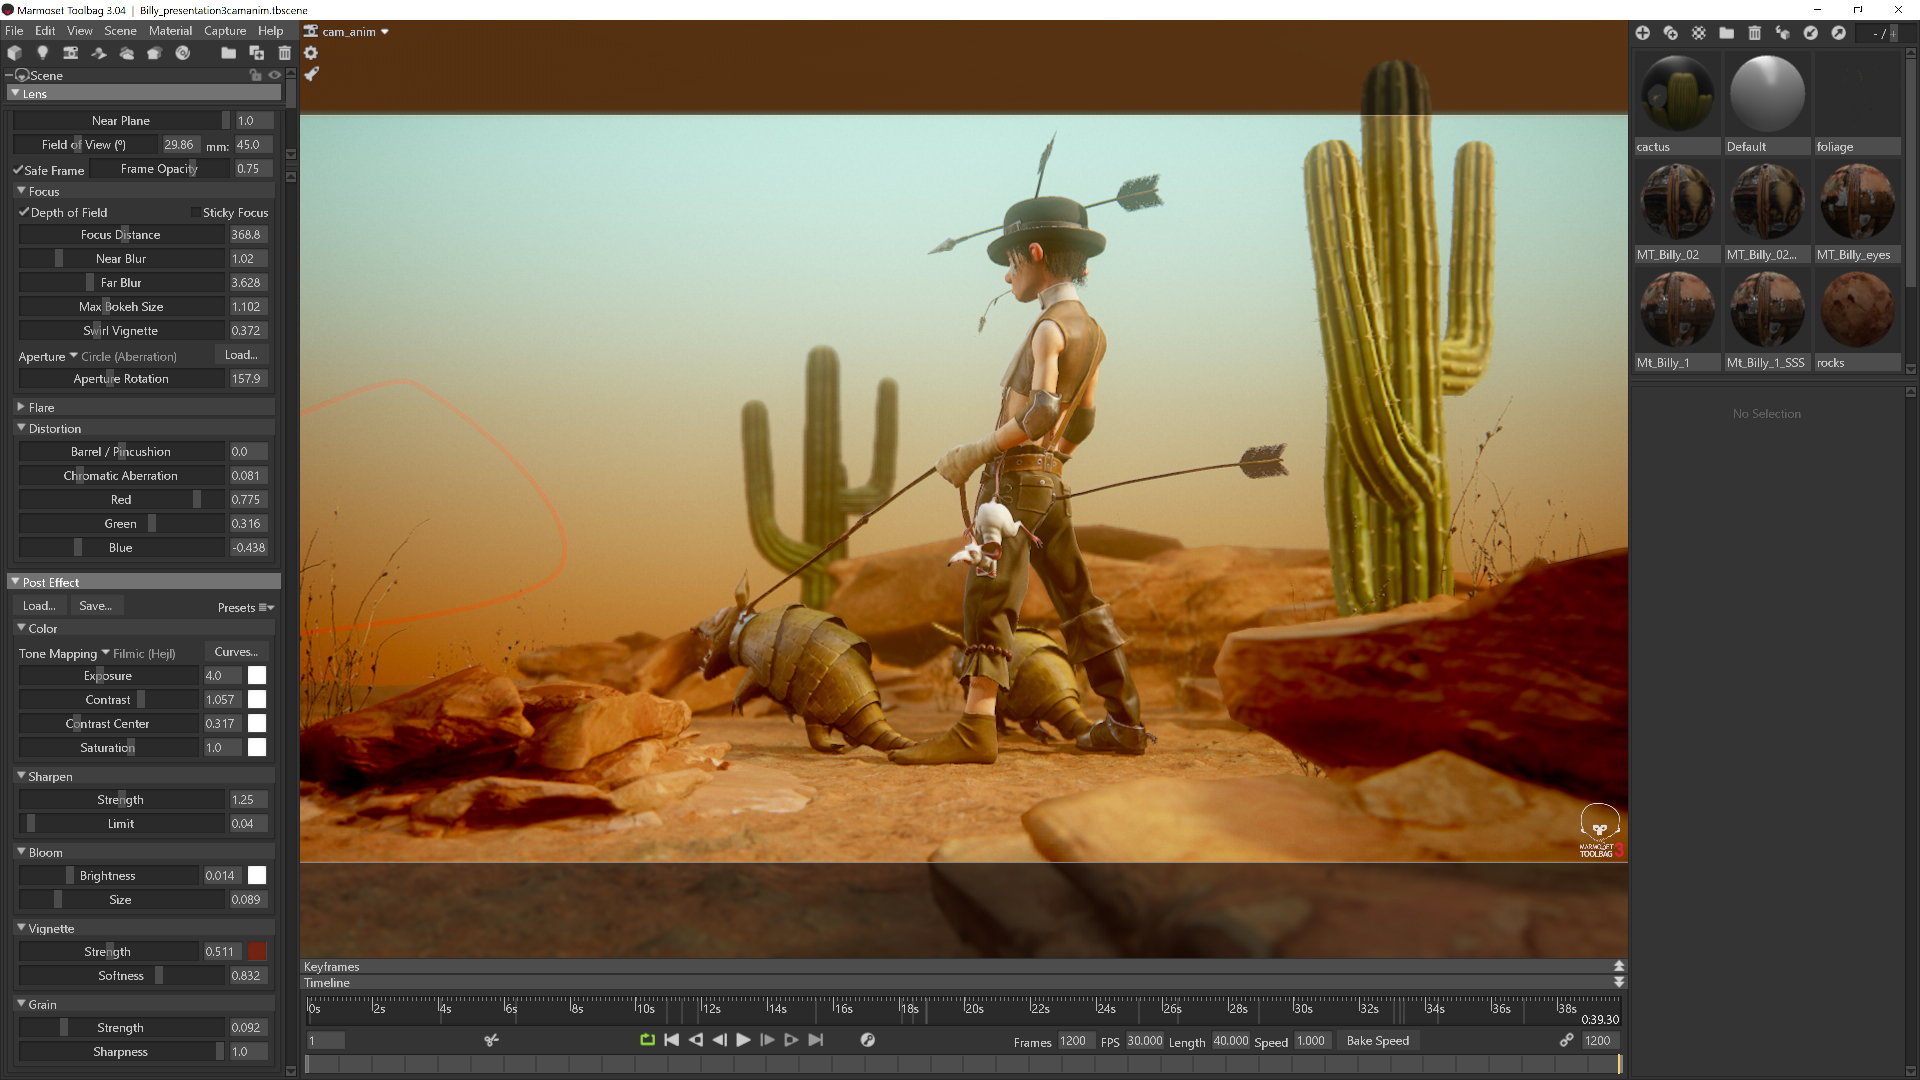
The Fog and Scene Settings are the same as the orange background and the final camera settings can be seen above.
Camera Animations
Toolbag is also great for animations. A camera animation I made for the video presentation took 5 minutes to sort out.
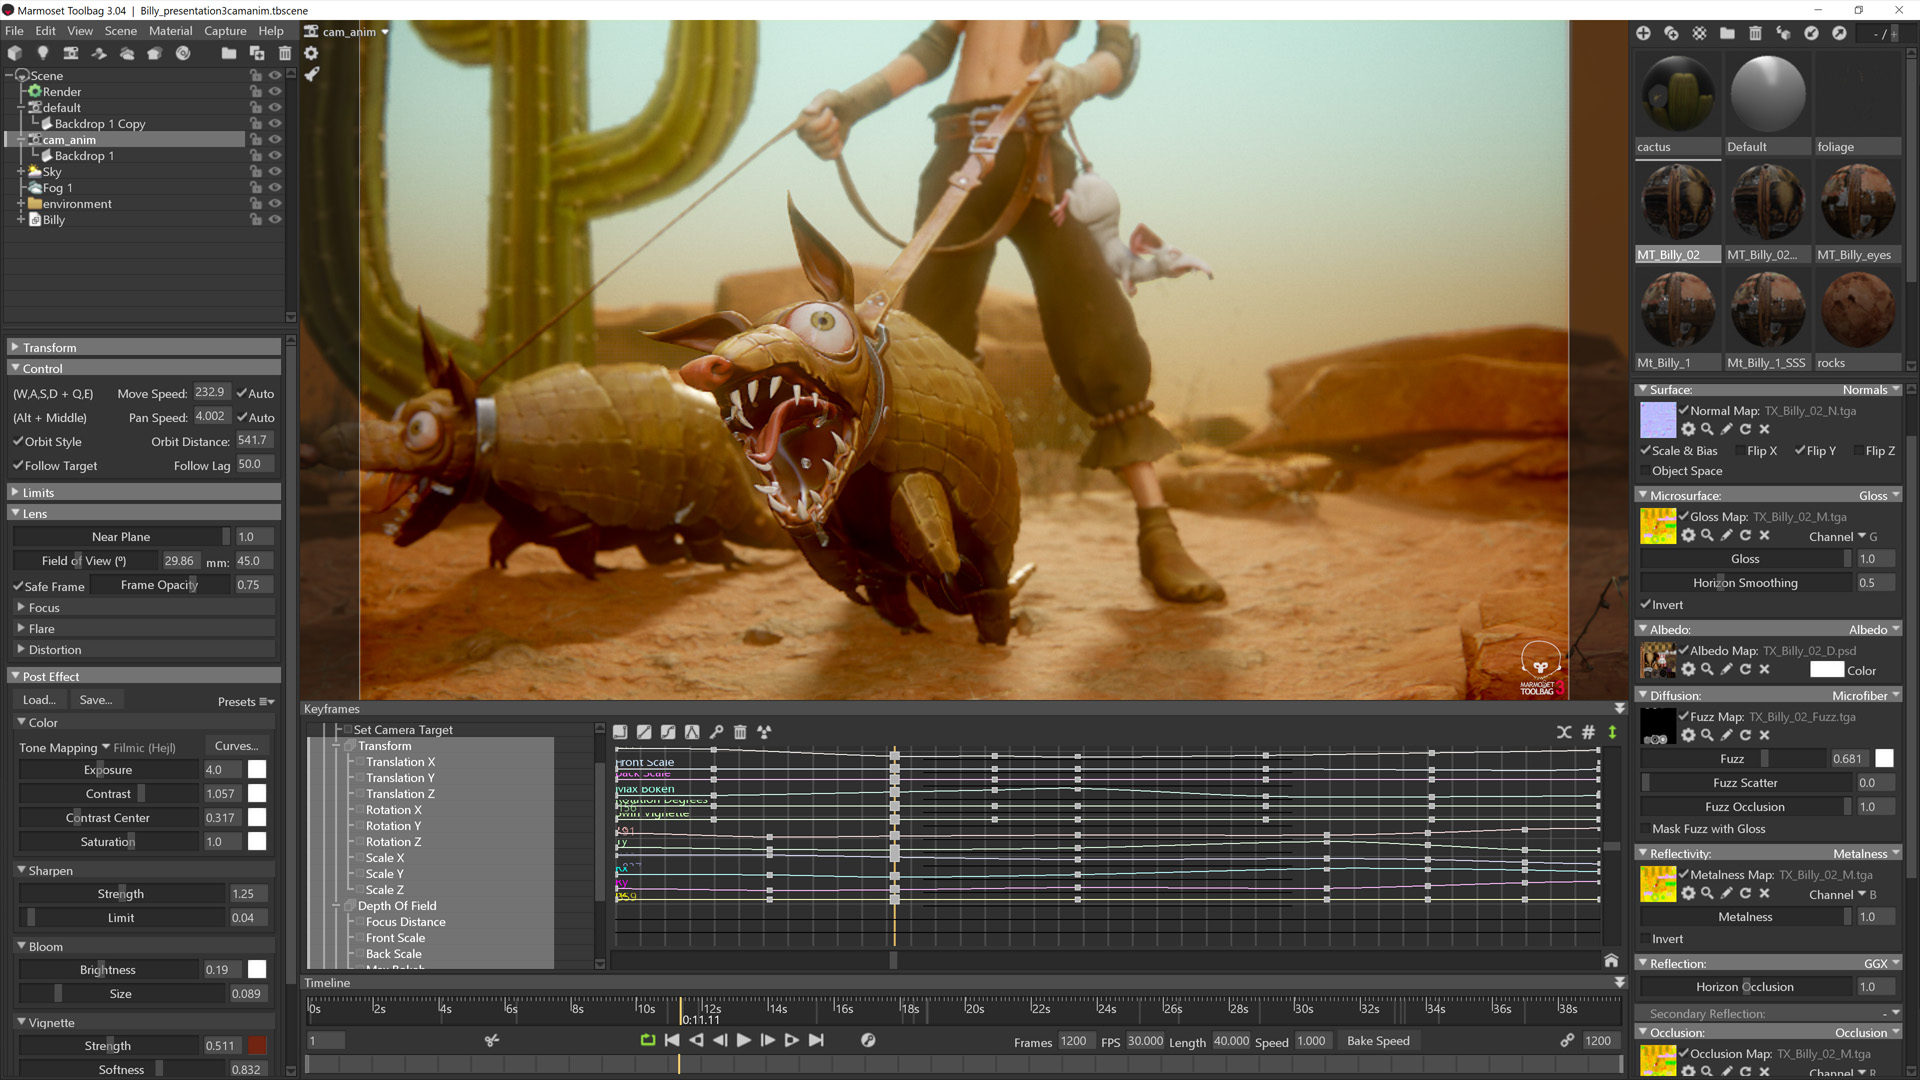
Similar to 3ds Max or Maya, you’ll need to add keys while moving the camera around to get the desired result. I had 5 positions I wanted my camera to touch, so I moved it into place for each one by adding keys to the timeline. I added a few extra keys to achieve a nice transition between the key position and played a bit with the Depth of Field.
I wanted to exaggerate the Depth of Field when focusing on the armadillo and the rat to make them the focal point for the viewer. I also set the Falloff of all the keys to be Linear since I wanted a fluent transition rather than one with acceleration and deceleration. That’s it; 5 minutes of setting up the camera animation and an hour or two of rendering, and I had a nice presentation video.
The End!
I want to say thank you to the people from Marmoset for delivering this amazing software that makes my life easier in so many ways, and for giving me the opportunity to show off my characters.
I hope this was helpful. Feel free to contact me if you have any questions.
You can find Georgian on Facebook, Artstation, Twitch, and Gumroad.
Learn how to present your characters in Toolbag.


