

Introduction
Hello! My name is Antoine Dupuis and I’m a Character Artist living in Paris, France. I started working in the games industry in 2016 and I am currently working at Lightbulb Crew on the game Othercide. I also teach character art for games at New3dge school.
In this breakdown article, I will discuss my process for creating my King Arthur character. My topics will include lighting, rendering, and how I used Toolbag’s animation features to enhance storytelling.
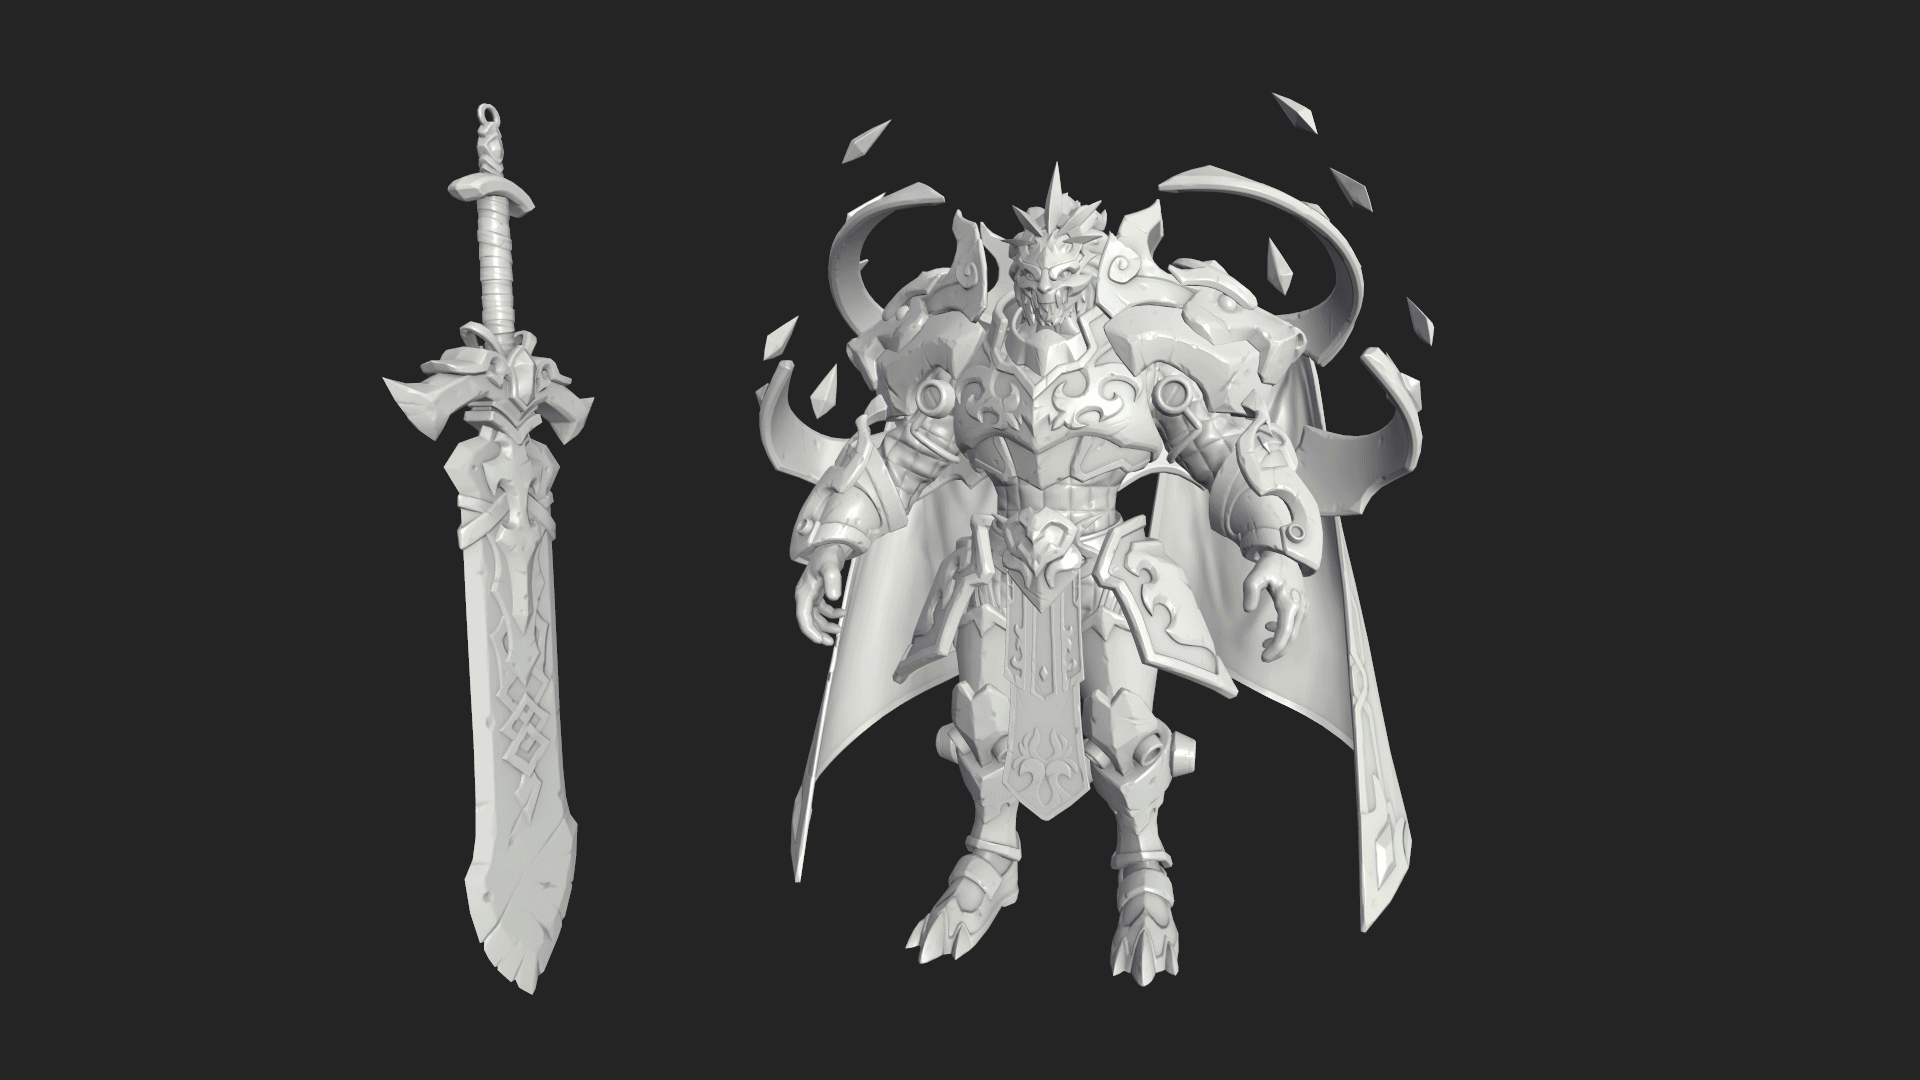
Sculpting
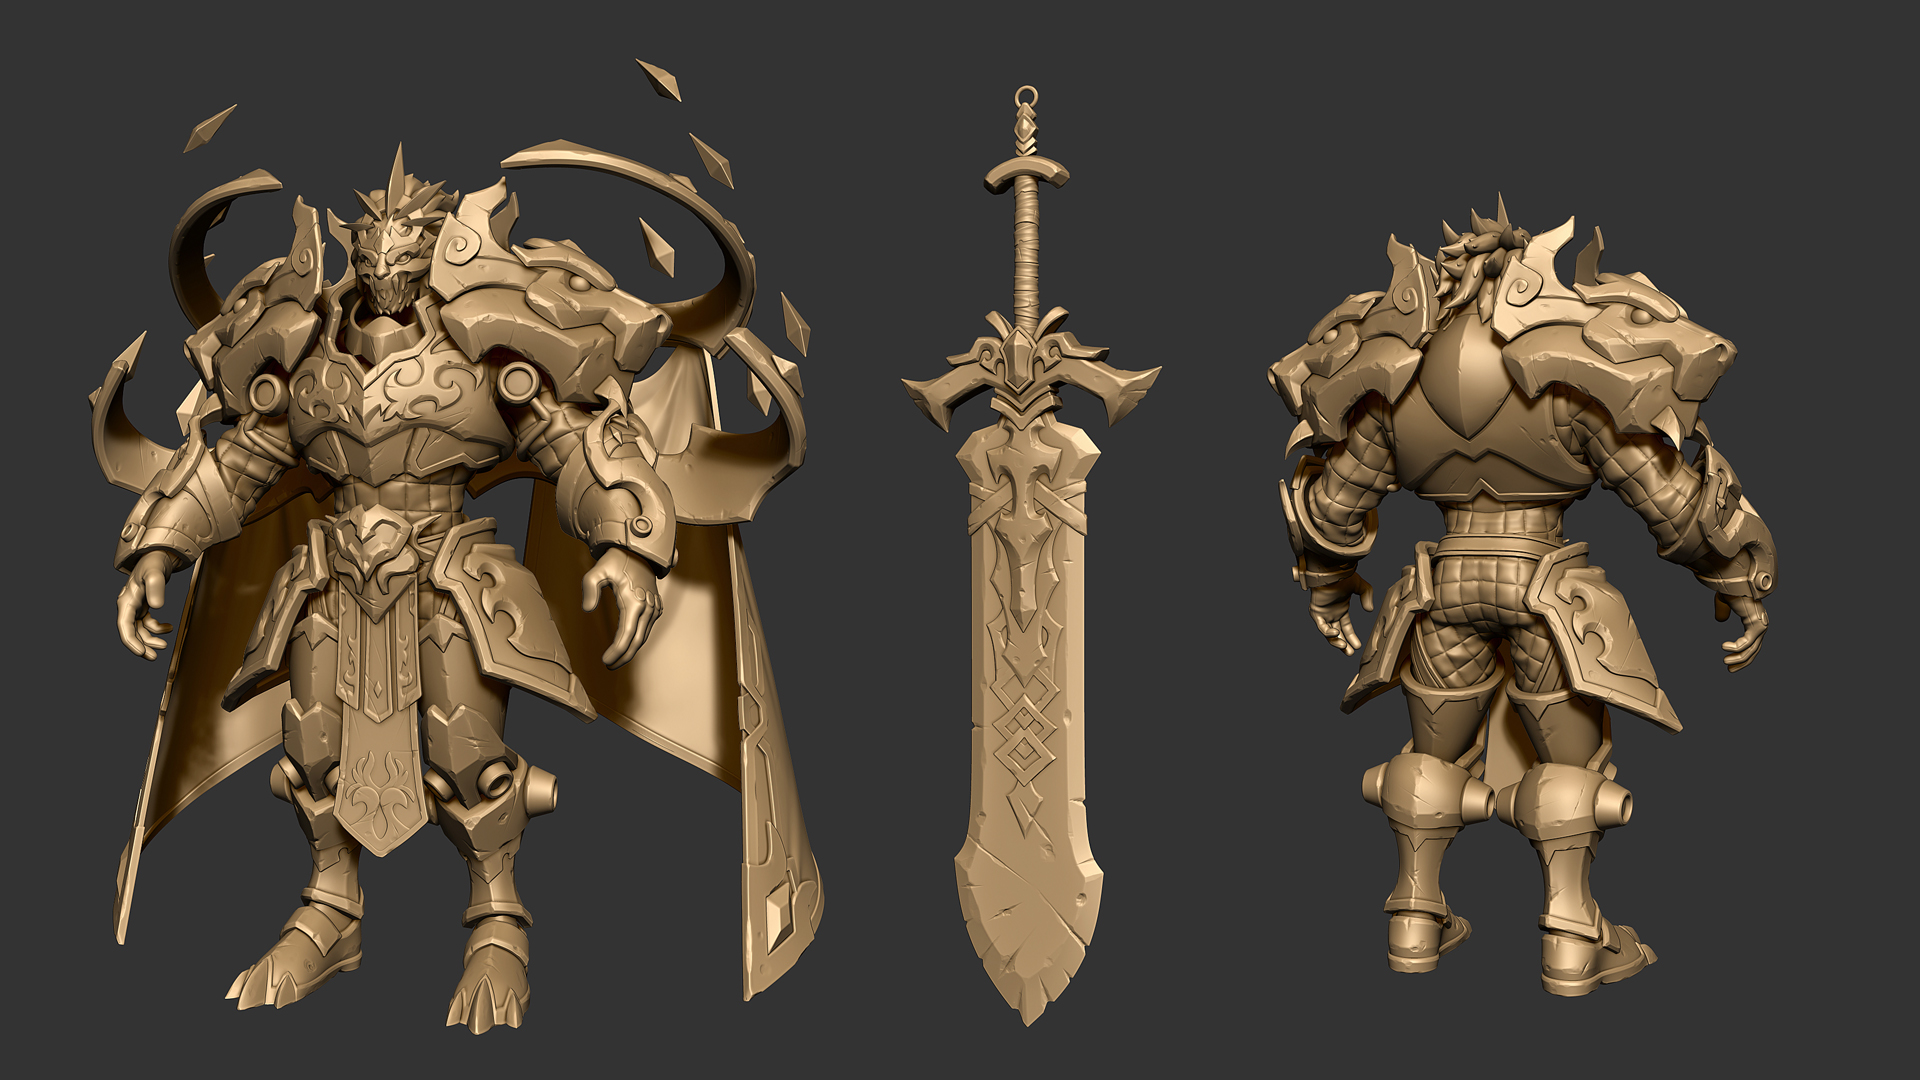
My main references were character sculpts from Darksiders II. These are among my all-time favorite game character sculpts and I had been wanting to try something similar for quite some time.
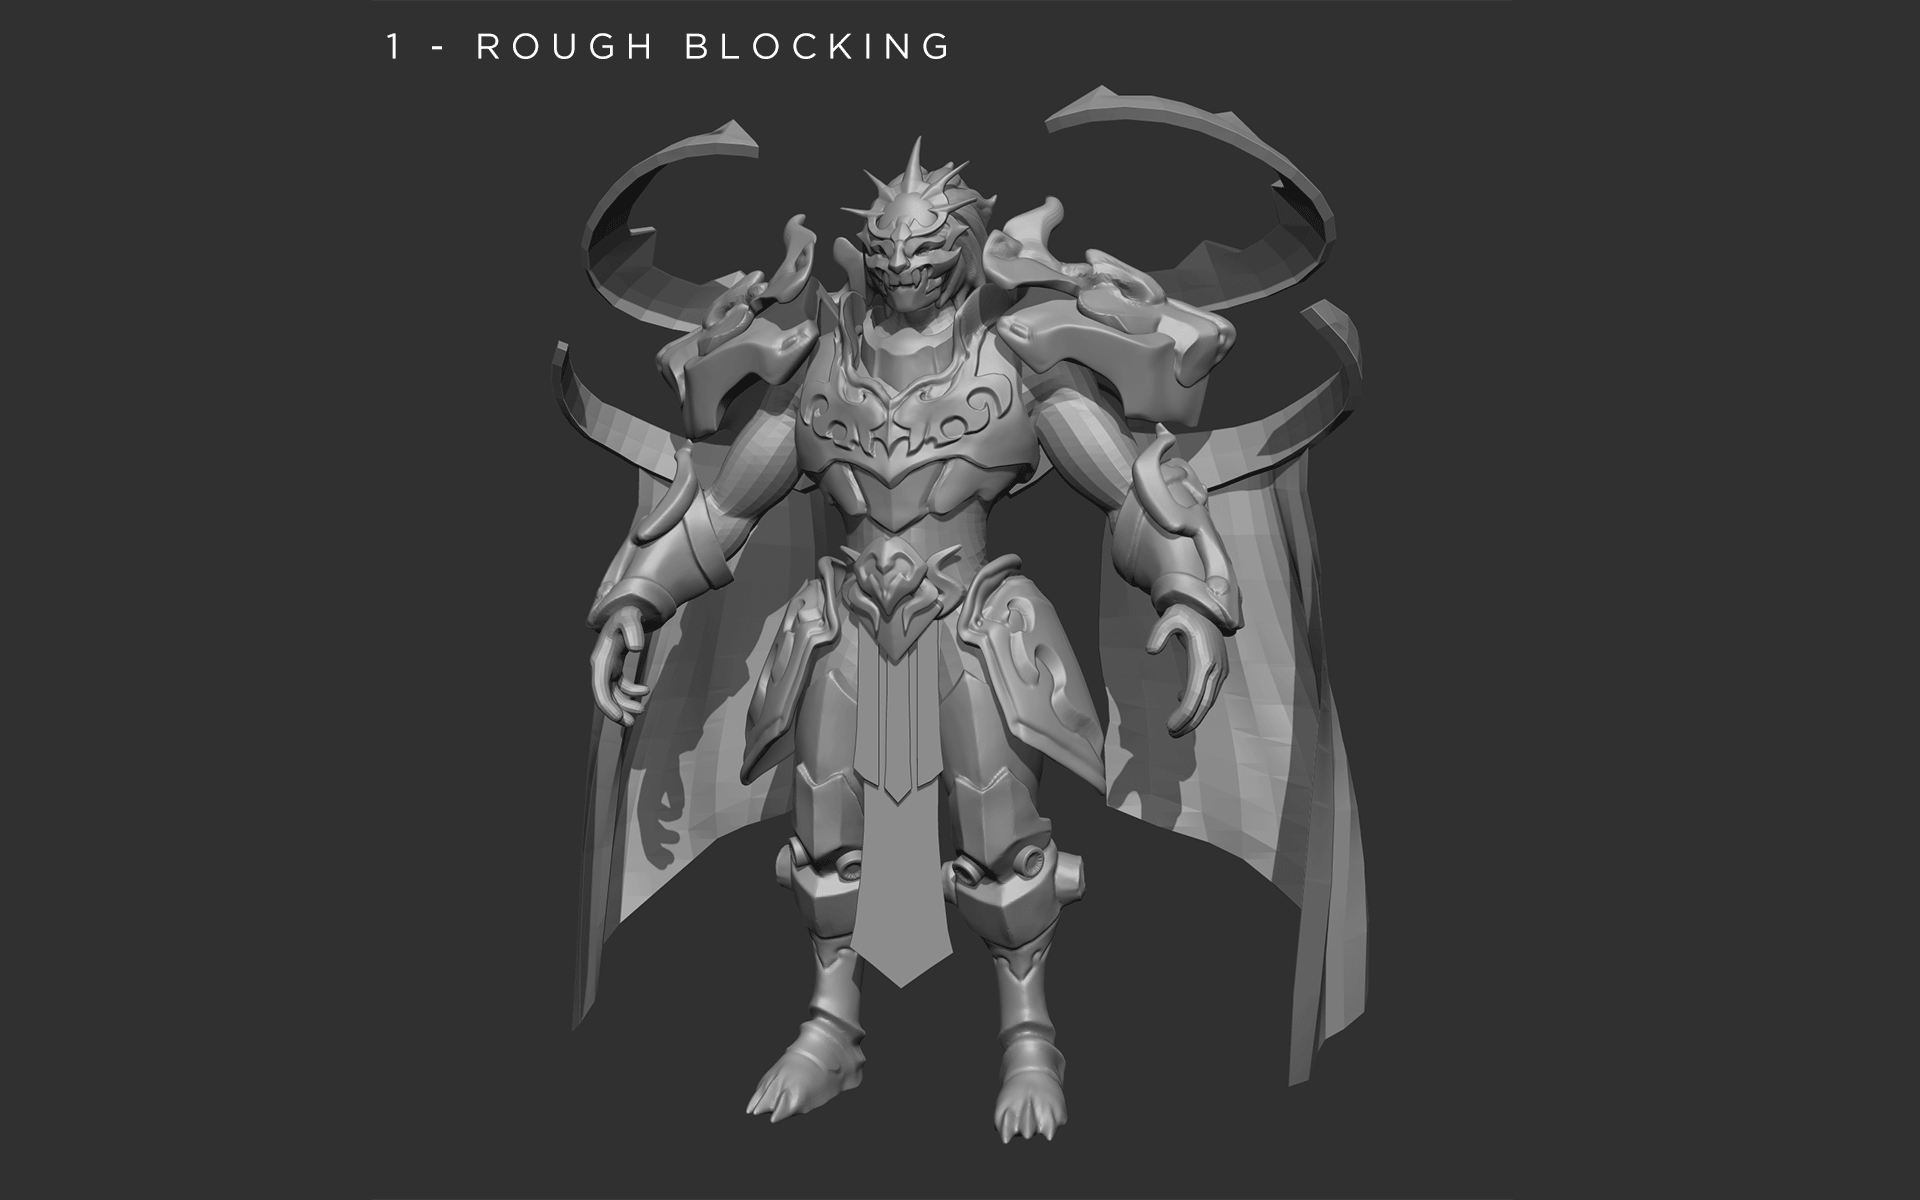
I started by blocking out a rough model of the character in ZBrush. The character is based on a concept done by Fino Feng during the first phase of the contest. At this stage, I try to block out the proportions of the different elements as quickly as possible. Of course, this can’t be achieved completely before I have clean topology to work with, but the earlier I manage to get the right proportions, the easier it is to add detail later on.
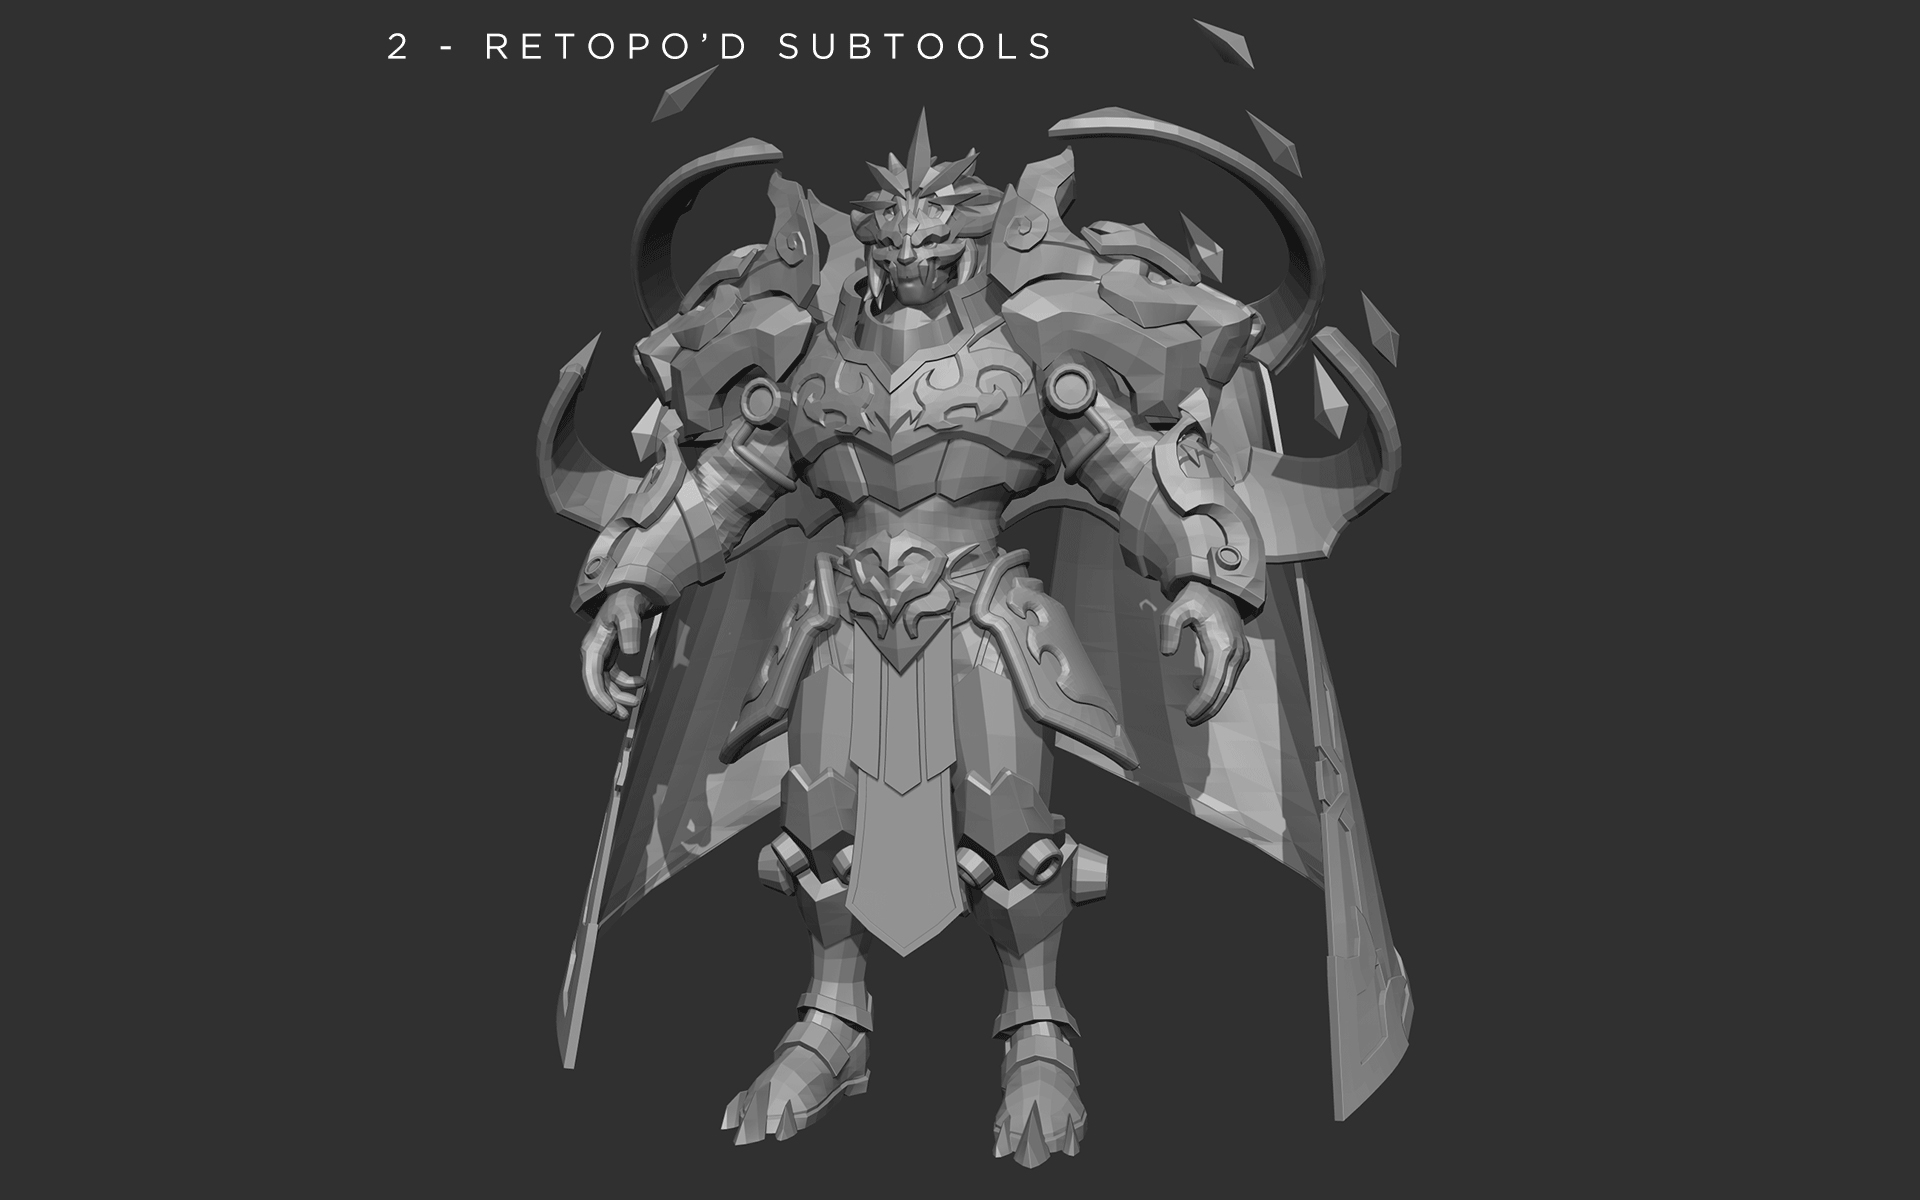
Then I retopologized the SubTools, mainly using 3DCoat. I generally do this by hand for hard-surface objects, but I used zRemesher for the organic parts to achieve clean, low-geometry base meshes for each part of the character.
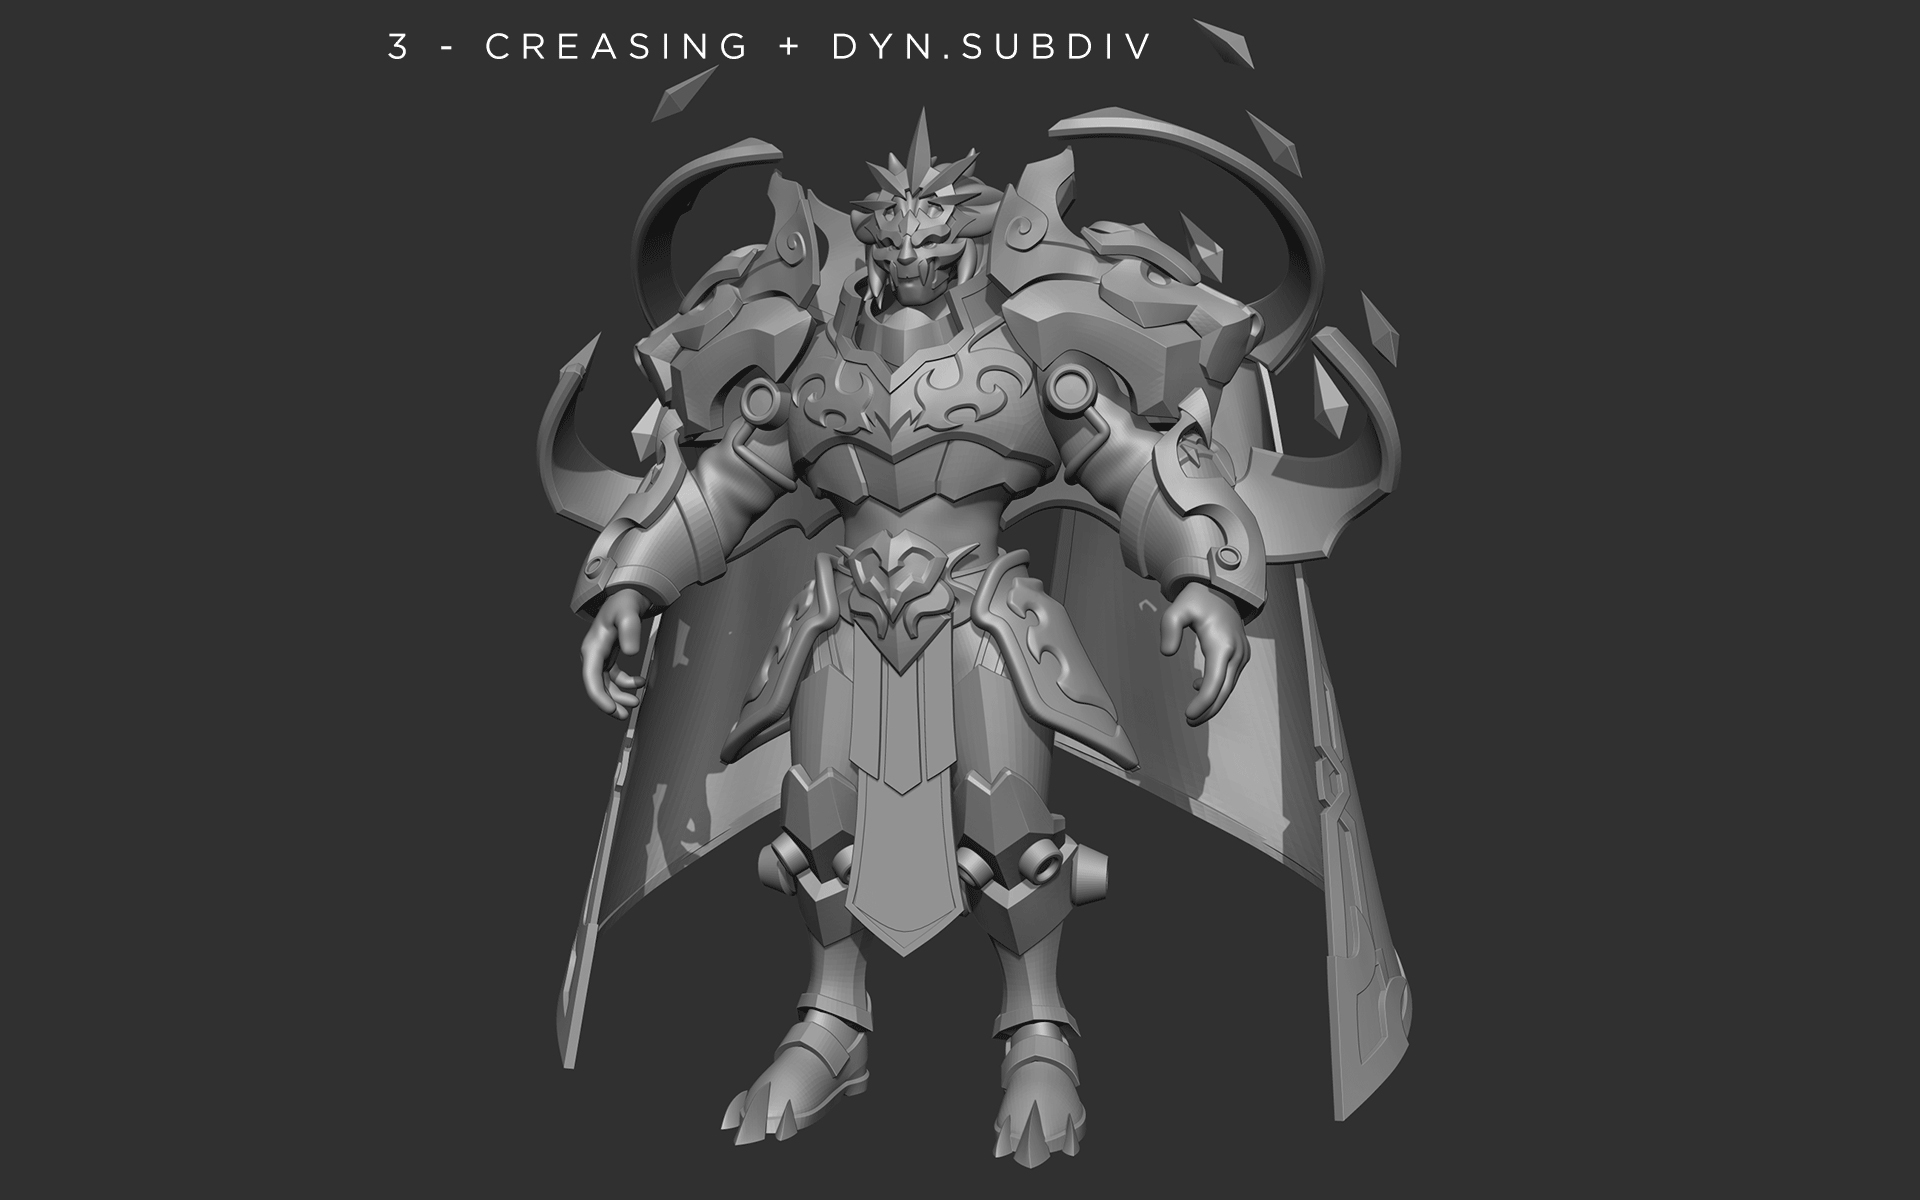
I creased any sharp edges and activated Dynamic Subdivision in order to get a better preview of the final look of the SubTool without completely losing the ability to modify it. Of course, it lacked mid and high-frequency details, but at this point, I was focused on achieving surfaces and curves that were clean with no waviness. If this low-level detail version looked bad, it wouldn’t look better with more details.

Once I was happy with the low detail character, I added mid-level details, mainly bevels on edges around big flat areas. I love to play with making non-linear widths for these bevels to explore more interesting results.
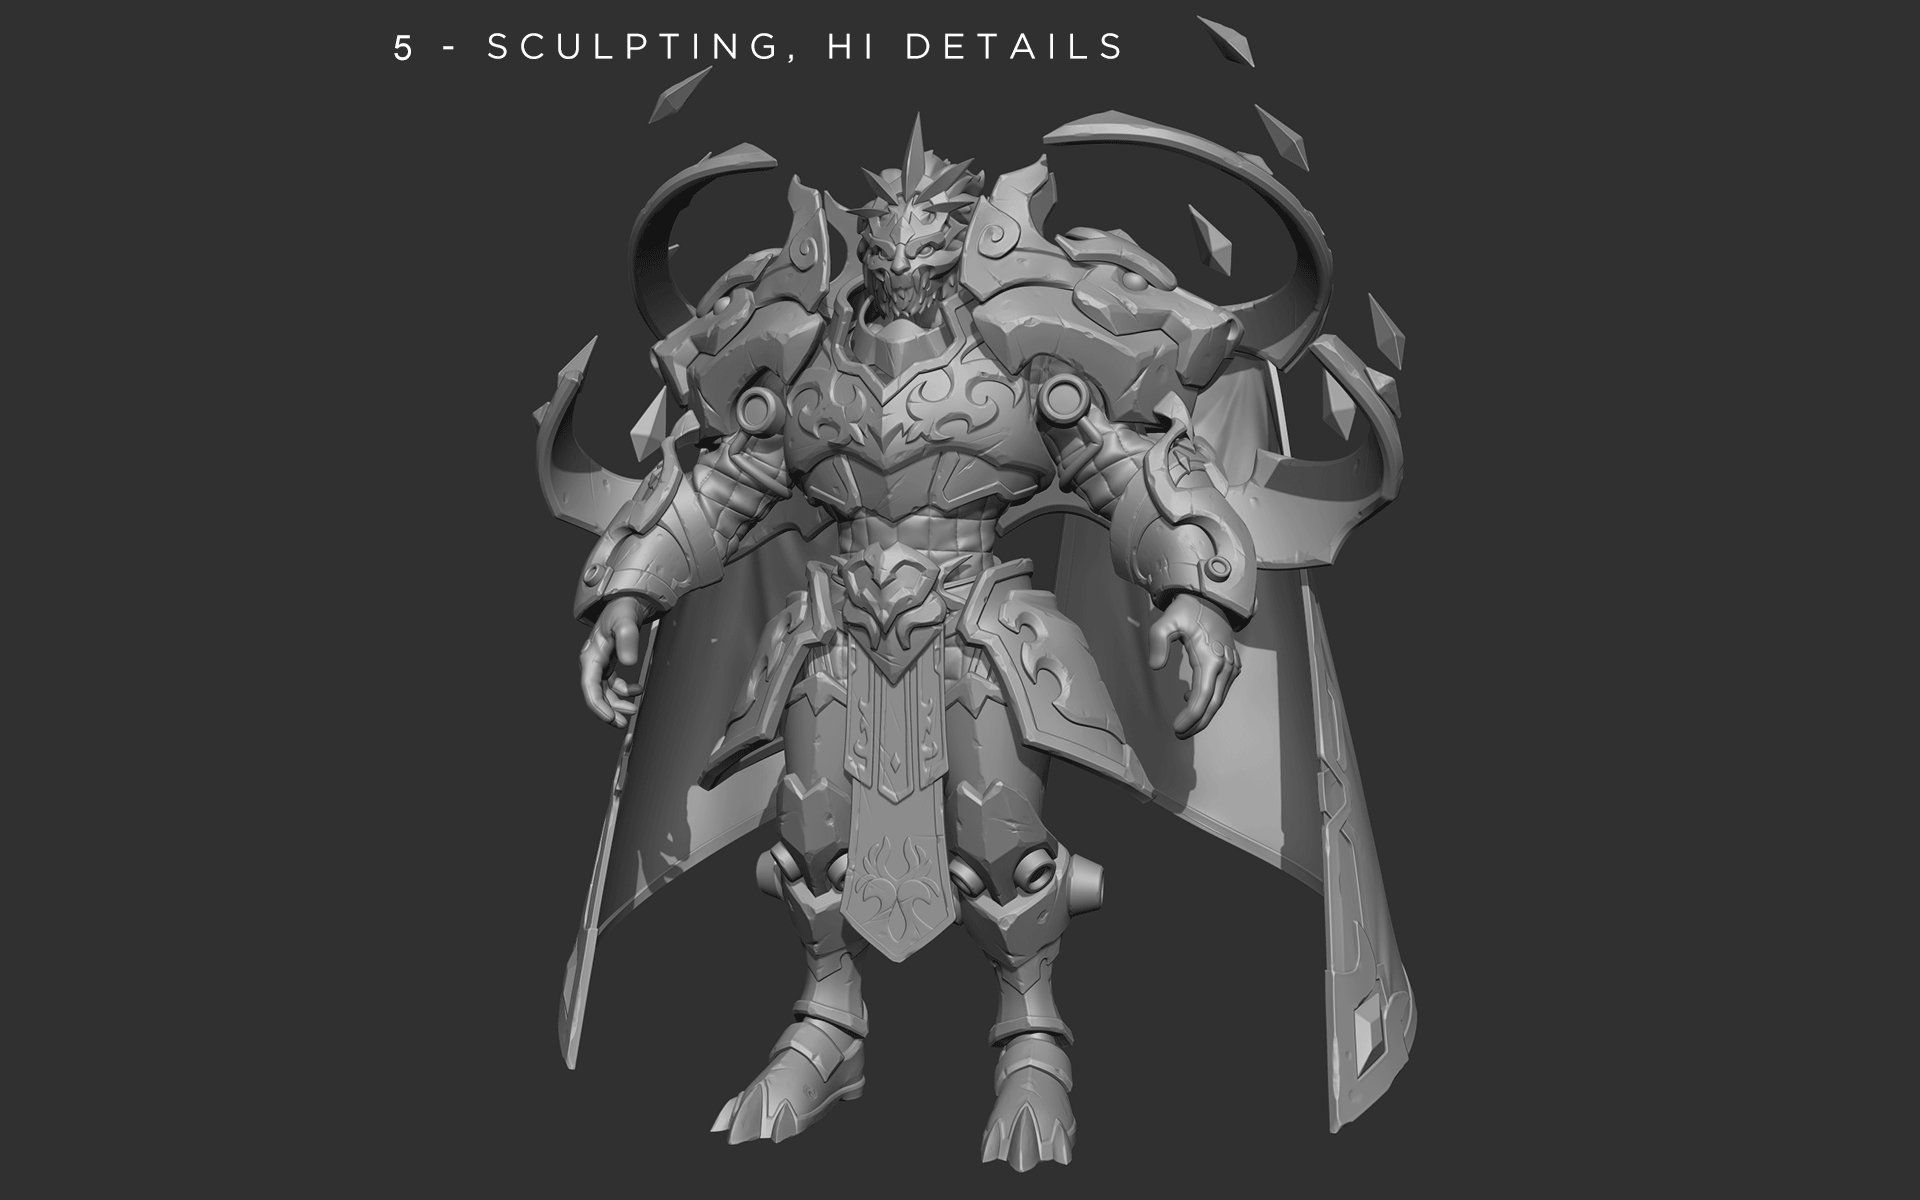
After this step, I disabled Dynamic Subdivision, added subdivisions and started sculpting details. At this stage, I started adding edge wear, breaking chunks of armor, slashes, and so on. Instead of spamming slash alphas in every blank space, I tried to add damage in a way that made sense and was believabile. For instance, I added slashes on the character’s armor in a way that indicated that they were caused by other knights during battle.
Retopology and Baking
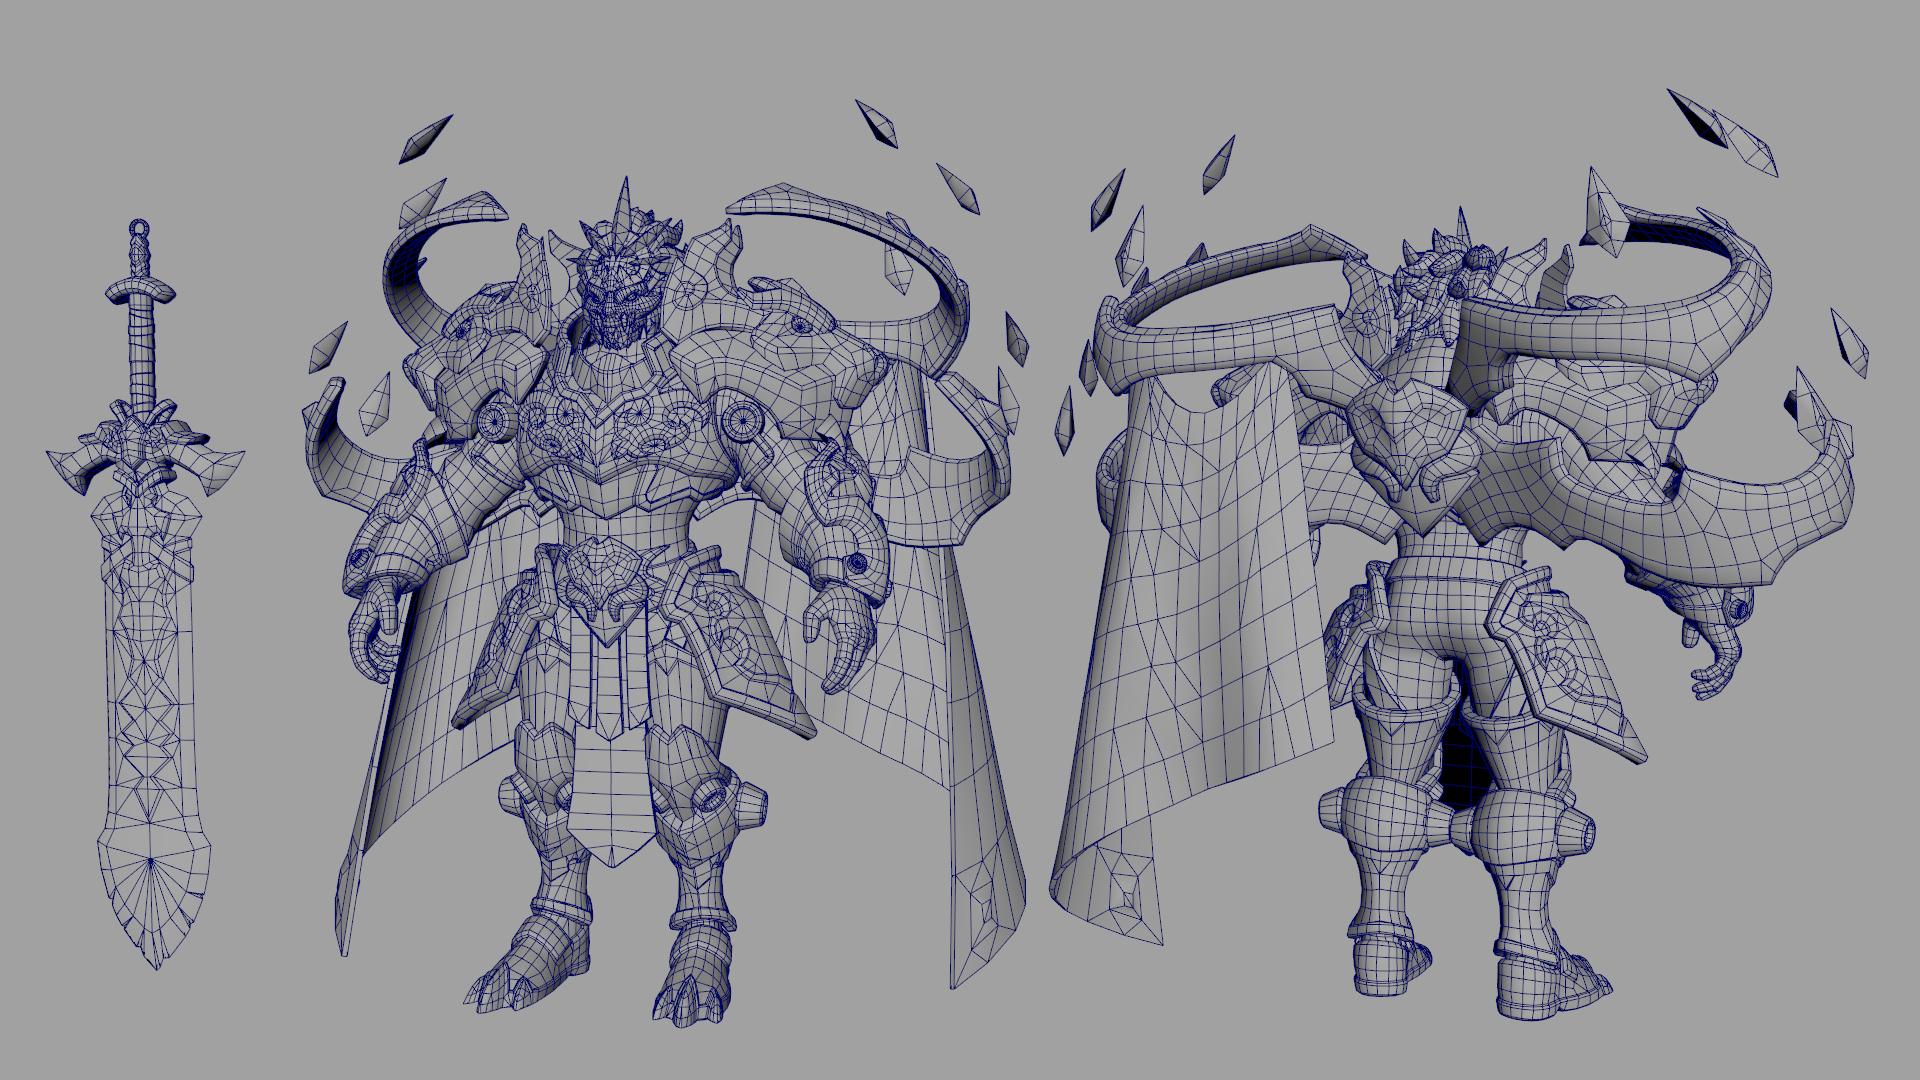
As I mentioned earlier, I mainly use 3D Coat for retopology. Another good aspect of manually retopologizing before detailing the sculpt is that I can use it as a base for the in-game model. 3DCoat has powerful unwrapping tools, so I tend to place seams and unwrap everything there before importing my meshes into Maya for packing UVs and smoothing groups. When it comes to baking maps, I use Toolbag to generate Normal, Ambient Occlusion, and ID maps from the high poly model. I bake additional maps directly in Substance Painter based on the low poly model and Normal/AO maps.
Lighting
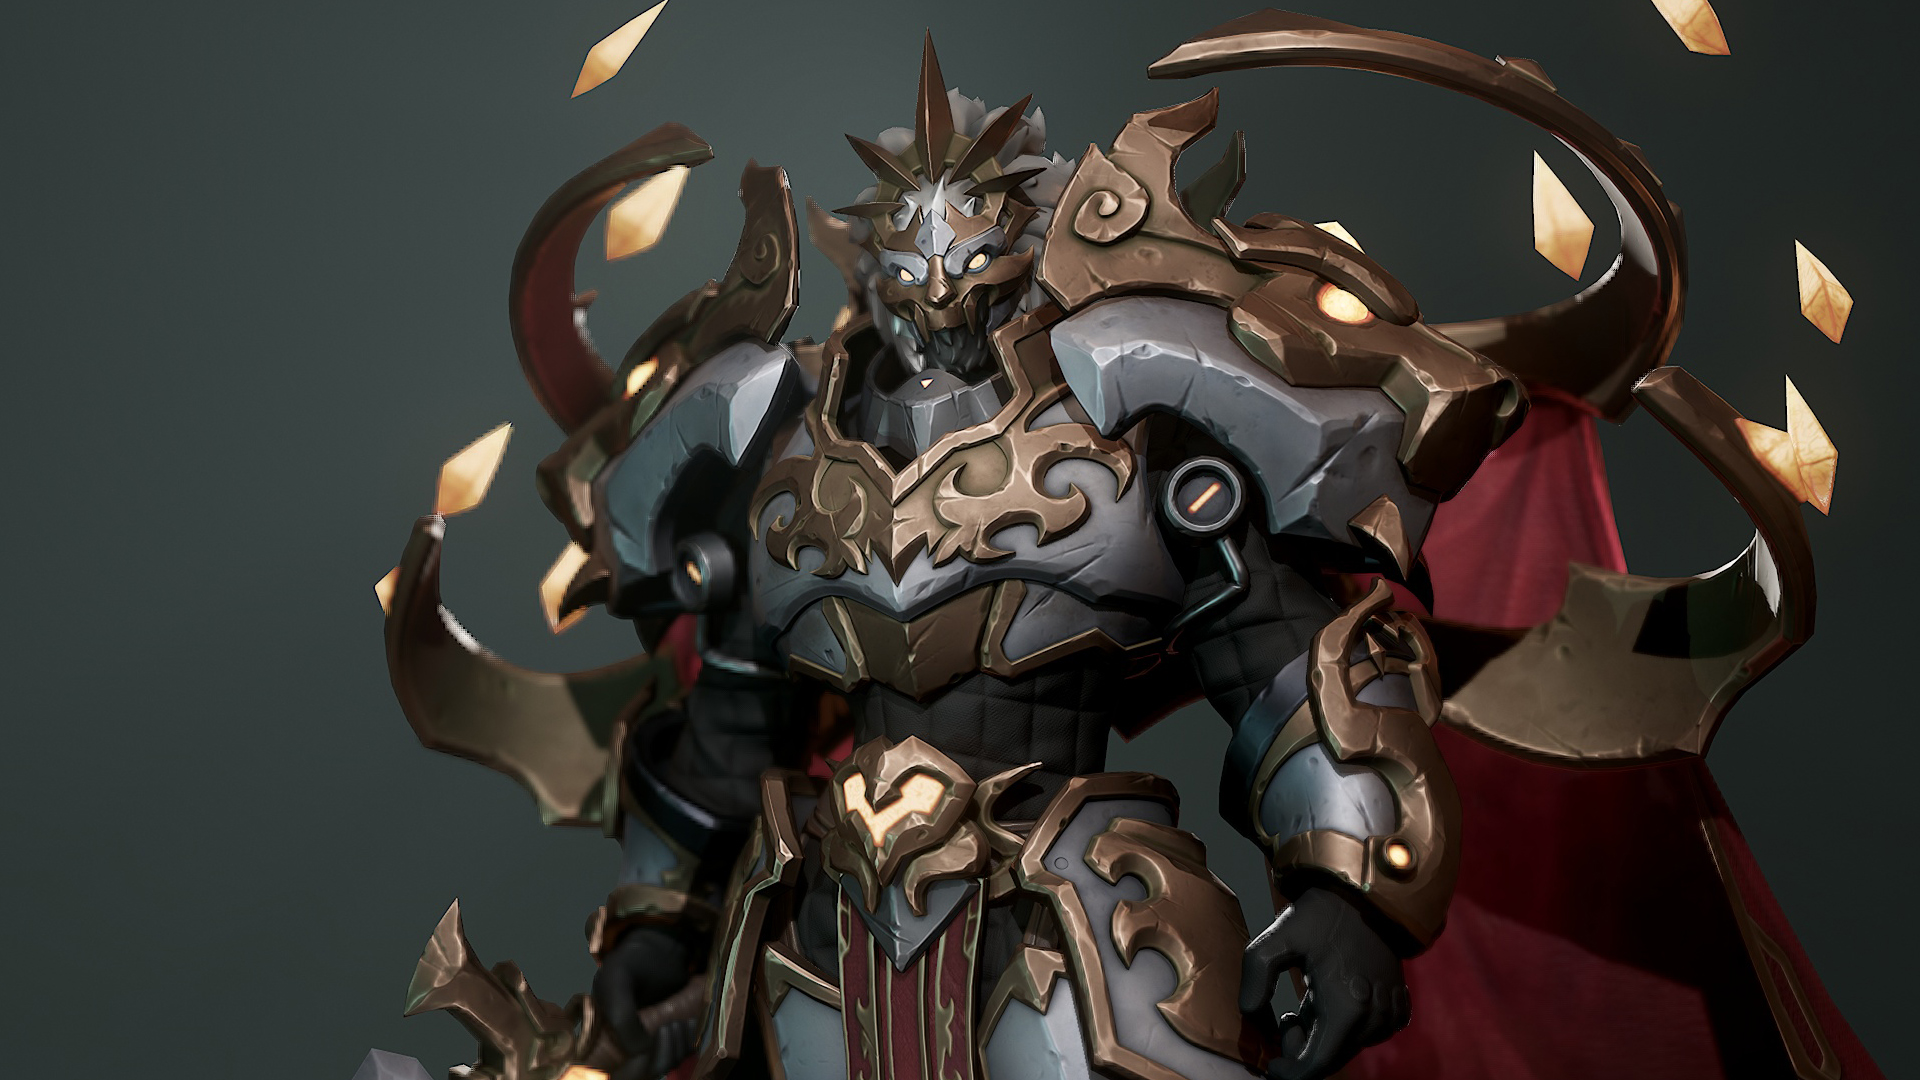
When my character was ready for texturing, the first thing I did was to import it into Toolbag and quickly set up a few lights and a Sky that would closely resemble the final mood. Of course, I would tweak these throughout my texturing and posing process.
Then, in Substance Painter, I set up the textures export folder and linked everything to the character’s material in Toolbag. This way I can simply press export and it automatically updates everything in Toolbag, giving me a view of how my textures will look in-engine. You don’t want to work dozens of hours in Substance Painter only to realize that it looks way different in-engine. The sooner you test in-engine, the more time you will save! The lighting setup was as follows:

I started by selecting a nice Sky Preset and set the Brightness to a low setting to avoid having pure black shadows. I set up several lights in a classic and precise 3-point lighting setup (labeled “A” which were key, fill, and rim Spot Lights). I placed them as child objects under the Sky so that when you rotate the sky using Shift+LMB, it turned the lighting setup with it. Make sure your character has been exported at the 0;0;0 world position from your 3d app. This is because the Sky and Lights rotate around the world origin, and having a character placed at the world origin will allow the lighting to work well at every angle. I used additional lights (labeled “B”) that aren’t child objects of the Sky. They need to stay relative to the character, as they are just small point lights helping areas to pop more. It’s better to avoid having high values with these lights and making sure your 3-point setup is doing a great job first.
Texturing
The texturing process used the standard PBR metalness/roughness workflow, with the exception of the metal parts. For the metal material, I did a hand-painted pass to make them shine the way I wanted, adding more subtle and stylized details that procedural masks wouldn’t give me. Even if you’re working with a Physically Based Rendering workflow, it is very common to “cheat” and make it less physically accurate by adding some AO or light information in your albedo, especially in stylized art styles. I played quite a bit with colors and AO to get exactly what I wanted. I knew I wanted to have a pretty desaturated scene in the end, however, this did not mean that I would create desaturated textures. It’s better to work with the overall color grading for the scene during the post-processing stage.
ANIMATION
Rigging and skinning
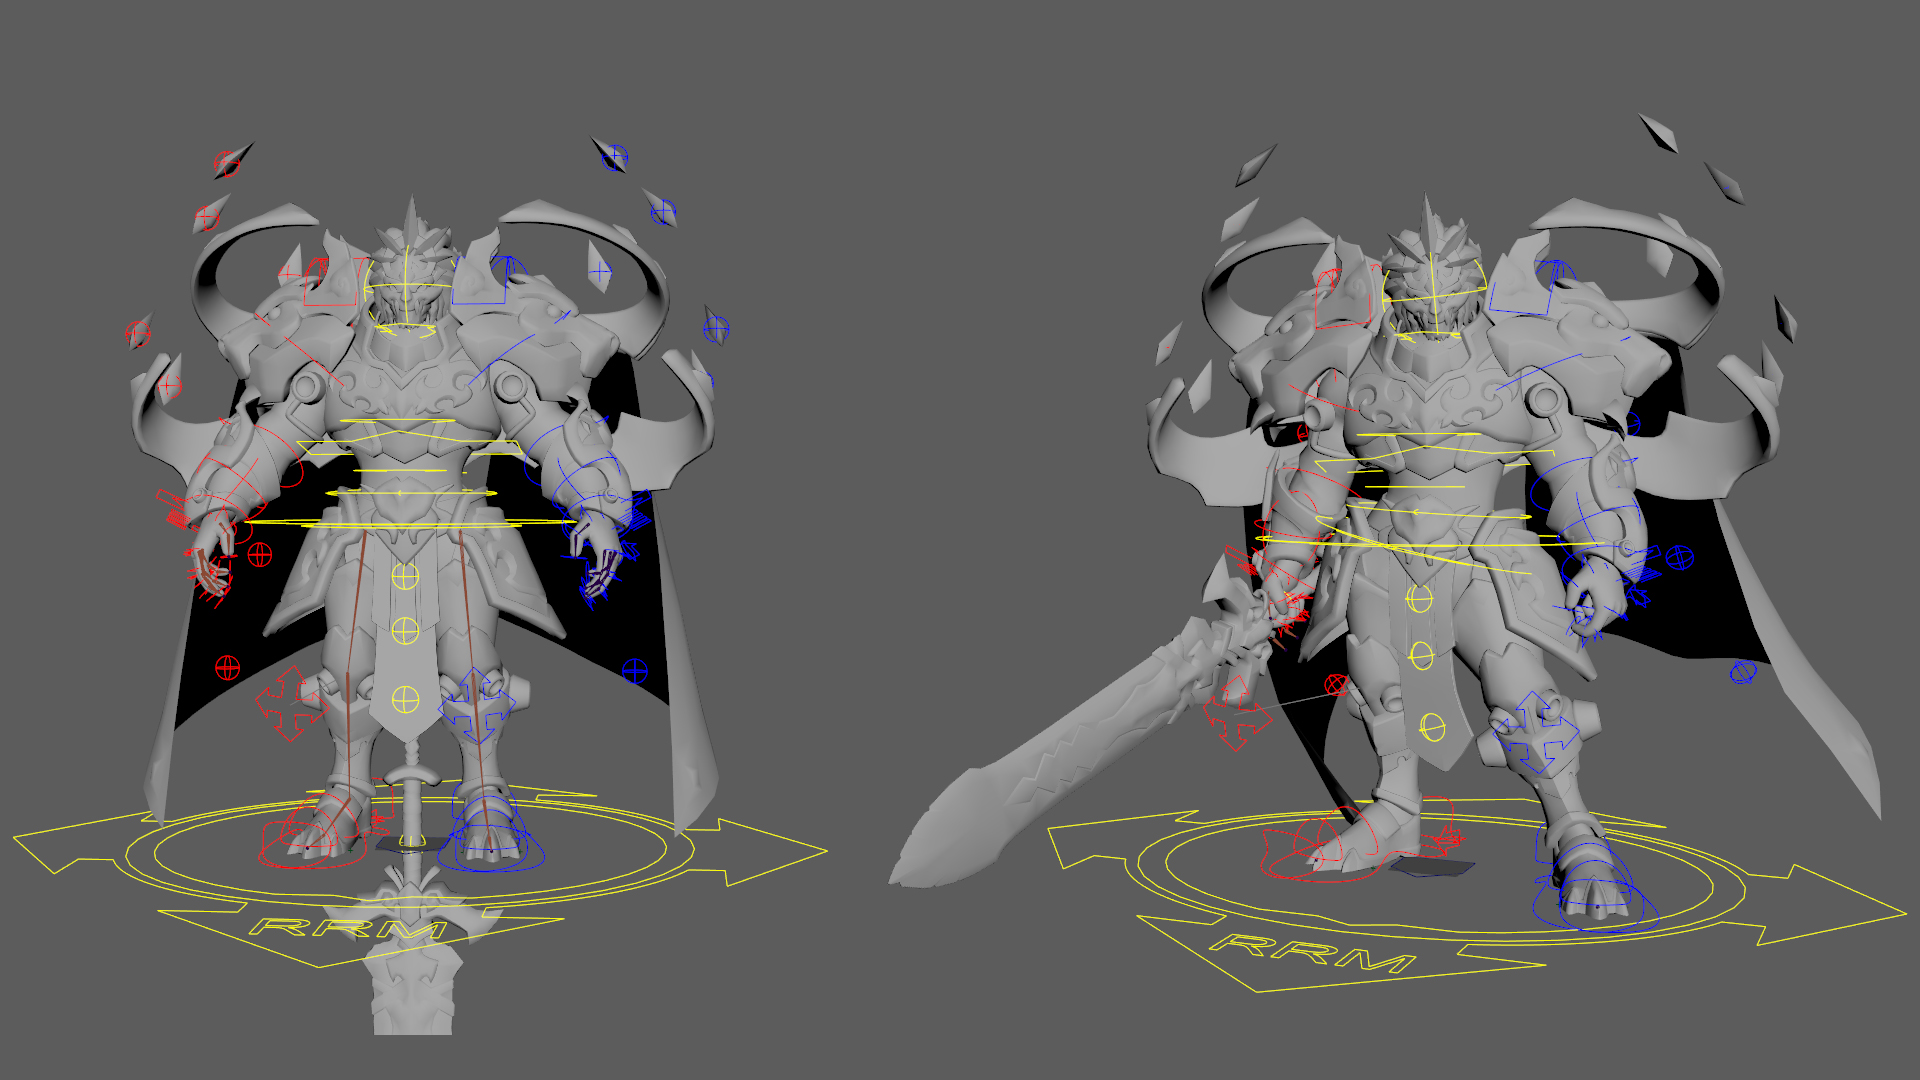
If you’re like me and most game character artists, you probably try to avoid rigging and skinning your characters due to a lack of experience with the process. That’s okay! It’s actually a step that will make a big difference, so I would highly recommend investing a few hours (which will turn out to be a 20% effort and 80% benefit scenarios). I’m not saying you should create complex rigs or skinning, simply go for the basics, such as painting skin weights and setting up control rigs. Check out Maya’s video on Quick Rigging and Skinning for Beginners as well as their documentation on how to create an automatic character rig for a mesh.
I dislike seeing well-crafted characters that are simply standing in T-pose. It ruins the whole project for me. I think posing a character in a basic idle pose is the bare minimum you need to have. Creating a simple rig with nice skinning will help you pose the character in different static poses and/or animate it the way you want. A character should have a story and a personality. A few different poses and an animated idle are too often the missing steps that could turn a great polygonal model into an actual character that feels alive to the viewer.
There are several pieces of software that can help you create quite advanced rigs with very little knowledge of actual rigging. For my rig, I used a software called Rapid Rig. I only had to learn the basics of painting skin weights and refresh my memory on things I struggled to learn many years ago in game art school from great teachers.
In addition to having controllers for the humanoid features, I needed the cape and tabard to have some too, because animating wind on cloth parts would play a big part in creating the mood and atmosphere I wanted.
Animating Arthur
I wanted to make two different animations for the final presentation. These would be idle animations of Arthur with wind flowing through his cape. For the first animation, his pose would be set up similarly to the one in the concept and would look like an action shot. For the second one, I was inspired by the League Of Legends animated login screens, which I think are very effective in conveying the essence of their characters.
The 3 big points I had to focus on while creating these idle animations were: the pose, the breathing, and the wind. Posing is obviously the most important part, and if it’s not good enough, adding breathing and wind loops won’t save it. When posing your character, you should focus on the emotion you want to convey to the viewer and look up references accordingly. I wanted Arthur to seem like a hollow king, who, after years of battle, would have turned into a fierce beast with no feelings, crushing anyone who would stand in his way. So I imagined the final pose and camera angle would be placed above the viewer as if Arthur were about to end his life. You don’t need to go for a complex pose, sometimes simplicity works fine.
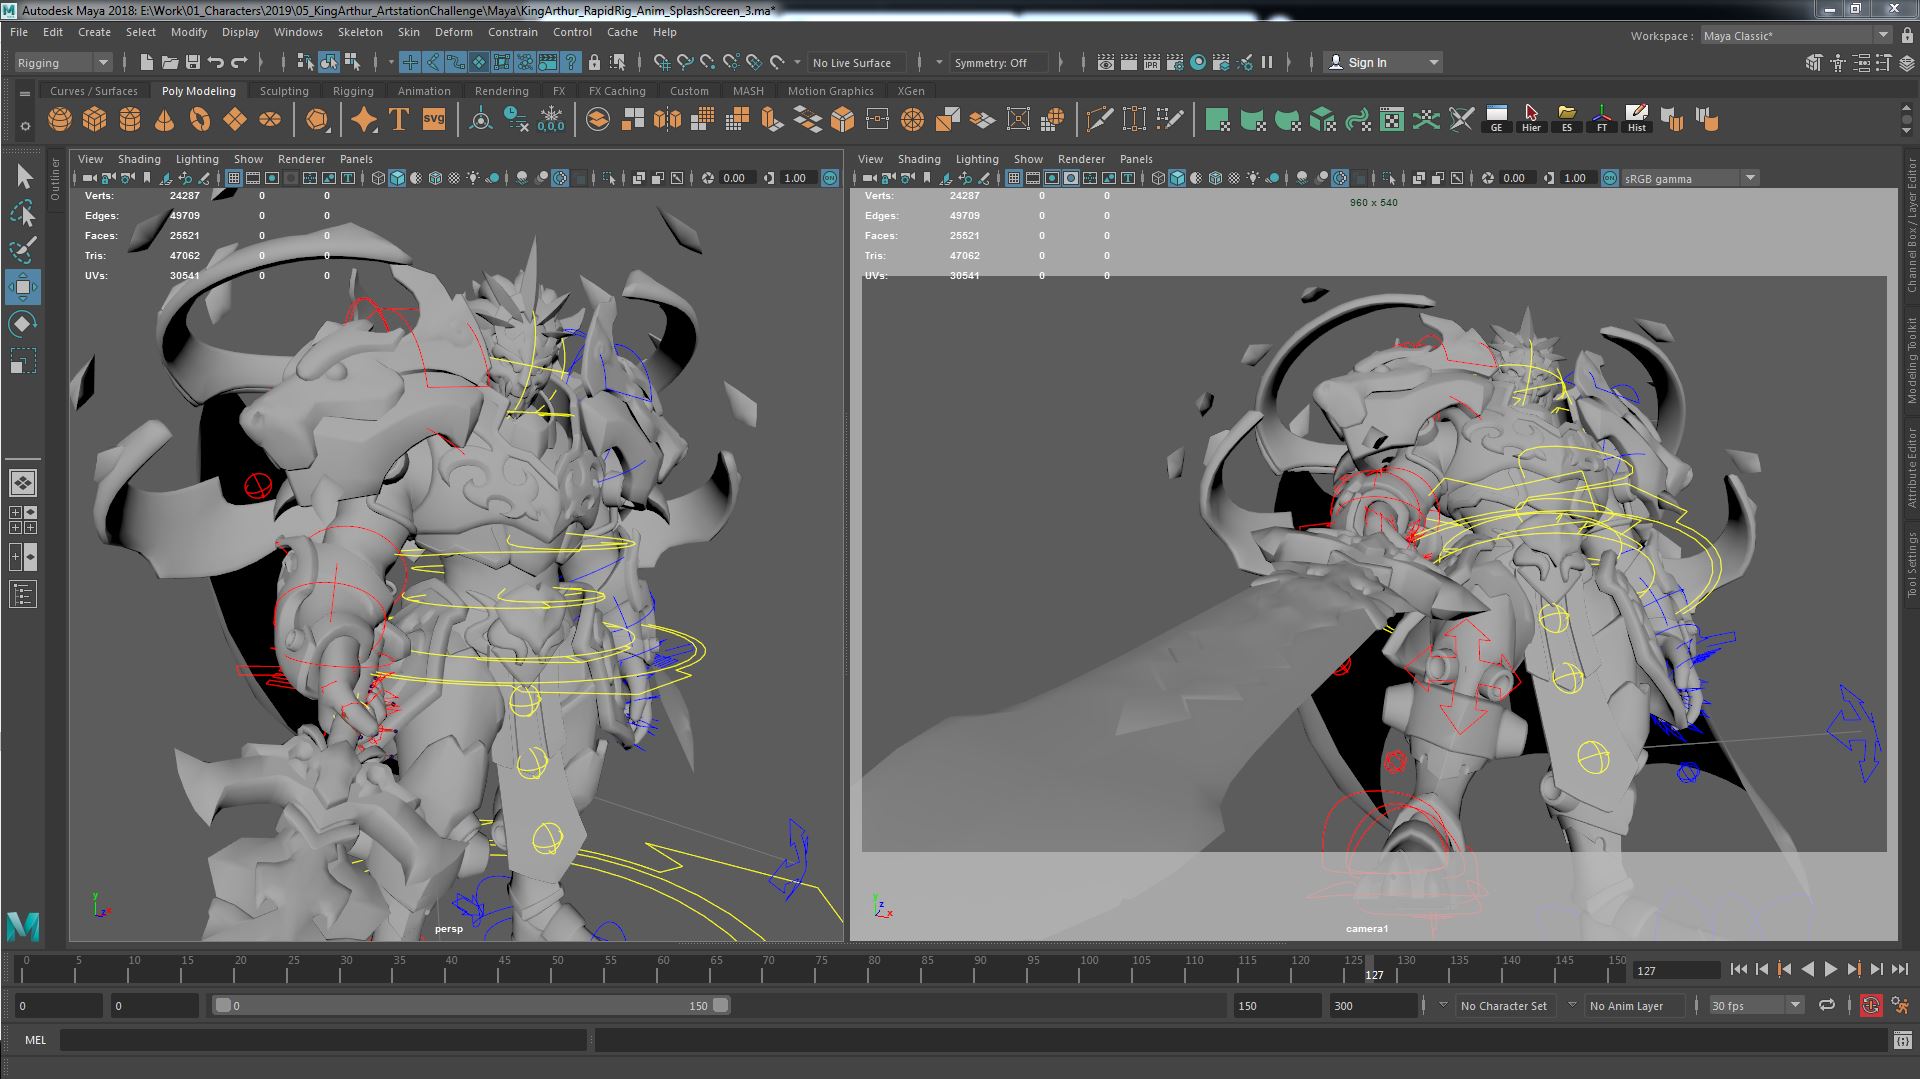
For the action shot, I made sure to set up a camera in Maya that had the same position, angle, and FOV as the one I would set up in Toolbag. I would work on one viewport while having another that showed me exactly what I will get in Toolbag. For the wind, I manually animated the joints to make credible waves for a short loop. However, I still thought I could add more detail to make the animation more realistic.
I looked for a way to displace vertices and found Danilo Paulo’s custom Displacement Panner shader which does exactly this. The great thing about it is that it works with vertex colors, so I could flood the whole character’s vertices in black and paint the cloth parts in white. Keep in mind that this works much better on meshes with softened normals, since a vertex with split normals acts as two vertices and will result with faces separating when vertices displace.
CONCLUSION
And that’s pretty much everything about my process. There are lots of different ways to improve your character presentations, such as creating impressive lighting and composition, and adding animation. Toolbag offers clean and functional animation integration as well as rendering features, and you should take advantage of this to push your character the extra mile. After rendering a Toolbag video with animation though, you can go even further by adding music, post effects, sound effects, or anything that will strengthen your character’s credibility. Each step during the character creation process is an opportunity to make choices towards the end vision you have for your character.
Thanks a lot for reading this article, I hope that by sharing my process, you learn new things or have ideas and inspiration for your future projects. Good luck and keep having fun making characters!
We’d like to thank Antoine Dupuis for writing this breakdown article. You can check out more of Antoine’s work on Artstation.
Find out how you can create powerful character presentations using the 30-day trial of Toolbag.


