

Introduction
Hi, my name is Felipe Chaves and I’m a Brazilian character artist currently living in Vancouver, Canada. In this breakdown, I would like to share my baking and texture creation process, as well as how I set up materials and lights for my Grumpy Goblin in Toolbag. This character is based on a concept by the amazing Todd Ulrich.
The main goal of this project was to see how far I could push the render quality in Toolbag and create a result similar to some offline renderers such as Arnold or V-Ray.
BAKING

Since my goals for the project were strictly about pushing render quality, I didn’t care much to optimize this character. The image above shows that the low poly mesh is still quite dense.

I created 3 different texture sets in order to have good resolution across the whole model; one for skin, one for leather, and one for metals. I divided the character into different groups so that none of the pieces touched one another. This is done to prevent baking errors due to overlapping meshes. The groups are split into high poly and low poly with correct naming conventions. For example:
- Leather01_high
- Leather01_low
- Leather02_high
- Leather02_low
Using the suffixes ‘high’ and ‘low’ for each group will make your life easier when loading your meshes to bake using the Quick Loader.

Toolbag’s baker has been my preference for the past couple of years. Tools such as the Paint Offset for real-time cage adjustments and Paint Skew for correcting bad directions make it easy to fix baking issues. For this particular model, I didn’t have many issues with the cage, but tight areas such as the transition from eyebrows to the nose were causing minor errors. The Paint Offset tool was used to fix that area as well as some other spots seen in the image above.

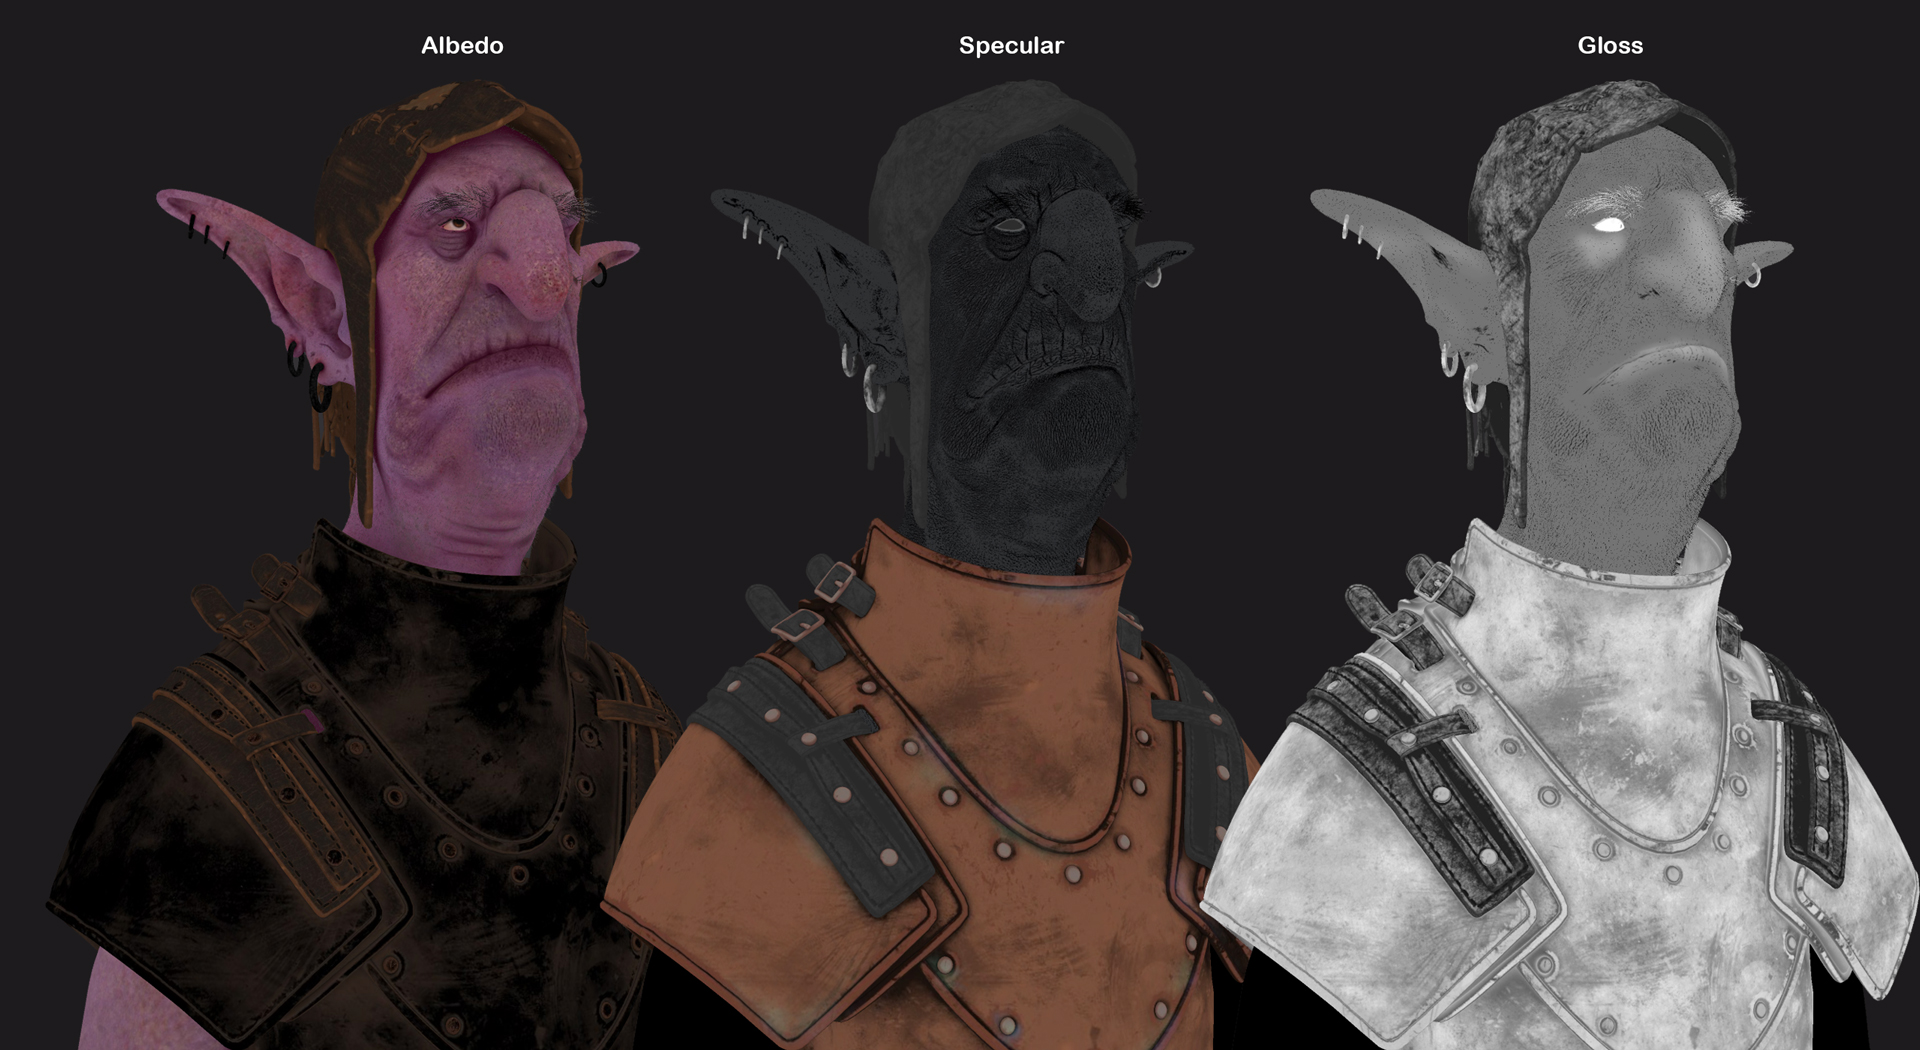
I baked all the base maps necessary to import into a Substance Painter project with the exception of an ID map. I usually use polypaint to create an ID map to make things easier while texturing in Painter, however, since all of the bolts and stitches were maintained as actual meshes, I decided to mask things out by selecting meshes or UV shells.
Texturing
As mentioned previously, the theme of the breakdown is how to push render quality. However, it is impossible for me to talk about rendering without first approaching some key points in the texturing process. In my opinion, texturing and rendering go hand in hand. No matter what software you choose to create your textures, it has to look good in the final render.

My high poly meshes tend to be very clean with few fine details. I prefer to create finer detail while texturing for a couple of reasons. First, it keeps my ZBrush file size relatively small and I won’t end up with a super dense mesh. Meshes with a heavy geo count always give me a headache when exporting the model for baking. If it’s too heavy, I would have to decimate it and this can sometimes be very time-consuming. Depending on the amount of decimation, the mesh might also lose some detail. The second and most important reason is that I have the flexibility to try several ideas for achieving the visual I have in mind to see what works best. Different types of material combinations, colors, and details will all be attempted.
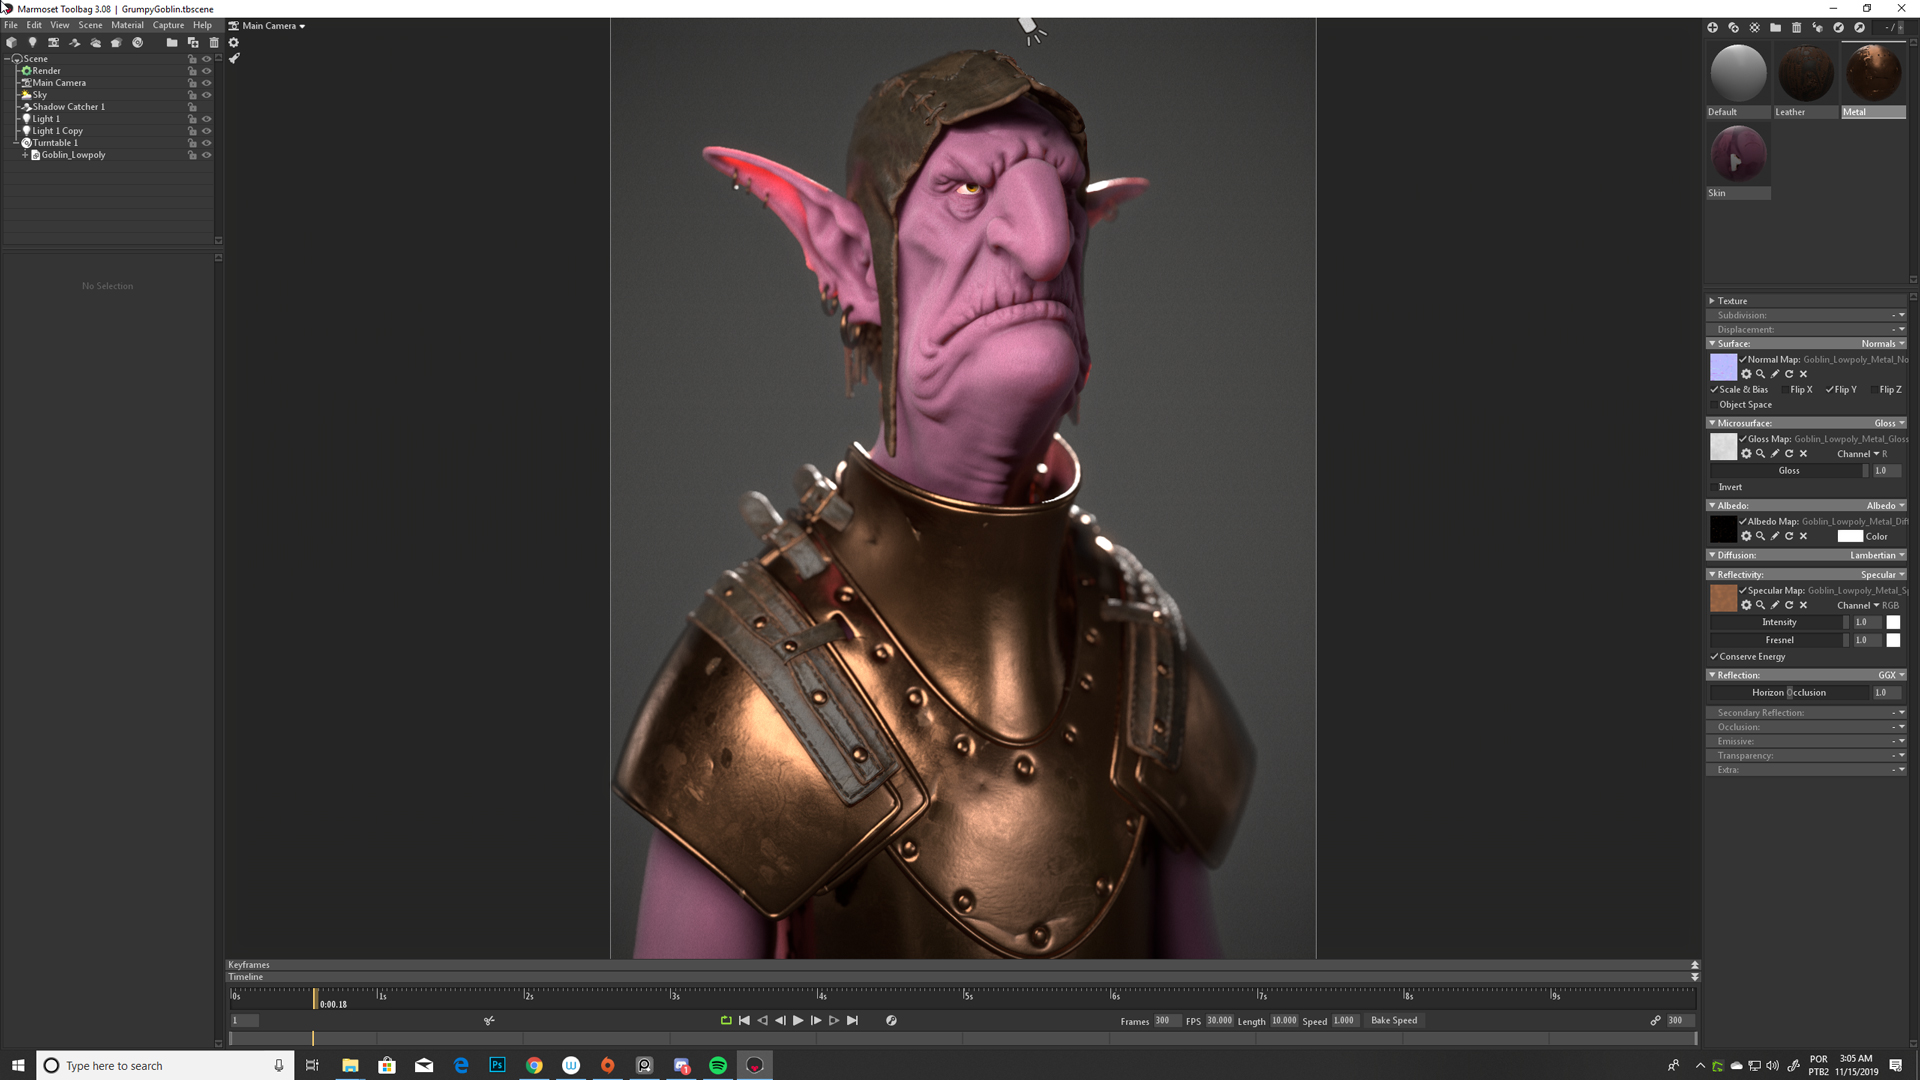
While texturing, I like to develop the textures for the character as a whole. So, instead of working on a small area to make that specific spot look awesome right away, I’ll do an overall first pass on the entire model that will help give me a better idea of what I want. As soon as I finish the first pass, I like to export the textures and start testing how it looks in the target render engine, even if they’re in a very rough stage. I imported everything into Toolbag as soon as possible. From this moment on, I set up a scene that became my main point of reference for the rest of the project. Every change I made while texturing had to serve the purpose of making the scene look good. The scene was in its initial stages, with no final lighting and settings in place. These will be discussed at a later point in the breakdown.

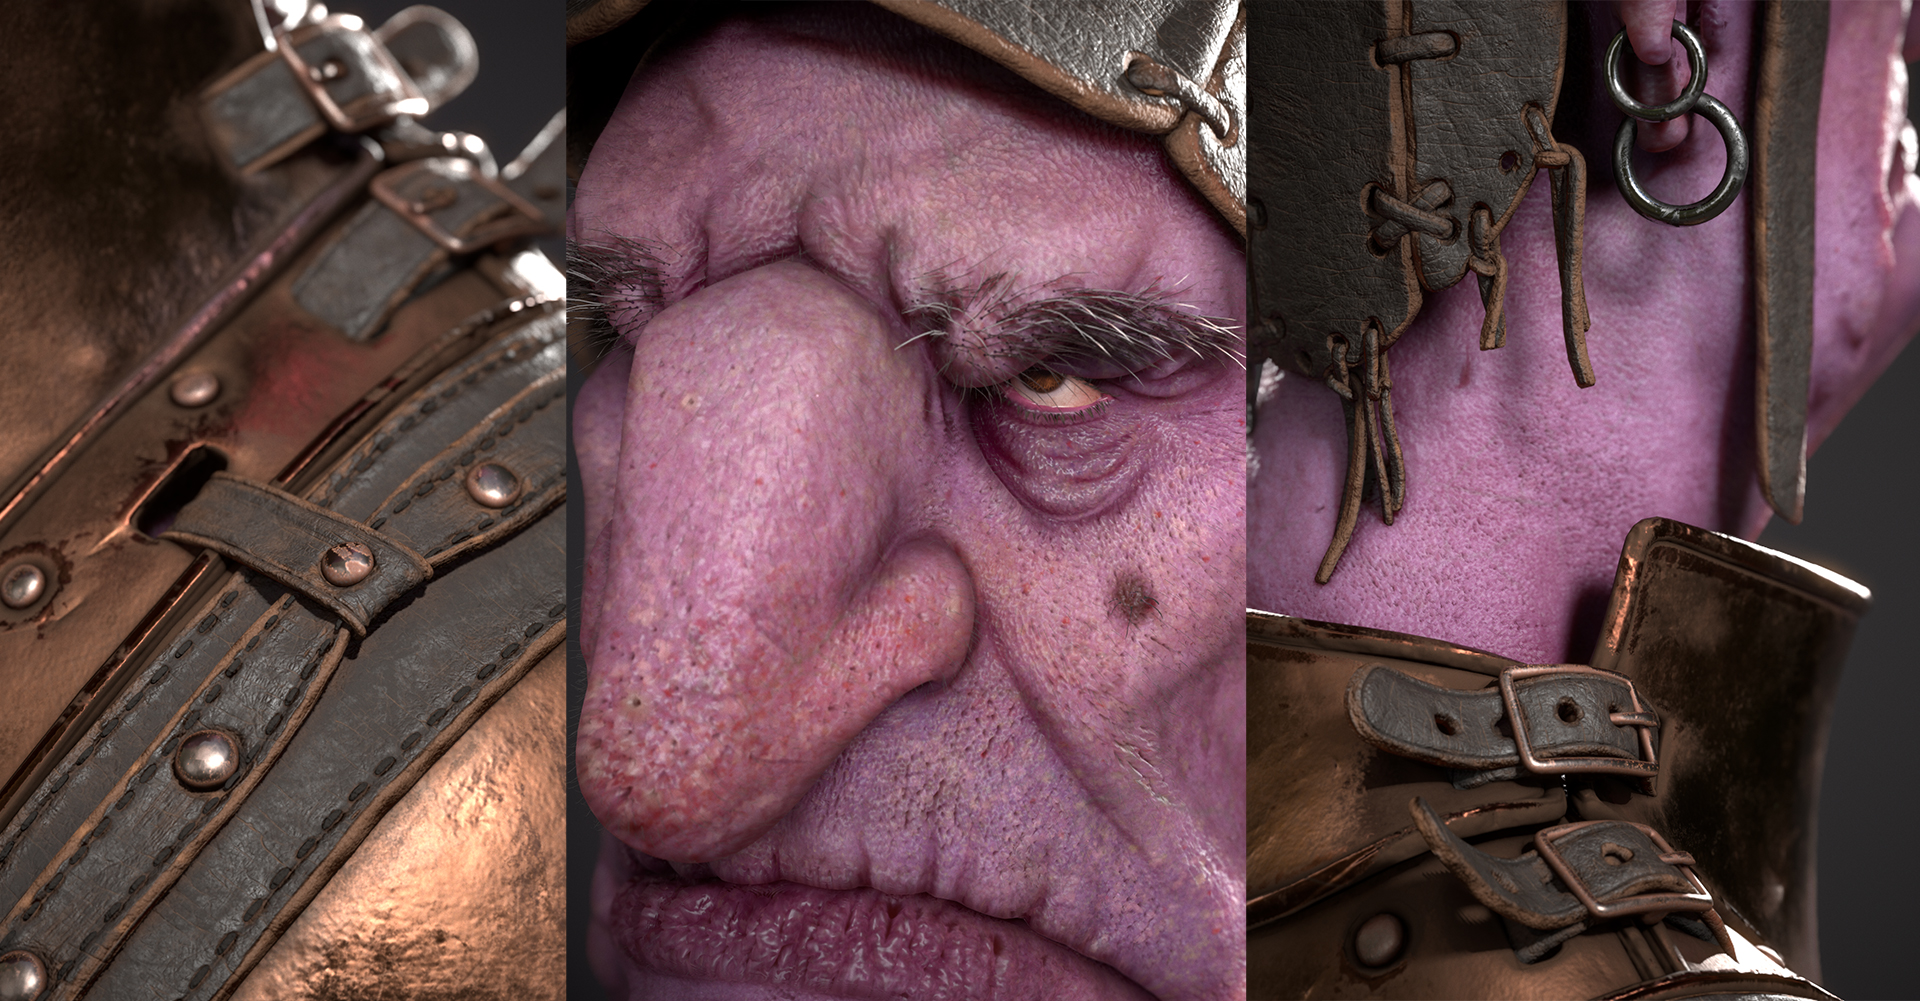
Once my scene and initial textures were set up in Toolbag, I started a second pass on the textures and added some detail to the leather, damage on the armor, color variation on the face, and so on. As the texturing phase advances and gets closer to its final stage, the back and forth process between Substance Painter and Toolbag happens more frequently, especially when working on the skin.
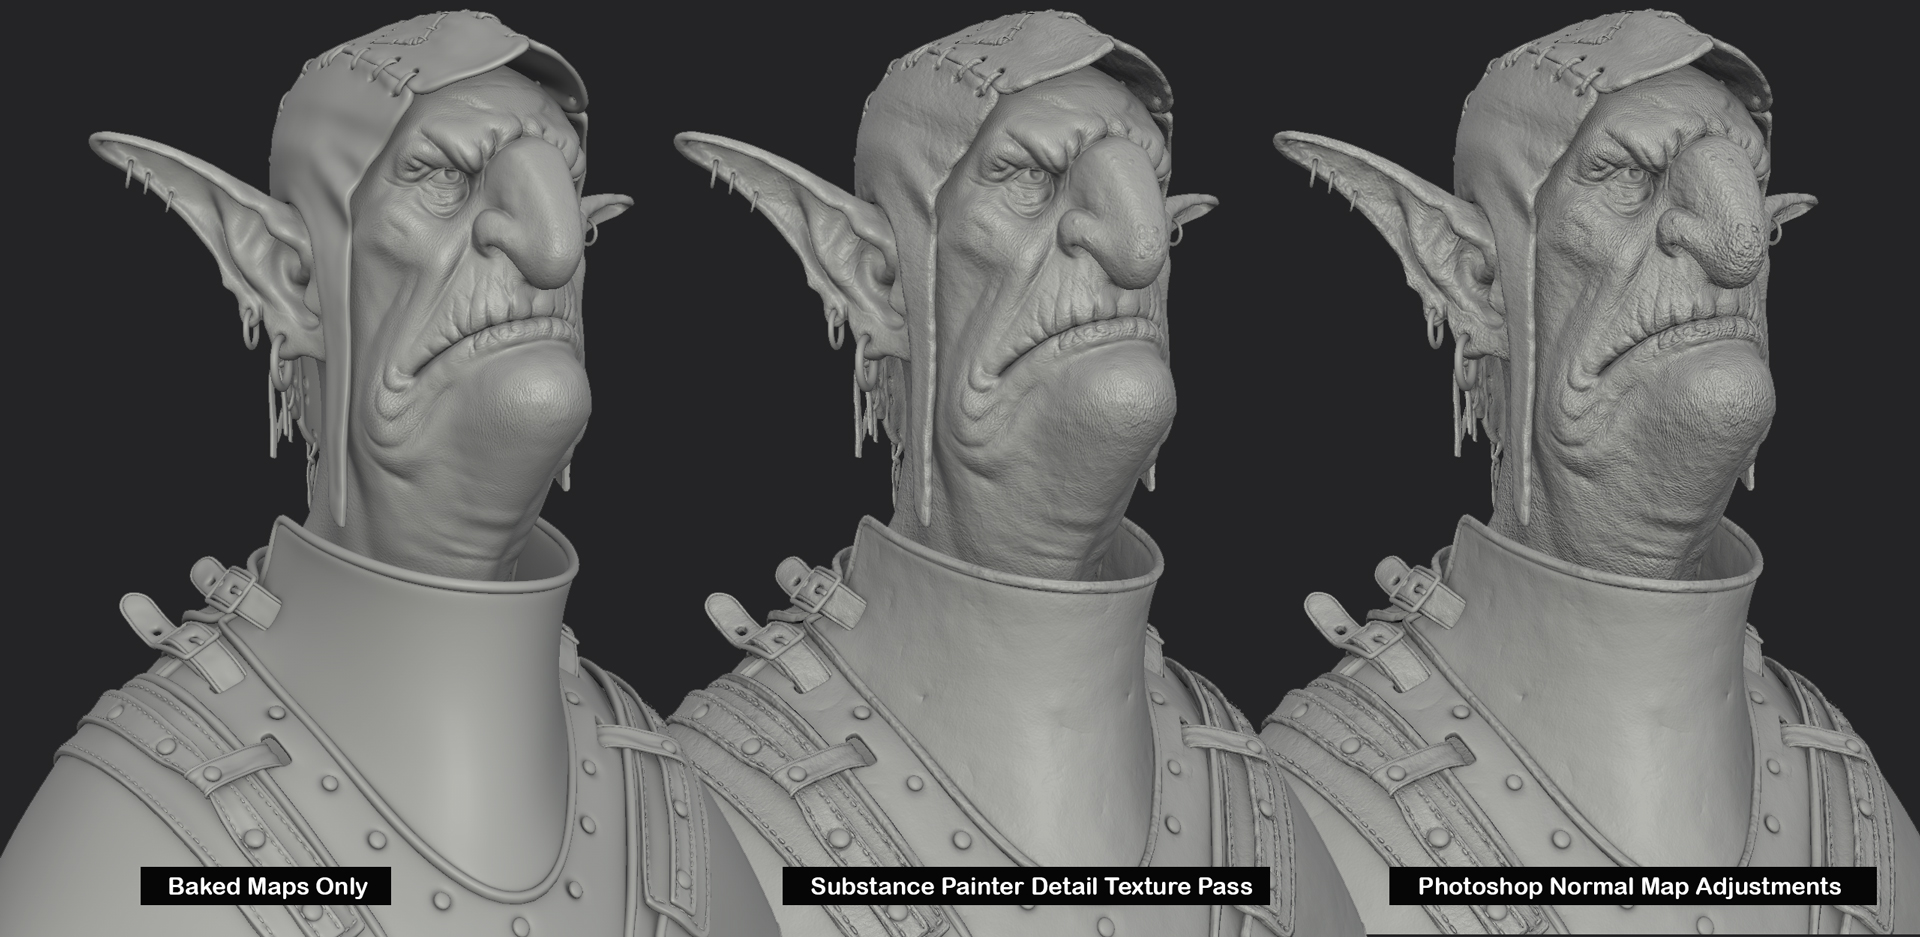
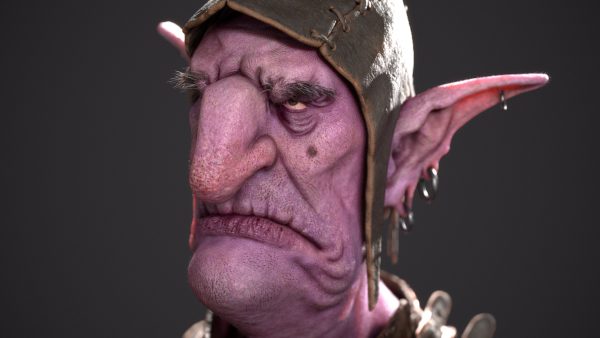
I wanted a rough look for his skin, resembling the face of an old goblin who sat out in the sun for too long during his glory days of the war. With that in mind, I took the skin normal map and exported it into Photoshop to make it way stronger by duplicating the normal map layer several times and setting the layer blending modes to Overlay.

I created a parallax map to help increase the illusion of volume on the face. This helped to pop out some of the skin details. I will discuss this part a bit further in the rendering section.

One thing that helped add the illusion of depth was to fake shadows in the texture. For most of my characters, I add a layer on top of the stack and call it “Overall Occlusion”. This is a Fill Layer with a dark diffuse color masked with a Fill node, where I input the occlusion map and add an Invert filter on top of it. Even when there is existing detail in the bake (e.g, the stitches around the patch), I like to manually paint in some occlusion and height information to add more depth to specific areas. These types of tricks will help your textures maintain their impact, even when there is a strong light hitting that area.
MATERIALS SETUP
Since the beginning, I imagined this character as someone who had dedicated his whole life to the military and is still part of the army but does not want to be disturbed. These mini descriptions always help me realize what I want for the final render. In this case, I wanted to recreate the mood of old photos from the early 1900s, so I searched for some photos to use as a reference for camera angles and lighting. Before diving into lights and cameras, let’s take a quick look at setting up materials in Toolbag.
For every personal project I create, I use the Specular Gloss PBR shader pipeline. I prefer it to the Metal Roughness pipeline since it gives me a bit more artistic freedom. For example, I can have a purple Albedo for the Goblins skin and set a slightly blue specular to break up the monotony of the dominant purple color. The difference is very subtle since the saturation of the blue has to be quite low, but it makes a good difference compared to the Metal Roughness pipeline where the specular would be white (or in the case of metal materials, it would be the same color as the albedo). This can be very powerful when working with hair or applying makeup on your character.
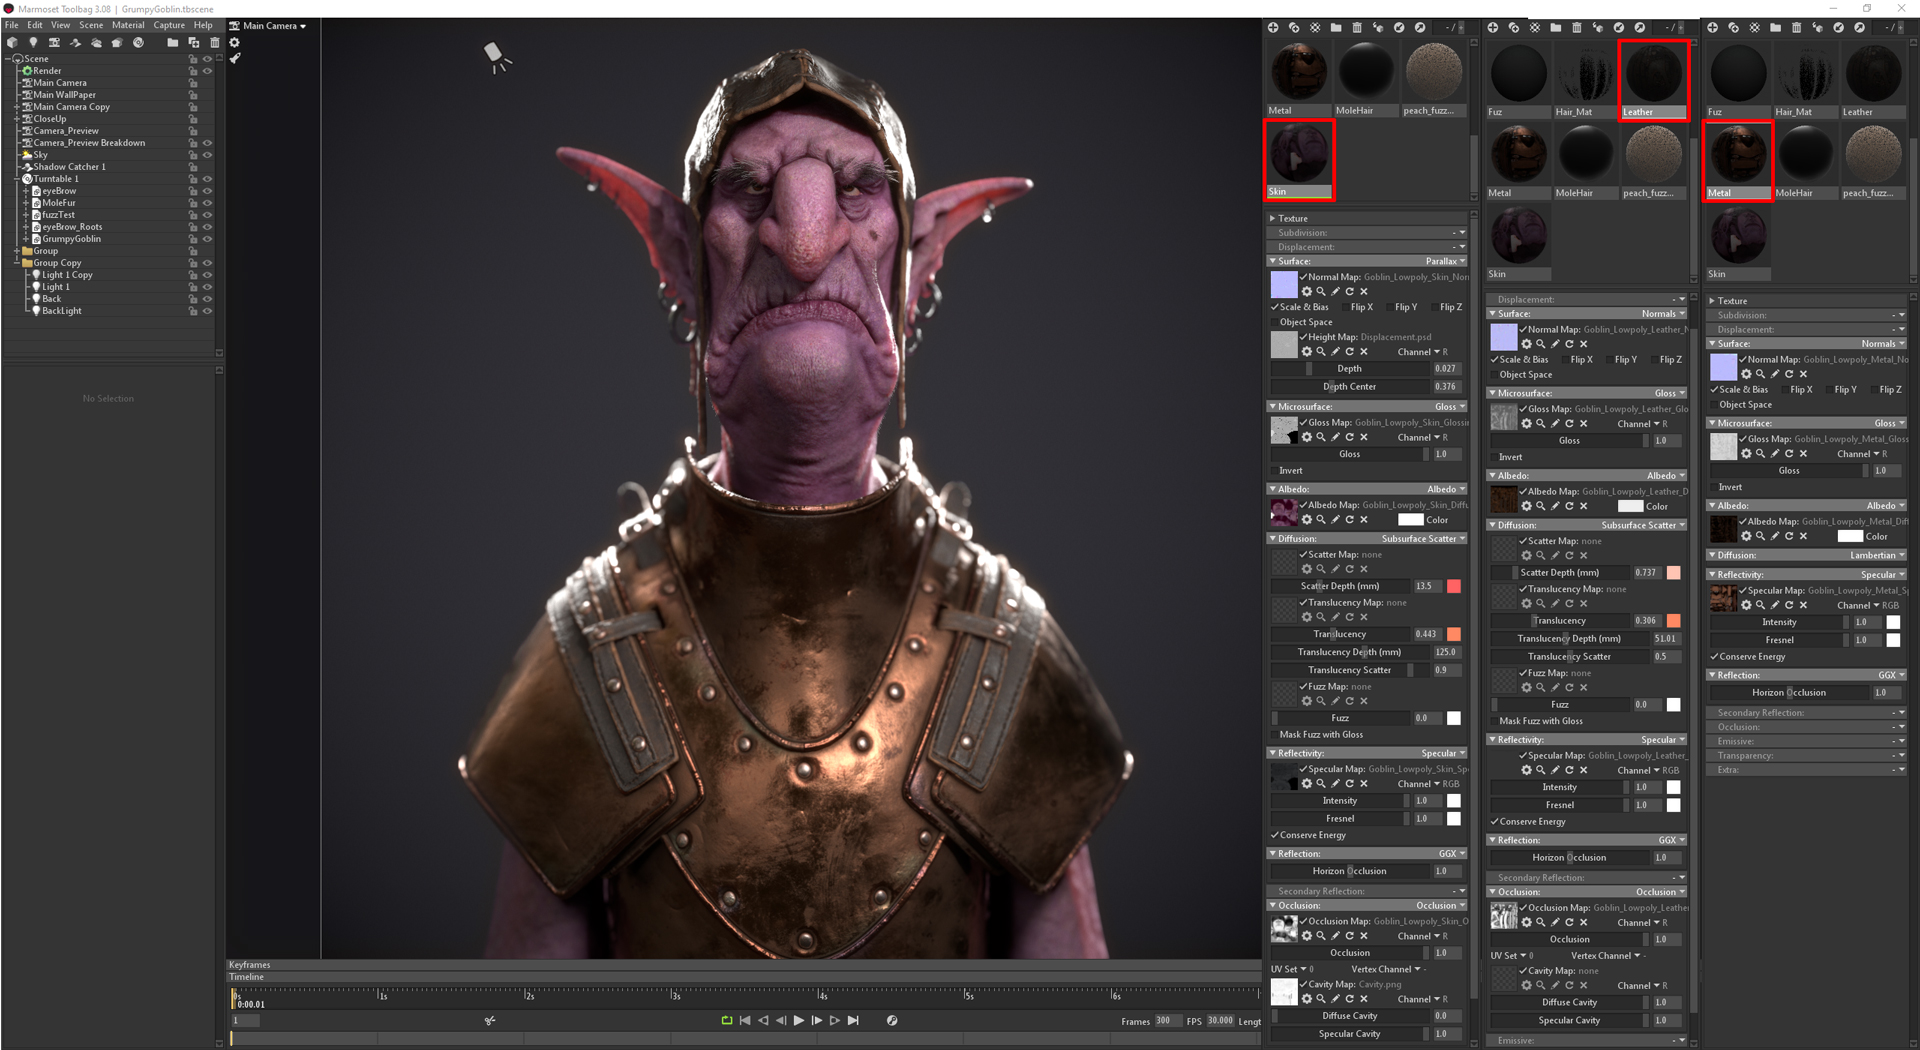
The image above shows my final material setup for skin, leather, and metal. For the leather, I set the shader module to Subsurface Scattering and simply adjusted the Translucency parameters. Since SSS is specifically made for skin materials, it generally does a good job by default with detecting how deep the light penetrates the model. These parameter values will always vary according to your scene settings and model scale. For the metal material, I had set up Normal, Albedo, Specular, and Gloss maps.
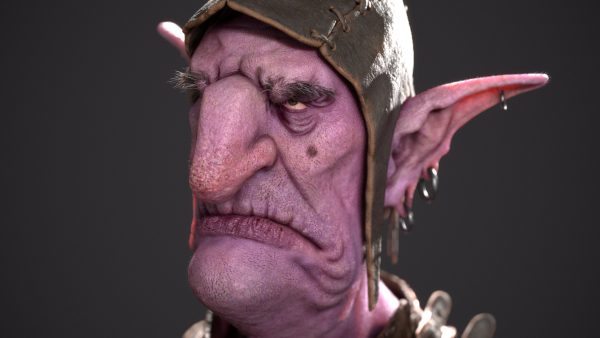
As previously mentioned, I added a parallax map to the skin material in order to help create a realistic sense of depth. This map will take care of occluding any cavities that shouldn’t be seen from certain angles, and the effect itself is called Parallax Occlusion. In the comparison above, you can see when parallax is on, it looks like the mesh has been inflated, but it’s only the height map controlling what pixels are seen and which ones are hidden based on the angle of the camera. If you look closer, you’ll notice the silhouette of the mesh doesn’t change. The rotating images show the differences between having parallax on and off. When parallax is on, you can see the cavity of the middle wrinkle on the lower lip is being occluded as the model rotates. When parallax is off, you can see all cavities are visible until they rotate 90º away from the camera. You can check out this video of a single plane rotating with a parallax map applied and learn more about parallax mapping here.
LIGHTING AND CAMERAS
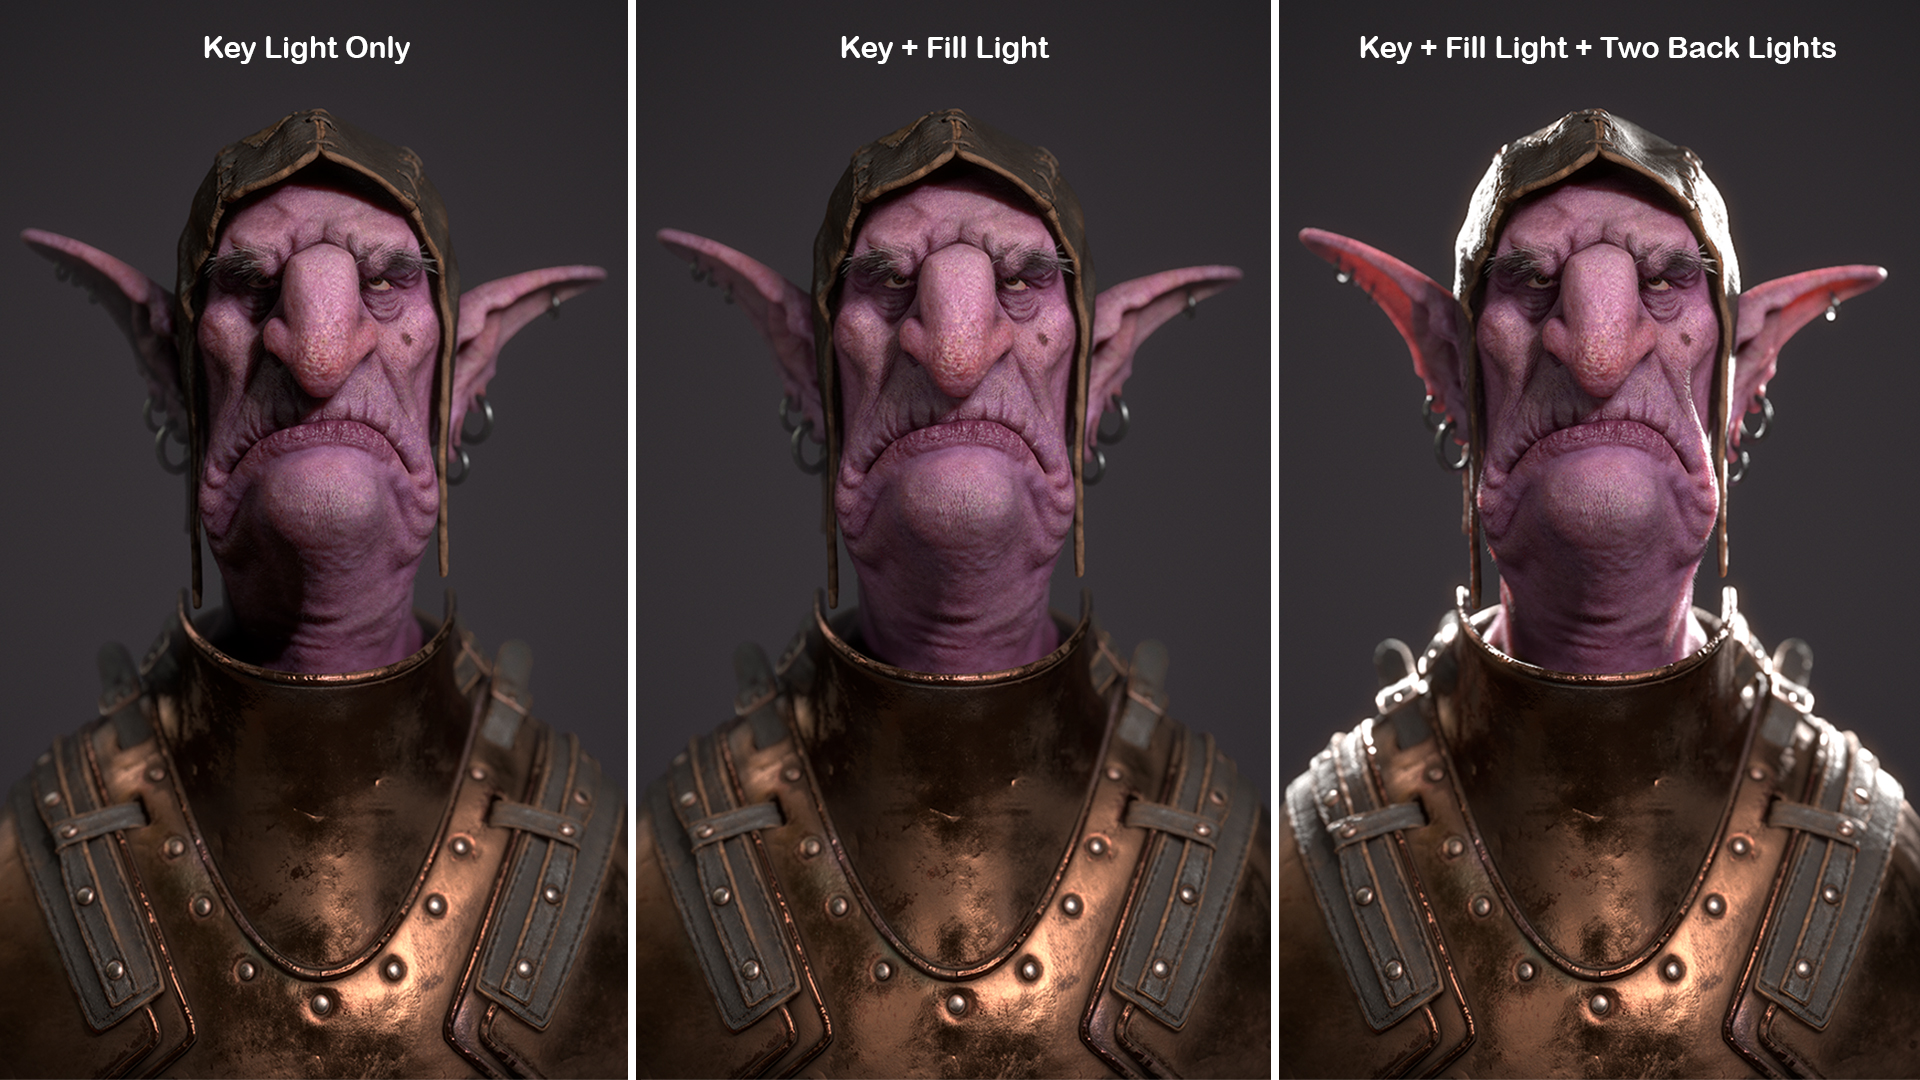
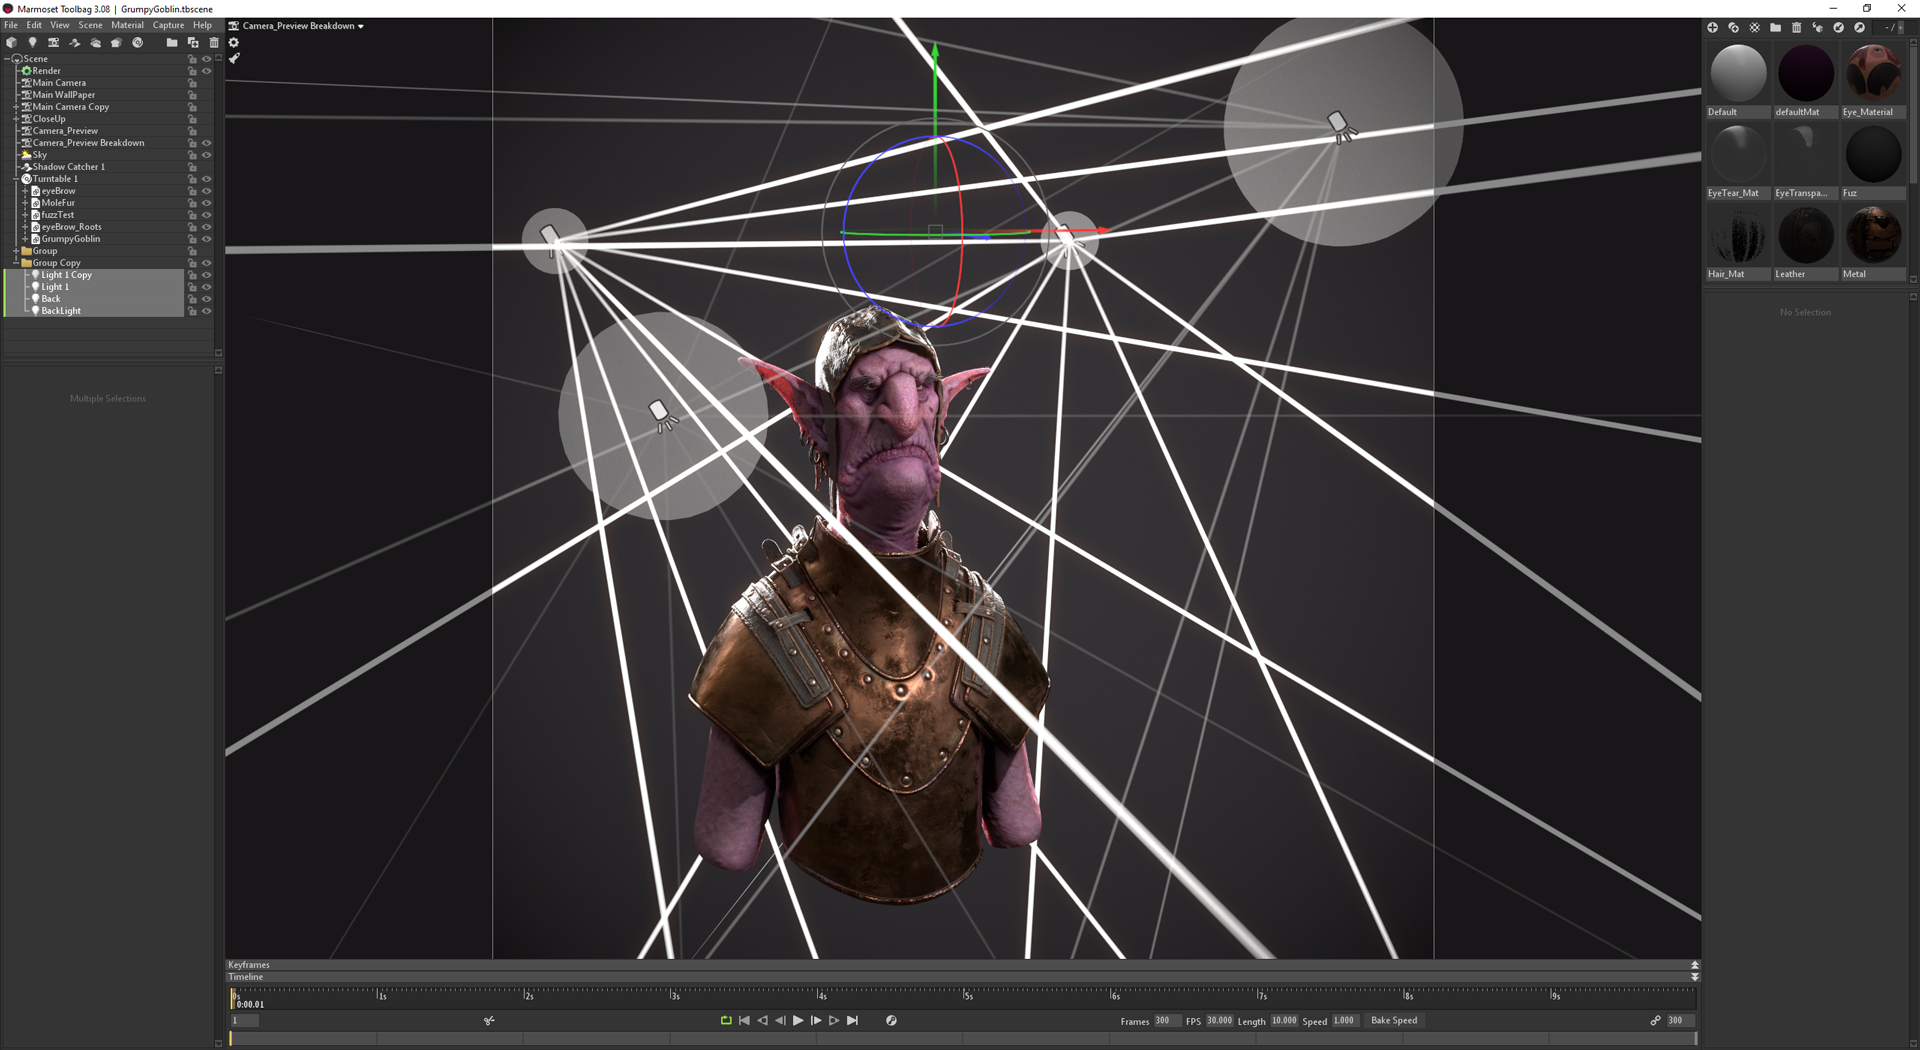
The light setup for this scene was fairly simple. I used 4 Spot Lights; 2 in the front as key and fill lights and 2 in the back as rim lights. I wanted the lighting to bring out the grumpy mood of the character without making him look evil or scary. Although my key light created a lot of shadows, I used the fill light to balance the composition and make the darkest areas a bit brighter.
Creating very strong backlights is part of my rendering style since I like the effect that the rim light brings to a composition. In the end, the idea was to have a radiant style photoshoot, but he was so grumpy that he just wanted this “photo thing” to end quickly. He is not enjoying it at all! For this scene, in particular, I bumped up the Bloom parameter a little bit in the Camera settings.

This was my process for setting up lights for the scene:
- I set up a key light that represents the final mood. A light that is placed high up can generate dramatic shadows, while one that is placed more towards the center can make the character look bright and have less pronounced shadows. This varies from project to project, but the main idea is to keep things simple when starting out.
- I set the position of my main Camera, pick my FOV value and lock it. In this case, I set my Camera to 60mm, but as you can see, my scene has multiple cameras for different situations. I always make adjustments using other cameras, this helps me to make comparisons every time I make a new test render.
- I added a Turntable object to the character to see how the light interacts with the character, even if my camera angle has been locked.
- I turned Global Illumination on and adjusted its Brightness to preserve the shadows. I made sure the Brightness value of GI didn’t disrupt the shadows I was working towards.
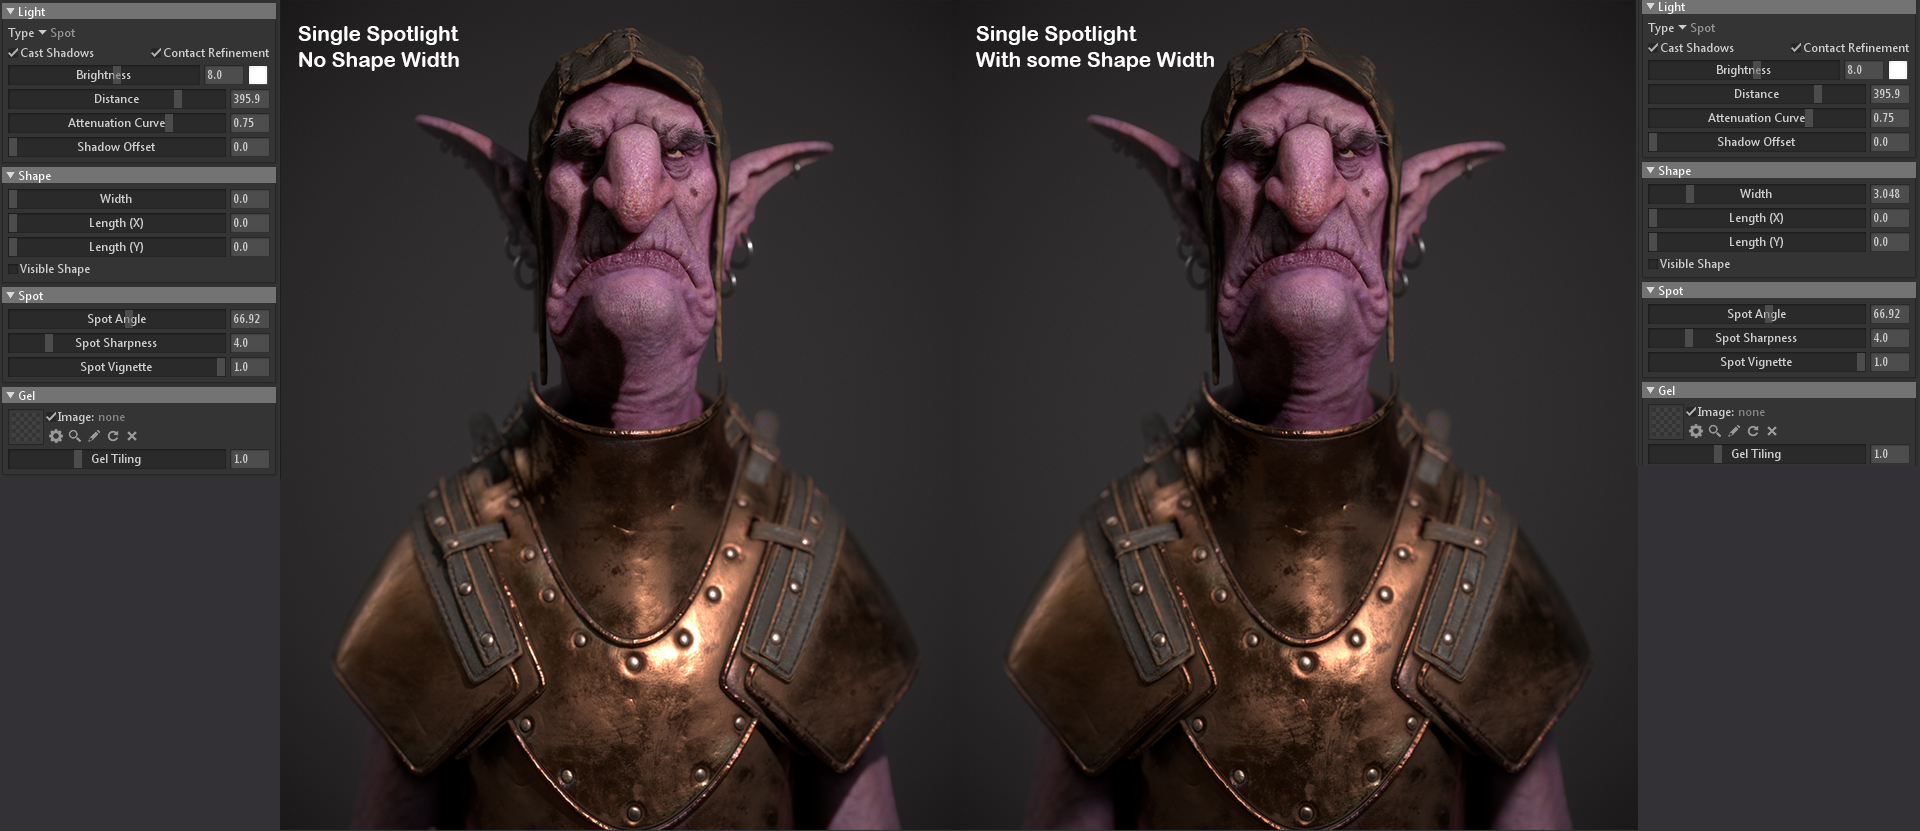
When setting up a Spot Light, it’s important to adjust its Shape Width. This will determine how soft or sharp your shadows will be. The default settings for this parameter will give you very sharp shadows, and in reality, shadows will hardly be that sharp, especially when it comes to skin. Areas such as the neck, which is a big cylindrical shape and has no object occluding the light, should have a nice and smooth lighting transition. Whereas some areas, where two elements are close in contact with one another, should create a sharper shadow edge. For example, a shadow cast from a hat to the face. You can try this test out by placing your hand close to a surface and raising it away slowly. You’ll notice that the further your hand is from the surface, the blurrier and softer the shadow gets. With that said, making the Spot Light shape width too big can kill your shadows as well, so be careful when adjusting these values.
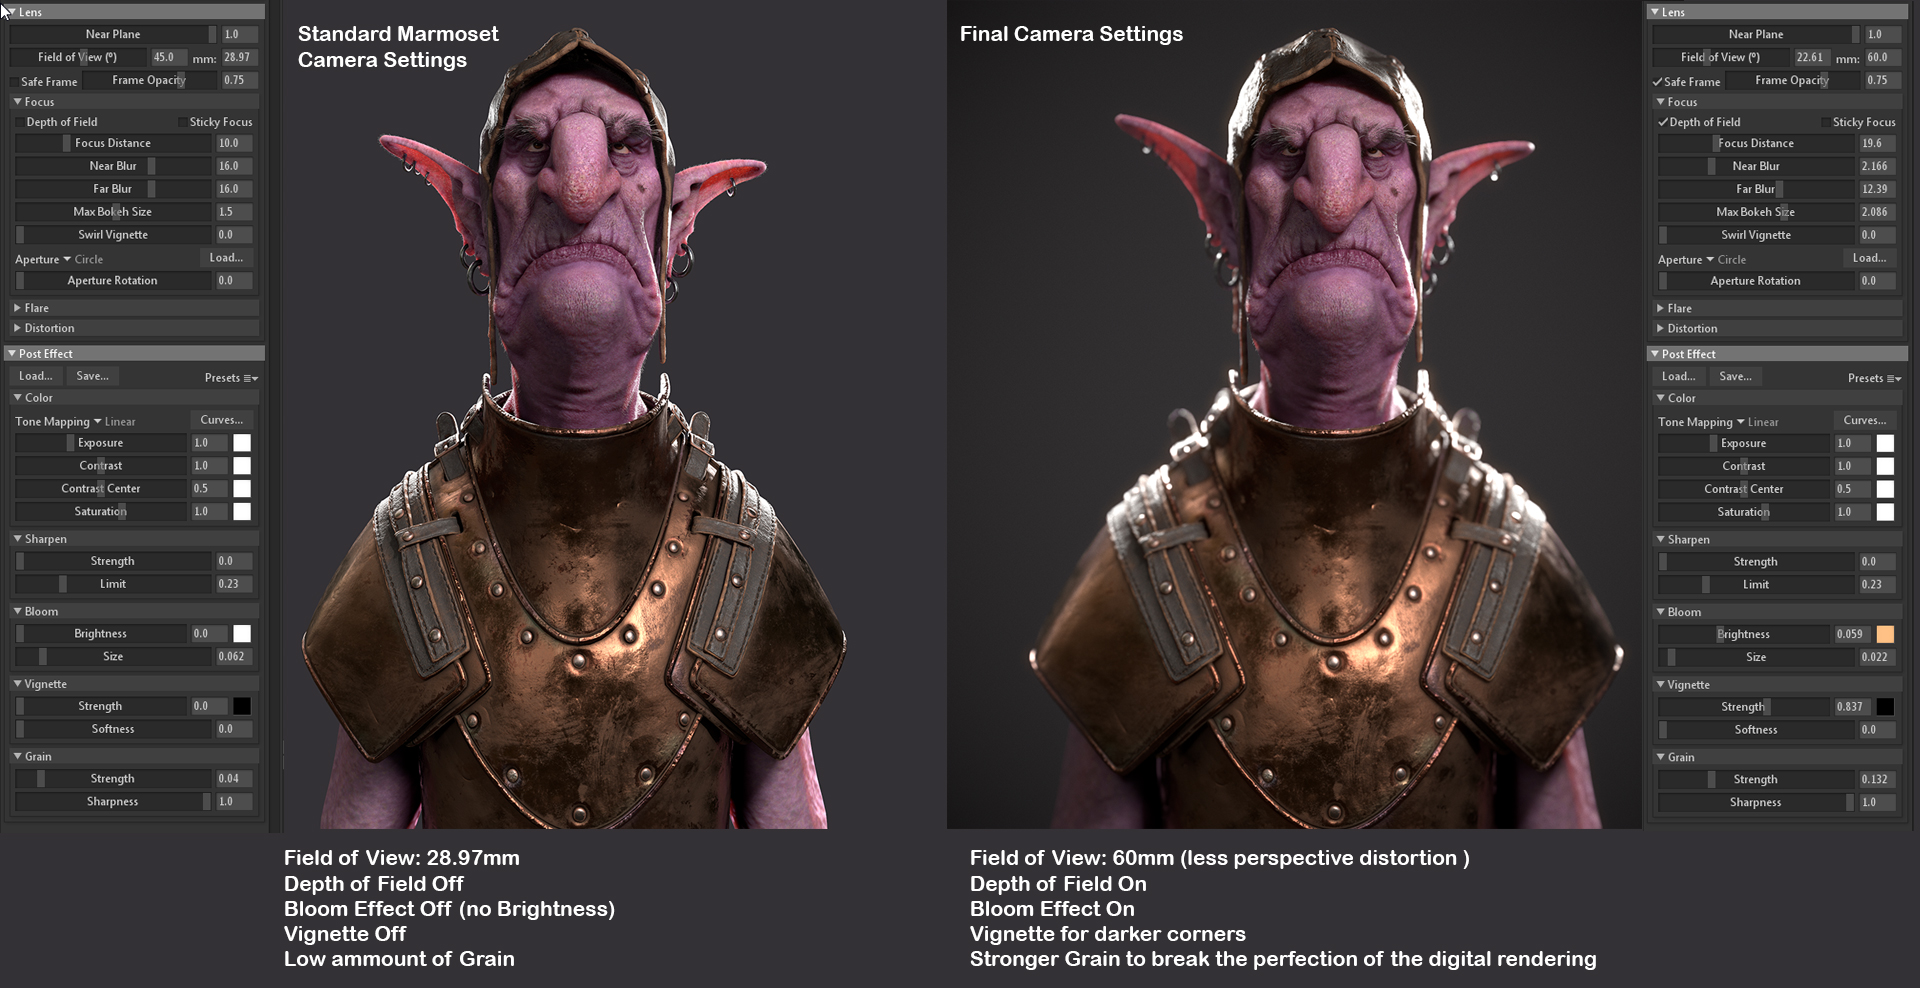
Even though the character is stylized, I wanted to bring some realism to the final render. Cameras, more notably in analog ones, can produce some interesting effects such as grain and imperfections. So I added some Depth of Field, Grain, and Vignette in the Post Effects of my Camera to replicate real-life photography. These few touches will help ground your character in reality. In the real world, lenses used in portrait photography will allow you to create interesting depth of field and specific focal points by adjusting the aperture value to a low one. If you have a completely sharp, highly detailed image, it can look fake and not lead your eye to a point of interest. Since we have peripheral vision and our eyes can only focus on one thing at a time, it would be effective to apply this logic in photography and in our renders. I highly recommend this article by Darren Thomas, which gives useful tips on how to improve your renders.
CONCLUSION
Toolbag is an extremely powerful tool that can create top quality renders! The fact that it is a real-time rendering engine makes it really easy to set things up and test everything on the fly, so it allows me to constantly try new things. I can’t wait to see what the Marmoset team has in store for us in the future!
Thank you so much for reading this article, I hope it was helpful and that you have learned something.
We’d like to thank Felipe Chaves for writing this breakdown. You can find more of Felipe’s work on Artstation.
Create wonderful portrait renders of your characters using the 30-day trial of Toolbag.


