
INTRODUCTION
Hi everyone, my name is Jonathan Benainous and I am a Senior Texture Artist currently working for WB Games Montreal. I started in the video games industry about 13 years ago and I’ve had the chance to work for many companies around the world, contributing to a bunch of AAA games such as Heavy Rain, Beyond: Two Souls, Horizon Zero Dawn, Ghost Recon Wildlands, and Assassin’s Creed Odyssey.
I recently had the pleasure of being invited by Allegorithmic to give a talk during the Substance Days at GDC 2019. For my presentation, I created a video using Marmoset Toolbag to showcase some of my personal work made with Substance Designer. I had a lot of fun playing with Toolbag 3, and this breakdown will go cover the main stages I went through along my creation process.
ITERATION TOOL
I’ve been using Toolbag to present my 3D projects for several years now. It became an integral part of my pipeline since it helped me to stay efficient and sped up my process. Besides using it to create final renders, I use the realistic lighting system to visualize my Height maps. I usually create a simple setup with a material applied on a primitive shape, then plug in my Height and AO maps that were created in Substance Designer with a simple gray Albedo to preview my volumes and displacement. This back and forth process between Designer and Toolbag helps me make corrections to my Height map. Toolbag can sometimes highlight issues that I may have missed in Designer, and so I recommend double checking your textures in Toolbag and using it as your main rendering tool.
PRESENTATION
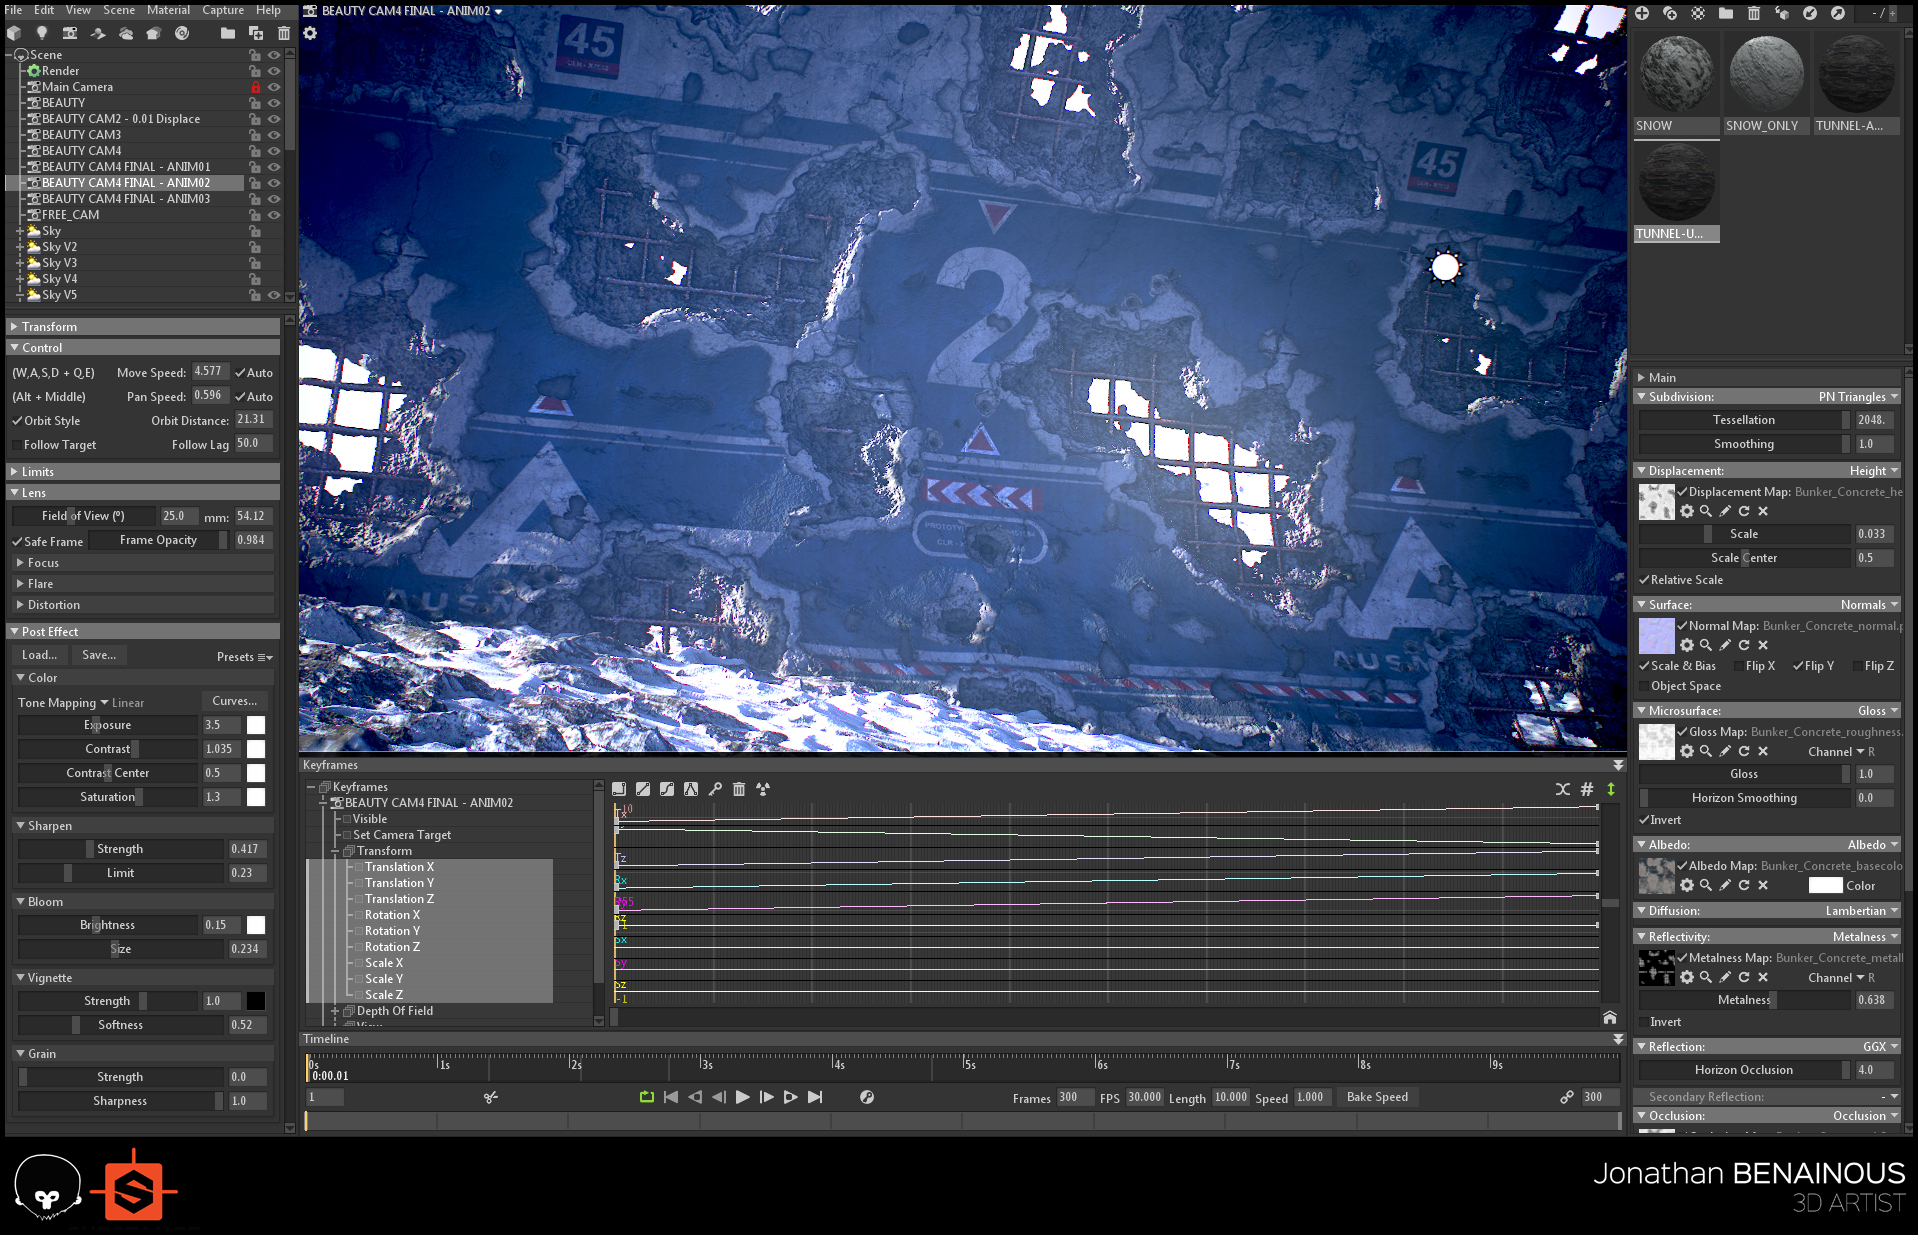
The first thing I had to establish when creating my video was how I wanted to present my materials. The sci-fi helmet was pretty easy, since the asset was already modeled and baked. However, I had to add a storytelling element to my material work. I started to create video presentations using existing scene setups that I made for my materials. The plan was to add motion without changing the mood of the setup.
To do so, I started by creating a keyframe for my Camera in the Timeline to preserve the original framing. To be sure that all of the settings are keyframed, you will need to create a key for the translation axis as well as the rotation axis. Then, I set the Length of my animation and activated the Auto Keyframe button. At this point, you can move your Camera to its final position and create a panning motion or rotation. You can play around with the Intensity of your Lights and the Rotation of your Sky to create subtle changes along the animation.
BASE MESH
When I start working on a material, I always have an environment in mind that I would like to create. Depending on the environment, I’ll define the kind of meshes that I need to produce. Sometimes, a simple primitive can do the trick, other times you might need to create more complex shapes.
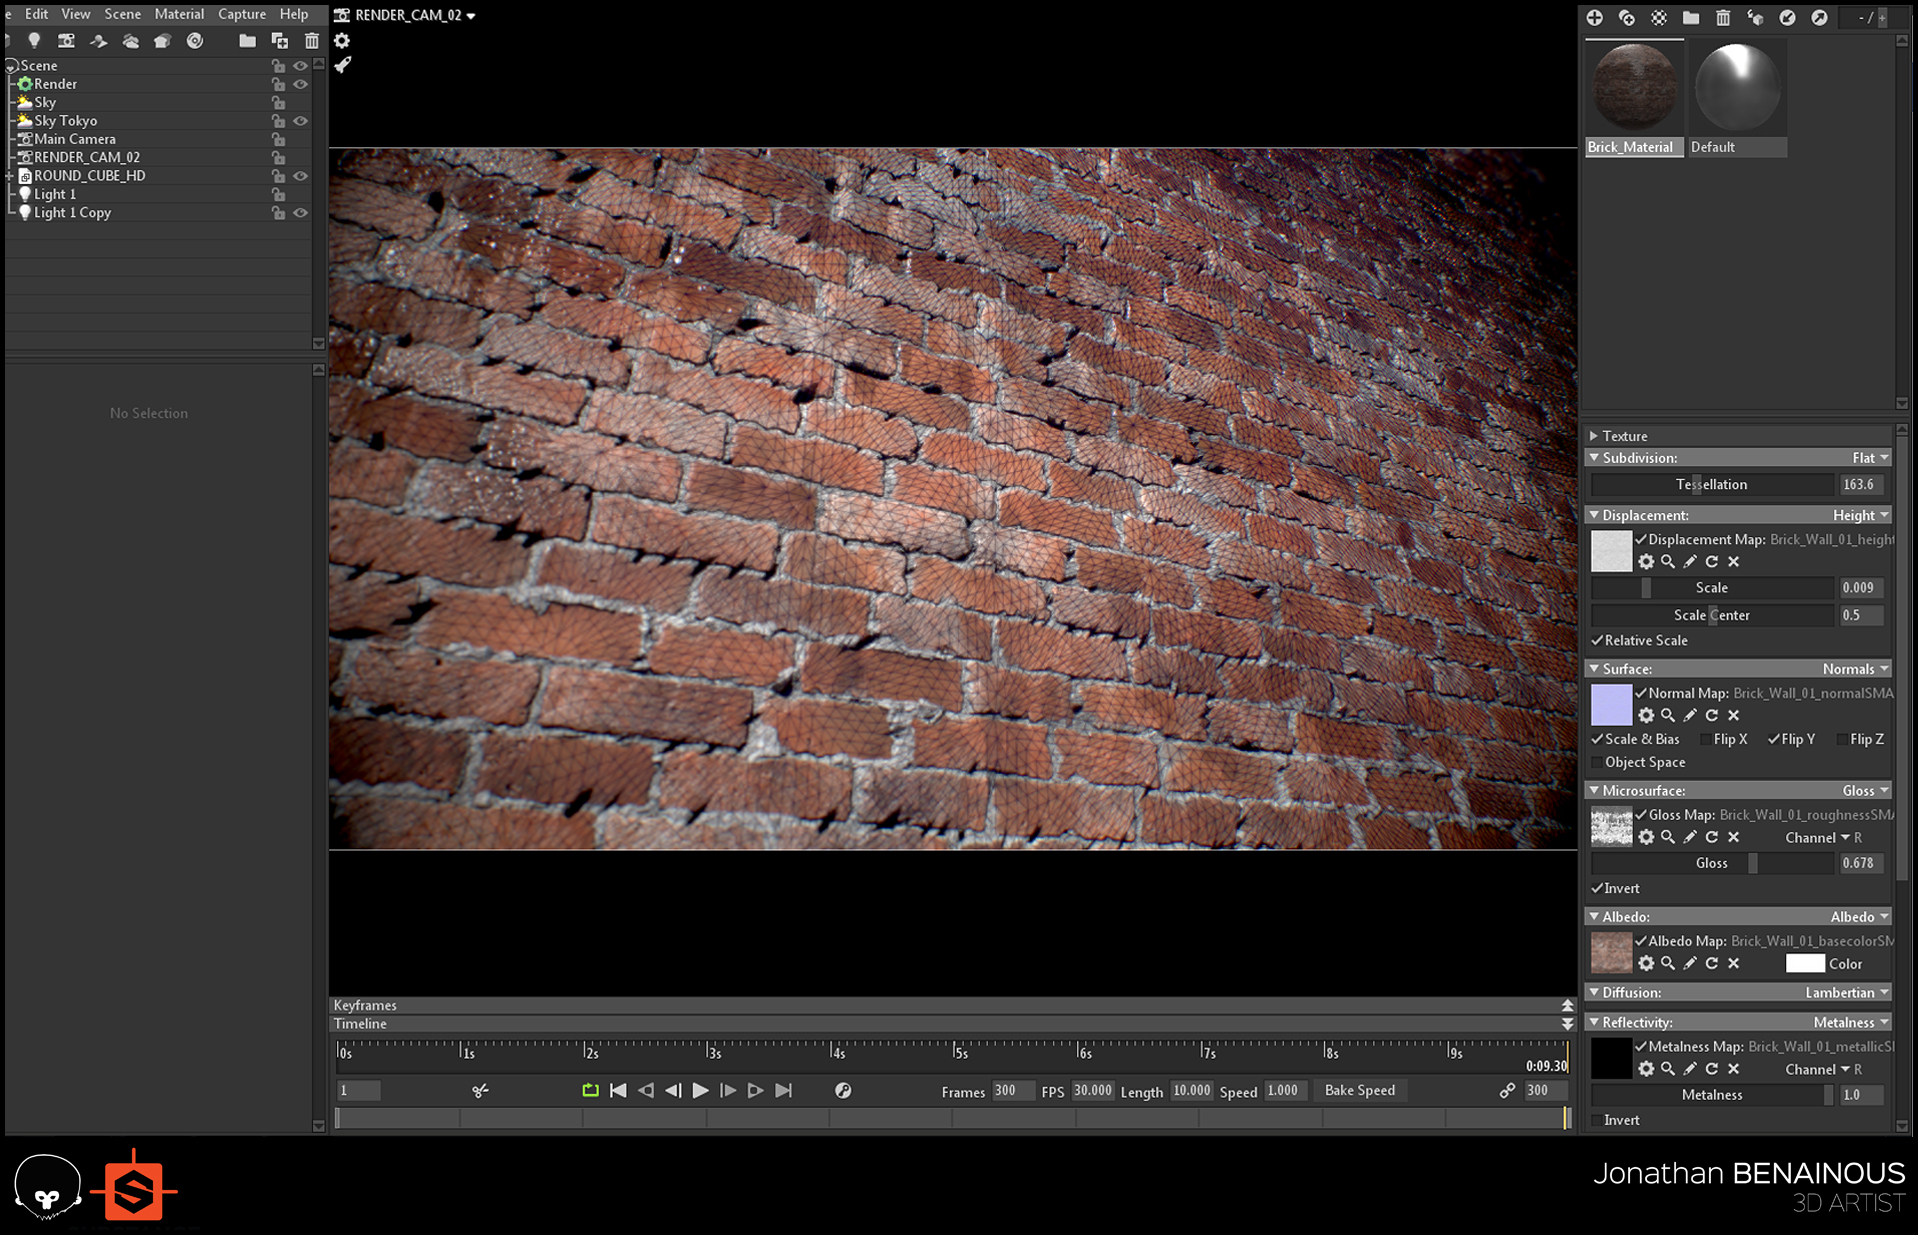
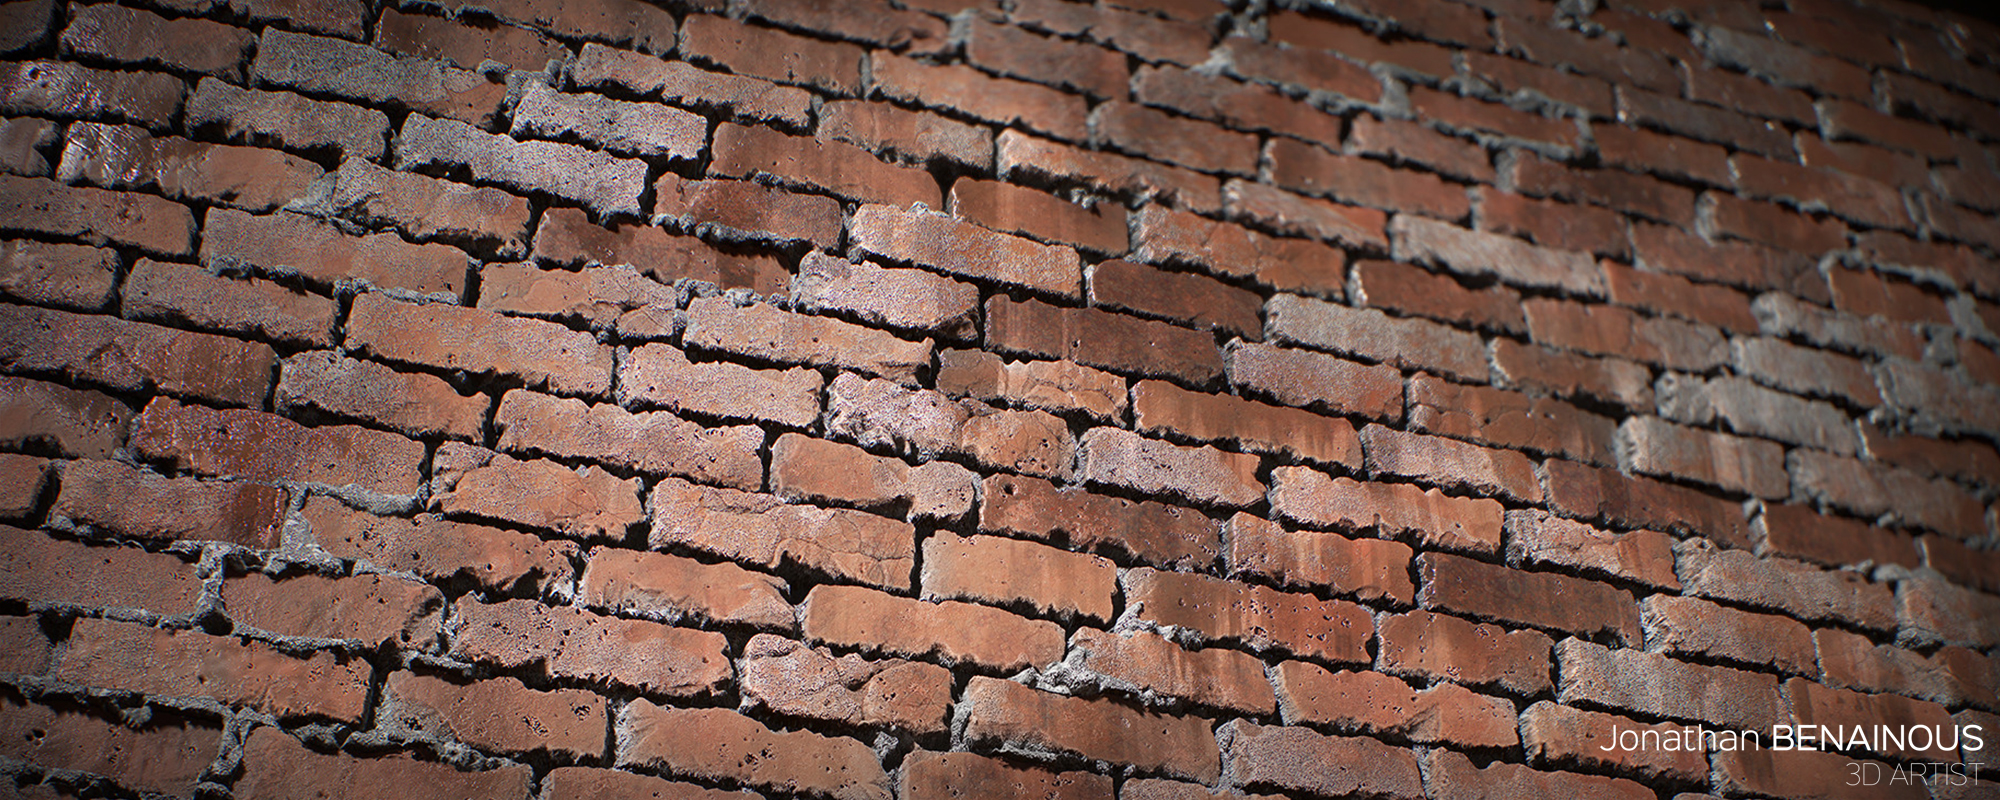
My brick wall was simple; I used a cube with bevelled edges that I displaced using the Tessellation settings in the Material Editor.
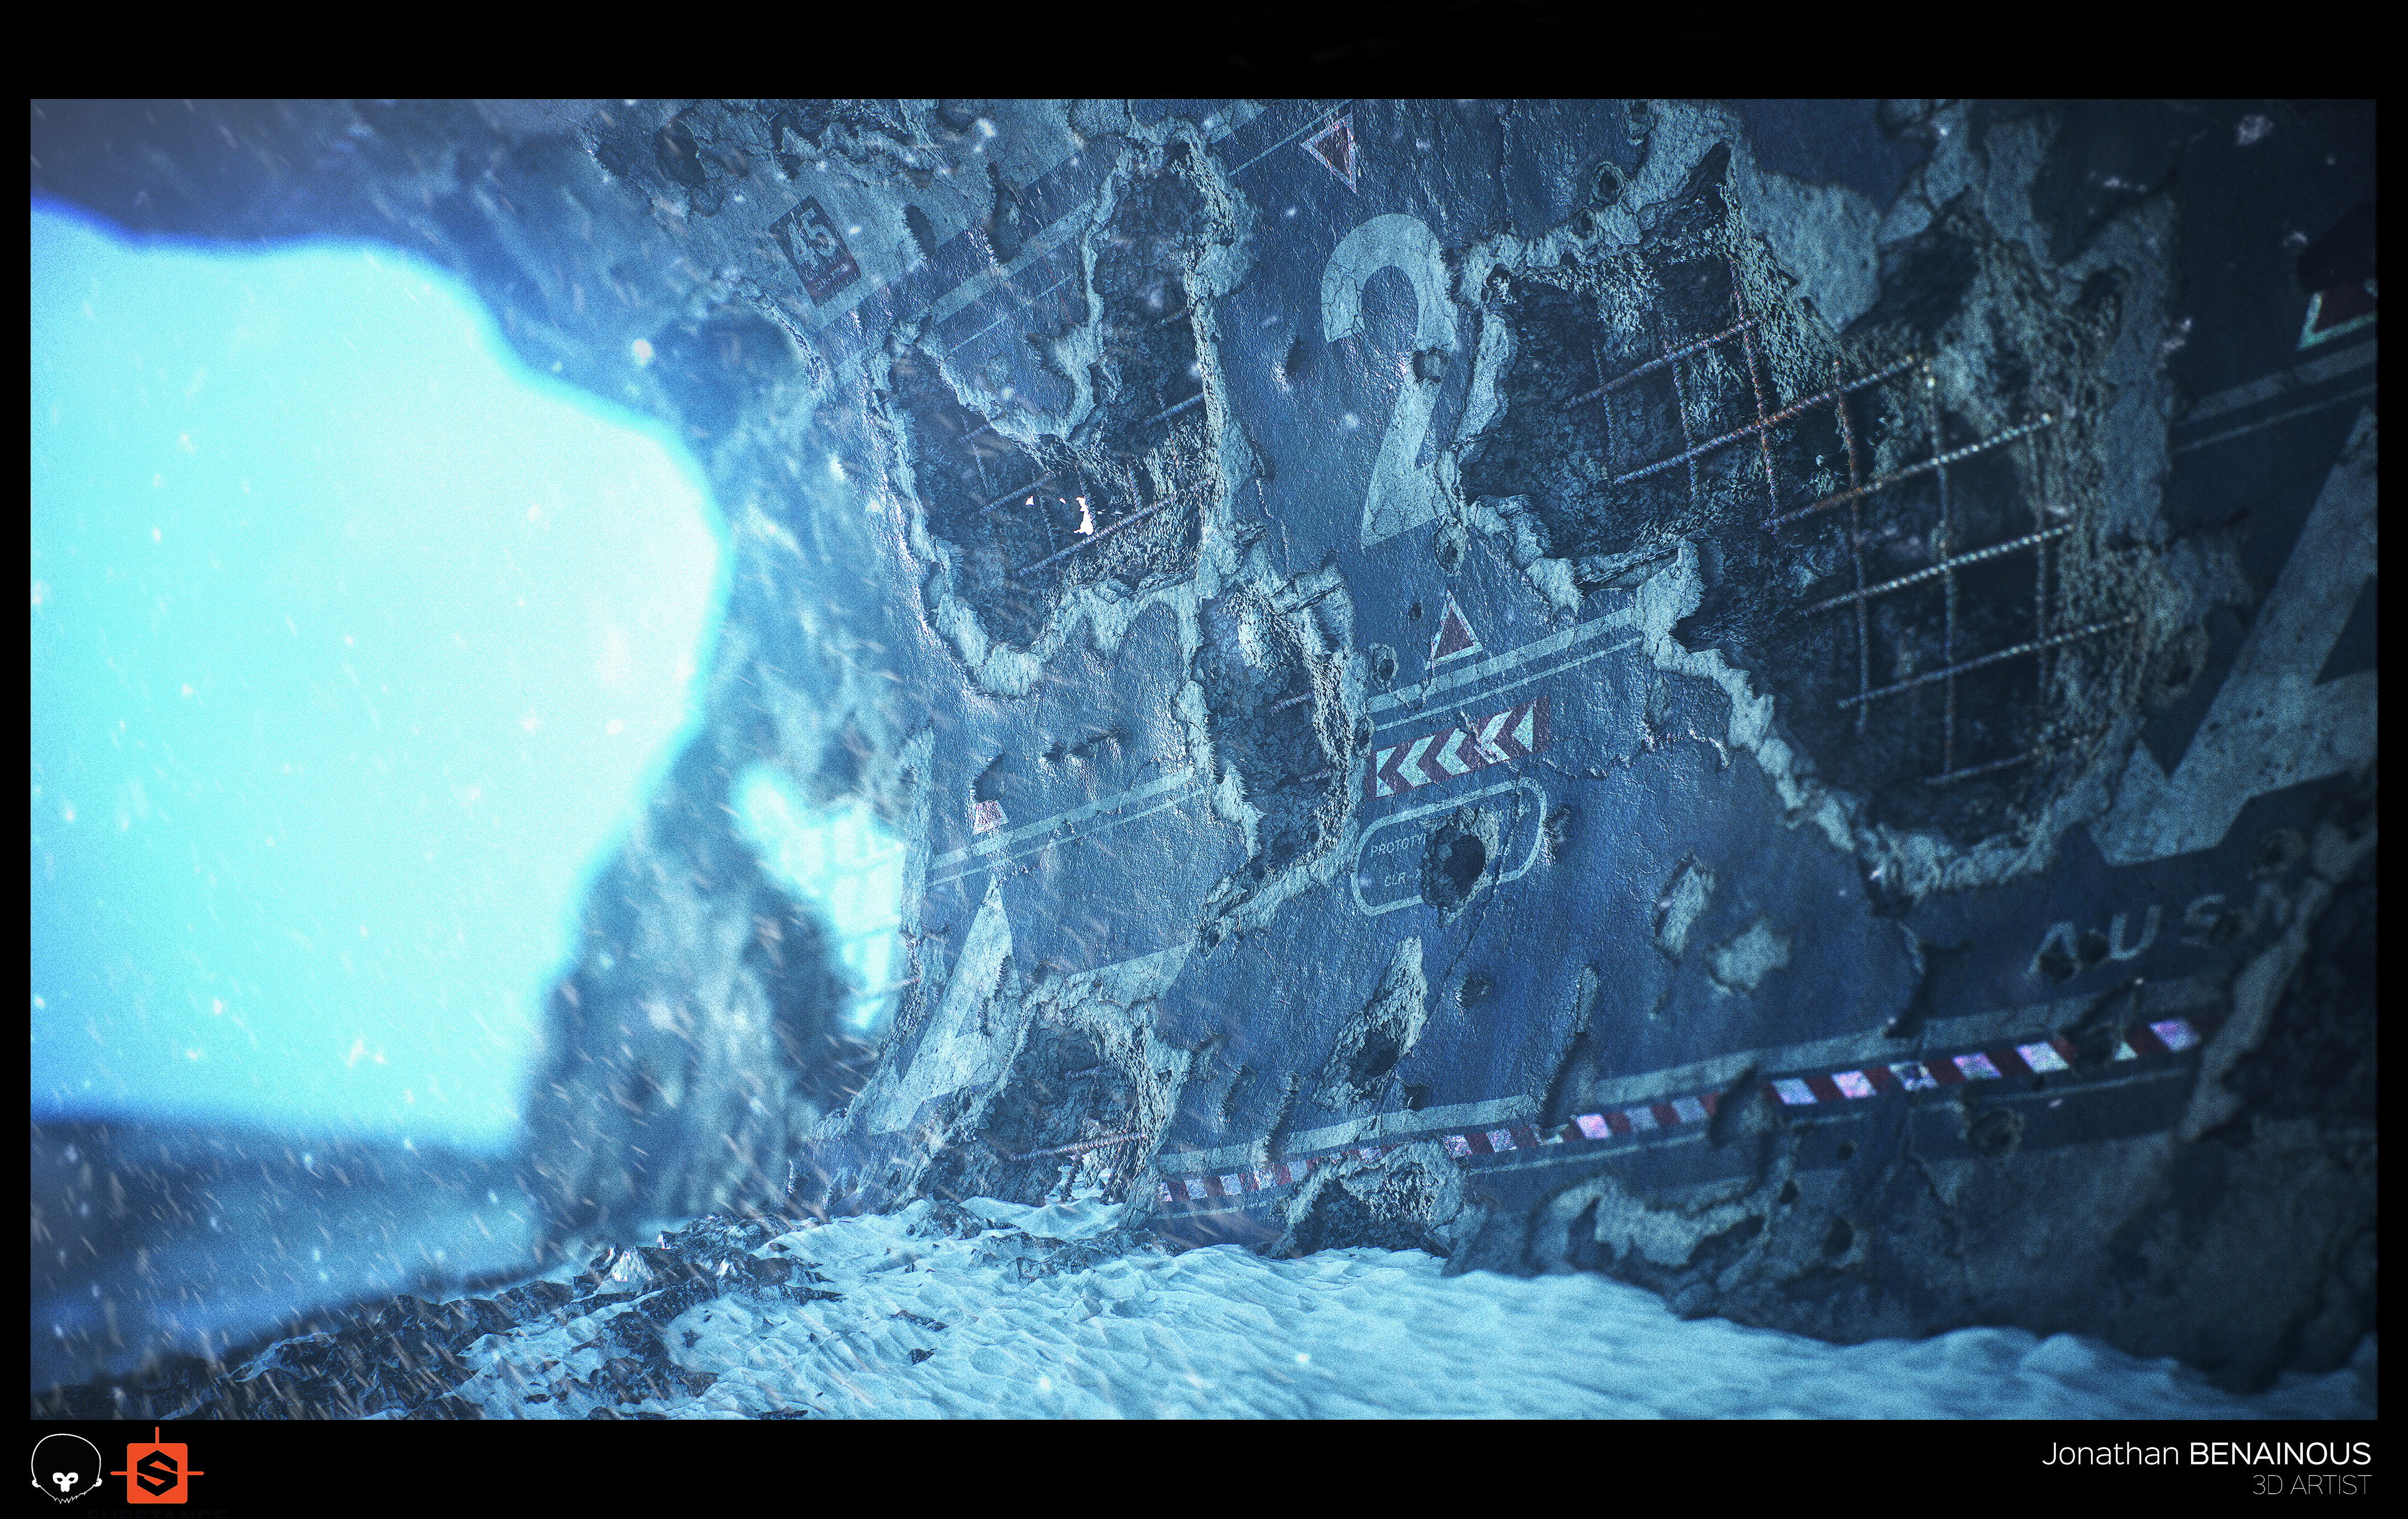
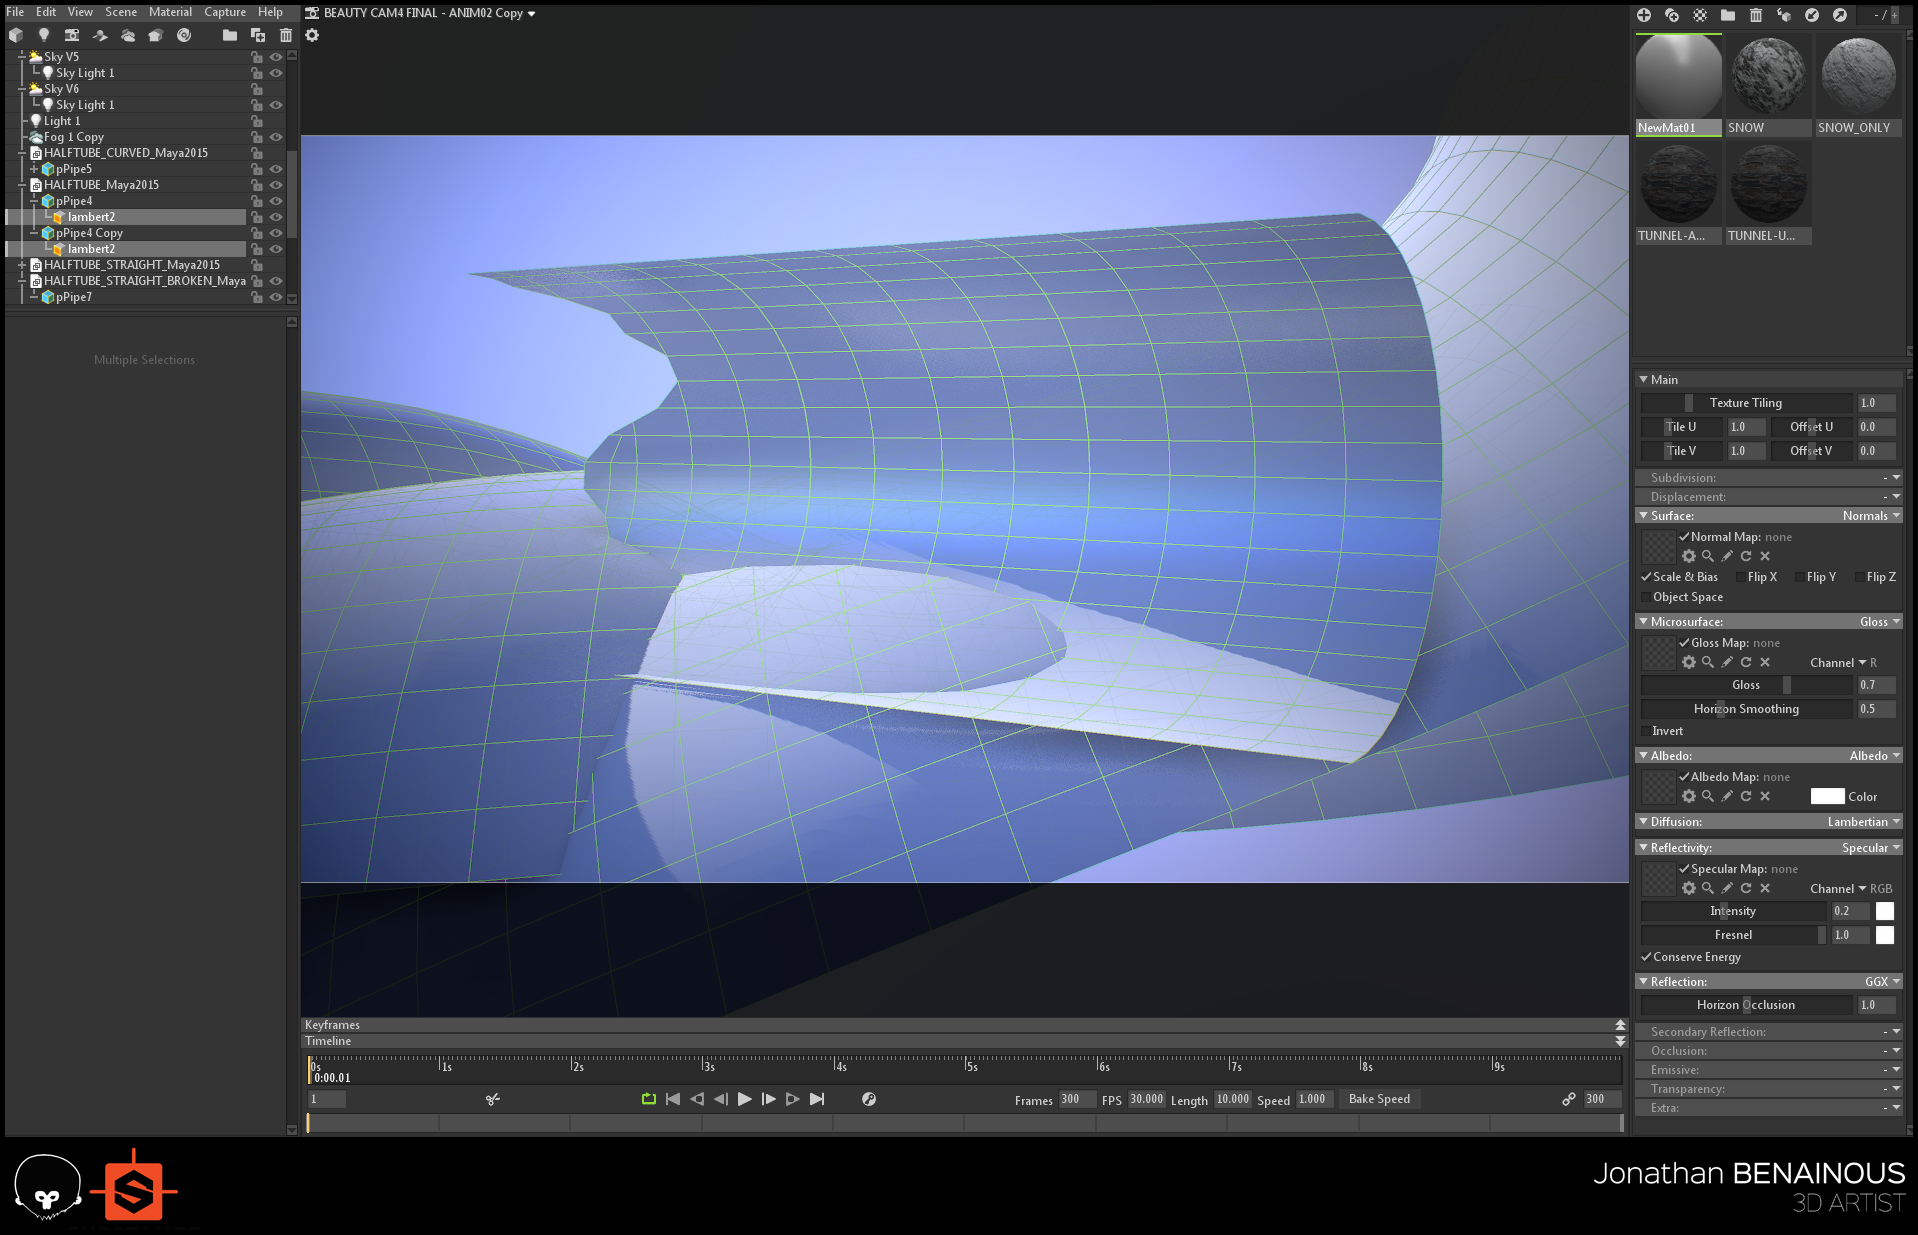 The setup for my Damaged Wall was more complicated, since I wanted to create a destroyed tunnel from a hidden sci-fi base in the North Pole.
By using simple shapes, I managed to create the environment out of half a cylinder and a bent plane to represent a snowy ground.
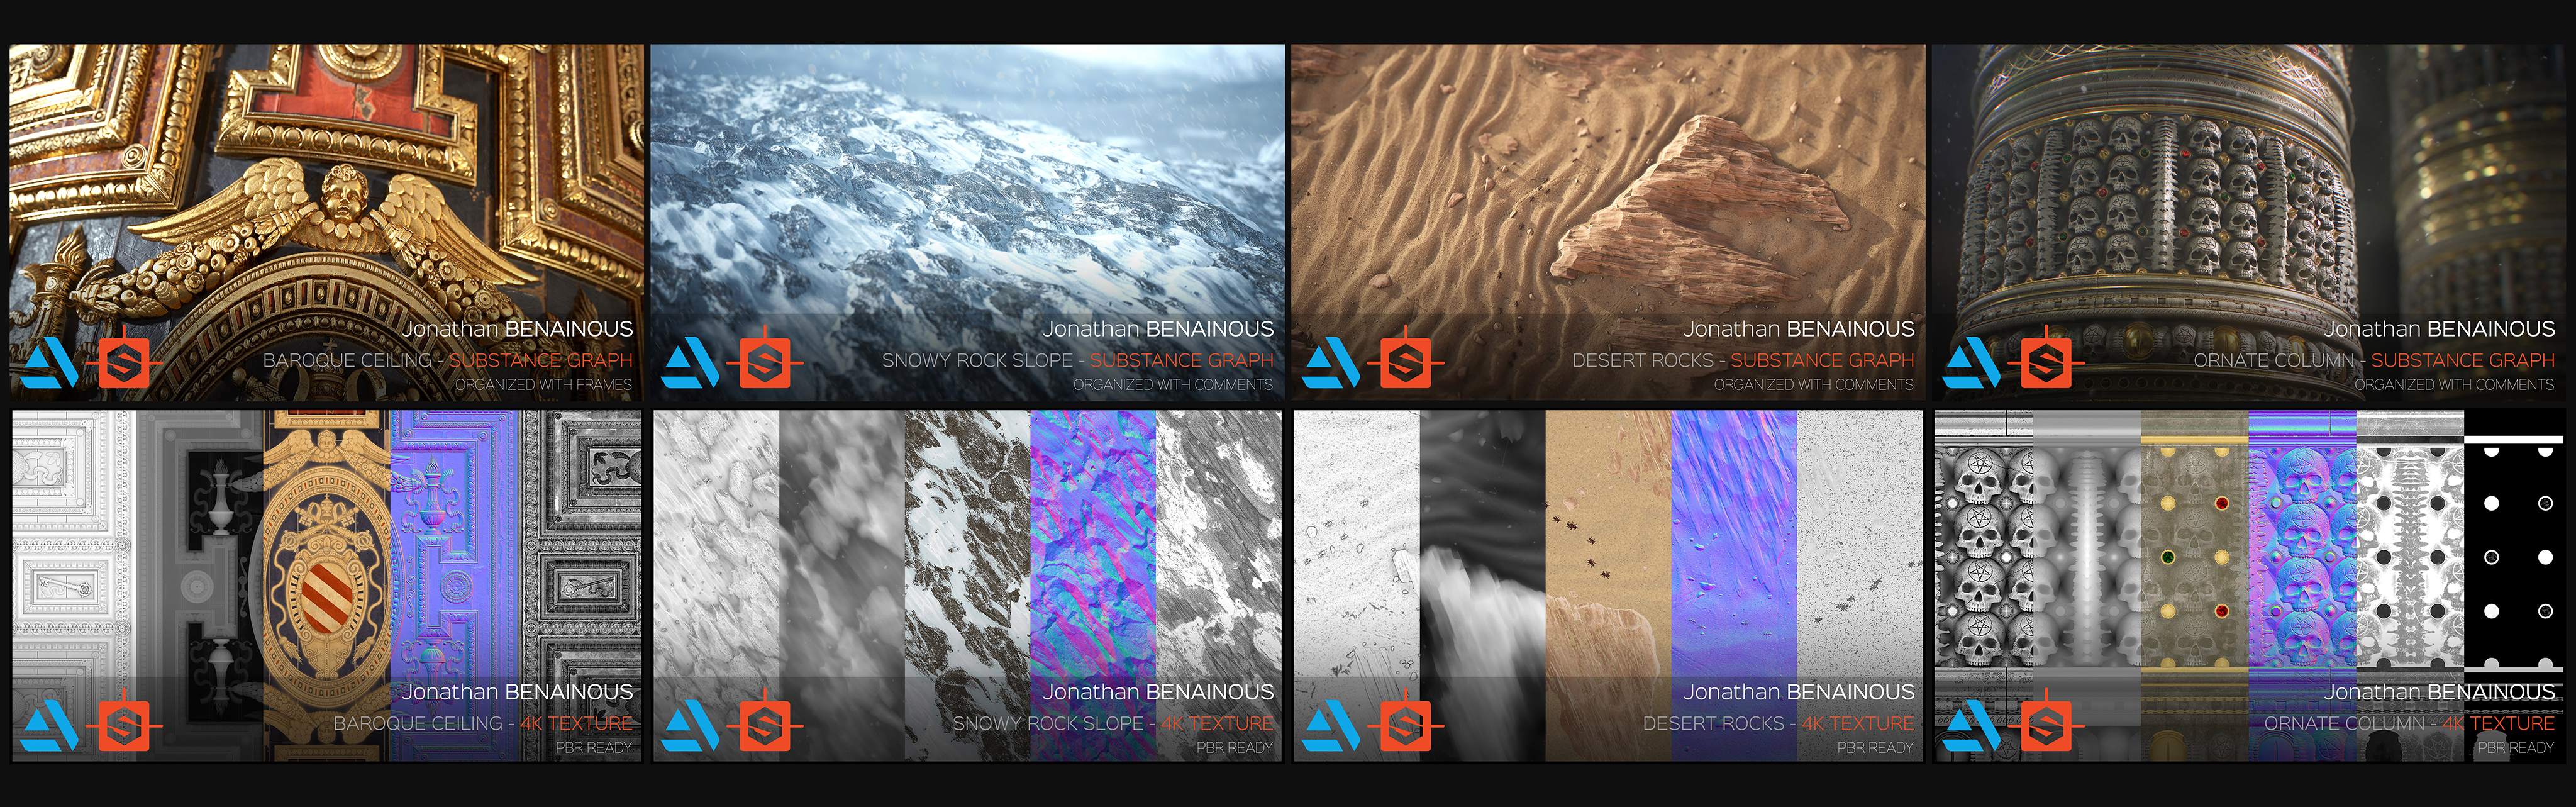
PBR MATERIALS
All of my materials are created in Substance Designer. As a reminder, the Roughness map is a greyscale map that that defines the glossiness or sheen of your material. The closer the texture is to a white value, the more matte and rough it is. And vice versa, the closer the texture is to black, the shinier and smoother the material is.
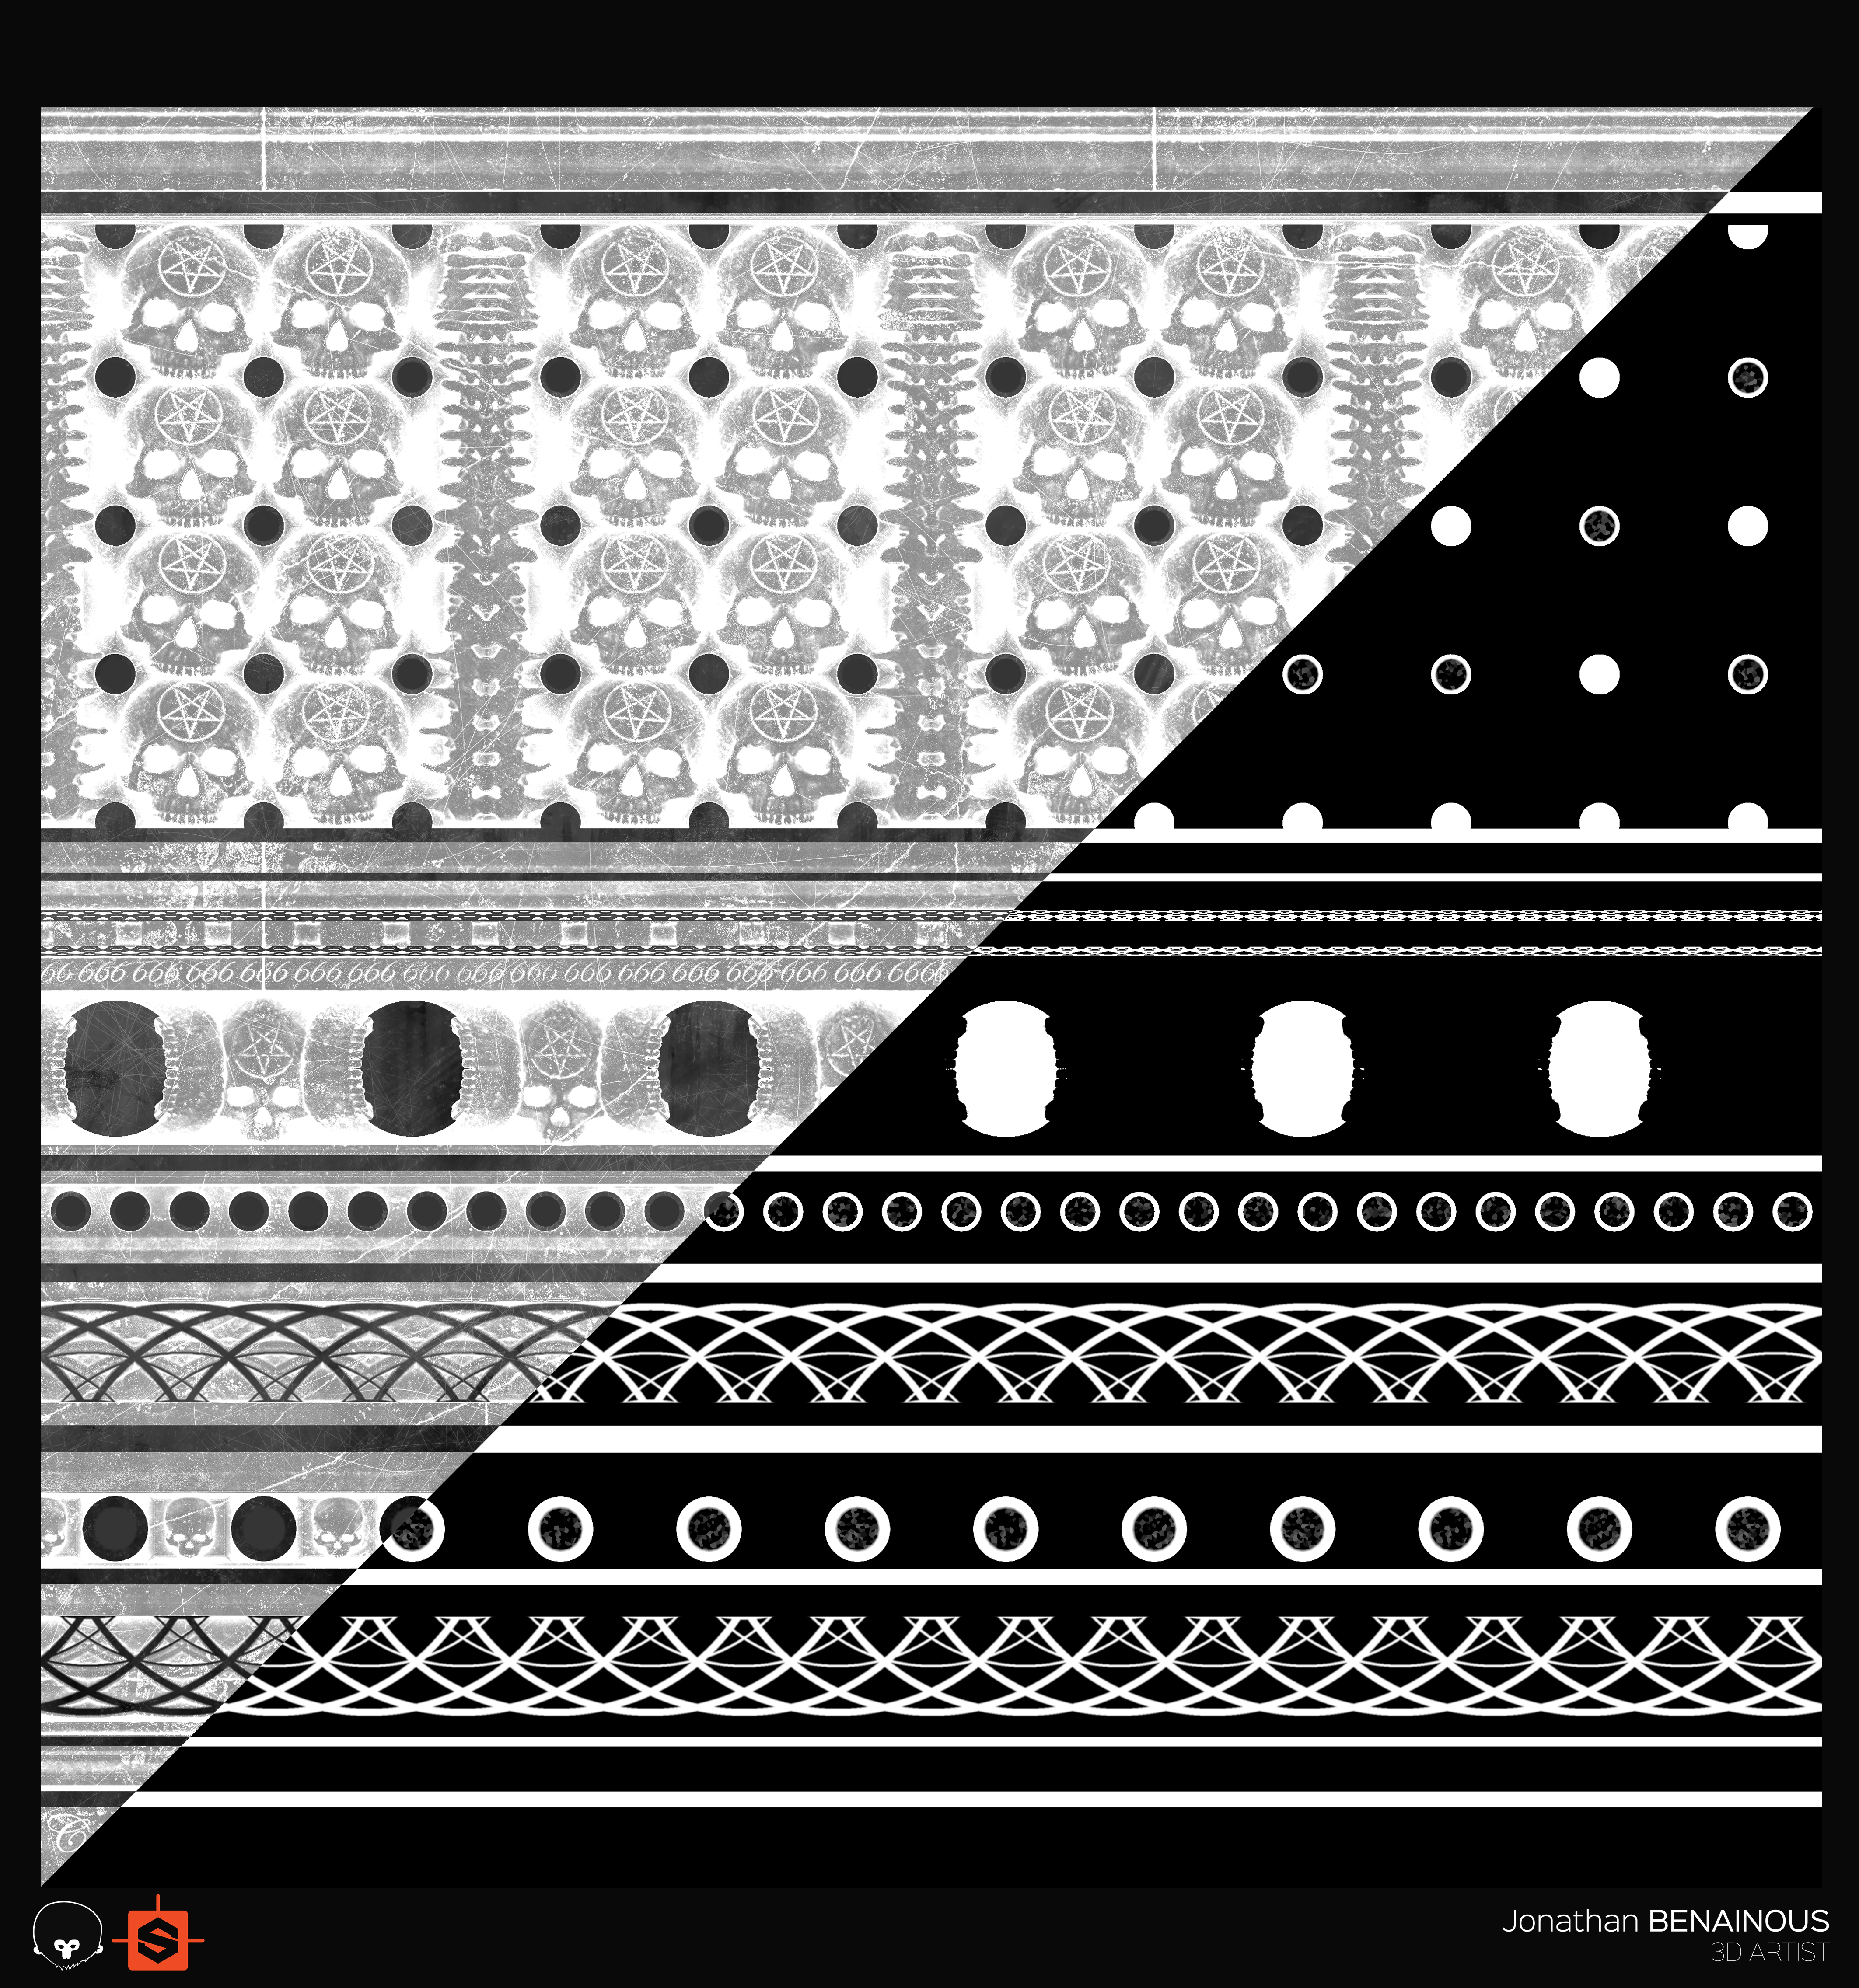
With that in mind, you can use a Height map to create variation between your elements. Invert your Ambient Occlusion and use the Curvature node combined with a Levels generator to create interesting gradient information. To highlight details, try playing with volumes by having more roughness in the cavities where dirt would exist. Use grunge maps to add contrast and subtle details. For the Metallic map, simply create a black and white mask. Black areas represent dielectrics and white areas will be metallic. With this workflow, you’ll be able to get a correct PBR value and create a hyper realistic result.
SCENE SETUP
After importing your UV’ed meshes, create a new material and load all of the maps exported from Substance Designer into their relevant texture slots. Don’t forget to tick the Invert checkbox in the Gloss settings or swap to the Roughness model if you’re using a Roughness map. Set the Reflectivity module to GGX to achieve better quality in your reflections.
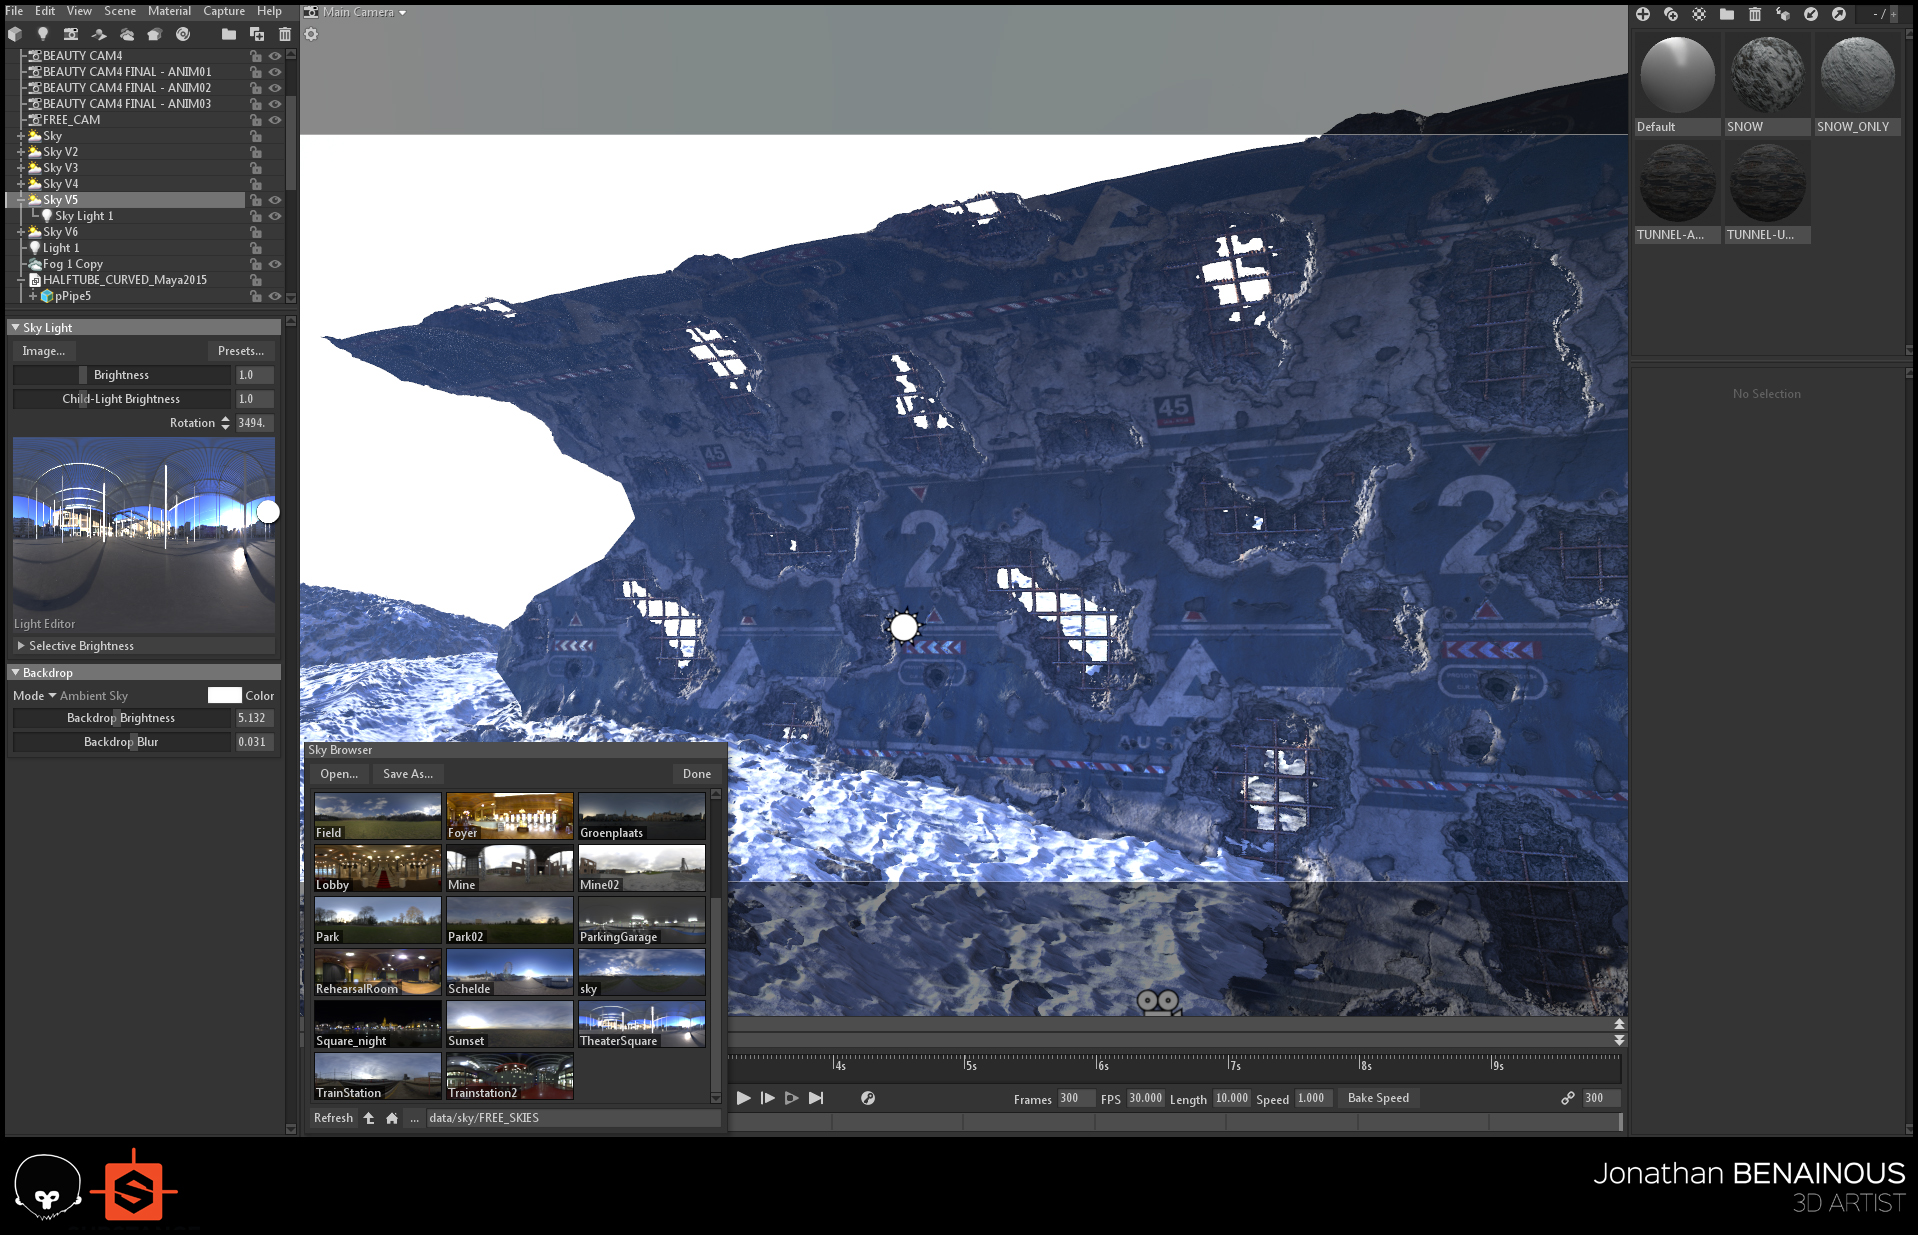
For this scene, my lighting setup was straightforward. I used a single Directional Light with a high Brightness value, enabled Cast Shadows, Contact Refinement, and added a bit of Fog. I used a custom HDRI Map called TheaterSquare created by Joost Vanhoutte.
Once you’ve created the lights and found a nice angle for the Camera, it’s time to add some post processing. The Tone Mapping, Vignette, and Bloom settings are my usual go-to’s. Adding Chromatic Aberration and some Depth of Field enhances the piece as well. Export your footage by going to Capture – Video.
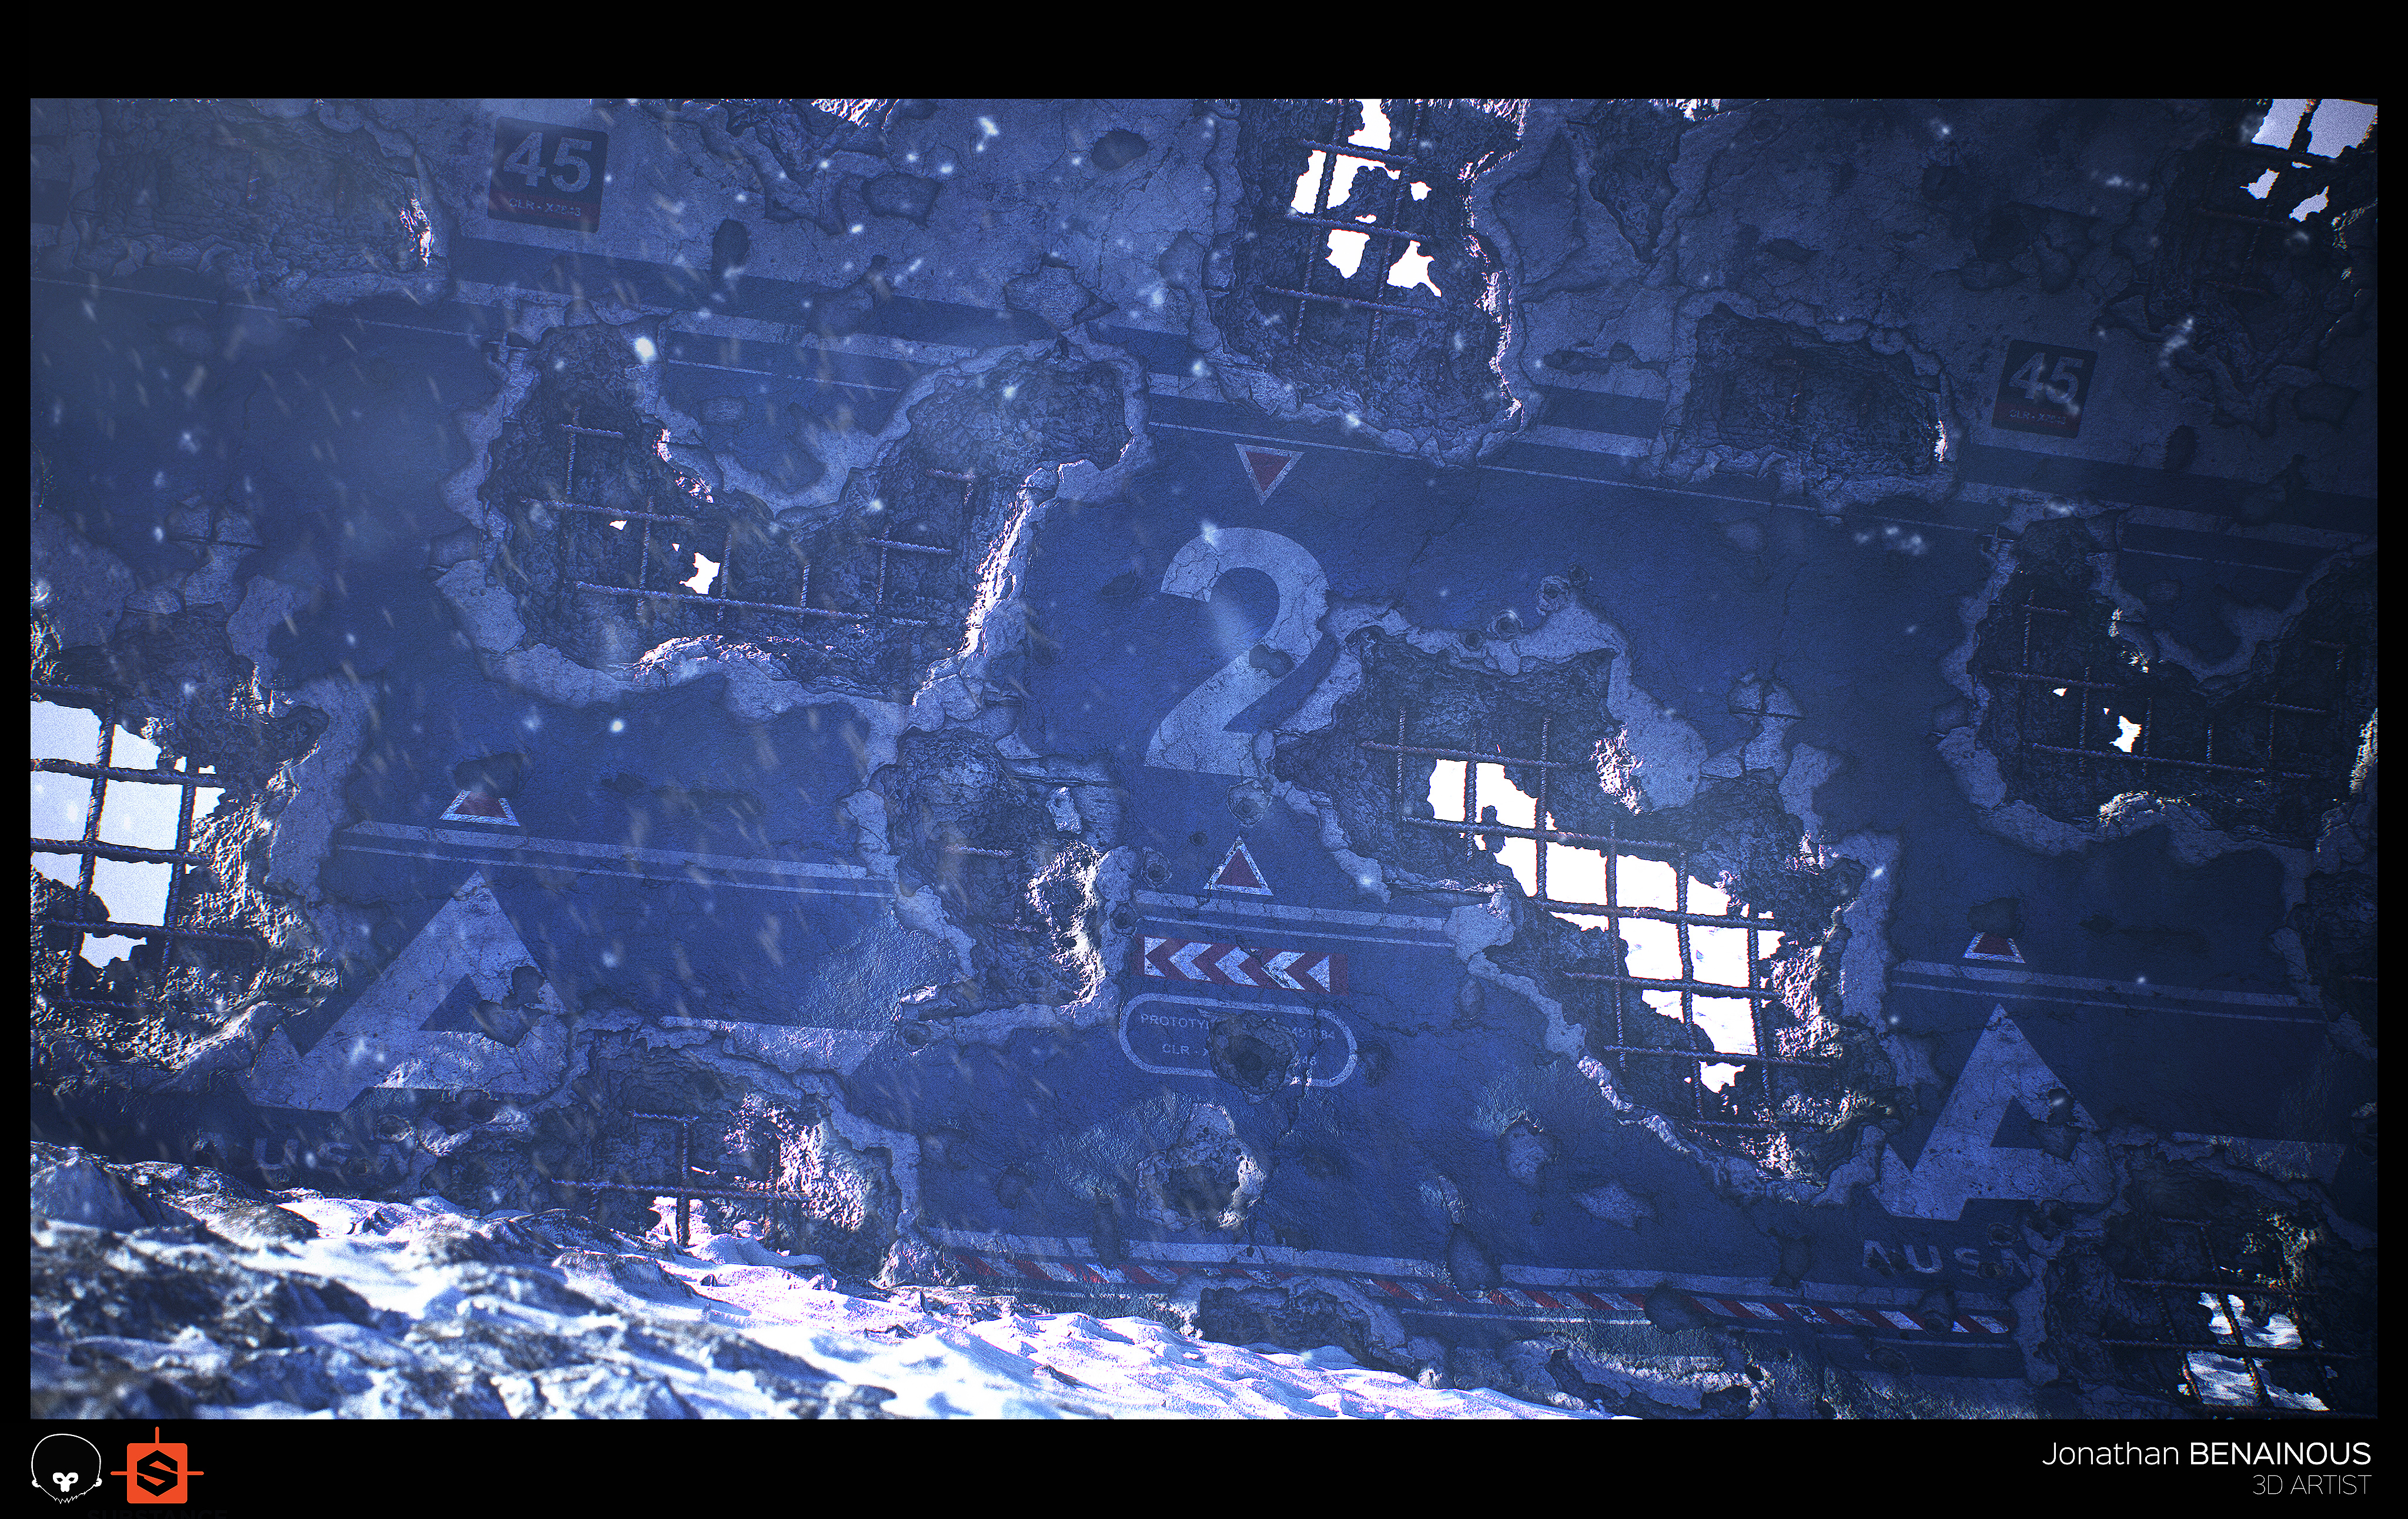
To add final touches, you can import your video into After Effects and add some particles, animated film grain, and camera filters.
For my portfolio renders, I added a few tweaks in Photoshop to add snowflakes with Directional Blur applied to create a snowstorm effect. Finally, I added a Brightness and Contrast adjustment.
GUMROAD & ARSTATION STORE
A few months ago, I started to share some of my recent work on Gumroad and the Artstation Marketplace. My Substance file for the Damaged Wall that I presented during my talk at GDC is now available. Thank you for your support!
We’d like to thank Jonathan Benainous for writing this breakdown article. You can find more of Jonathan’s work on Artstation, Twitter, and Instagram.
Create fantastic video presentations of your work using the 30 day trial of Toolbag. If you’re interested in collaborating on a tutorial or breakdown article, please send us your pitch, along with a link to your artwork, to submissions@marmoset.co.


