
INTRODUCTION
Hello! My name is Angelina Diez and I am a 3D Artist at Ubisoft Barcelona in Spain. I love hand-painted artwork, cartoons, stylized characters, environments, and props. I grew up playing games by Blizzard, so I decided to specialize in creating stylized art. I usually create my own concepts, but sometimes I fall in love with beautiful 2D concepts made by other artists that compel me to transform them into 3D.
CONCEPT

I chose a concept by Cream Bird that’s a diorama of a shop filled with candy and lots of cats. Since it’s in isometric view, I decided to create 2.5D elements for the scene to give the illusion of 3D. I also wanted to set a static isometric view camera similar to Diablo 3 or Battle Chasers by Airship Syndicate.
MODELING – BLOCKOUT AND UVS
I made a blockout of the major elements in the concept using 3ds Max. I built the scene from a viewpoint that was similar to the concept. This allowed me to delete unseen faces of some meshes, or simply create some symmetry to have an efficient texturing process.
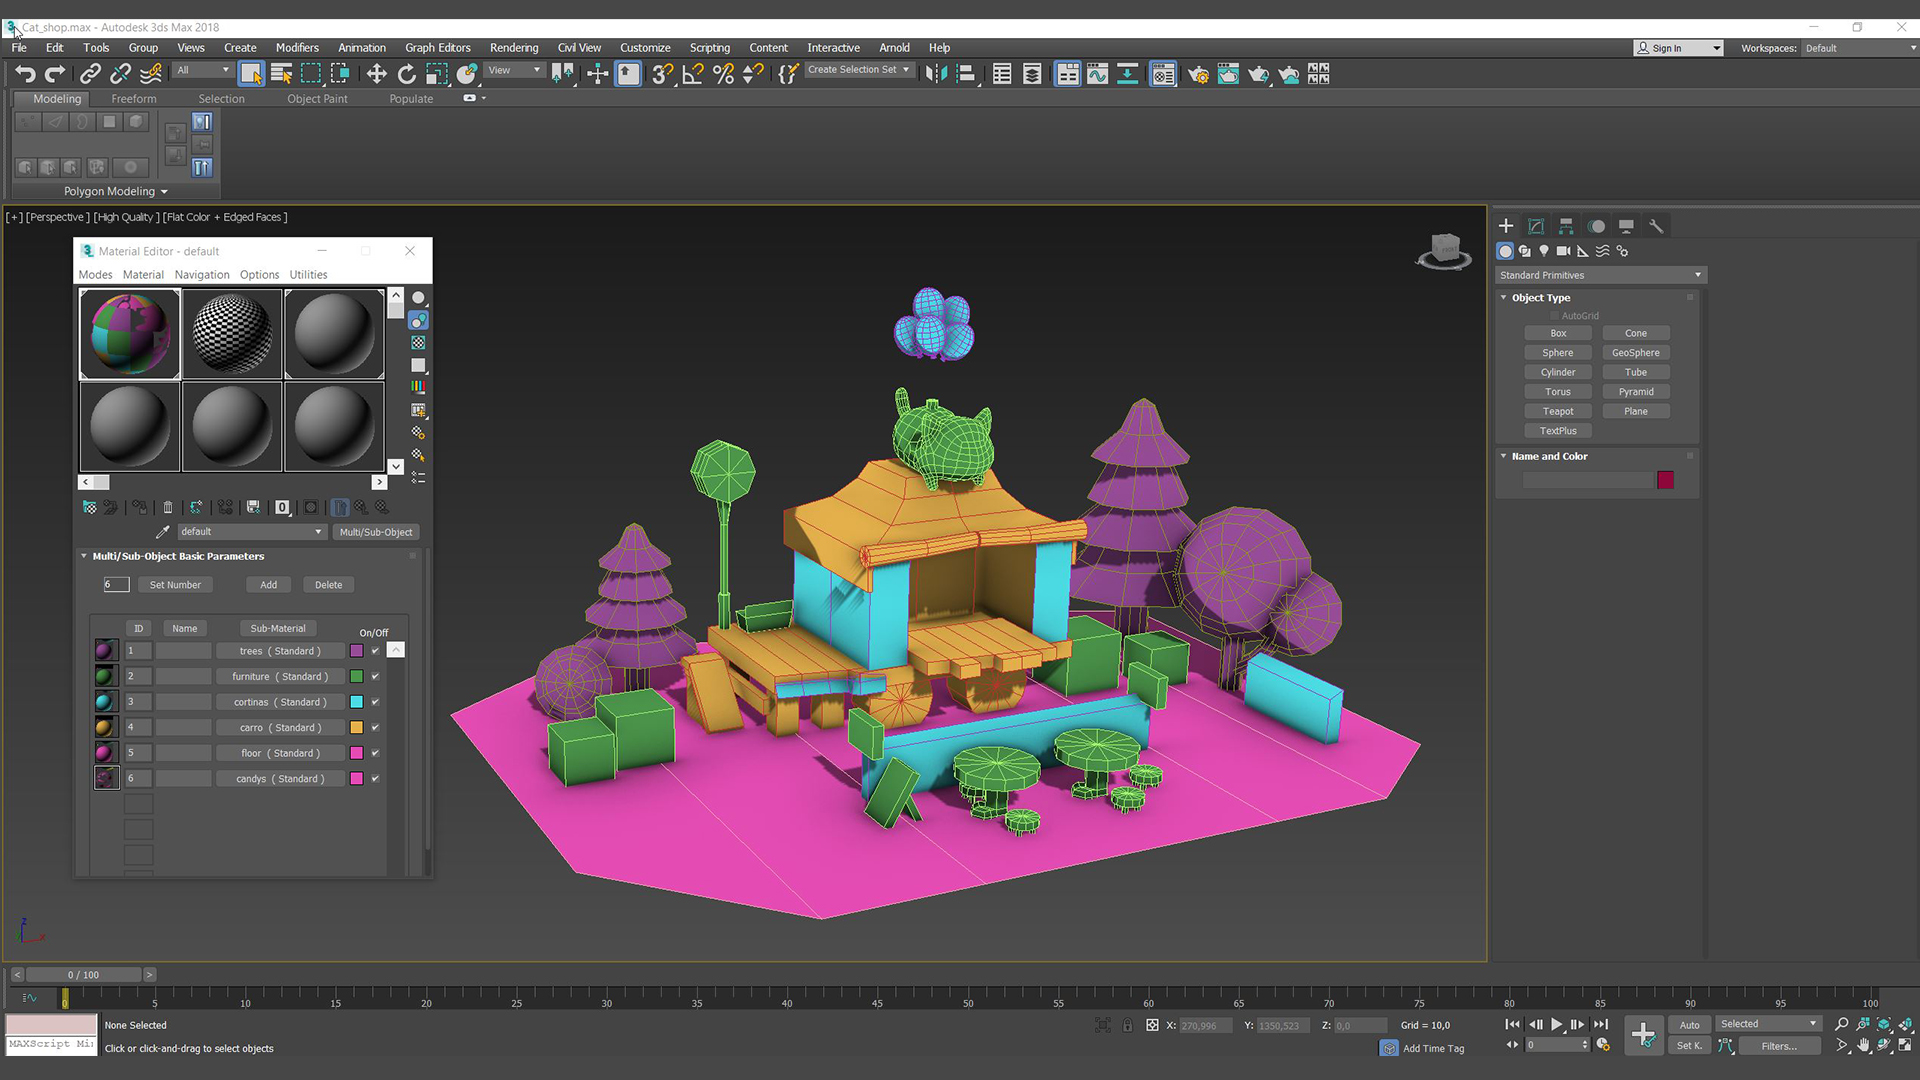
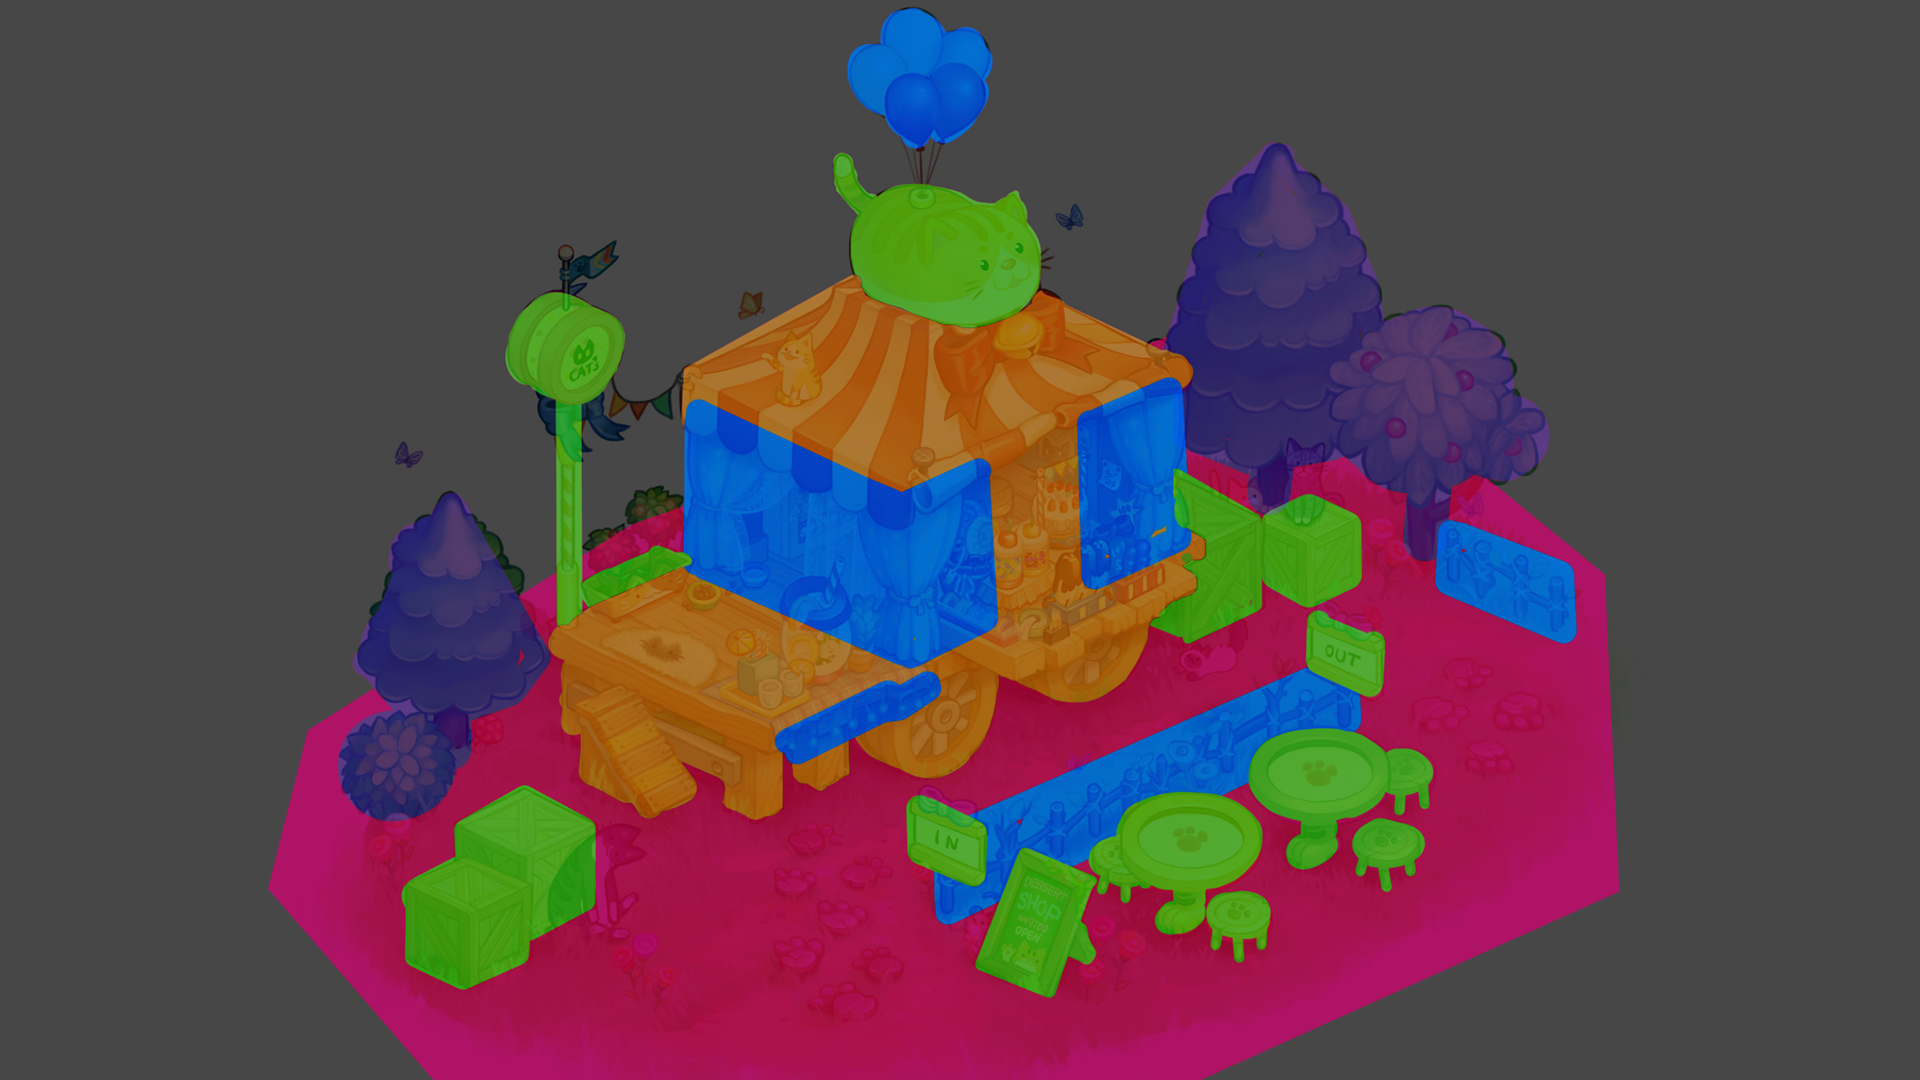
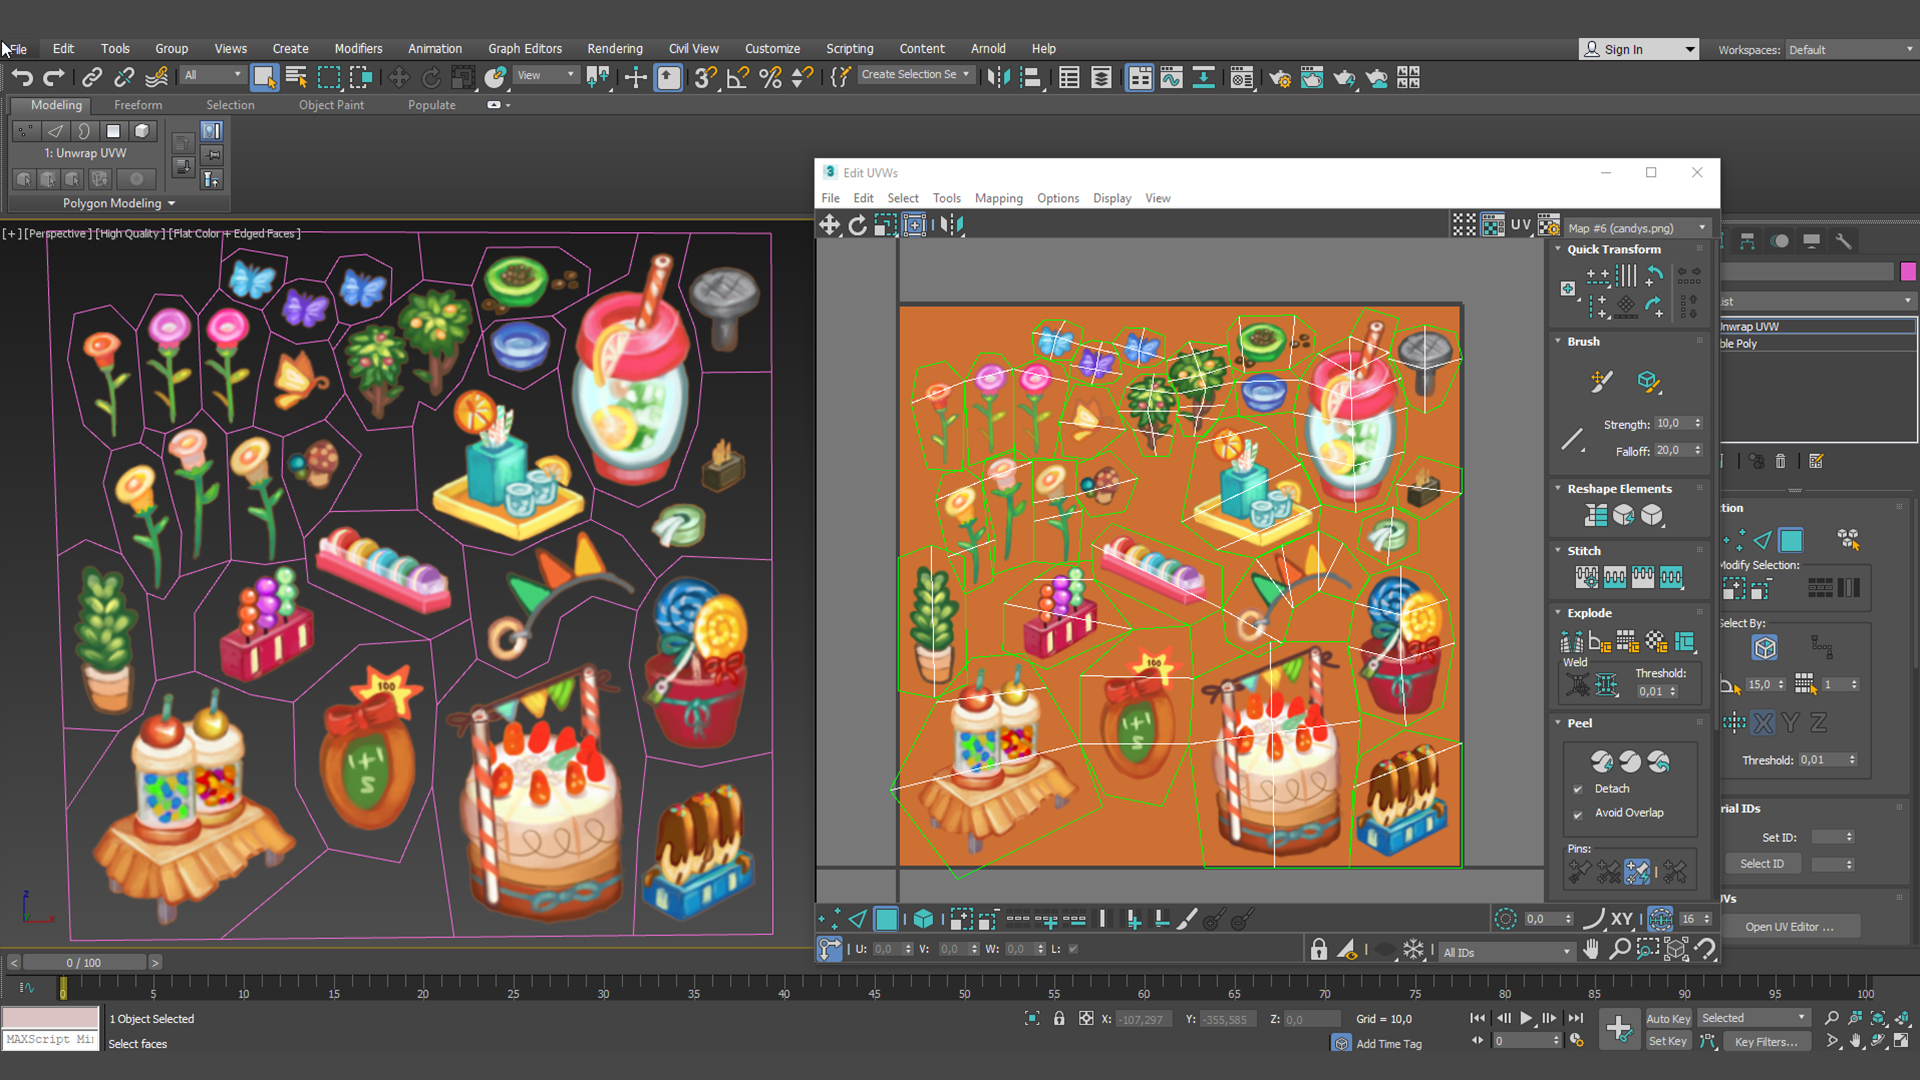
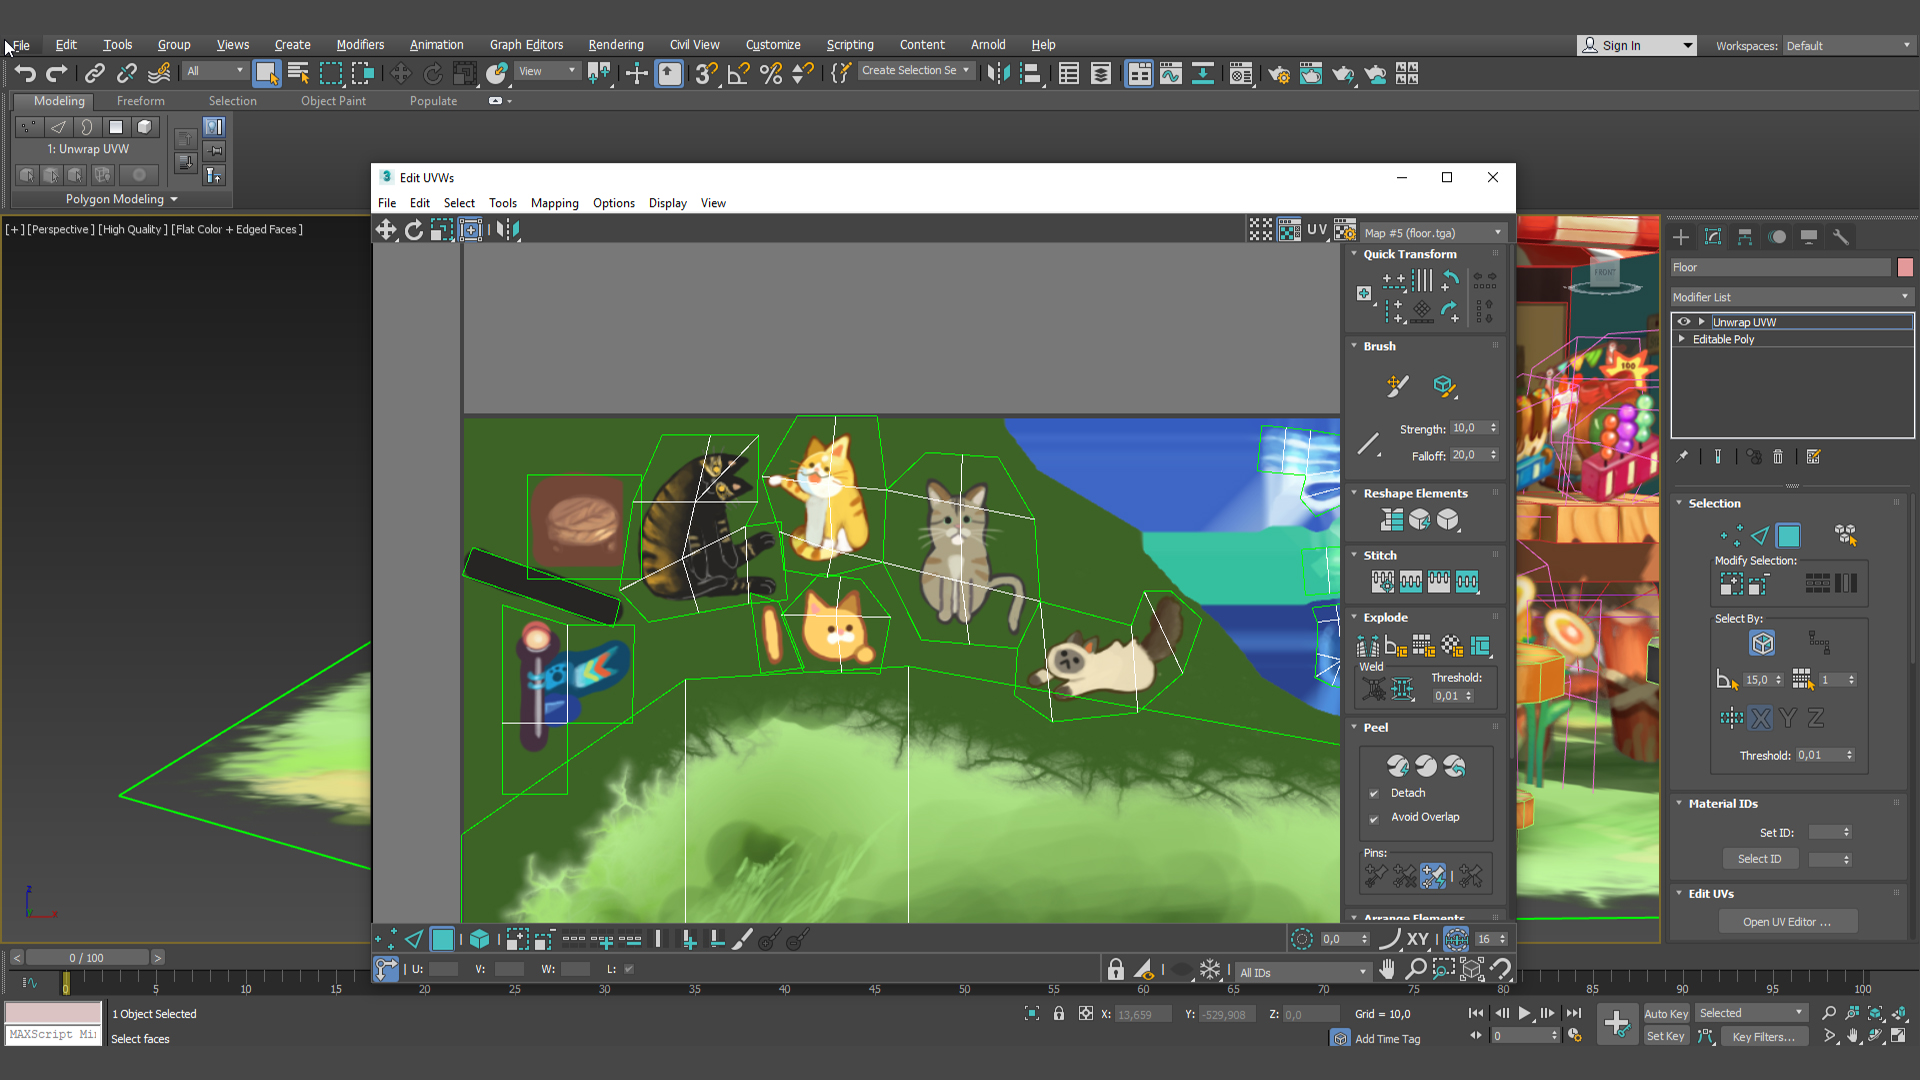
Afterward, I created my UVs and organized the elements in different texture maps. I do this with scenes that contain several elements so I can better manage objects, layers, alphas, etc.
TEXTURING

When hand-painting textures, it’s very important to not have any light sources because you will create unwanted colors. Instead, you will hand paint your own light source in the texture maps. Using 3DCoat, I select View > Flat Shade to block any light source from influencing the final colors of my meshes.
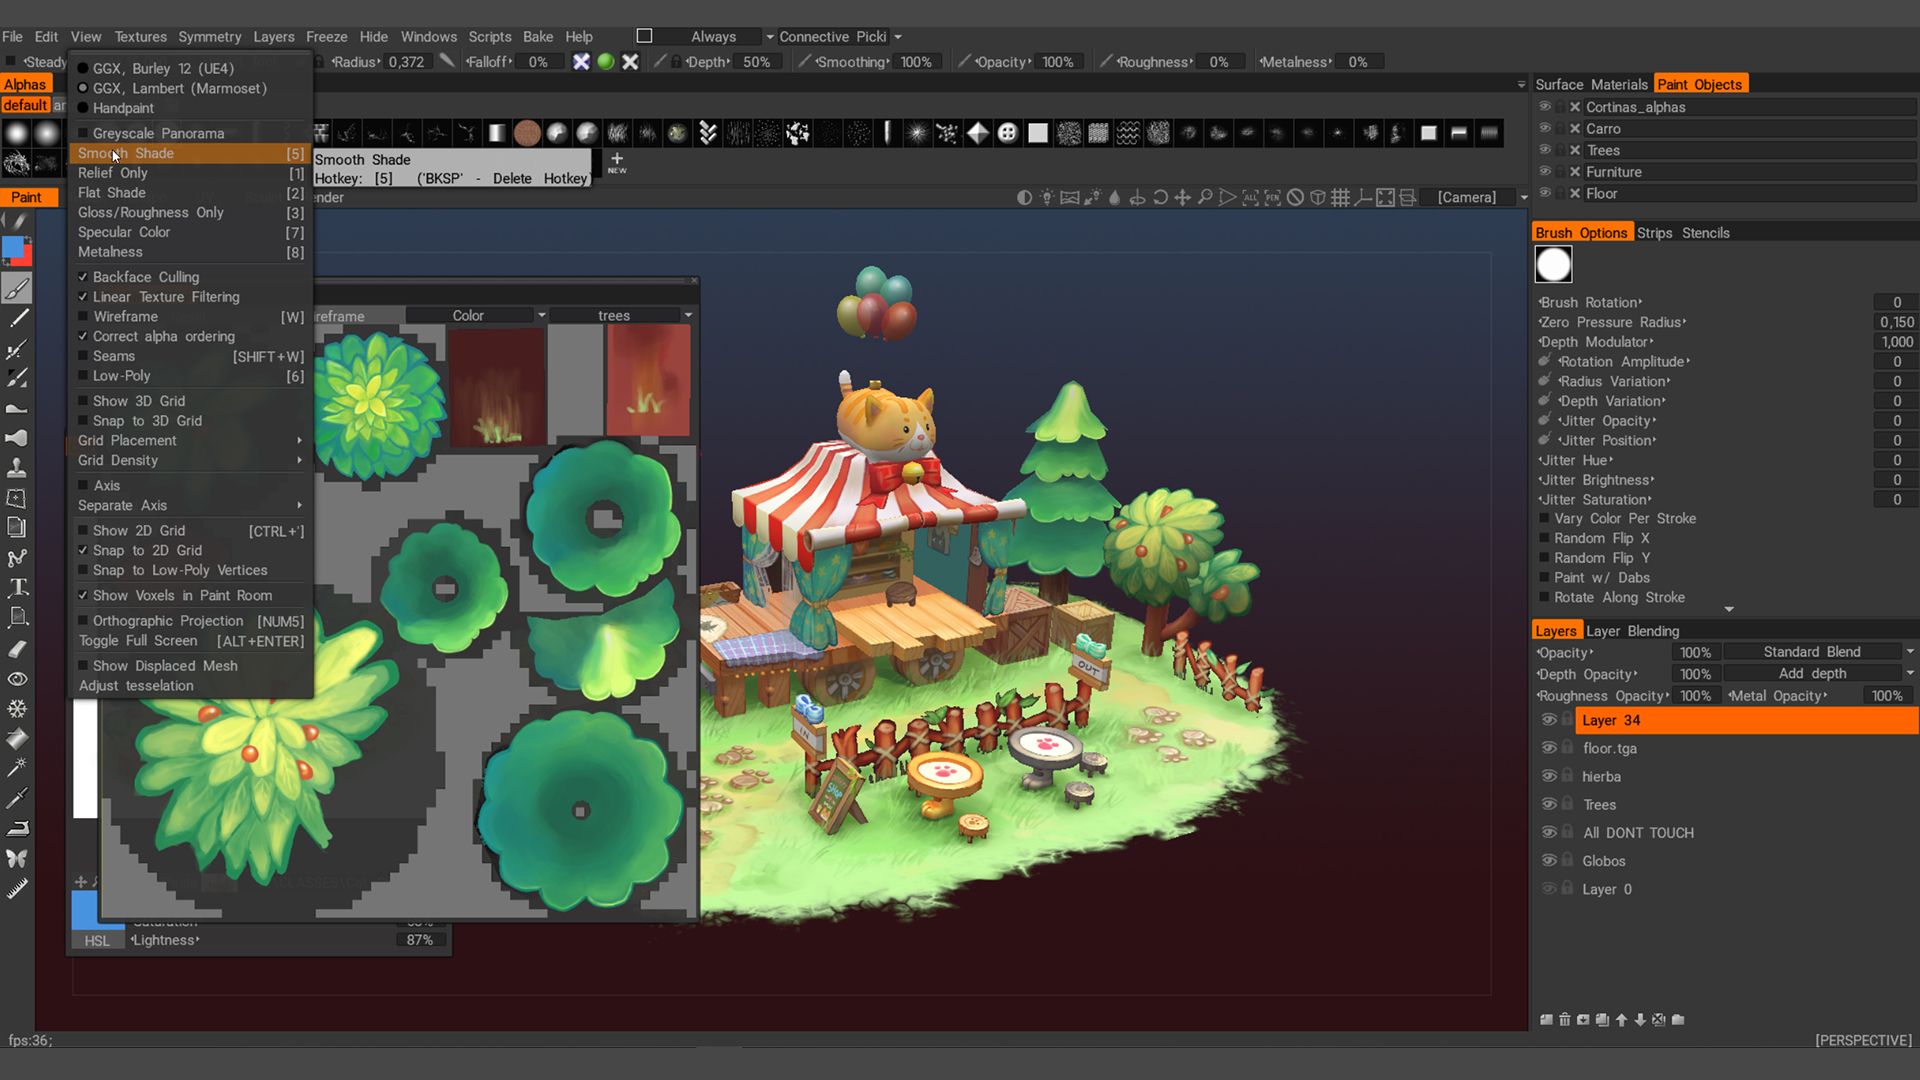
Working with alphas in 3DCoat can be similar to working with layer masking in Photoshop. You will need to hide the background layer (Layer 0) while painting on the first layer. This allows you to clearly see the areas you’re masking. Tip: You’ll need to select View > Smooth Shade to avoid problems with how your alpha/transparency layers are rendered in the scene.
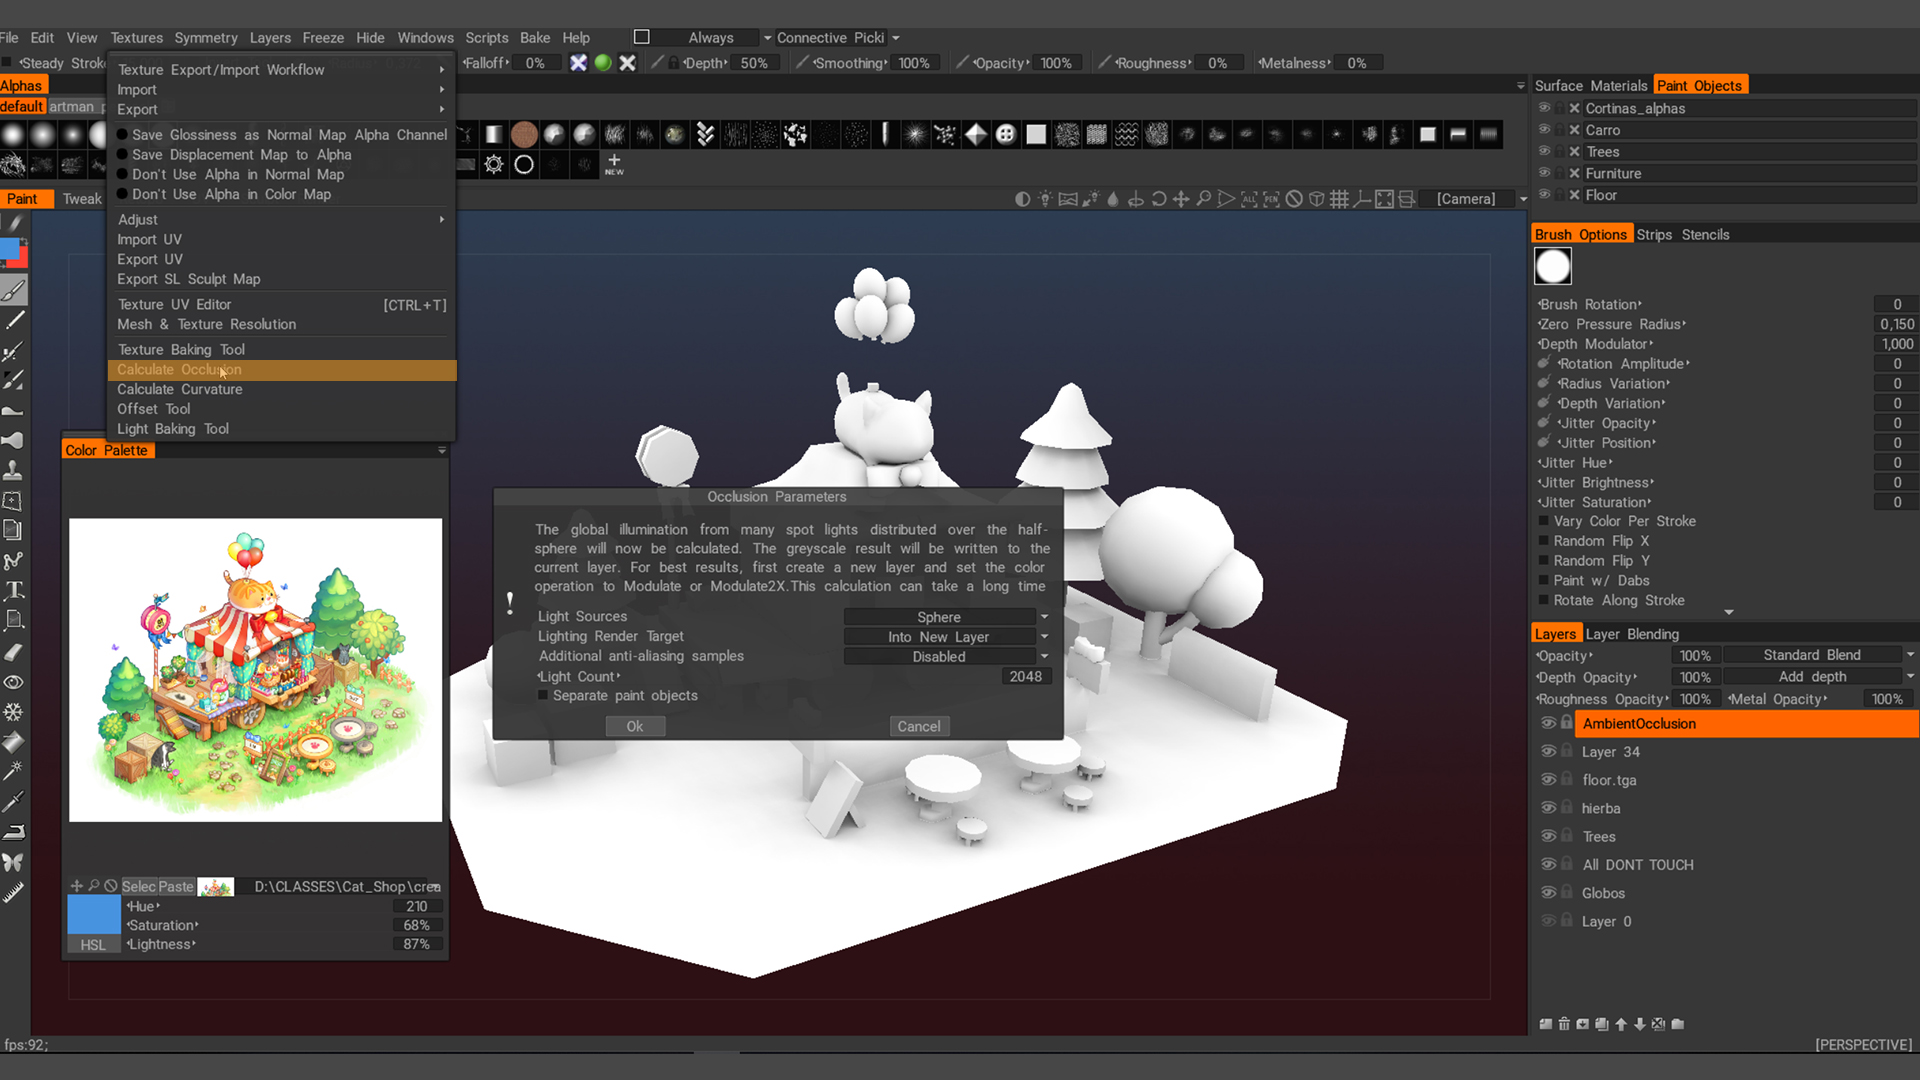
I baked some simple Ambient Occlusion maps to help start the texturing process. While working from a single camera viewpoint, I painted everything by hand, adding base colors and matching them with the concept. Even though I was painting from this specific camera angle, I would occasionally rotate my scene and check for visual errors in meshes or textures (e.g seeing holes in geometry or textures with bad deformations). During this stage, I painted some light and shadow detail. I worked on my alpha maps between 3DCoat and Photoshop to help refine my textures.
2.5D ELEMENTS
When I work with a bunch of tiny elements in a scene, I usually prefer to use a technique that is used in most isometric-view games. I start by painting the assets in Photoshop (similar to painting a concept image), then use a 3D package to create a plane and map the painted texture onto it.
At this point, I began to shape the plane accordingly to fit the shape of my objects.
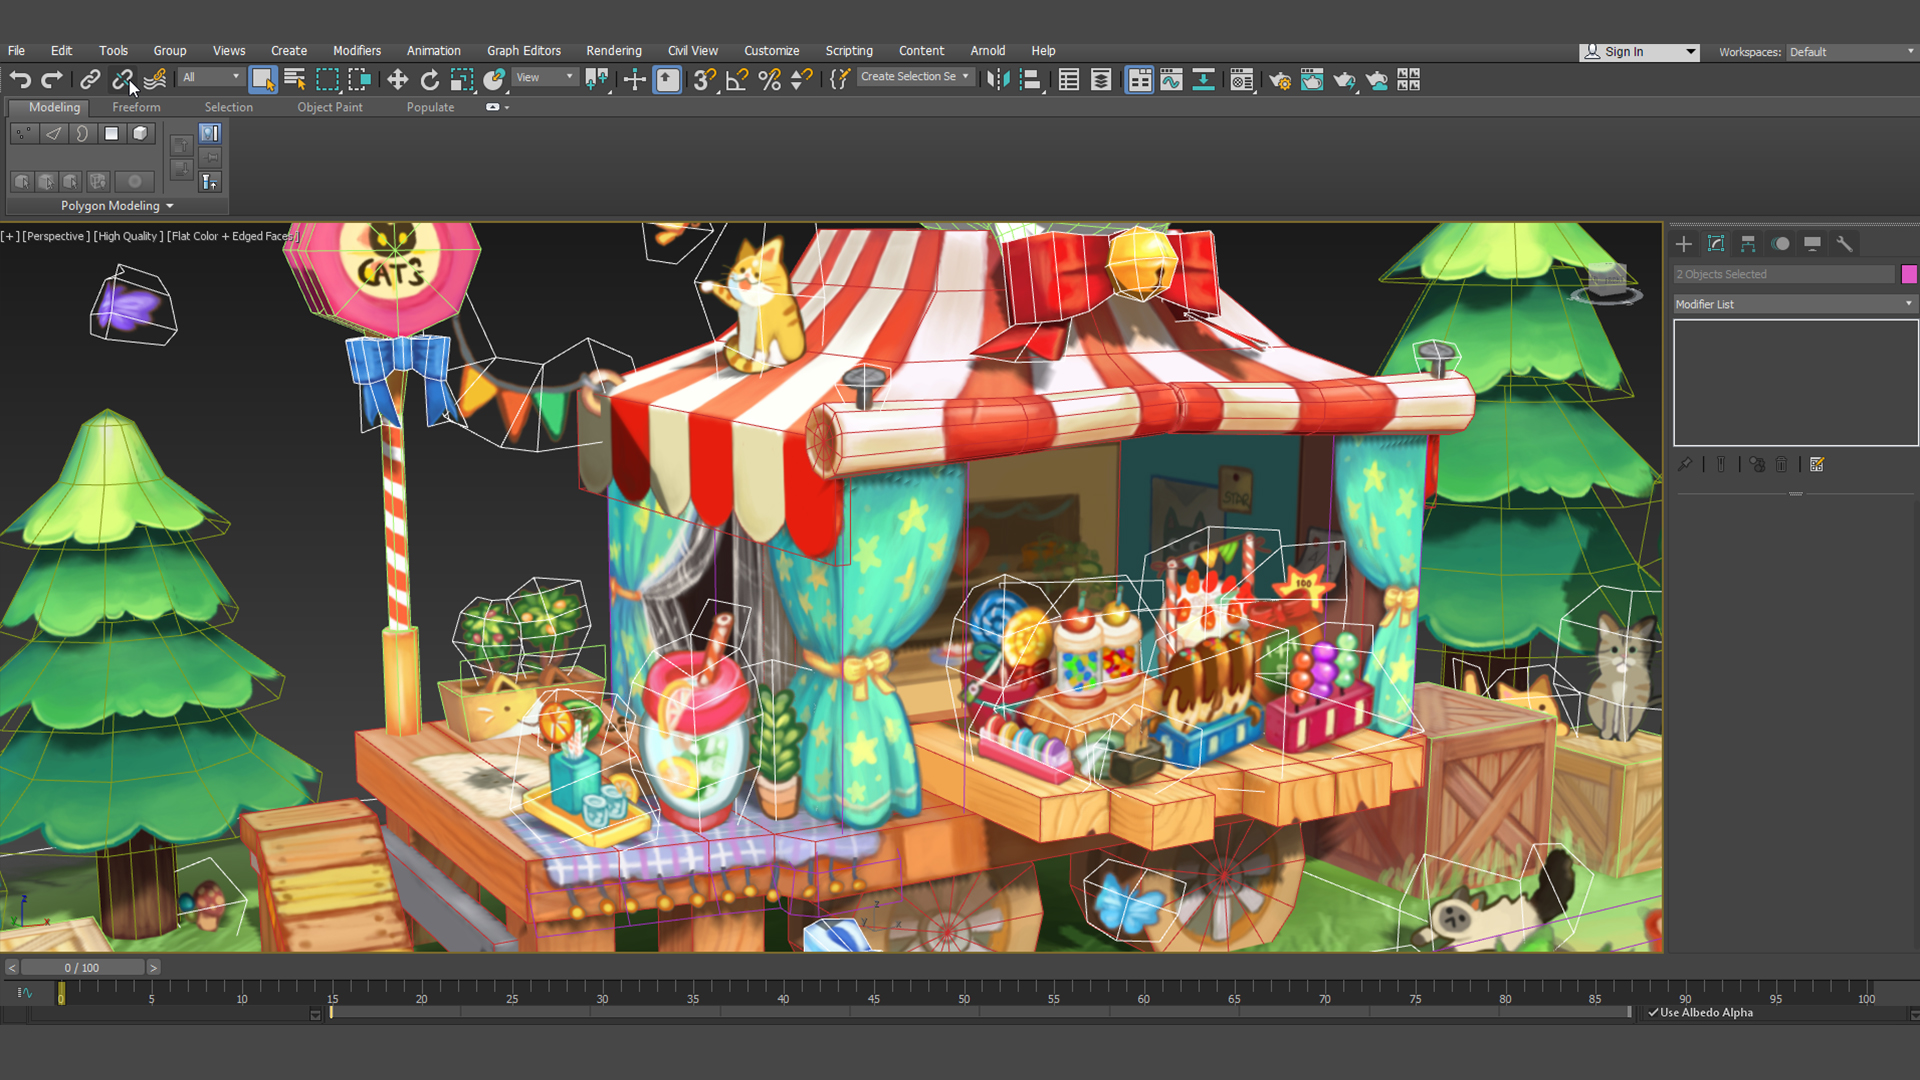
I placed the objects in the scene and adjusted the plane and geometry to give an illusion of volume according to the isometric view of the camera. And that’s it! Now was the time to have fun and dress the scene in Toolbag.
SETTING UP THE SCENE
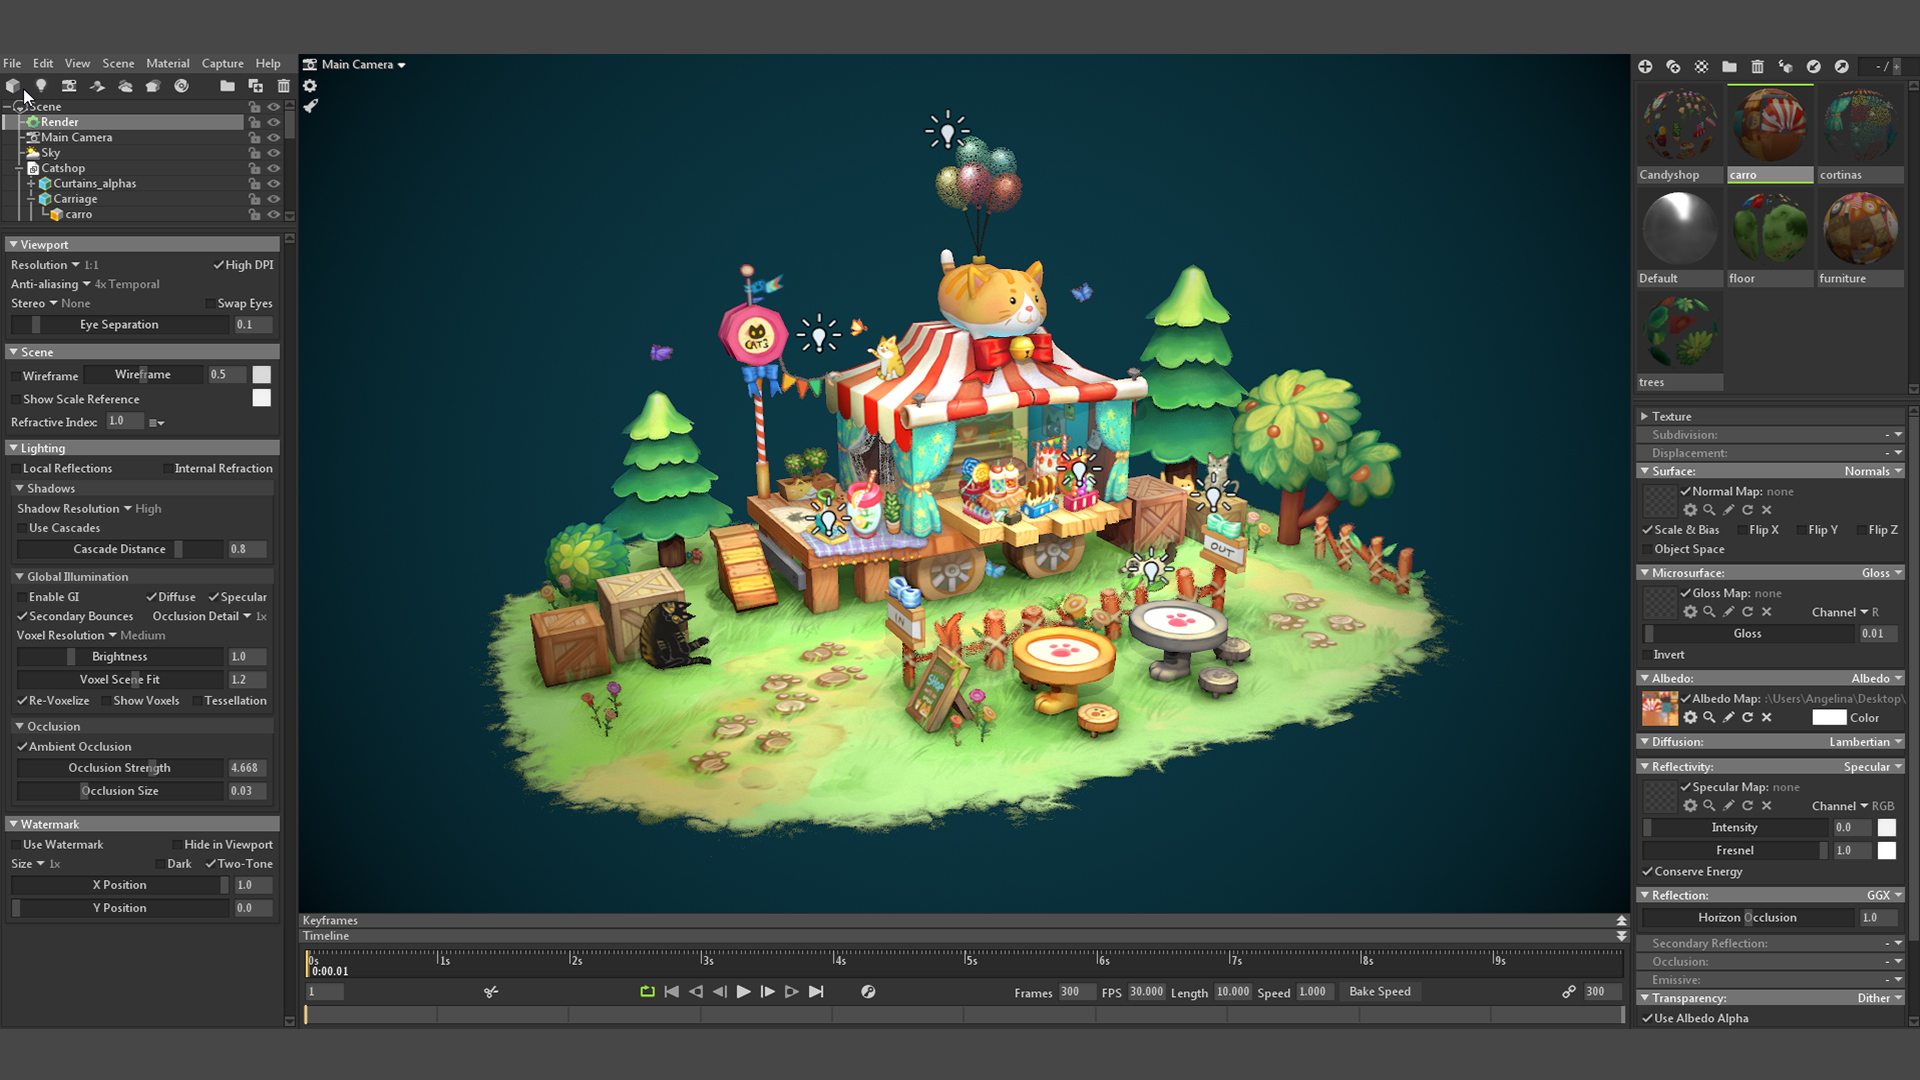
I always use Marmoset Toolbag for my final renders. It’s very versatile and easy to use, and the results greatly enhance your scene. My setup process tends to be very fast since I import my model with the texture sets previously assigned in 3ds Max. I exported everything as an .FBX, imported it into Toolbag, and the textures were automatically assigned to my meshes.
LIGHTING & POST PROCESSING
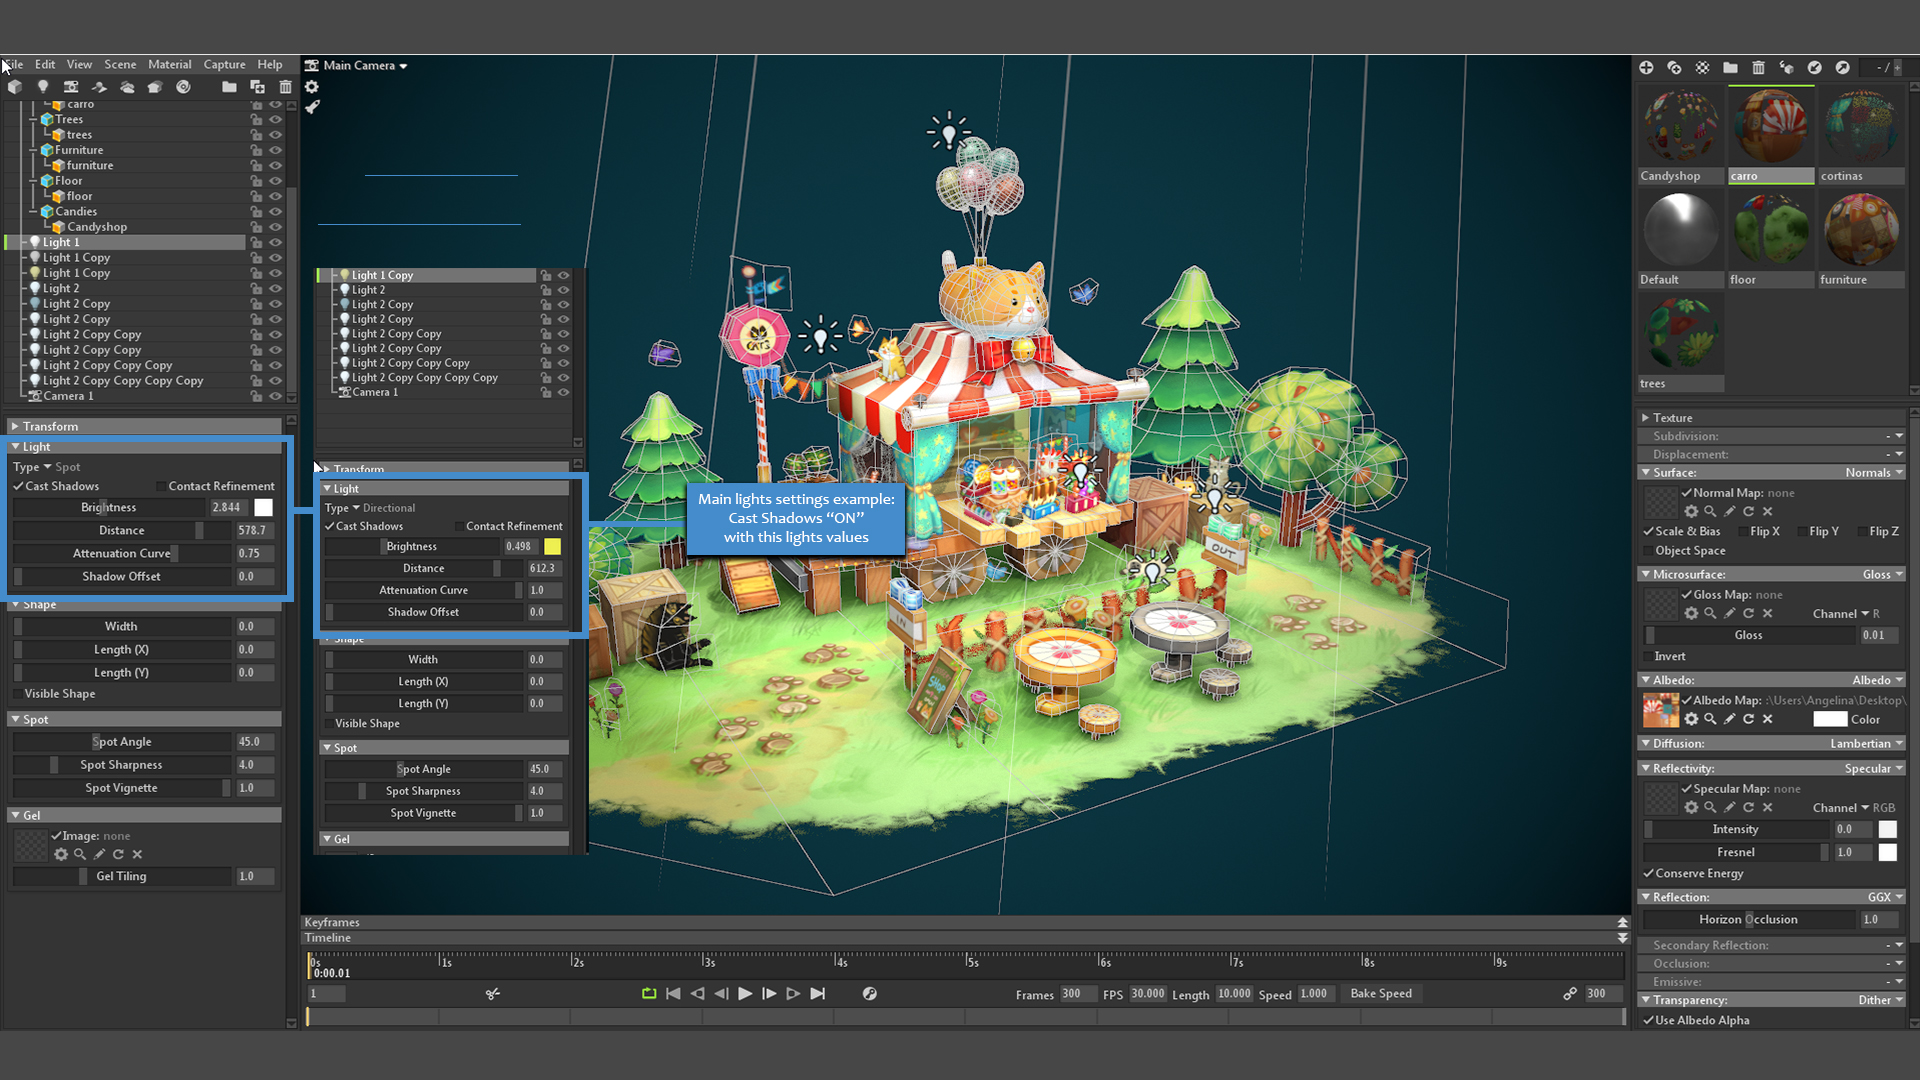
At this stage, we can start to play with lights and post-processing effects. In the Render settings, I turned on Ambient Occlusion to help create a more integrated look in the scene. I usually let my Sky Preset set the initial mood of the scene. For this scene, I chose the Overcast Hillside Sky Preset and set the Brightness to a low setting. Then I started to place my main lights which consist of some Spot Lights as well as a Directional Light and set them to different colors. I enabled Cast Shadows and placed them in different positions. I tweaked each light settings respectively until I achieved a result I’m happy with. When it comes to lighting hand-painted scenes, you need to be very subtle since your textures already have light and shadow values painted in. Then I placed some Omni Lights to help focus the viewer’s attention to certain parts of the scene. The two sliders I play with the most here are the Attenuation Curve and Brightness settings. It’s like painting but with lights instead of brushes.

I wanted to have a Marmoset Viewer version uploaded, however, I wanted to maintain the camera view without allowing the viewer to rotate the scene. To do this, I enabled Use Limits in Viewer, Limit Orbit Patch, and Limit Orbit View and tweaked the values to my liking.
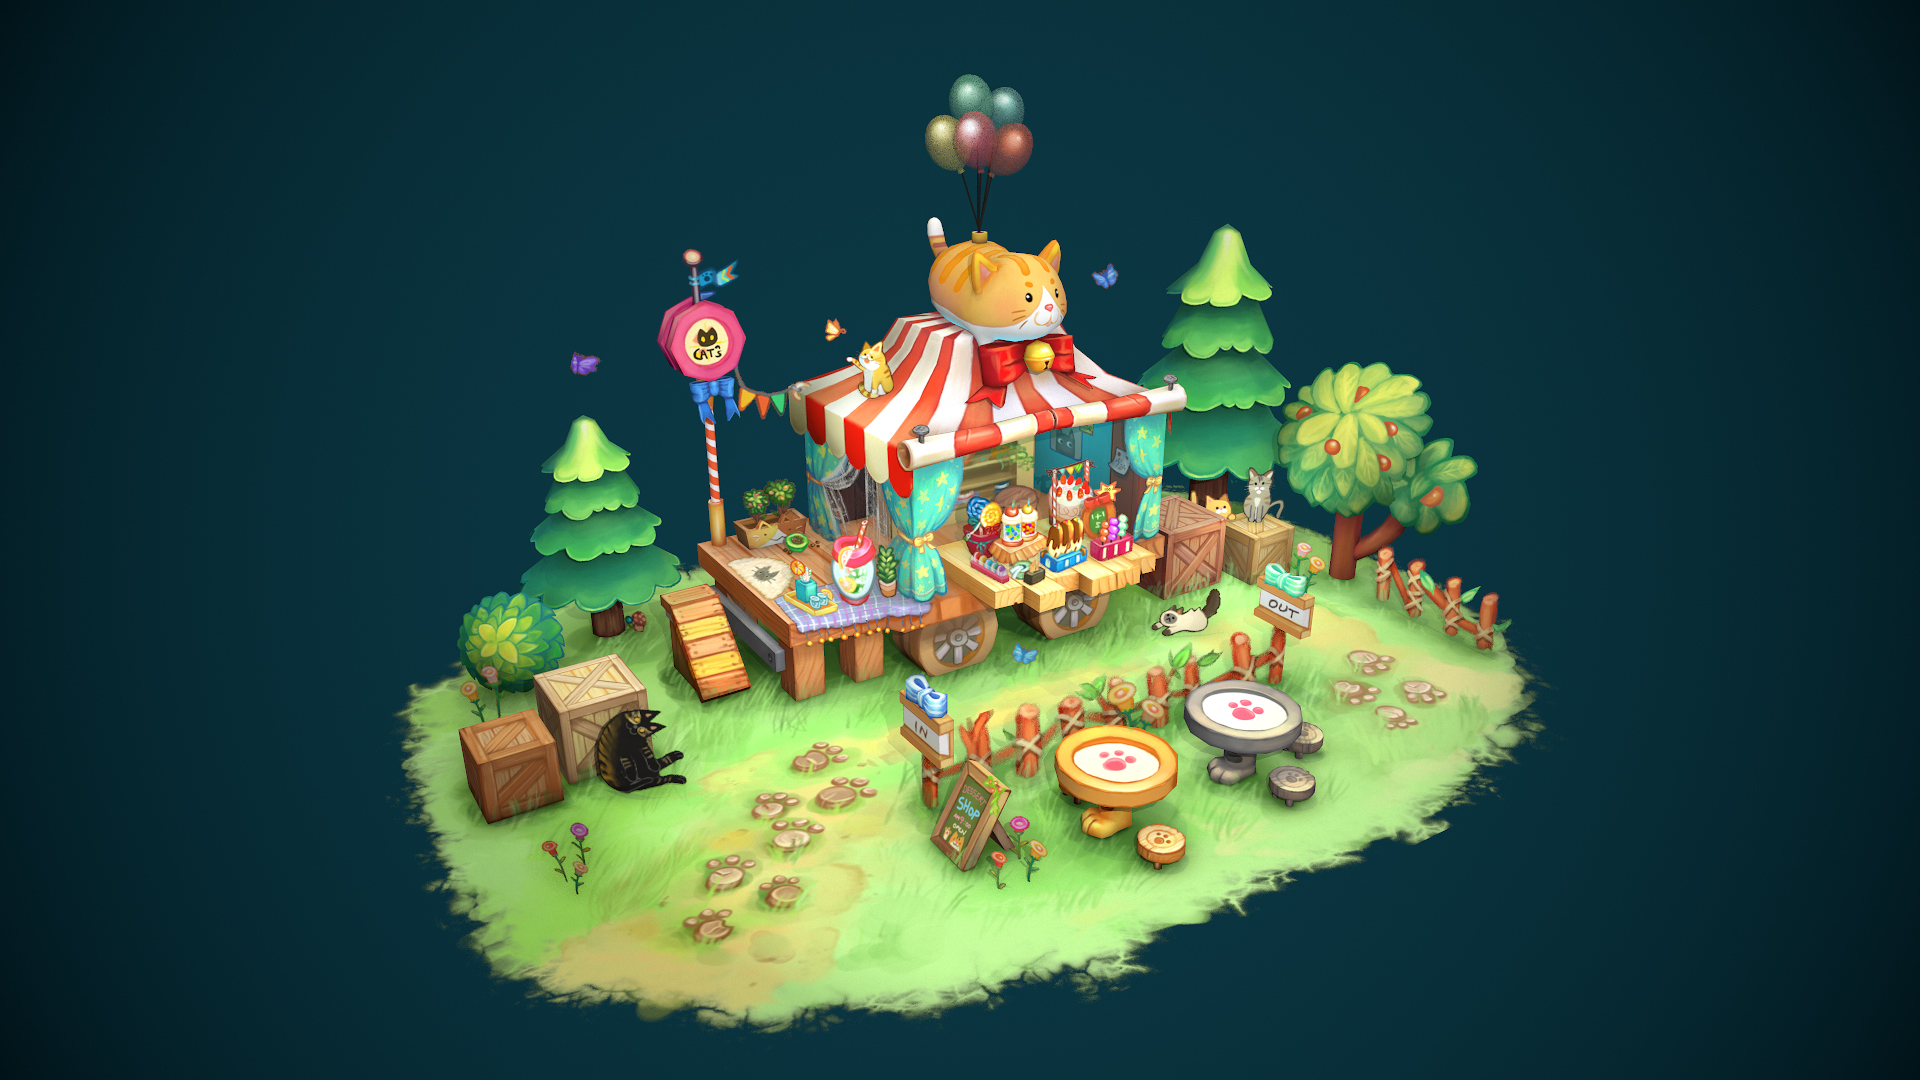
This is my final version of the Marmoset Viewer scene. You can notice the limits I’ve set when rotating around the scene and you can double click to view a breakdown of each map in the scene.
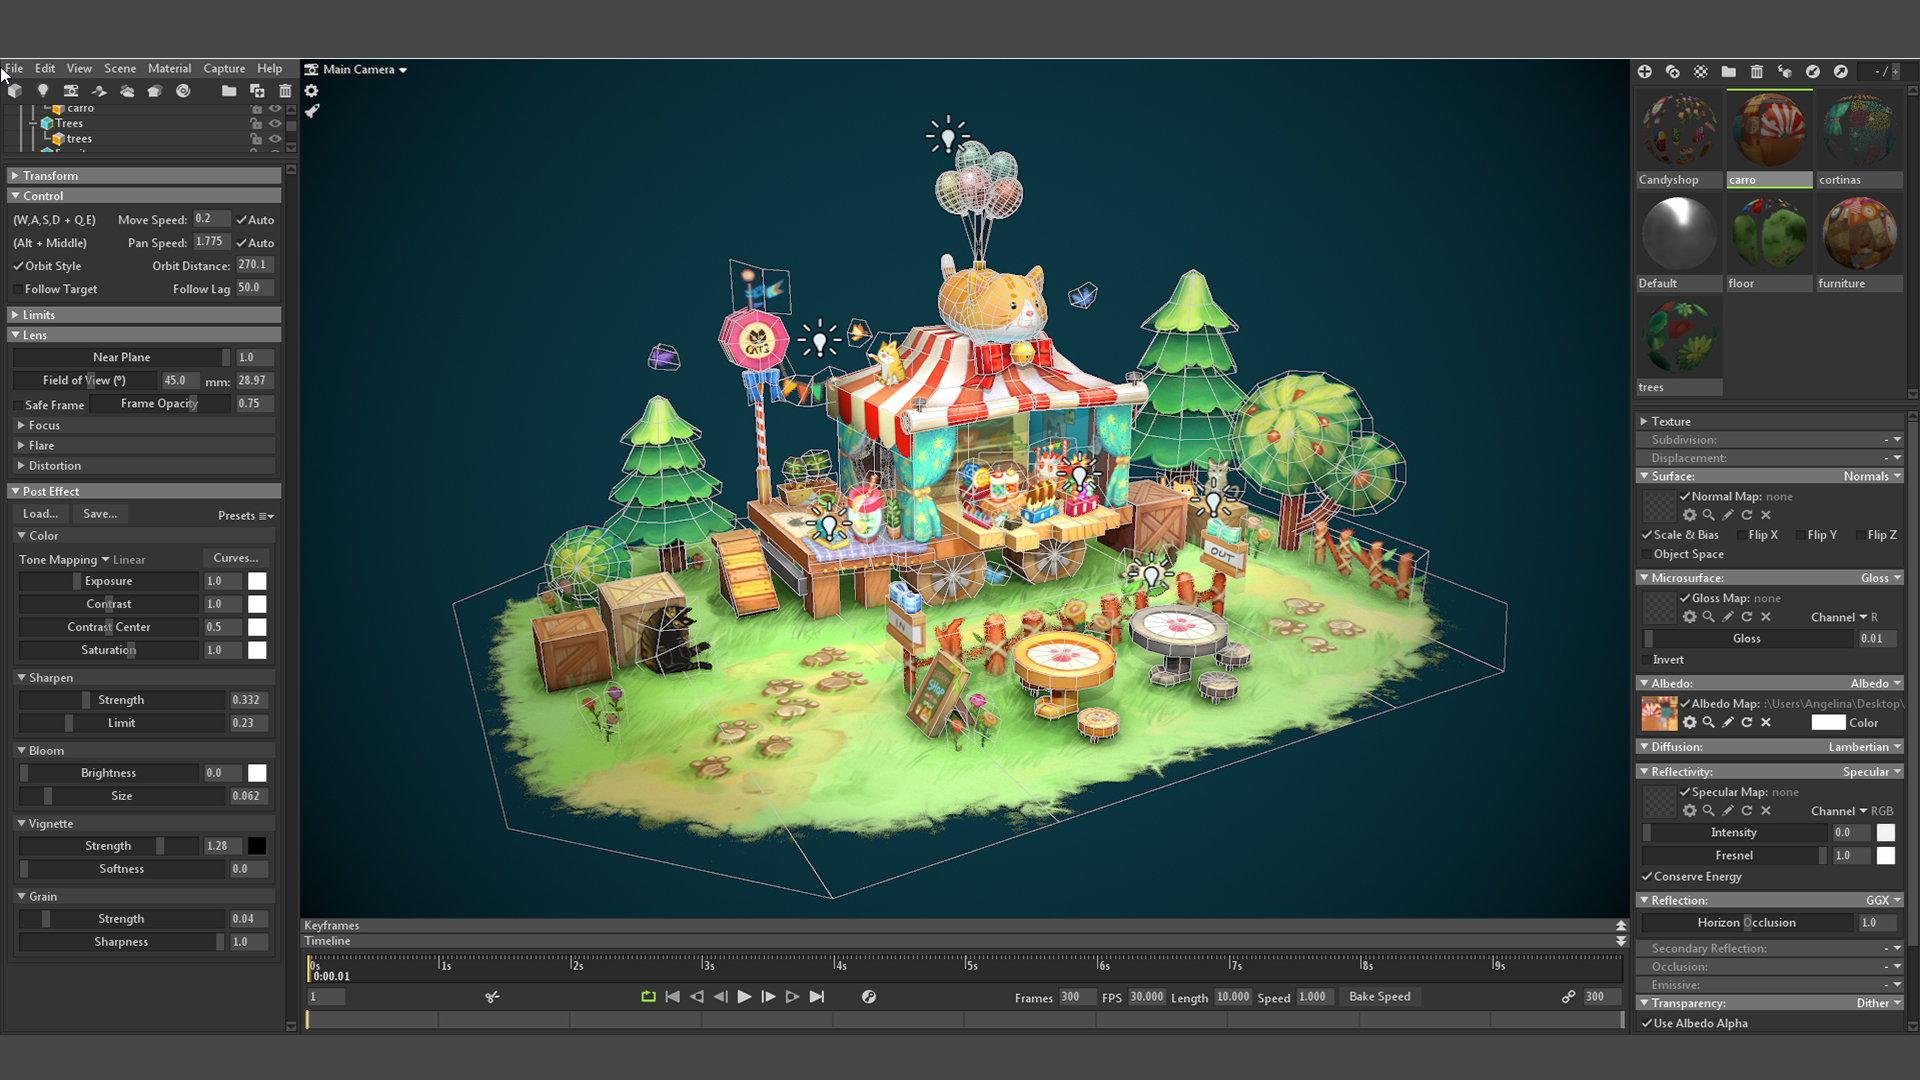
In the Camera settings, I added some Sharpen and Vignette. I decided to set my background color to a deep blue in order to keep the focal area within the main scene.
CONCLUSION
I really enjoyed creating this heavily-detailed piece, filled with color, candy, and cats! I really love cats. In fact, I’ve painted some of them to look like my own cats! 😉

Thank you so much to the Marmoset team for giving me the opportunity to share this breakdown of my process, and for giving us the software we need to enhance our artwork and make it shine!
We’d like to thank Angelina Diez for writing this breakdown article. You can find more of Angelina’s work on Artstation.
Create a cute collection of cat shop renders using the 30-day trial of Toolbag. If you’re interested in collaborating on a tutorial or breakdown article, please send us your pitch, along with a link to your artwork, to submissions@marmoset.co.


