
“Marmoset Toolbag 3: A Pocket Camera With DSLR Quality!” – Chong Zhang
Motivation
I’ve recently resigned from my position at Virtuos, a great outsourcing company where I spent 10 years learning most of my industry knowledge. This finally gave me a big chunk of free time to do some hands on artwork, which I’m always eager to do because most of my job at Virtuos was on the management side.
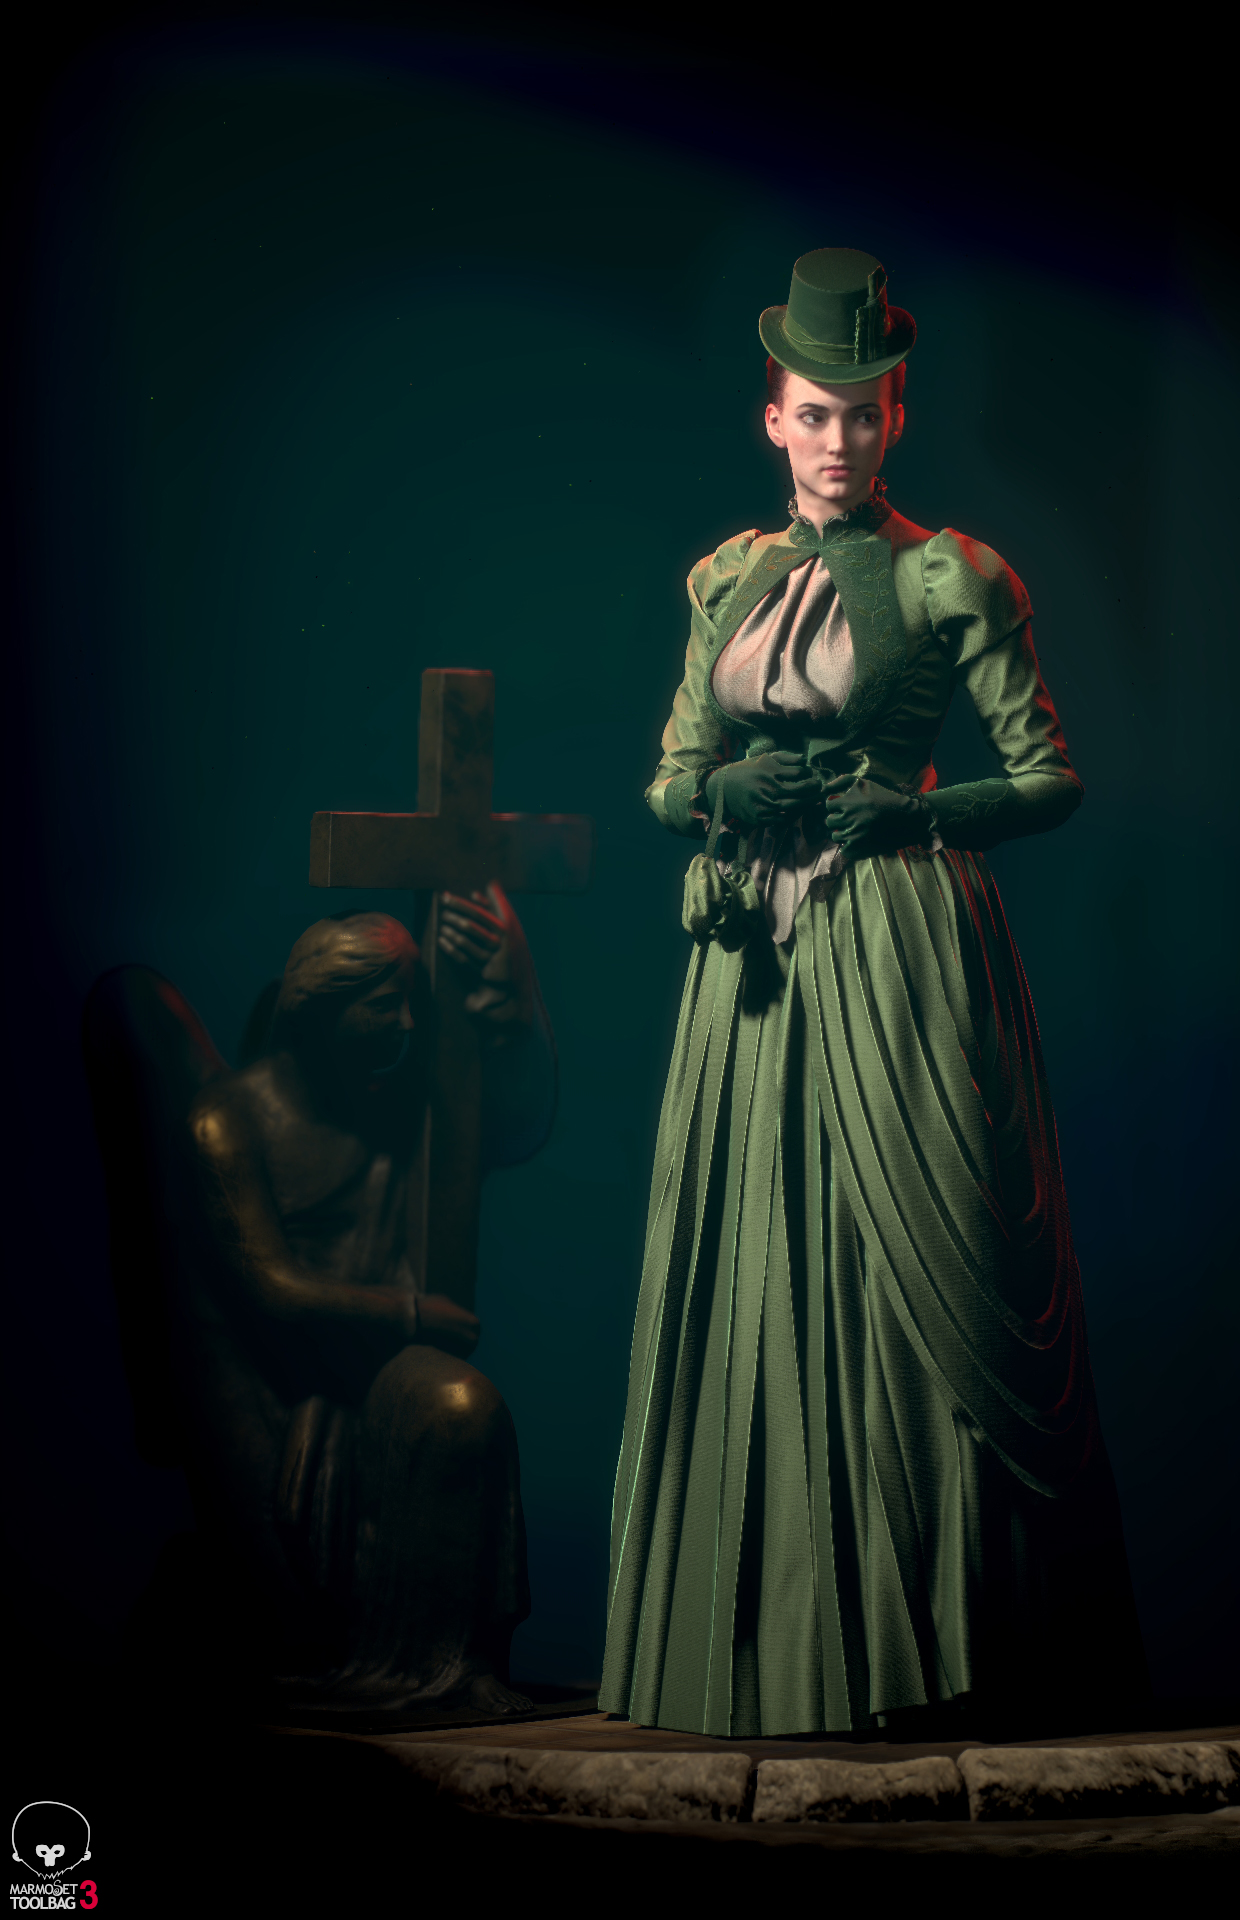
Now I needed a subject. I can’t write stories or invent characters, so I tend to choose one from the movies I like. I’ve always liked Coppola’s Bram Stoker’s Dracula. While it’s not a perfect movie, Winona Ryder’s beauty, Gary Oldman’s performance and Annie Lennox’s song make the movie shine. Since I’m not a musician and Gary Oldman just received an Oscar, I thought I would represent Winona Ryder’s beauty. Finally, my strong love of the story, character and emotion is what helped me get through the long production period.
Why Marmoset Toolbag 3 (MT3)?
The answer: the engine is specifically designed for individual artists. For that to work, it must have certain qualities.
Ease of Use
I’m an artist without a technical background and do not have a team of technical artists to help me solve my problems. Marmoset Toolbag 3 makes it easy to pick it up and go. When I do have a technical concern, the community on MT3’s Facebook user group are there to help. On the few occasions where I was facing issues, I asked my questions and received responses instantly. There are no complicated shaders and not much optimization is needed. Everything is well placed and the focus is on what an individual artist really cares about, leaving time for creativity and boosting quality. This leads us to the next point, quality.
High-Quality
MT3 is one of the best engines for visual quality because Marmoset understands the needs of an individual artist and have designed Toolbag to make their work look as good as possible. Although, you still have room to adjust the balance between quality and performance. But we don’t care about performance too much since we’re not using MT3 to present an open world game, right? 🙂 So everything has been set everything to high-quality by default. But do we need a super machine to run it? This leads us to the next topic, performance.
Good-Performance
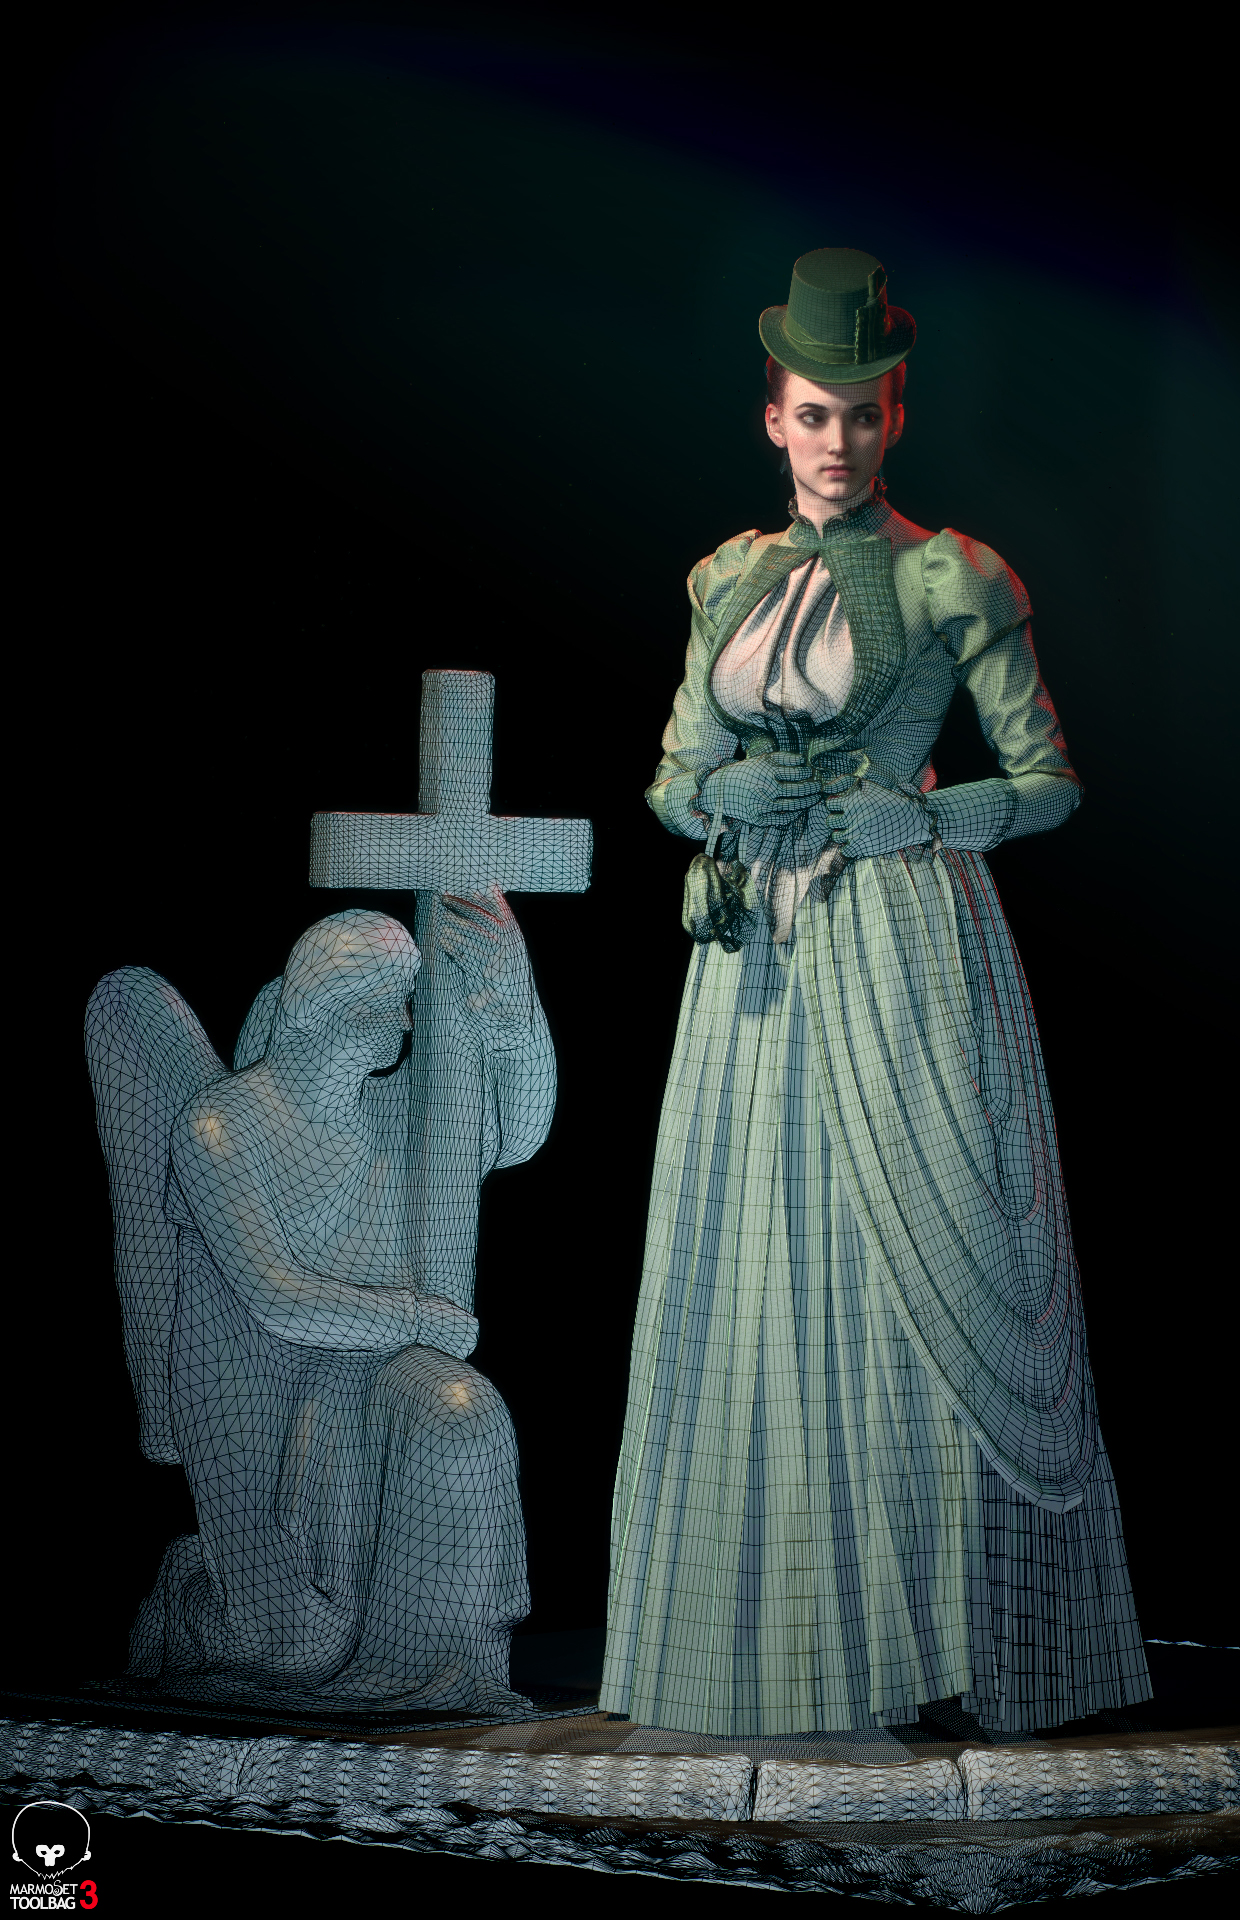
The scene I’m about to show is roughly 200k tris and includes 800MB textures. I know I could have optimized a lot, however I did use .psd files to save time. It runs smoothly on my 3 year old Dell T7910.
Okay, let’s talk about how MT3 helped me complete the production of my character.
Baking
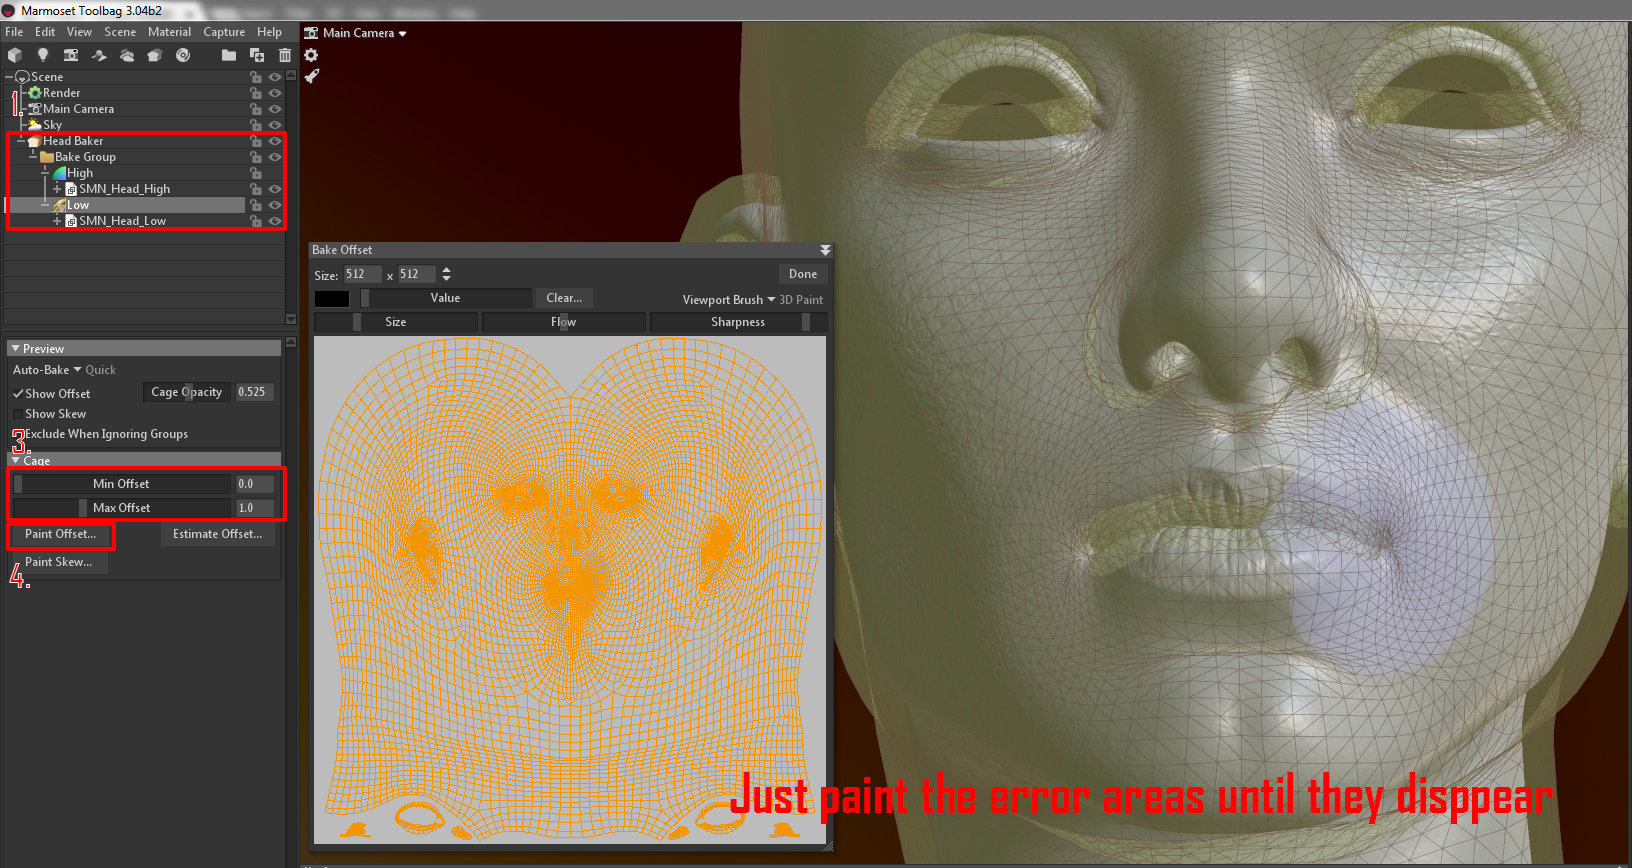
I’ve tried baking in several programs and they all have their advantages. However, the reason I chose MT3’s baker is because it provided me with the opportunity to adjust my baking cage’s offset by painting weights on the UVs. The offset information is stored in my MT3 file as a map, which means that every time the high poly or low poly meshes are updated, the offset map remains unaffected. Another handy feature is the ability to re-paint weights and see the result update instantly with no rebake necessary. To make this possible, MT3 stores the updated map in the cache. Once you’re satisfied with your results, you can bake to save the maps on your hard drive.
The general process I use for baking is:
- Import the low poly and high poly meshes into MT3 and set up the baking groups in the correct hierarchy
- Bake a test version of the normal map on the low poly mesh. At this stage, I don’t refine my baking cage’s offset, so my first bake will likely produce many errors.
- Select the lowpoly sub-group and adjust the Min/Max Offset values until you have a fairly good result with most of the errors removed. A few errors will remain here and there.
- Click the Paint Offset button and begin to paint out the errors. Painting with a high value pulls the cage out and painting with a low value pushes the cage in. The point remains: you won’t need to rebake the map at all and the result updates instantly.
- Once I have the perfect result, I start baking the rest of the maps. (AO, Thickness, Curvature…etc.)
It’s a very effective process when you become familiar with it. The best part is when you want to make significant changes to the model, you can simply re-import your high and low poly meshes and bake again without needing to go through the process again. The offset information has been stored in the MT3 file. There is a more in-depth tutorial created by the MT3 team to cover the basics of baking, however I simply wanted to emphasize how you can benefit from using it.
Silk Material
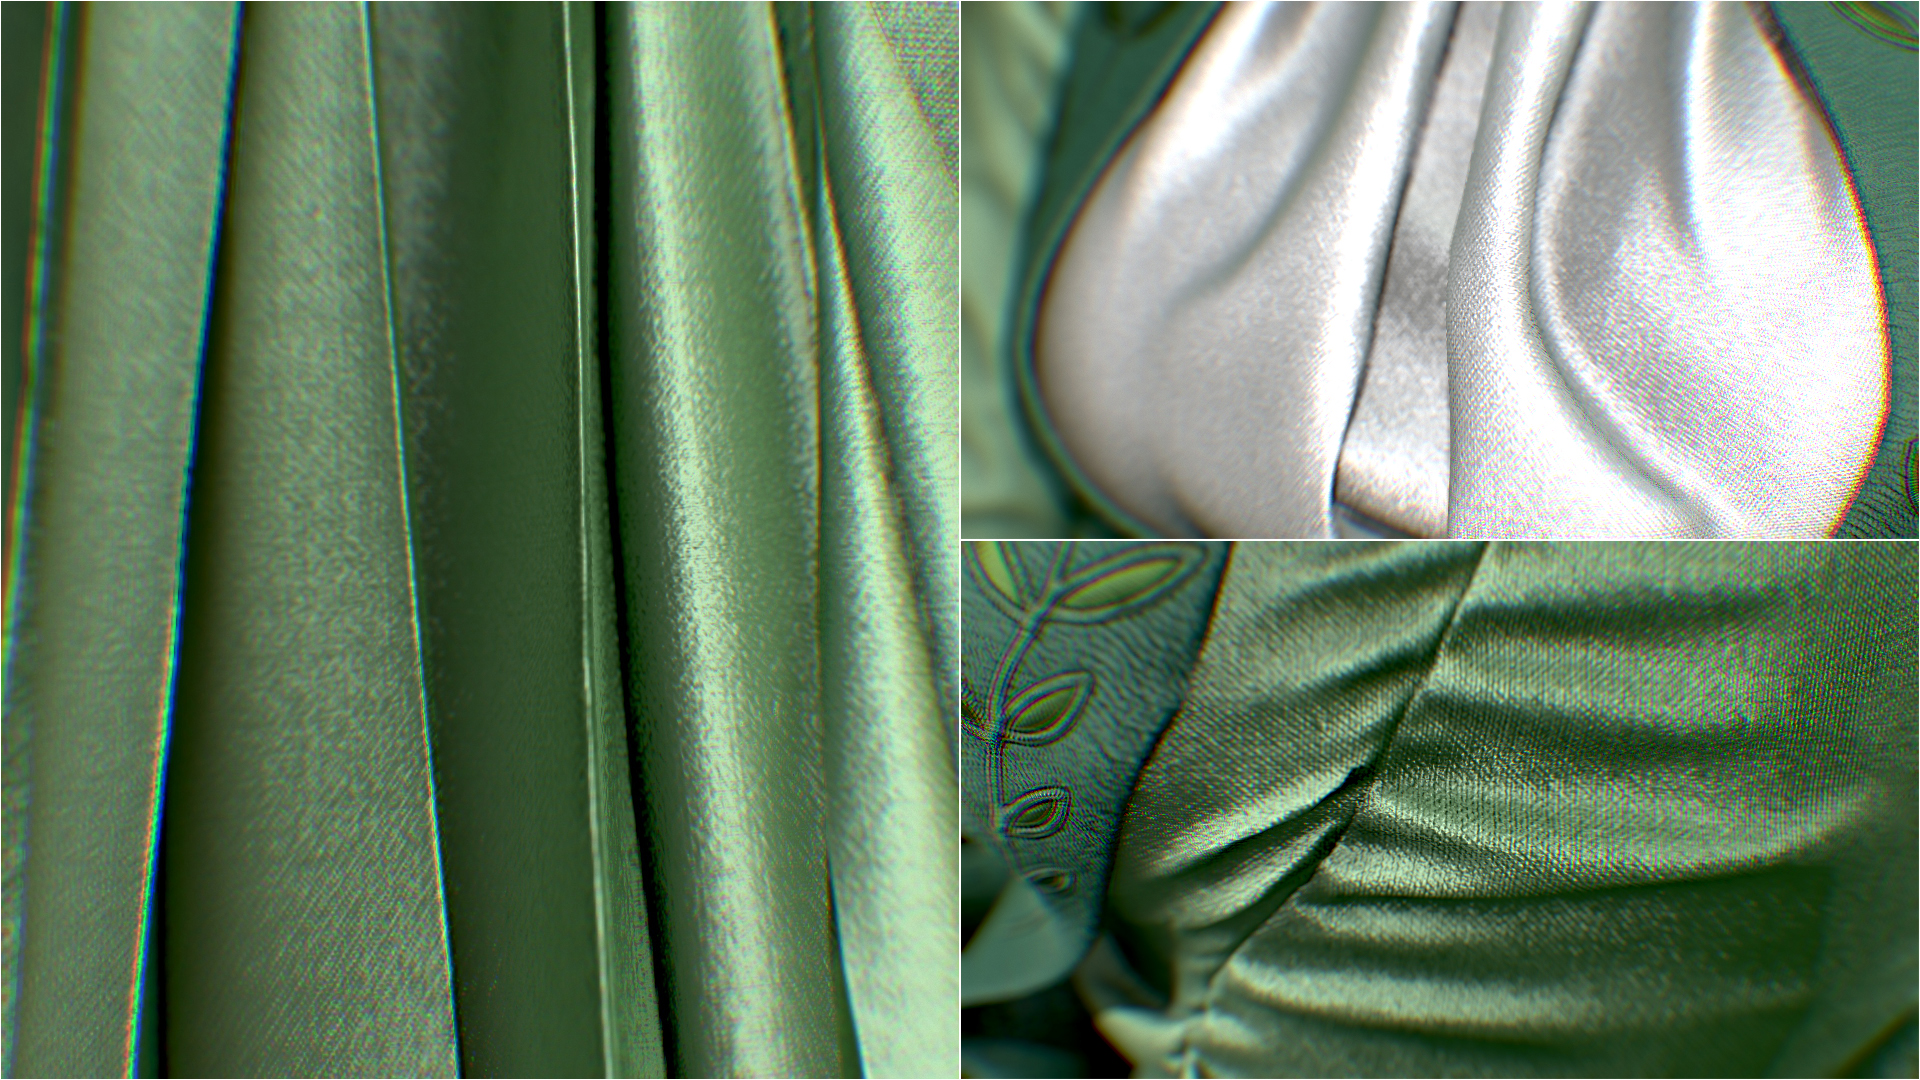
I simplified the silk material to be a highly reflective material with a fuzz and anisotropy effect. MT3’s shader has all I need to represent this. Here’s the shader breakdown:

Nothing fancy. The important part is to change the Diffusion shader from Lambertian to Microfiber for the fuzz effect. I’ve also changed the Reflection shader from GGX to Anisotropic.
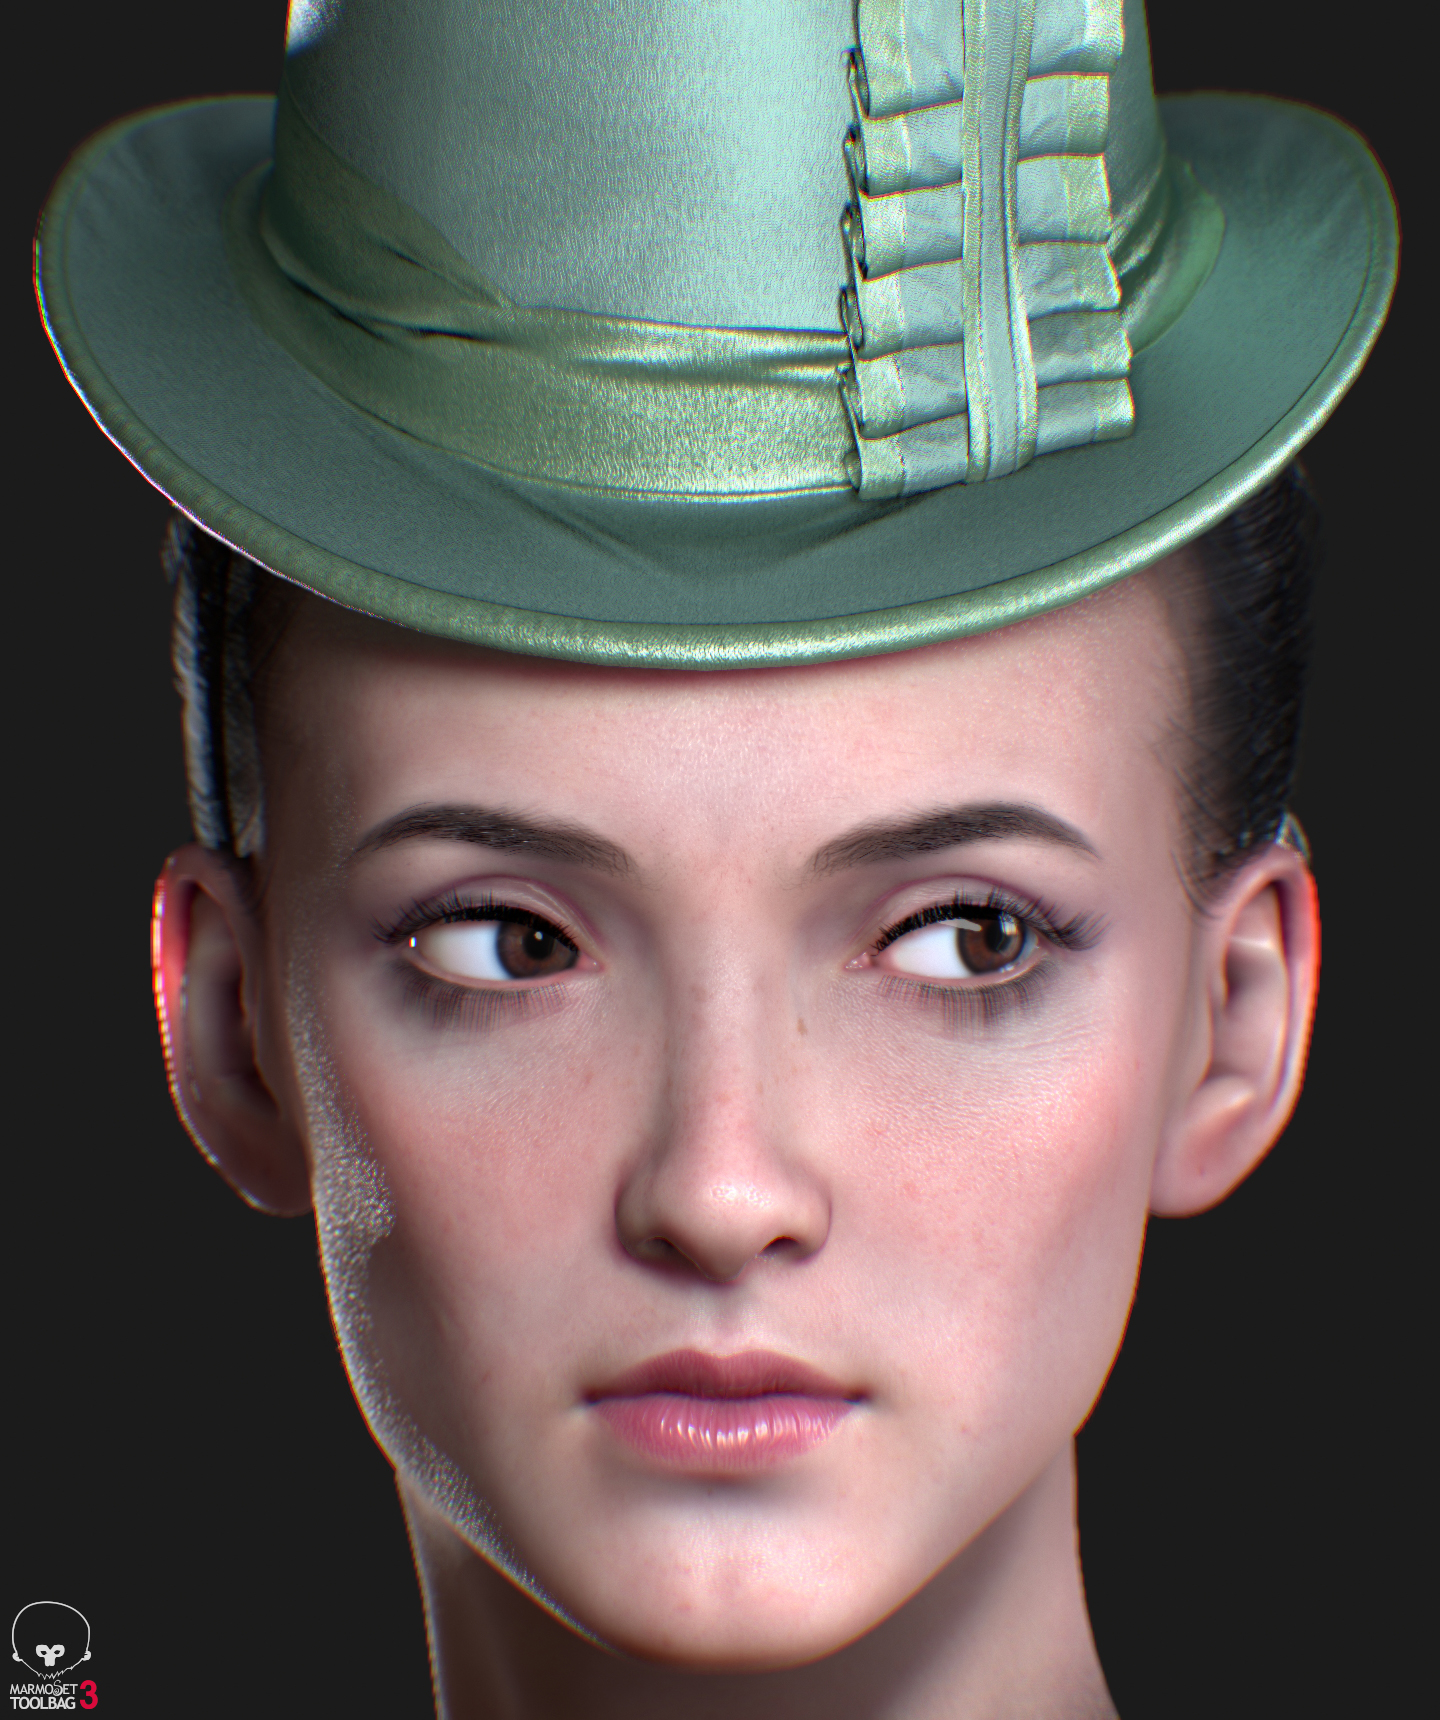
Skin Material

I based my skin shader on the tutorial video provided by the MT3 team. Here’s the breakdown:
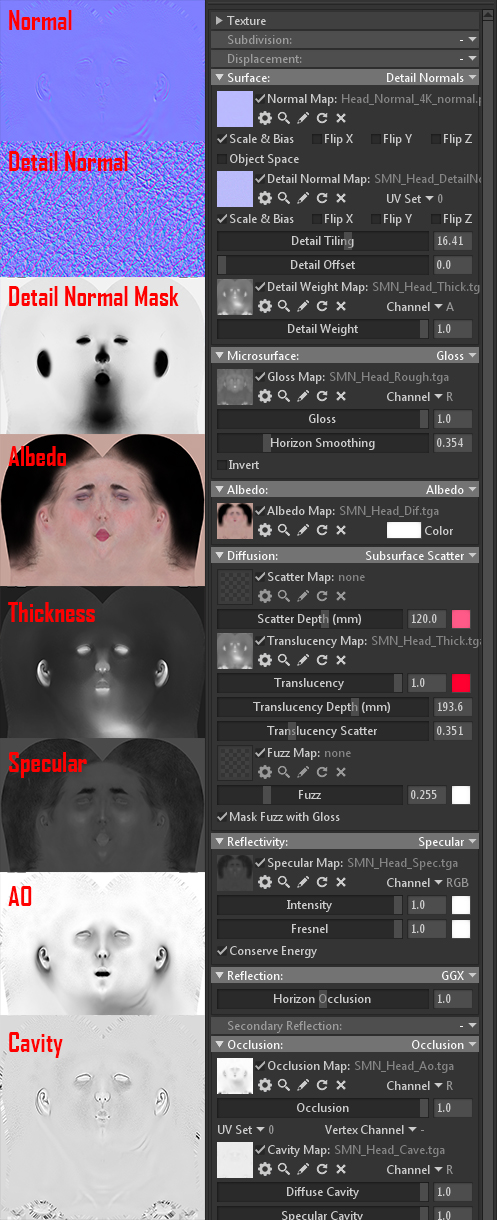
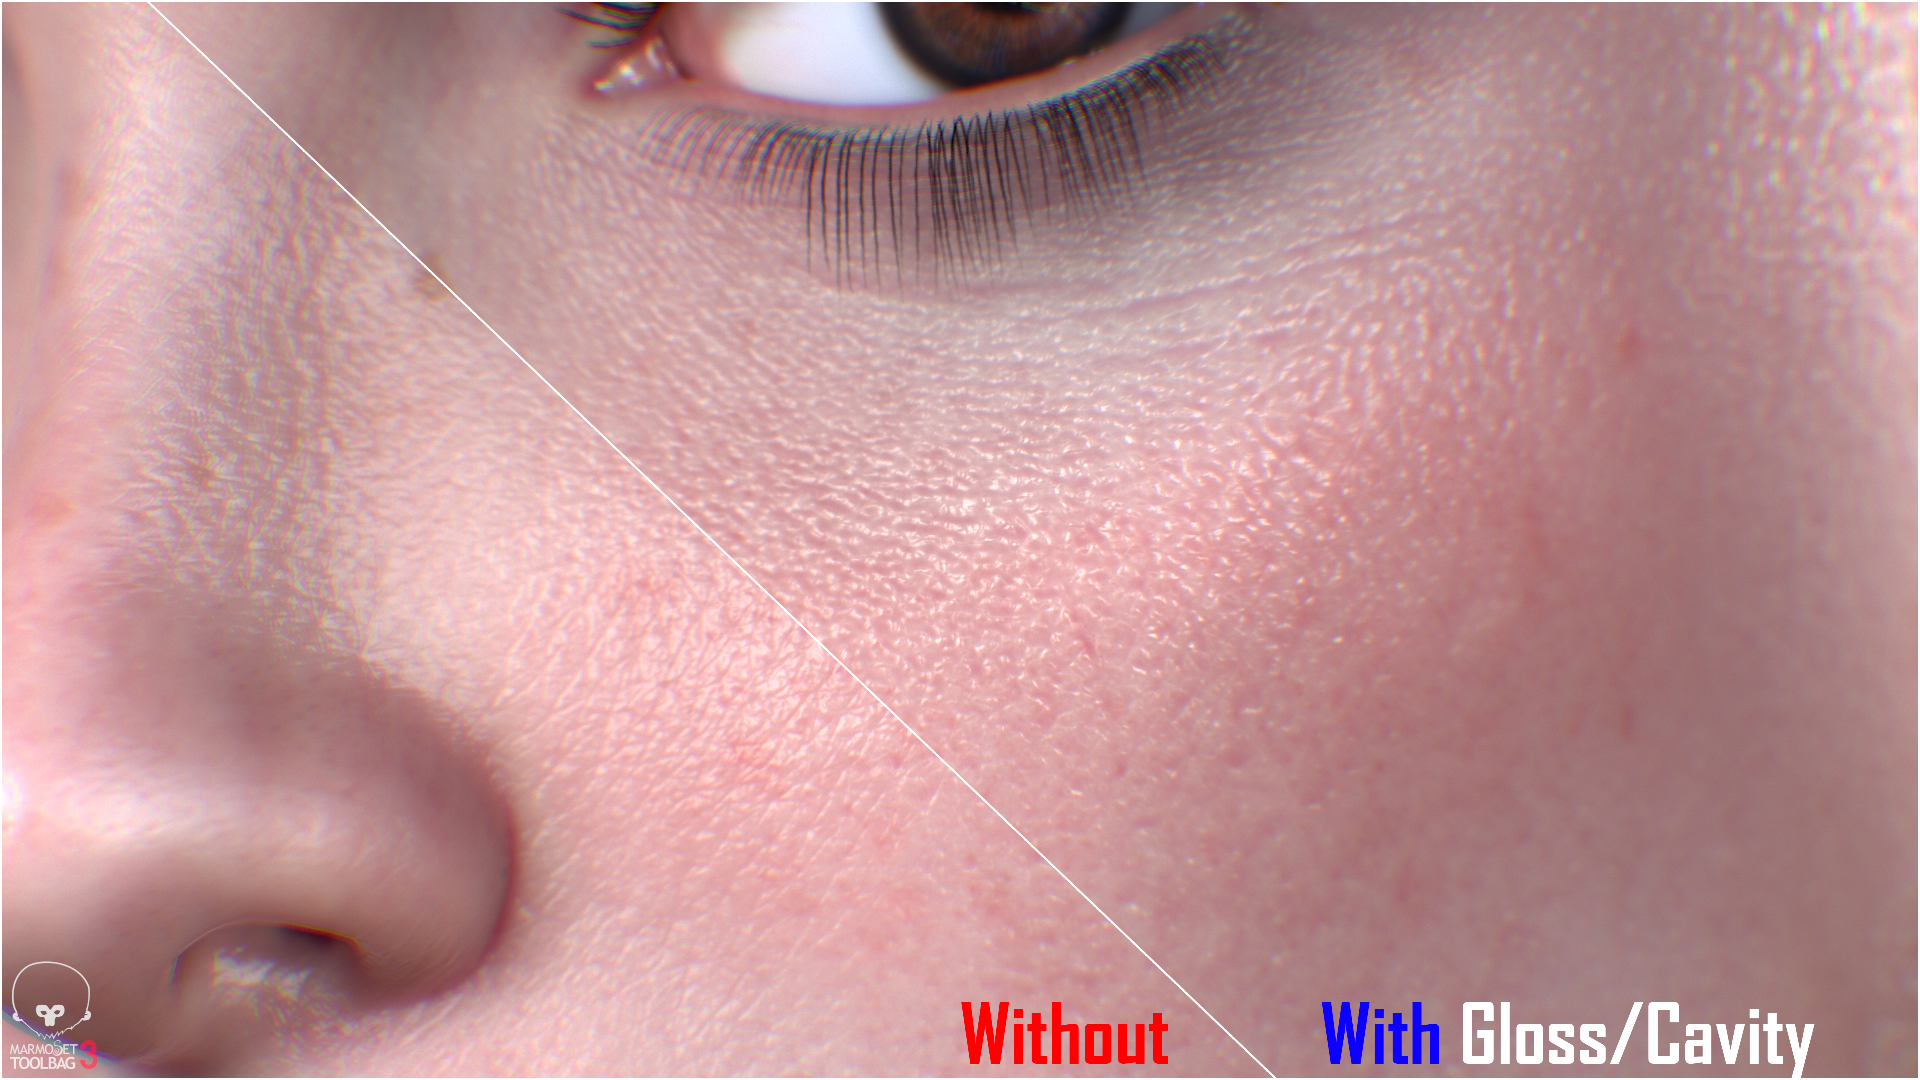
I want to emphasize that it is actually the Gloss and Cavity maps that make the skin look more detailed, so don’t hesitate when creating them. And don’t forget to take advantage of the Detail Normal Map.
Eyes
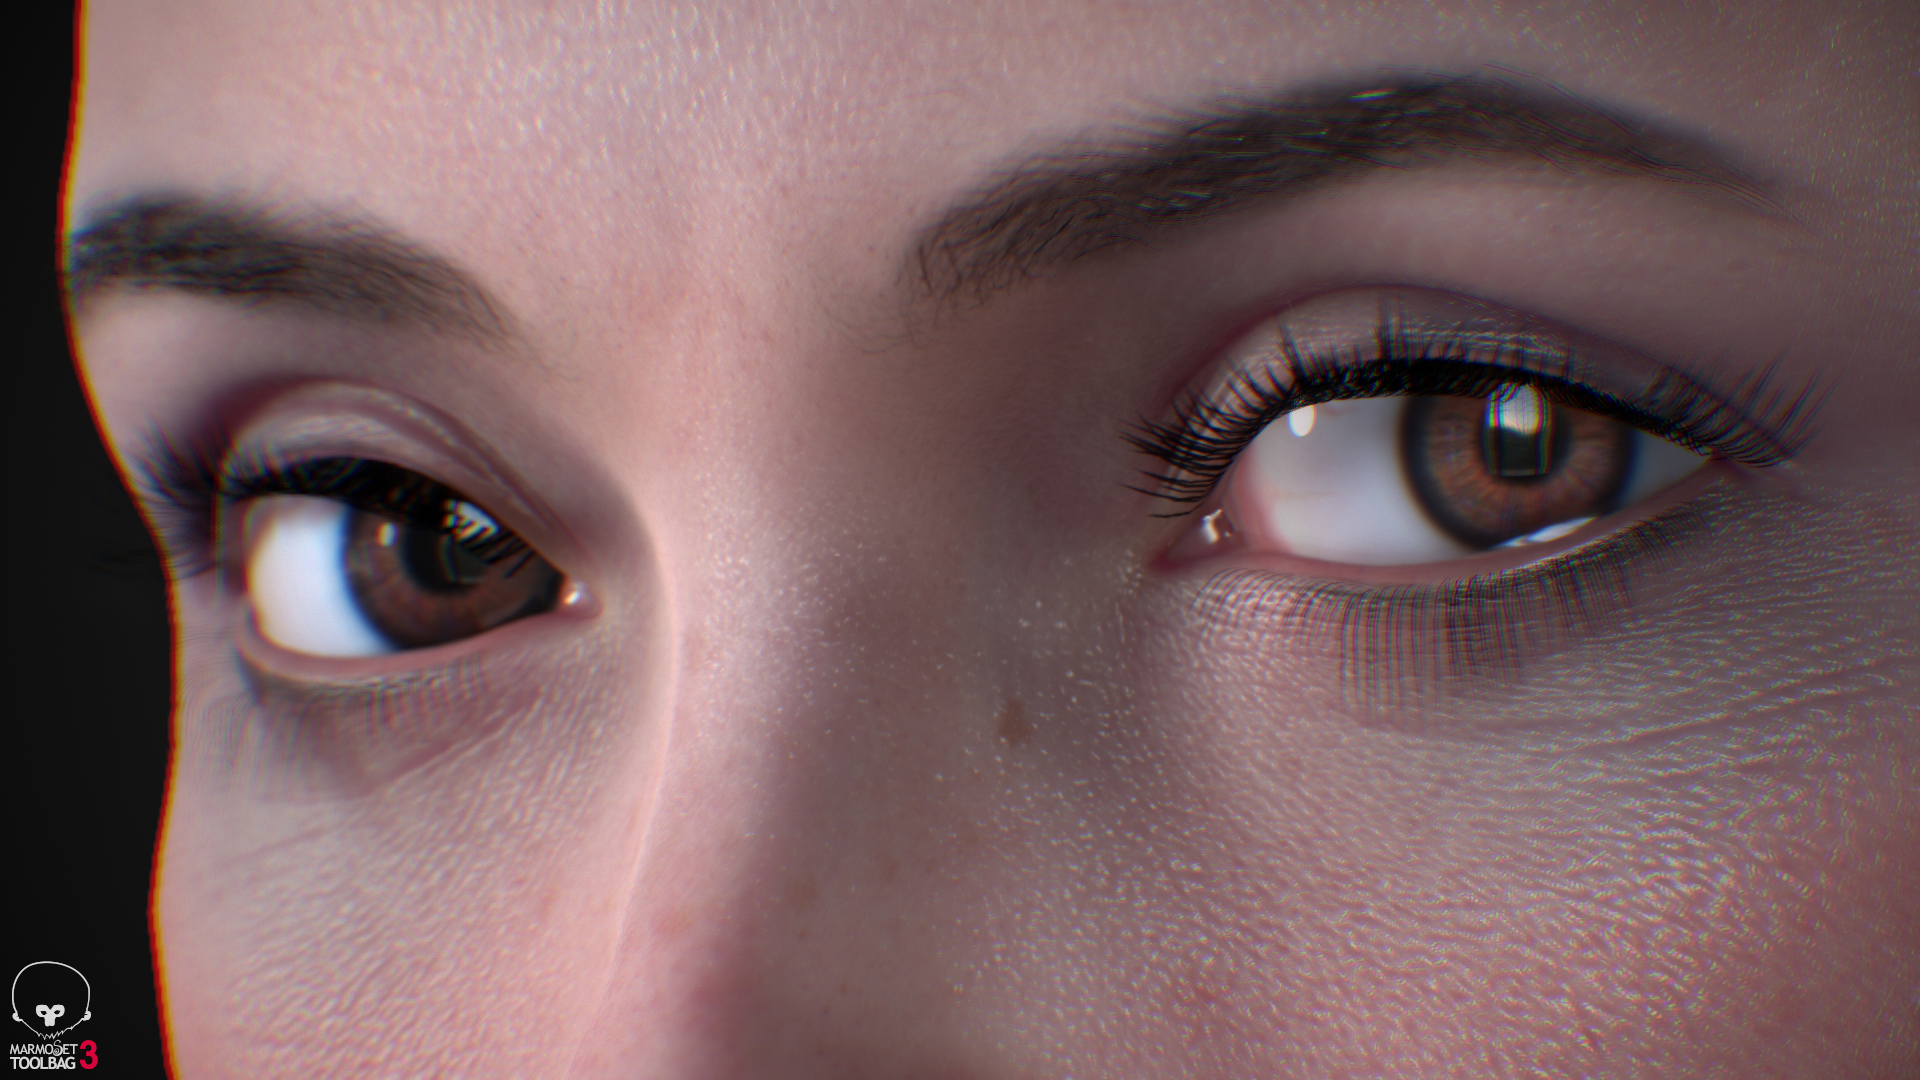
Eyes are difficult for me and I haven’t found the best process for them, but this is my breakdown:
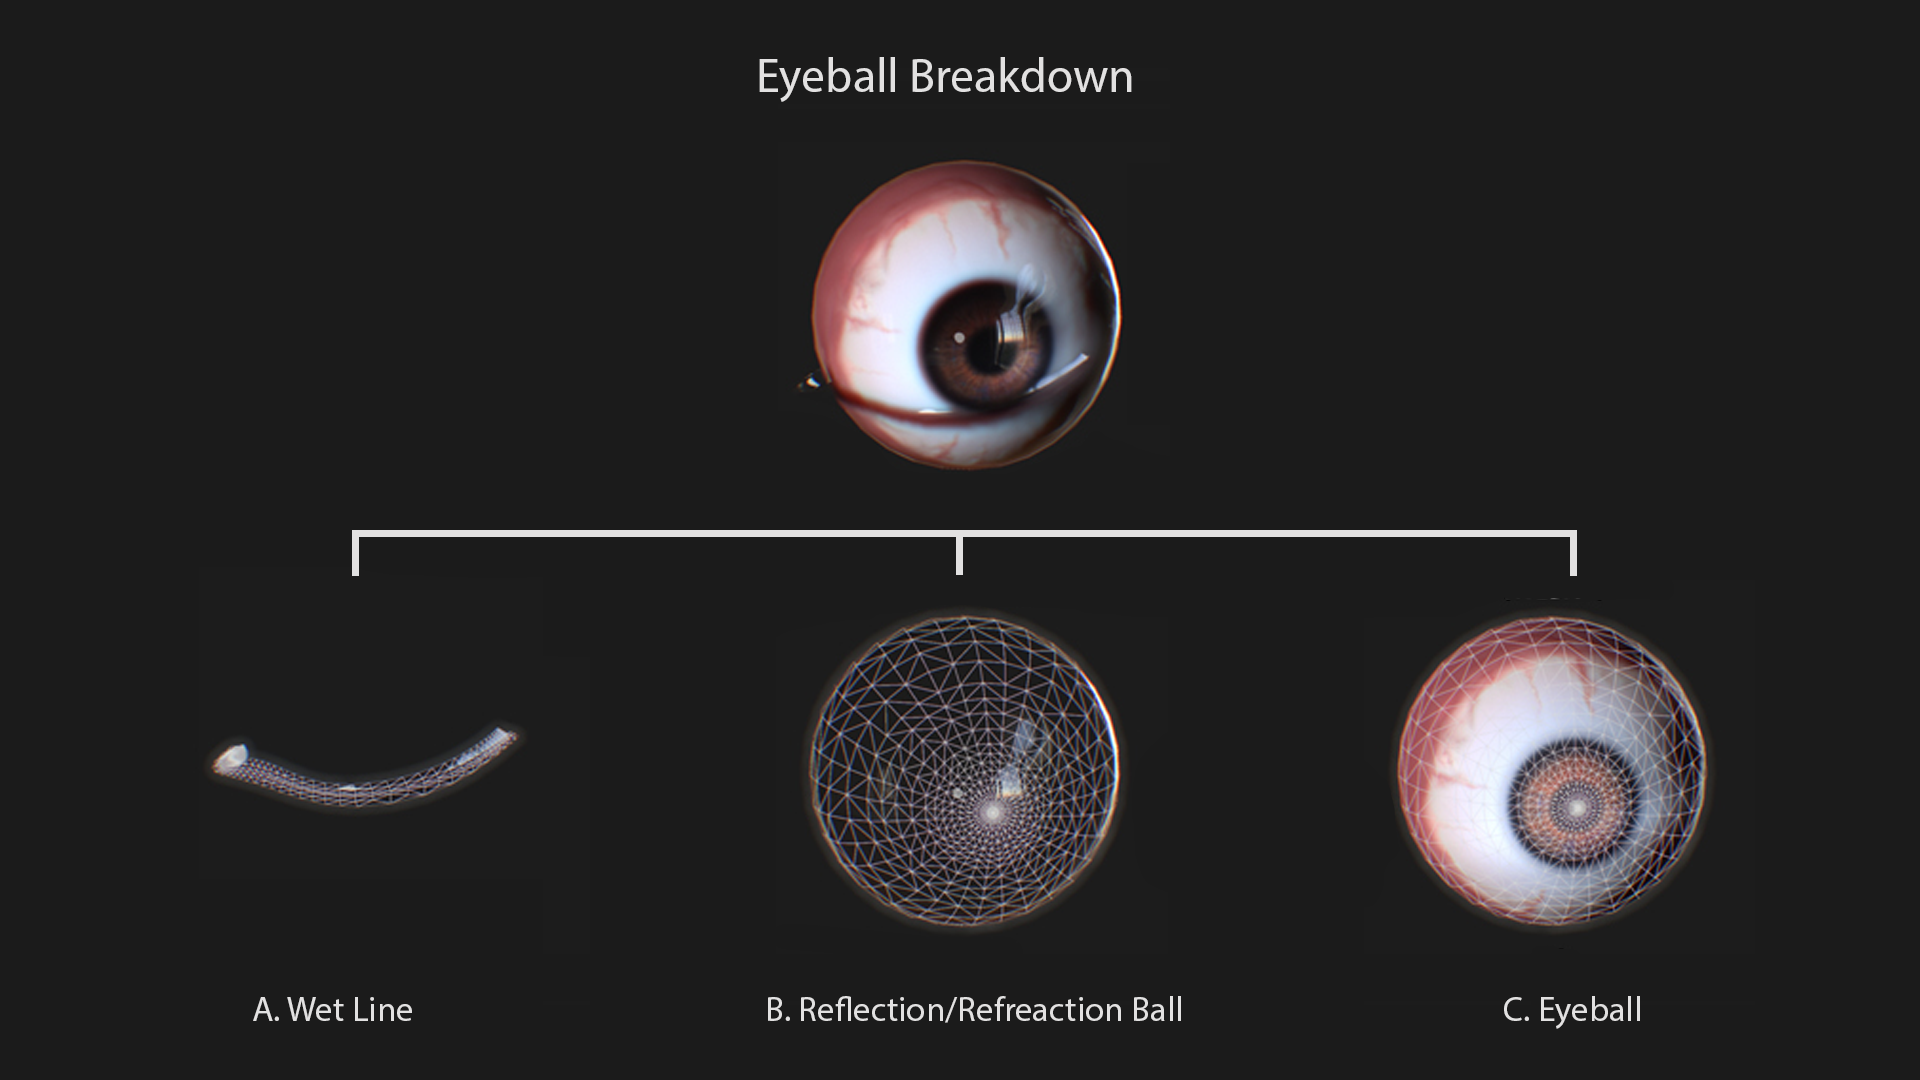
The eyeball consists of three meshes:
A. Wet line (which exists between the eyeball and bottom eyelid)
B. Reflection/Refraction ball
C. Eyeball
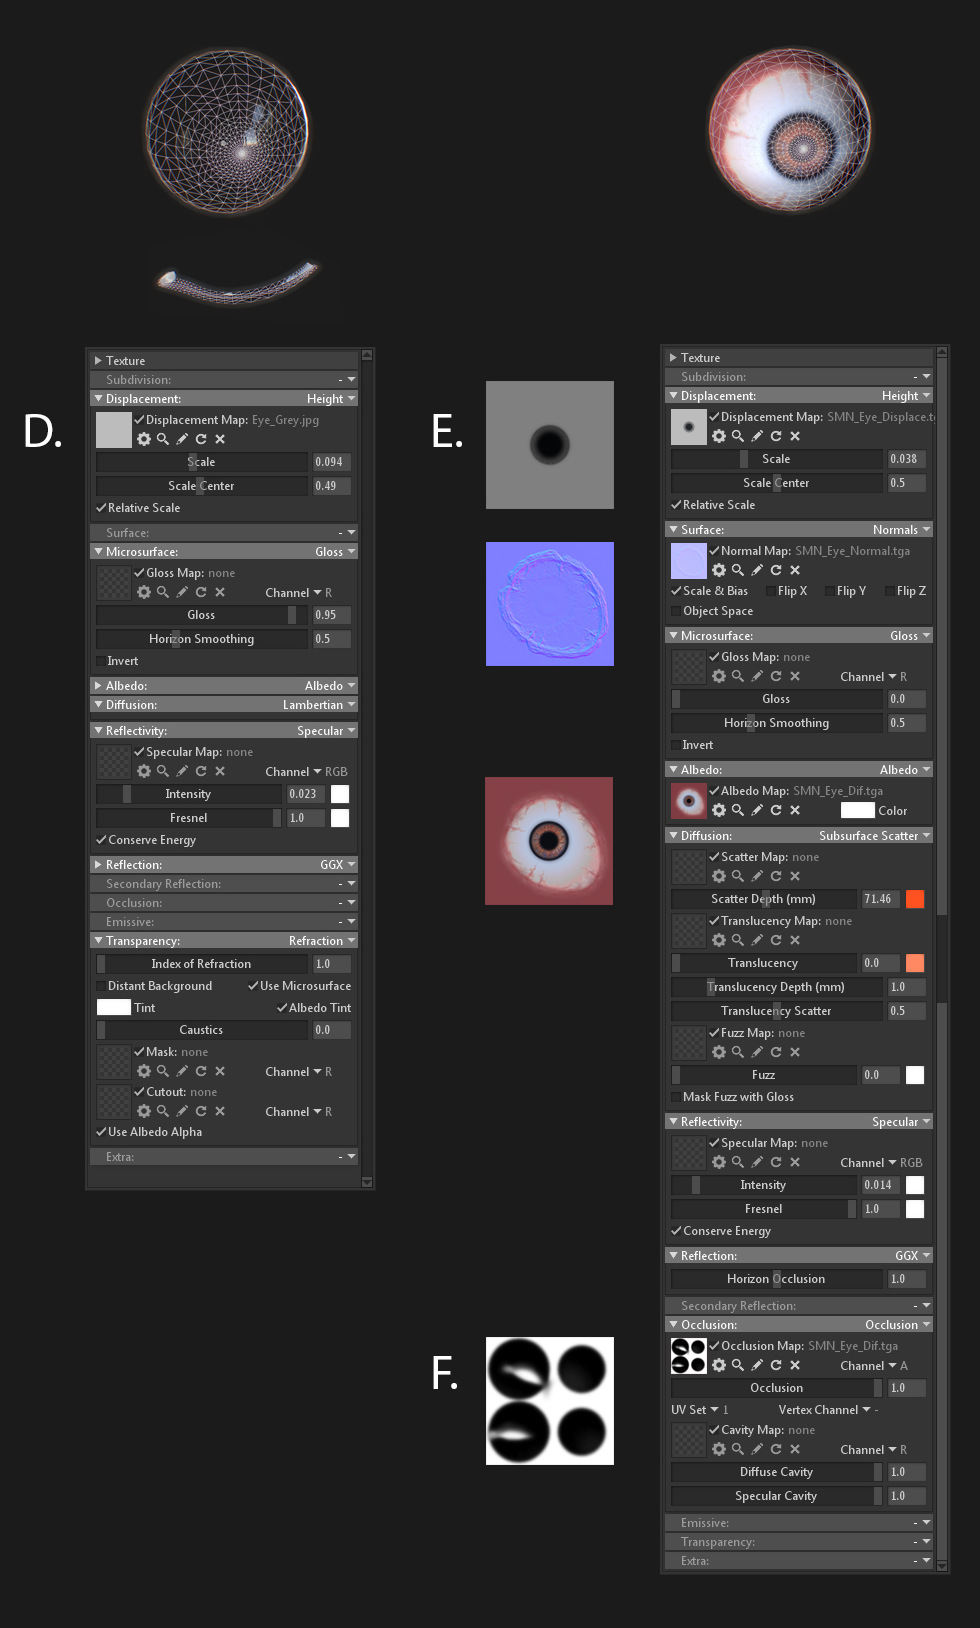
D. I’ve applied a flat 2×2 px texture to enable the Displacement shader. The general idea is to make the Reflection ball slightly bigger than the eyeball since both meshes are the same. Alternatively, you can use a bigger mesh for the Reflection ball and avoid using the Displacement shader.
E. I’ve used a Displacement map to create a concave pupil.
F. The AO map simulates the subtle ambient occlusion caused on the eyelids. You’ll need a separate UV channel here.
There are a couple of things that make me unhappy with the current approach:
- I’ve assigned the Refraction shader to the whole Reflection/Refraction ball mesh. This is incorrect, as the cornea is the only part that has refraction and this causes some problems from certain angles.
- The AO effect is not strong enough and can’t be increased using the current approach. Because my AO map is in the AO channel, the AO effect weakens once the light hits it. This is natural to AO.

I’m hoping we can find a better way.
Animation
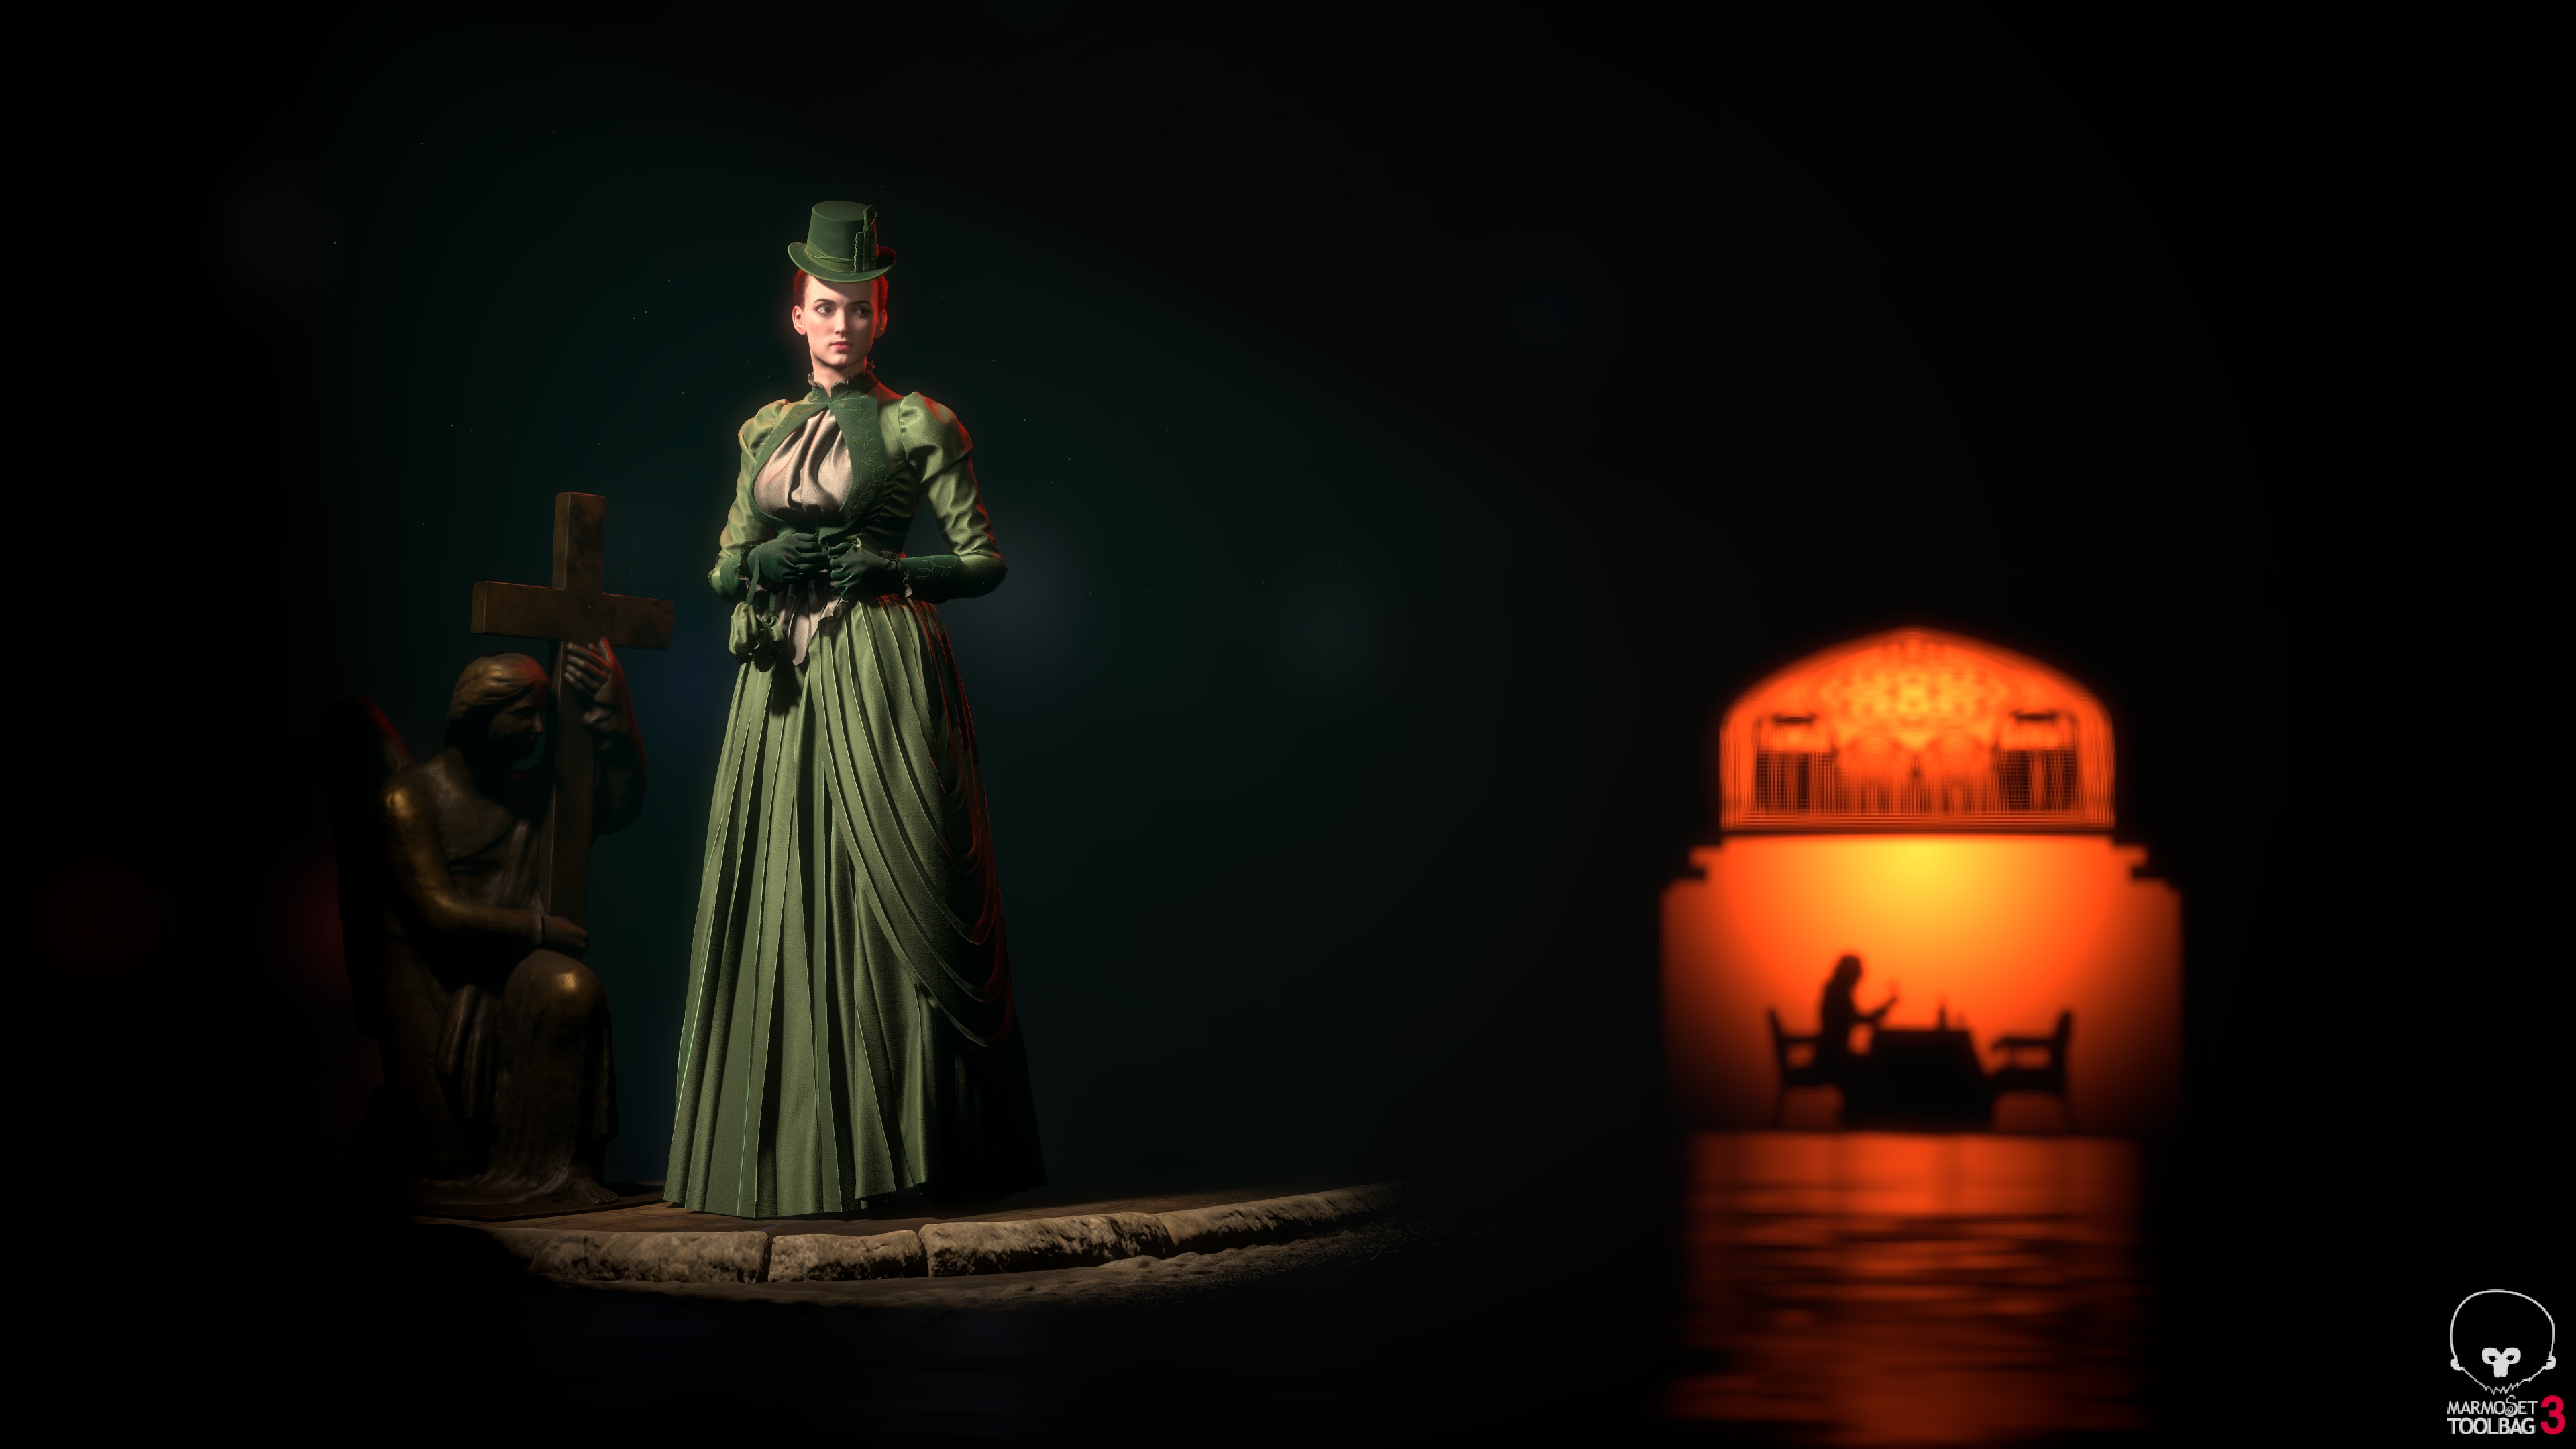
It’s worth mentioning that MT3 supports the Alembic format. This was perfect for my scene since my particle animation was generated in 3ds Max as a vertex animation. I’ve simply exported the particle asset and imported it into MT3. Camera animations can also be exported from any other 3D apps, or you can animate your cameras directly in MT3. In my case, I’ve animated my cameras inside of MT3. The animation tools are as intuitive as other features in the app, especially when you have some basic knowledge of keyframe animation.
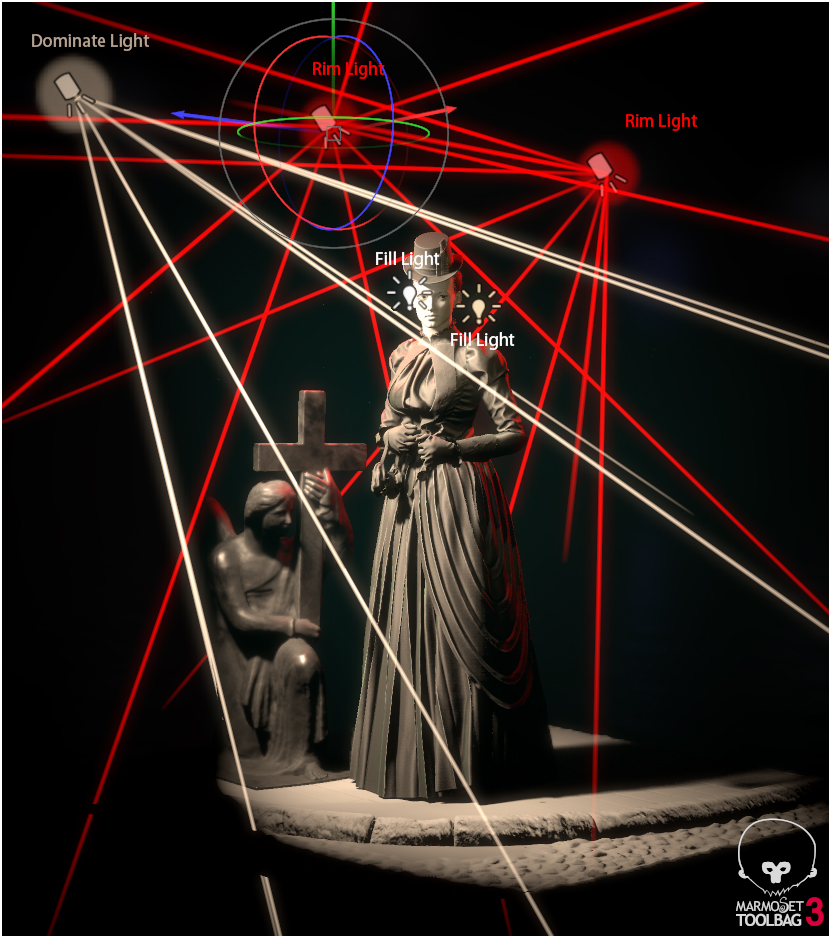
Lighting
I almost forgot to mention lighting! This is my simple setup for lighting the scene. I‘ve added a dominant Spot light, two rim Spot lights behind the character and two Omni lights to light the face up a bit.
That is all. Thank you.
Find more of Chong’s work on Artstation and learn more about Toolbag 3.


