
Let’s Get Started
Creating realistic animated fire effects is now possible using Material Layering and animation tools in Toolbag 5. By stacking procedural textures, keyframing UV transforms, and using displacement mapping, we can create a convincing fire effect without expensive simulations or baked animations. In this guide, Marmoset’s Lead Designer, Joe Wilson, walks you through the process step by step. Download the project to follow along and take a closer look at the scene setup. Note: You will need to have Toolbag 5 installed to be able to open the file correctly.
Watch our video tutorial to learn more about Material Layering in Toolbag
Material Layers Build-Up
Material Layering allows you to stack multiple layers of texture sets in a single material, adjust the layers independently, and mask and blend them to achieve various complex effects.
To create the fire effect, we need multiple layers working together to control displacement, emission, and transparency. In this scenario, using a mesh with volume works better than a flat plane. It ensures the fire is visible from all angles and conveys depth as the camera rotates around it. The mesh also follows the shape of the engine’s exhaust, making the fire appear to emerge naturally around the edges of the stretched cylindrical part.
To start with Material Layering in Toolbag, select your material from the Materials tab and pick the Mask layering mode from the Layers panel.
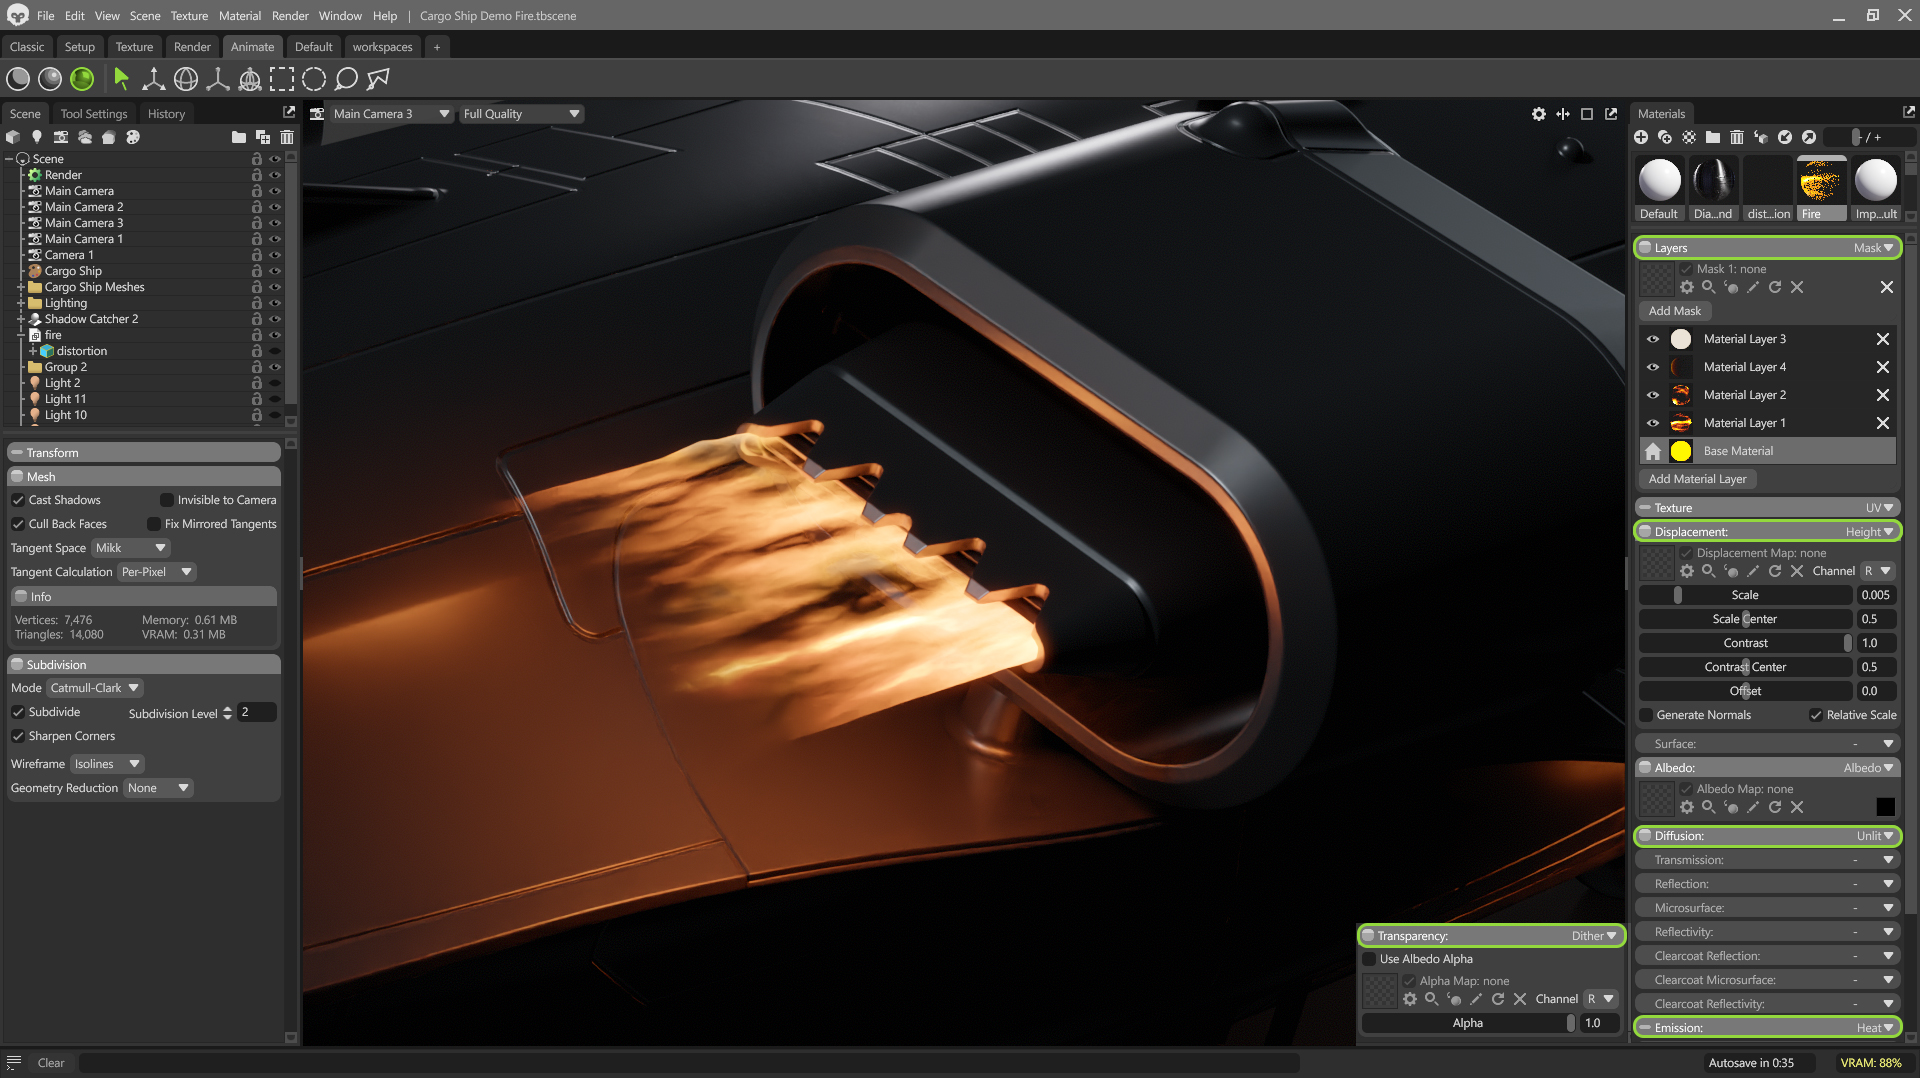
The Base Material layer lets you define the shading models you want to use for the entire layering setup, meaning that any layer above will follow suit. For this fire effect, most of the shading models in the Base Material layer setup are disabled. Enabled modules include:
- Displacement set to Height
- Diffusion set to Unlit
- Emission set to Heat
- Transparency set to Dither
Material Layer 1 and Material Layer 2 in the layer stack have procedural noise textures loaded in the Displacement, Emissive, and Transparency texture map slots. Their blend modes control how the layers interact, allowing me to build the effect from multiple components.
Material Layer 3, which contains a gradient texture, has a fixed position and uses the Multiply blend mode to mask where the other layers appear. This layer represents the primary shape of the effect, using a soft fade effect to create the tips of the flame.
Animating the Fire
Material values can be keyframed in the Timeline and Keyframes windows by turning on Autokey and changing the settings in the corresponding frames.
In this case, I’ve keyframed the UV offsets for two textures to make a panning effect and animate the fire. The layers pan in different directions, with Material Layer 3 subtly breaking up the effect.
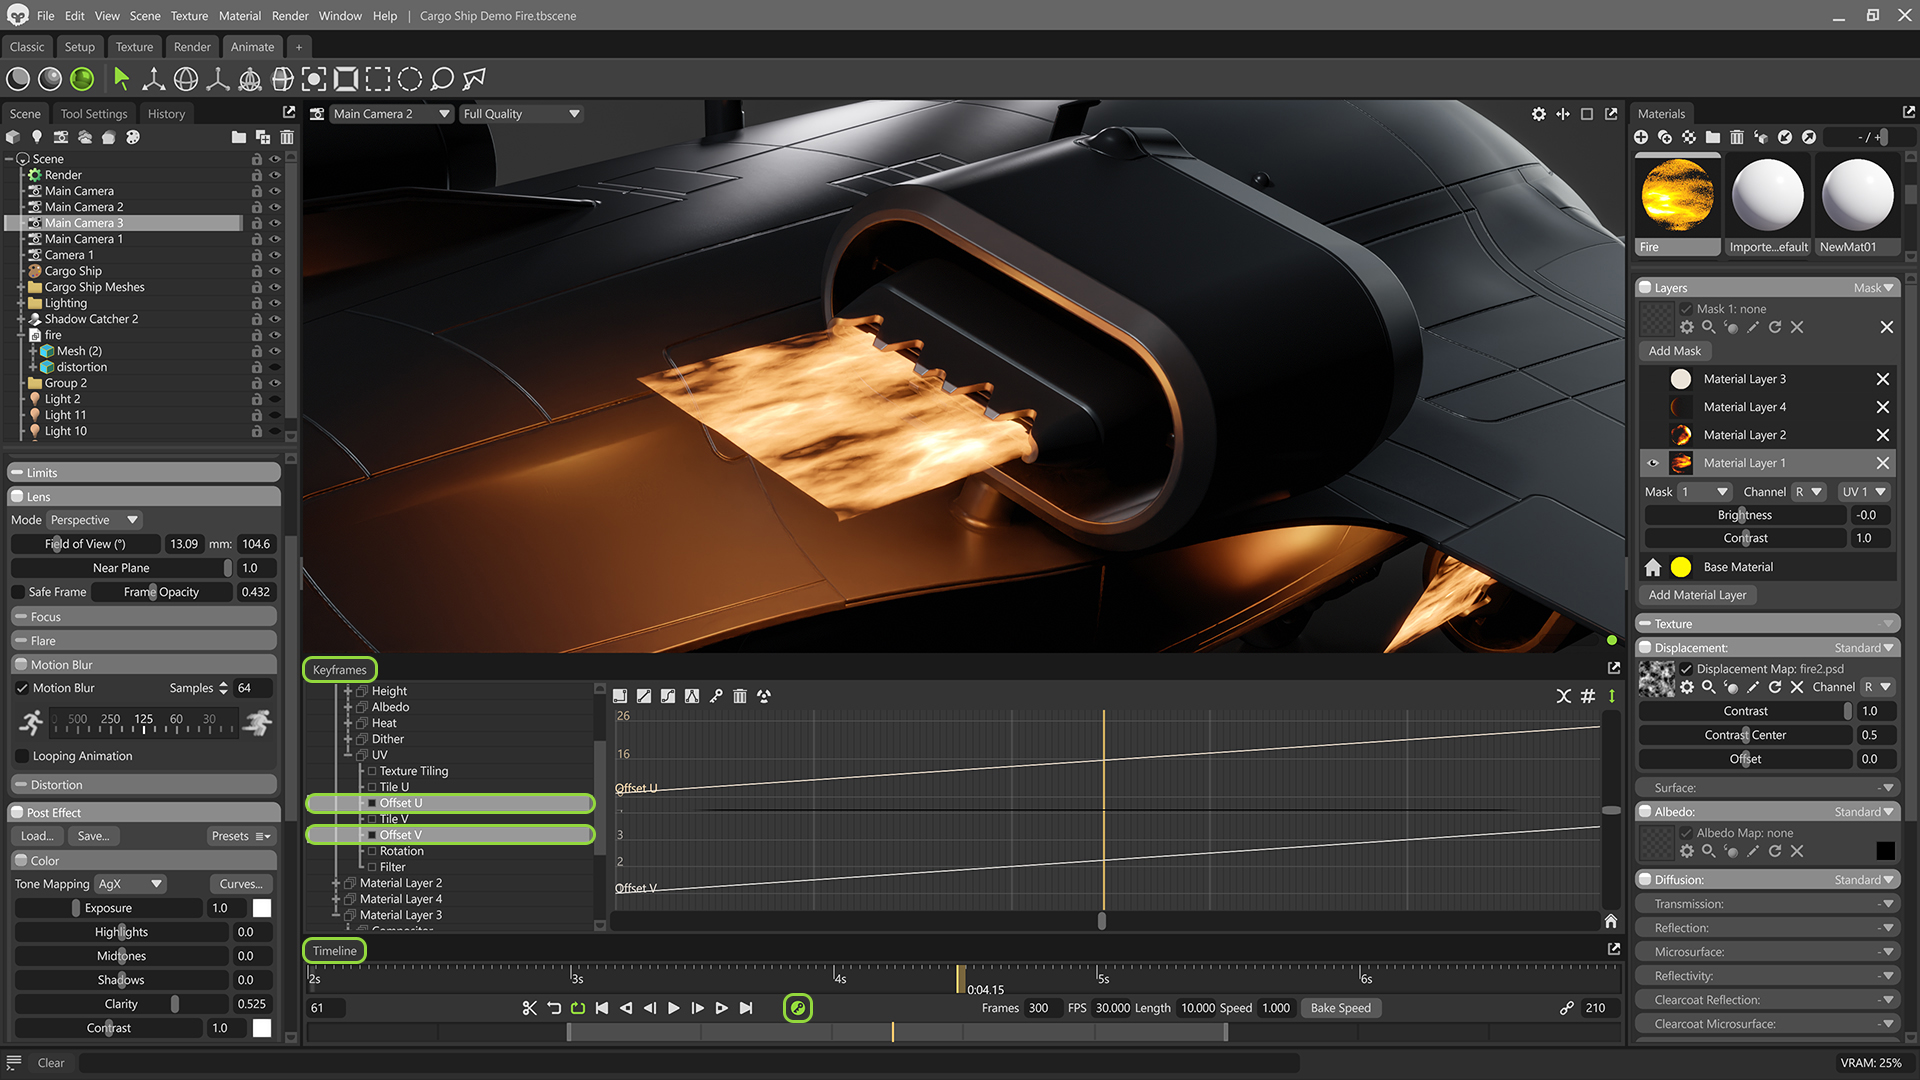
Material Layer 4 modulates the effect, allowing me to keyframe the transition where the engines turn on at the start of the video. To do this, set the Emissive to 0 Intensity, blend mode to Multiply, and keyframe the Transparency value to fade this layer to 0%.
Since fire is visible from all angles, disabling Cull Back Faces in the effect mesh’s settings will create a double-sided material and render the effect from every perspective. This makes the flames appear more volumetric rather than disappearing when viewed from the side. This can result in an intensification of the effect, so you may need to adjust the textures.
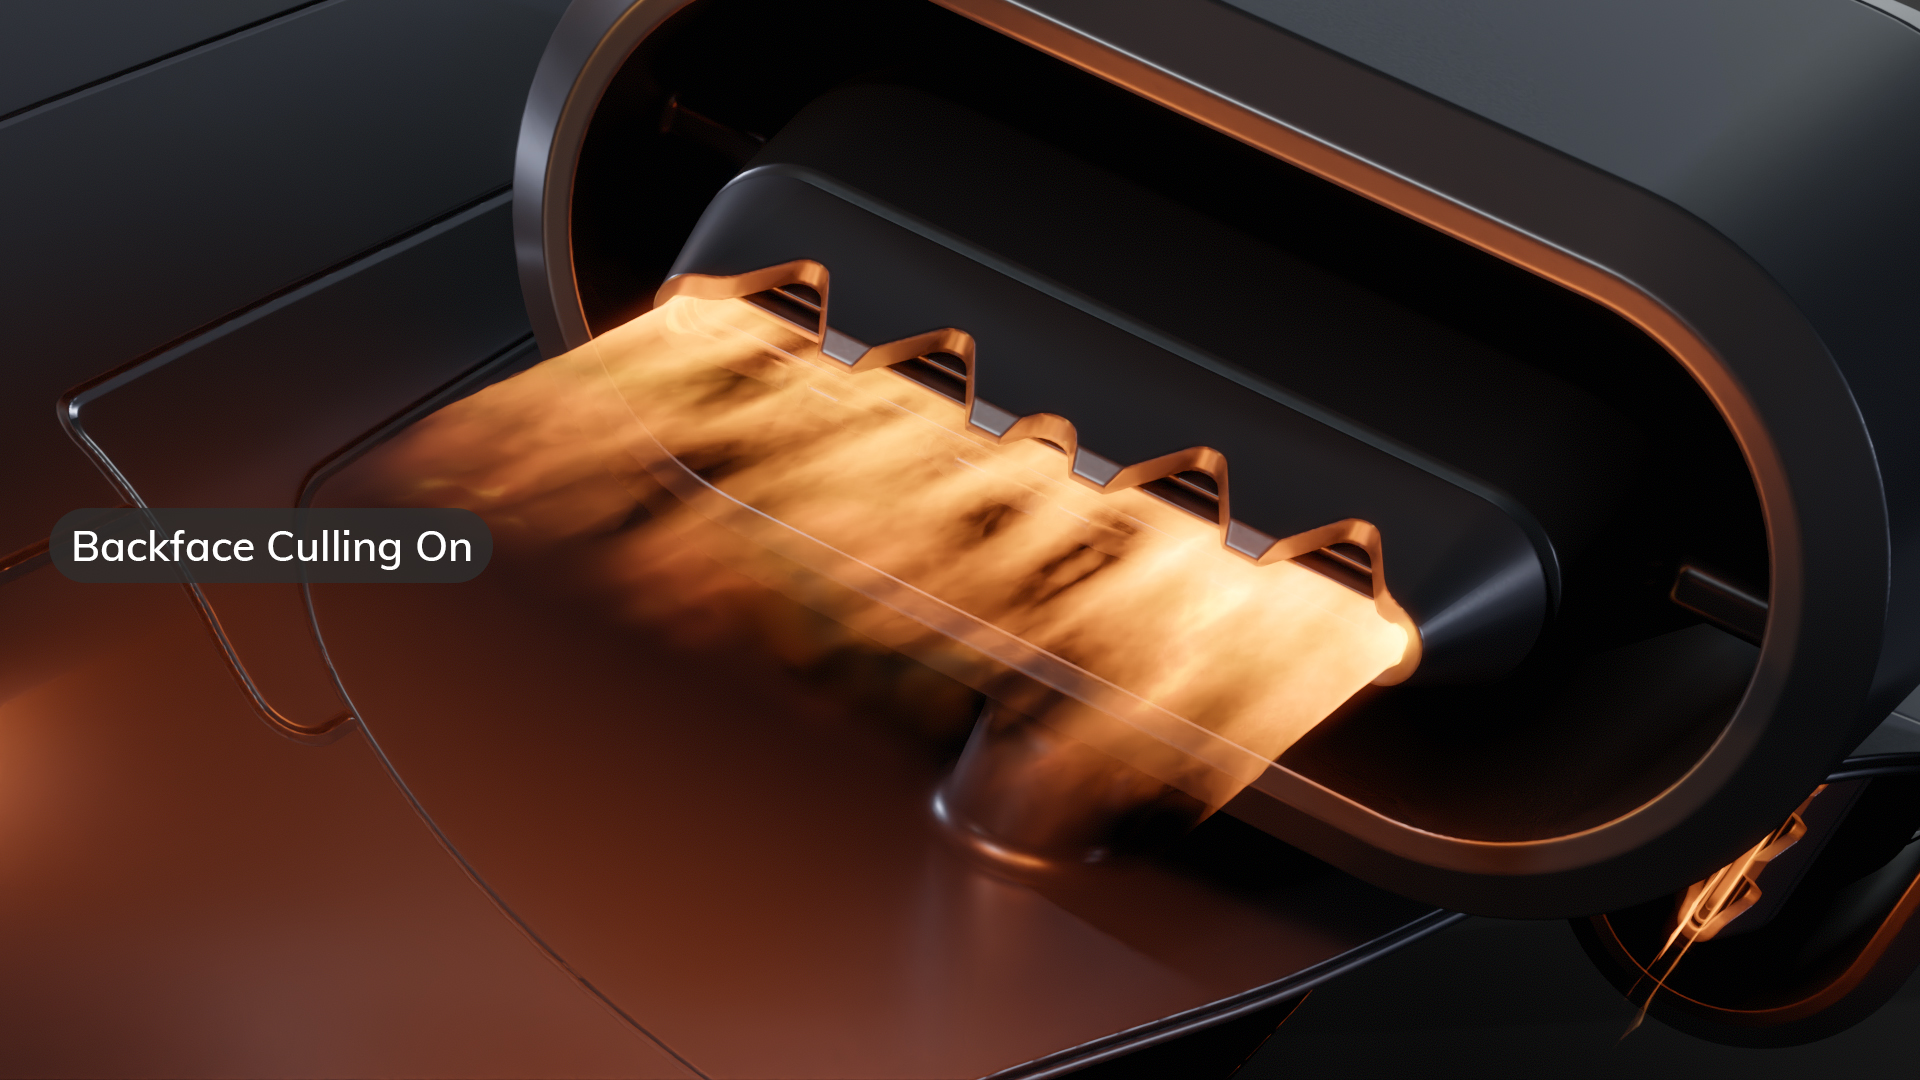
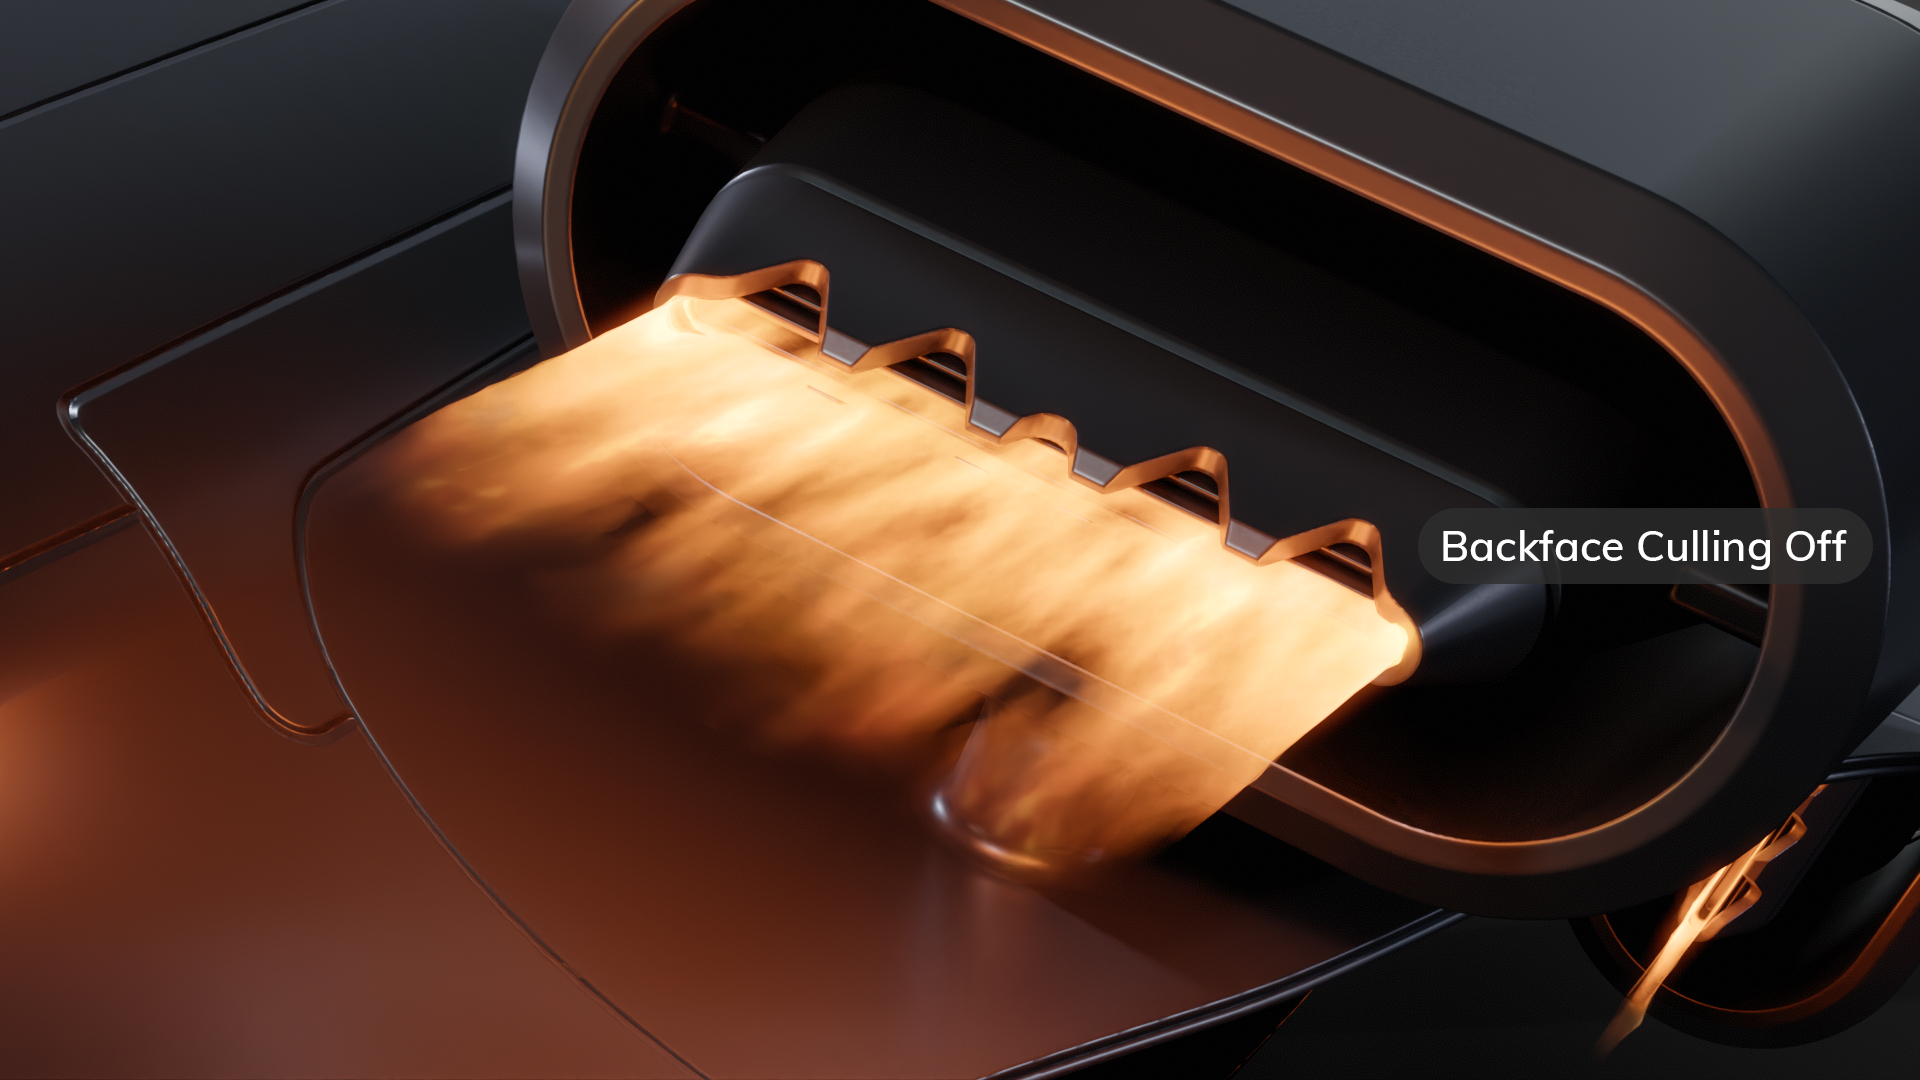
Drag the handle between the images to compare backface culling on and off.
Creating Heat Distortion
To push the effect’s realism, we can introduce some heat distortion and simulate how hot air bends light. This effect creates a wavy appearance and helps integrate the fire into the environment by producing a subtle refraction around the flames. We’ll use Toolbag’s refraction model and animation tools to animate heat distortion.
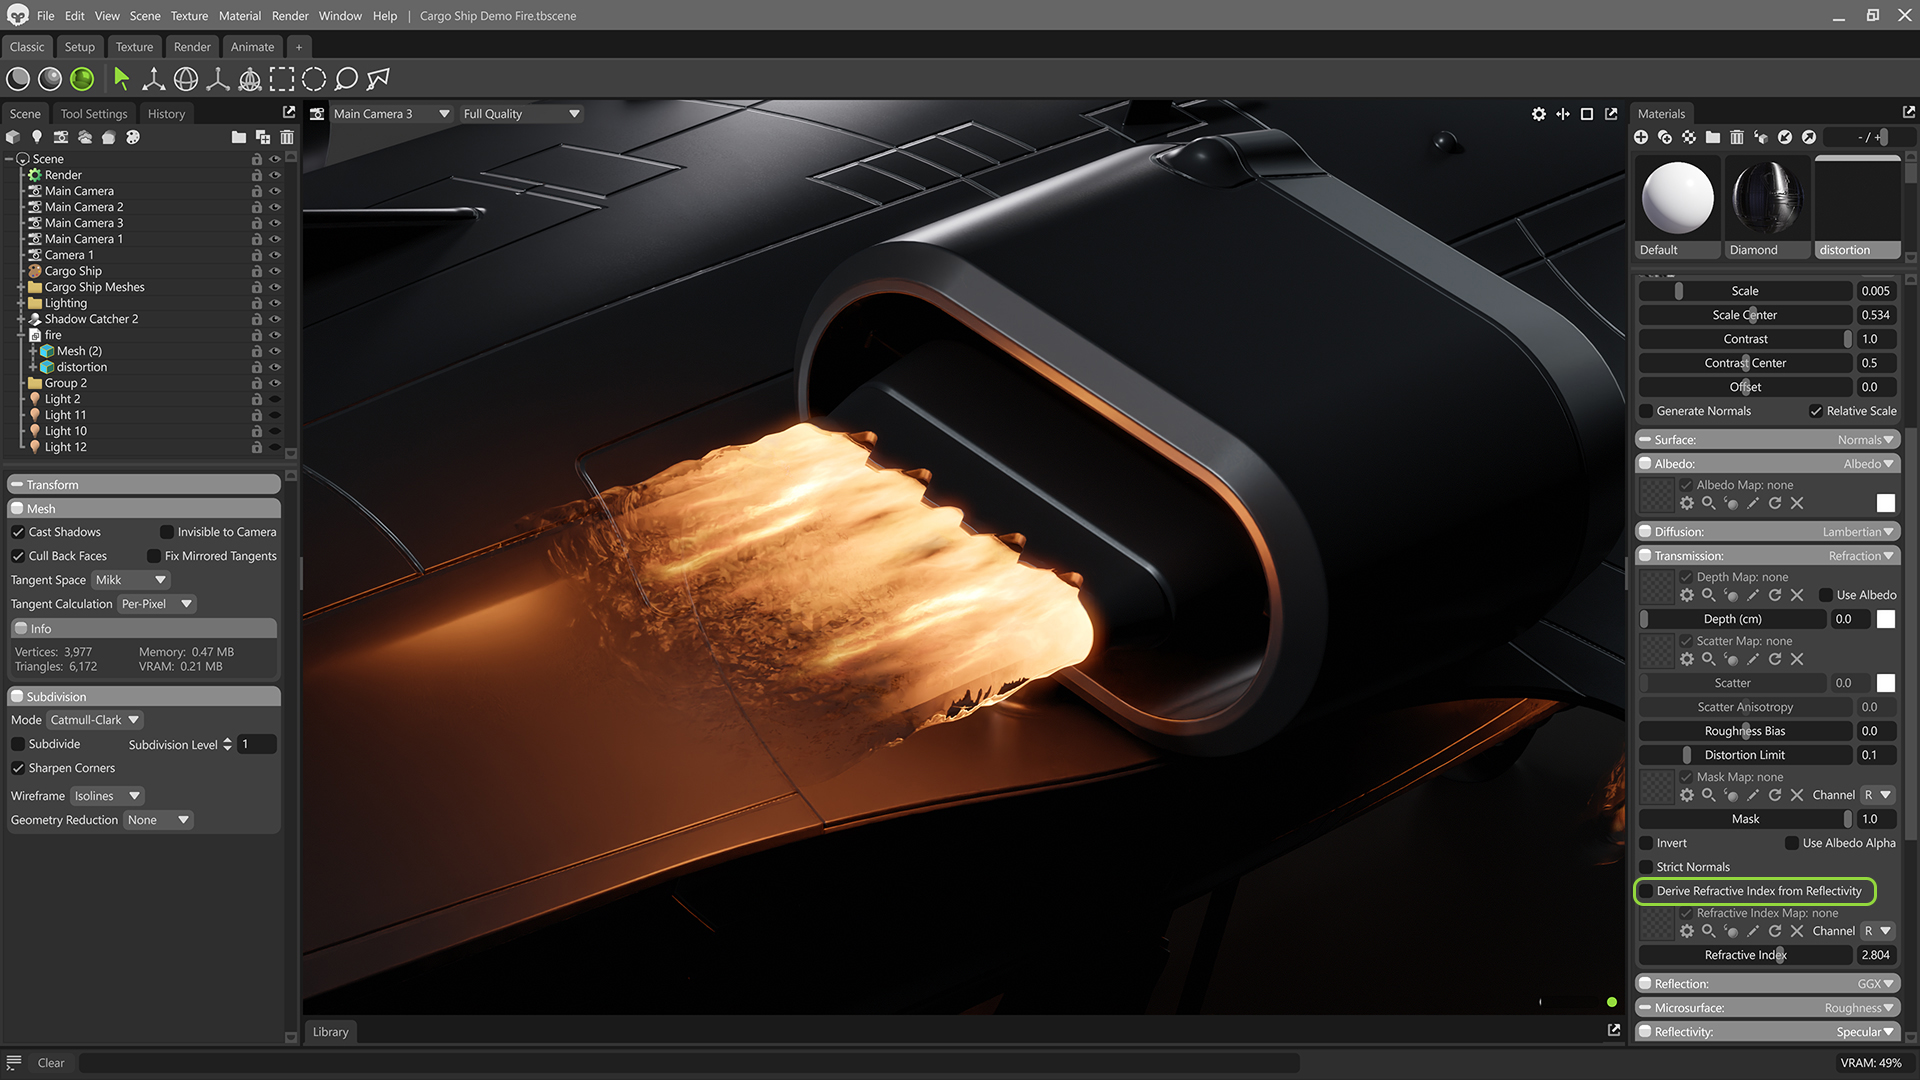
To start, I duplicated and inflated the effect mesh and enabled the Refraction shading model in the Transmission module.

I created a refractive effect without reflections by setting the Specular Intensity and Fresnel to 0. I used the displacement and gradient mask techniques on this material to create a similar motion and falloff.
By default, the Refraction Index is tied to reflectivity, limiting how strong the distortion appears. Disabling Derive Refraction Index from Reflectivity allows you to set higher values, giving you more control over the effect and letting you set unrealistically high values for more stylized results.
Since fire moves chaotically, sharp edges can make it feel unnatural in animation. Enabling Motion Blur in the Camera object settings smooths out the fire’s movement, blending frames for a more organic, realistic fire effect. Check out our quick guide to learn more about setting up Motion Blur.
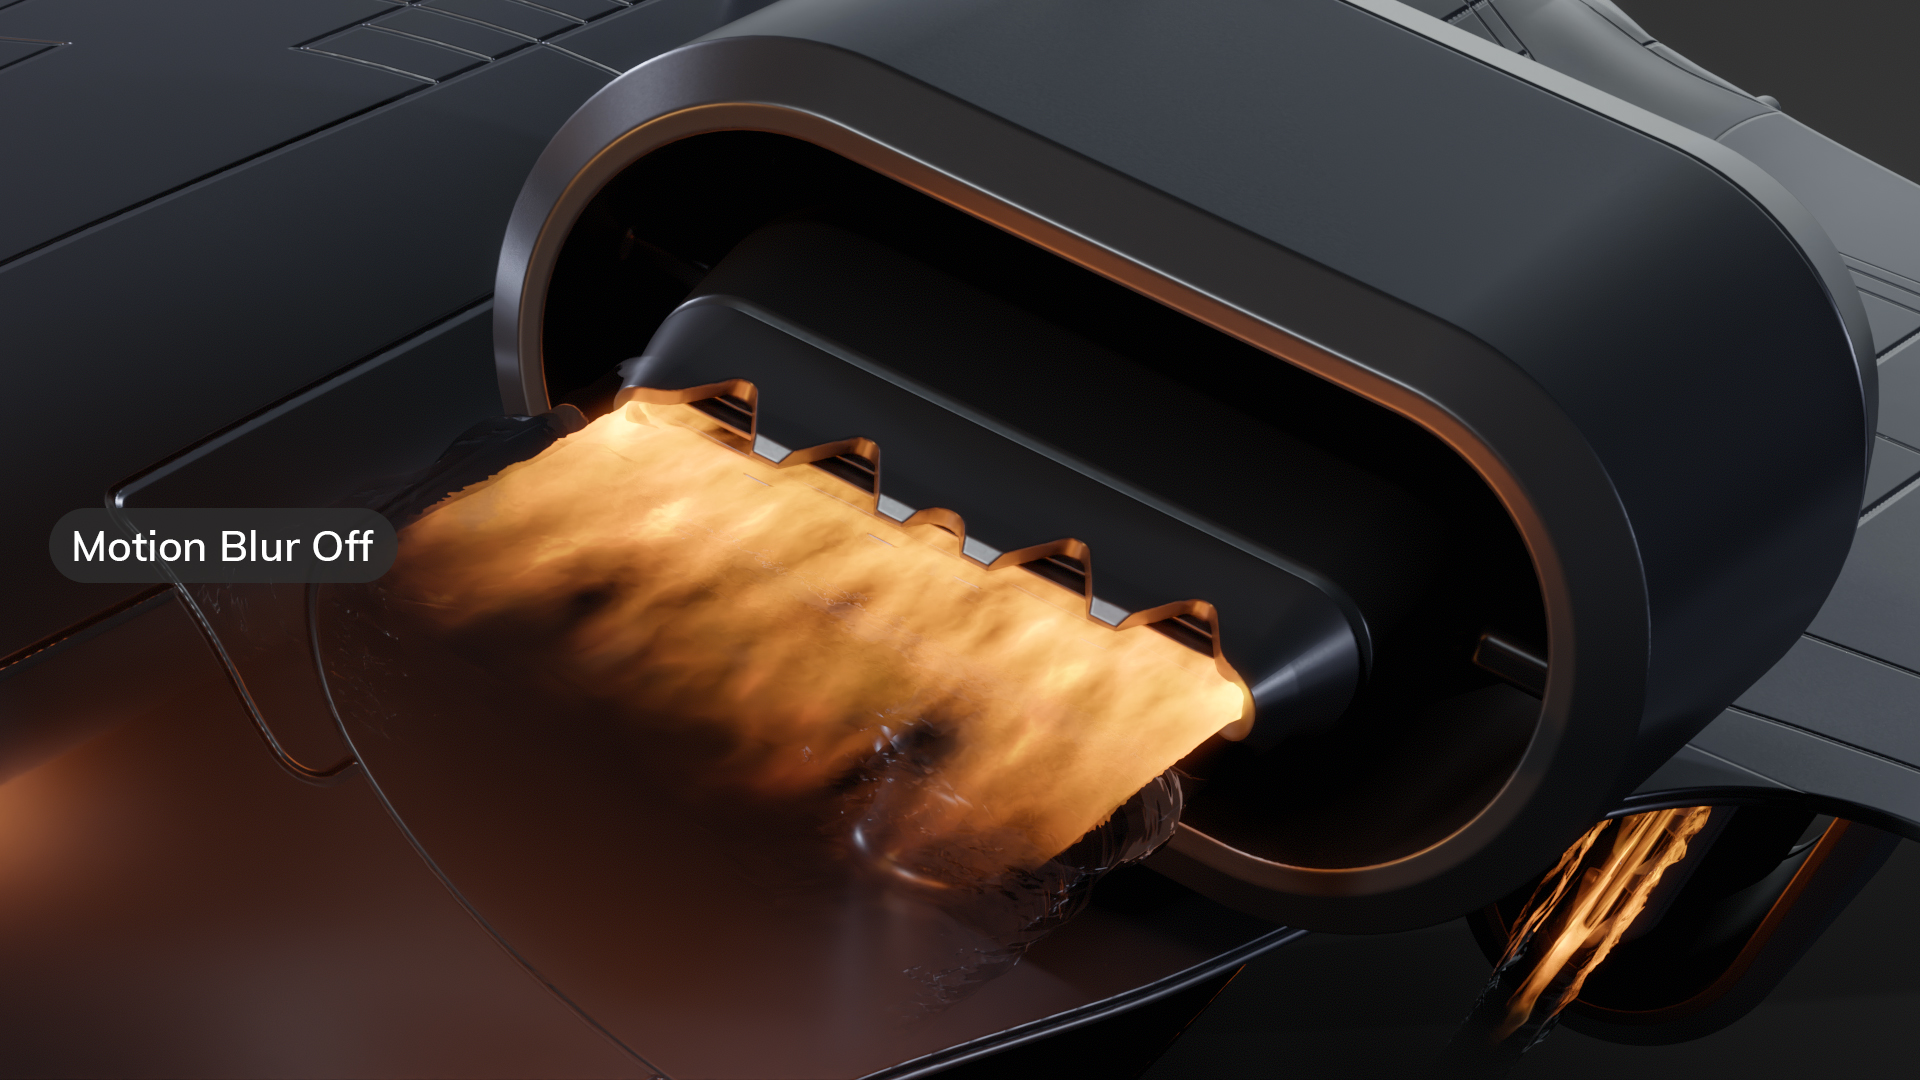
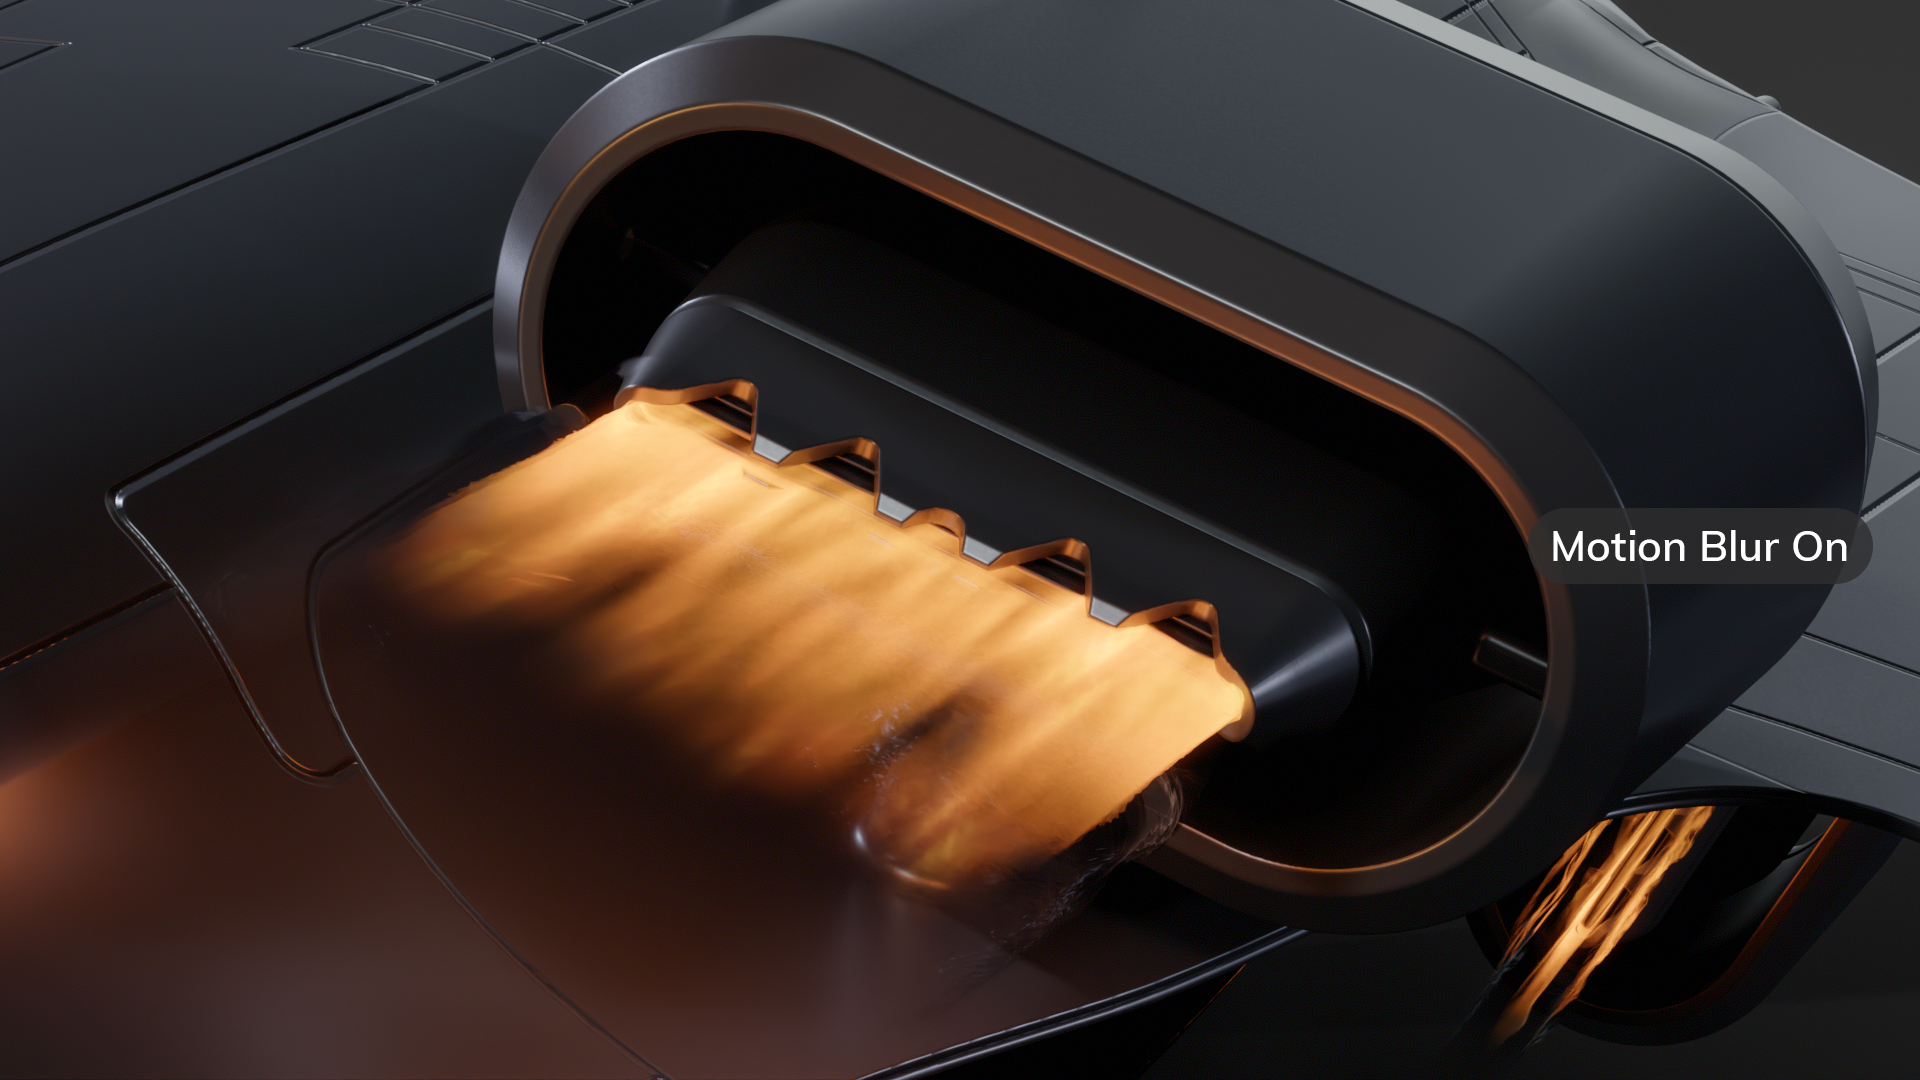
Drag the handle between the images to compare motion blur on and off.
When rendering test videos, use a low Samples count (i.e, 32 or 64) in the Render object’s settings for quick previews. When happy with the effect, increase the Samples count to achieve the best quality.
Check out the Render Output chapter of our Ray Tracing & Advanced Raster Rendering video tutorial to learn more about optimizing your ray tracing render settings.
Thanks for reading! Start a free, 30-day trial for Toolbag today to create realistic fire effects. For more Toolbag tutorials and quick guides, check out our Resources.


