Glass is a very tricky subject that I get asked about a lot, so here is a short tutorial covering some techniques for creating glass and other transparent, reflective materials in Toolbag 2. Check out the example scenes for more details on exactly how I set up the materials and lighting.

Additive Blending
Additive transparency works by adding the pixels of a particular material on top of the rest of the scene. Add in this sense means to make brighter. By default, additive blending only takes the specular reflections of the model into account, which is ideal for glass, as glass is generally transparent except where highlights are visible.
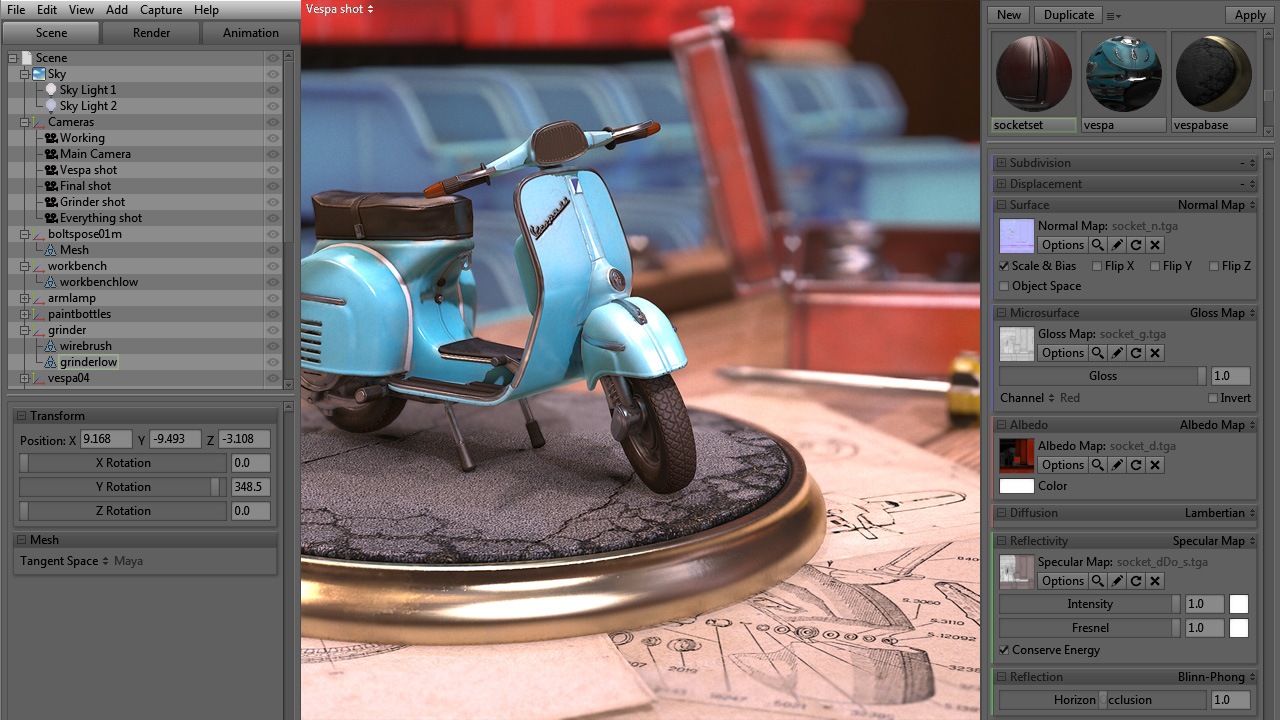
 Creating a very simple glass material involves nothing more than enabling add from the transparency drop-down, setting a logical microsurface level (for smooth glass, usually a gloss value in the 0.9-1.0 range) and setting the appropriate reflectivity value (linear specular intensity of about 0.4, or metalness value of 0).
Protip: Add Newton’s rings to the secondary reflection slot at a low intensity to give the reflections subtle color variance.
There are some limitations that you should be aware of when using additive blending to mimic glass:
- Additive materials do not cast shadows.
- Additive materials do not work with the depth of field effect (additive materials can not be rendered into the depth buffer), so it is best to avoid DOF when using add blending.
- Toolbag 2.05 does not have a refraction shader, so other objects in the scene will not distort while looking through an add blend material.
- Glass generally isn’t 100% transparent, the thicker the glass is, the more opaque it will appear. It needs some sort of murk or cloudiness. Due to the nature of additive blending, including the diffuse contribution will further brighten the object and give a glowing appearance, which is not what we’re looking for.
Protip: Additive diffuse blending can be used for a variety of interesting effects, like fire, sparks, etc.
Dithered Blending and Multi-pass Rendering
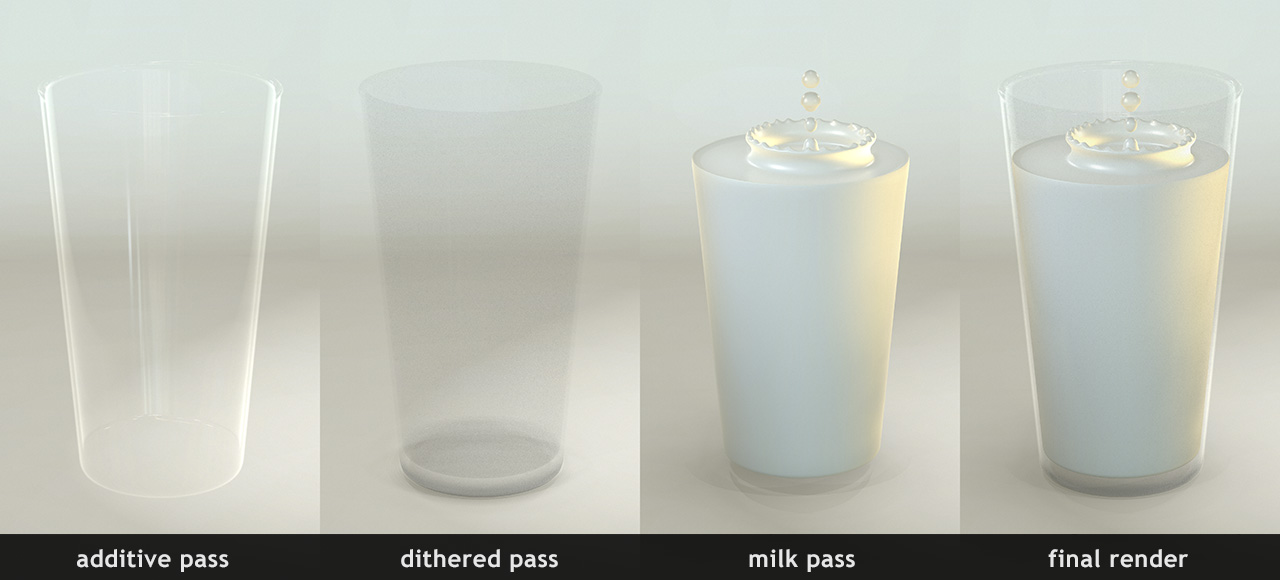
Fortunately, there is a workaround for the murk issue. The solution is to duplicate the glass mesh and use a second material with dithered blending to mimic the cloudiness. Essentially, you need to create a multi-pass shader using two identical meshes.
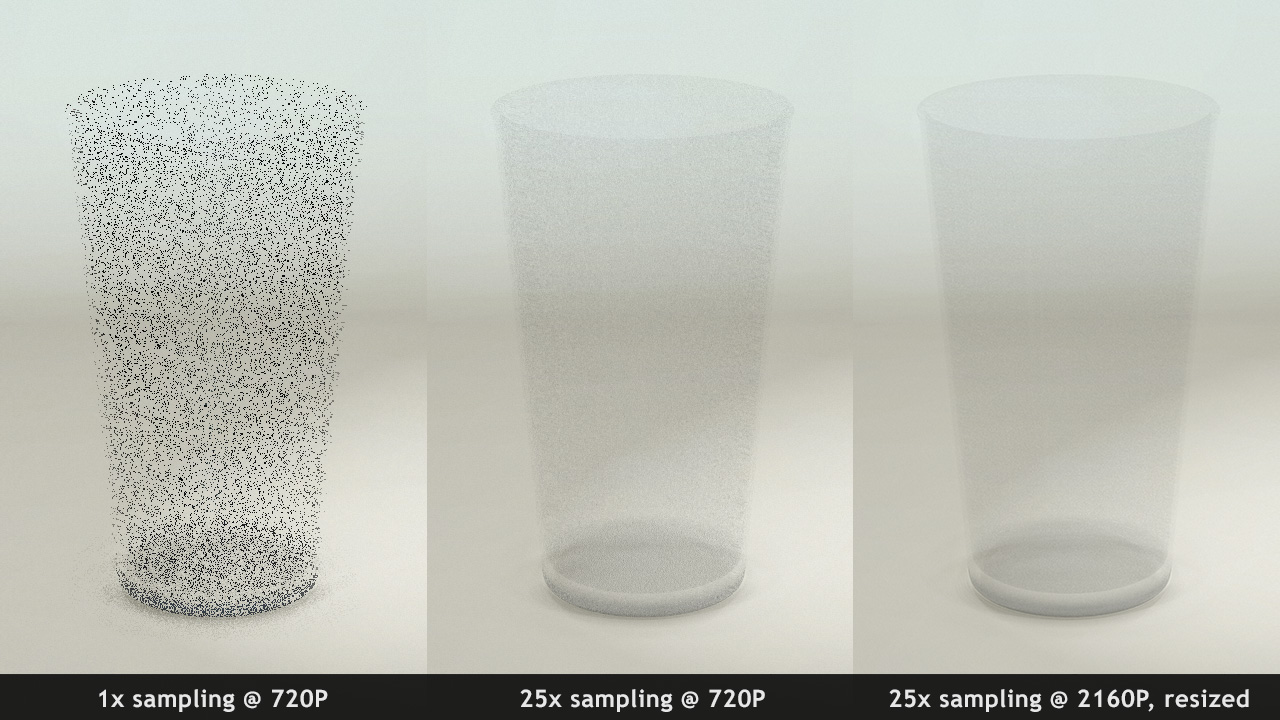
The first thing to note when using dithered blending is that it is going to look quite noisy in the viewport. The good news is that dithered blending improves significantly when rendered out with sampling enabled. The quality of dithered blending can be further improved by rendering out a very large image, (for example 3840×2160 for a target of 1080p or 720p) and resizing it in photoshop, which should take care of most of the noise.
The goal is to add a subtle, semi-transparent layer to darken the bright additive element. Materials that use dithered blending can cast shadows, which helps to ground the object in the scene as well.
Protip: Use the alpha channel of the albedo map to make thicker areas of glass more opaque in the dithered pass.
For more information on dithered transparency and hair, check out the Character Quick Reference tutorial.
Single-pass Materials and Add Tint
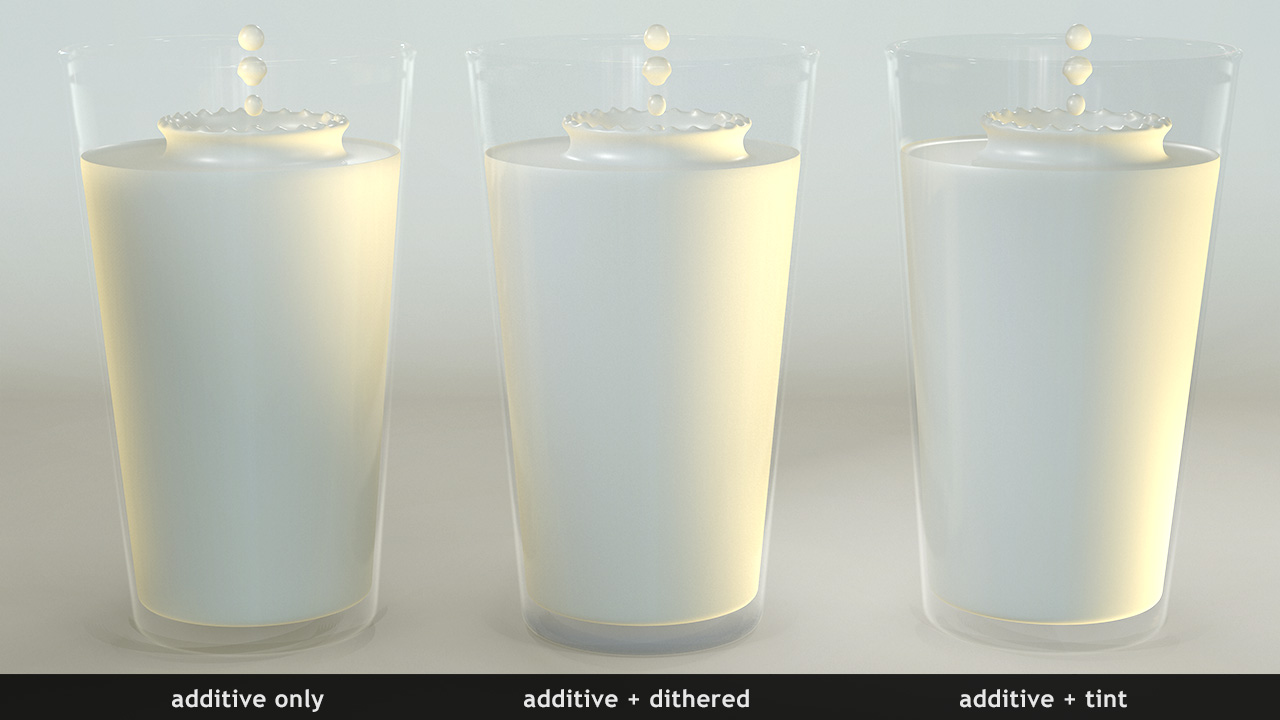
A similar darkening effect can be achieved with a single by adding a subtle tint value in the add blending options. The tint value works by multiplying the background before adding the result. However, there are some libations to this method:
- The tint value is a simple RGB value, so you can’t add any texture variation to define thicker areas of glass.
- As additive blending is being used solely here, the object will not cast shadows.
- Add tint can result in strange behavior when used with direct lights (more on this below).
Liquids and Further Limitations
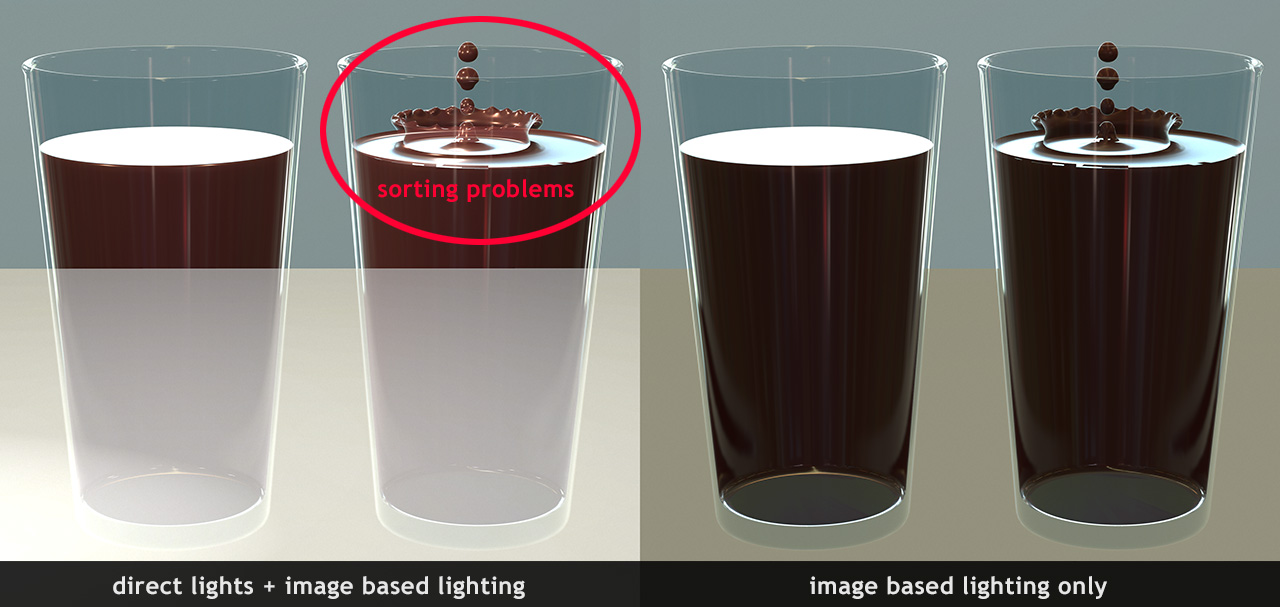
Liquids can be created with similar techniques as well, for instance, by using a dark add tint value. As mentioned above, this method has a problem with direct lights. While the additive tint will look great when the skybox is visbile, or when background objects are lit only by the image based lighting, directional lights tend to wash out the effect.
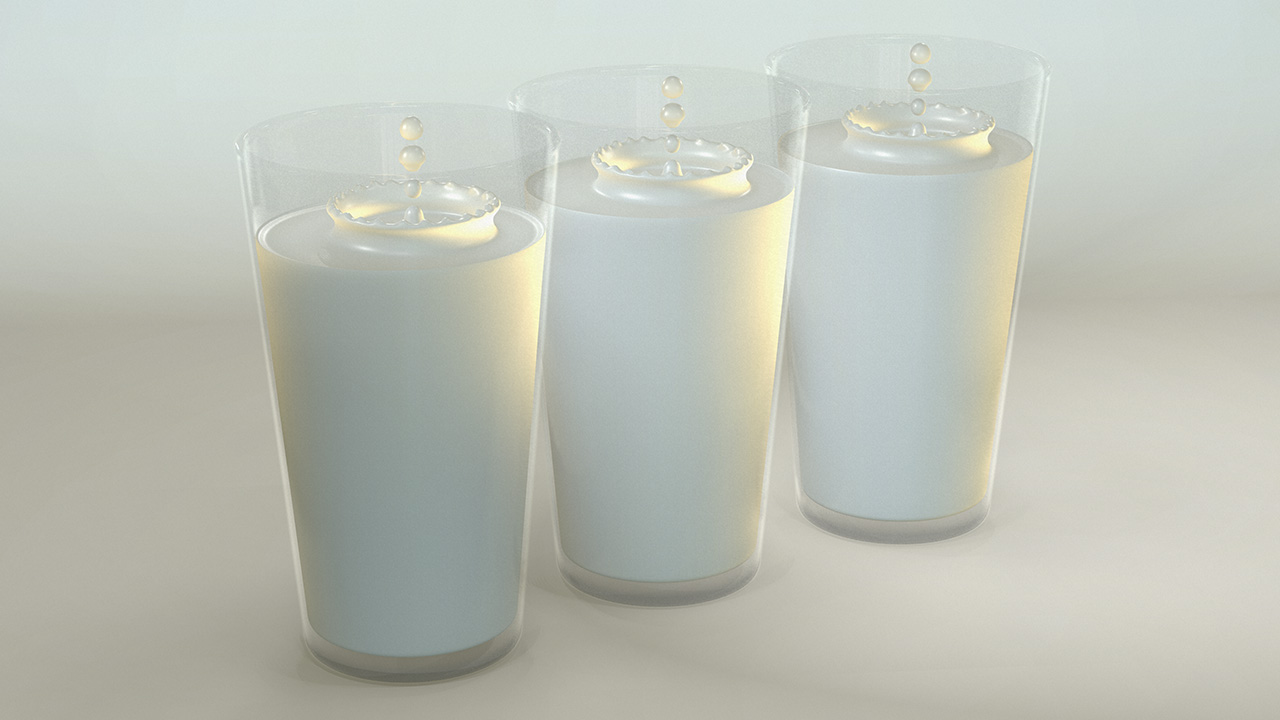
Sorting can also be a problem, generally you want to make sure your liquid mesh is as simple as possible. You can see when I use the same mesh for the milk example, which has complex overlapping geometry for the splash effect, that various sorting artifacts are present.
Adding Texture Variation
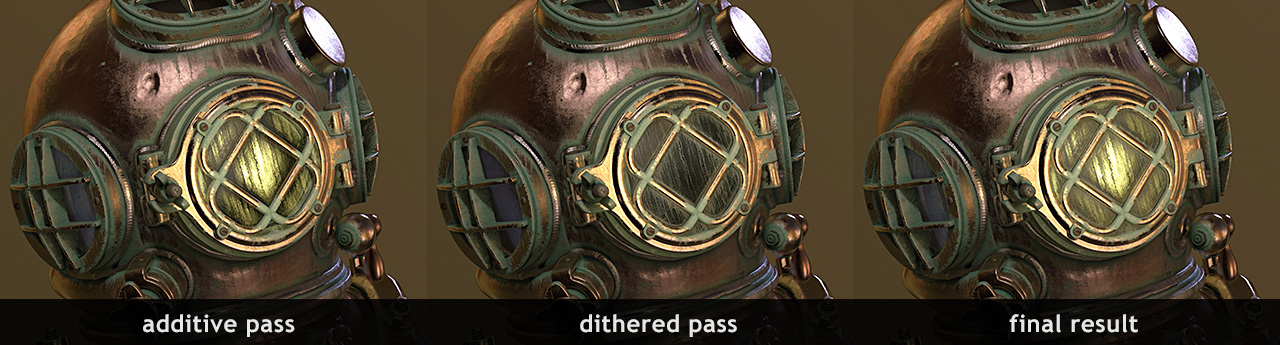
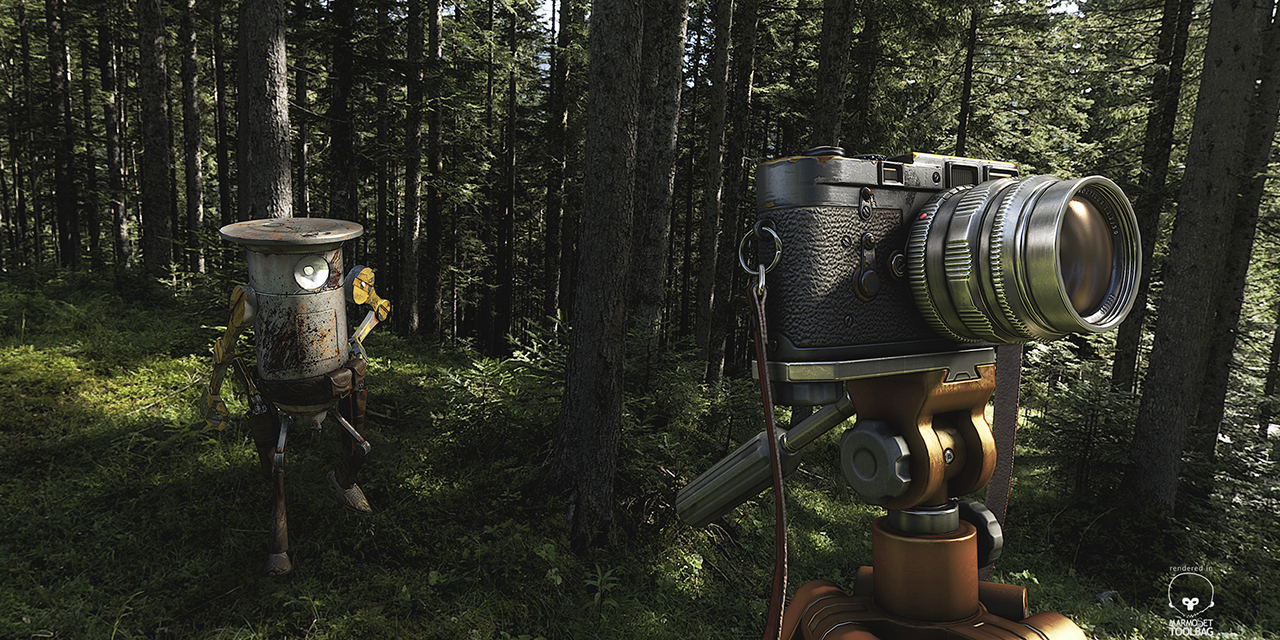
 On a more advanced level, we can use our multi-pass system along with texture maps to blend between clean, transparent glass and dusty, opaque areas where other materials (like salt or calcium on the diving helmet) have built up over time.
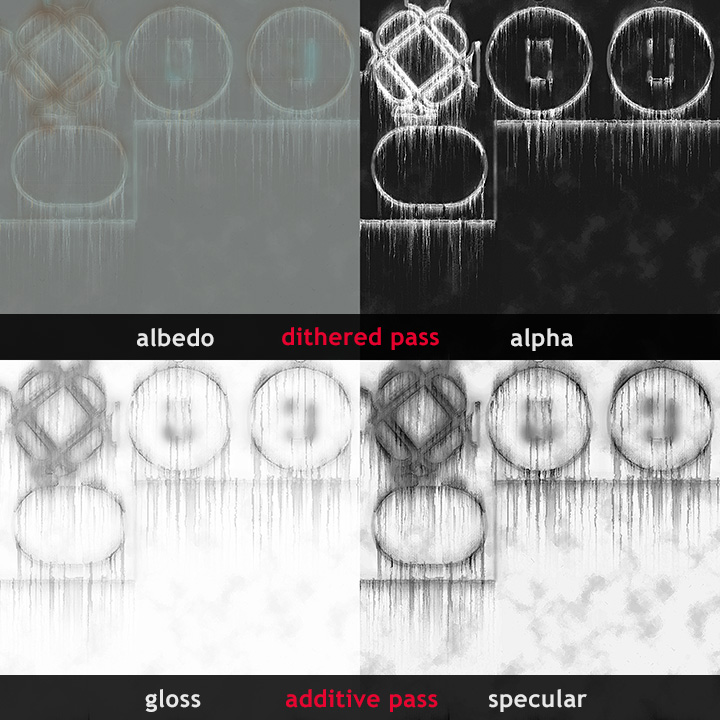
To do this, use the alpha map hooked up to your dithered material to define where the crud is. Then, invert that map so that the cruddy areas are dark, and load that map into the gloss and specular slots in your additive material. You can also add further variation to the gloss and/or specular maps for interest.
If using the metalness workflow, use a metalness value of 0 and use the gloss/roughness map to define the surface variation.
Conclusion
The basic principles outlined in this tutorial can be used to create all sorts of different materials, such as simple glass, dirty windshields, broken glass, plexiglass and other transparent materials.
![]()
The mulit-pass shader setup can be used for clear coat effects as well, like car paint, carbon fiber, adding a wet layer for eyeballs, etc.
Additive blending can be used to create glowing effects as well. Check out Daniele “Danko” Angelozzi’s inventive use of additive materials to create a fire effect: Ilmenite Titan Turntable. See more of Daniele’s work on his portfolio.
Mix and match the various elements explained in this tutorial to see what sort of unique effects you can come up with.