Let’s Get Started
Toolbag 4’s Microfiber diffusion model will allow you to create a material that accurately represents a vast range of fabrics, such as lace, velvet, and wool. In this breakdown, we’ll cover the basics of setting up a fabric shader and take a look at some practical use cases by artists Pete Mc Nally and Anson Weese.
Featured art by Linus Tegelbratt and Sergio Acevedo Ruiz
Using the Microfiber Shader
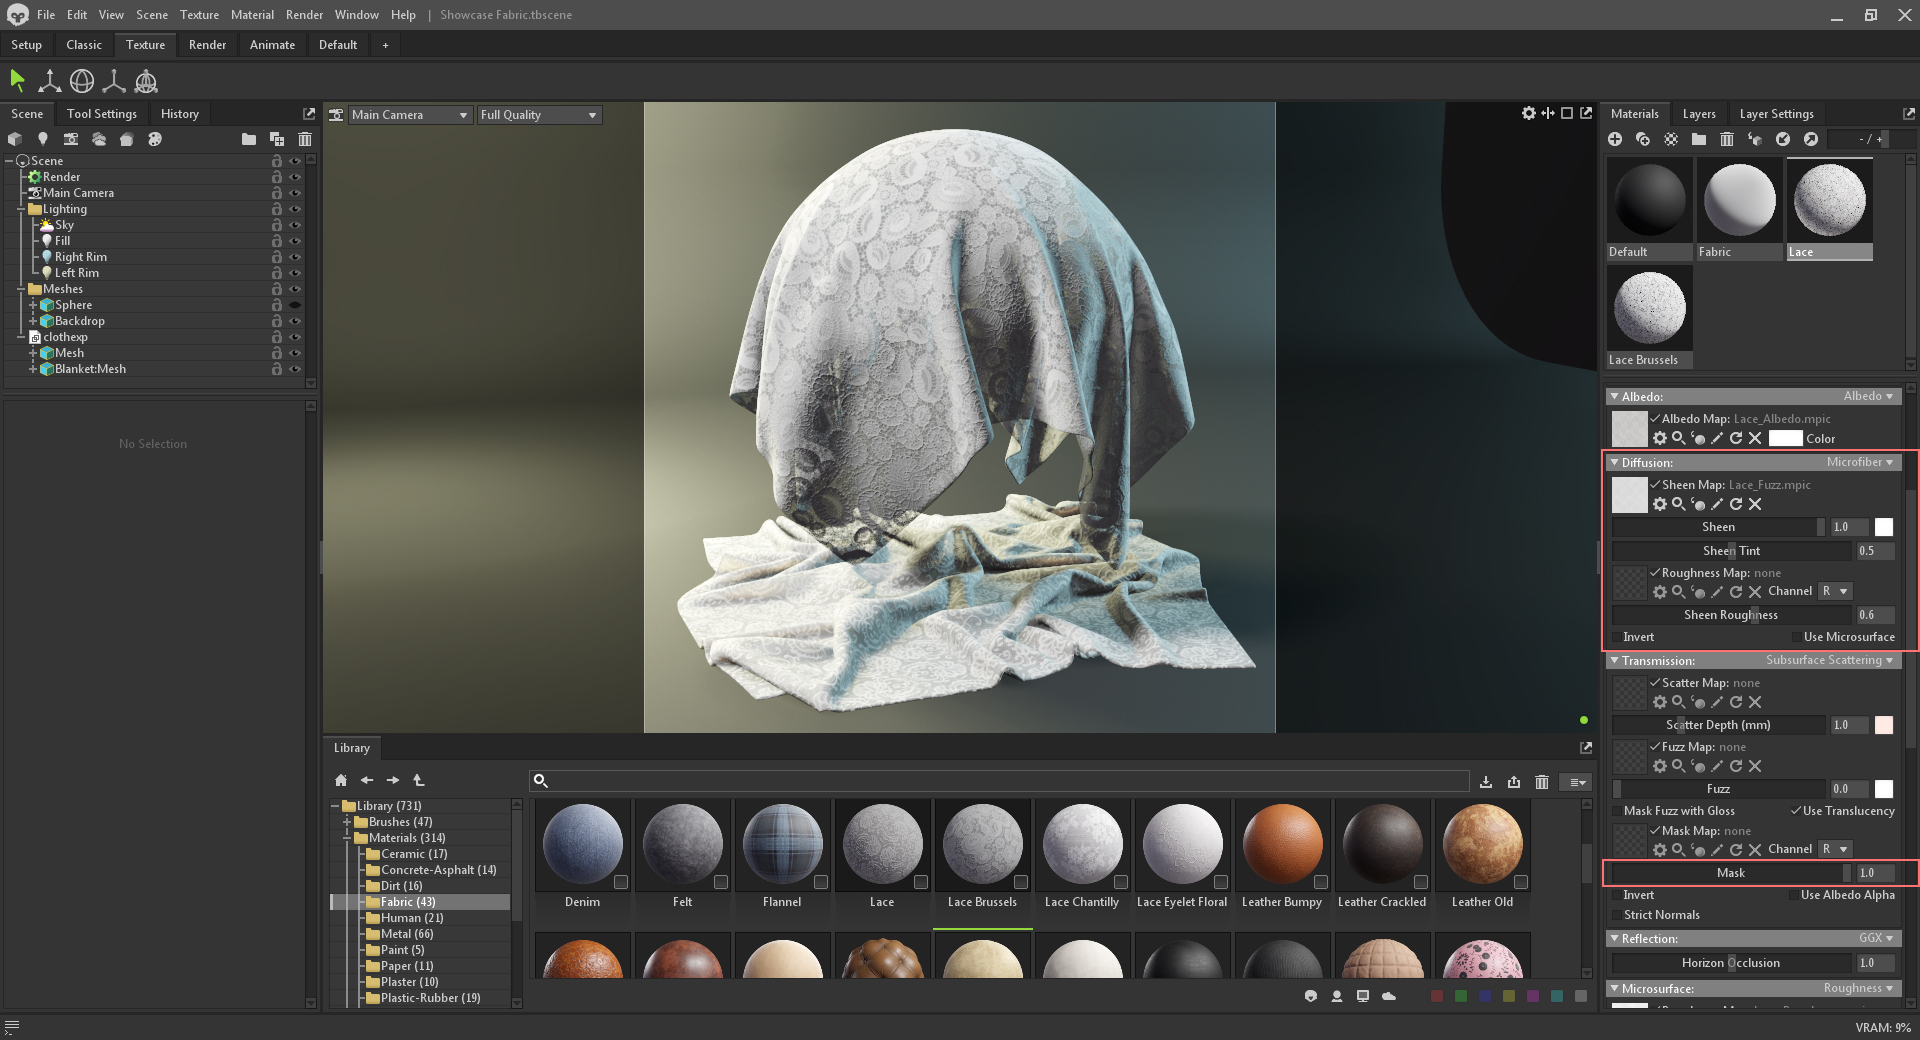
To get started, select or create a Material, and change the Diffusion module to Microfiber. You’ll notice some sheen settings that can be adjusted.
- Sheen – This slider is responsible for the overall intensity of the effect.
- Sheen Tint – Tints the Sheen effect with the albedo value. You can tint the Sheen directly by authoring a colored texture or using the color picker to the right of the Sheen slider. This value should generally be set to 0 if you’re tinting Sheen directly.
- Sheen Roughness – Controls how tight or broad the Sheen effect is. This allows you to independently control Reflectivity and Sheen Roughness, though you can use your base Roughness map by enabling Use Microsurface.

If you want to create translucent cloth, use the Mask parameter in the various Transmission models. Currently, Transmission will override Diffusion if the Transmission Mask slider is set to 1.0. A value of 0.5 with Subsurface Scattering is a good starting point.
The scattering shading models still use Fuzz, which is generally more appropriate for representing peach fuzz on skin, and blending in Sheen may create odd results. We recommend exploring the various fabric materials found in the Library and playing with their settings to learn more. The Library also includes a Showcase Fabric scene that you can download and use to test different fabric materials.
Towel Shader Breakdown
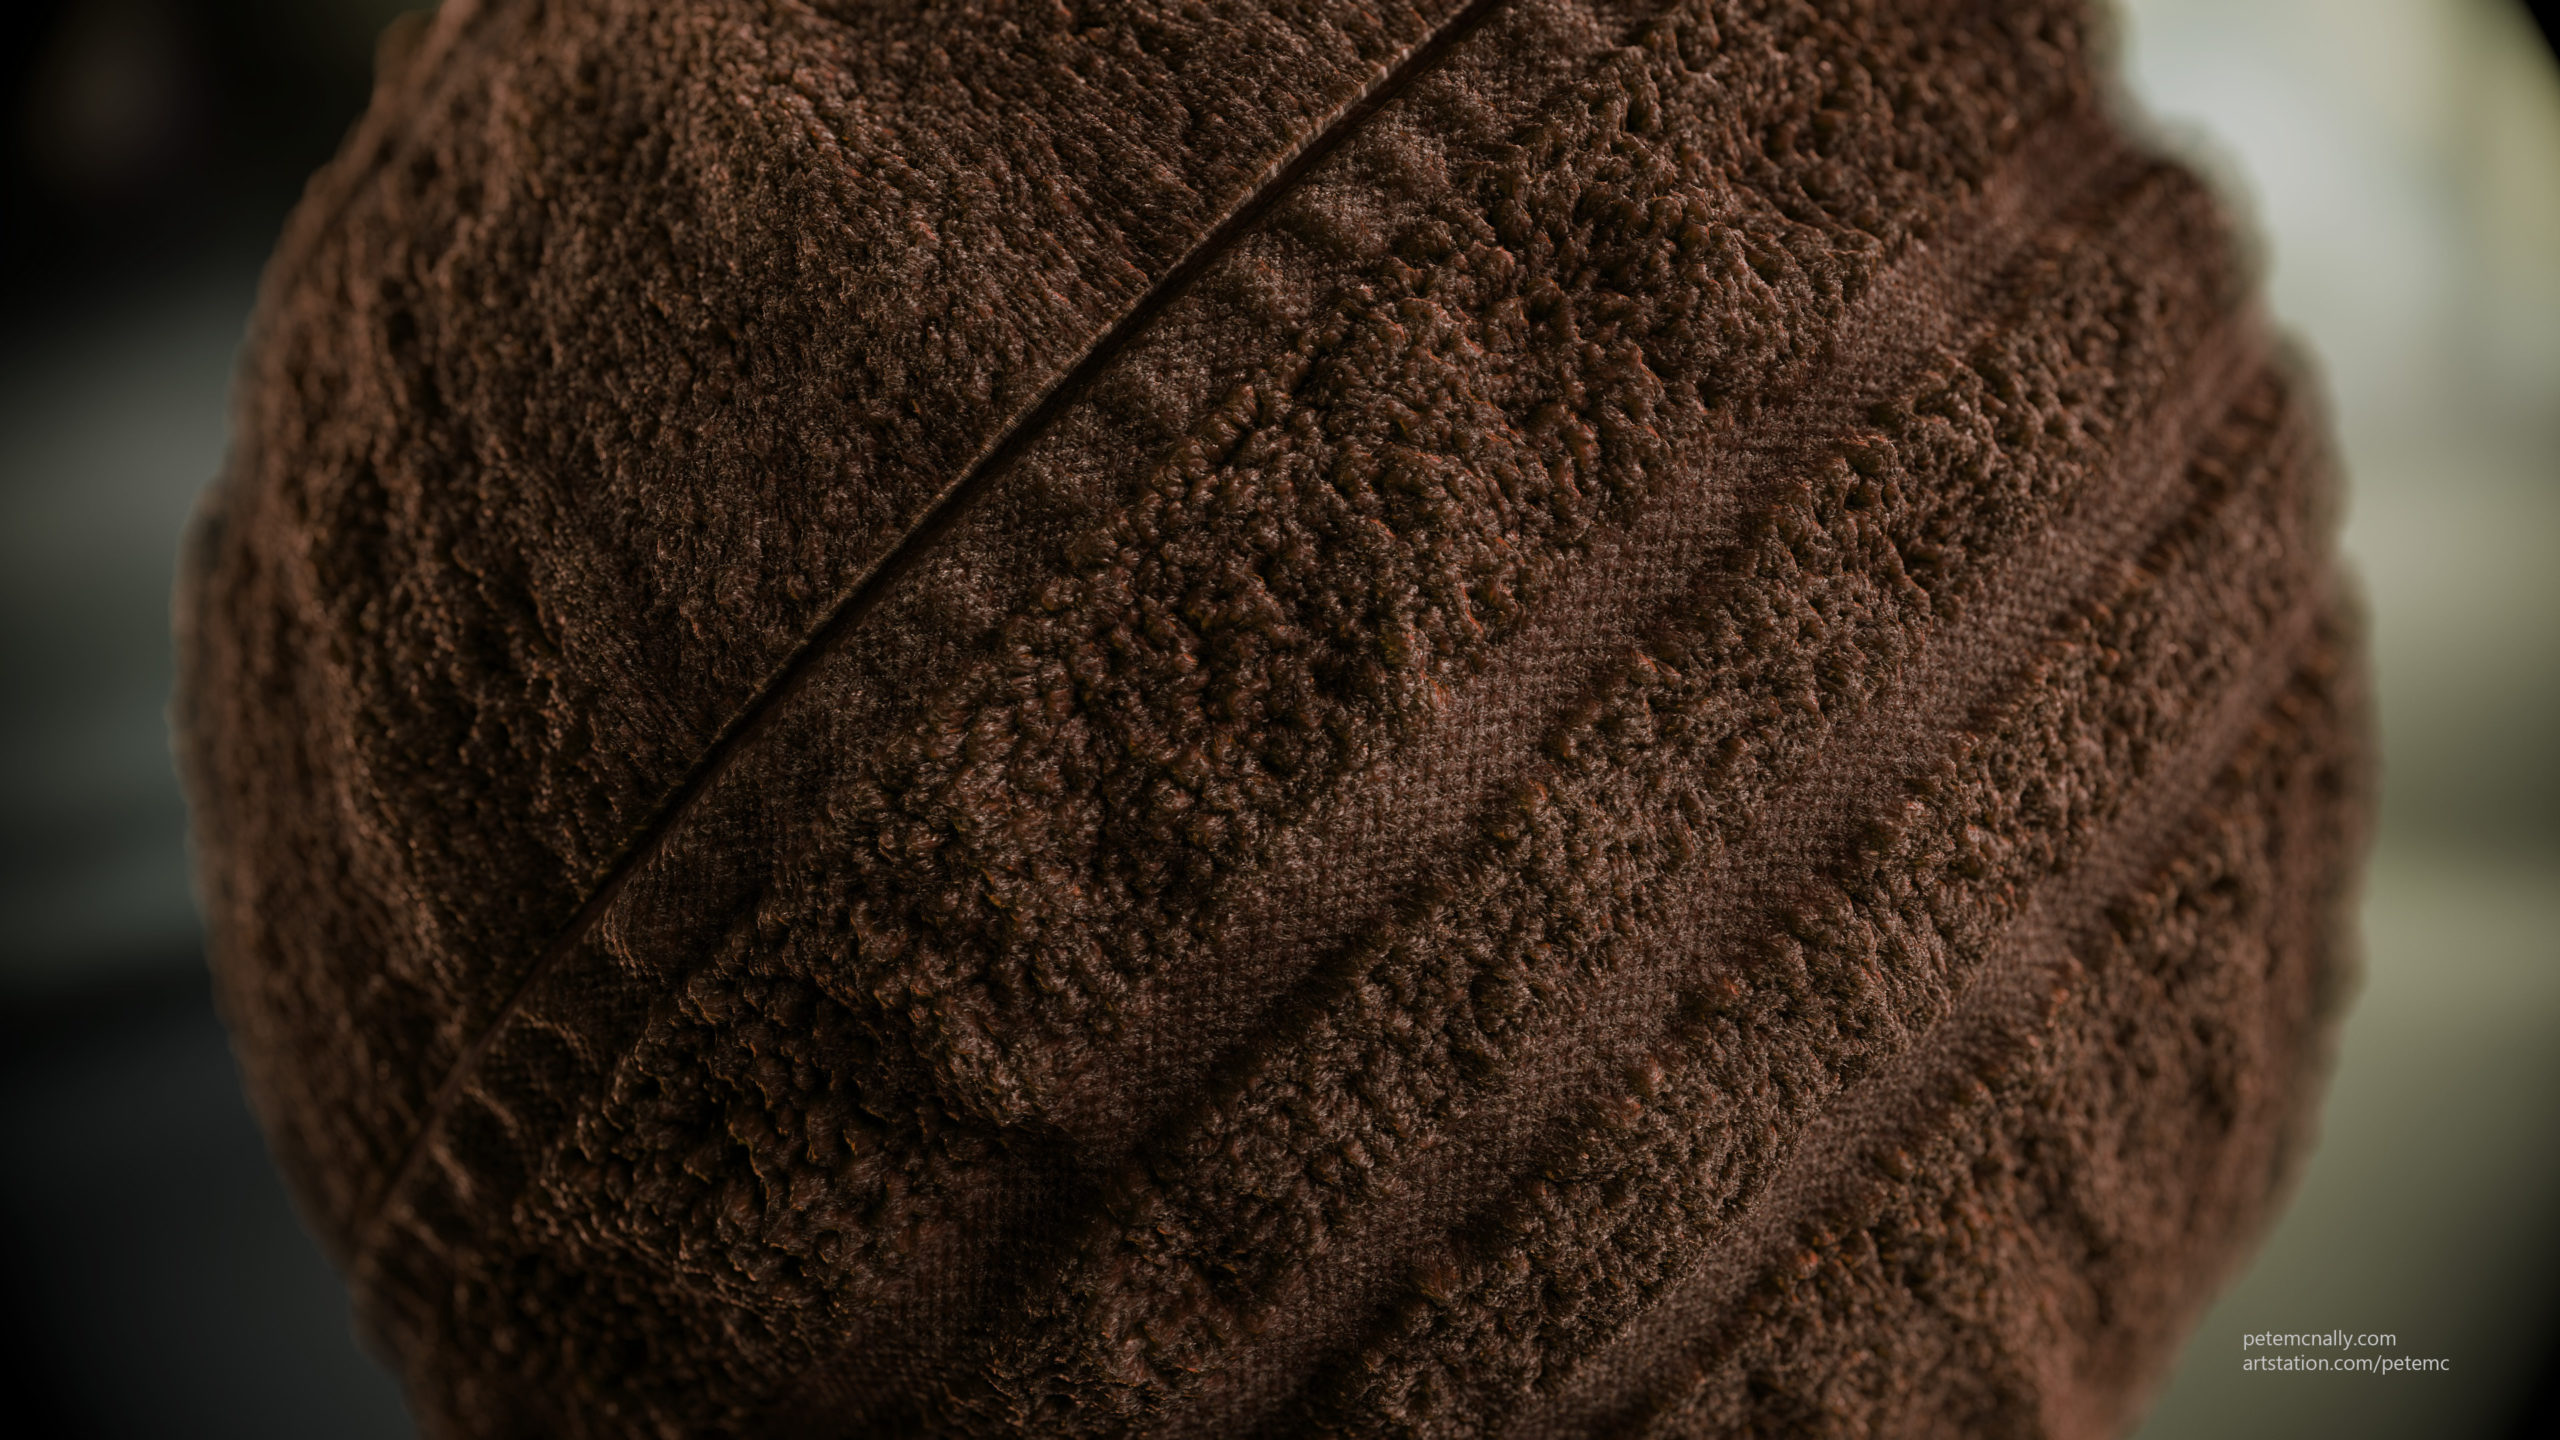
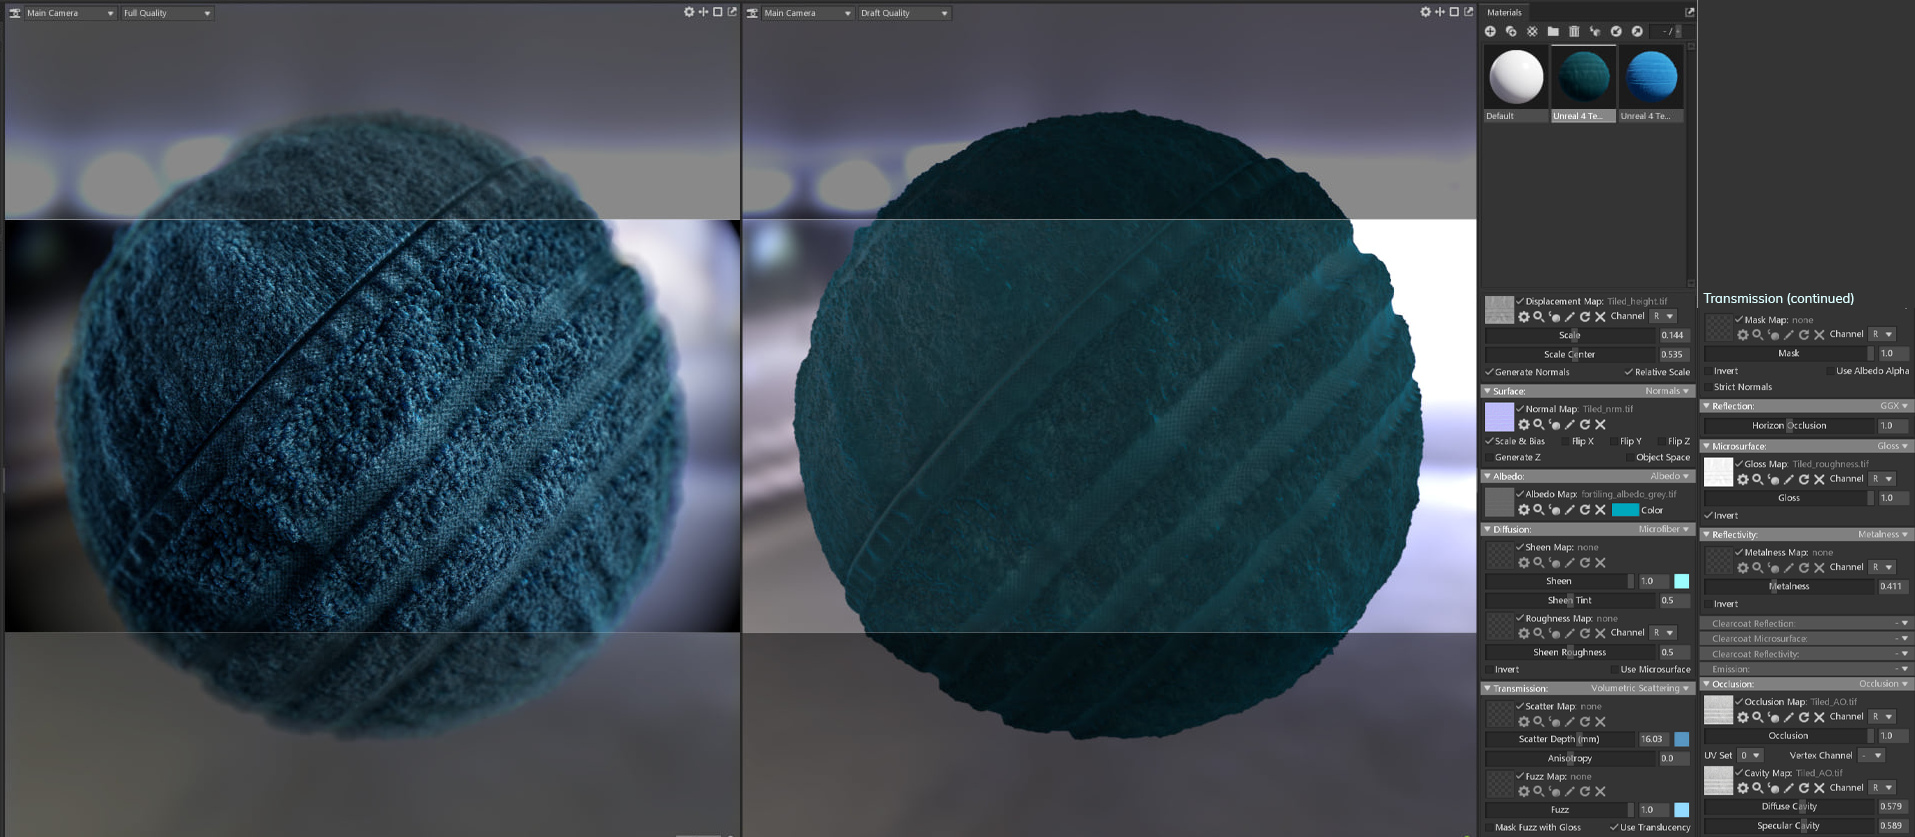
Here is the Microfiber shader in action, as demonstrated by Pete Mc Nally. The Microfiber shader was critical to creating a convincing towel material. The ability to adjust sheen values added further believability to the surface, especially at the glancing angles where it is most visible on real-world fabrics. Another vital component with cloth and fabric materials is the inclusion of cavity and ambient occlusion maps.
The AO map contributed heavily in shadowed areas and was reused for the albedo and specular cavity maps. The greyscale albedo map provided the flexibility to change the color of the towel on the fly using the albedo color swatch. The displacement map was limited to waves and medium-sized folds rather than including every fiber. The fine detail was reserved for the normal map, which was created using a photometric stereo approach. Volumetric Subsurface Scattering helped to soften the shading further.
Fluffy Carpet Breakdown
The following breakdown is by Anson Weese, which demonstrates the use of stacked opacity maps to create a fluffy carpet.
The carpet was created using four separate materials, three of which contained progressively diminished alpha maps. The mesh was duplicated four times and the offset was achieved by shifting the Scale and Scale Center of the Displacement parameters. Here is a screenshot of the base mesh with the albedo map applied.

Anson used the height and normal information of the Library’s Carpet material to save time, and the albedo was created by repurposing a retro carpet reference image. Once one material was created, it was duplicated, the displacement was shifted, and the detail of the opacity map was diminished. This was repeated until the last layer was barely visible.
The diminished opacity maps were created using Blend If sliders in Photoshop’s Layer Style window to select and gradually remove detail carefully. The maps were saved out as grayscale images.

Each shader can be micro-adjusted for variety, and each subsequent layer has a slightly lighter microfiber color and potency, allowing the internal areas to appear darker and in shadow. Also, the Alpha slider in the Transparency Dither module was slightly tweaked for each opacity map.

Thanks for reading. For more tutorials, check out our Tutorials & Resources section and follow along using our 30-day trial of Toolbag. We would like to thank Pete Mc Nally and Anson Weese for their generous contributions to this article.


