
Introduction
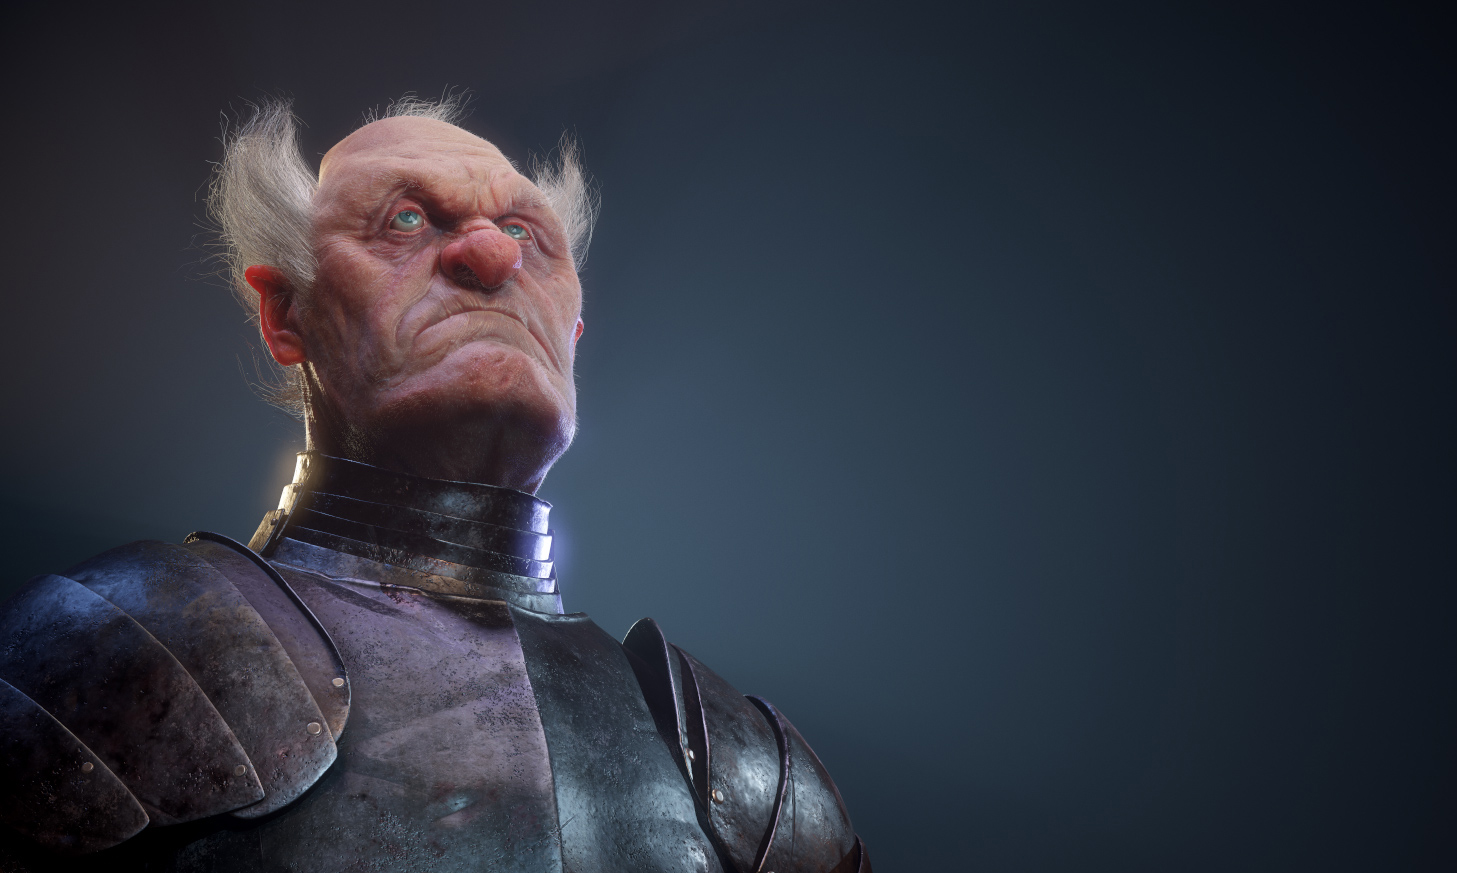
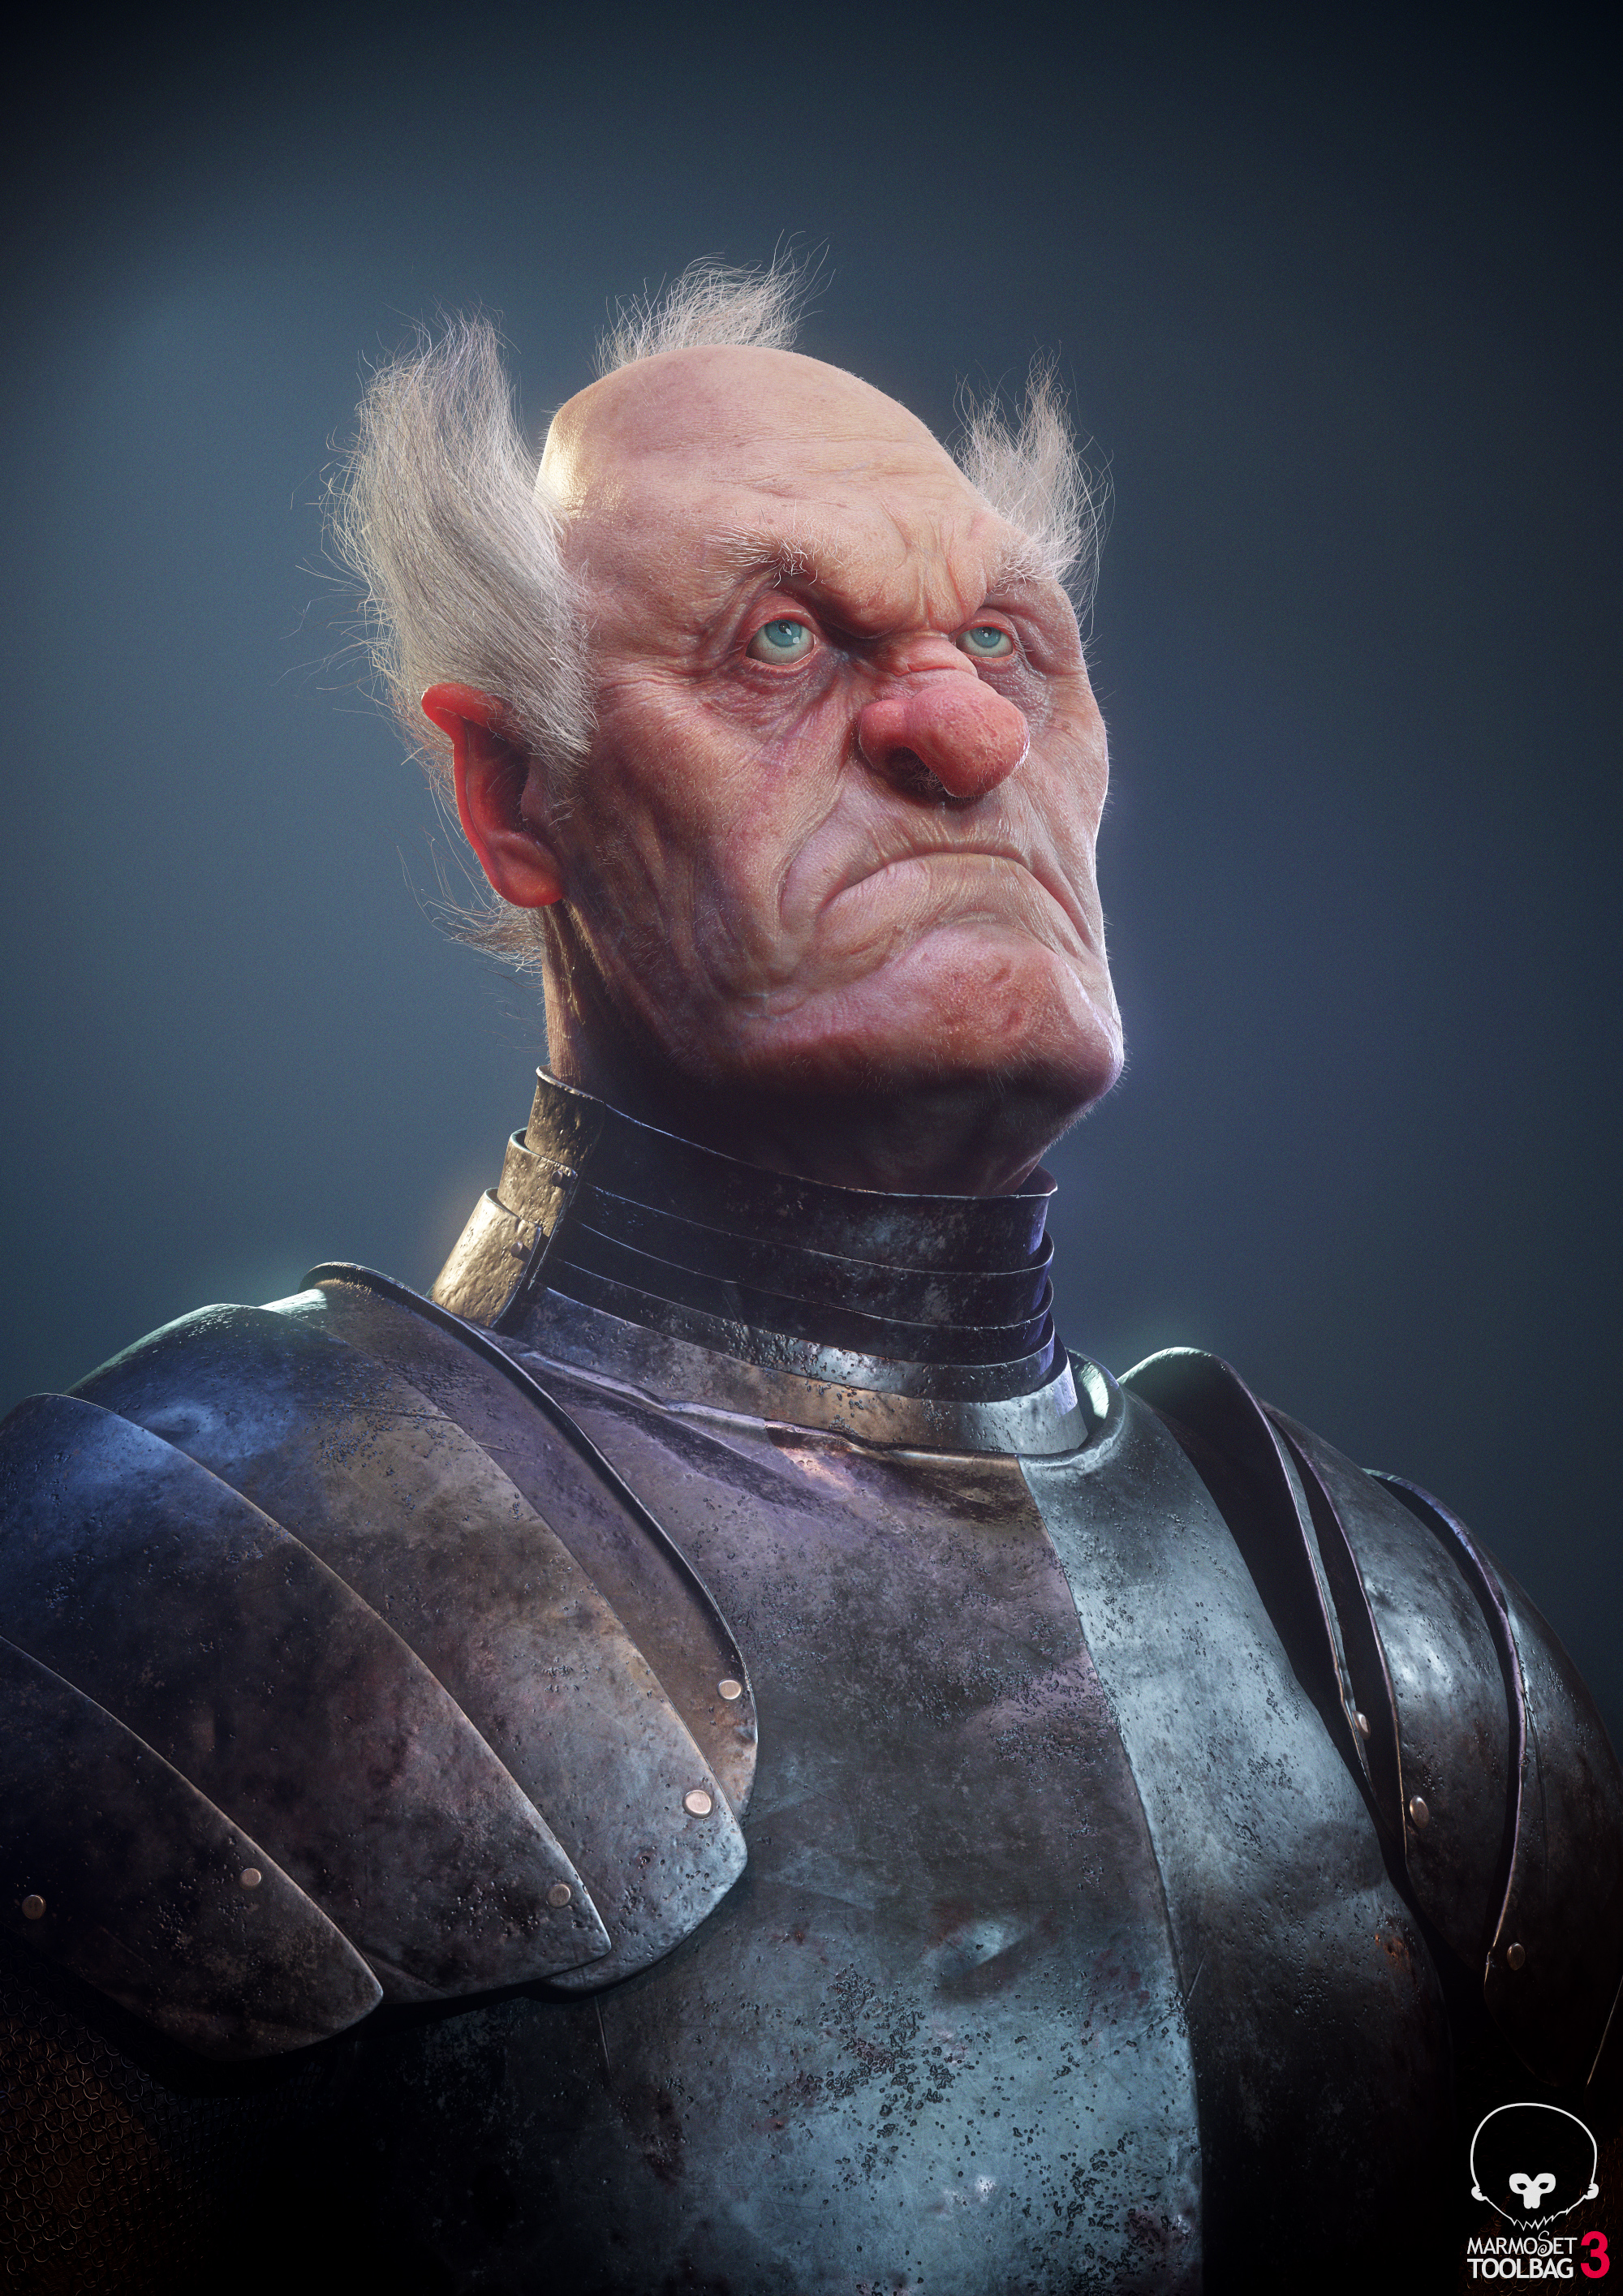
Hi, my name is Radek Kowalczyk, and I’m a Character Artist working in games. Currently, I am doing freelance work for Shapefarm, a Tokyo based company. In this article, I will discuss my material setup, lighting, and presentation for my Old Knight character in Toolbag. This character is based on a concept by Vyacheslav Safronov, you can check out more of his amazing work on Artstation.
MODELING
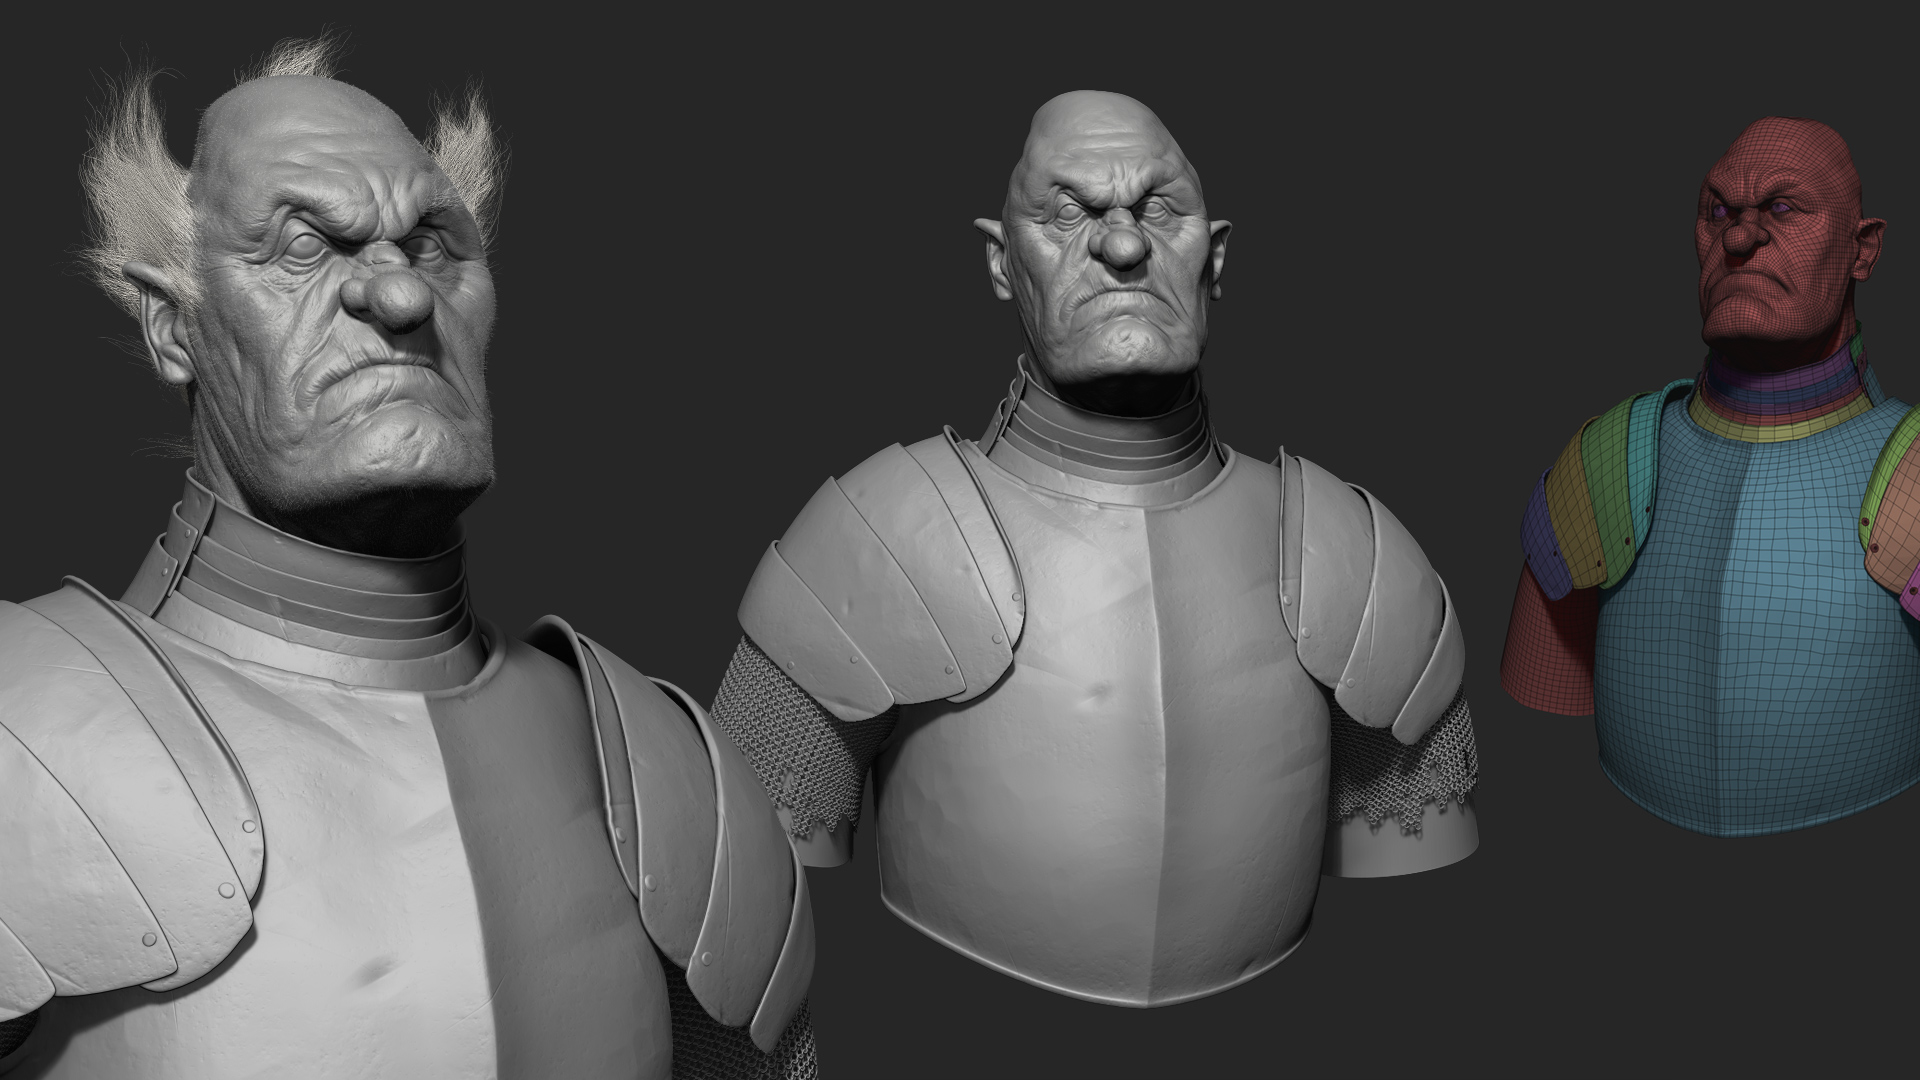
My workflow was pretty standard. I created my high resolution meshes in Zbrush and unwrapped them using UV Master. Afterwards, I did some UV clean-up and layout work in Maya.
TEXTURING
I used Substance Painter for baking and texturing. Neutral environment maps were used to avoid color influences from the environment on my texturing. The skin material that comes with Painter usually works great as a starting point, and I like to turn on SSS preview here as well.
MATERIALS

My material setup was very simple. For the eyes, I created two spheres; one with the textures applied, and another slightly enlarged sphere encasing it with a glass material applied. You can learn about how to create a convincing eye setup in a previous breakdown written by Saurabh Jethani. I exported my default maps as well as AO, Subsurface Scatter, and Cavity maps. I increased the saturation of my base Diffuse map, plugged it into the Translucency Map slot and increased the Translucency Depth value. Maps 5 and 6 can be used interchangeably, so I switched them around, played with the settings, and ended up with this setup. Making minor color tweaks to match the lighting conditions and overall look (i.e in this case, eyes and metal) makes a huge difference, and it’s easy to fine-tune in Toolbag.
HAIR
This section covers how I tackled hair creation for this character. The meshes I needed to create were:
- Facial hair and eyelashes
- Transition hair
- Main hair and eyebrows
I read Vadim Sorici’s How To Create Realistic Hair, Peach Fuzz and Eyes article and decided to apply his techniques to my character. Since the goal of this project was to create an image, and not necessarily a real-time character, I skipped creating hair cards and imported FiberMesh geometry directly into Toolbag. Toolbag can handle a large amount of geometry, so I had no performance issues with this part. When adjusting FiberMesh geometry in Zbrush, things can get a little messy, so I turned Backface Culling off in Toolbag. The Fibermesh in this scene was around 3 million triangles. I scattered some peach fuzz all over the face, and I think the character looks relatable and kind of funny without thick shaved facial hair.
ZBRUSH CAMERA EXPORT
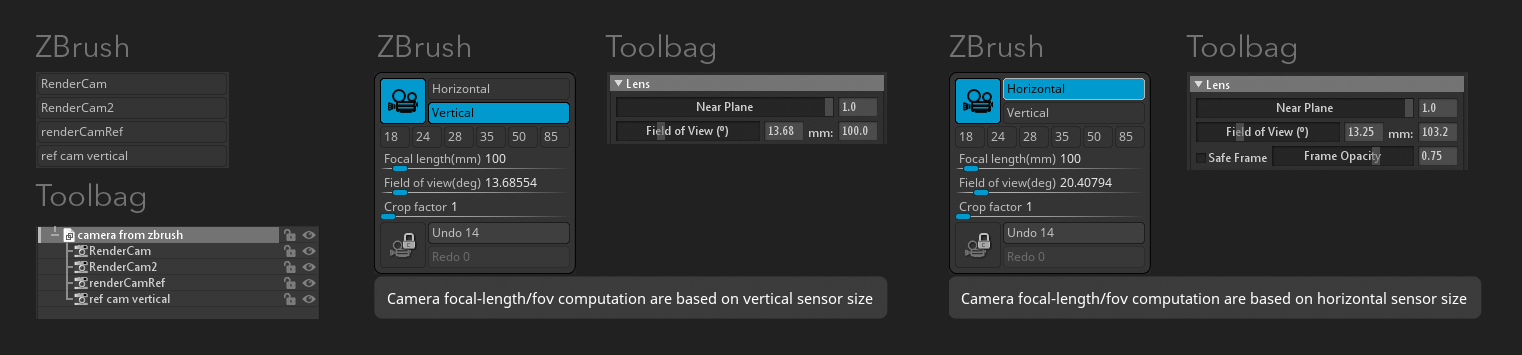
I took advantage of Zbrush’s brand new Universal Camera feature and framed my model in Zbrush while sculpting, then exported this camera as an .FBX file to Toolbag. To match the Camera settings, you will have to switch the Camera Focal Length computation from Horizontal to Vertical in Zbrush. Zbrush can export all of your cameras in one .FBX file, so you can set up different camera angles early on during the sculpting phase.
LIGHTING
For my lighting setup, I used the Grace Cathedral Sky Preset. I added some Child Lights and Spot Lights to brighten up specific areas on my character. The things I try to keep in mind while lighting are creating catchlights, a separation between the background and the character, and the use of warm and cold lights. Turning on Global Illumination makes a big difference, especially in the hair region. I really like adding Fog, since it heavily impacts the overall look.
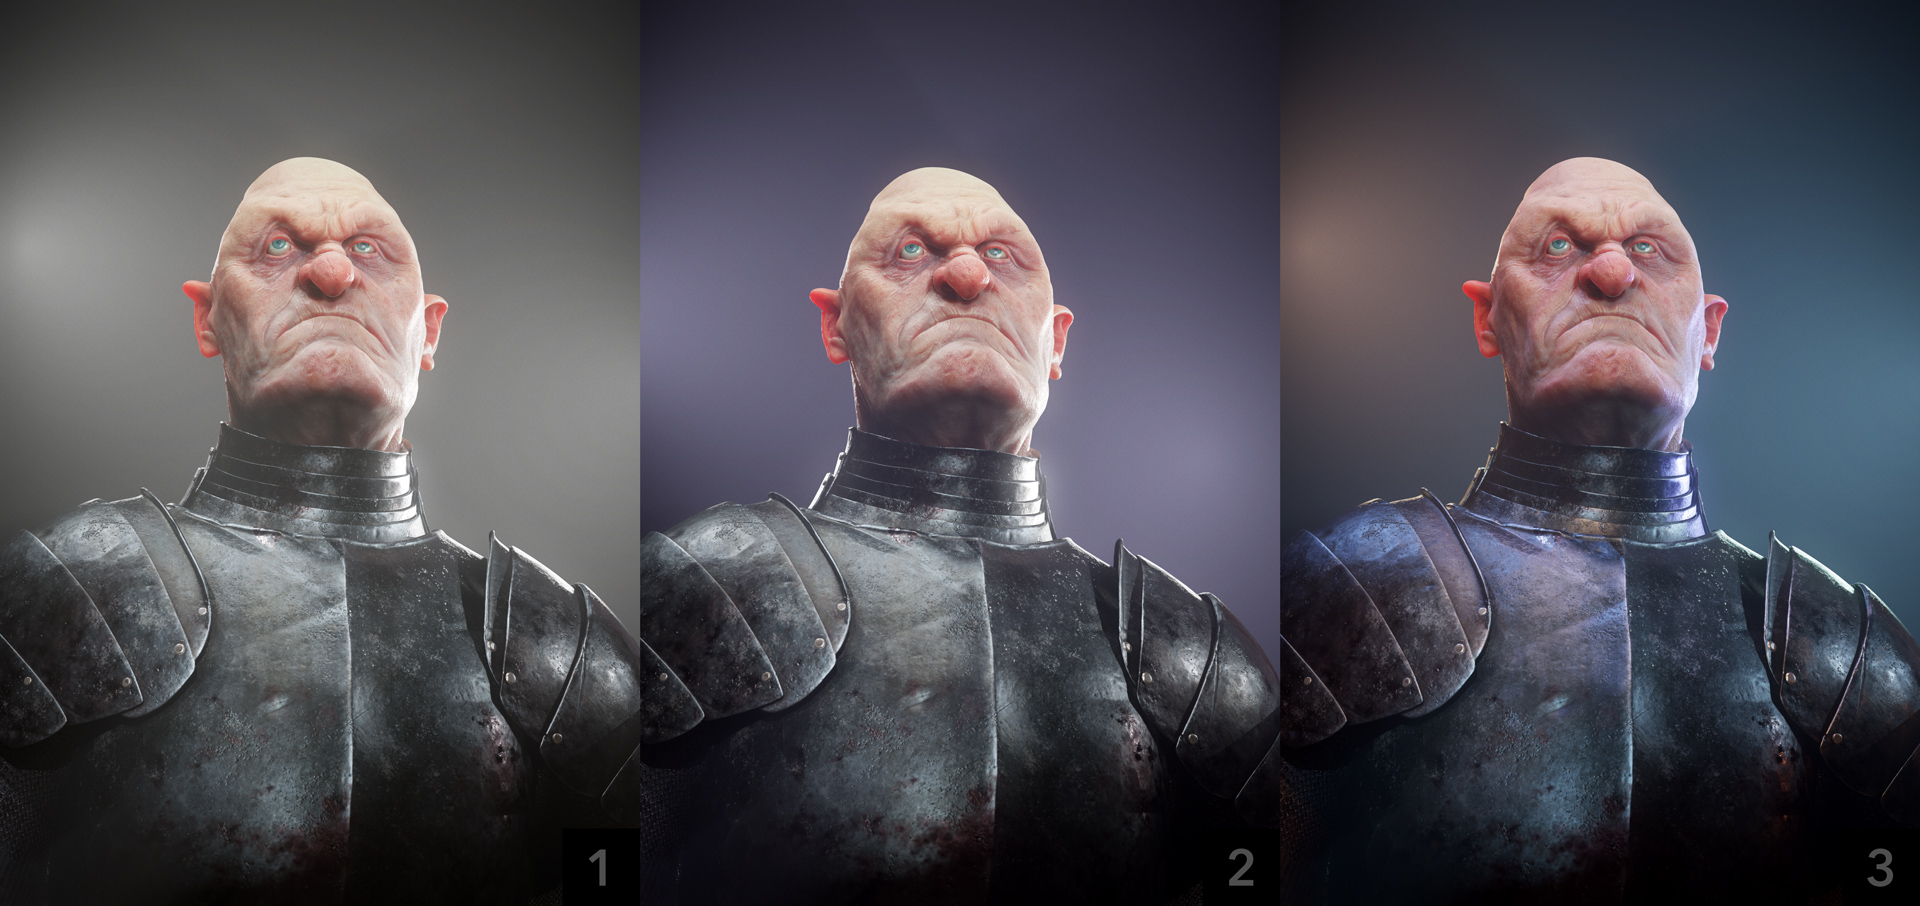
These shots display my step by step process. Shot 1 shows lights and Fog added with no color. I added color to my Fog in Shot 2, and then added color to my lights in Shot 3. The Diffuse map for the armor was pretty boring, so adding color to my lights helped add richness to the material.
CAMERA & RENDER SETTINGS
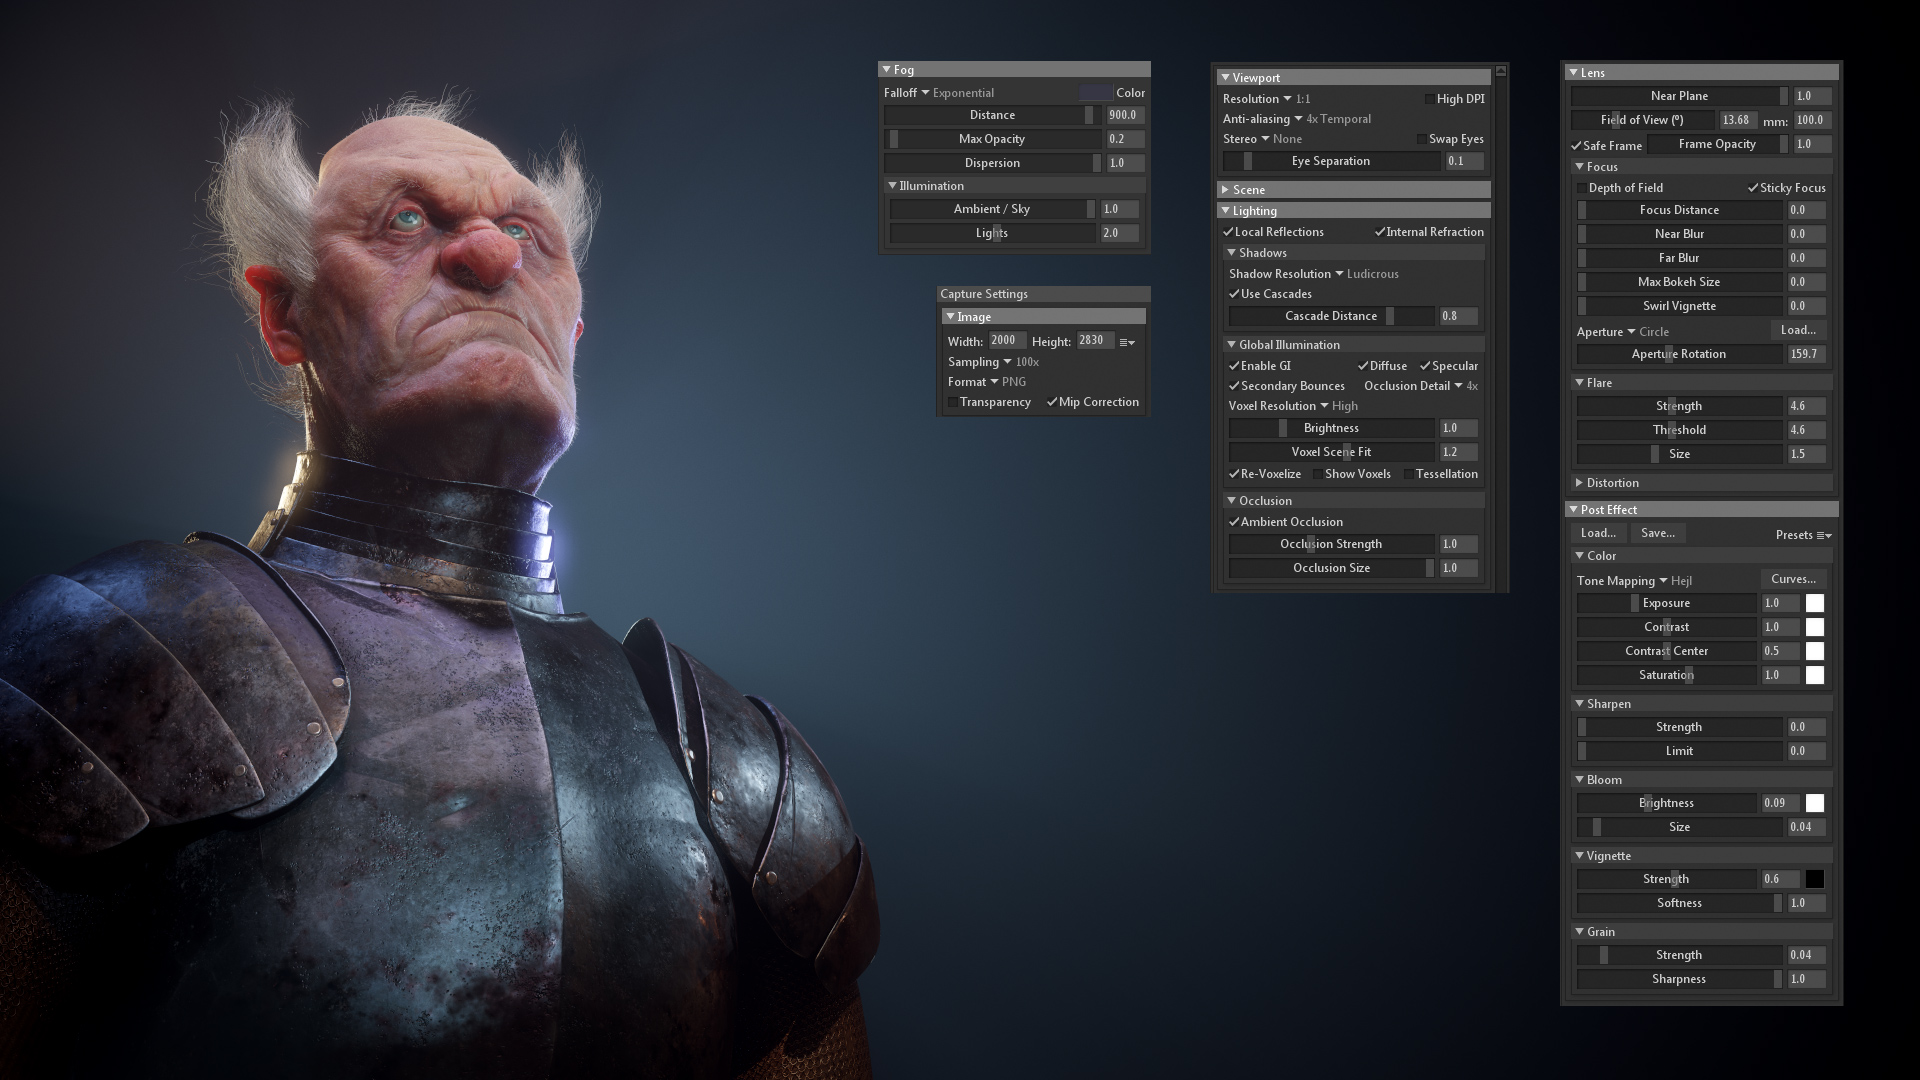
This image shows my Camera settings. For portrait shots, a focal length value of 80mm and above are commonly used in photography. I’ve found these focal lengths to work great in matching the concept art I’m working from while modeling. In the Camera’s Post Effects, I set my Tone Mapping to Hejl. I became aware of this setting recently, thanks to the Marmoset Tutorials section. In Photoshop, I added some slight contrast and a bit more grain to my final render.
CONCLUSION
Some individuals who have read this article might have hoped to find a new magic button to make a render look good, or that it’s necessary to have a complicated setup to make things work. In actuality, most scenarios don’t require things to be complicated in order to achieve a good result. I believe Toolbag can make everything look good out of the box, with very little to tweak.
Thank you so much for reading, and many thanks to the Marmoset team for giving me the opportunity to write this article.
We’d like to thank Radek Kowalczyk for writing this breakdown article. You can find more of Radek’s work on Artstation.
Create magnificent real-time renders using the 30 day trial of Toolbag. If you’re interested in collaborating on a tutorial or breakdown article, please send us your pitch, along with a link to your artwork, to submissions@marmoset.co.


