Isometric drawing is a great way to present a 2D design in three dimensions. This short guide will help you to ‘think isometric’ and use Hexels’ dedicated iso tools with confidence.
Perspective vs isometric
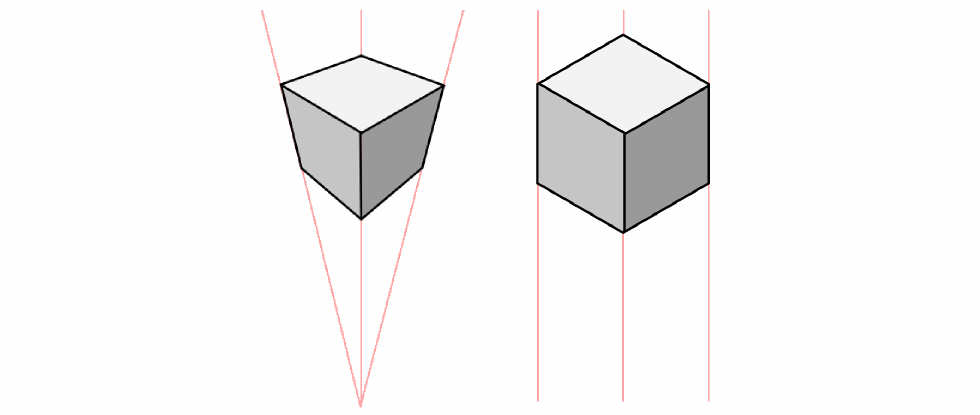
Perspective drawing is a way of presenting a three dimensional look by replicating how our eyes judge depth. Objects appear smaller the further away they are and lines tend to converge in the distance. An isometric viewpoint ignores perspective with parallel lines that are of equal distance apart at any point.
Isometric viewpoints have become increasingly popular in video games, illustration, and design. Hexels has simplified the process of creating isometric art by allowing artists to paint on a series of multi-directional grids.
Hexels provides tools and a set of canvas grids specifically for working on isometric art. These tools and grids enable artists to paint lines, shapes, and volumes that all align to the same isometric angle.
Getting started

When launching Hexels, start with Trixels template. This uses vector mode and is designed for isometric art.
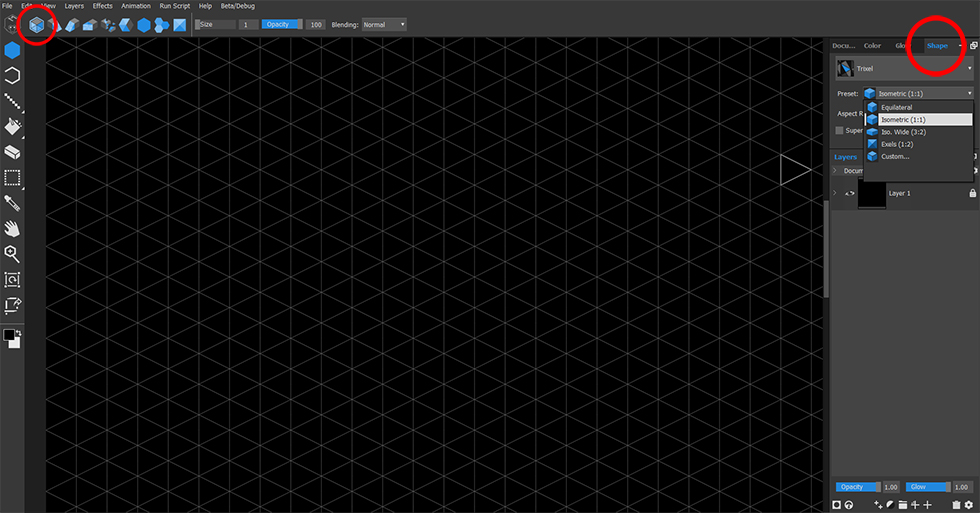
The document will load with the default ‘Trixel’ grid (circled top left). Over on the right side of the screen is the ‘Shape’ tab (Ctrl+6). This tab presents an array of isometric grid presets.

The presets change the grid aspect ratio as shown above. There is also a ‘custom’ option which allows the user to define their own aspect ratio. The following demonstrations use preset Isometric (1:1).
Think 3D!

Before drawing, take a moment to think differently about the grid. Although the grid is made up of triangles, consider it as squares rotated in a 3D space.

Imagine extruding a square up or down. Having a single colour can make it hard to visualize the square as three dimensional, so let’s add some shading.
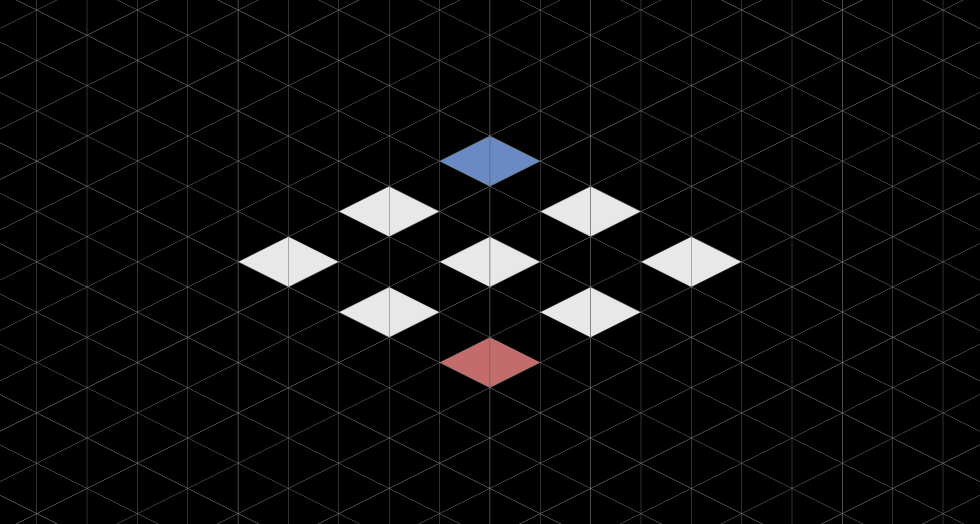
Adding two shades of colour to the extrude gives the illusion of lighting and tricks the brain into thinking it’s seeing a three dimensional object. Also note that in our 3D space, the red square is nearer to the viewer and the blue square is farther away. Covering the blue square, completes the illusion of depth.
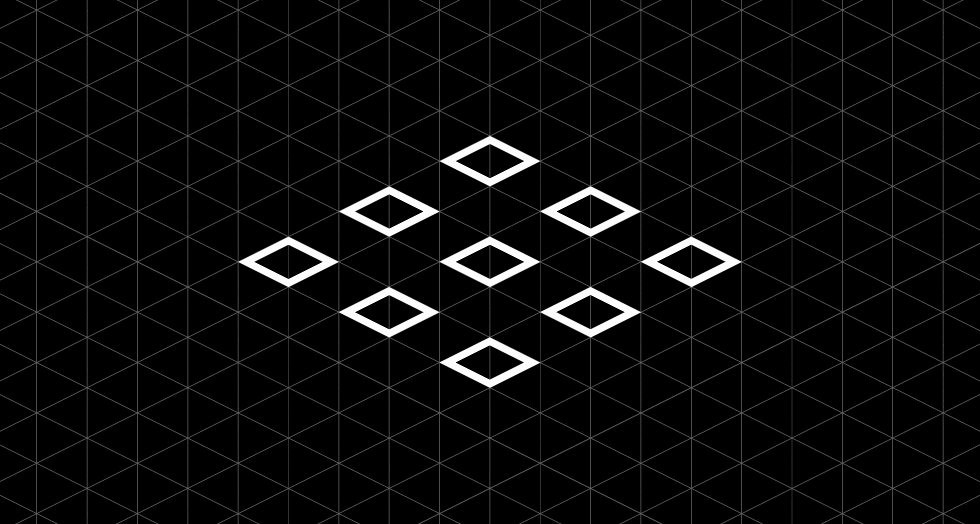
Lighting isn’t always necessary. By only applying outlines to the edges that would be visible in a 3D space, and hiding the distant square, the same illusion of depth is achieved.
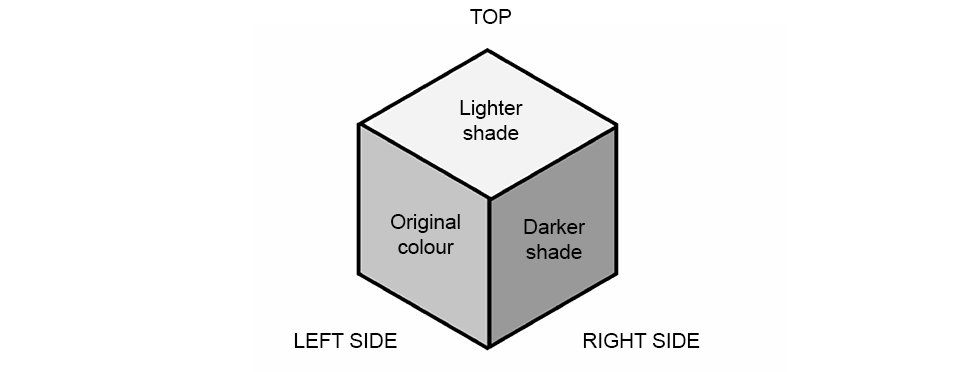
When lighting an isometric shape, consider this isometric lighting rule.
Simplify with Primitives
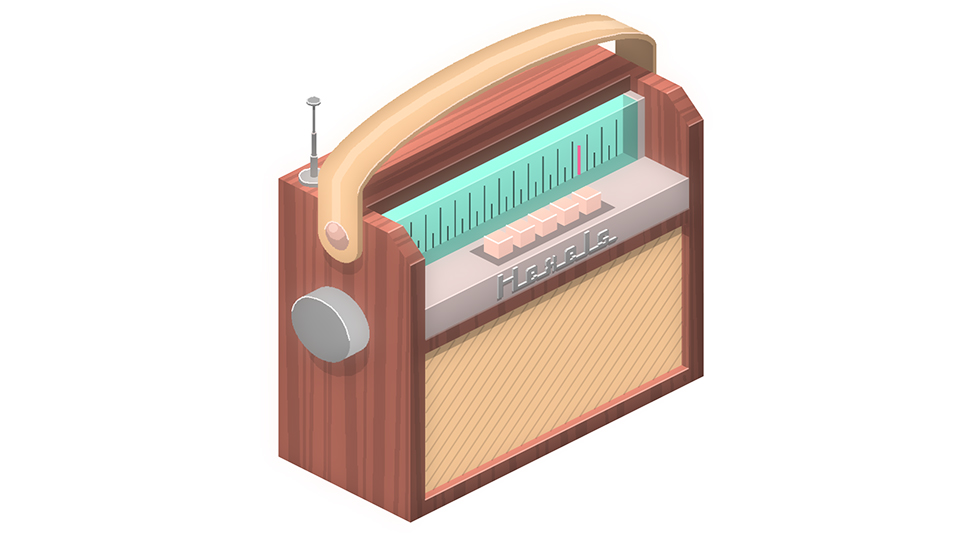
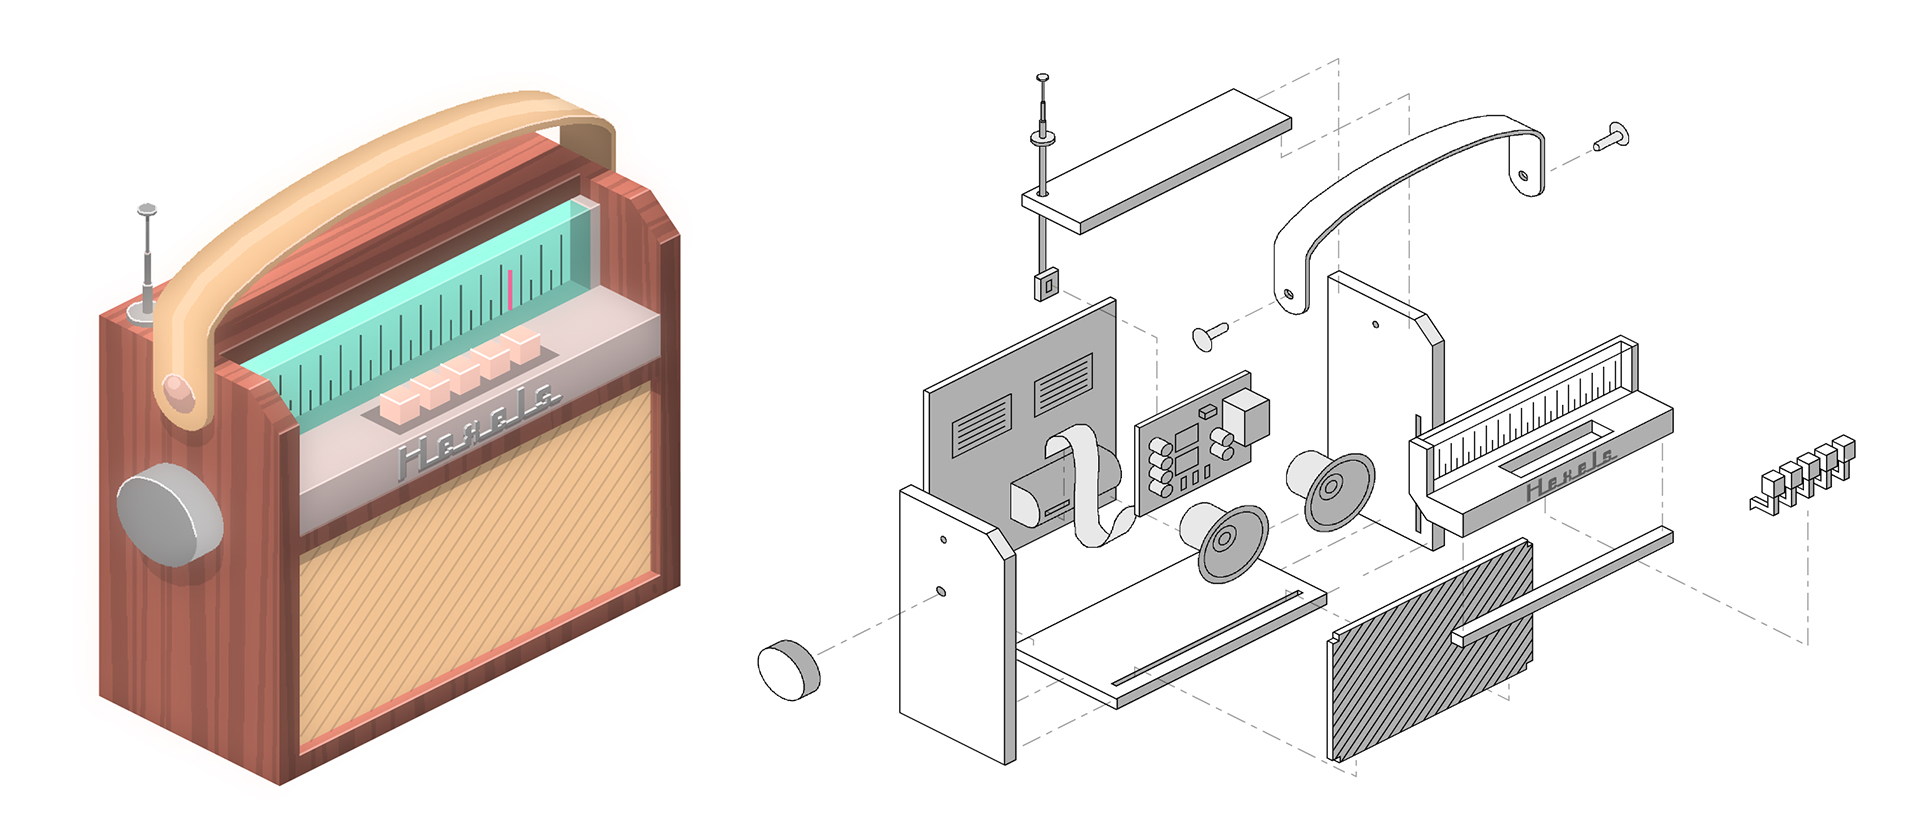
An isometric vintage radio
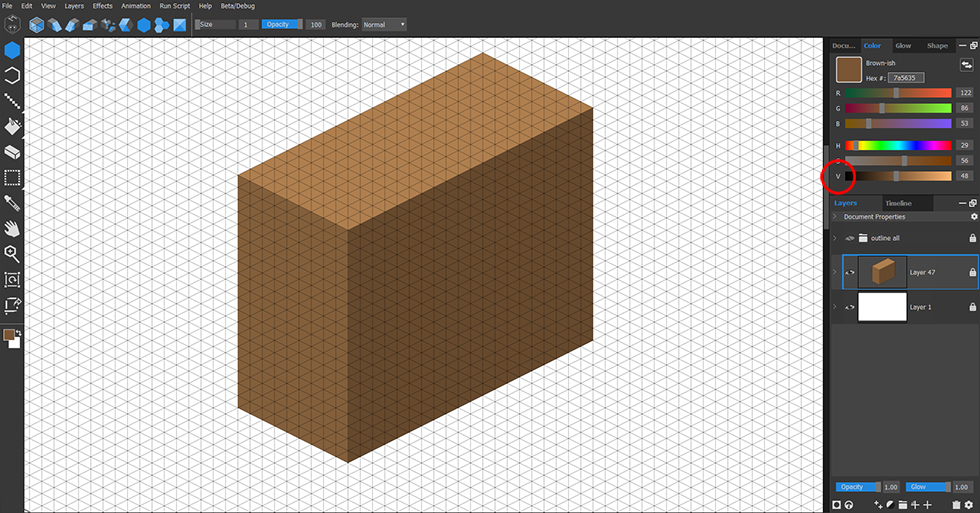
When tackling an object such as a radio, it can help to break it down into primitive objects first. For the radio, I created a cuboid with dimensions measured in squares rather than in grid triangles. I used the ‘isometric lighting rule’ by adjusting the Value (v) slider in the Color tab.

Using the Line tool (L) and the Color picker (alt), I painted areas as if they were being cut away.
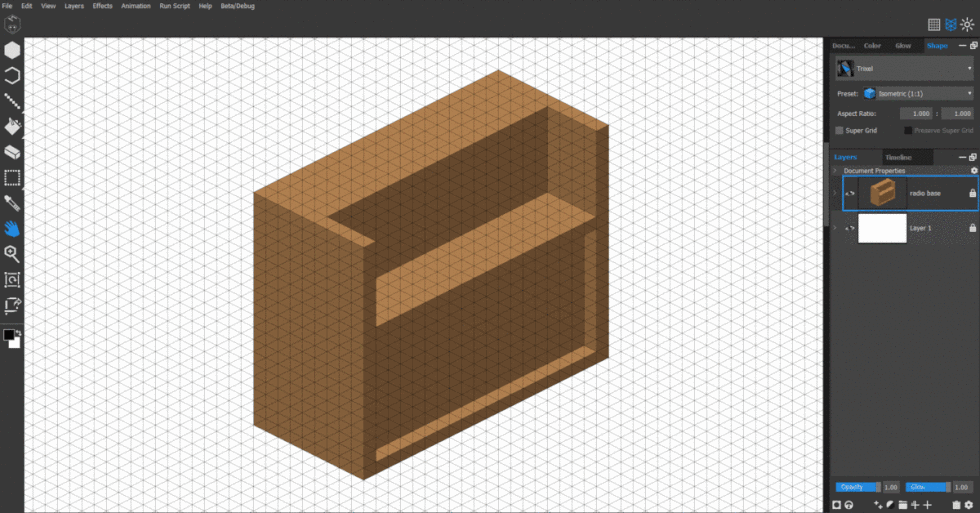
Re-applying any of the initial face colours, elsewhere in the primitive, gives the illusion of removing or adding areas of the solid object.
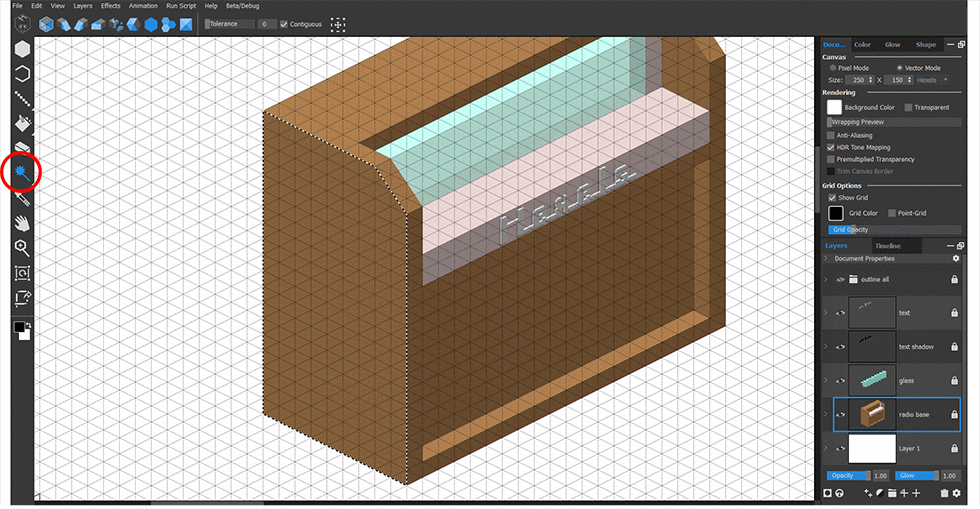
Sub Grids
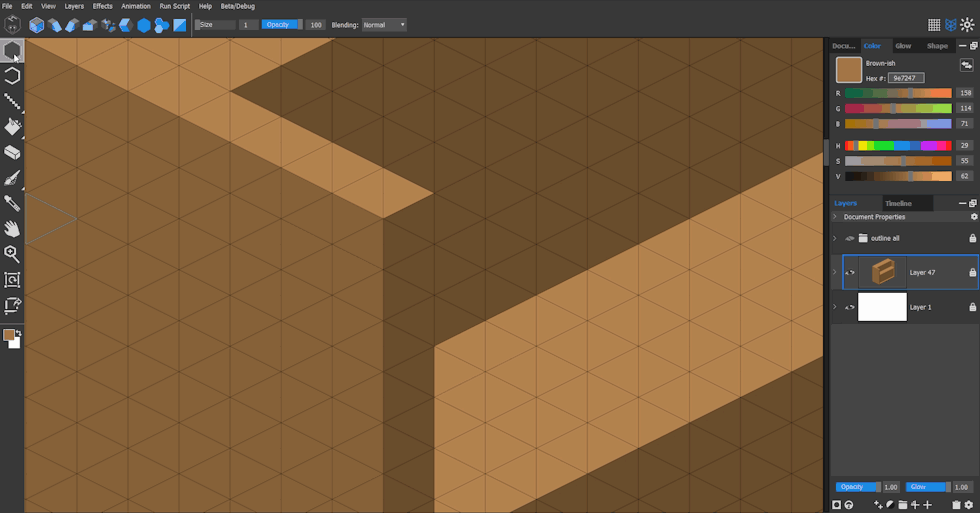
For the angled corners of the radio, I switched to the ‘Ramp Right’ grid (alt+2) from the top toolbar. Notice the change in the grid to accommodate different grid slices.
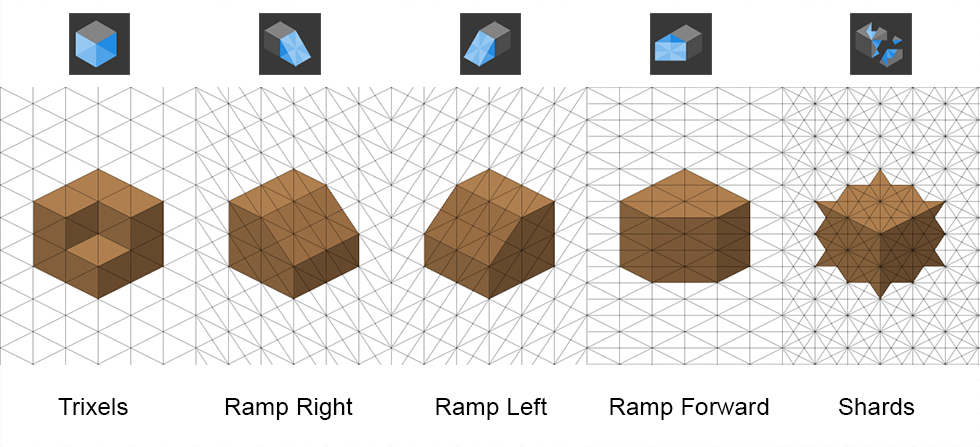
The other sub-grids achieve different angles and shapes that aren’t possible with the standard Trixel grid. Other grids, such as Sideways Trixels and X-els, are available from this toolbar too.
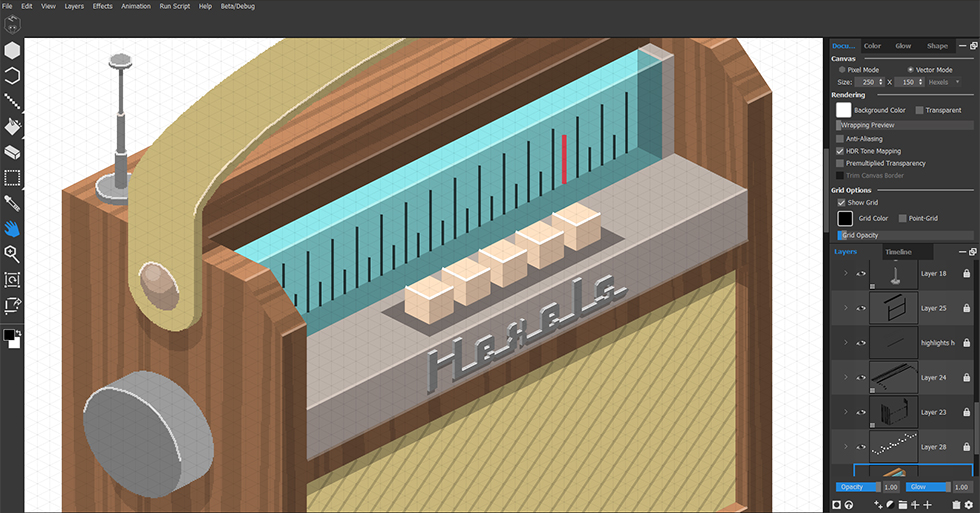
Materials
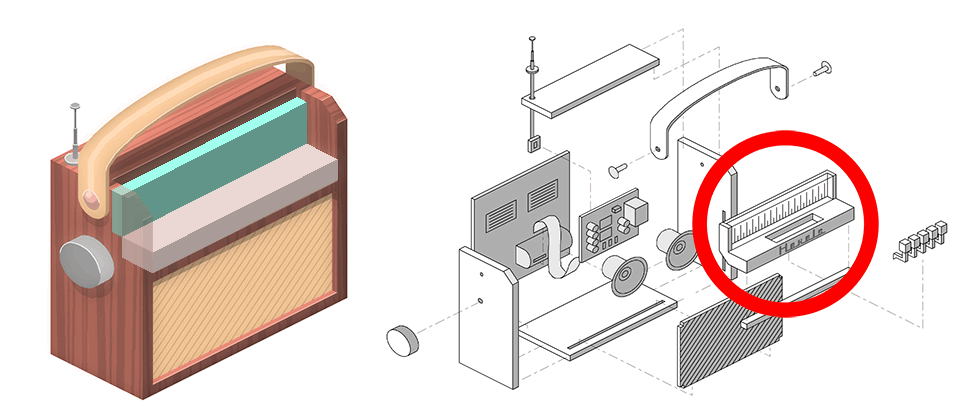
Let’s consider the metal faceplate and glass in the radio image. The actual shape can be seen as complex when thought of as a component (red circle). However, as part of an object, only the visible areas need be drawn. By breaking the shape down into primitives and ignoring the buttons, the shape is simplified into two cuboids.
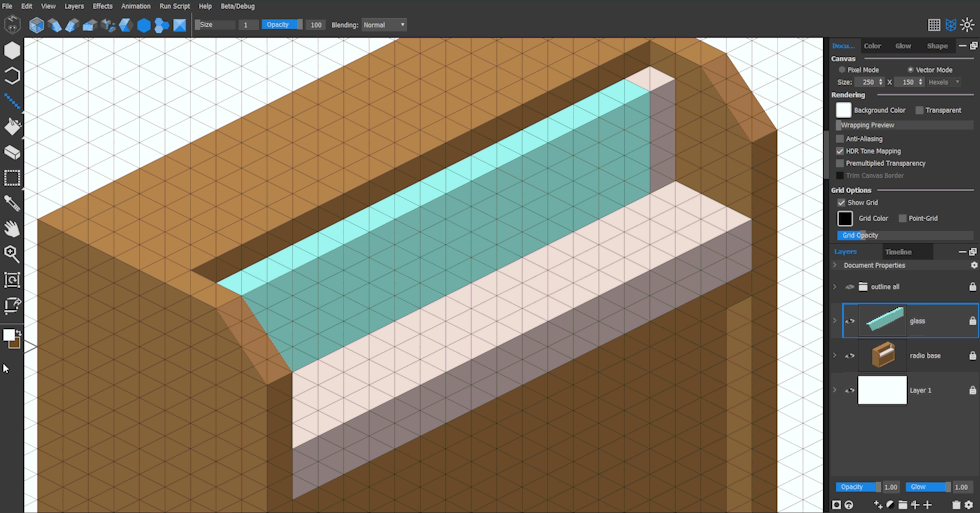
An easy way to create a glass effect is to use layers at different opacities. Create the solid glass primitive on a new layer and simply lower the opacity to make the image transparent. To change the color directly behind the glass, add a new layer below the glass layer and color it white.
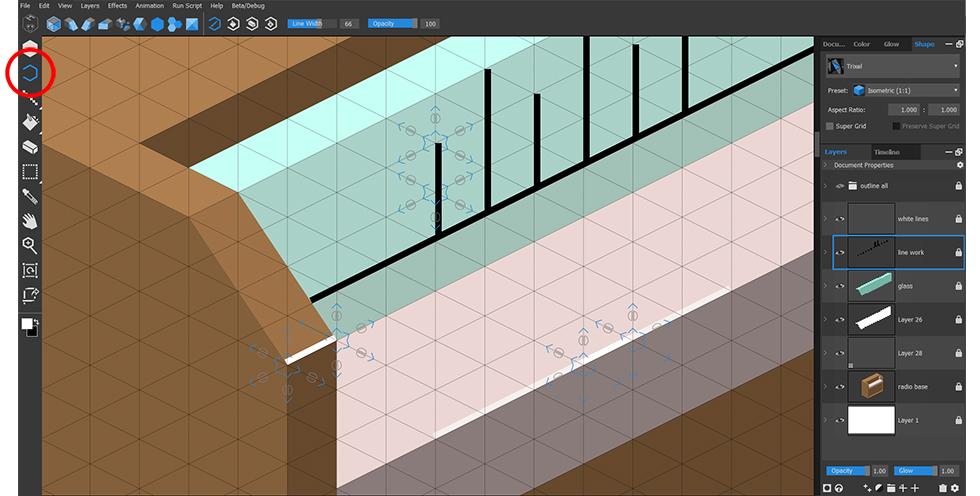
Markings and highlights, such as the analogue tuning display and shiny surfaces, are created using the Outline tool (O) on a new layer.
Creating Text
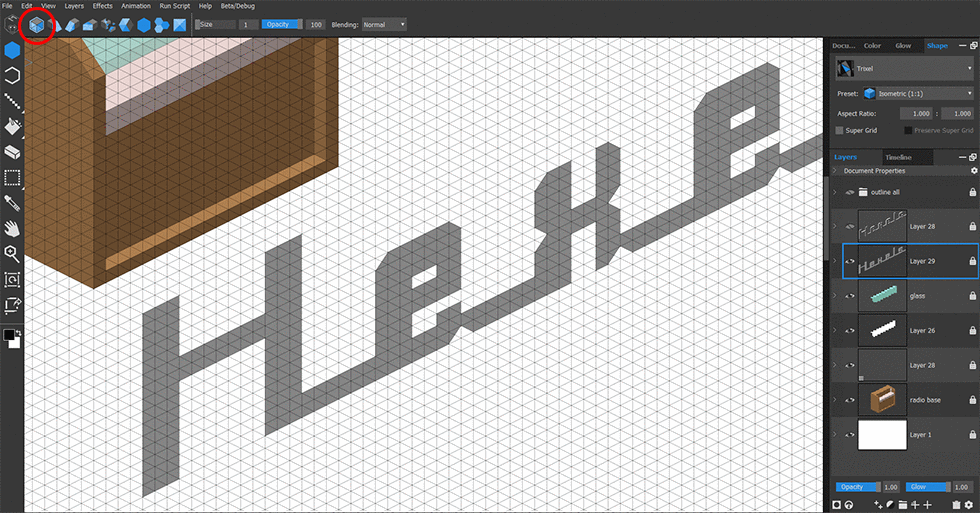
The isometric text logo was created on a new layer using the standard ‘Trixel’ grid and the ‘Ramp Left’ (alt+3) grid. Again, using the isometric lighting rule, I added depth to the text.

The text Layer can be re-scaled and positioned by using the Transform tool (T).
Adding Detail With Pixel Layers
A wood grain effect was created by selecting the side of the radio with the Magic Wand (S), adding a new pixel layer, and using the Line tool (L) to draw black lines. Notice that the selection made on a trixel layer constrains brush strokes painted on a pixel layer. The wood grain effect was faded out with layer opacity, and the whole process repeated for each surface of the radio.
Using the same methods and techniques, I continued building components and details using vector layers. I added highlights to edges using the Outline tool (O) with opacity reduced and I used pixel layers to paint the aerial, dial, and handle.
Glow
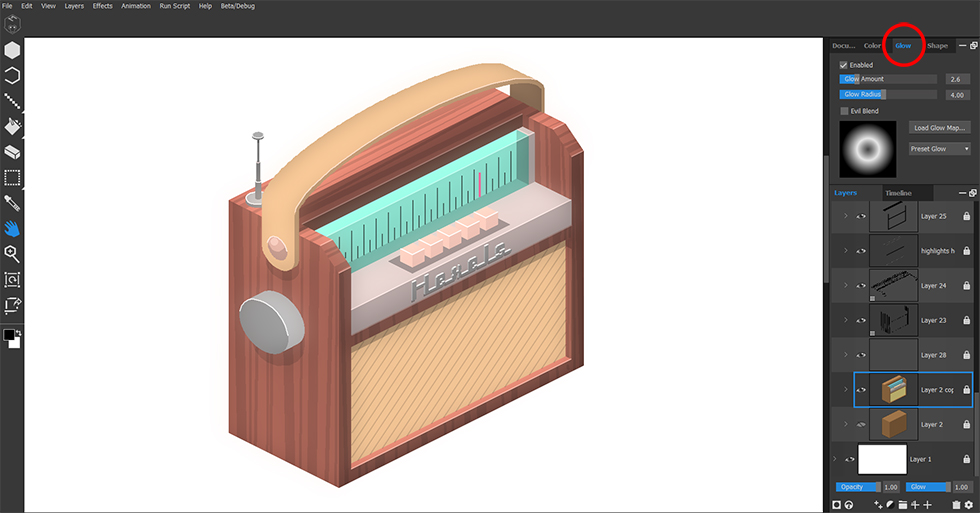
Finally, glow was ‘Enabled’ via the Glow tab. This brightened the scene and softened edges.
Simplifying Complex Objects
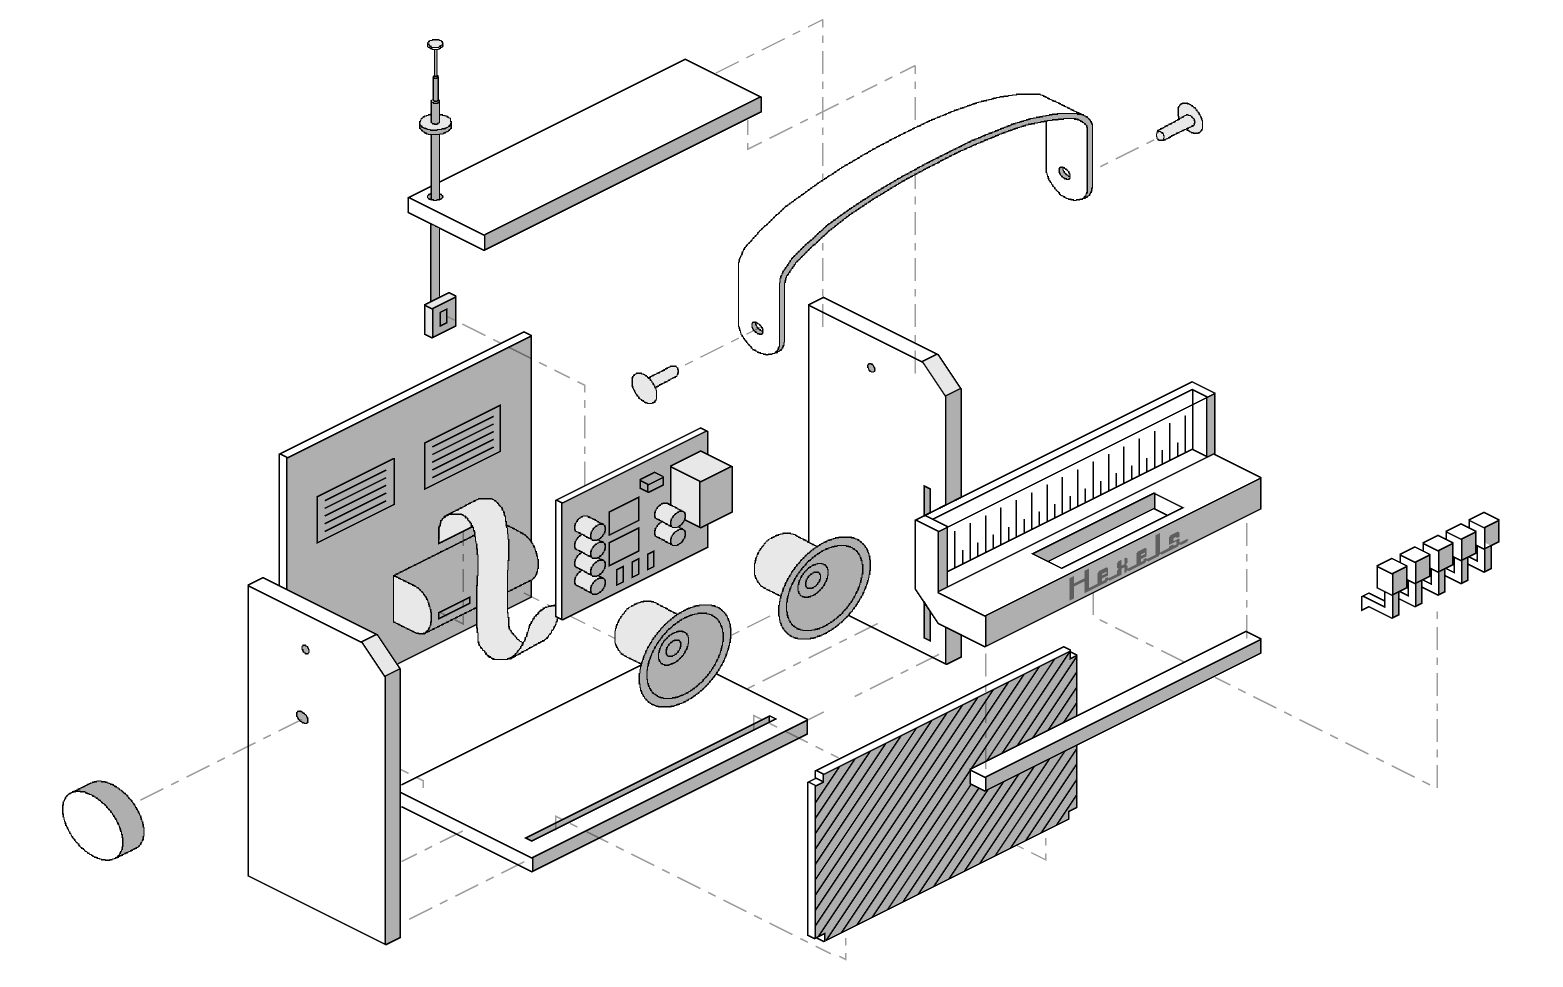
This exploded view of the radio may initially appear more complex to create than its solid counterpart. Ignoring color and shadows, the image is made up of primitive shapes that can be drawn using vector layers with edges defined by the Line (L) tool. Details such as transistors, speakers, and the aerial are created on pixel layers, again with the Line tool (L).
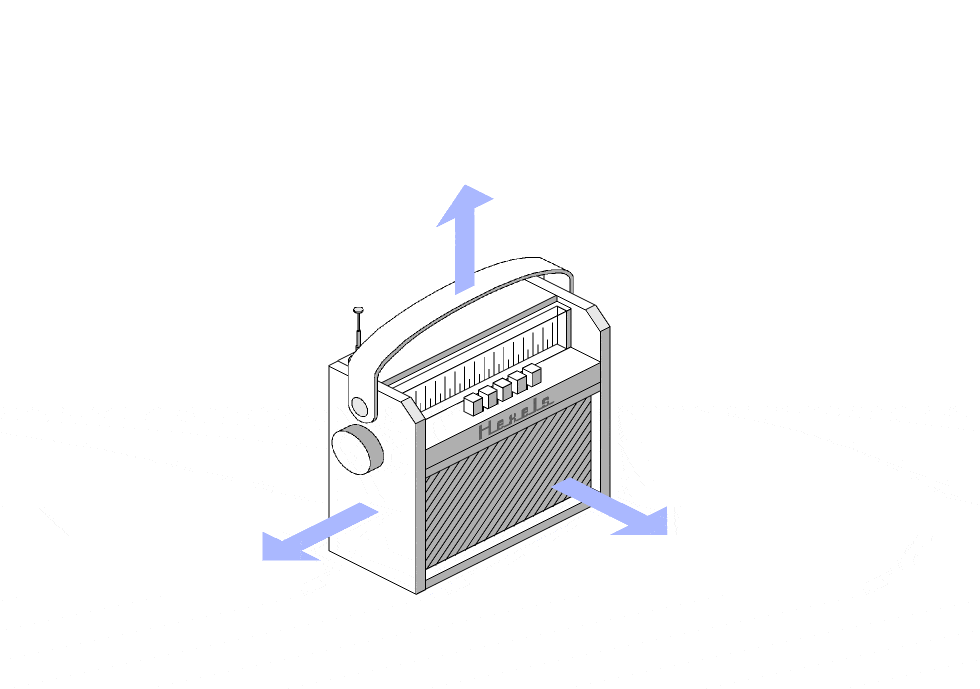
Whether static or animated, projecting image components outwards, along isometric planes, greatly increases a three dimensional effect.
Conclusion
From engineering plans, presentations, video games and concept art, the use of Isometric views are prevalent. Hexels grid based drawing makes creating isometric designs intuitive and fun.
Try the Hexels 14 day free trial and share your isometric creations with the Hexels User Group on Facebook.