
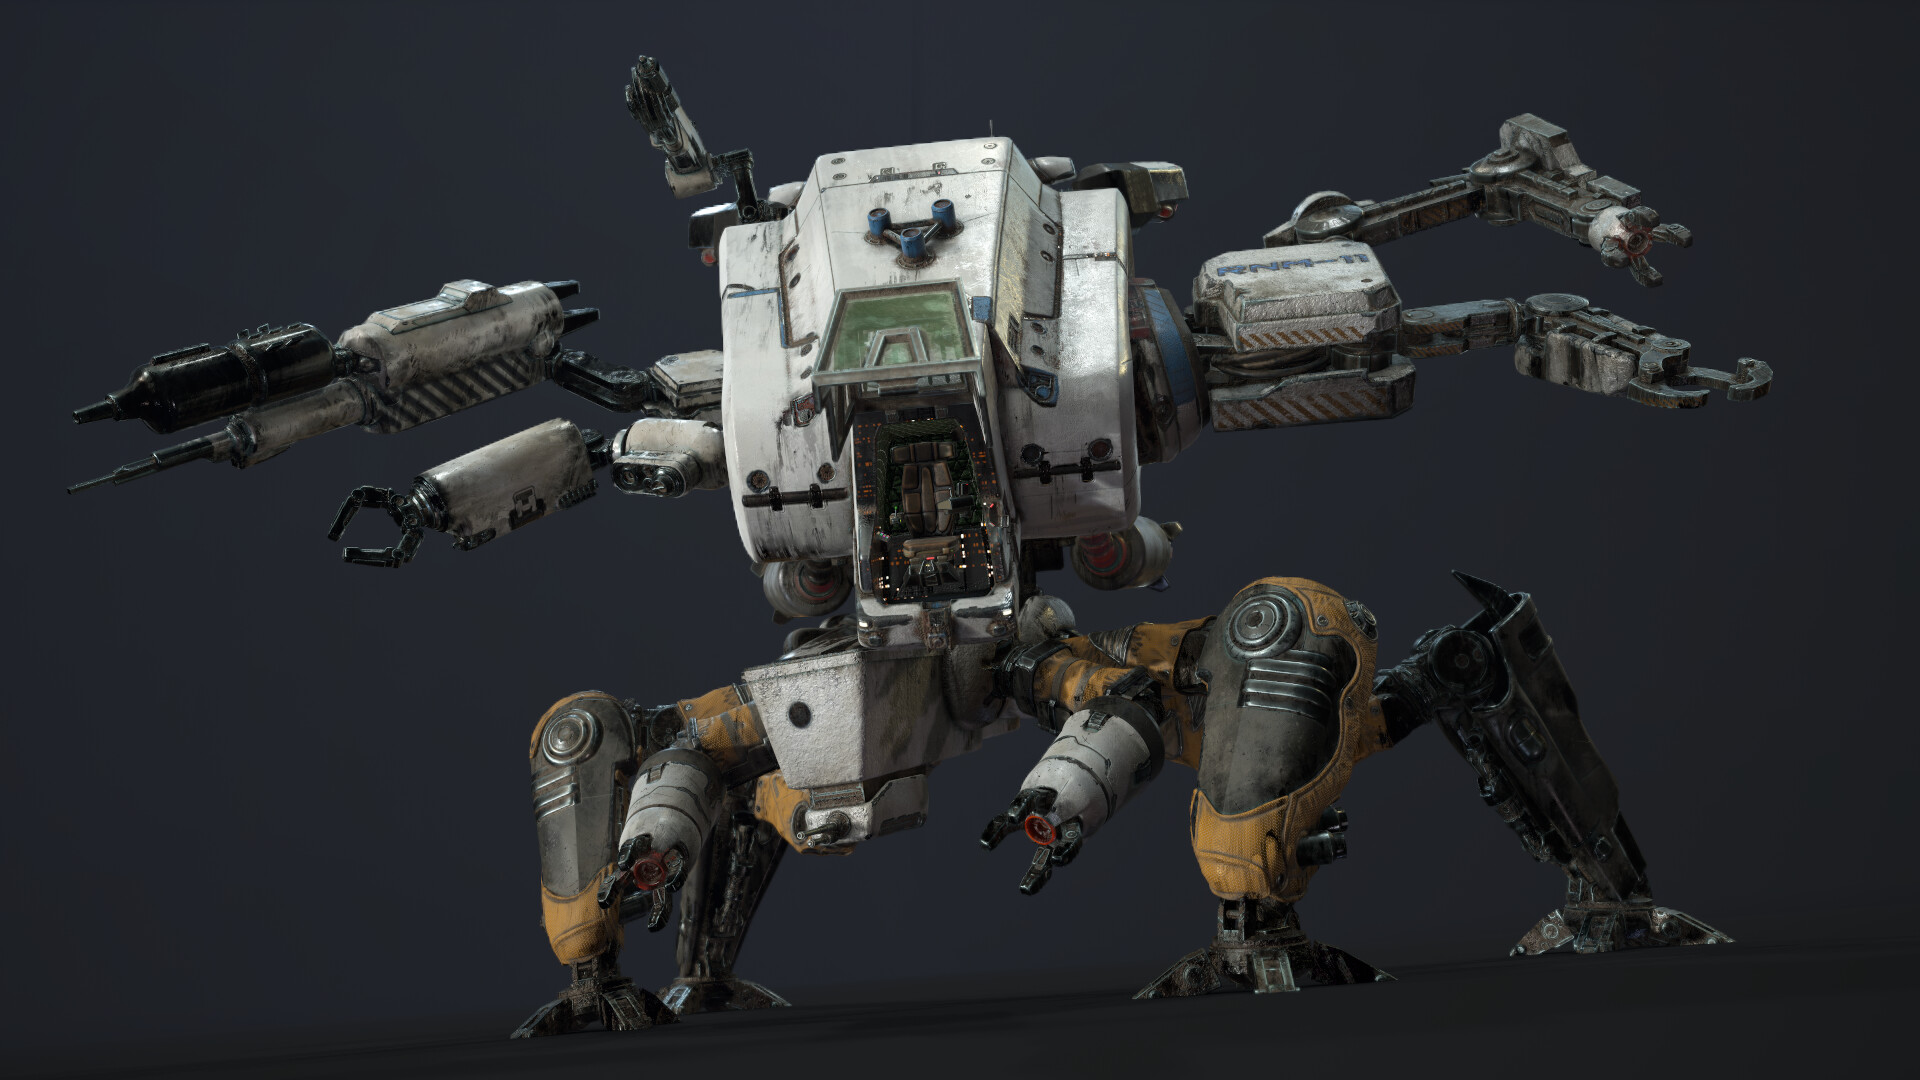
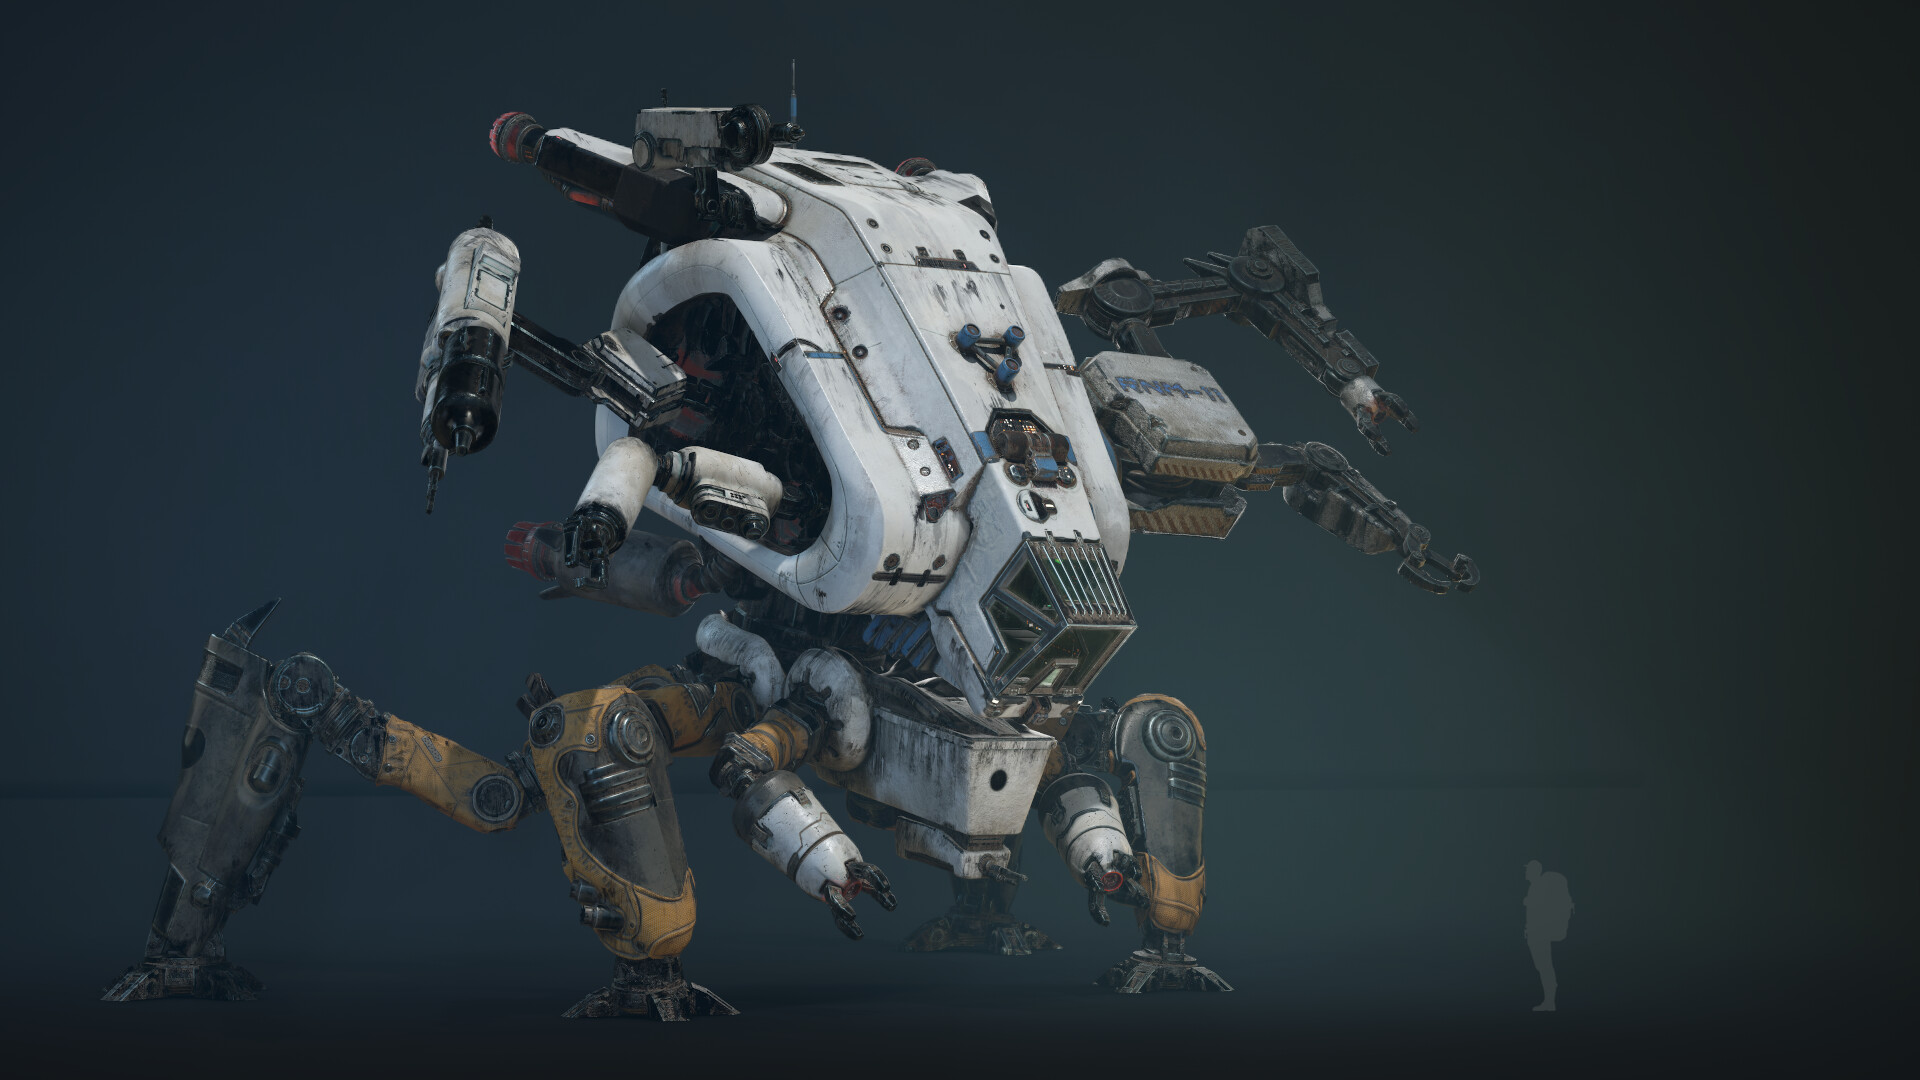
Hi, my name is Dmitry Danilenko and I’m a 3D props and environment artist in the games industry. I’m currently working with Gameloft in Kharkiv, Ukraine. In this article, I would like to talk about the role that Marmoset Toolbag played in creating and presenting my piece, The Miner.
Modeling
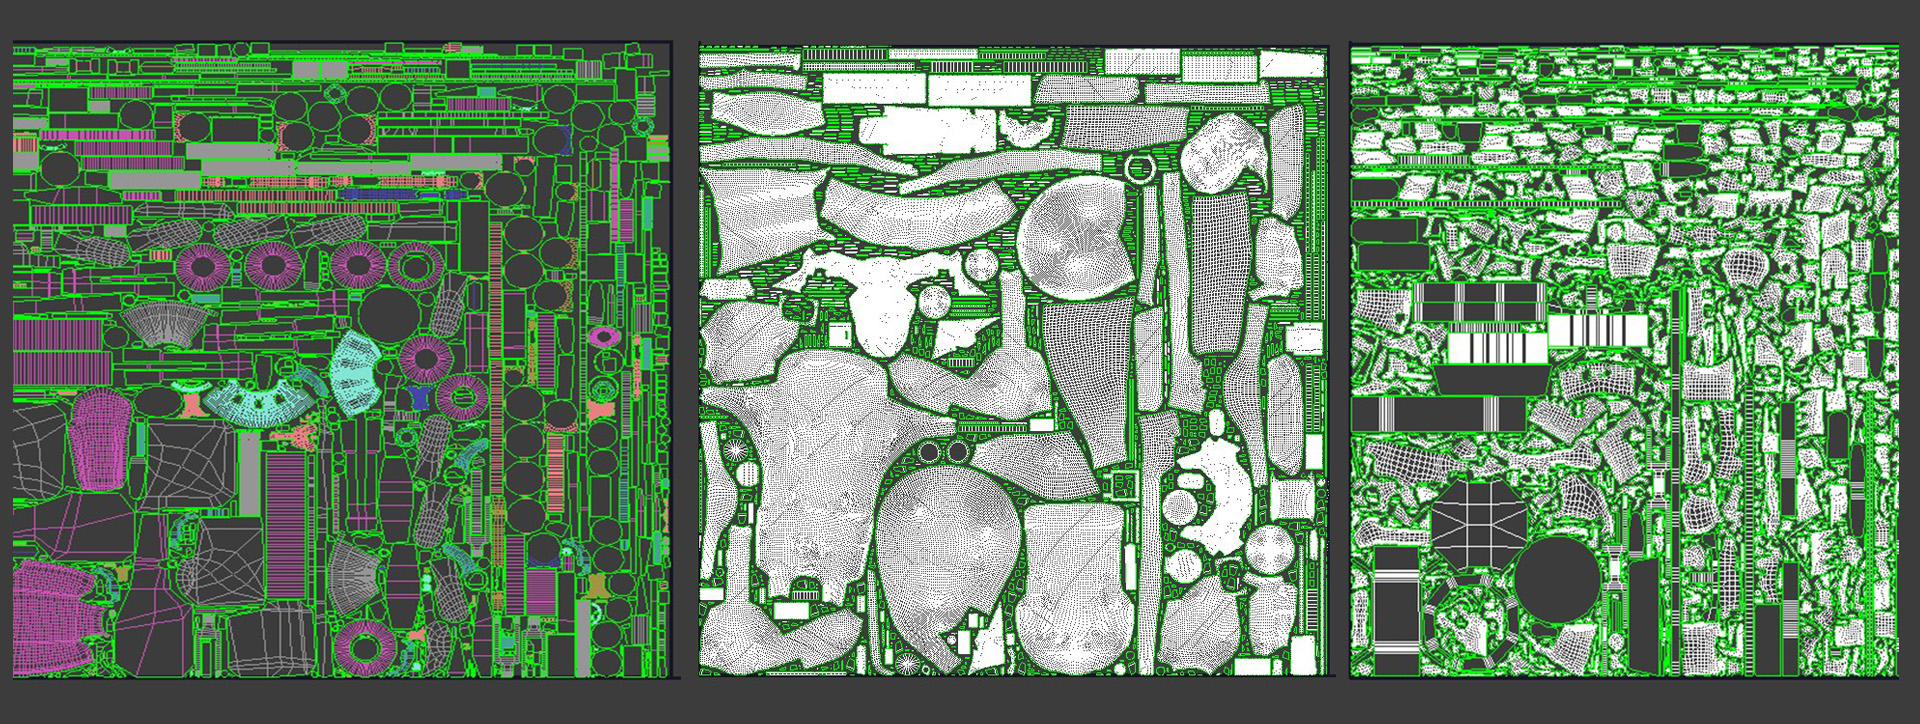
The high poly stage was done in 3ds Max and Zbrush. Zbrush was also my main retopology tool throughout this project. The ZRemesher is amazing as far as quality and time are concerned. For the UV’s, I used 3ds Max’s ‘Flatten by Smoothing Groups’ feature and then finished packing the UV’s in RizomUV.
Texture Baking
I worked on this mech during my free time (which I don’t have much of), so it was very important for me to save energy, time, and most importantly to not lose steam halfway through. With that in mind, I used all possible ways to speed up the process of creating my high poly, low poly, UV’s, and baking texture maps. Therefore, some meshes and UV’s vary in quality and were created differently. Despite this, I did not have any problems baking all of the models and there was no need to do any serious post-processing of baked maps in Photoshop.
For a while now, Toolbag’s baker has been my baker of choice. I really like the flexibility and the level of control that the baker provides. I broke down the texture baking process into several stages; model preparation, setting up the baking scene, and baking finalization and polish.
Model Preparation
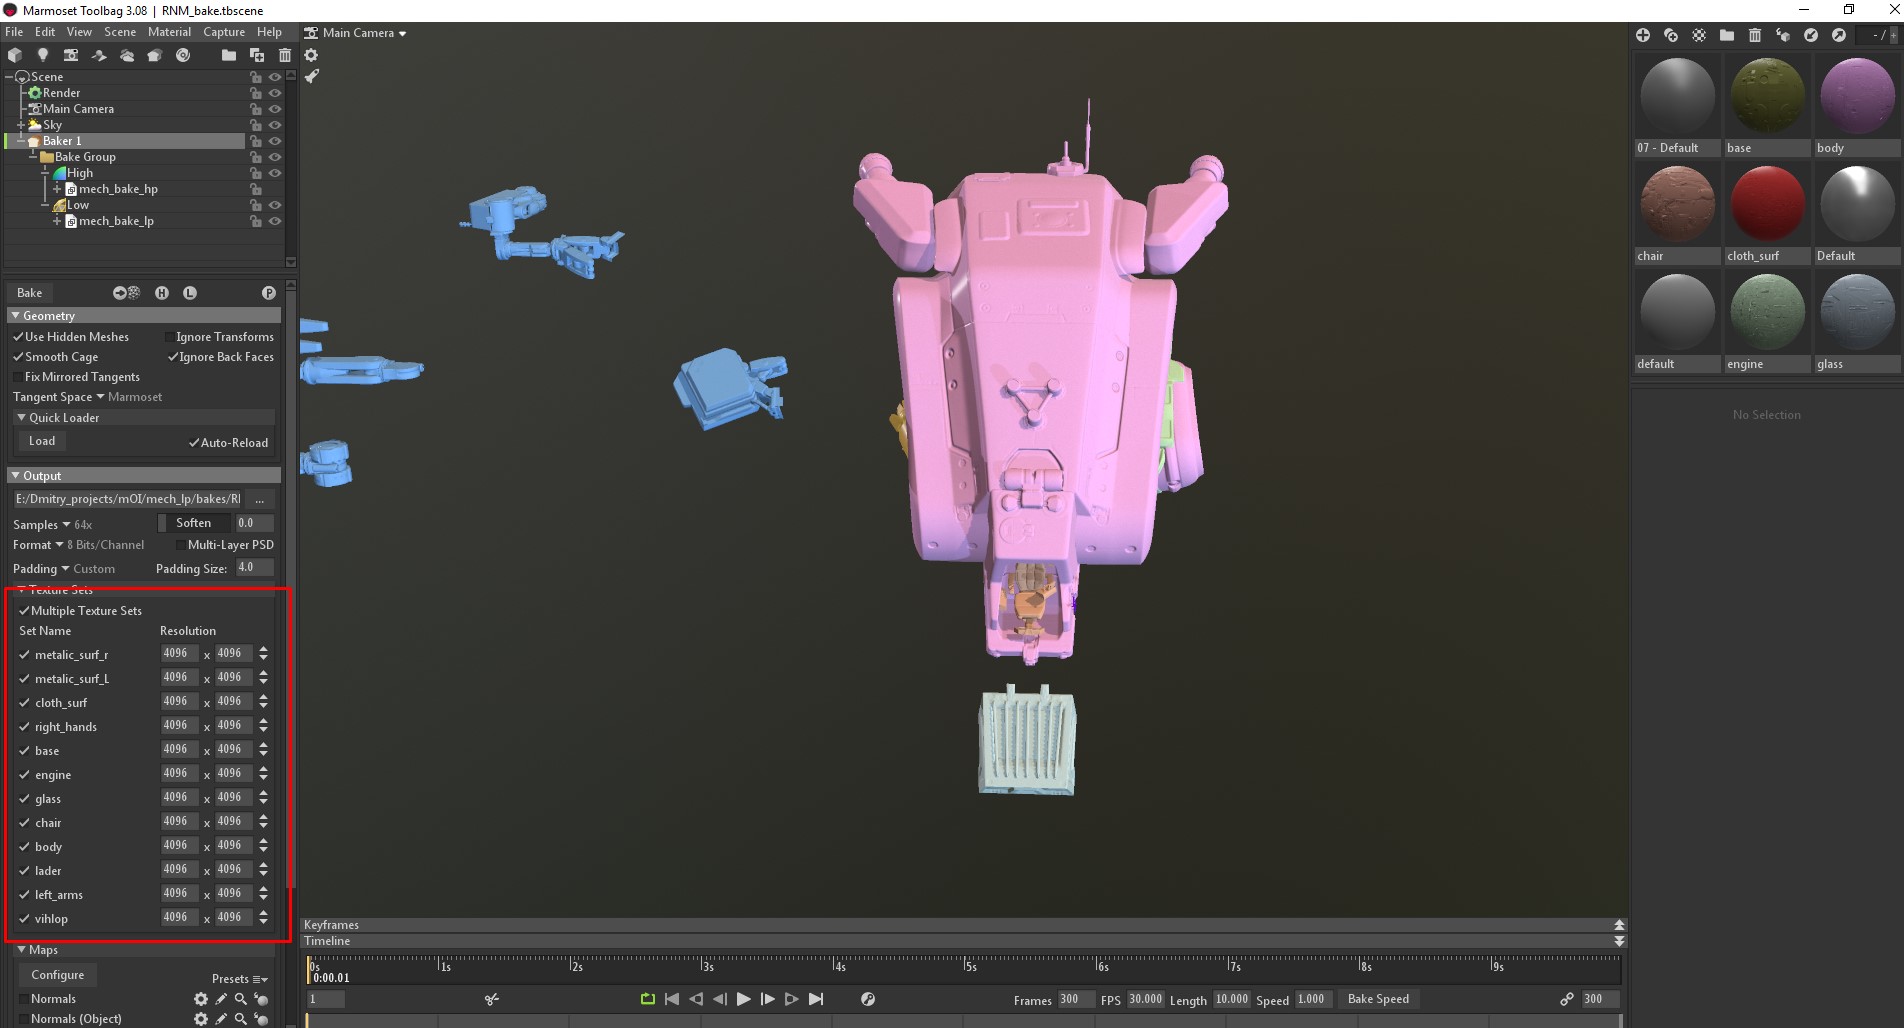
Since the model consisted of multiple UV’s, it was necessary to assign separate materials with unique names for each UV set. This allows all of the maps to be baked at once, thanks to Toolbag’s Multiple Texture Sets option. Setting clear, unique names makes it much easier to work on texturing and setting up materials later on.
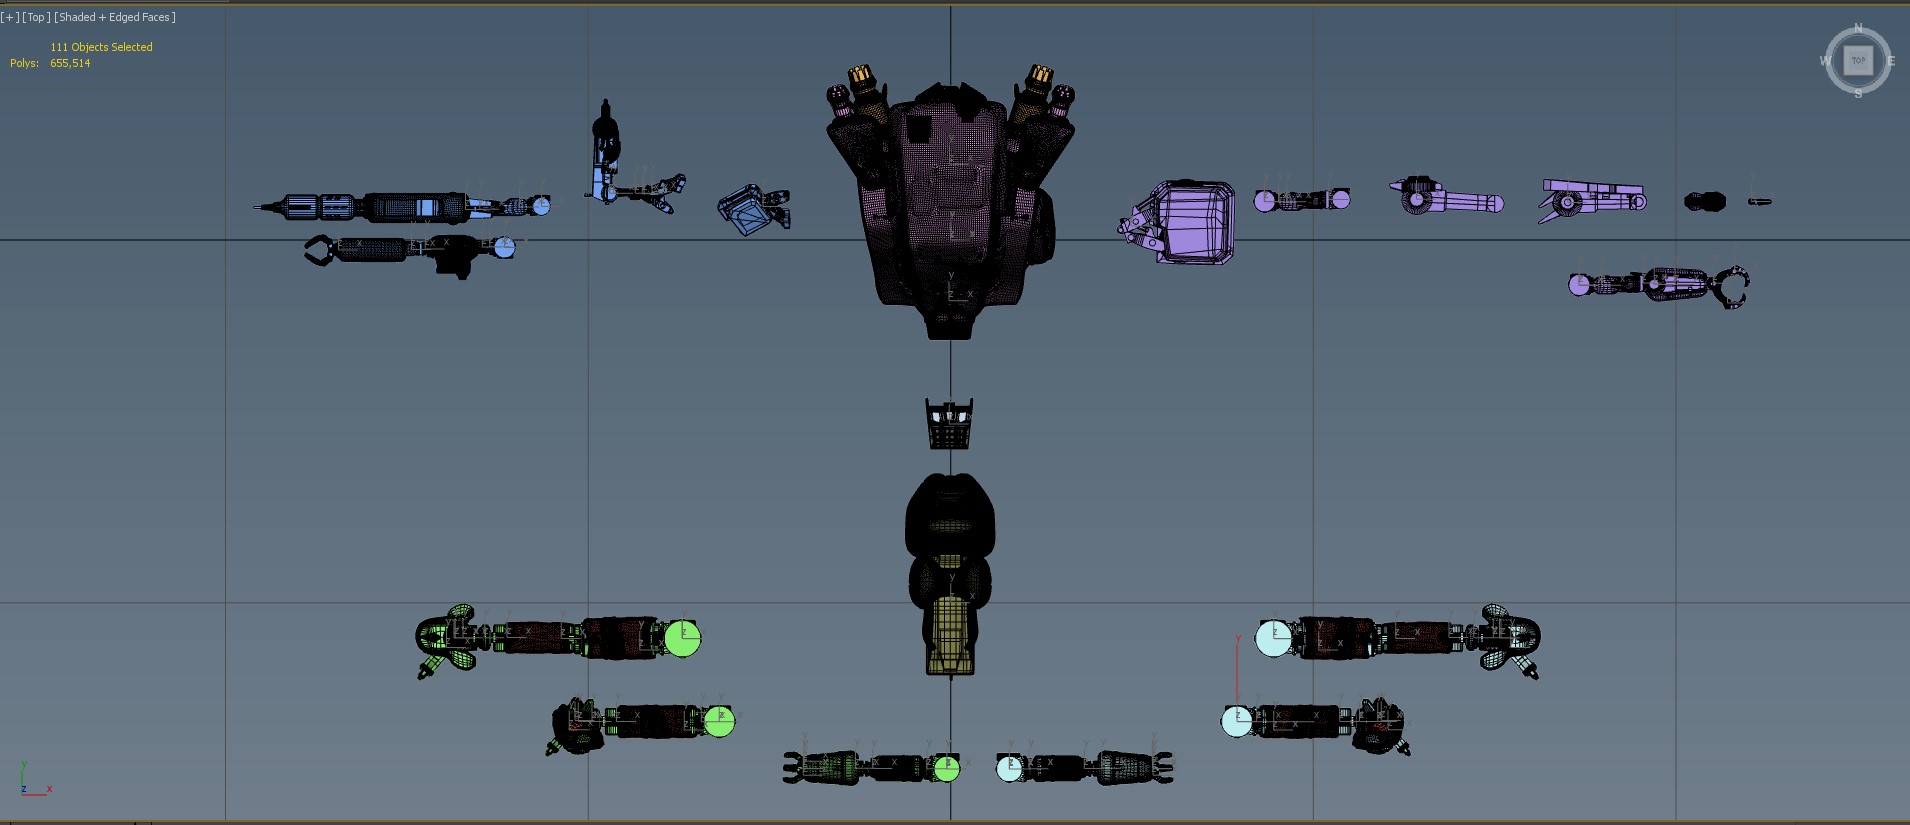
Usually, when working with complex mechanical models, I have a habit of baking the assets in their base position with the correct orientation and their pivots relative to the world and local coordinates. Doing this makes it seem as if these parts were in the shop during assembly.
I don’t use baking groups often since I prefer to manually explode the model elements for more precise control over the influence each element has on another. For example, I wanted the rubber bags and metal parts of the mech’s legs to be baked together, but I didn’t want the mech’s body to influence the cockpit. Additionally, it makes it easier to check the model for errors and artifacts.
Setting Up the Baking Scene
I just can’t express in words the satisfaction that arises every time I load the high and low poly meshes in the baker and the cage envelope is nearly perfect by default, despite having baked something really complicated and big. Therefore, the process of setting up and baking texture maps was very easy. First off, I always check the cage of the low poly mesh. If the difference between the geometry of the low and high poly is drastic, then pressing the Estimate Offset button will do an automatic cage envelop adjustment perfectly. You might have to tweak the Max Offset slider slightly. Sometimes, you might need to use the two small yet powerful buttons, Paint Offset and Paint Skew. Above all, every adjustment made during this stage is updated in real-time.
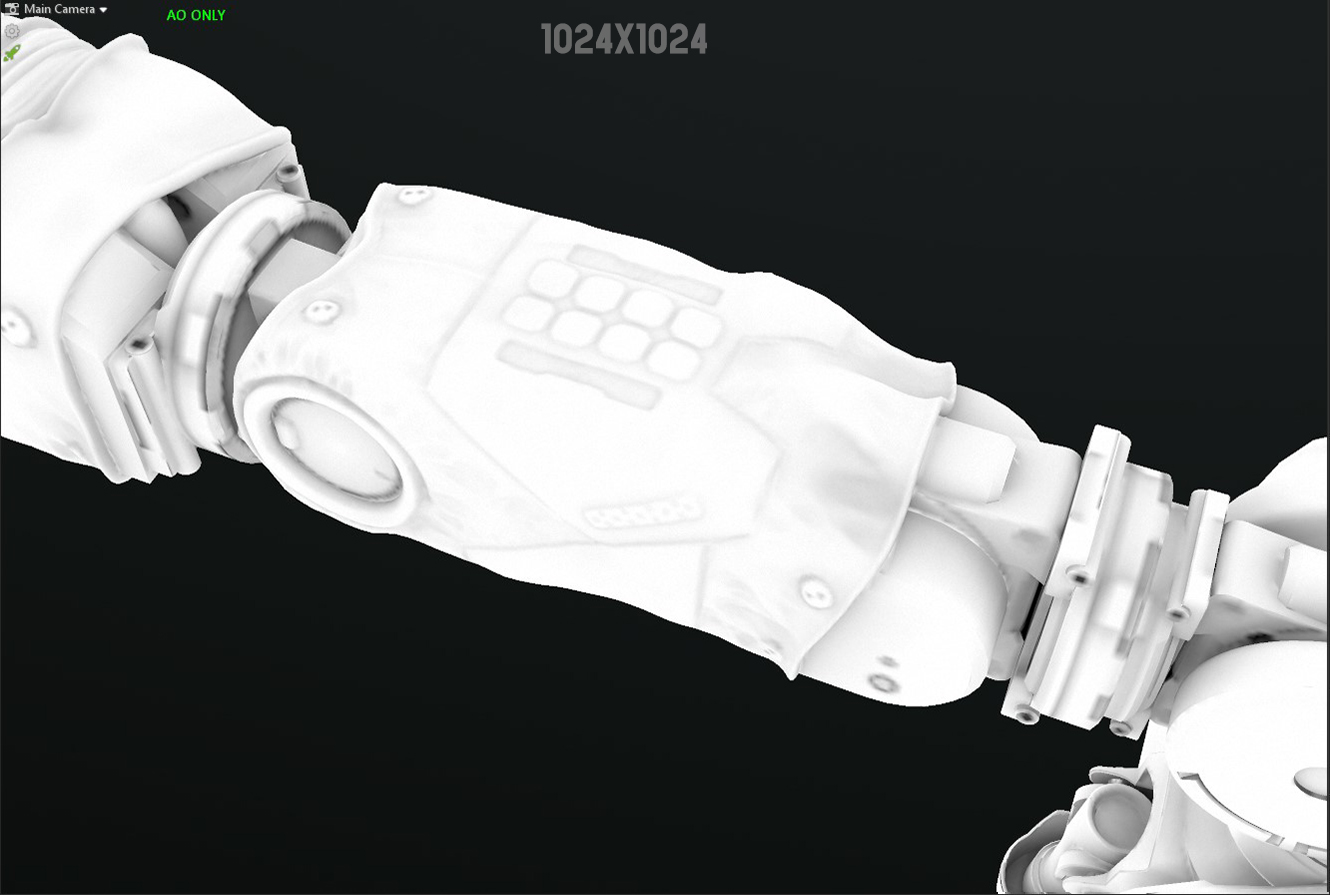
It’s time to make the first round of baking normal maps at a resolution of 1024×1024. This texture map displays artifacts best and bakes quickly. After searching for artifacts, I make the necessary adjustments to the cage envelope offset and cage skew then move on to setting up the Ambient Occlusion and Curvature maps.


When setting up the Ambient Occlusion bake, I usually keep the Floor Occlusion and Add Cavity options off. These options work well for static objects, but not for moving mechanical stuff. I always concentrate on fine-tuning the Search Distance option, which was added with the 3.06 patch. This option gives a clean and sufficiently occluded map that allows better control when used in generators and creating masks in Substance Painter.
When tweaking AO, it usually takes a couple of baking rounds with a low number of rays (to save time) to determine the best settings. In most cases for the curvature map, I choose an Intensity value of higher than 1 to get slightly sharper detail.
Baking Finalization and Polish
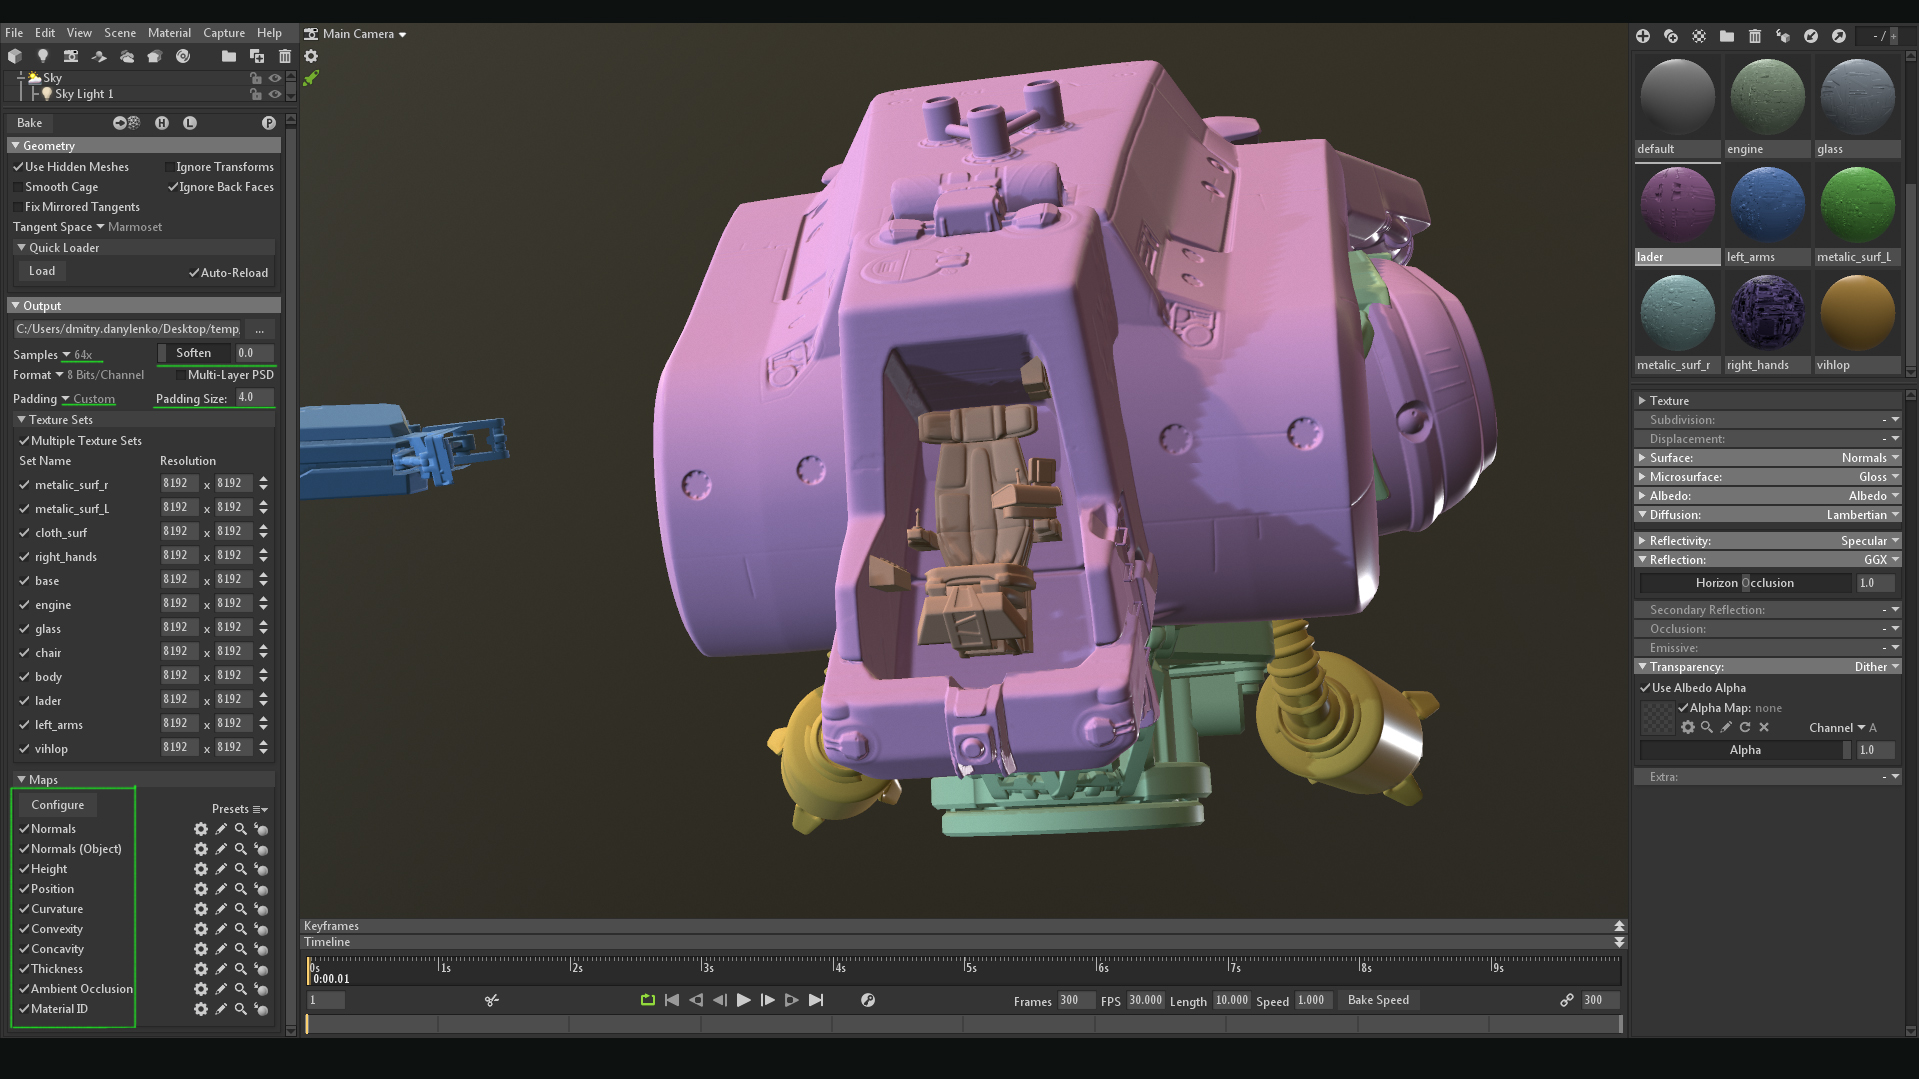
For all other maps, I tend to keep the default settings as they are. The only thing I do before starting the final round of bakes is raising the maximum number of rays for AO and the Thickness map. Most maps for this project were baked at 8k resolution. Be sure to wind up the number of samples per pixel to 64 and press Bake. And then that means it’s time to drink tea. You can see the final list of maps that I usually bake with their settings in the image above.
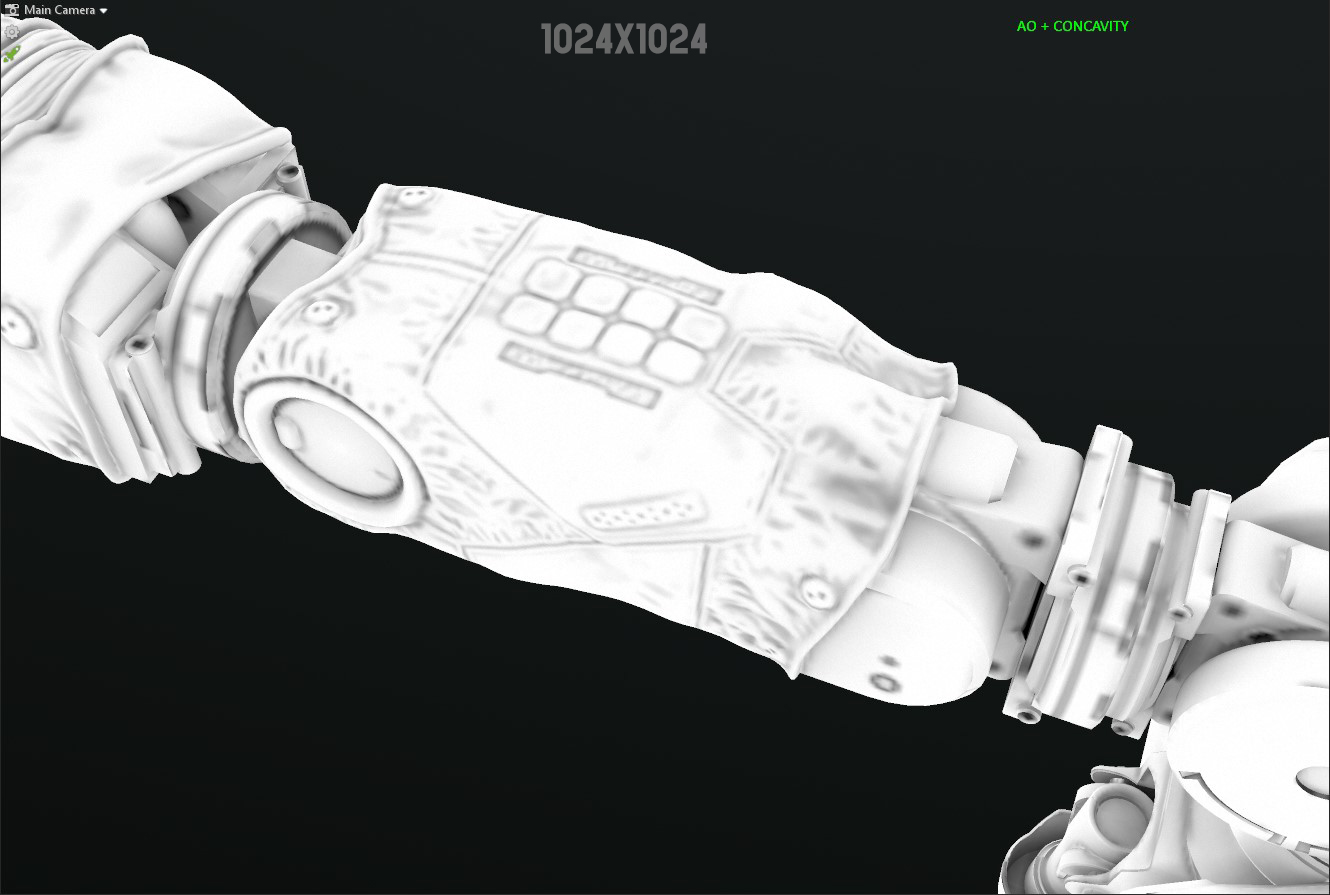
I want to draw your attention to two very simple yet interesting texture maps that are not often considered in the pipeline but can be very useful – Convexity and Concavity. Blending these maps in Photoshop can significantly enhance the detail of the AO and Curvature maps. To do so, all you need to do is add your Concavity map as a layer on top of your AO and change the Blending to Multiply.
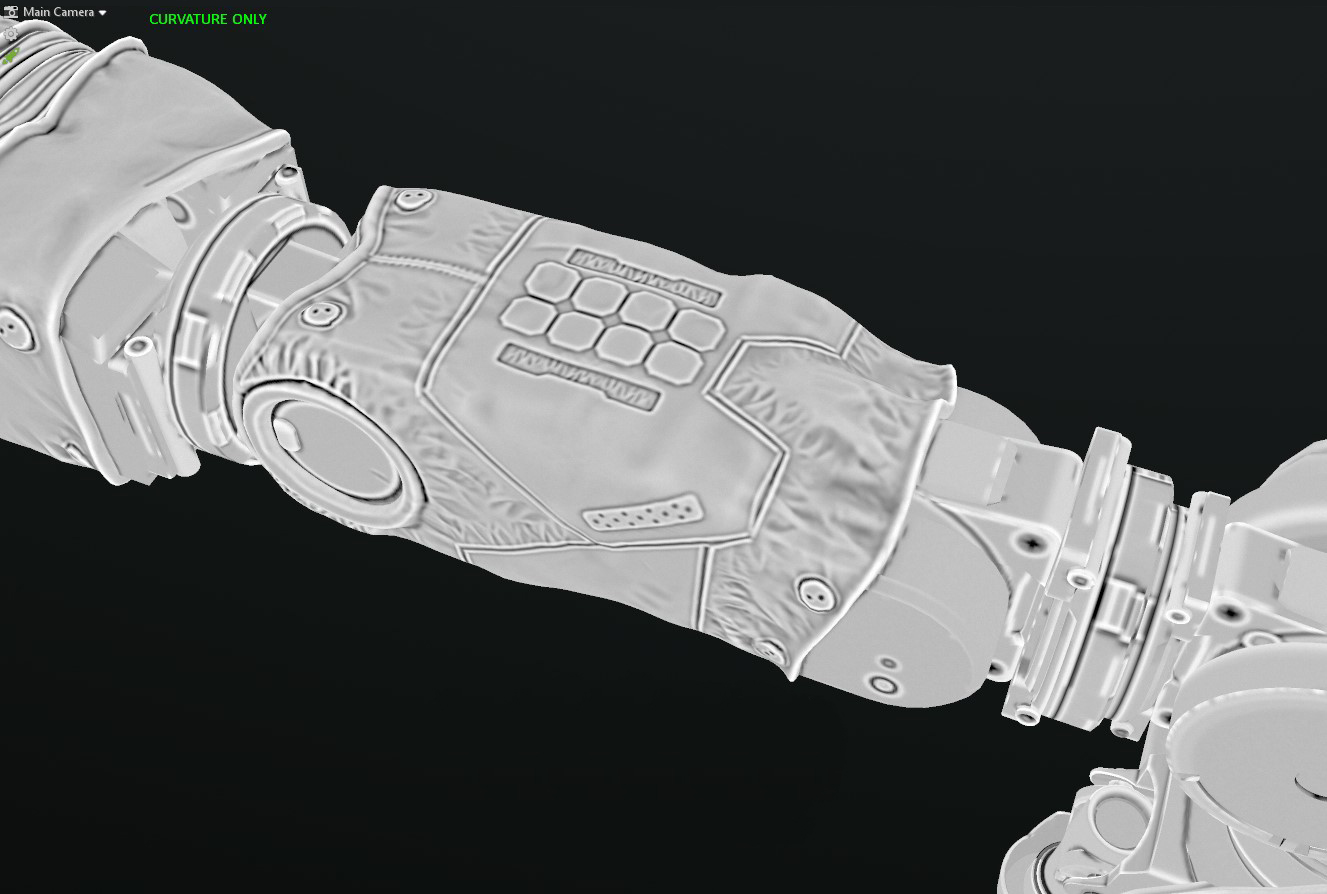
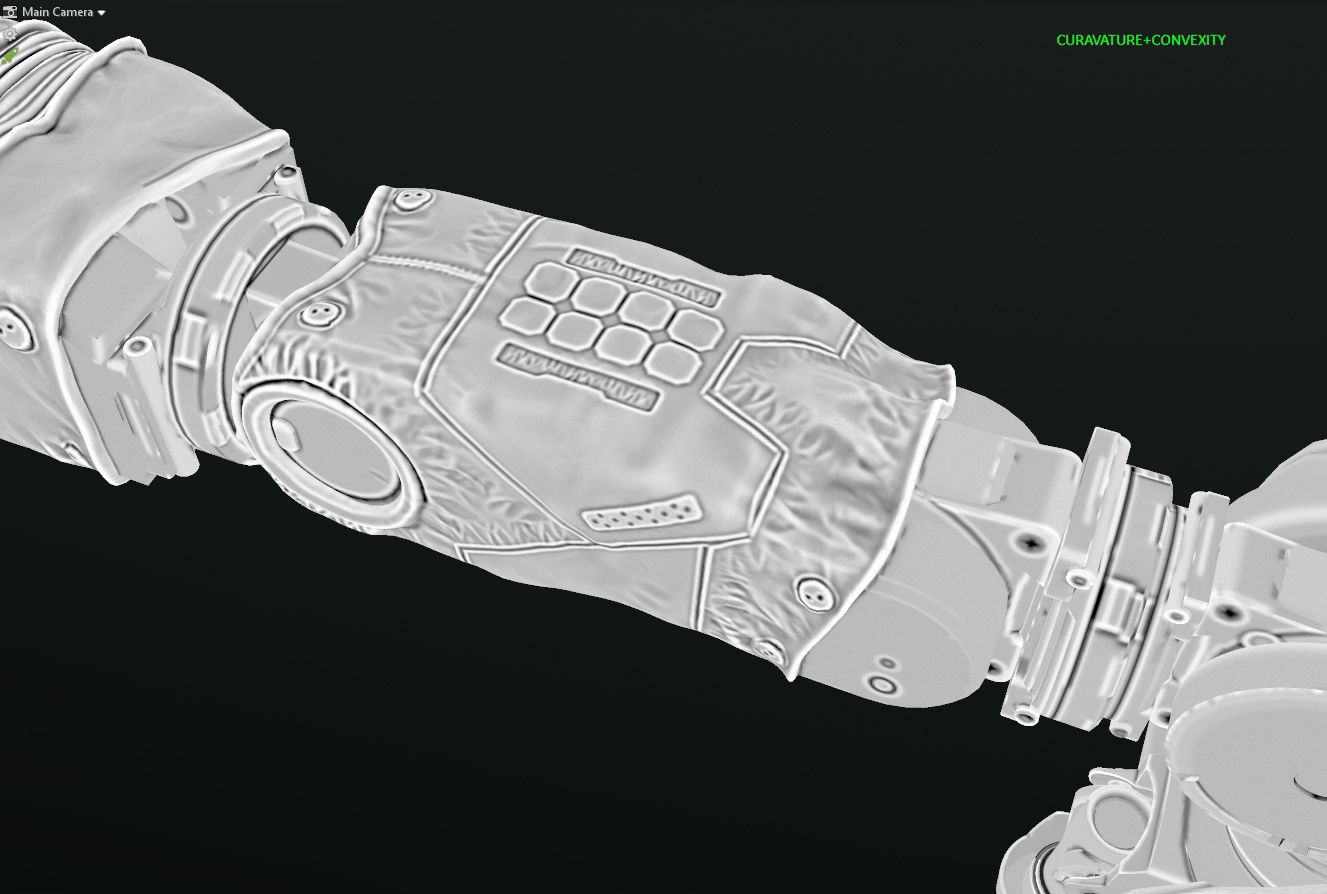
To improve the Curvature map edge detail, add the Convexity layer above with the Blending mode changed to Linear Dodge (Add). Lower the opacity of the layer between 50-75% and save. These maps are very useful in Substance Painter since they act as extra fill layers for masks or as simple overlays on top of base diffuse maps to sharpen details.
All of the texturing was done in Substance Painter, which is another awesome tool that is constantly updated with tons of useful features. This is something that both Toolbag and Painter have in common – you get a sense that they’re created by artists for artists.
Lighting and Presentation
A cool concept, excellent technical execution, and awesome textures mean nothing without stunning presentation. Very often, this process can take the same amount of time and effort as the actual production of the asset, especially if you’re using the wrong tools. This is why Toolbag is my go-to software to make my artwork shine. I don’t think there’s any other software that can produce better results in a short amount of time whilst providing flexibility and control. Not only can you make changes to the lighting and render settings in real-time, but parent-child hierarchy is also supported in the animation system. These aspects make Toolbag a great tool for the successful presentation of animated hard surface models, especially mechs.
As for my lighting setup, I usually start by choosing a Sky Preset. In most cases, I prefer a warm or neutrally lit environment. I love to experiment when it comes to lighting, and this time, I tried the lighting techniques described in the breakdown article by Juras Rodionovas. I found it to be a very useful guide, so thank you. My lighting setup consisted of 4 Spot Lights: a key light, backlight, as well as two rim lights on either side. I had a few extra Omni Lights to behave as area lights. I like to play with the Shape properties of Lights to soften the highlights and add more shape to the reflections. I love to add some colored Fog to give it that feeling of depth and atmosphere, especially when combining it with Spot lights. At the same time, it creates very nice gradients and makes the scene looks complete.
Camera Setup
My workflow for the Camera setup was pretty simple; configure the primary camera first, clone it and make adjustments. In this case, the Focal Length was set to 85mm. I like to add a bit of a Z rotation to some of the cameras, which makes the scene feel more dynamic. I don’t go crazy with the Depth of Field options, I add an amount that’s barely noticeable for the sake of having a soft transition in the background. I like to add a bit of Sharpen, Contrast, adjust the Tone Mapping settings, and play with the Curve Editor. The other Camera settings are optional and will depend on the asset you’re rendering.
In the Render properties, I always turn Global Illumination on. I keep the GI Brightness fairly low since it can brighten up areas that are meant to be dark. Finally, don’t forget to set your Sampling value to 400 in the Capture Settings before rendering.
The Grand Finale
A big thank you to all the readers, I hope that my article was informative and fun to read. Once again, I want to thank Yishu 5 for the concept art that this piece was based on. Thanks to all of my friends at Gameloft (KHA Studio) for the help and advice during his project. And a huge thank you to the Marmoset team for creating such awesome software and for letting me share my experience. GG everyone!
We’d like to thank Dmitry Danylenko for writing this breakdown article. You can find more of Dmitry’s work on Artstation.
Animate and bake your hard surface models using the free 30-day trial of Toolbag. If you’re interested in collaborating on a tutorial or breakdown article, please send us your pitch, along with a link to your artwork, to submissions@marmoset.co.


