Article by Magdalena Dadela
Introduction & Project Ideation
Hello everyone! My name is Magdalena Dadela, and I am a character artist living in Montreal. In this walkthrough, I wanted to share my process behind a little personal project called The Mouse.
The goal of the project was to learn basic Houdini grooming and try rendering it in Marmoset Toolbag. Marmoset Toolbag 5 added a few amazing features to our toolbelt. One is UDIM support, and the other is support for groom curves; both were used in this project.
Admittedly, I have always avoided working with groom data in personal work because I find it tedious, but lately I decided to get over it. I do not like using XGen, so I’ve been thinking about learning Houdini for a while. It is a little intimidating at the beginning, but the grooming pipeline turned out to be relatively straightforward to grasp
I wanted to create something simple and fluffy to test the basic features without diving into complex hairstyles because I knew I would get bored and drop it.
I have always loved the cute mice of Jill Barklem’s Brambly Hedge and figured a little mouse grandma might be the thing. I didn’t want her to be a copy of the book critters, so I changed her look a bit, adding larger eyes and tiny, cute glasses.

Modeling and Texturing
I started with a simple ZBrush sketch and then quickly ran it through Marvelous Designer to create the frilly apron. The topology was done in ZBrush, and I didn’t really care about it much, as long as I had enough polygons for grooming, as the Houdini groom maps do rely on vertex count.

I then started on the basic textures in Substance Painter. Because I wanted the hair on the ears and many areas of the face to be white (she’s old), I needed to split the textures into a regular skin texture and a separate groom map so the pink of the ears wouldn’t get picked up by the hair. This was a perfect opportunity to determine whether the Houdini groom would support UDIMs.
The two textures themselves are very simple. The groom’s texture is full of random spots I wanted to show in the hair, so it looks a bit chaotic on its own. It’s also more desaturated than the base body map.

Setting Up Grooms
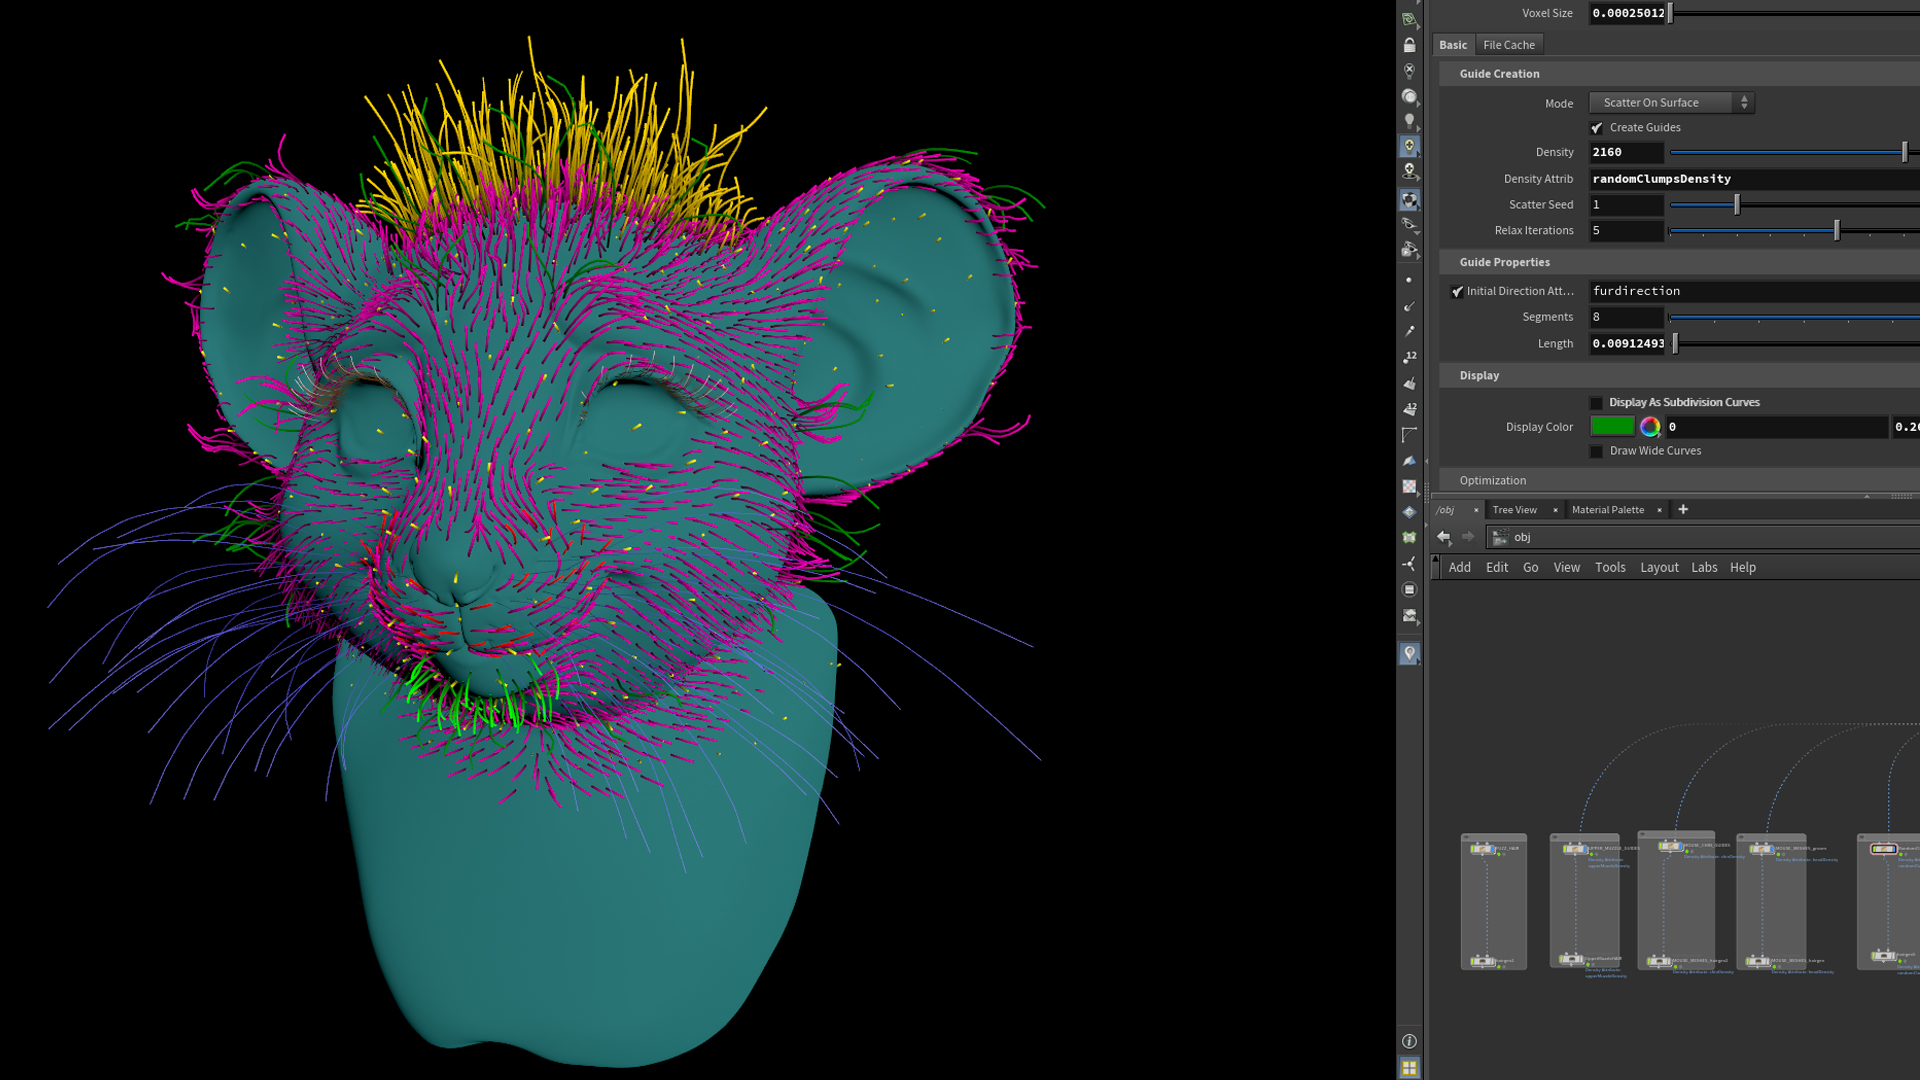
Working in Houdini was new to me, so I definitely tried many different things before it worked semi-decently, and I’m sure I’m still making silly mistakes. I divided the groom into multiple ‘zones’ and started with a simple overall base. The first step was to prepare mesh maps, such as density maps, to tell Houdini exactly where I wanted the groom to grow from. I later went back and forth, adjusting those throughout the process. Here’s a screenshot with the color-coded guides for each area.
As soon as I had basic hair growing out of the mouse, I tried exporting it from Houdini to Marmoset Toolbag as a proof of concept.
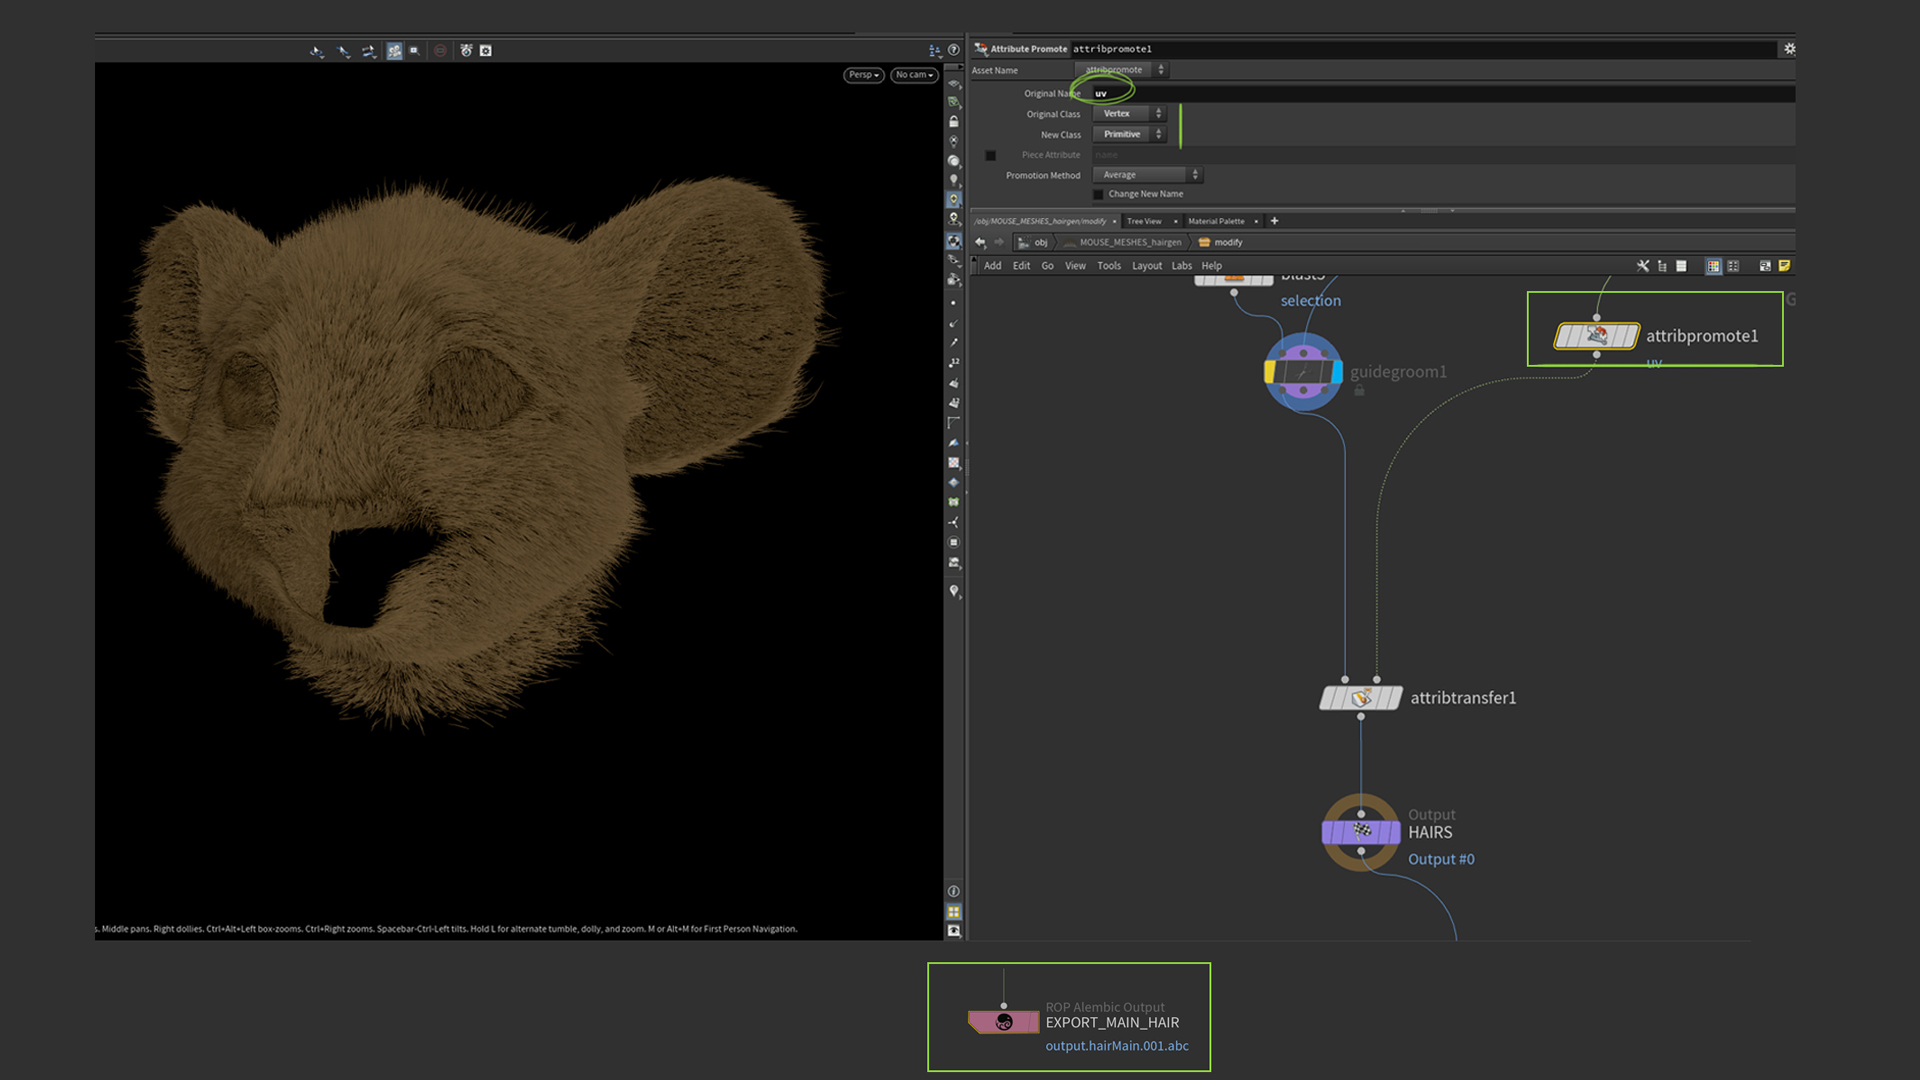
The first thing I realized was that the UV attribute might be lost during export, so it’s important to check your hair before exporting. Make sure you have a UV attribute on the actual hair curves. If it gets lost, use an ‘Attribute Promote’ node and promote UVs from the original mesh.
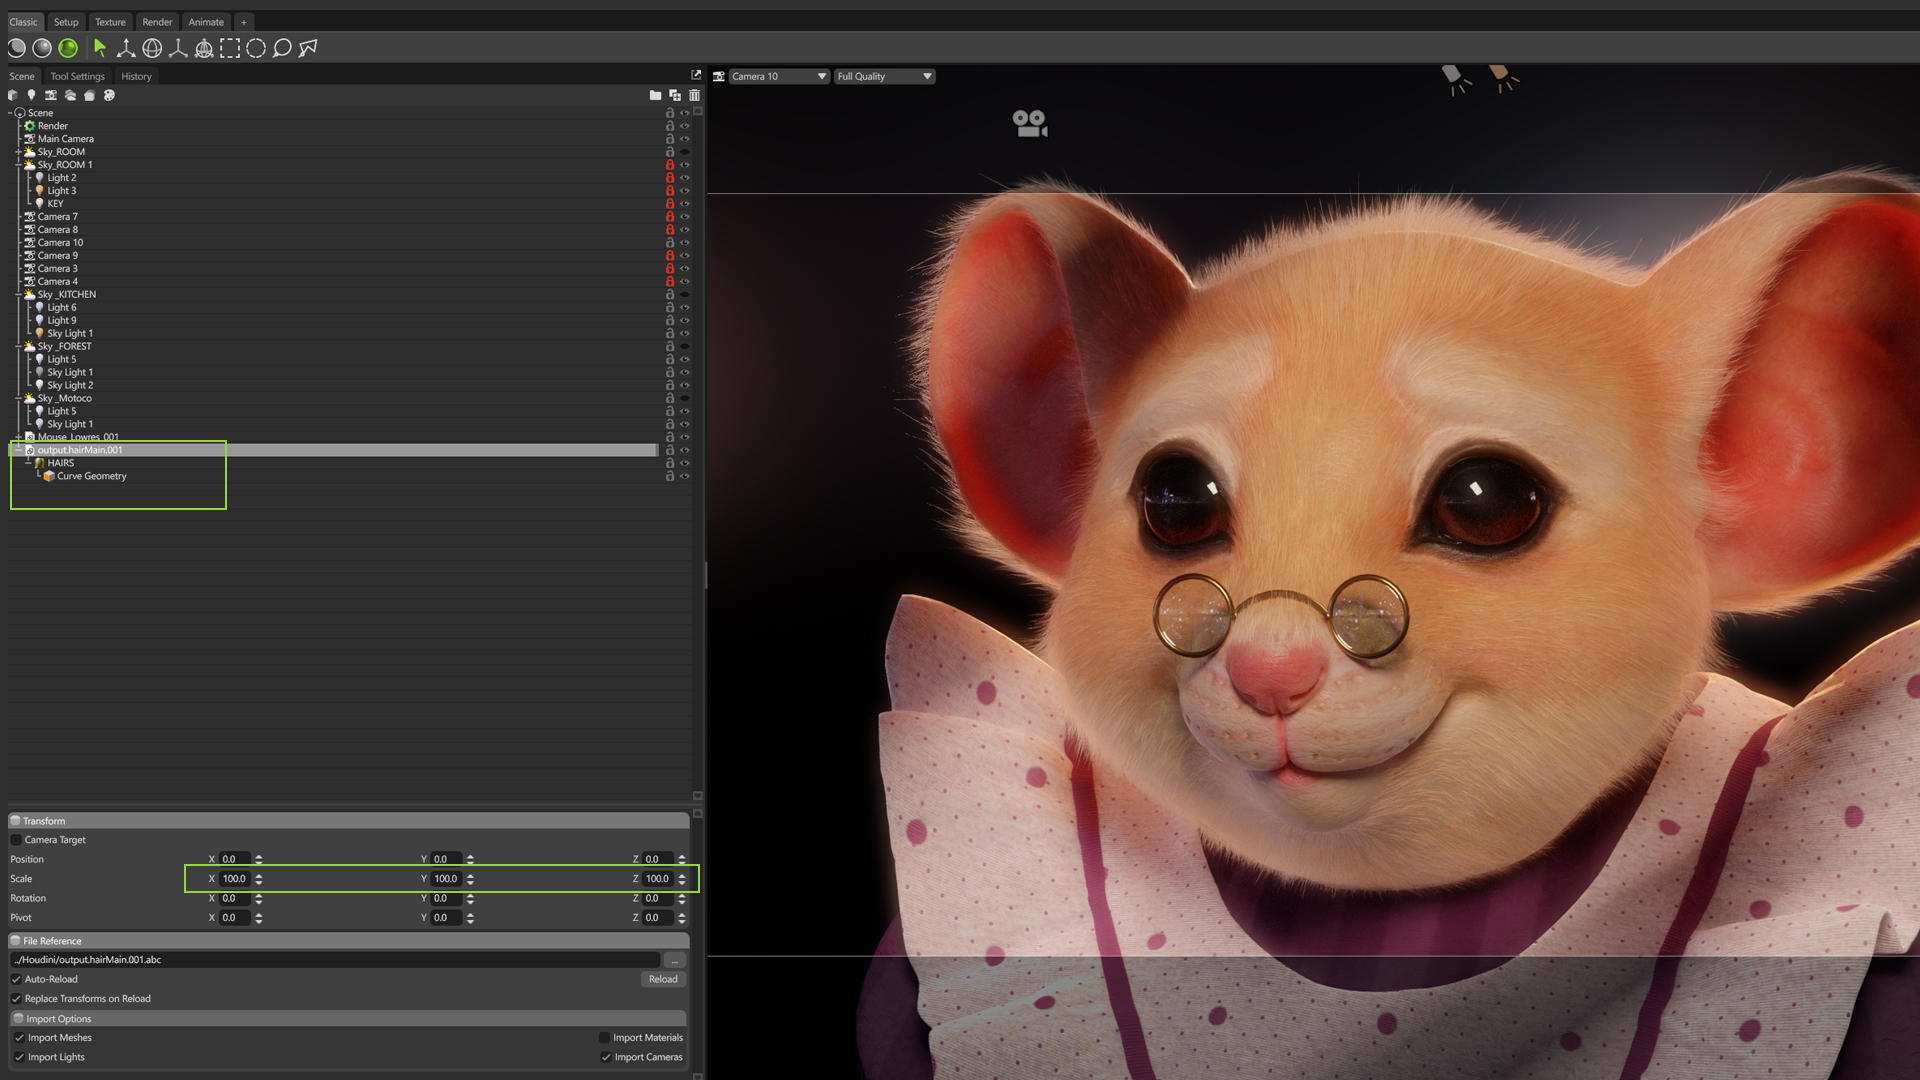
Another important thing is scale. Houdini works in meters, so your groom may appear very small when first brought into Toolbag. Instead of manually scaling the mesh, you can simply adjust Toolbag’s Scene and Import Scale settings to match Houdini’s units, ensuring everything comes in at the correct size upon import.
Watch this Quick Tip to learn how to import and set up groom data.
To be able to import your curves into Marmoset Toolbag, make sure you also export them using the Alembic ROP node.
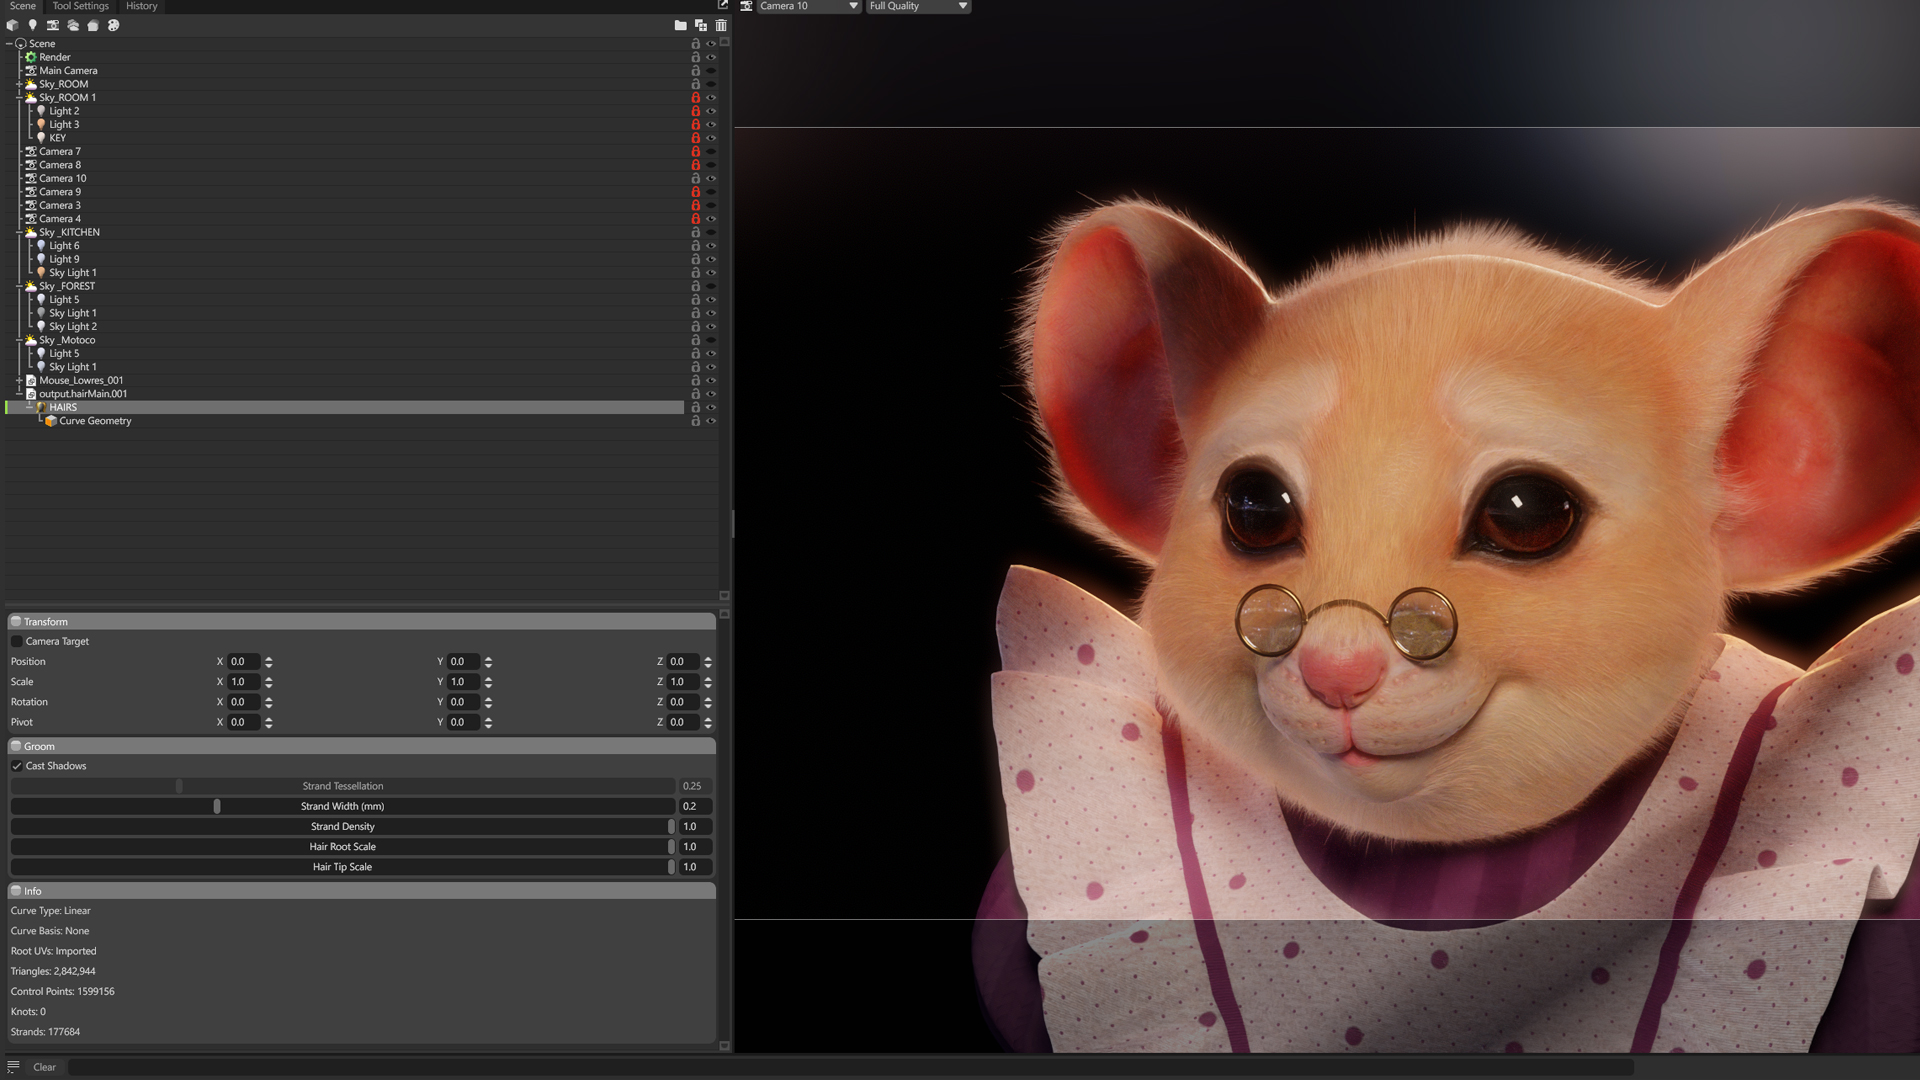
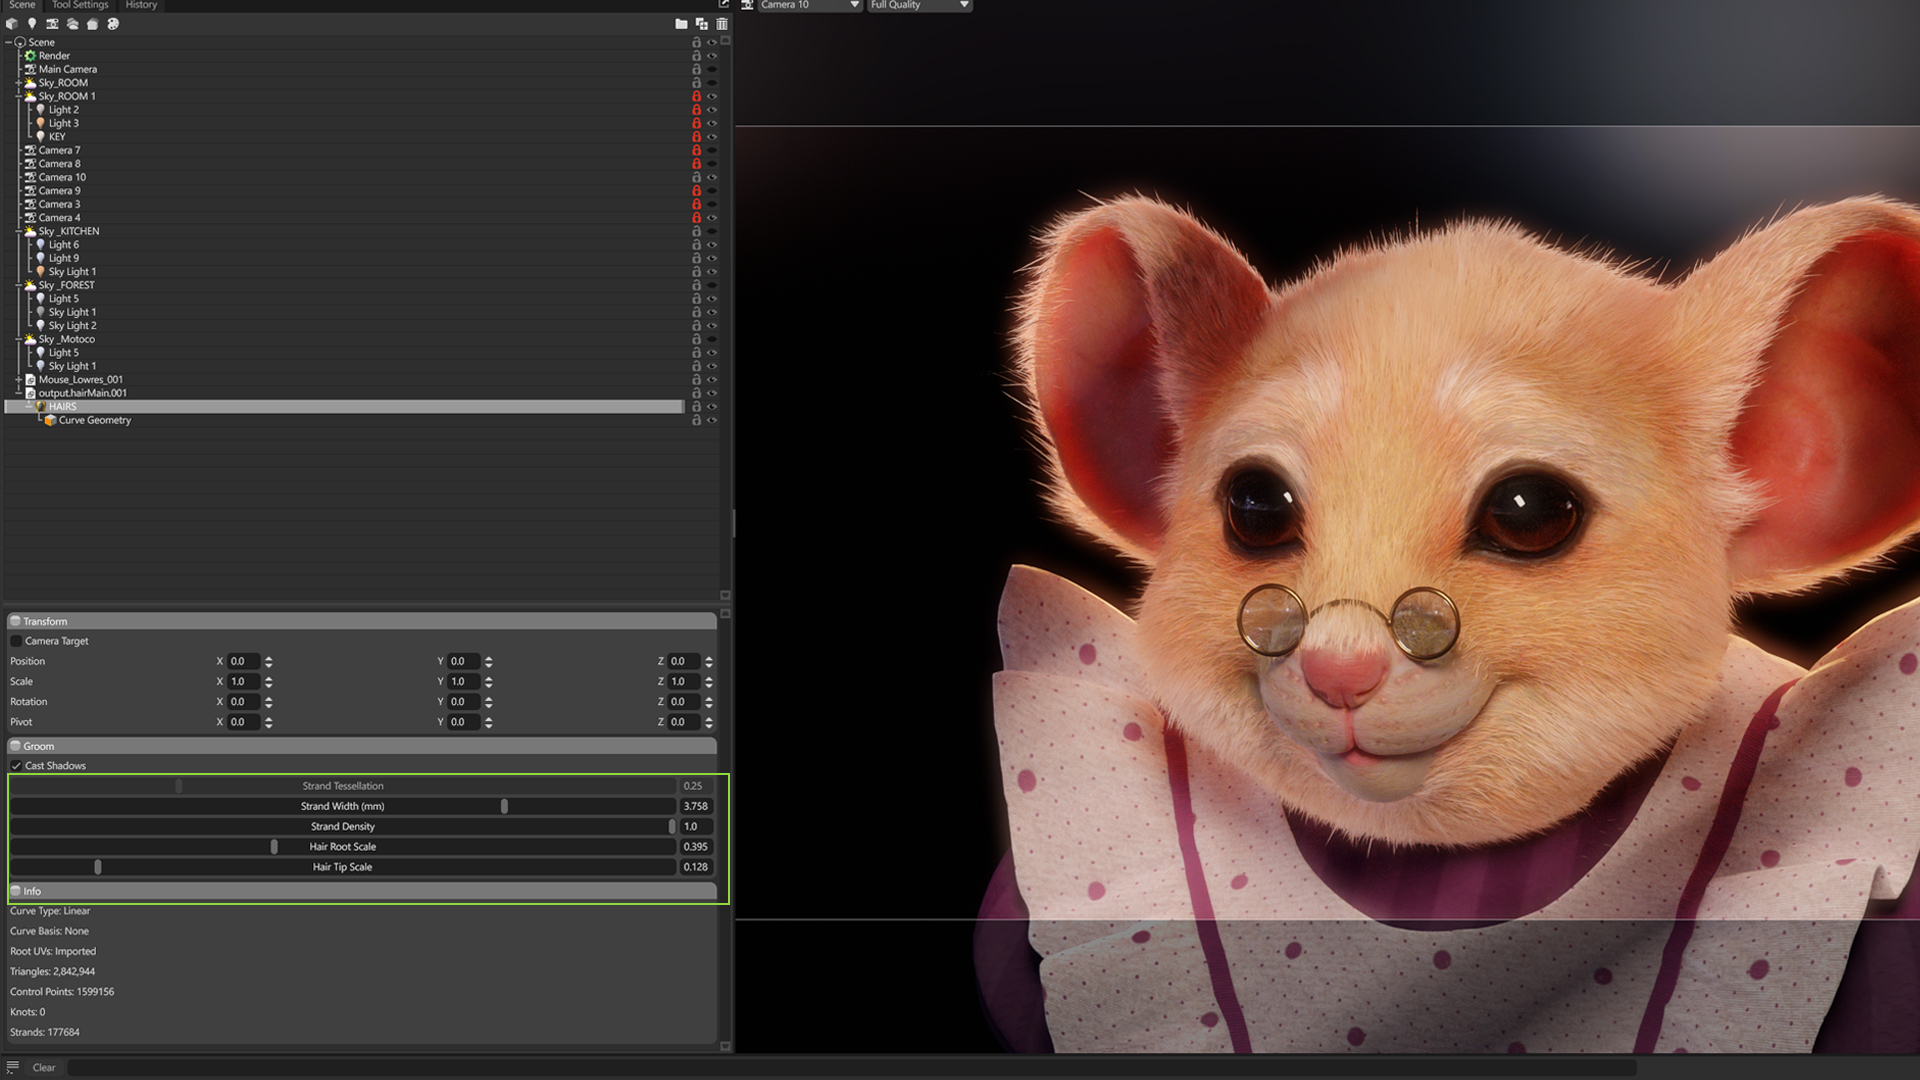
Once you import your groom into Toolbag, it will automatically create a groom material for you, which is great! It will also create some groom settings in the object properties. First thing you’ll notice is that your hair is super fine and wispy. Make sure to adjust the Strand Width and the Hair Root and Hair Tip Scale. I like to lower the latter two and increase the overall scaling.
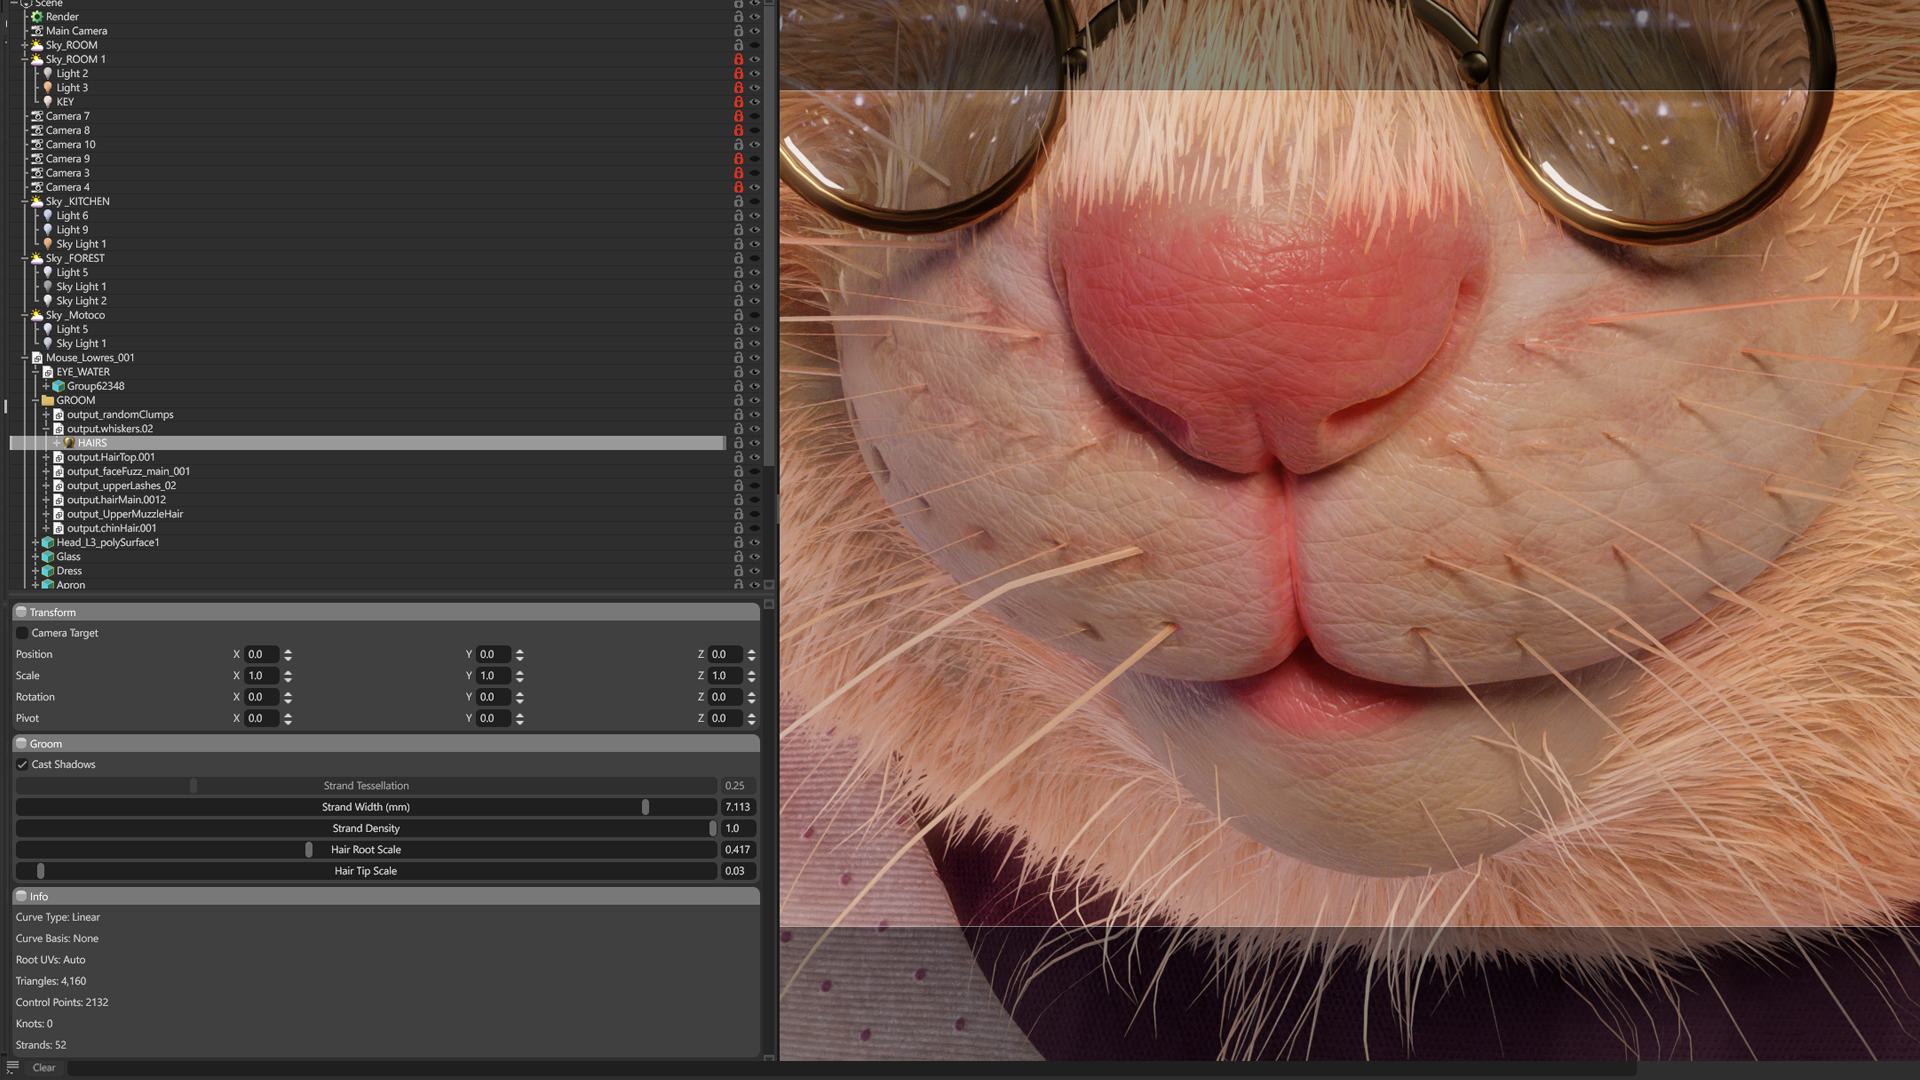
For the whiskers, I increased the Strand Width almost to the maximum to make them stand out. I did realize, however, that the hair is rendered as flat ribbons, so I wish there were a camera-facing option to orient them towards the camera at all times, because from some angles the whiskers almost disappear, as you can see in the image. Another great feature would be an alternative to tube rendering. I didn’t want to export it as geometry from Houdini because I did not like the result, so I left it as is. But those two settings would definitely help a lot.
Editing Hair Shaders
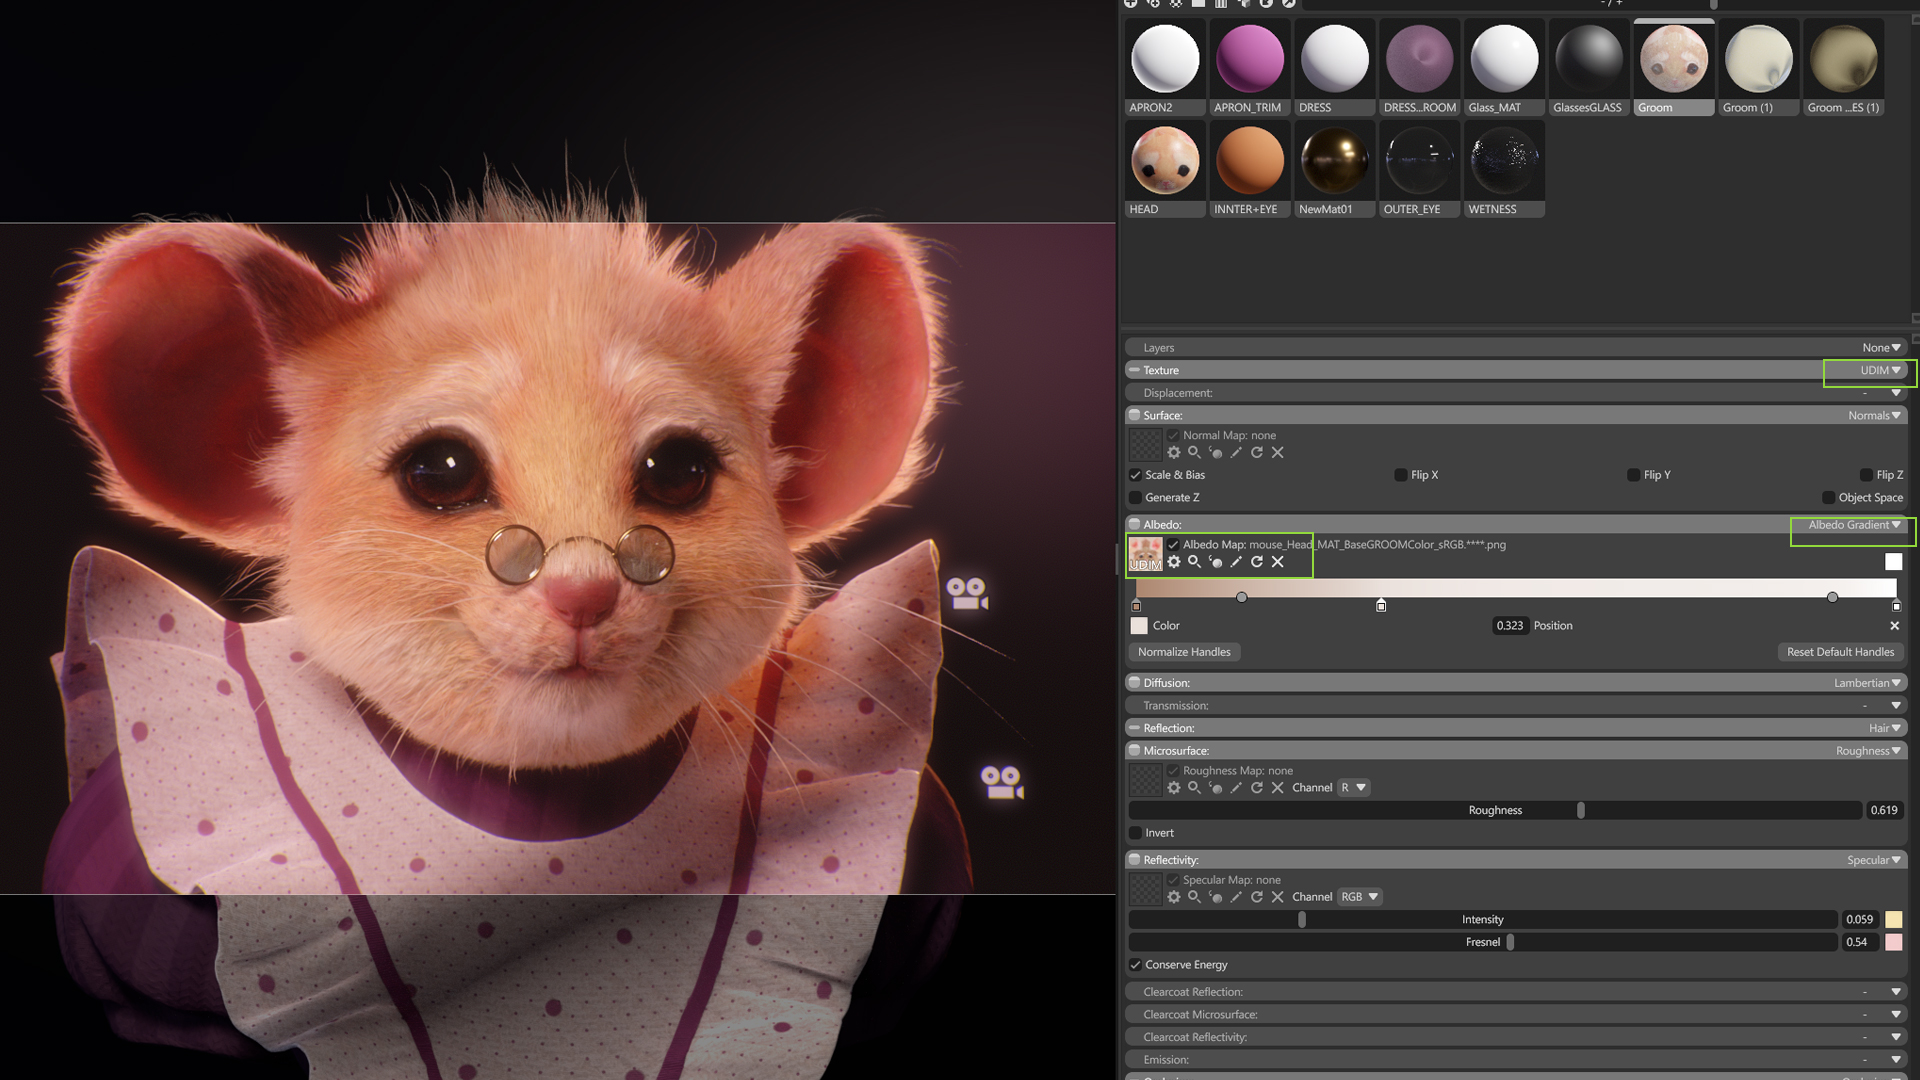
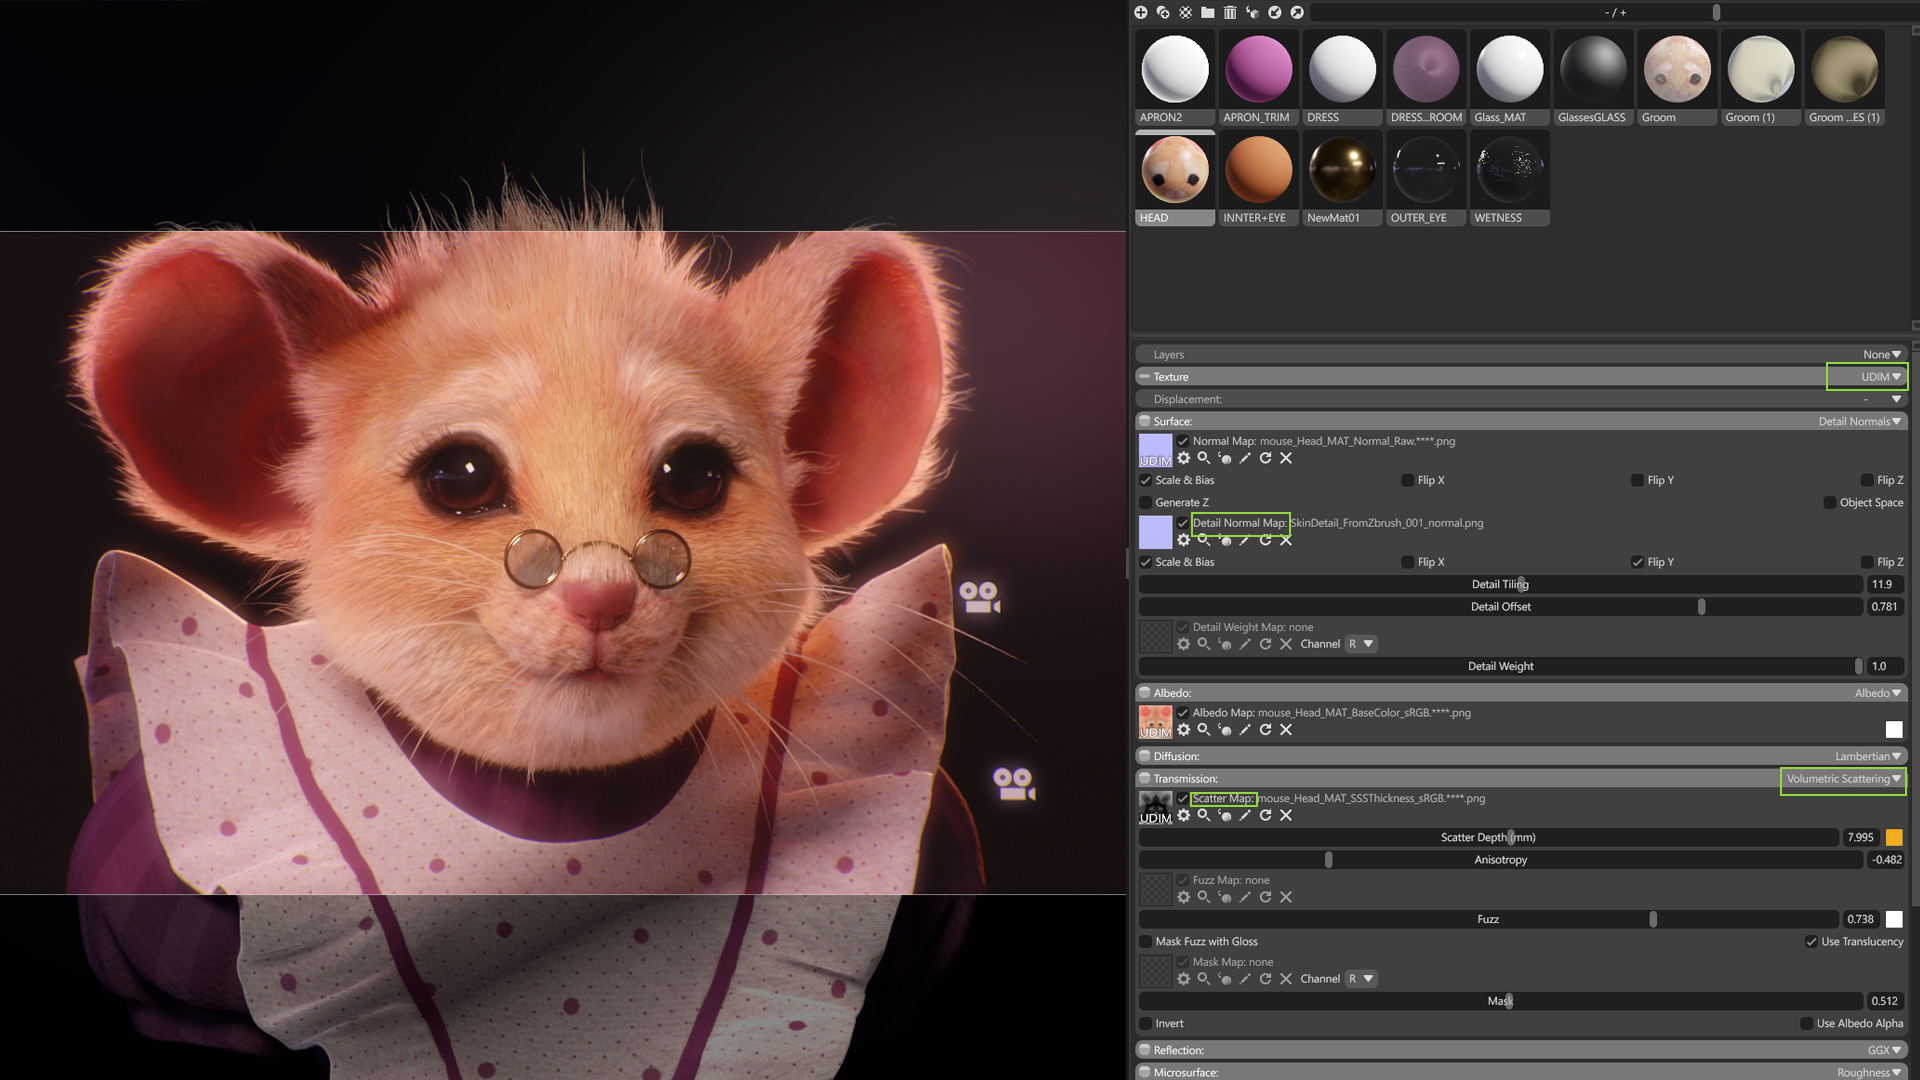
Now let’s look at the materials. The groom material is basically almost the same in terms of settings as any other Toolbag shader. This is great because it’s easy to understand. The most amazing thing to me was discovering that I could use a UDIM map on the groom, so I didn’t have to create a separate UV set for the hair.
I used the groom map in the Albedo module to control it separately from the face maps. I also added a slight gradient to tint the hair a bit at the base using the Albedo Gradient shading model. This is super useful for something long, like the whiskers in particular. I duplicated the groom shader and made a separate one for the whiskers.
That’s basically all you need to know about the groom setup. For the remaining meshes, I used simple shading. On the head, I used fairly strong Volumetric Scattering to make the ears pop. I created a simple black-and-white scatter mask to prevent the rest of the character from glowing too much. I also used a tiny detail normal map applied all over to simulate skin texture breakup, which is visible on the nose and ears.
For the clothes, I didn’t want anything too distracting, so I stuck to a simple shader with a bit of fuzzy fresnel and noise breakup in the maps. I also added some scatter to the apron to achieve a nice translucent effect under backlighting. I did export a groom for the dress, but it’s very subtle.
Lighting the Scene
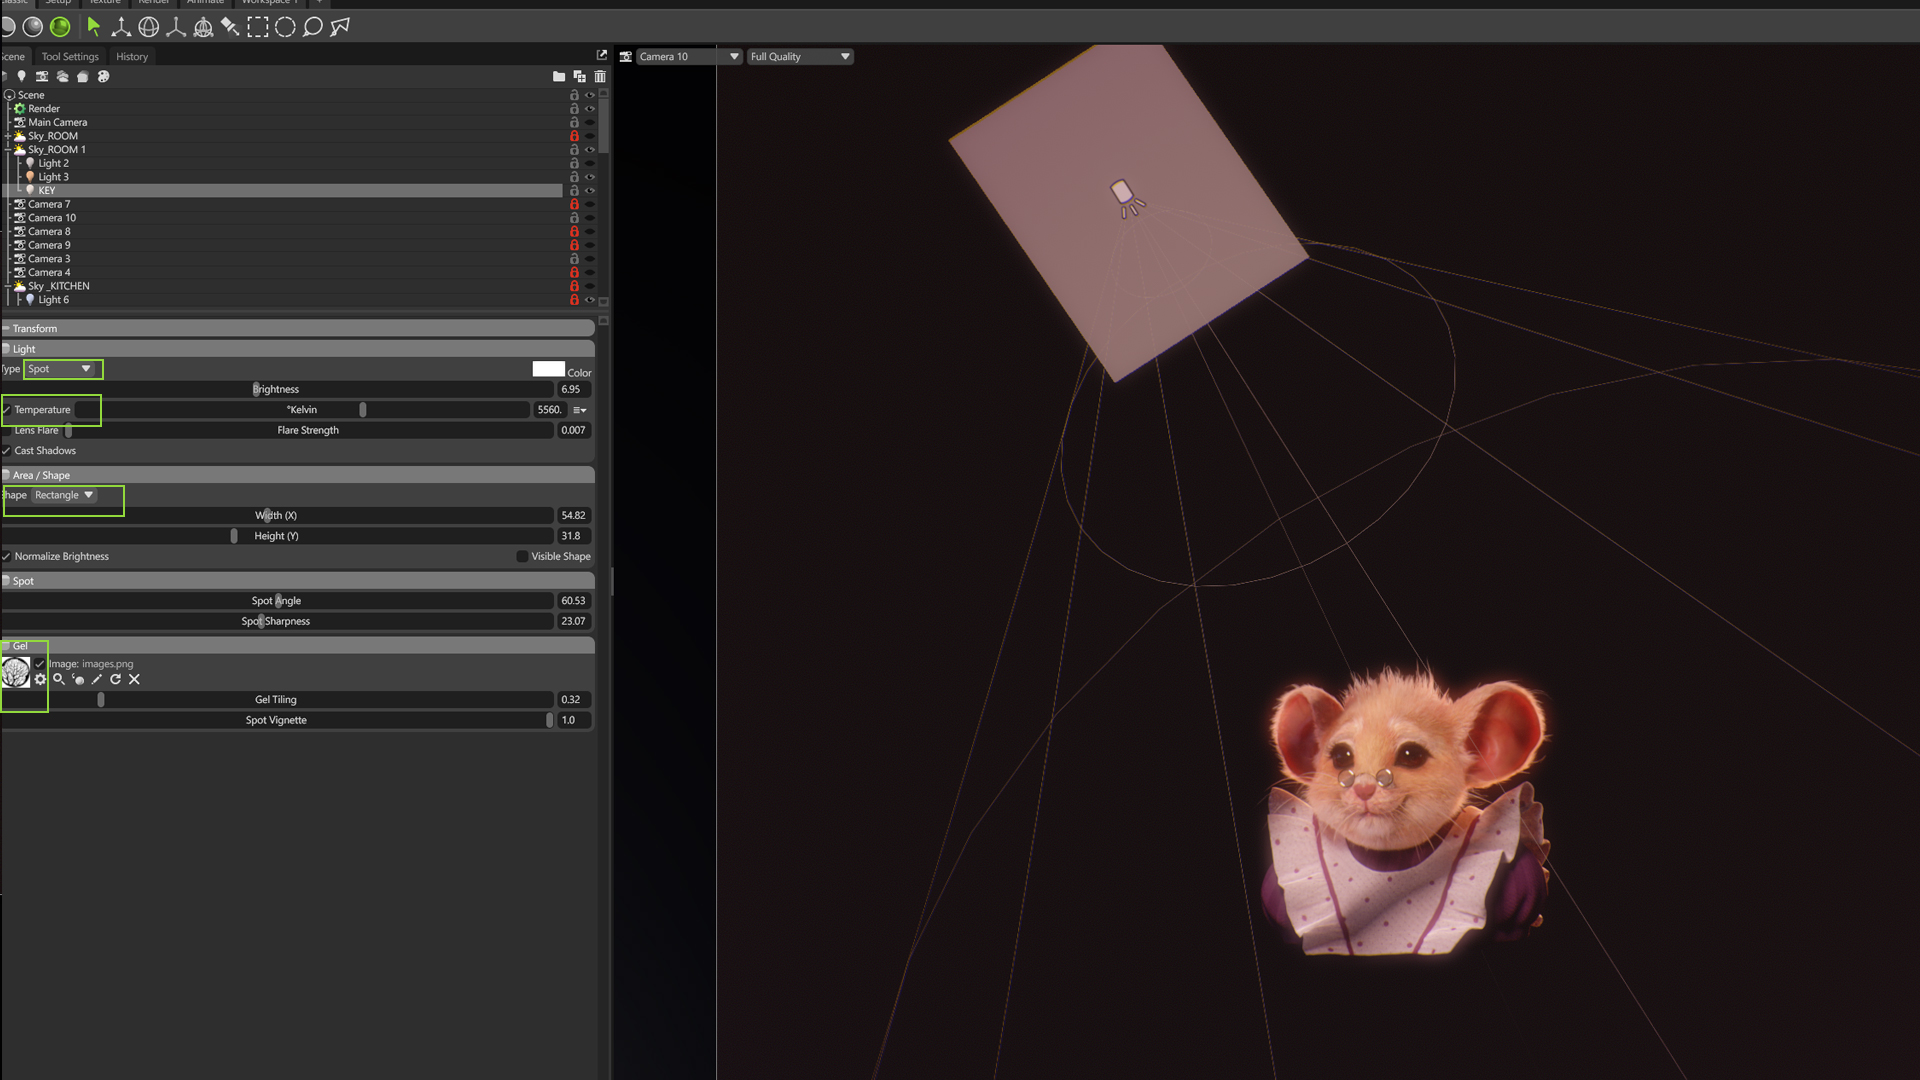
Finally, a few words about the lighting setup. I created a few setups by duplicating the Sky object and trying different HDRI’s to see what works best. For most of them, I just added a 3-point lighting setup, simple and effective. I also added a simple gobo to the key light, which casts lovely shadows on the mesh and adds interest to the otherwise simple scene. I always like to use a rectangular area light with the light Temperature setting enabled.
The End!
That’s it. I hope you enjoyed the walkthrough, and I look forward to seeing more people play with groom rendering in Marmoset Toolbag. It’s a great addition to the software, and it’s very user-friendly. Don’t be afraid to have fun and experiment.
Thanks for reading! Start a free, 30-day trial for Toolbag today to craft compelling 3D artwork. For more Toolbag tutorials and quick guides, check out our Resources.