
Introduction
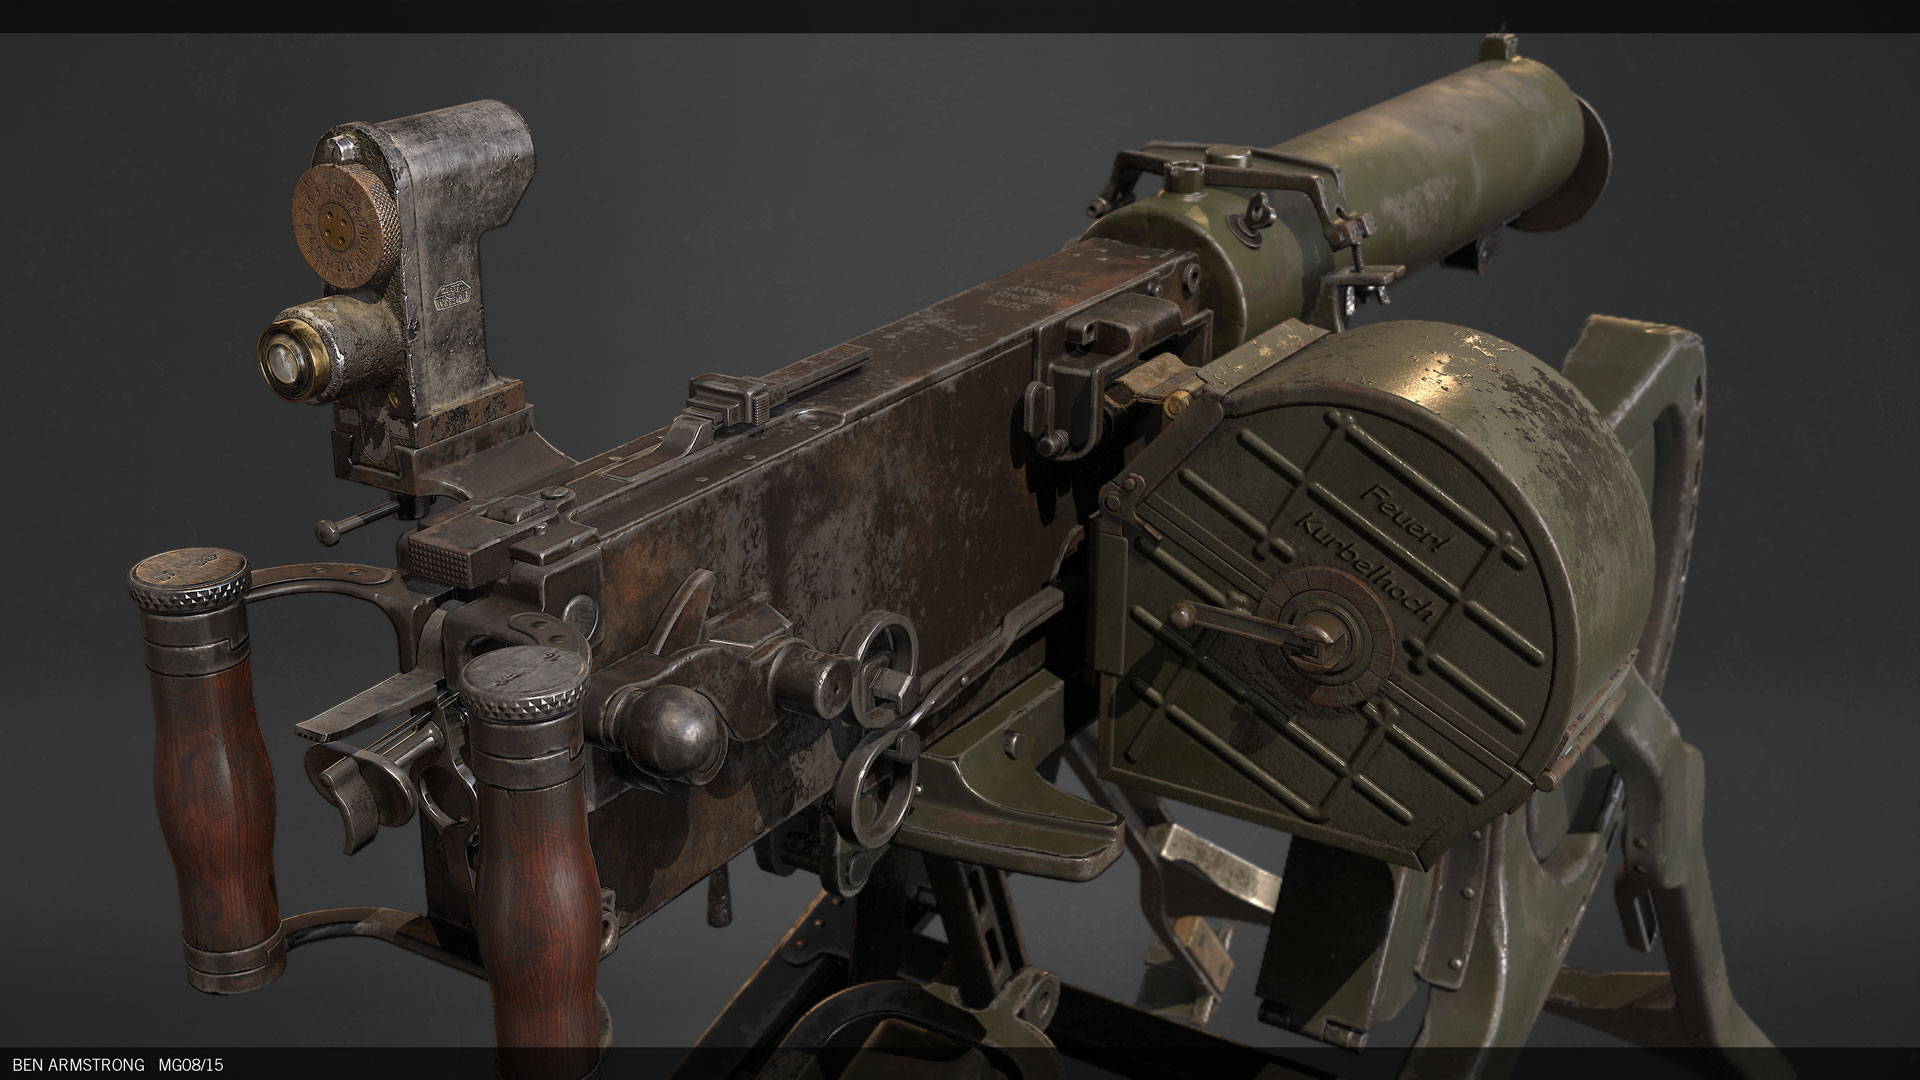
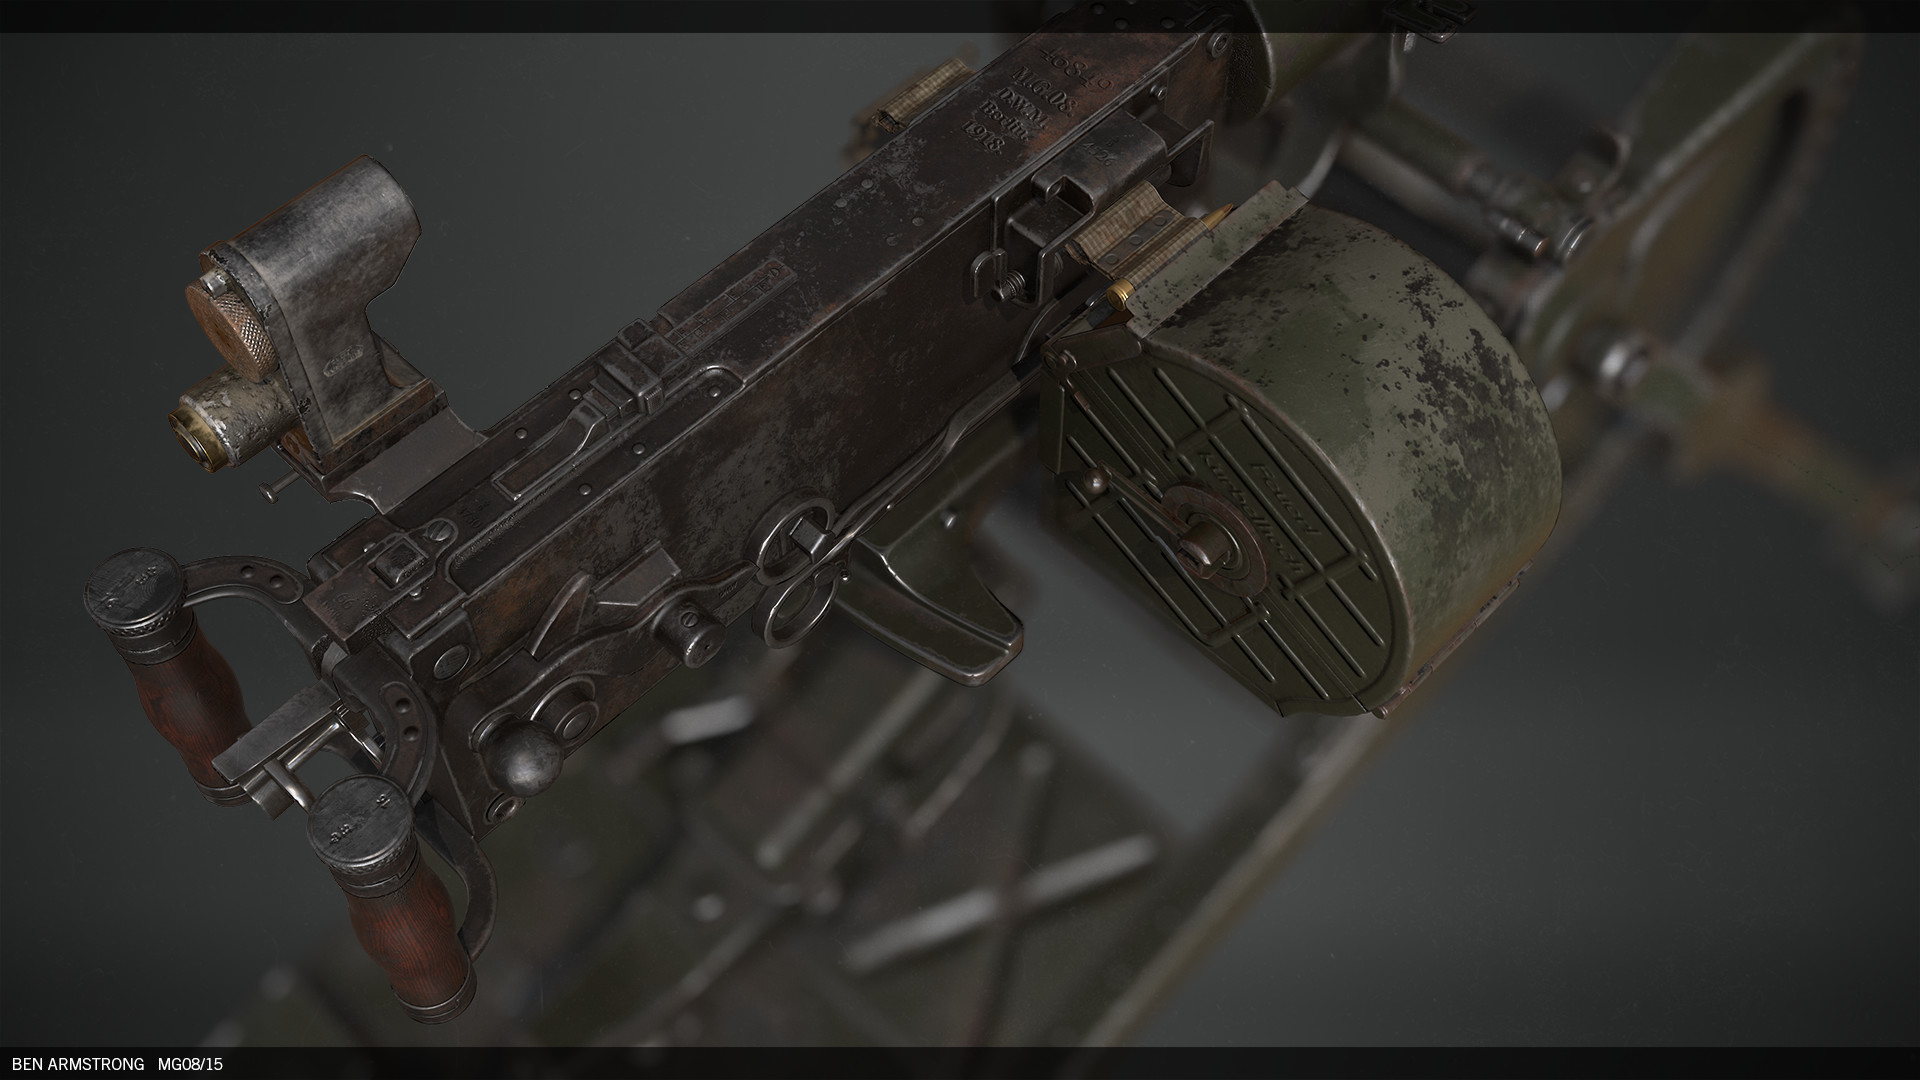
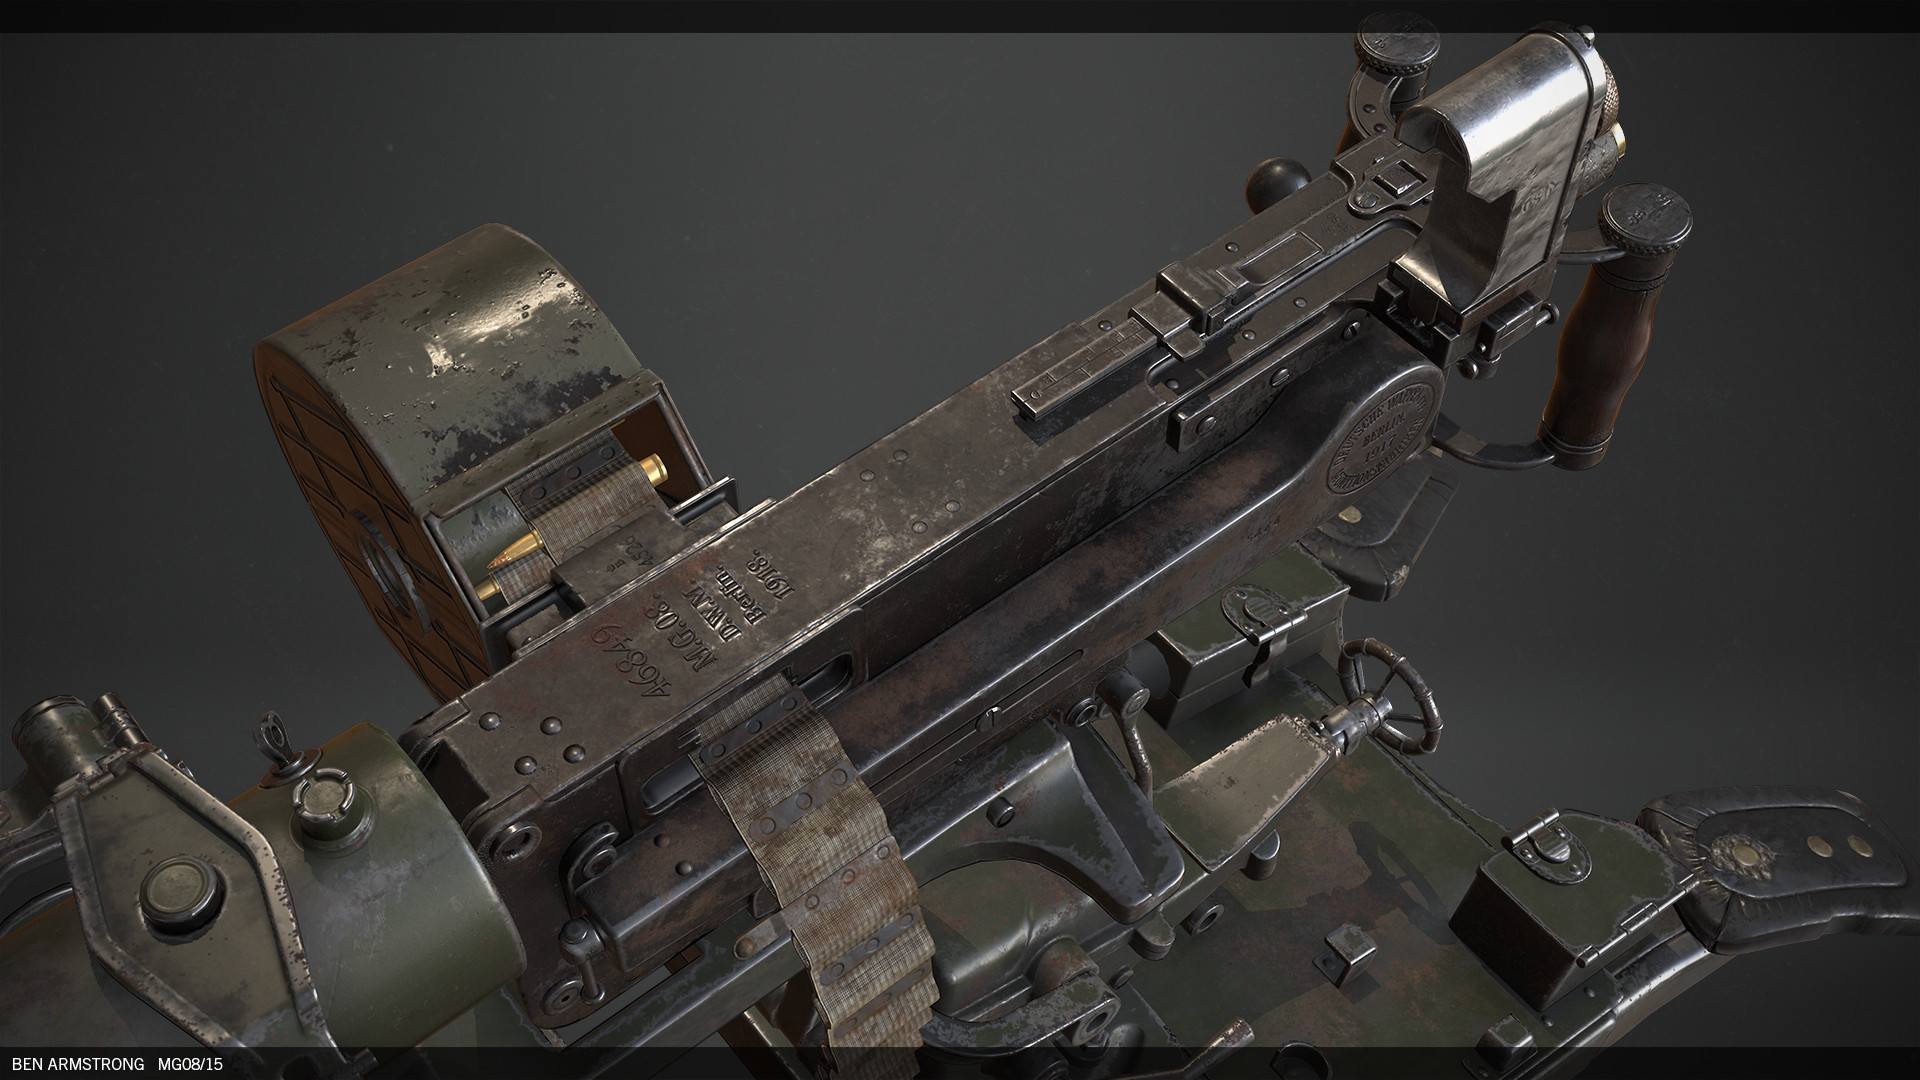
Hello everyone! My name is Ben Armstrong, and I am a 3D props and environment artist in the games industry. In this breakdown article, I’m going to go over how I integrated Toolbag into my hard surface asset creation pipeline, specifically for my Worn MG08-15.
Reference Collection
For this stage, I used Pure Ref and gathered as much reference as I could, including blueprints and images of similar weapons. During this phase, I created a plan for each asset of the complete set. This asset contained 4 components; the Maxim MG08_15, Scope, Ammo and the Reel, and the stand. Each asset had a defined amount of work with their own texture sets.
Modeling

I use 3ds Max for subdivision modeling and I usually go through a few procedures during the modeling stage of a base high poly mesh. This image shows the final base high poly mesh before moving on to the Zbrush phase. The callouts in the image highlight the mix of workflows used in the creation of the asset.
- Regular subdivision modeling
- Smoothing groups + Quad Chamfer + Turbosmooth
- Pro-Boolean
- Double Turbosmooth
Regular subdivison modeling
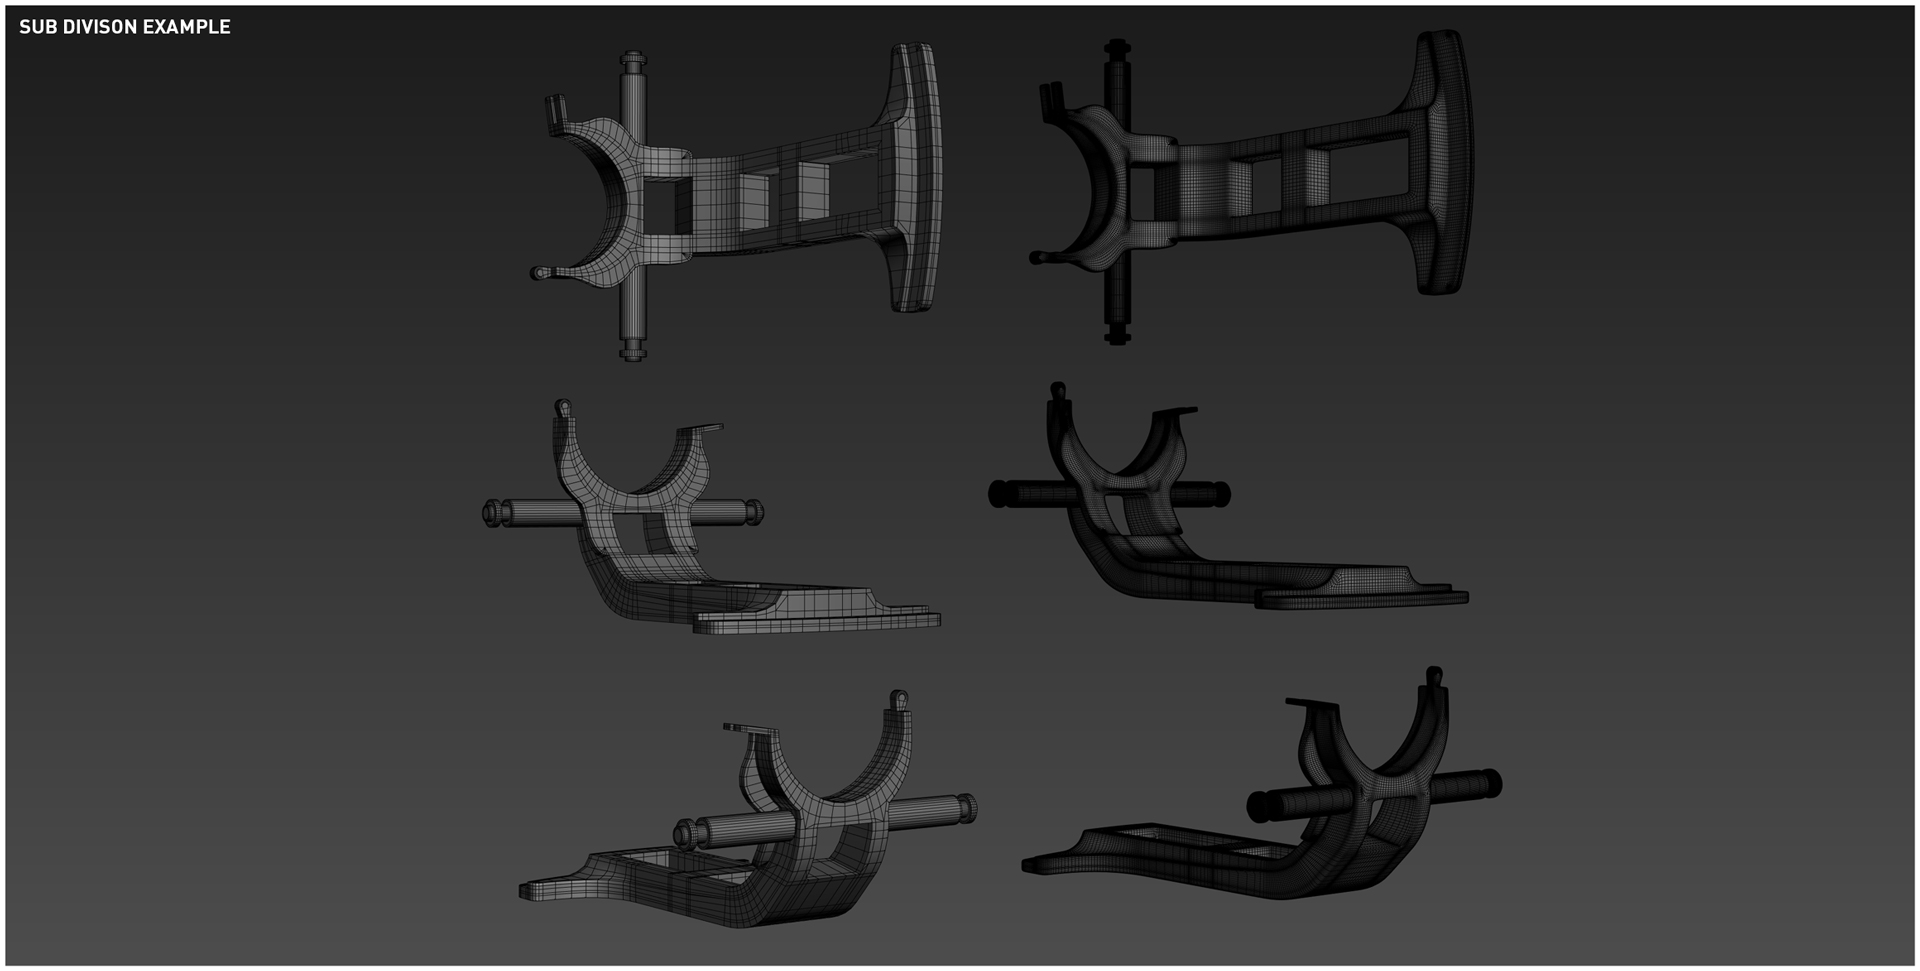
Traditional subdivision modeling was the least used method out of the four methods. It was mainly used to nail some shapes that need specific control loops.
Smoothing Groups, Quad Chamfer & Turbosmooth
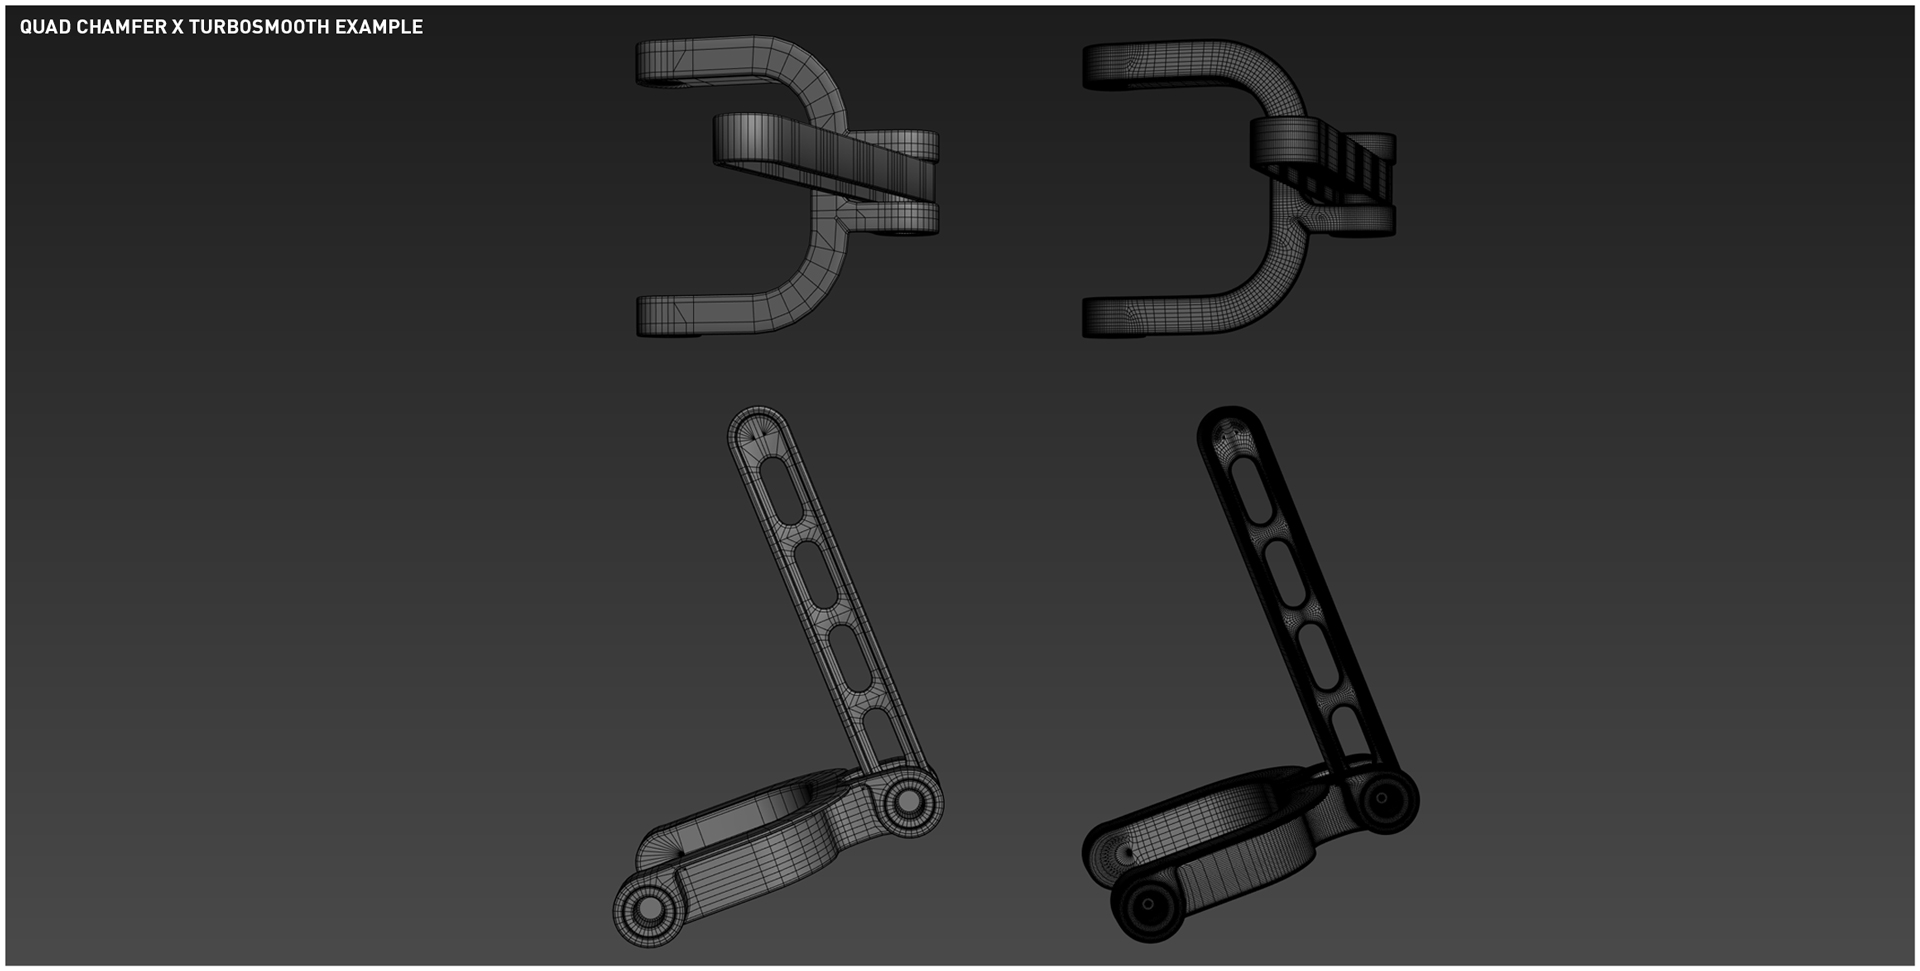
I tend to model the base mesh to a medium resolution and use Smoothing Groups in conjunction with Quad Chamfer and Turbosmooth. You can get pretty far using the Smooth 30 action (I have this set to a shortcut). This auto assigns smoothing groups based on the threshold of 30 degrees. If the adjacent polygon is at an angle greater than 30 degrees, a new smoothing group will be assigned. If it’s below the threshold, it will be assigned the same smoothing group. You can then manually select polys and use the same action to assign a different smoothing group.
This will give you additional control over once the Quad Chamfer modifier is applied. Make sure to set the Quad Chamfer modifier to use Smoothing Groups to define where chamfers are applied. Most of the Quad Chamfer modifiers were set to 2 iterations in the Edge Chamfer options. This provides better control over the edge transitions, resulting in a cleaner look.
Double Turbosmooth
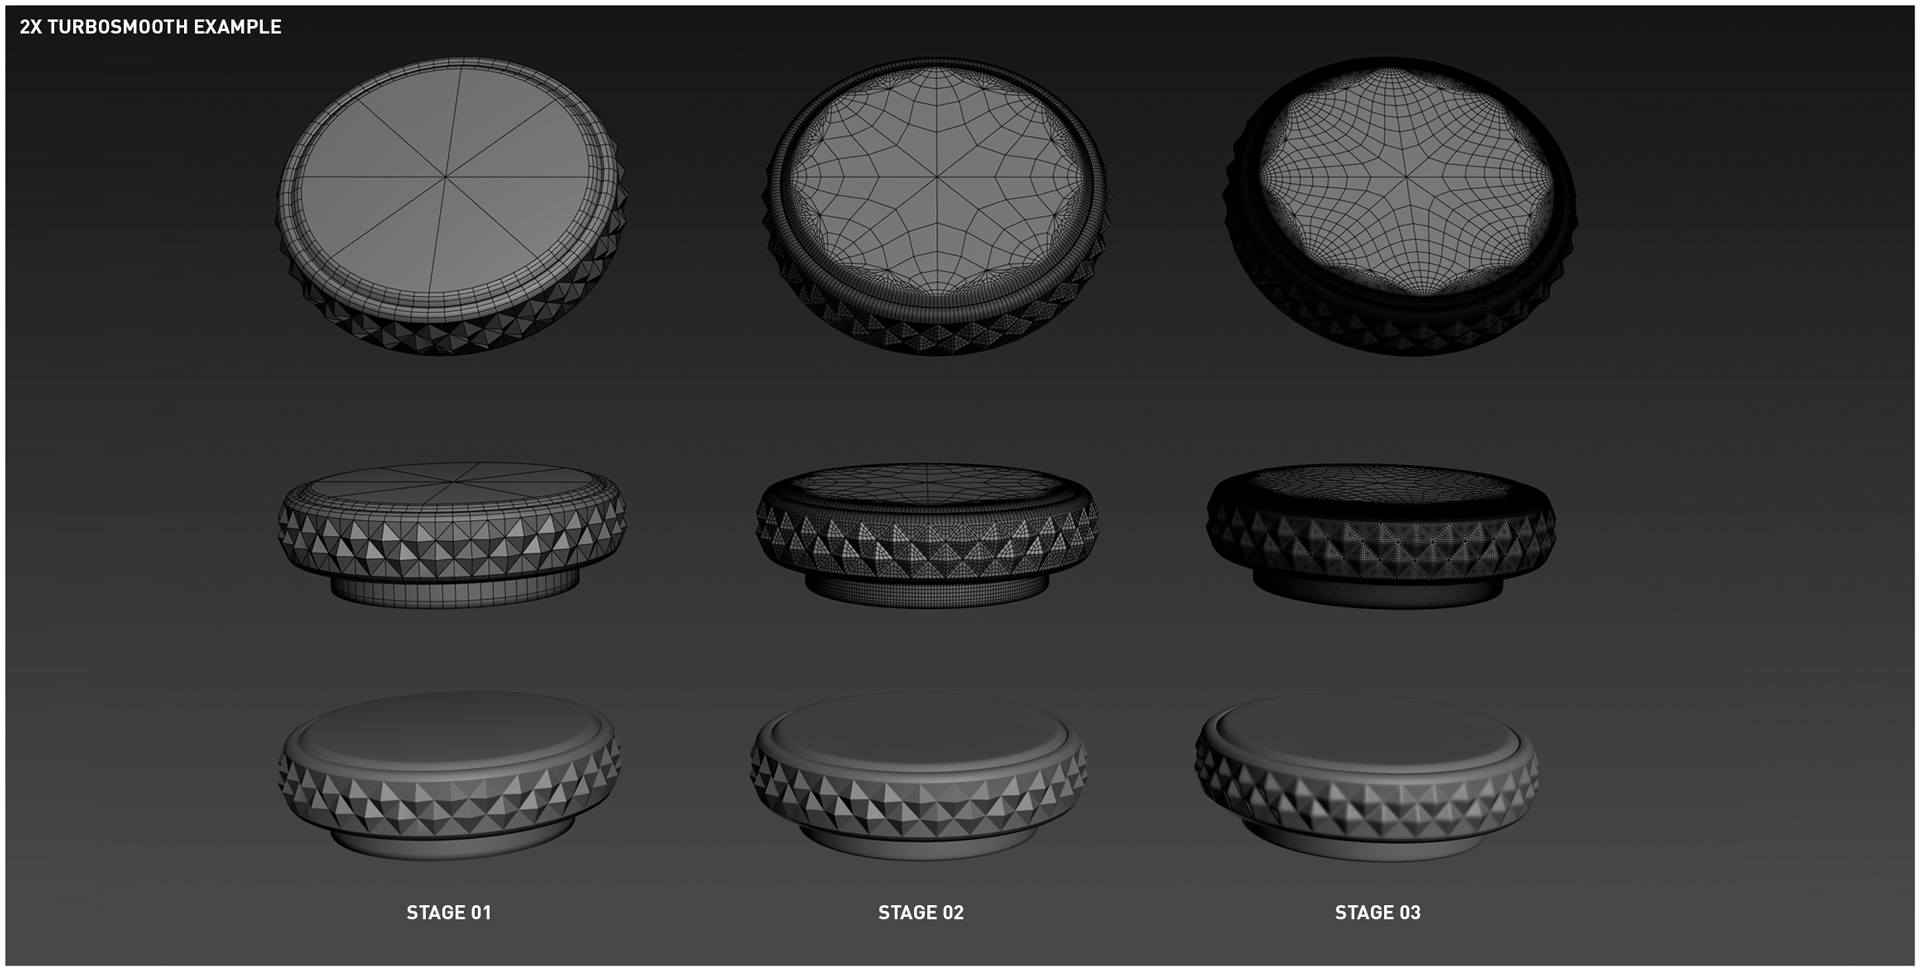
The double Turbosmooth technique is super handy for small, knurling type of details. You will need to manually set the Smoothing Groups or choose to have them set automatically by a specific angle to ensure that each face of the knurling pattern has an isolated smoothing group. The next step requires setting your first Turbosmooth modifier iterations to a value of 2 and checking the Smoothing Group check box under Surface Parameters. This tessellates the surface while maintaining organic forms. At this point, you will need to add another Turbosmooth modifier. This will give us the final smoothed high poly mesh.
Pro Boolean Workflow

The final approach is the well documented Pro Boolean workflow. Though, I have my own slight tweak to the workflow. Once you have completed the pro boolean pass and you’re ready to send your meshes to Zbrush, add a Turn to Poly modifier. This will quadify and resolve any ngons.
Once you have imported your meshes, you will need to navigate to the Polygroups sub menu (A.). Click Auto Groups to assign each sub element a polygroup. At this point, you can isolate chunks of the mesh using Ctrl+Shift+Left Mouse Button. I like to isolate elements that will be combined and assign them the same polygroup using the Group Masked hotkey (Ctrl+W). Next, navigate to the Subtool menu (B.) and select Group Split (C.). This will split the mesh by the Polygroups that were assigned in the previous step. The sub menu should now look similar to (D.).
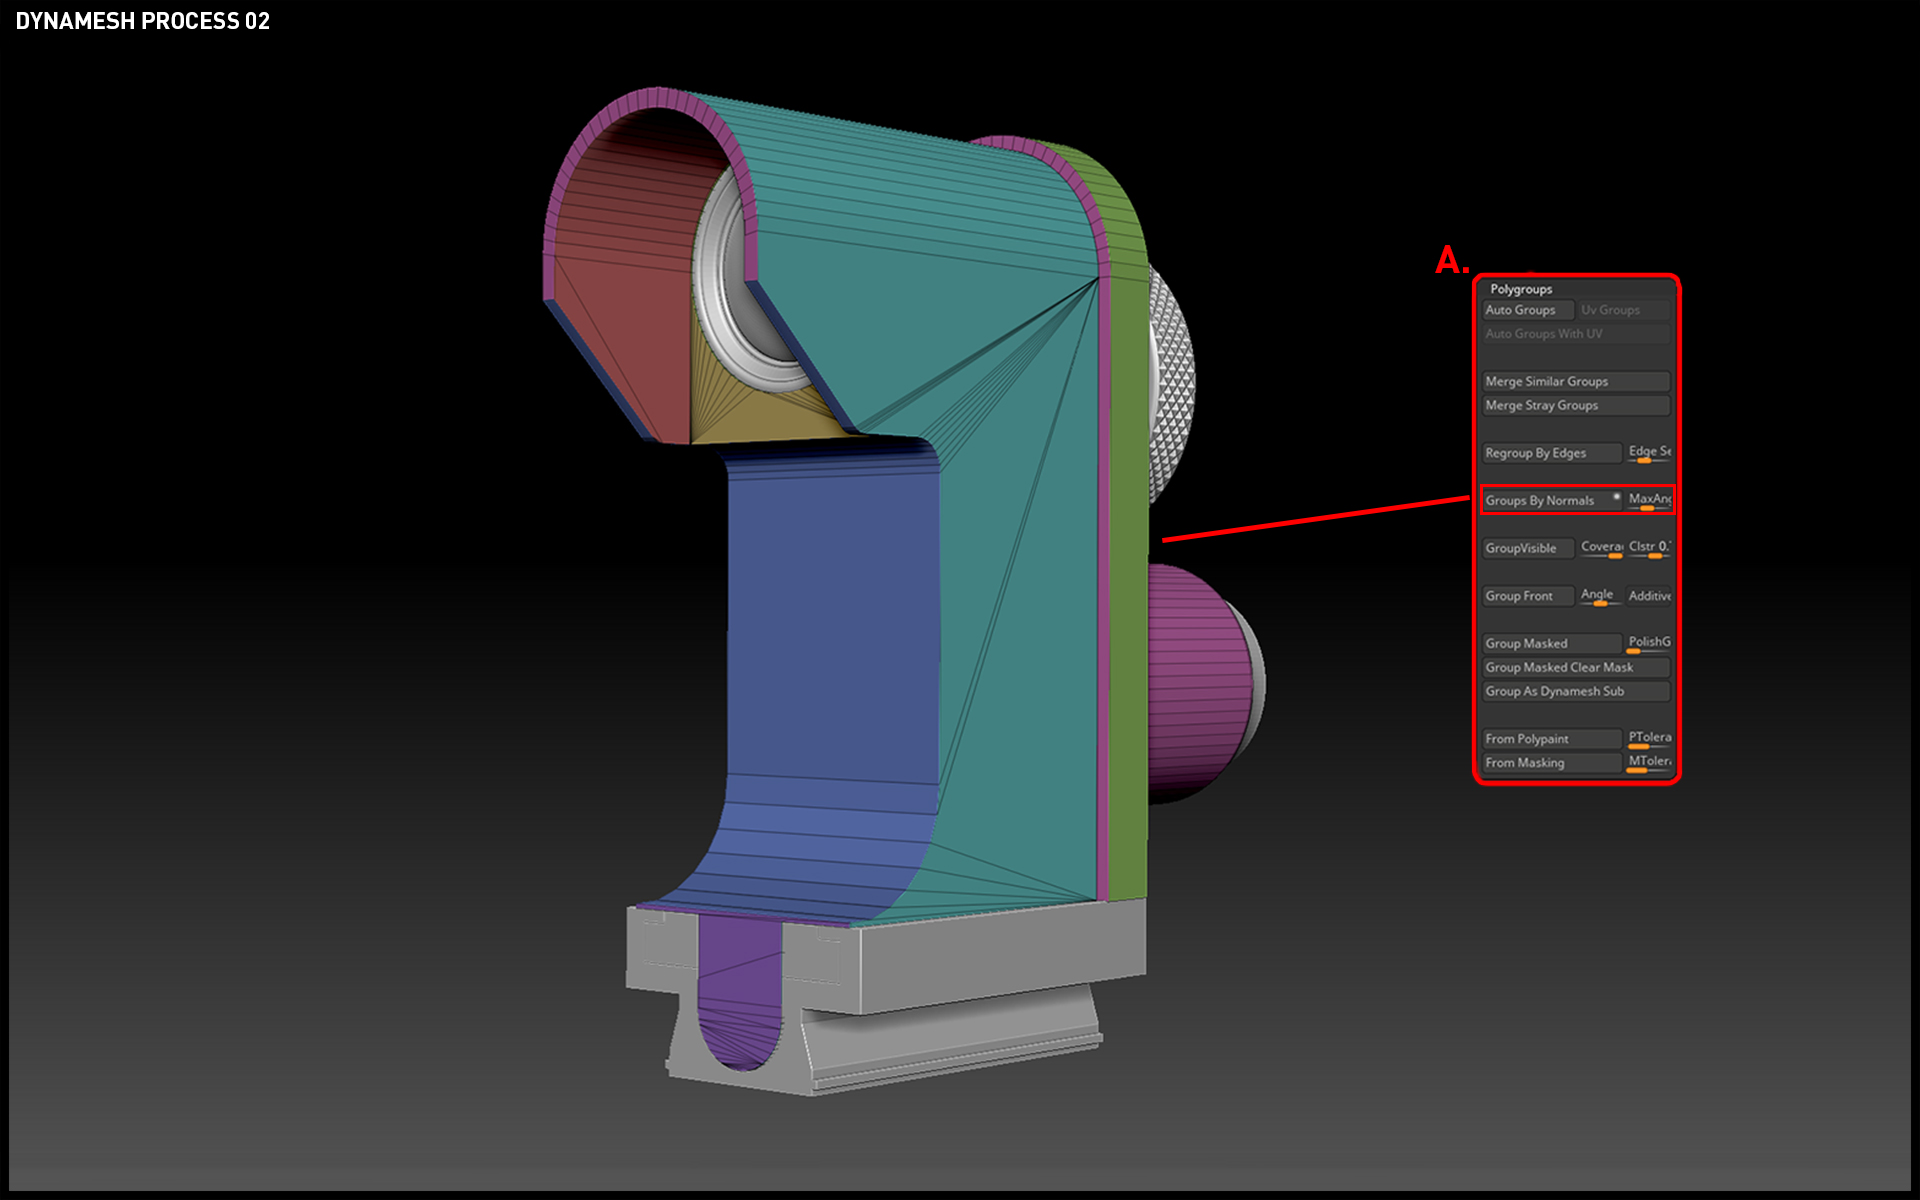
I selected the main body that was a boolean mesh in Max, navigated to the Polygroup menu, and used the Group by Normals option to create new Polygroups on the Subtool (A.). Adjust the Max Angle slider until it looks right on your mesh. This works similar to the Smoothing Group threshold in Max. It can take a few attempts until the mesh is grouped correctly and it can be more difficult depending on the complexity of your mesh. The result should have the correct Polygroups applied that can be used in the next step.
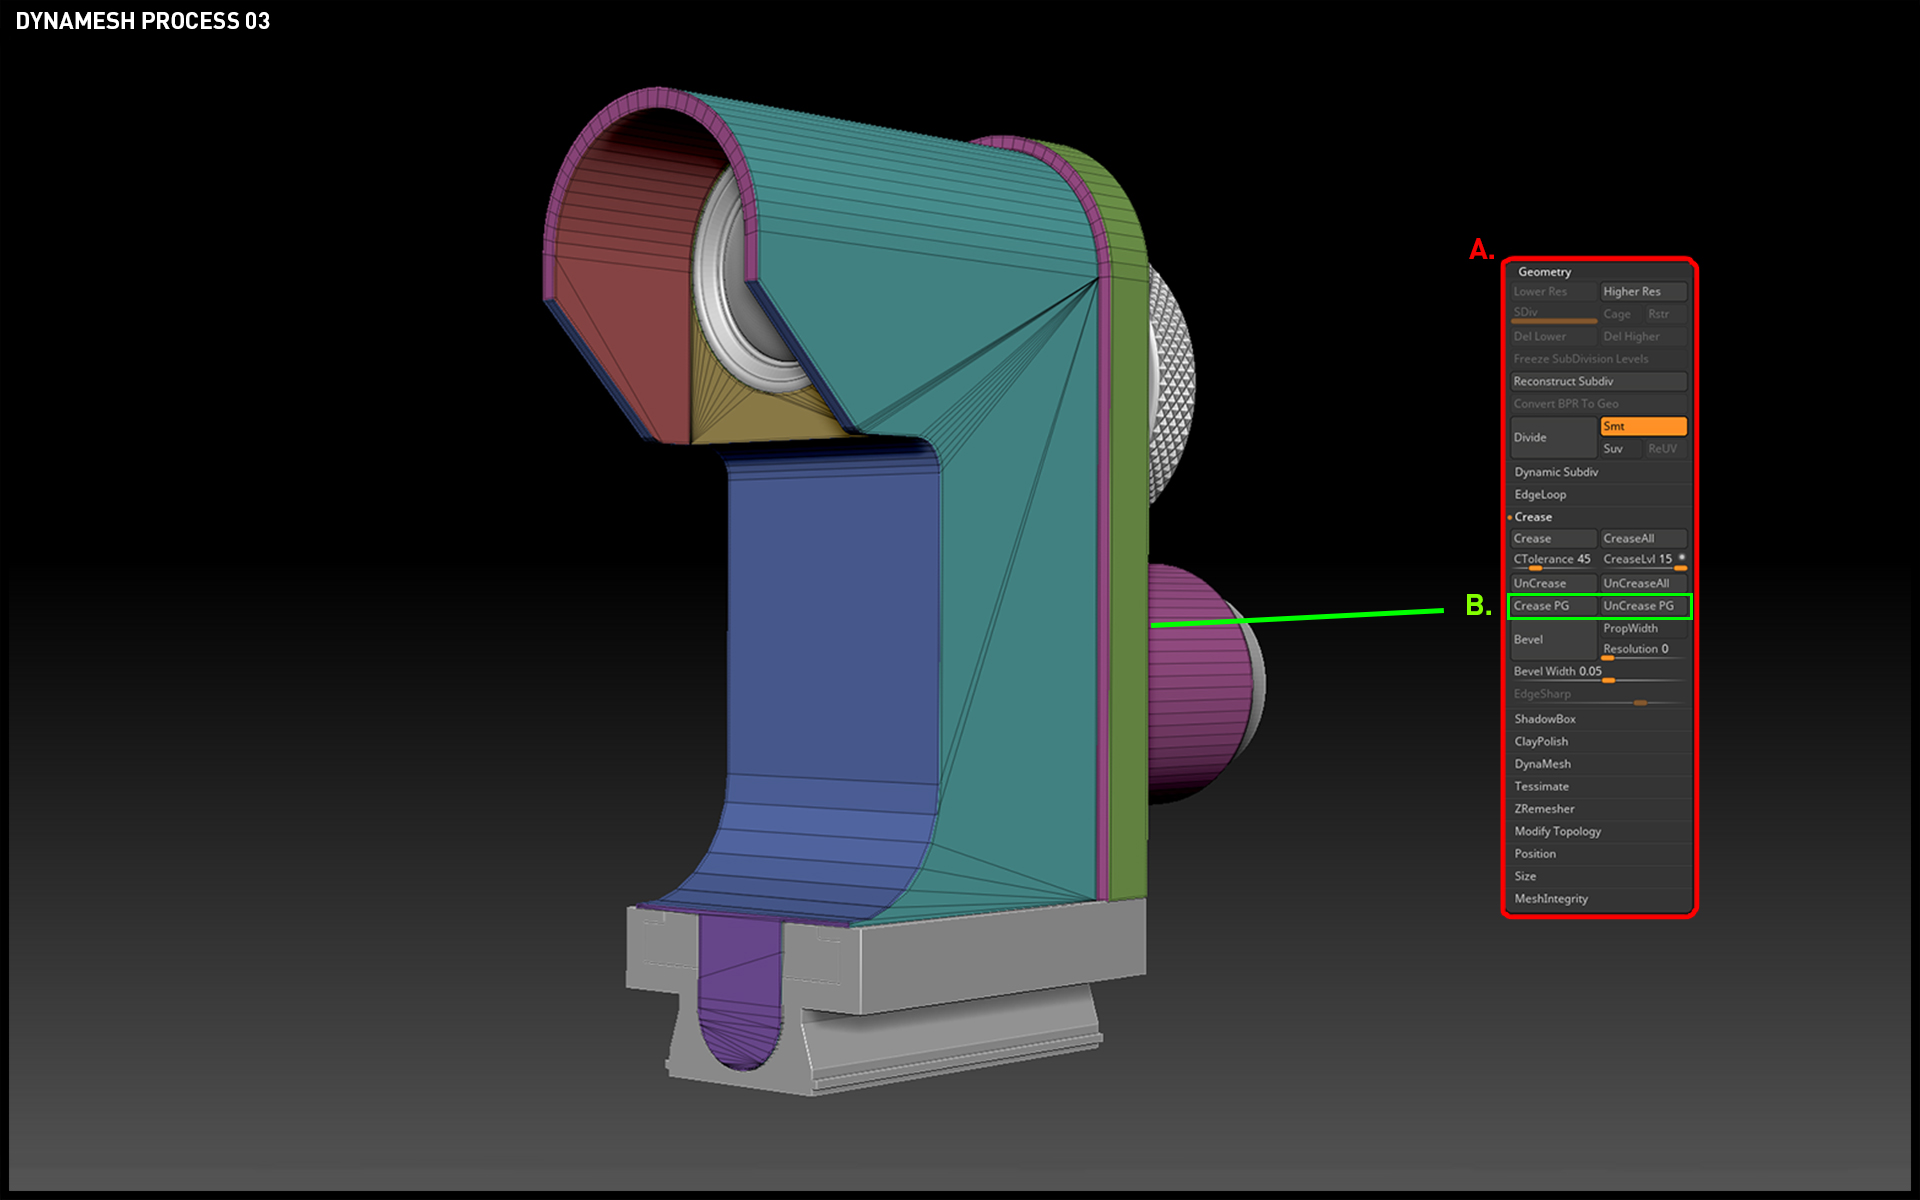
Go to the Geometry section (A.) and use the Crease PG (Polygroup) and Uncrease PG (B.) to crease your edges according to the Polygroups you’ve set. If you’ve made a mistake with setting your Polygroup, you can use the Uncrease PG option to remove the creasing from the Subtool without issues.

Next, I subdivide the geometry (Ctrl+D) to a high density. The result should be a smooth, high resolution Subtool with no faceting on the surface. The creasing will hold the Quadchamfer forms or the manual control loops you’ve applied.
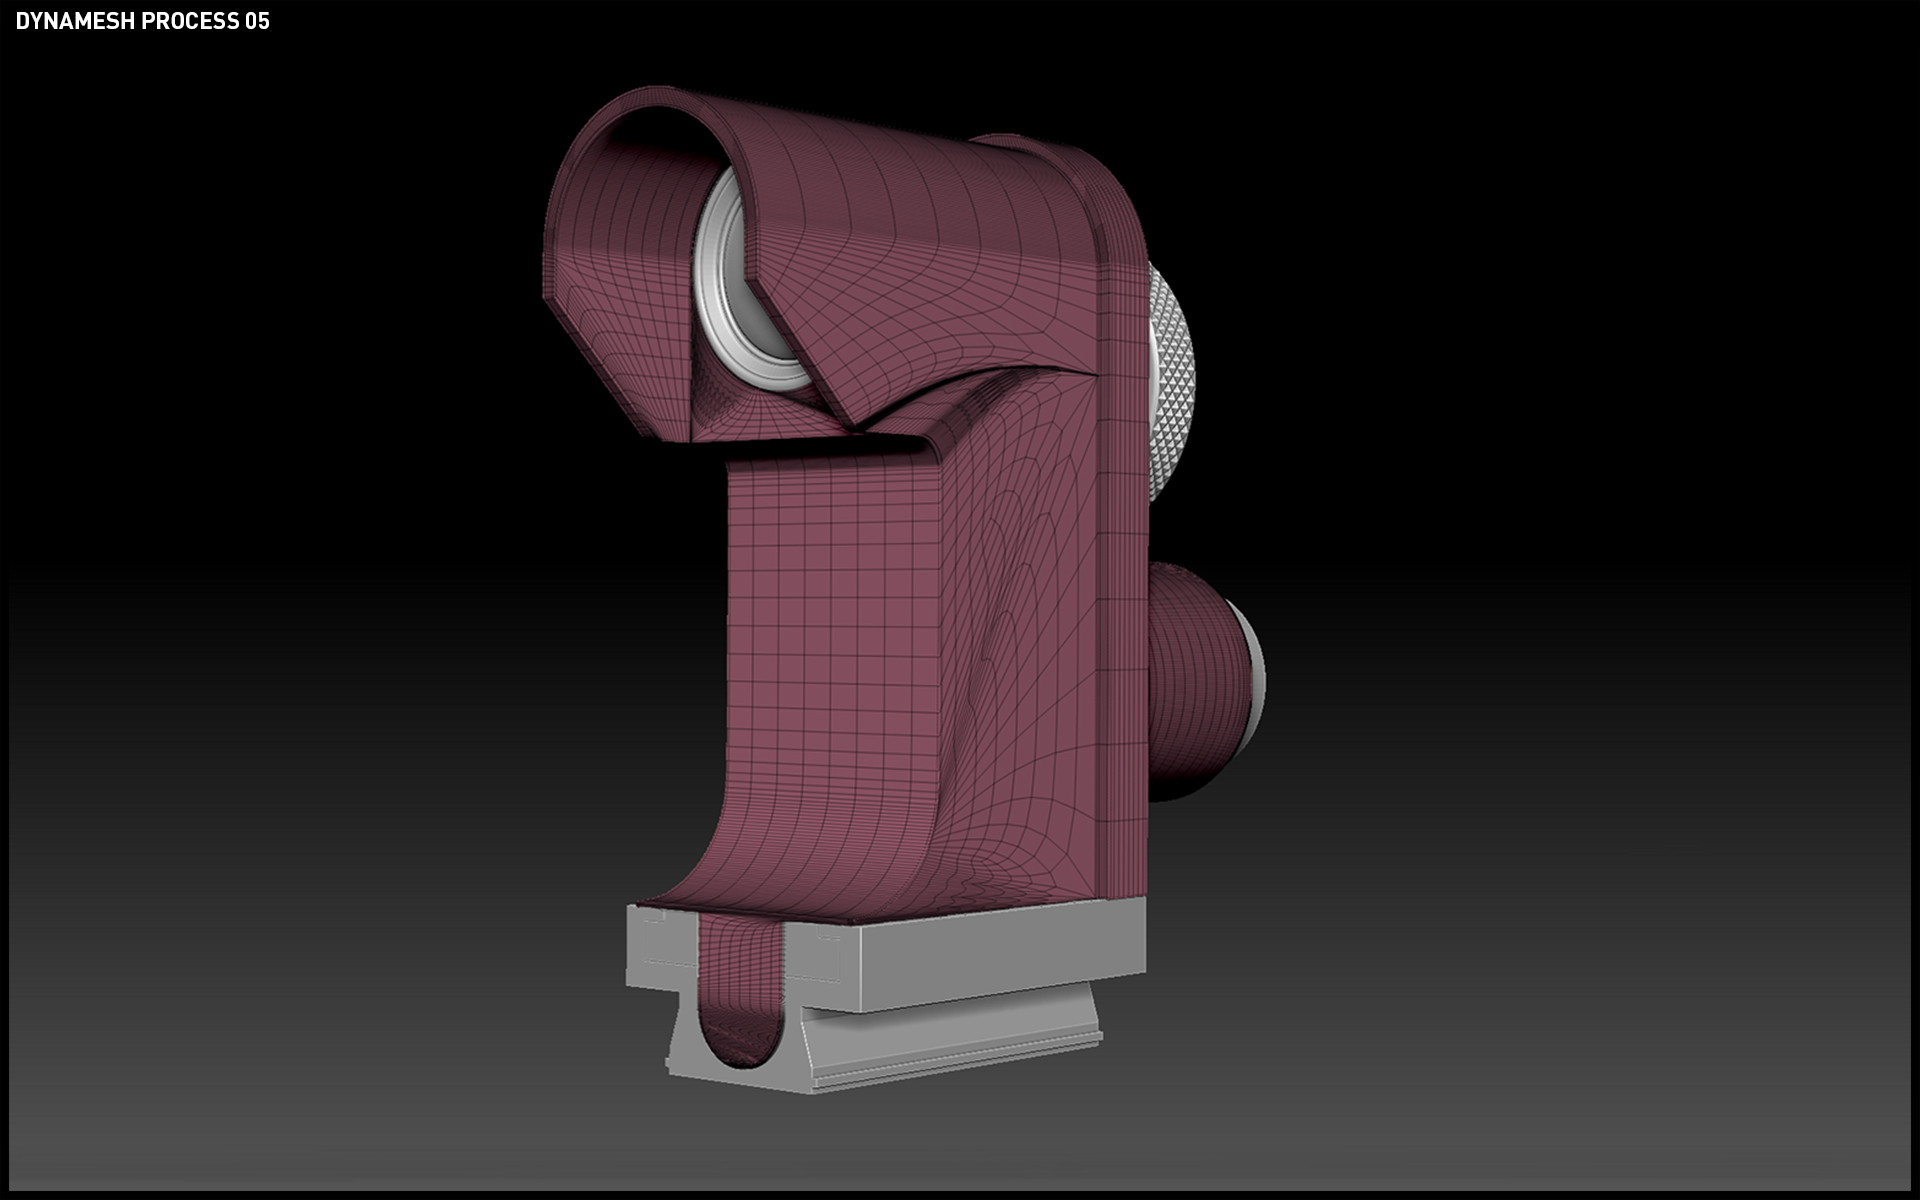
Before Dynameshing the Subtool, you will need to merge all of the Polygroups into a single Polygroup. Make sure to remove the lower subdivision levels for the Subtools that will be Dynameshed.
Tip: Depending on the complexity of the Subtool (e.g a baroque style object), it can be a good idea to duplicate the Subtool so you can use it to reproject the detail onto the new, clean Dynameshed Subtools. This is because details can become muddy and overly soft during this phase.
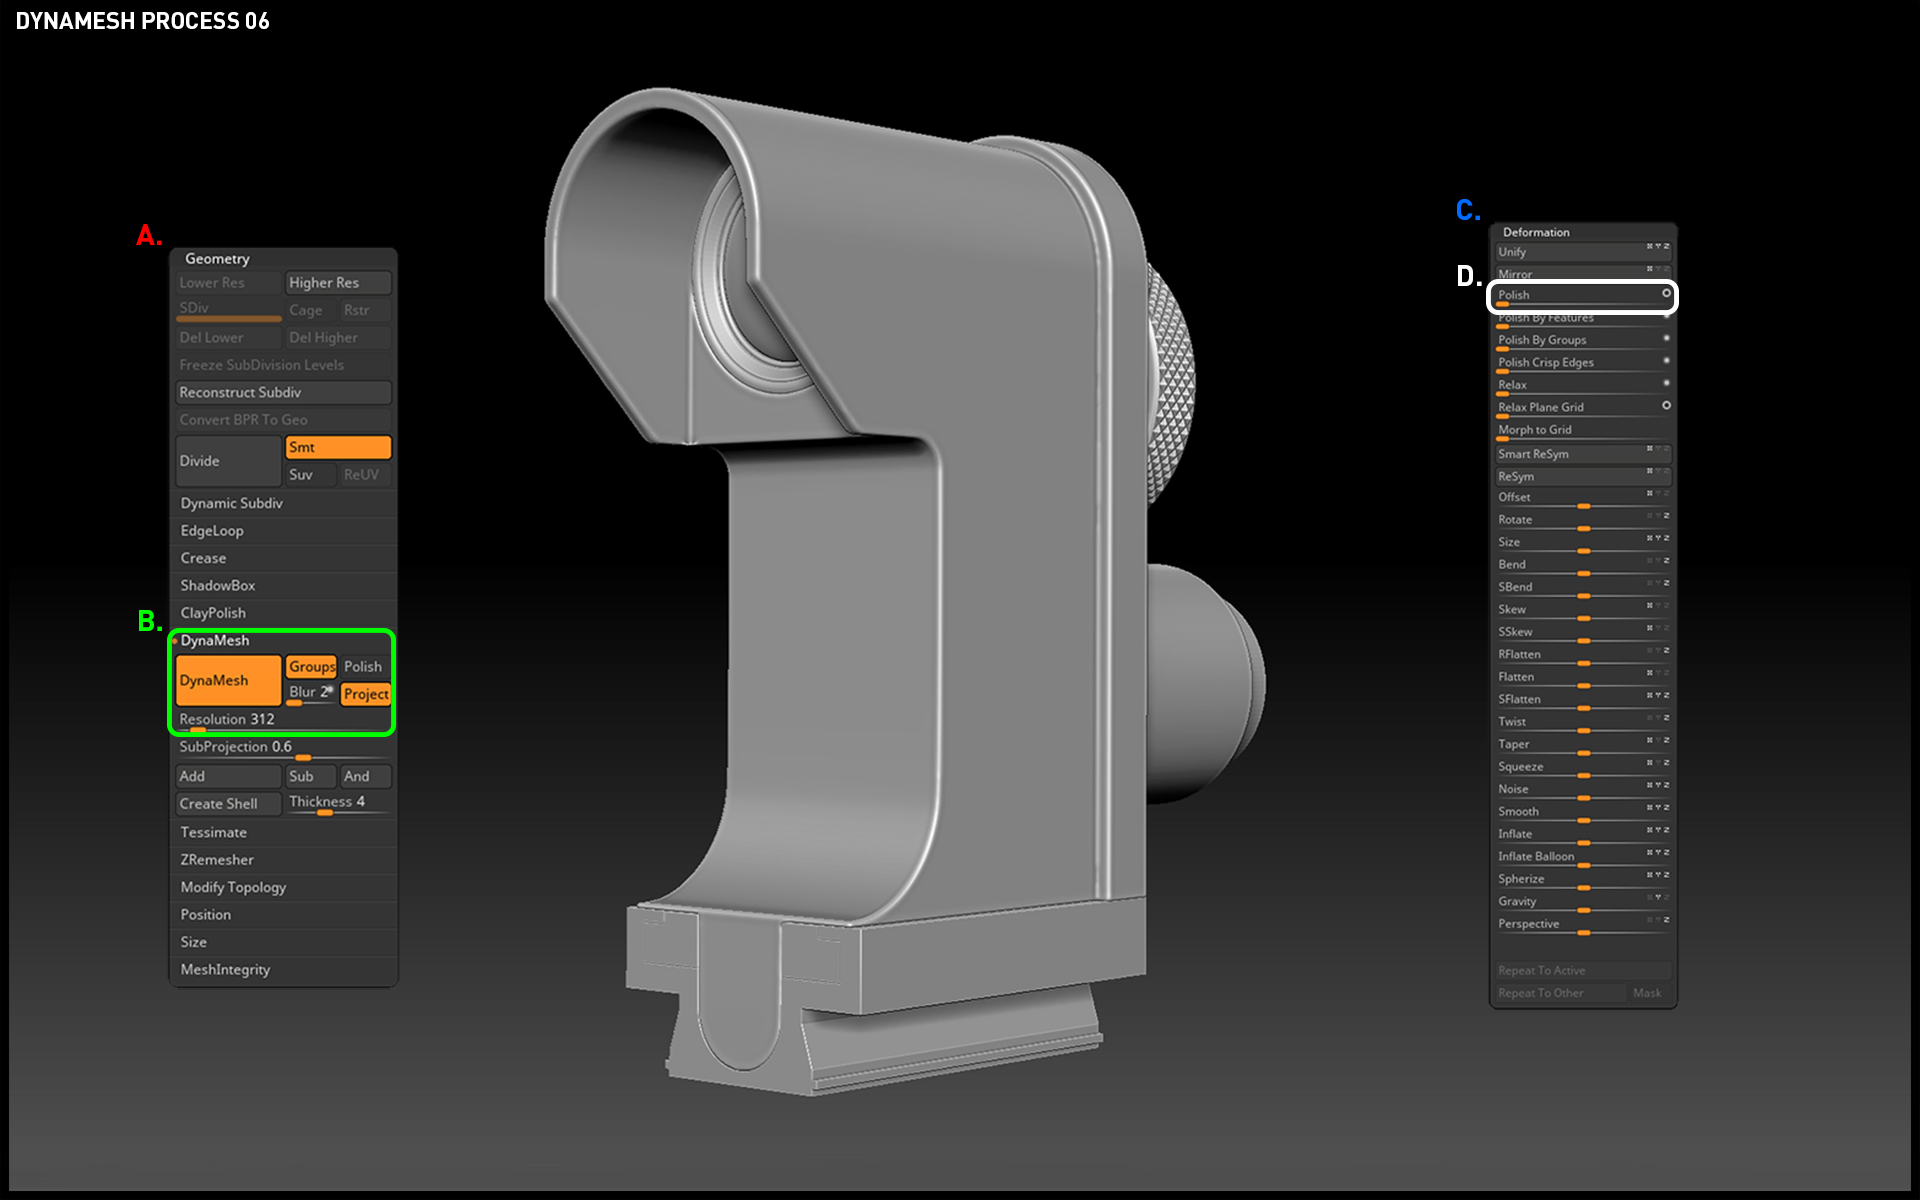
Now it’s time to Dynamesh the Subtool and finalize the base high poly pass. Go to the Geometry menu (A.) and navigate to the Dynamesh sub menu. I have my settings dialed in for this piece (B.). This stage can take a bit of fine tuning, however, it’s pretty quick to change the values and undo/redo the Dynamesh to get a result you’re happy with. Next, head over to the Deformation menu (C.) and use the Polish slider (D.) to soften the edges. Toggling the small O button to the right of the slider will switch the Polish mode. Polish the mesh until you’re happy and prepare to enjoy the wear and tear pass!
Sculpting Wear and Tear
Setting Up Meshes in Zbrush
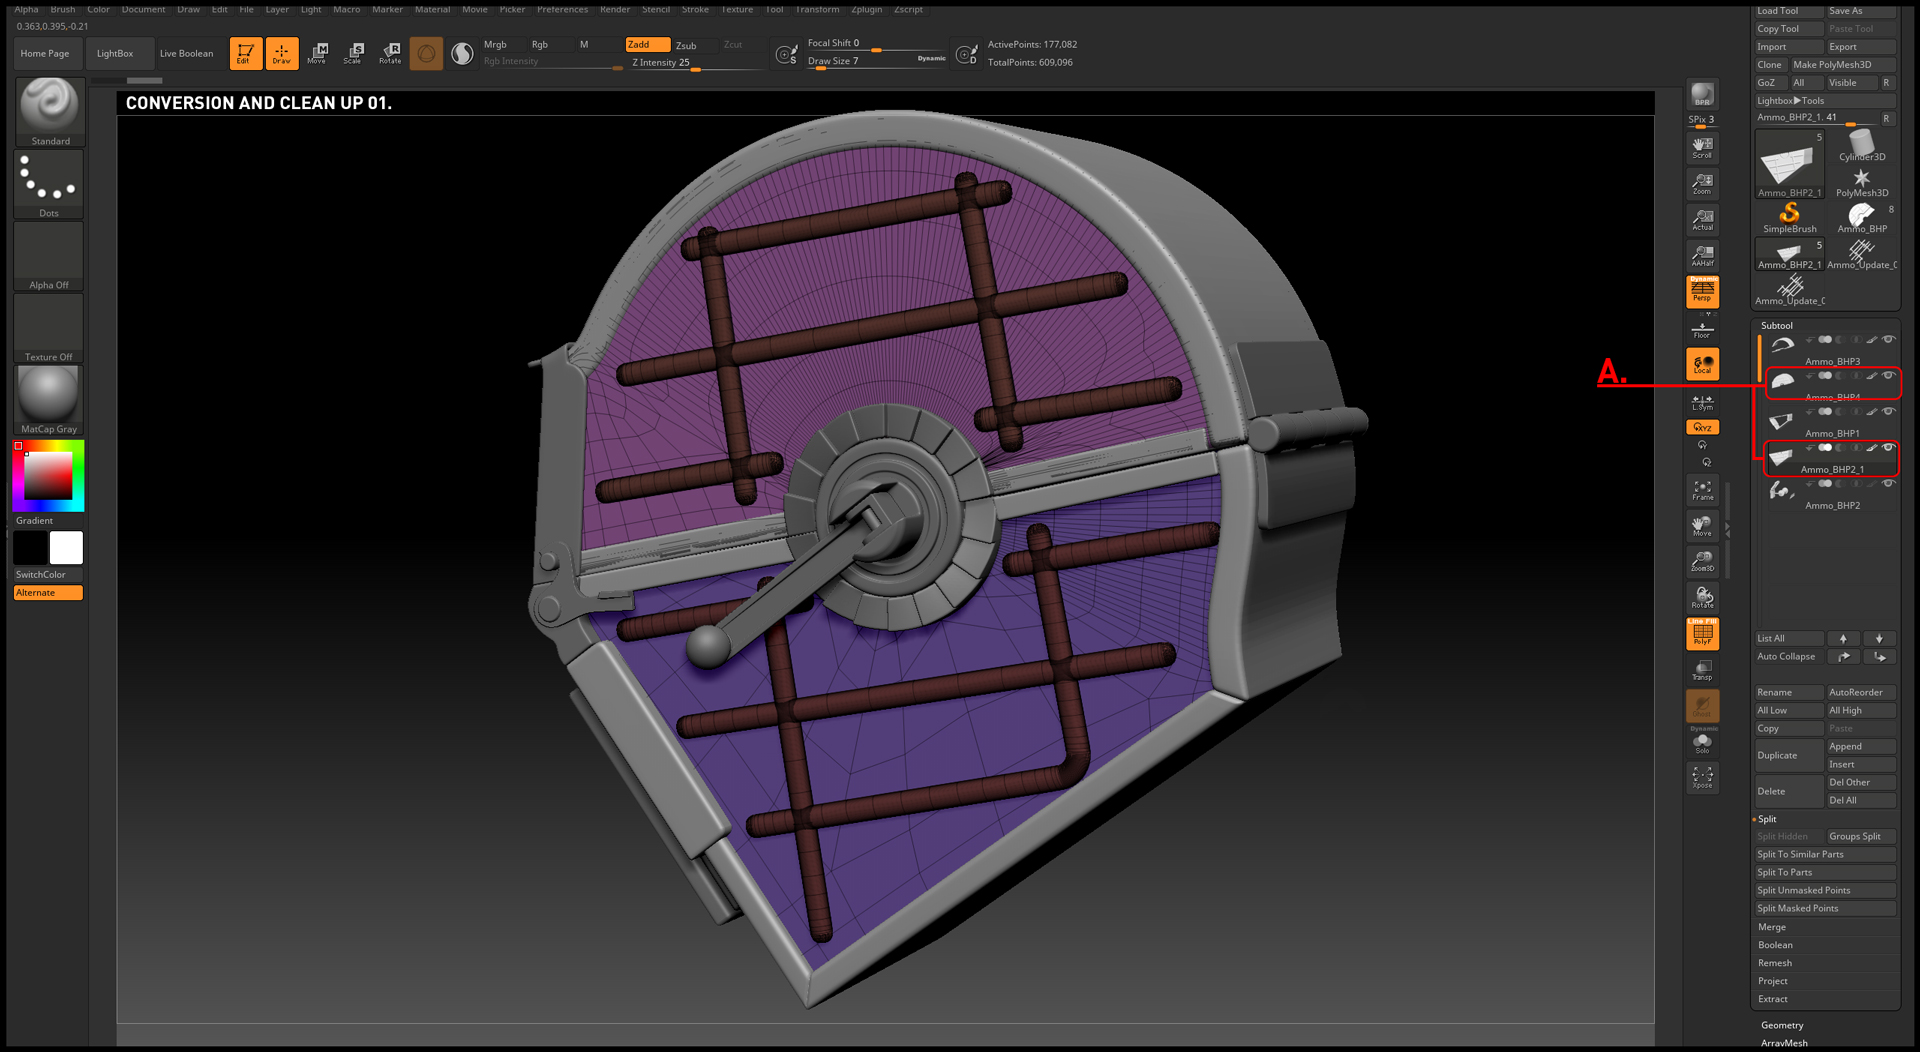
Every sculpted element called for a Zbrush damage pass. This meant that every element up to this point needed to be converted to clean, sculptable geometry. For the subdivided, quad chamfered, and kitbashed elements, there needed to be a conversion pass. Once the asset is imported, I follow a similar approach of Auto Grouping my Polygroups and setting up my Subtools (A.).
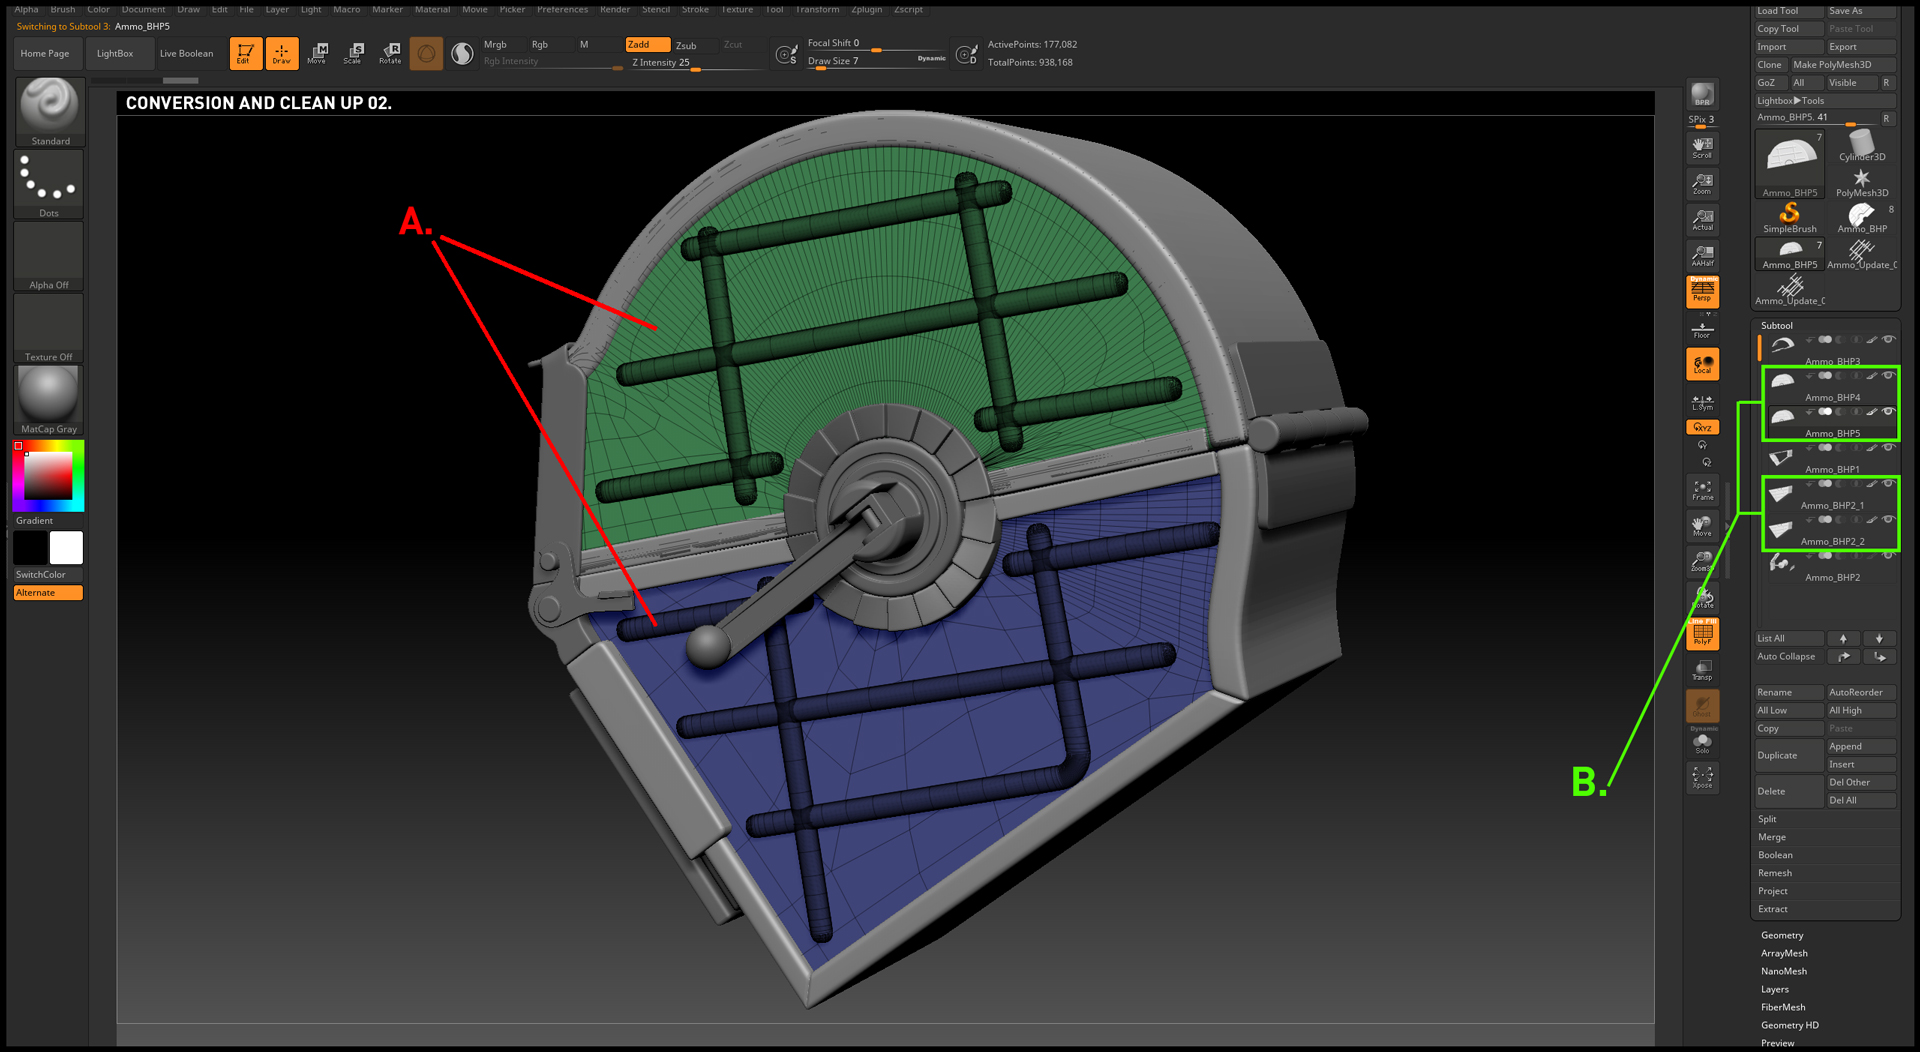
I use Ctrl+W to assign a polygroup per Subtool (A.) and duplicate each Subtool that needs converting (B.) These will be used at a later stage.

Once the Dynamesh resolution and subdivision levels are applied, the results might not be clean enough (A.)

To clean this up, we need to take a different approach and reproject the original mesh onto the Dynameshed Subtool. The stack for reprojecting should look like (A.). Ensure the original Subtool is above the Dynameshed duplicate and that they’re both visible. Unroll the Project sub menu found in the Subtool menu (B.) and click Project All. This will result in a clean, quad mesh that is identical to the original kitbashed mesh (C.). The projected mesh is likely to inherit some of the errors found on the kitbashing mesh. To clean this up, I used the Planar brush (D.).
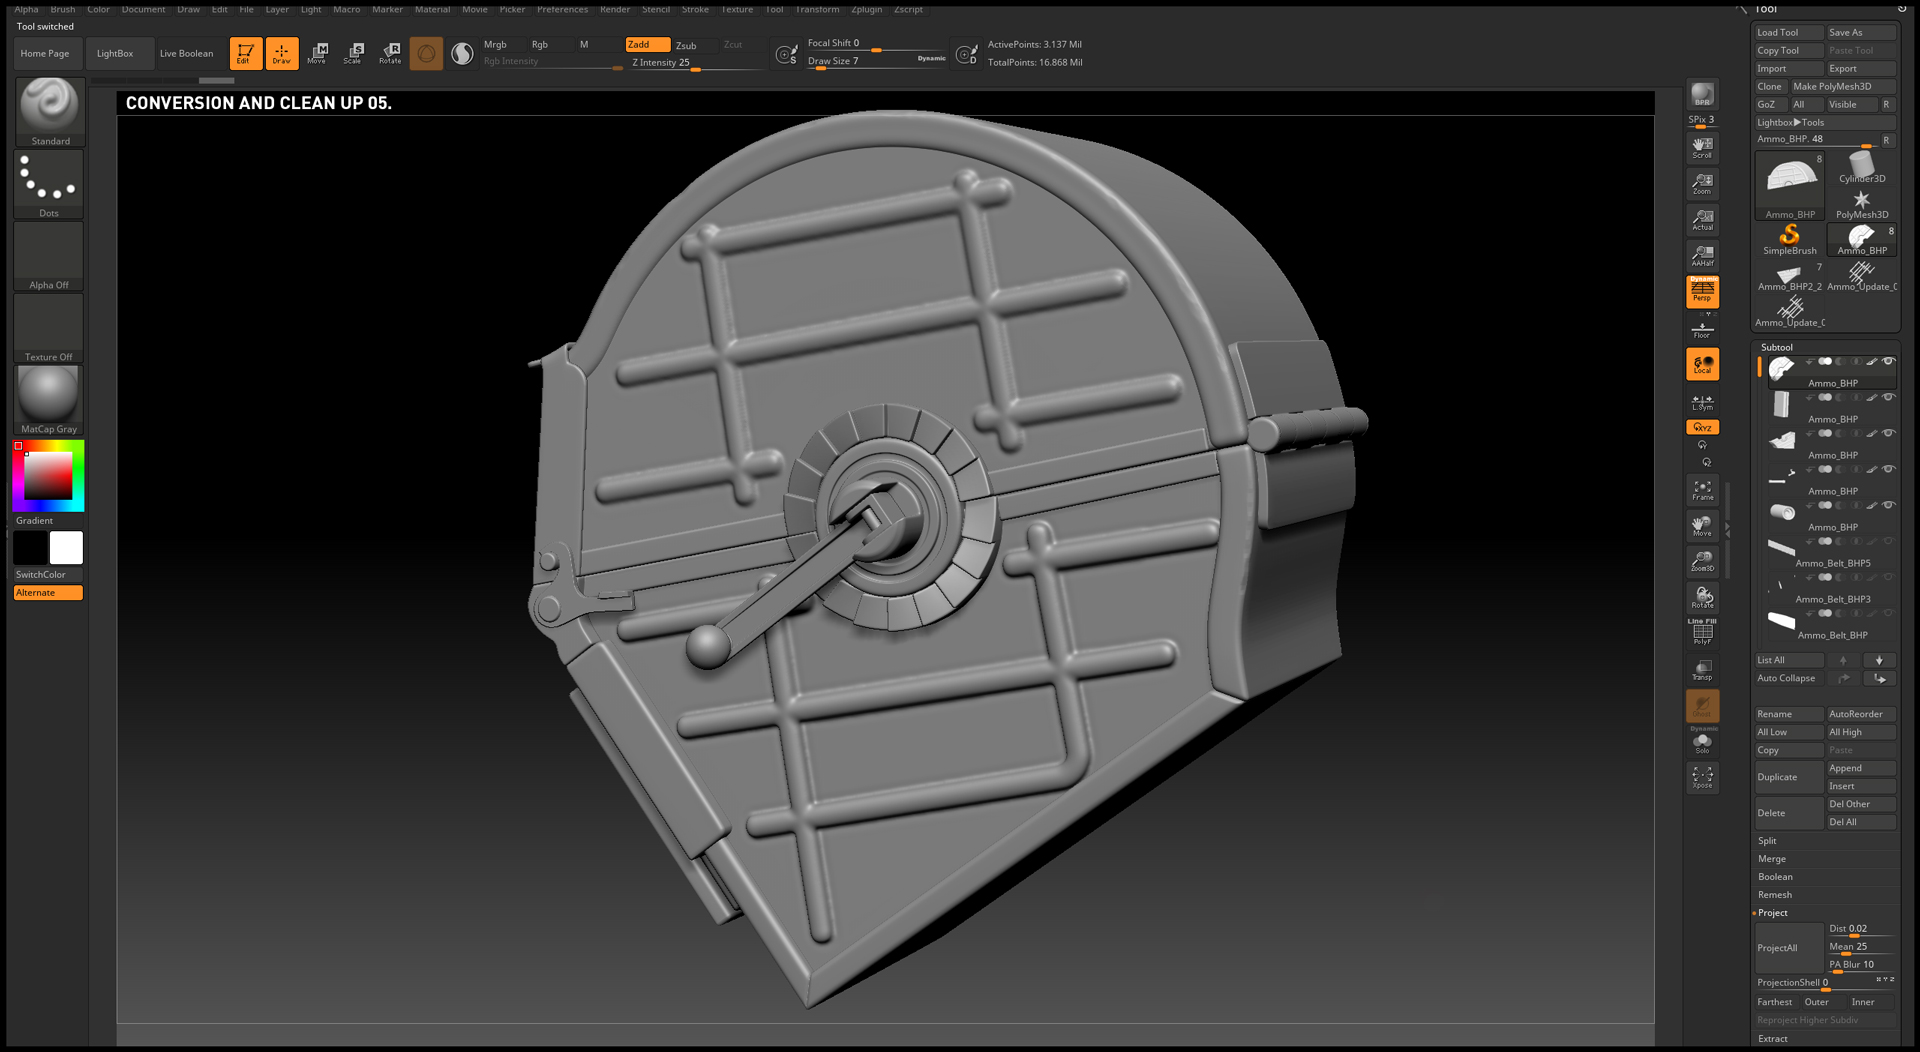
The final step is to use the Polish tools under the Deformation menu to finish the Subtool.
Zbrush Damage and Detail Pass
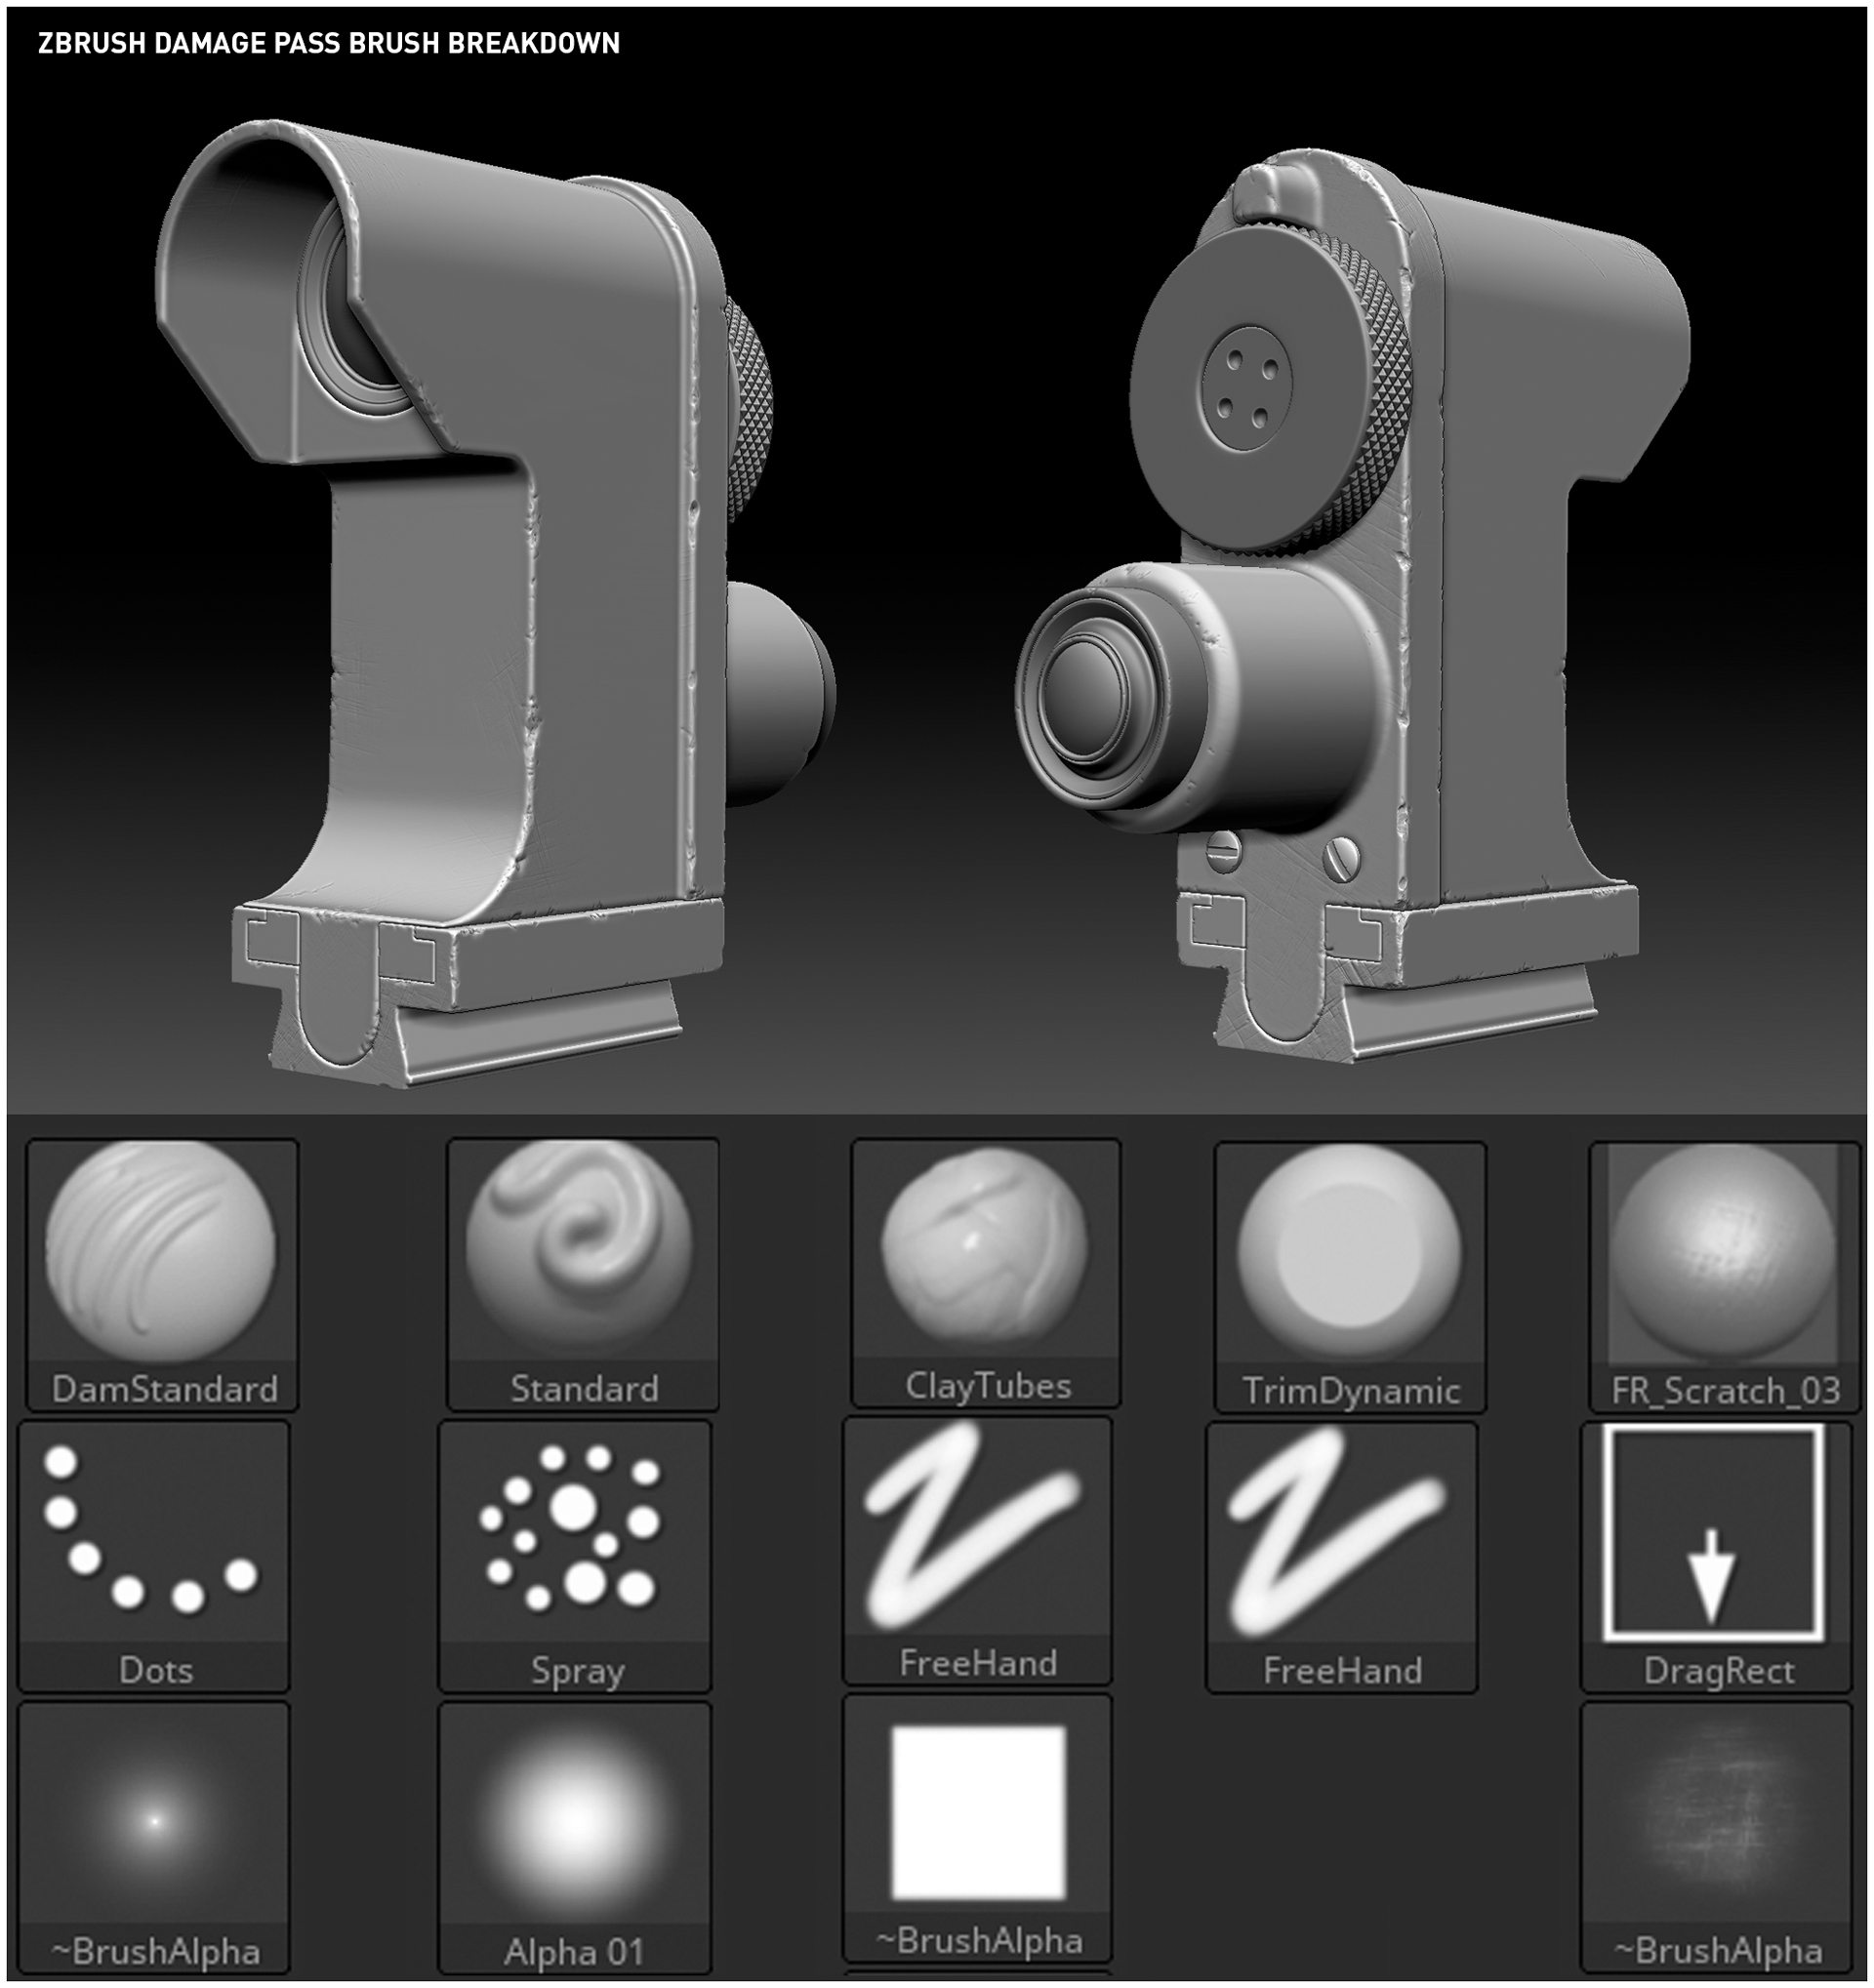
I used this small set of brushes to paint wear and tear onto my gun. I would pull detail back and forth using a stored morph target, trying to keep a balanced variation between chipped edges and edge dinting to develop a believable worn look. The brush set on the right is from a Metal Surfaces brushes and alphas collection by Fredo Gutierrez. I’ve found this set to be incredibly useful for creating complementary detail that supports the main edge damage. Adding some wear to the surface of certain locations helped sell use and maintenance, such as scratches near screws where the screwdriver could have slipped and scratched the surface.
Tip: Store Morph Targets and work on layers. This allows you to have better control and flexibility when sculpting details.
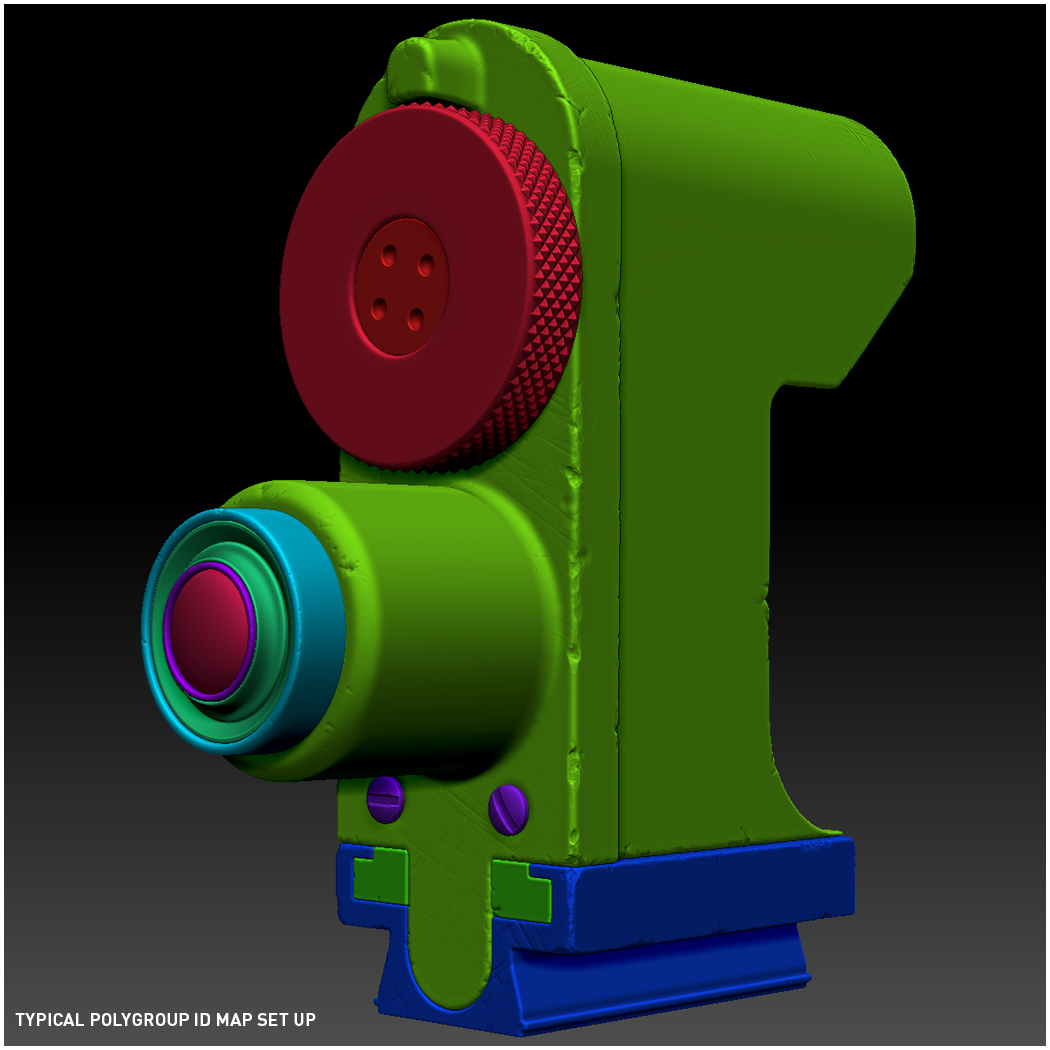
Once the wear and tear pass was complete, I started using polygroups again and splitting various details into groups that would share the same material treatment. As soon as I’ve grouped my elements, I used Polypaint From Polygroups to color the vertices of the mesh for my ID texture map.
Creating the low poly mesh
Since most of my high poly detail was stacked using modifiers in Max, it was easy to get the low poly part of the process done. I started deleting and adjusting modifiers where needed, optimizing down the mid resolution mesh. At this stage, I’m constantly checking the FPS view to make sure that I am not removing details that will affect the overall quality.
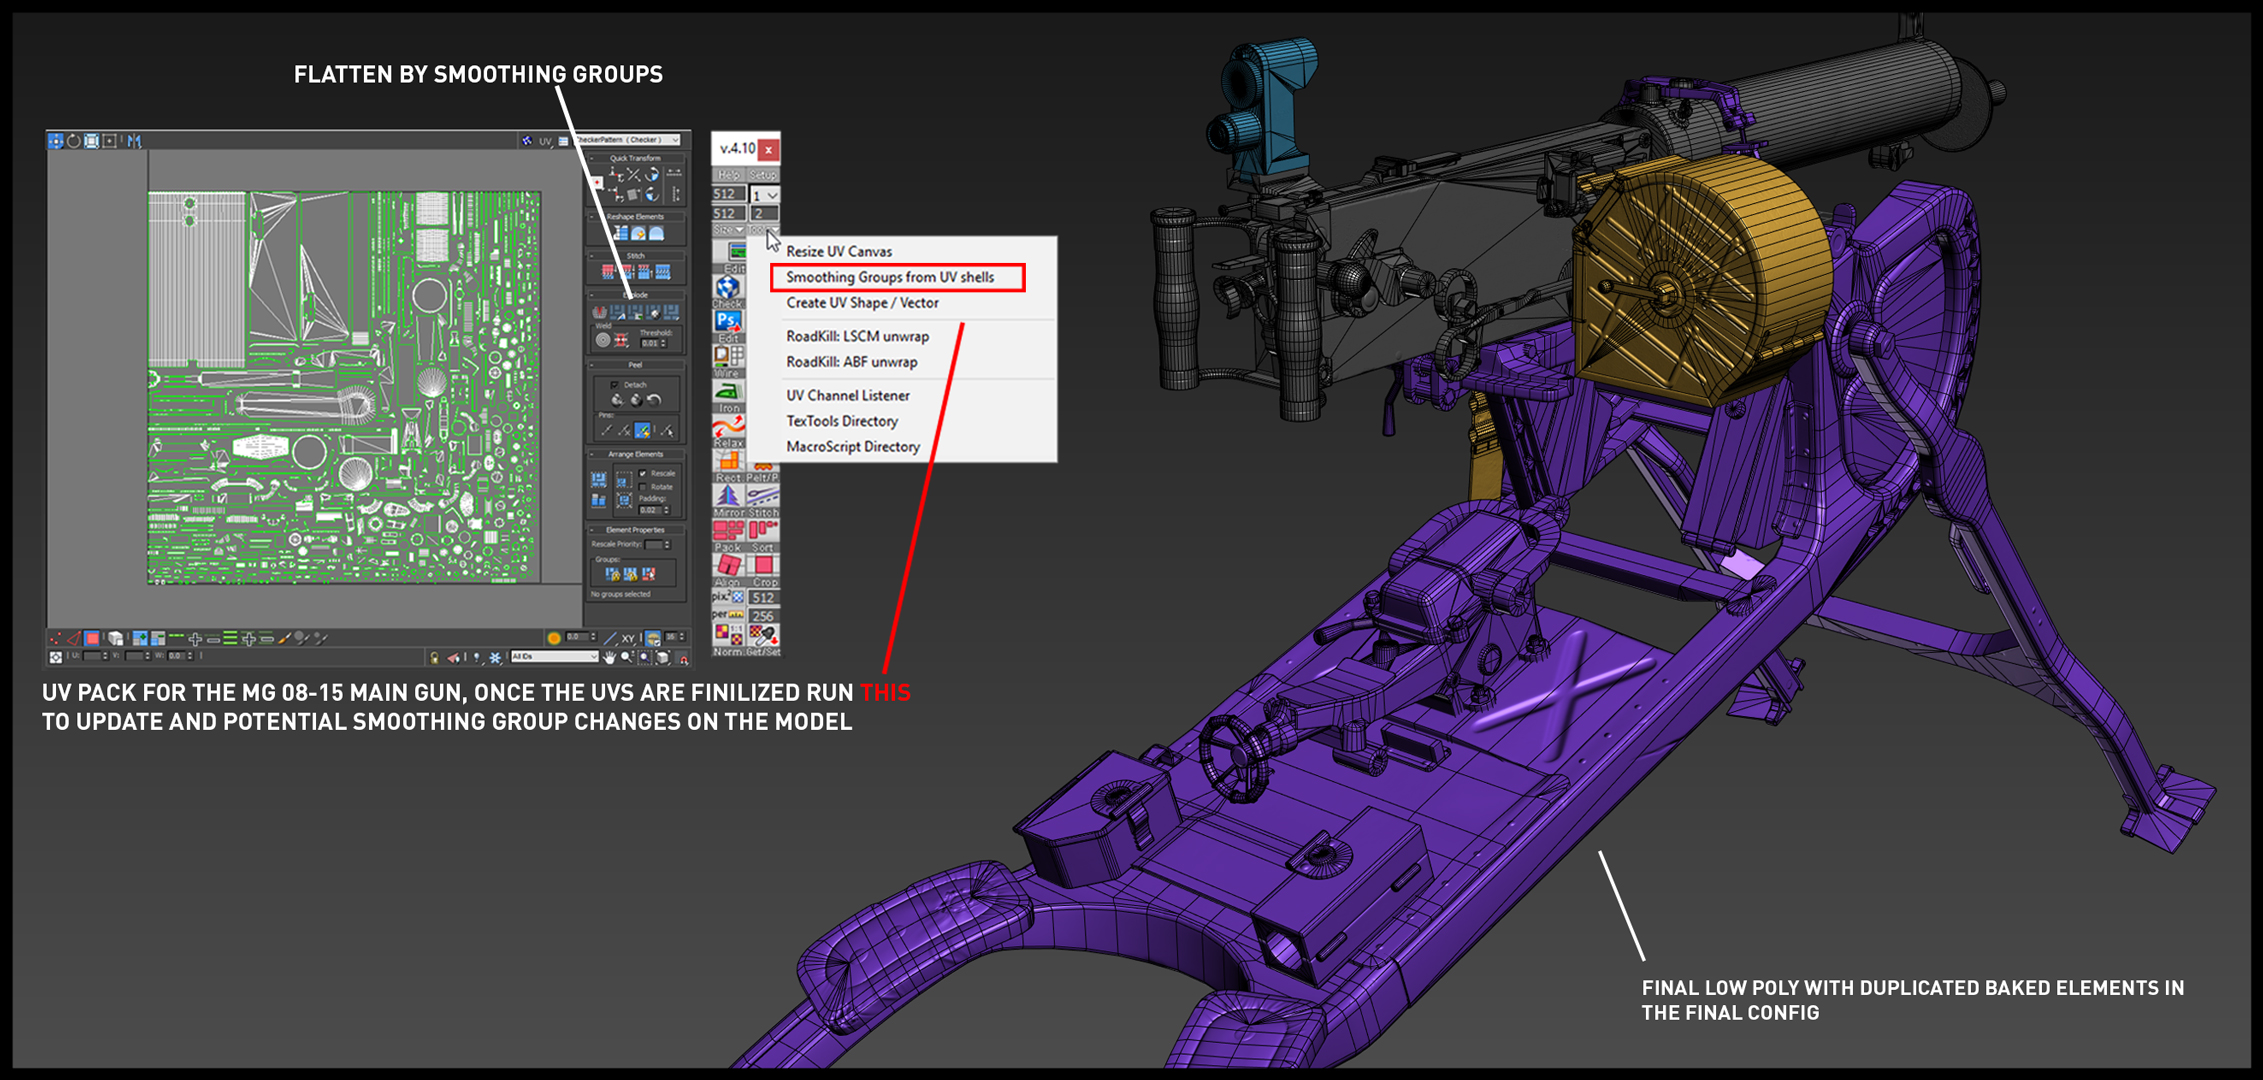
Tip: Use TexTools’ Smoothing Groups from UV Shells feature to transfer any UV or smoothing group changes to the final low poly mesh. This can be found under the Tools drop down menu.
After setting my smoothing groups on the low poly, I unwrapped each segment of the object using the handy UV Shells from Smoothing Groups option within the unwrap window. Having UV splits along the hard edges defined by my smoothing groups gets me most of the way. Some rework may be required for some of the chamfered elements where there could be one smoothing group. Adding new UV splits and relaxing or quick peeling these islands will fix these issues. Once all of the shells for each part of the mesh were unwrapped, I used IPackThat to efficiently pack all of the shells into the 0-1 space with correct padding for clean bakes and mipping.
Baking in Toolbag
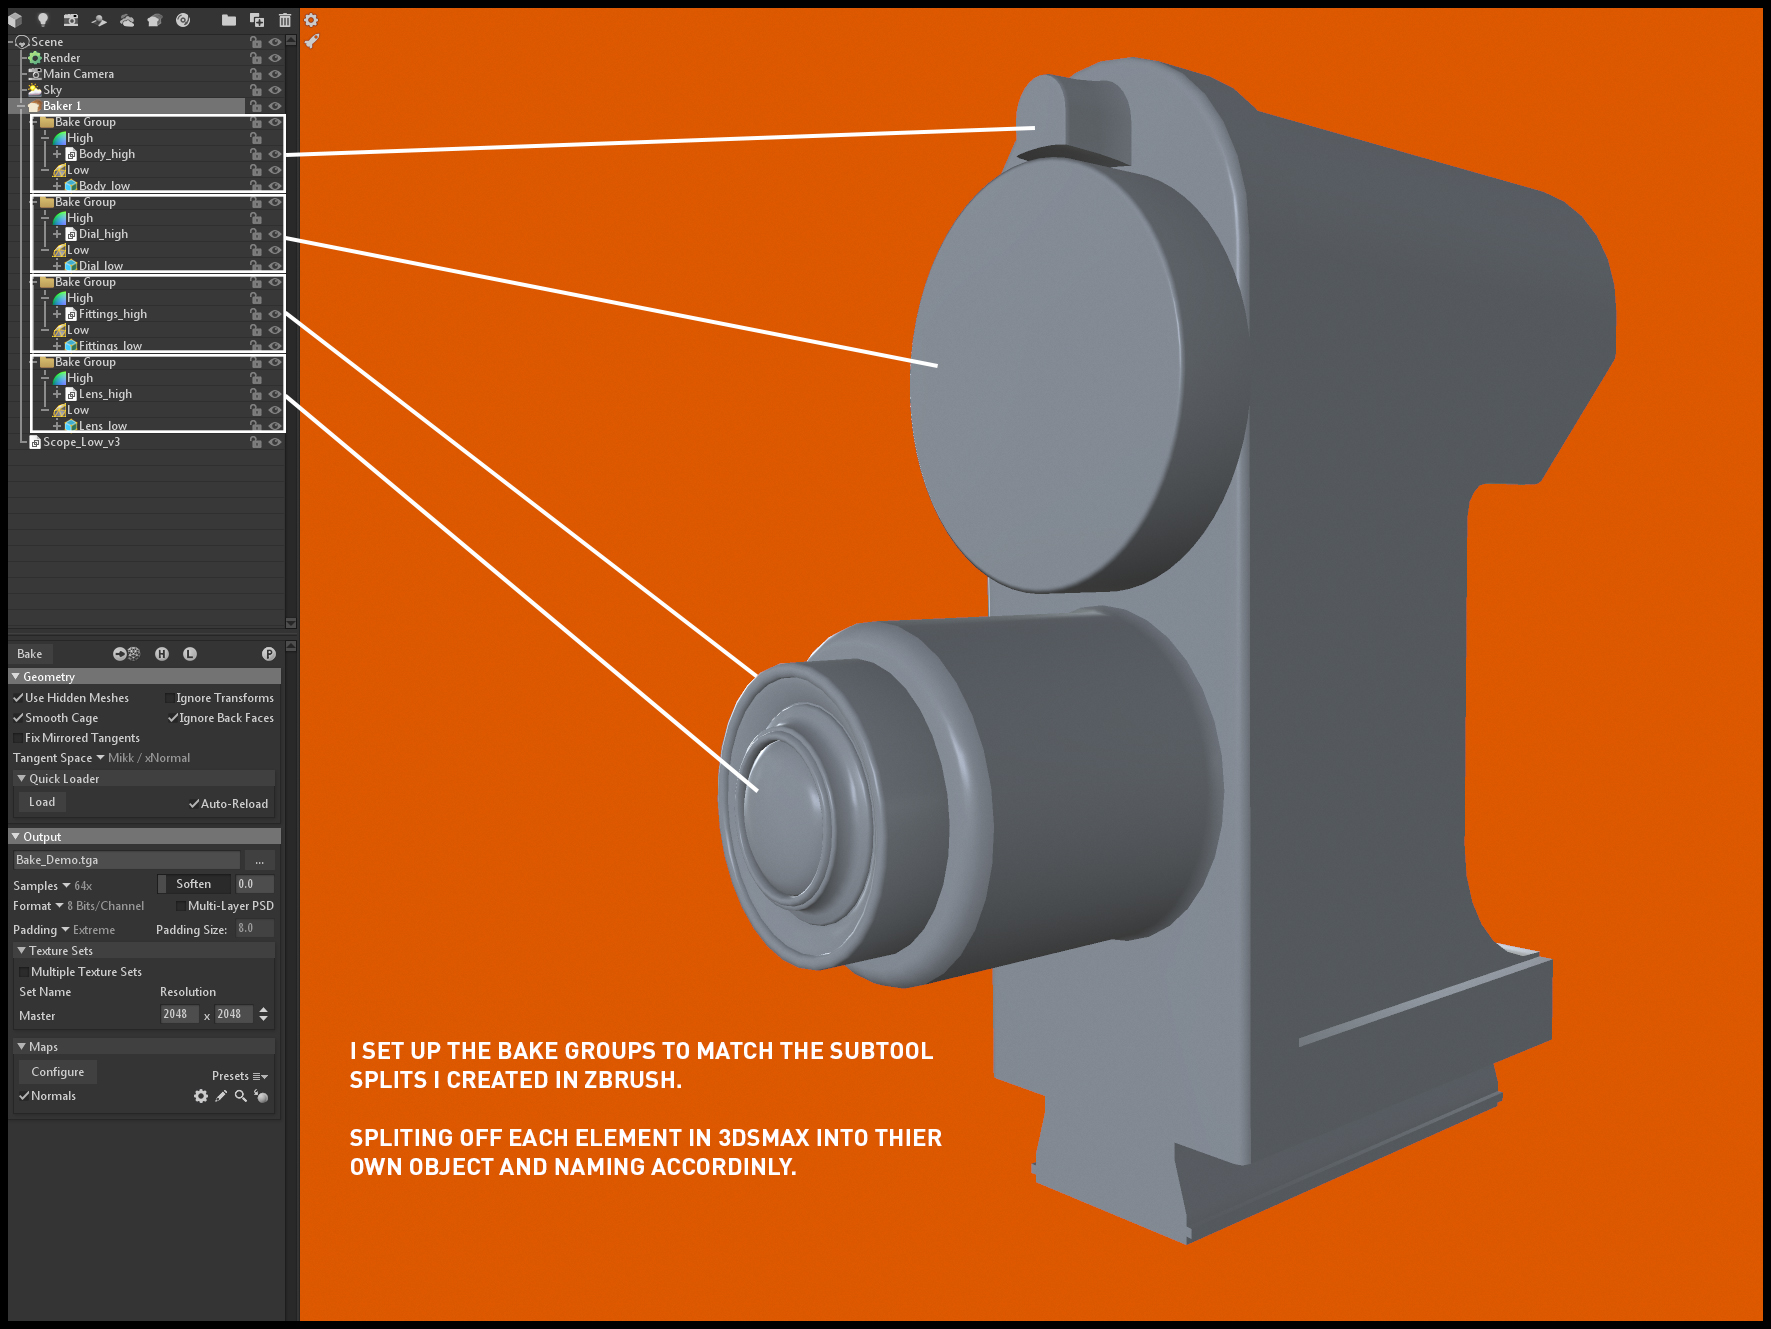
Integrating Toolbag’s baker into my workflow was a pretty easy transition. What was once a relatively slow process has now been sped up immensely. The baker handles high poly counts exceptionally well, which made this project a breeze to work on, even on older hardware. I created a new bake scene for each part of the asset to keep things organized and running smoothly. I made extensive use of Bake Groups in Toolbag. This allowed me to bake a number of high poly parts that were intersecting or in close proximity to one another without causing baking errors.
If you have moving parts or other elements which you do not want to cast to or receive AO from, you can enable the Exclude When Ignoring Groups option. Make sure to set up the Cage Settings per element before baking. This will avoid any clipping of baked details. The automatic Cage generation within Toolbag is pretty accurate. No more “mesh monsters” like the initial results produced by the Projection Modifier when using the render texture window in Max!

If you need to correct the cage, there are some ways to do so within Toolbag. The first is a global offset for the Low element of a bake group. Navigate to the group where details are being clipped (A.) and turn on Show Offset under Preview (B.). Next, adjust the Min and Max sliders in the Cage drop down menu (C.) Adjust the sliders until the cage encapsulates the clipped details. The amazing Auto-Bake option instantly updates and displays the changes you’ve made. It’s one of the best features in Toolbag for baking!
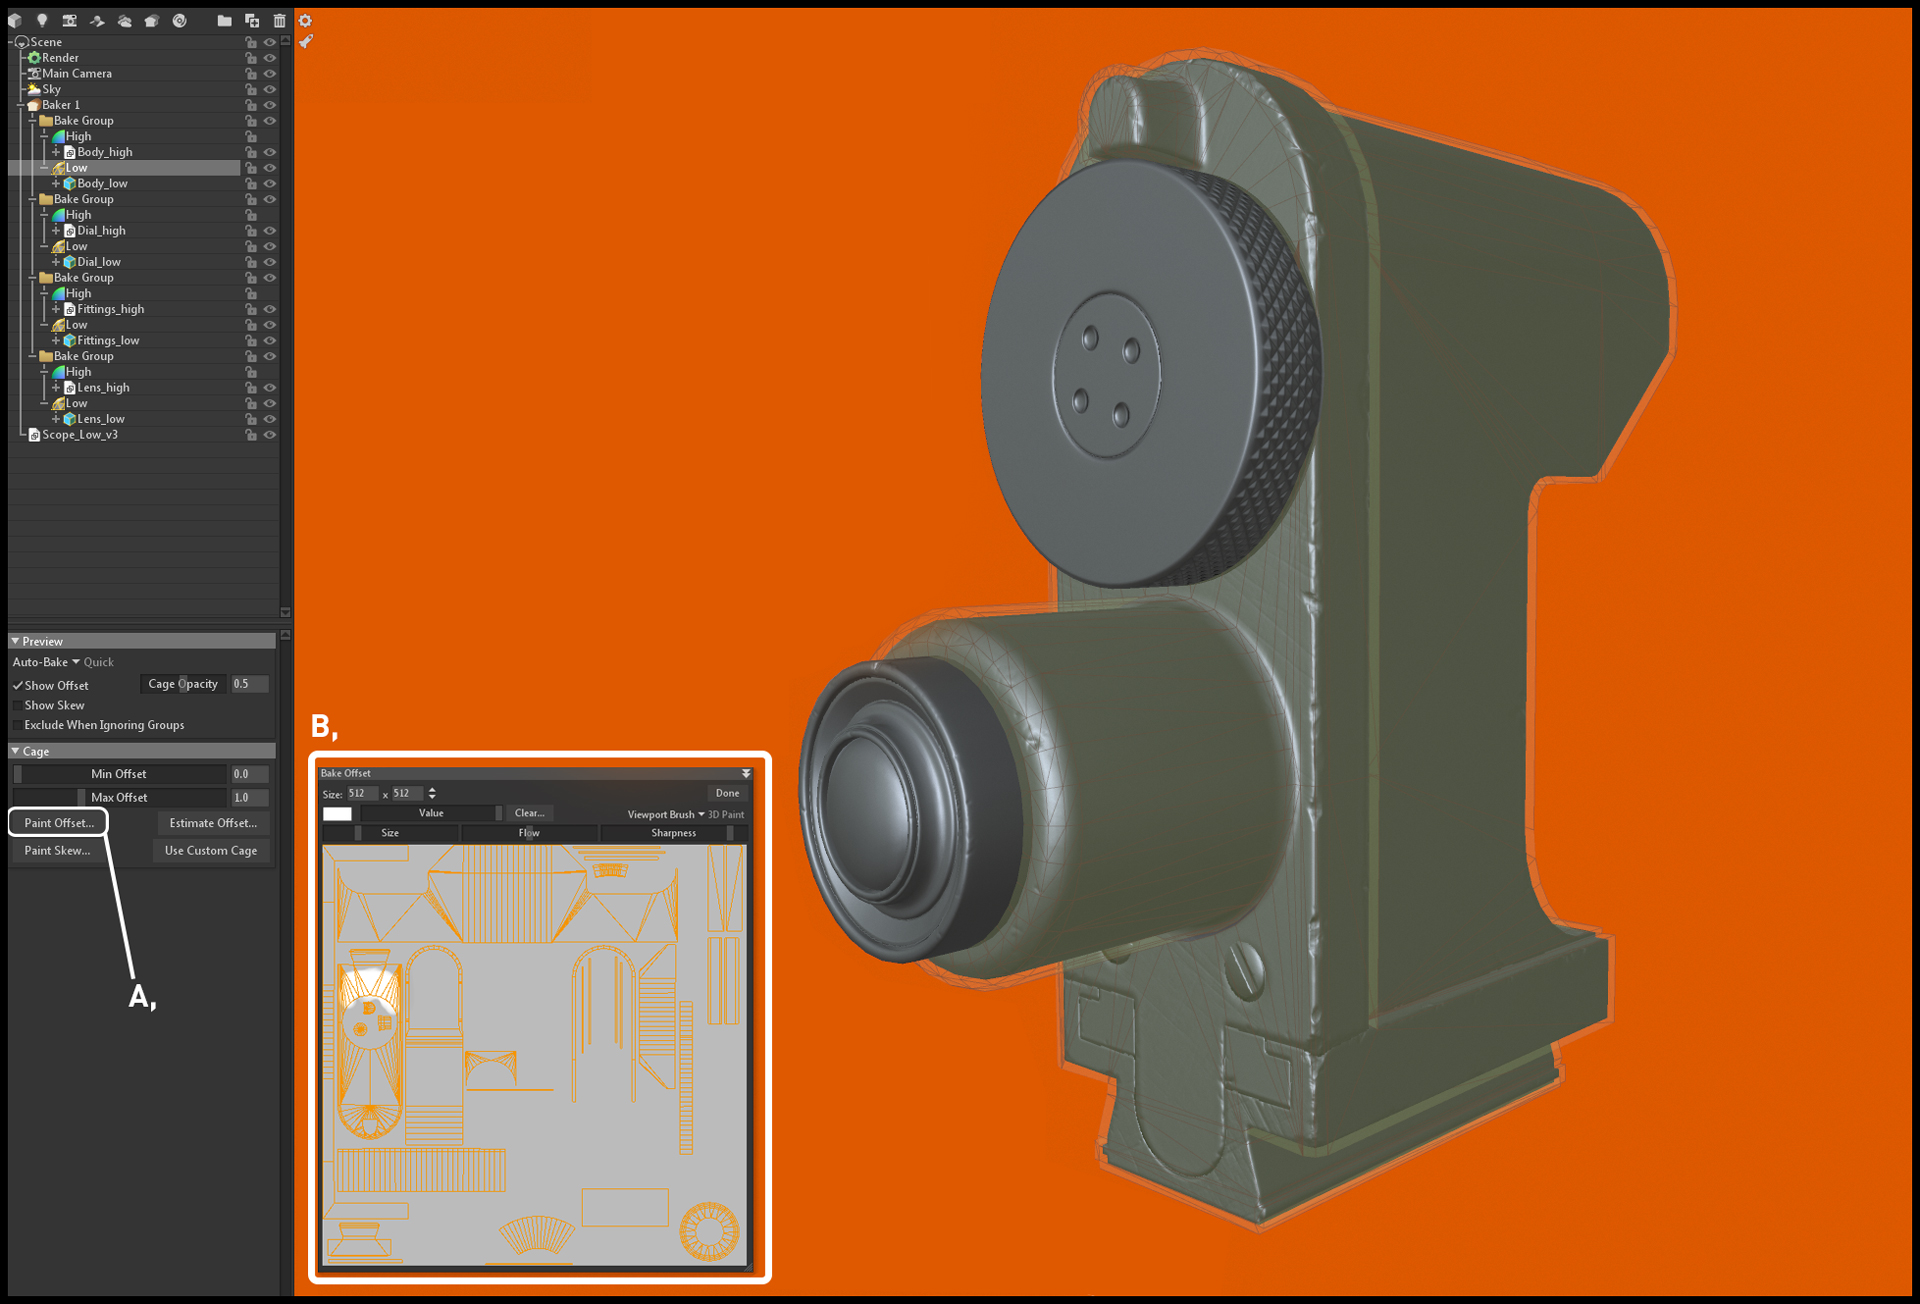
The next method allows you to fine tune the cage. In the Cage menu, you’ll find the Paint Offset feature (A.). When selected, a window will pop out which allows you to paint values to push and pull the cage. A white value (of 1) grows the cage, while a black value (of 0) shrinks it. A grey value (of 0.5) is the default offset value. You can paint in the window or directly on the mesh. Now that your cages are good to go and the mesh bakes are clean, some of the details may be noticeably skewed. One of the other best features within the baker is the Paint Skew feature. You can either paint the correction on the UV map or directly on the mesh. This enables you to quickly iterate on bakes produced using Auto Bake, correcting skewed and wonky details with ease.
Once the cage and skewed details have been corrected, I baked out the rest of the maps: AO, ID (from the vert polypaint in the previous stage), Thickness, Curvature, Concavity, and Convexity. I’ll save these maps for later use in Substance Painter.
Texturing Overview

When everything was baked, I created another pass on the smaller normal details. These are added to the high poly pass using nDo Painter or Substance Painter.

At this point, I brought everything into Substance Painter and started layering up materials by adding base materials, then moving to coating (paint, varnish, etc.), and adding wear and tear. I like to spend a lot of time tailoring and tweaking materials to make them believable. I added superficial imperfections to the Roughness map and checked my references constantly to arrive at the final results. For me, this is very much a trial and error process where I export multiple iterations to Toolbag, and jump back to Painter to further refine my textures.
Tip: Paint your masks! Use a Smart Mask, tweak it to a near-final stage, and break out the Paint and Levels layers. This adds finer control and really allows you to nail the finish you’re looking for, and it’s fun to get stuck in there.
Presentation and Rendering

Setting up the final materials and meshes in Toolbag is pretty straightforward, a drag and drop affair, if you will. Once I’ve set up the assets, one of the first things I do is turn on the Safe Frame in the Camera properties. This allows us to frame the shots more accurately. Where possible, I tend to work with all of my settings turned on; Global Illumination, Shadows (including Use Cascades), and Ambient Occlusion.
Tip: Bring in a few HDRI’s from Substance Painter’s shelf folder to ensure everything is behaving the same in Toolbag as it had done in Painter. Custom HDRIs can be loaded in the Sky object properties by clicking the Image button.
For this project, I went with a fairly simple lighting setup with a little more of a natural feel. I started by searching through HDRI’s and landed on the Ennis House Sky Preset. I adjusted the Brightness slightly and added a Directional Light to be the main light source. I tend to work with Sticky Focus turned on and play with the Depth of Field in the Camera properties. This helps keep the viewers eye on the focal point and adds believability to the renders. When framing the shots, I like to rotate the Sky around the asset (Shift+Drag in the viewport), looking for where the light hits best and keeping an eye out for interesting shapes, material responses, and separating the prop from the background. I added Child Lights where needed to refine the rim light.
The Post Effects in the Camera were pretty minimal. I bumped up the Grain slightly and added some Sharpness. Once I rendered out the final shots, I took them to Photoshop to add a background (a series of gradients to emulate a studio lighting setup), color curve adjustment layers, and some lens specks and dirt, followed by some framing work.
Conclusion
I hope you’ve found this breakdown helpful in some way and I would just like to say a huge thank you to everyone at Marmoset for asking me to write this breakdown article. Thanks for reading!
We’d like to thank Ben Armstrong for writing this breakdown article. You can check out more of Ben’s work on Artstation.
Speed up your baking workflow with Toolbag and download the free 30 day trial today. If you’re interested in collaborating on a tutorial or breakdown article, please send us your pitch, along with a link to your artwork, to submissions@marmoset.co.


