
Introduction
Hey, my name is Zrinko Kozlica and I’m a self-taught Senior 3D/VR Artist currently working and living in Amsterdam. I got started in the industry in 2015 as Junior Character Artist at Guerrilla Games, working on Horizon Zero Dawn. I later joined Force Field VR, where I am working on upcoming VR games and experiences.
This article will focus on the rendering process of a personal project called BANG. The project started out as a character art piece, based on a concept by Aleksey Baydakov. While working on it, I got inspired by the by the misty, cold autumn streets of Amsterdam. I decided to incorporate that into the project and give the character a fitting environment.
Why Marmoset Toolbag
Originally, I planned to create the character to learn more about non real-time workflows and pipelines, however, I soon found out that it was better to stick to a platform that I was already familiar with from previous projects. Toolbag has evolved quite a bit (lighting and skin shading areas in particular) and can handle a high amount of polygons, materials, objects and lights whilst staying fairly responsive. This makes iteration fast and easy.
Most importantly, Toolbag is very easy to use and has an extensive Tutorials section, which helped me to achieve my goals, so I would like to give a big thank you to Marmoset and previous contributors to this section. I think it’s very easy to get overwhelmed by the amount of different, great rendering solutions and engines available these days. Learning new tools can distract from achieving your goal, so it’s better to use one you’re already familiar with instead of getting frustrated with the basics in other tools.
Scene Overview
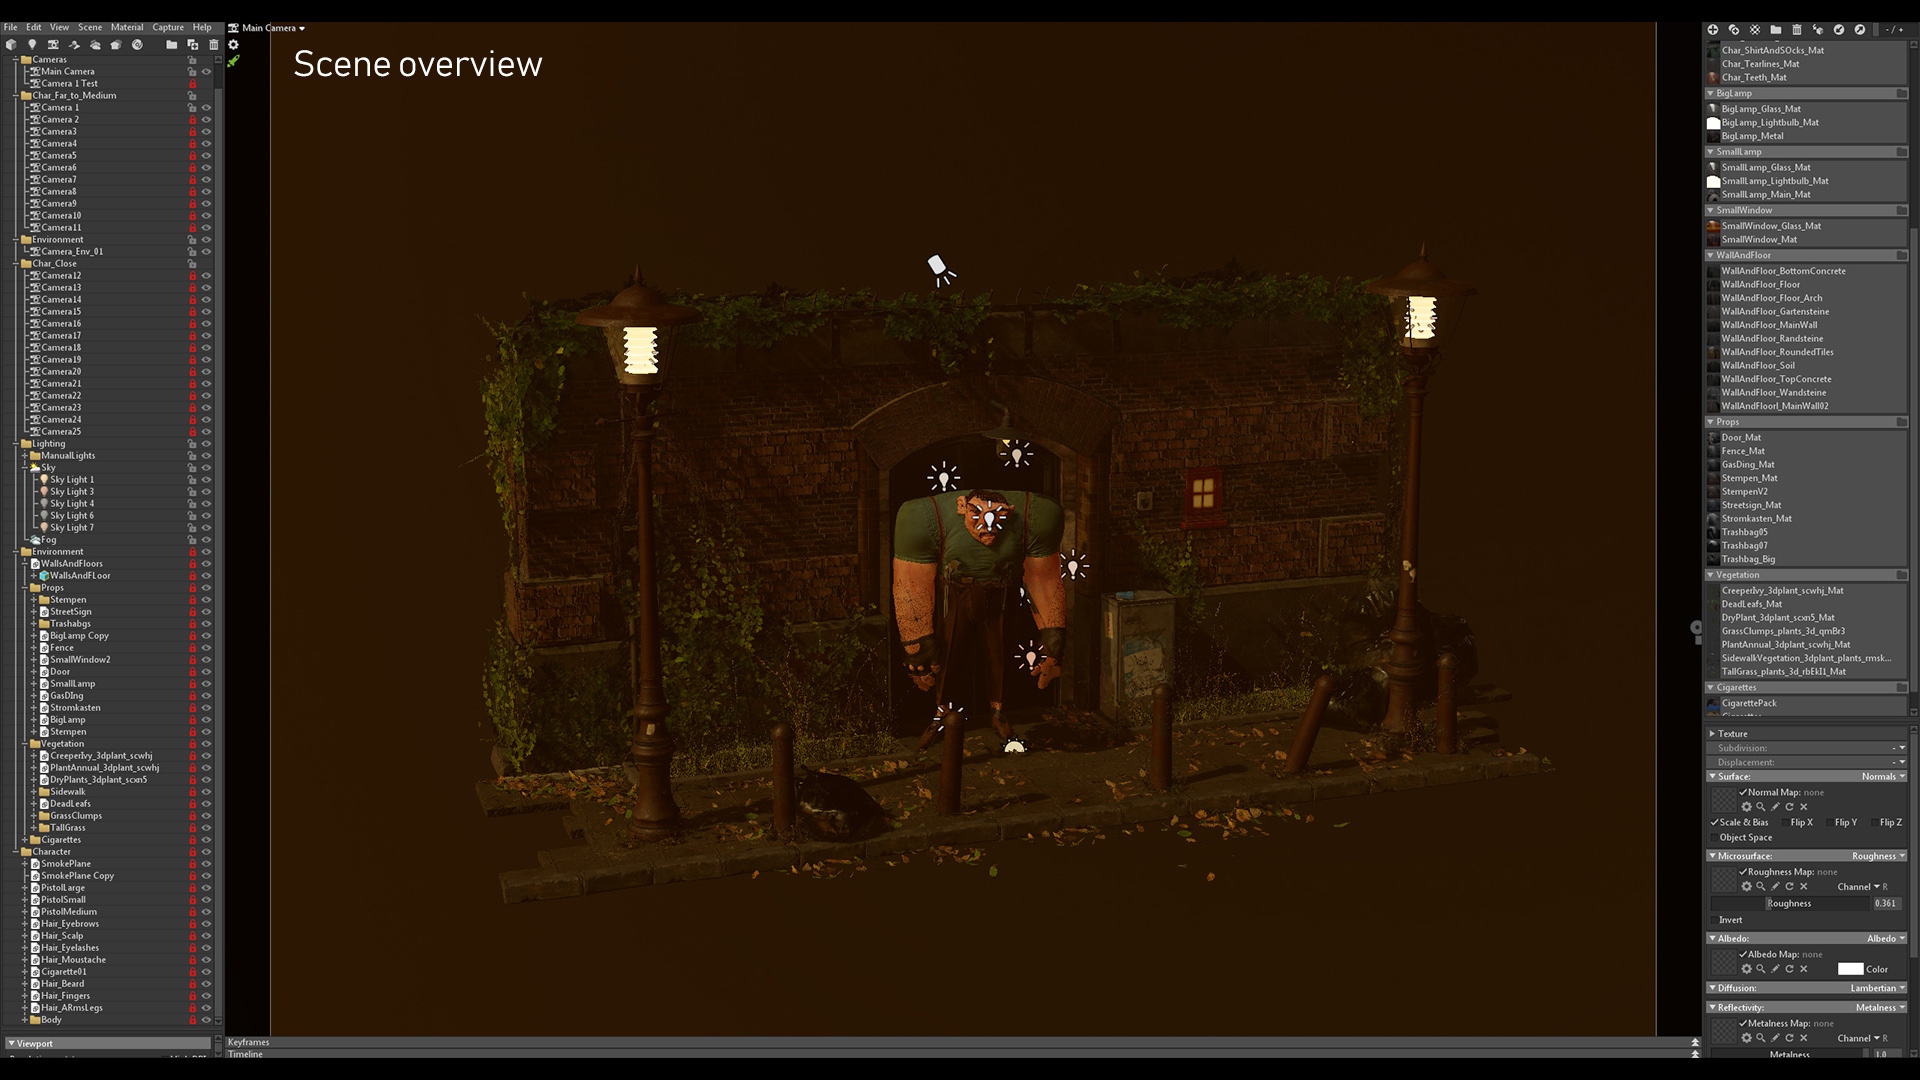
One thing to consider when creating a scene of this complexity is optimization. In my case, I opted to not focus on optimization too much, since my PC is quite powerful. The screenshot above gives an overview of the amount of materials and objects used. If you have the time to spare, it’s definitely recommended to use less memory in your scene for better performance. A useful addition to Toolbag is the Speedy Viewport Mode (Ctrl+Shift+J), which disables complex rendering effects and increases the framerate. I turn Speedy Mode on whenever adjusting settings or adding things to the scene.
Lighting Setup
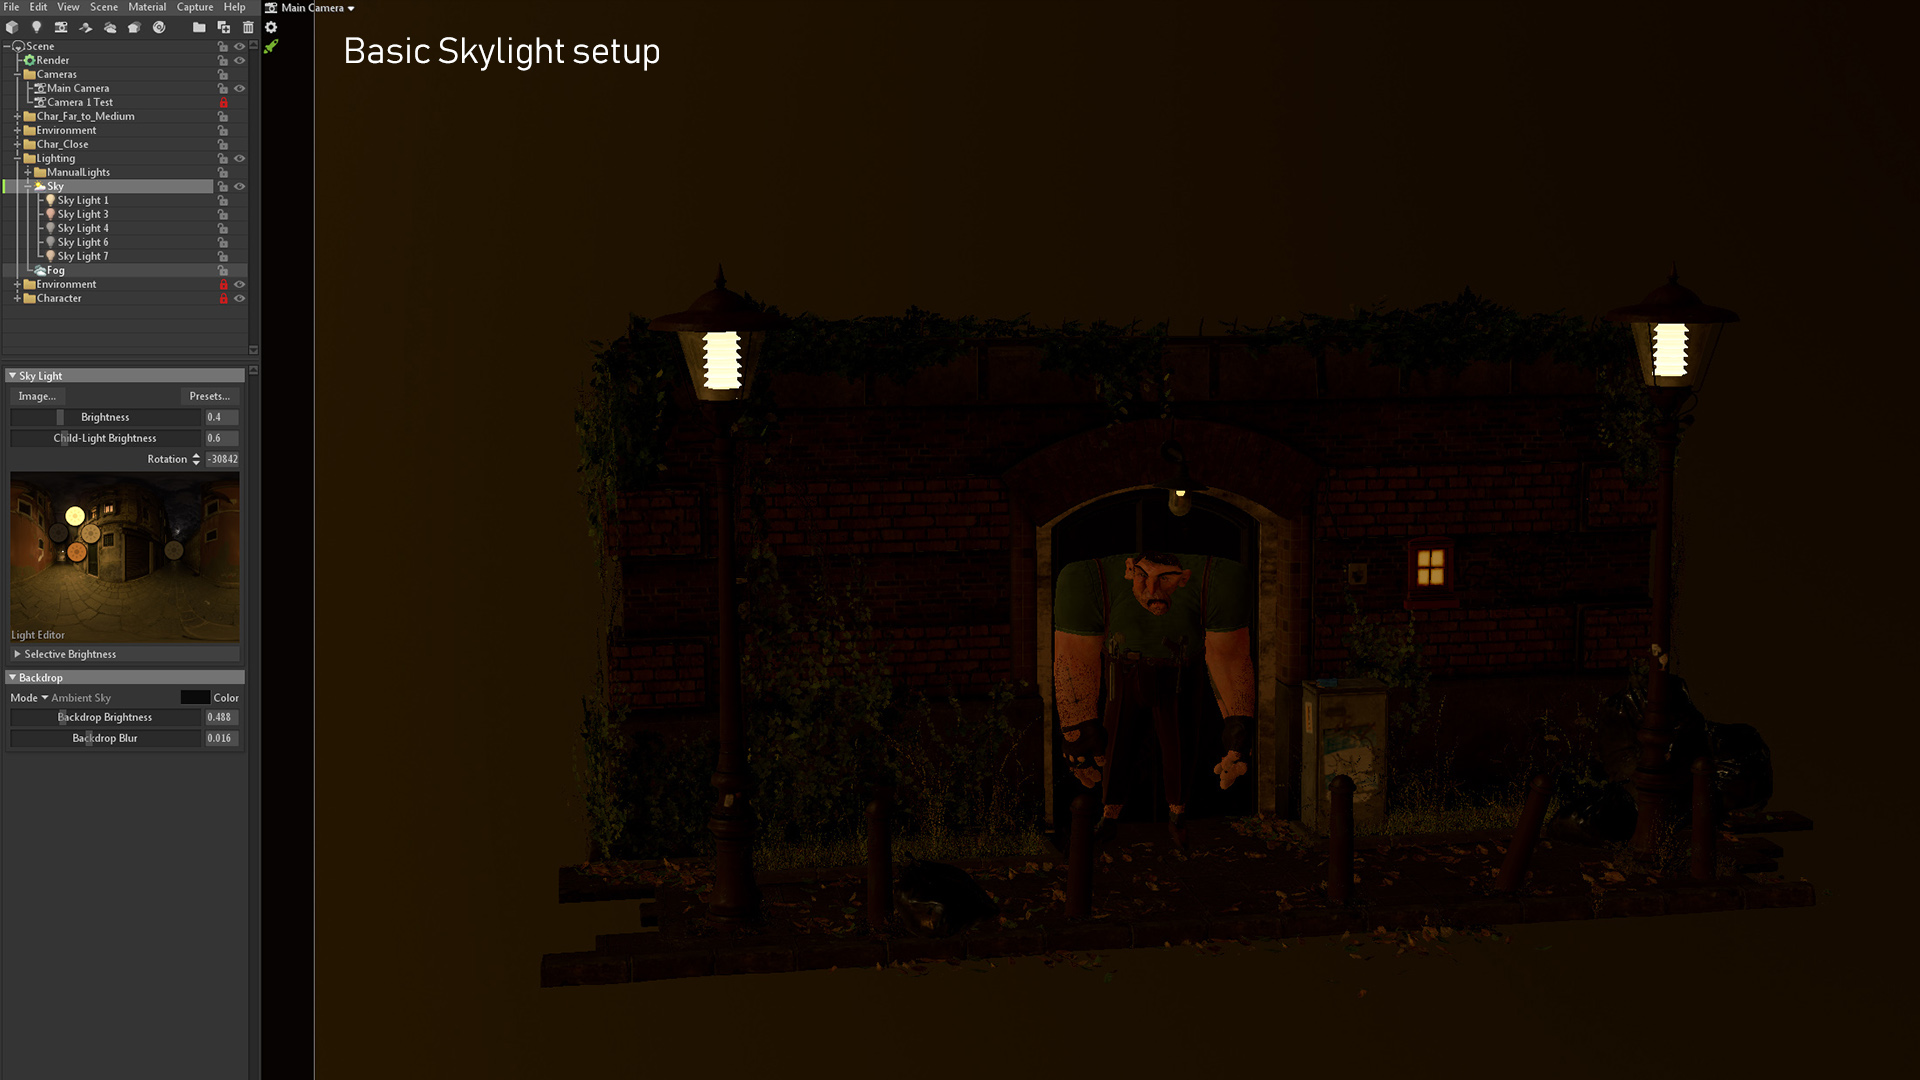
The first step is to find a suitable Sky Preset. After some iterations, I found one from the official Marmoset Northern Italy Pano Pack that seemed to give the right kind of mood. The Brightness is set to 0.4 and I chose the Ambient Mode so that the Sky Light can still create some nice gradients when interacting with Fog.
After that, I started to add some Child Lights, which is a really nice and easy way to improve the lighting. Simply click an area on the Light Editor and it will create a Child Light in that spot. This allows for fast iterations and enables you to get the most out of your Sky Light, even if it’s just to create subtle effects. The street lights in the scene are created with Emissive materials.
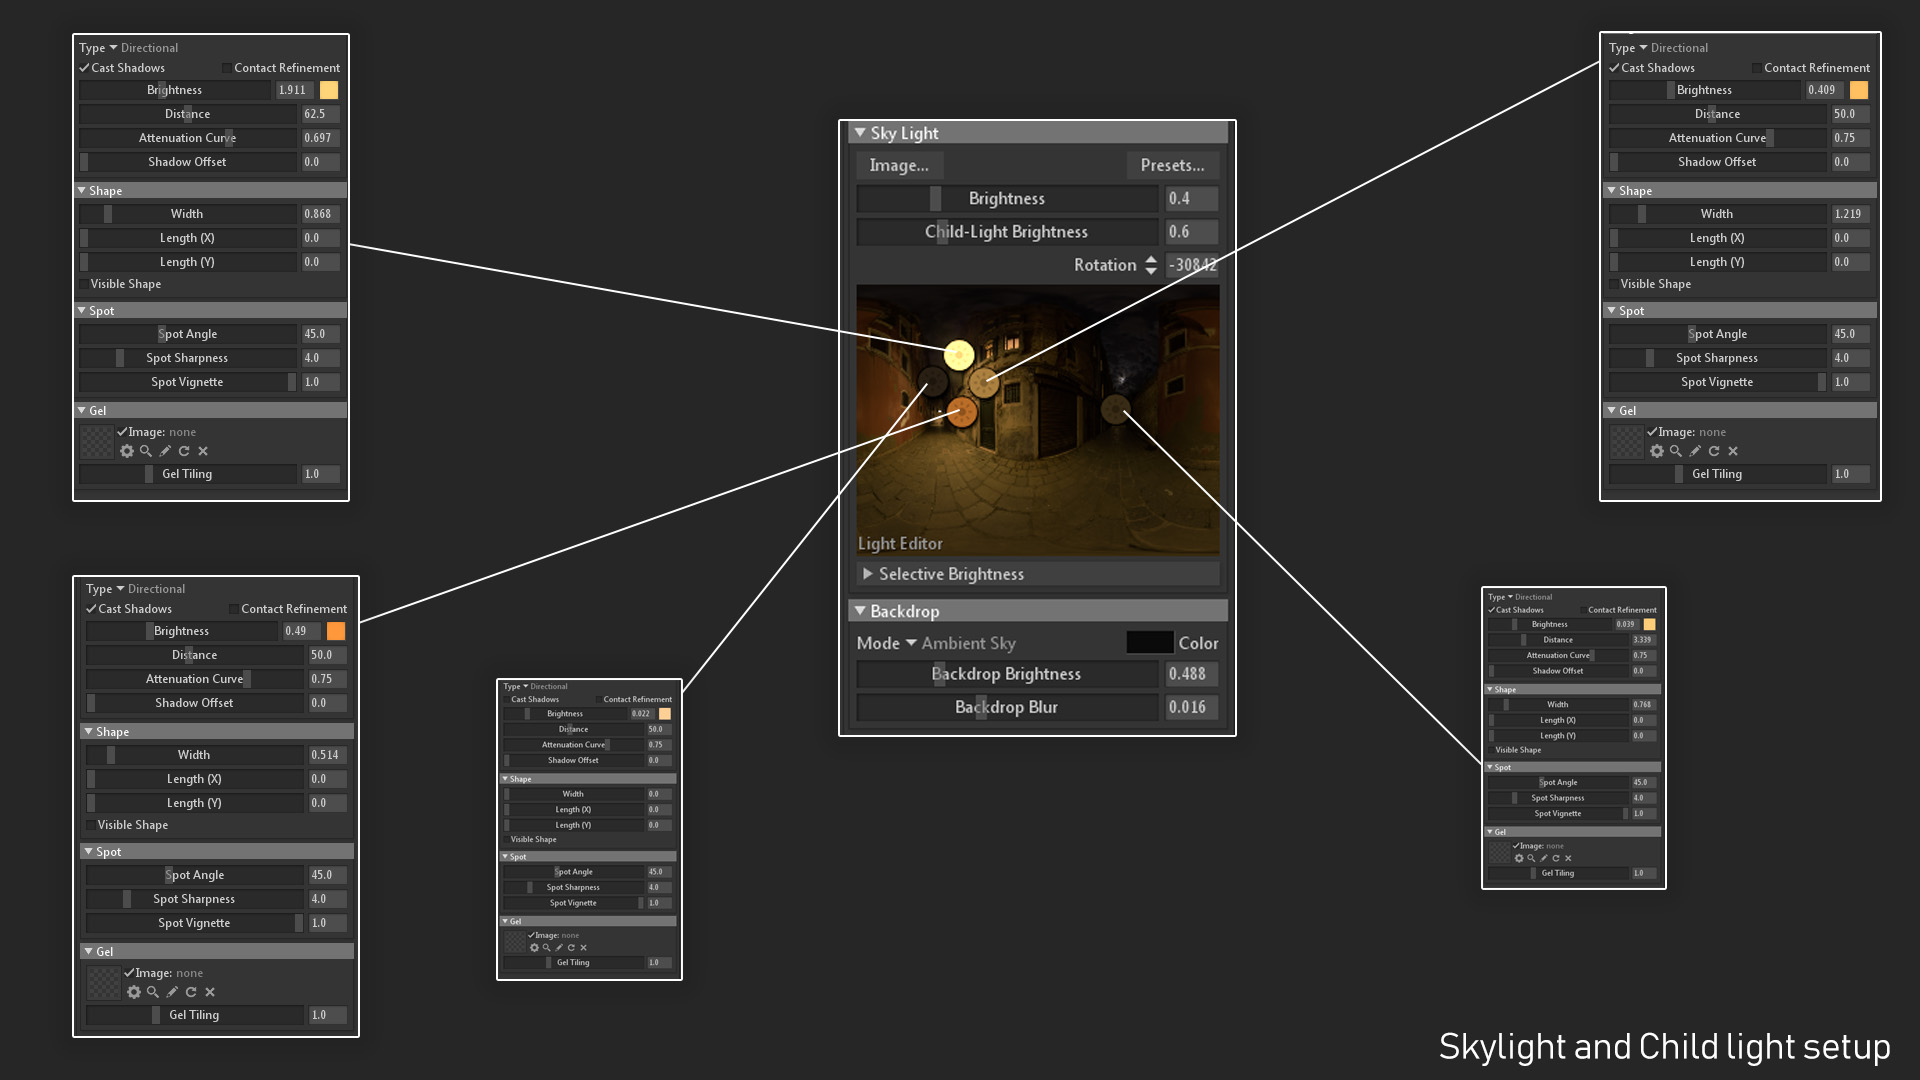
You can see the Sky setup including the settings for the Child Lights above. When starting this process, it might seem overwhelming to realize how much work you will need to put in to achieve reasonable results, but in the end, the patience pays off.
Setting up the Camera view
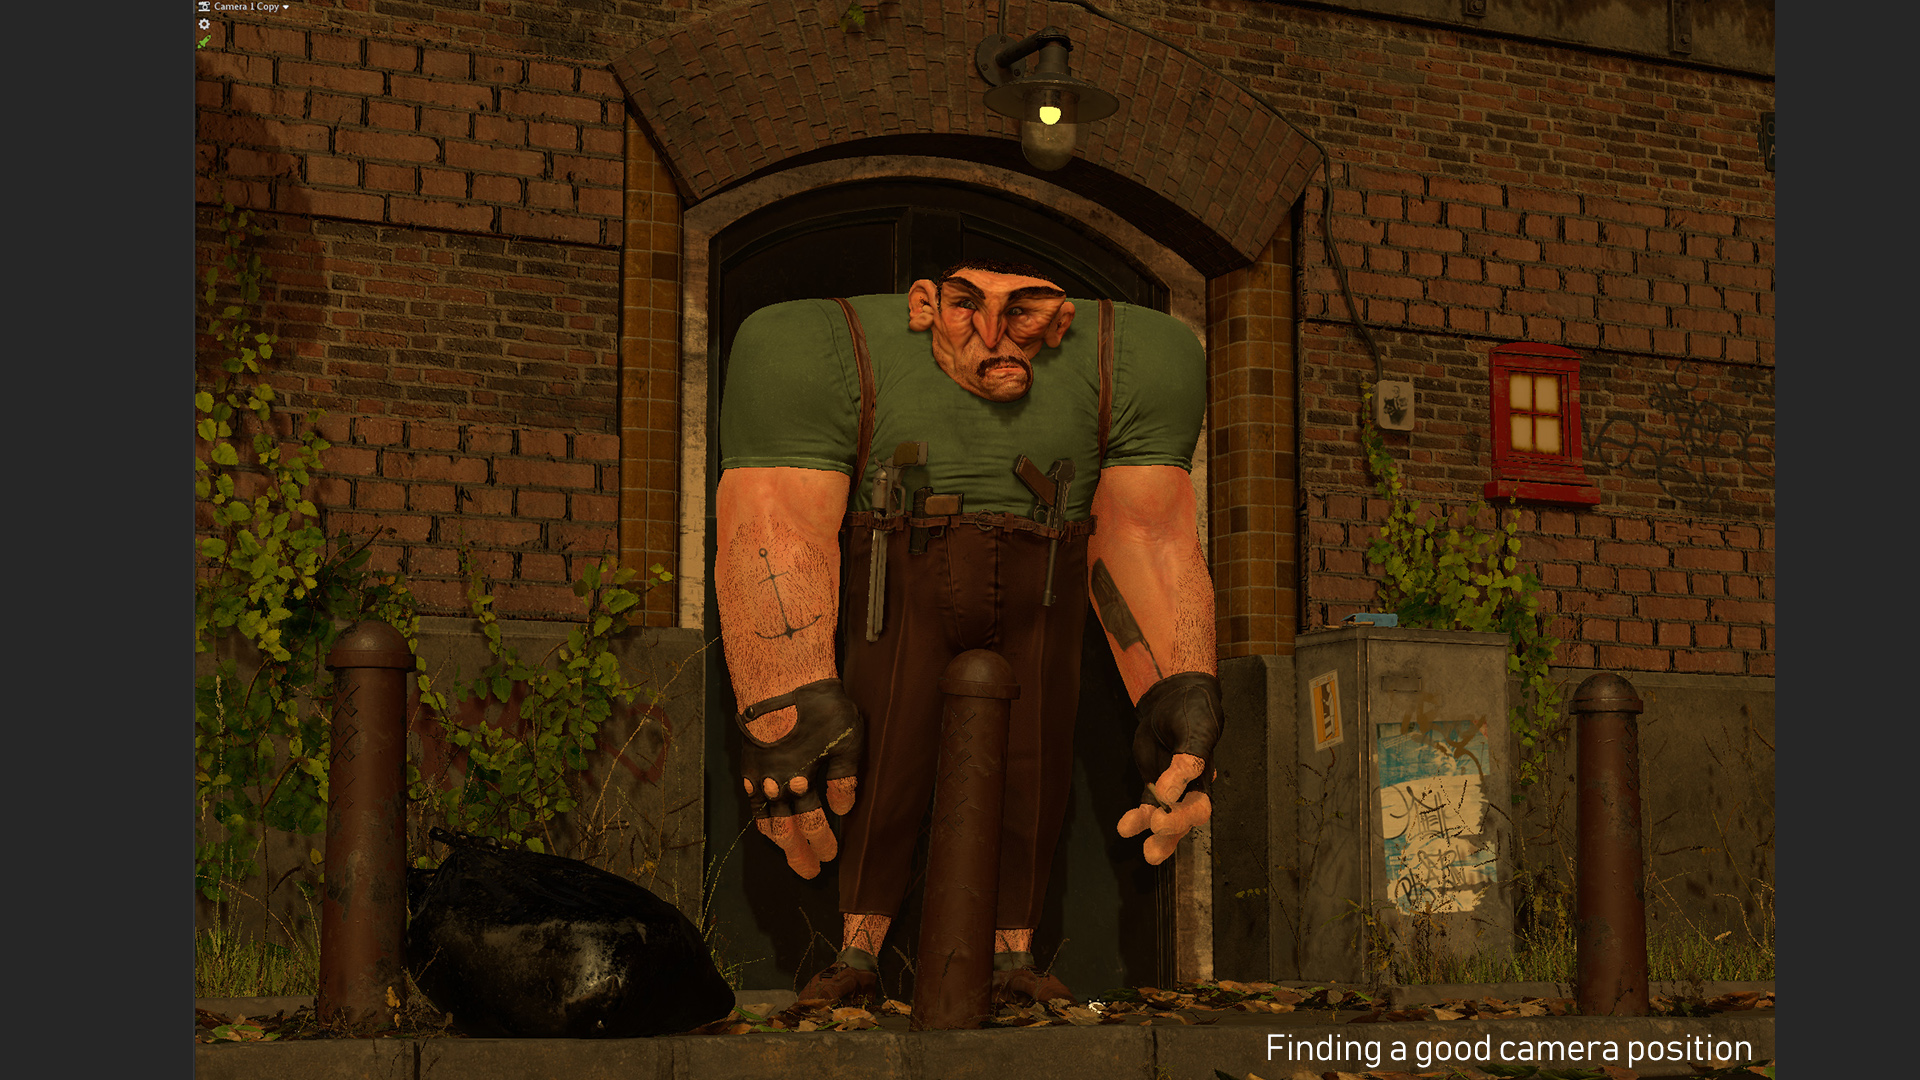
After settling on a scene setup that feels satisfactory, the next step is to find a camera angle from which we will make further adjustments to the lighting. At this stage, I will usually decide how far I can push the quality of the whole project based on one camera view. I don’t move on to creating any other camera setups until I’m satisfied with this camera view. Doing so can lower your ability to judge your initial setup properly.
For the hero shot, I chose a Focal Length of 65mm and positioned it fairly low to the ground make the character look more imposing whilst showing a good amount of the environment. Usually, I try to research what focal length is commonly used in photography, since that usually provides me with a good guideline on what focal length to choose. I like to rotate (Shift+RMB) my Sky Light until I’m happy with the way the lighting interacts with the scene. The next step is to dive a bit deeper into the camera setup and finally enable the high quality render settings.
Camera and Render Settings
Render Settings
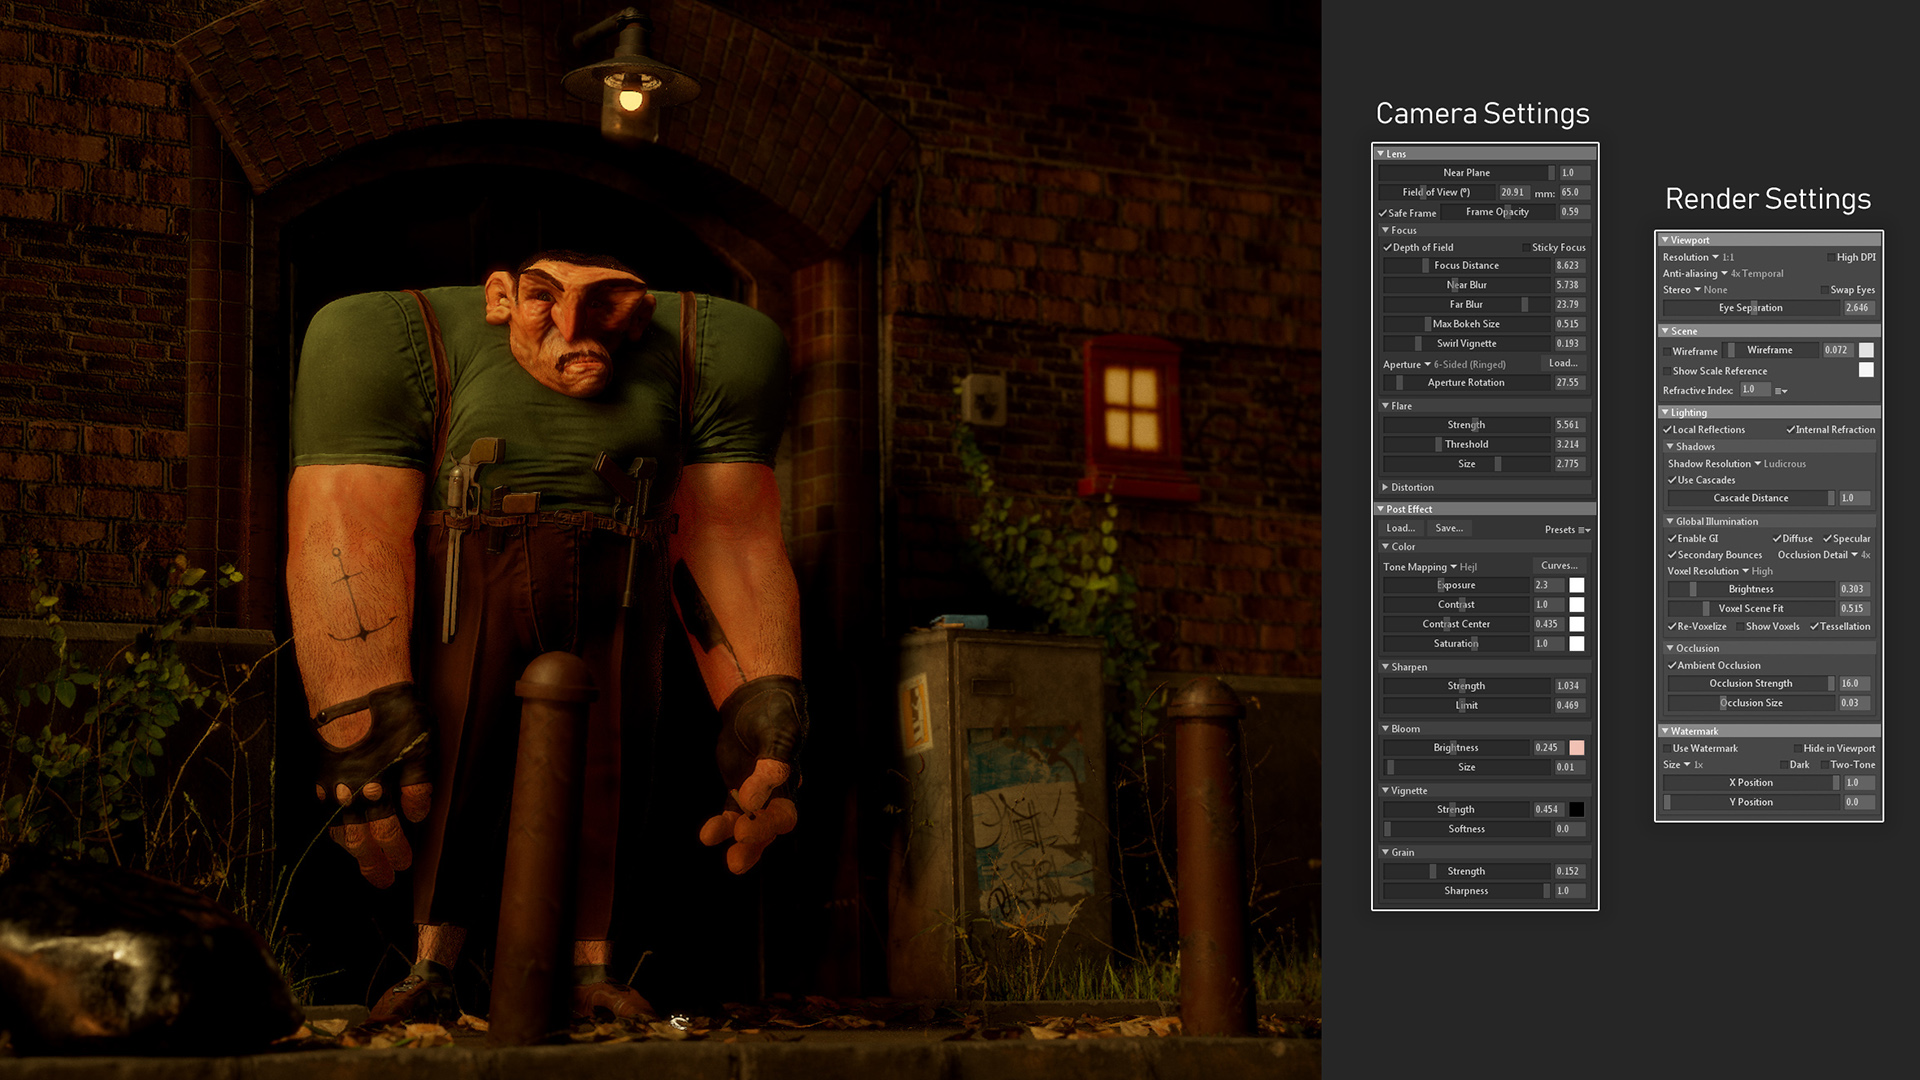
Before adjusting the Camera settings further, I like to crank up the quality settings in the Render tab.
- Global illumination: Set the Occlusion Detail to 4x and Voxel Resolution to High. The Voxel Scene Fit and Brightness sliders can affect the outcome greatly. In this case, I had to find a Global Illumination setting that gave me enough detail for close up shots but works for the environment as well.
- Shadow Resolution: Ludicrous. Because, why not?
- Cascading Shadows: I enabled this to improve the shadows cast by Directional Lights. So far, the Sky Light and all of its Child Lights are Directional Lights, so this setting will help improve the quality. Keep in mind that the Cascade Distance needs to be adjusted depending on whether you are looking through a close up camera or from a full view camera.
- Ambient Occlusion: This improves the visual quality compared to solely using baked AO in the materials. The ideal settings, of course, vary from scene to scene. For this scene, I maxed out my settings since I had quite a few meshes and materials that I baked independently from each other and therefore, I did not have baked AO in most cases.
Camera Settings
The Camera settings are fairly straightforward. There’s one function that I discovered during this project which made achieving a nice Depth of Field much easier. While looking through your camera, you can middle mouse click on any point in the scene and it will set the camera’s focus in that location. This is much more convenient than adjusting the DOF slider.
- Tone Mapping: This is another setting that I discovered through the Tutorial section of the Marmoset website. Setting this to Hejl (Filmic) will create a filmic tonemapping.
- Grain/Sharpen/Vignette: These are three settings that can add the extra finesse to your render. I tend to add Grain to my renders since I prefer having a more analog feel to them.
- Capture Settings: Lastly, don’t forget to increase the Sampling in your Capture Settings (Ctrl+P) to 100x or 400x.
Improving the lighting
The last step before rendering the final image is to adjust the lighting a bit more. I felt that the character didn’t pop out enough from the environment, so I added several Omni Lights to brighten up some local areas. I also added a number of Spot Lights to create some highlights and emphasize the shapes of the character, especially around the face and shoulder area (which is where I wanted the viewer to look first). The main thing to notice here is that the shadows cast from the new lights are smooth and soft, which maintains the balance between the character and the background. You can create soft shadows by adjusting the Width setting the Light properties.
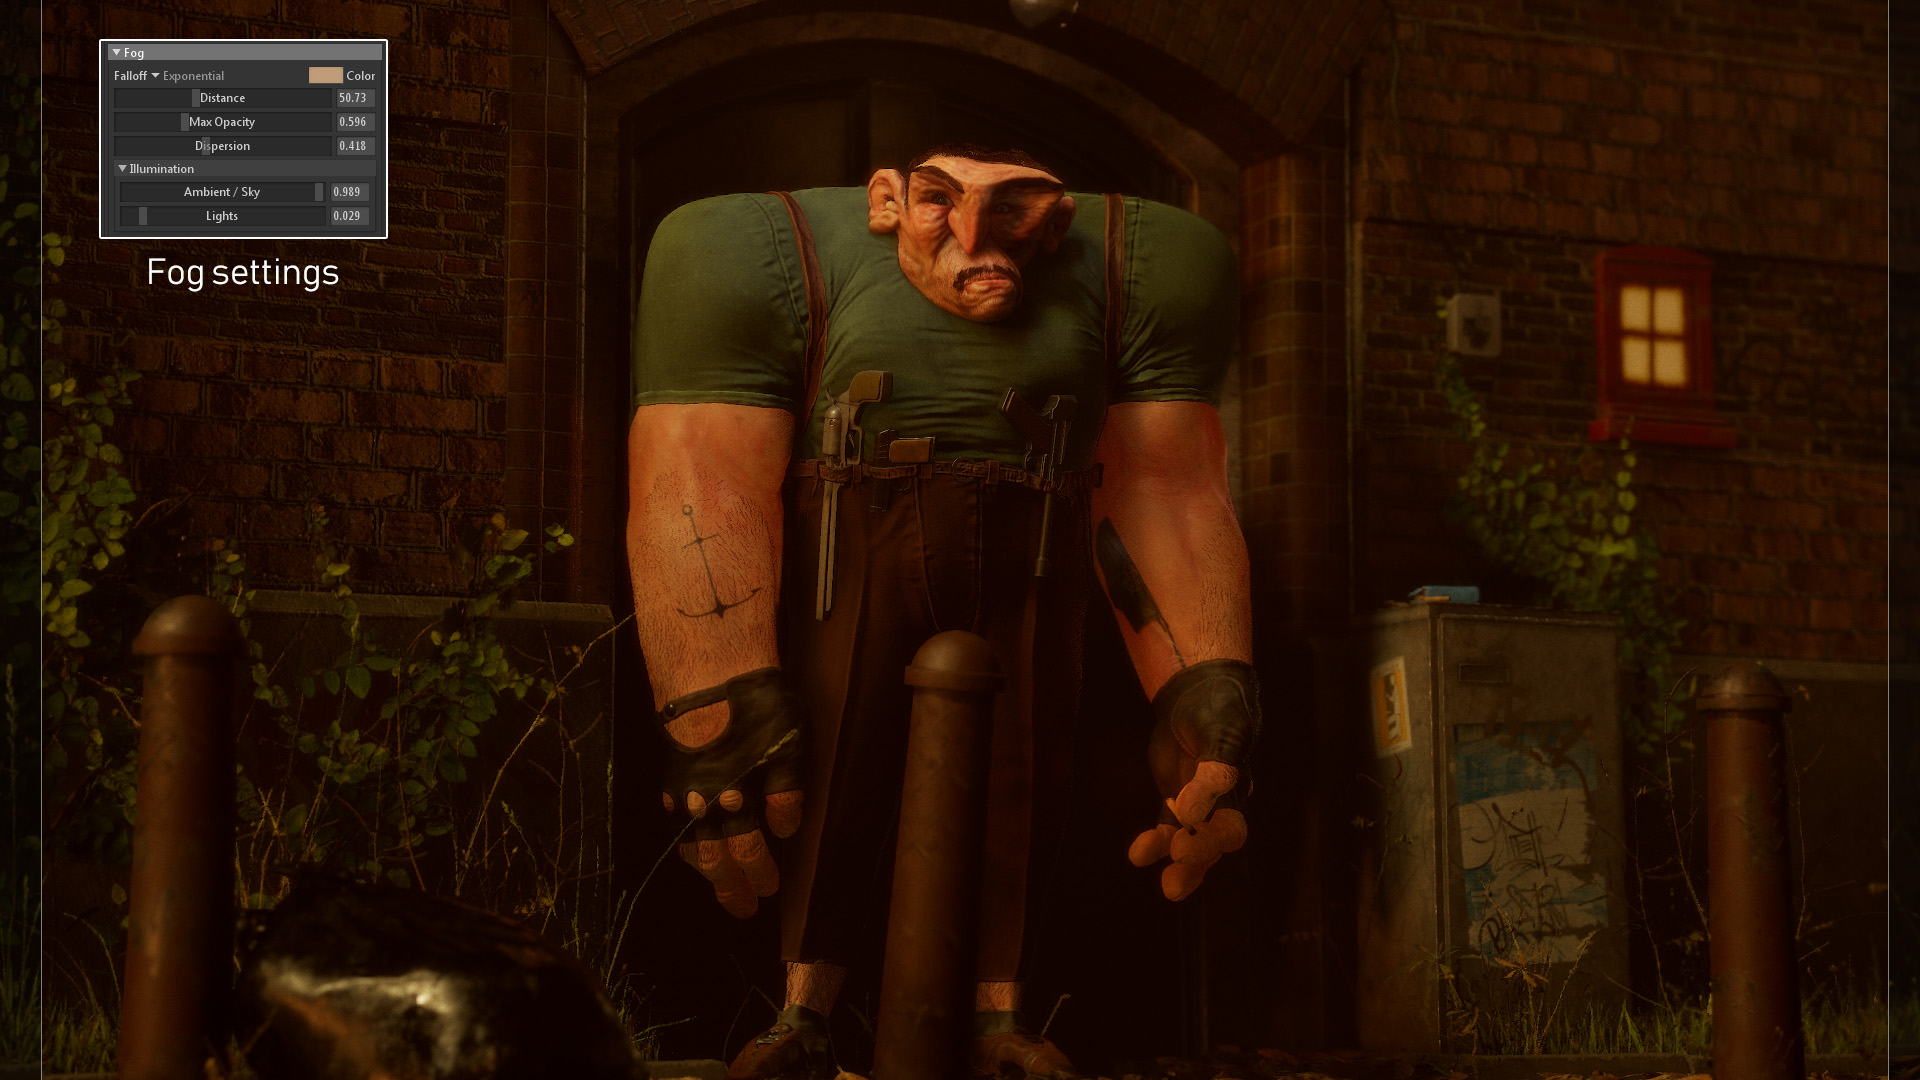
At this point, I felt the render was too clean. Luckily, adding the Fog volume helps to achieve a more atmospheric and analog feel to the whole scene. This wraps the Toolbag part of the project. Next up are some final touch ups in Photoshop and applying a LUT.
Post Production and Final Touches
LUT (Color Lookup Table)
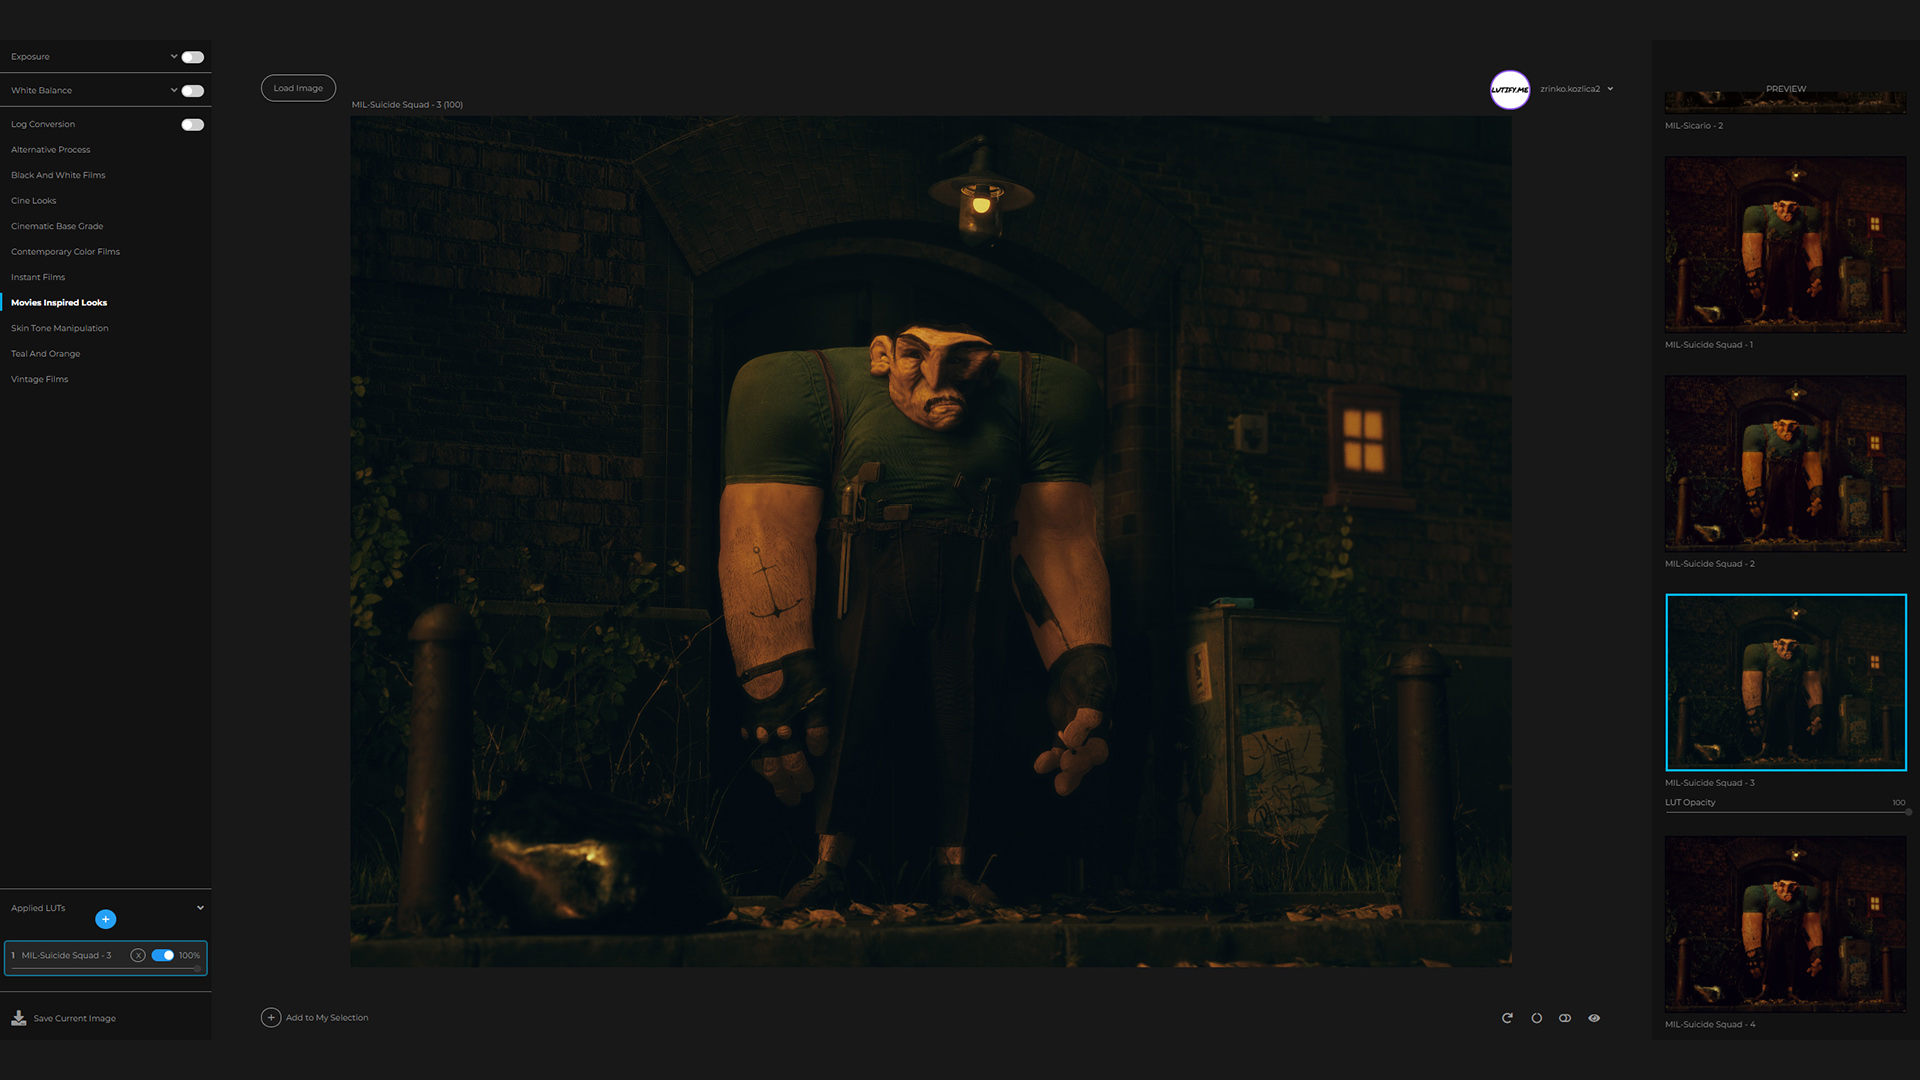
These final steps can add a lot of character to the raw renders captured from Toolbag and ensure that you get the most out of the project. The first step of the polish phase for me is to check out how the atmosphere can be enhanced by applying a color LUT.
A Look-Up Table (LUT) is a precise way of taking specific RGB image values from a source image and modifying them to new RGB values by changing the hue, saturation and brightness.
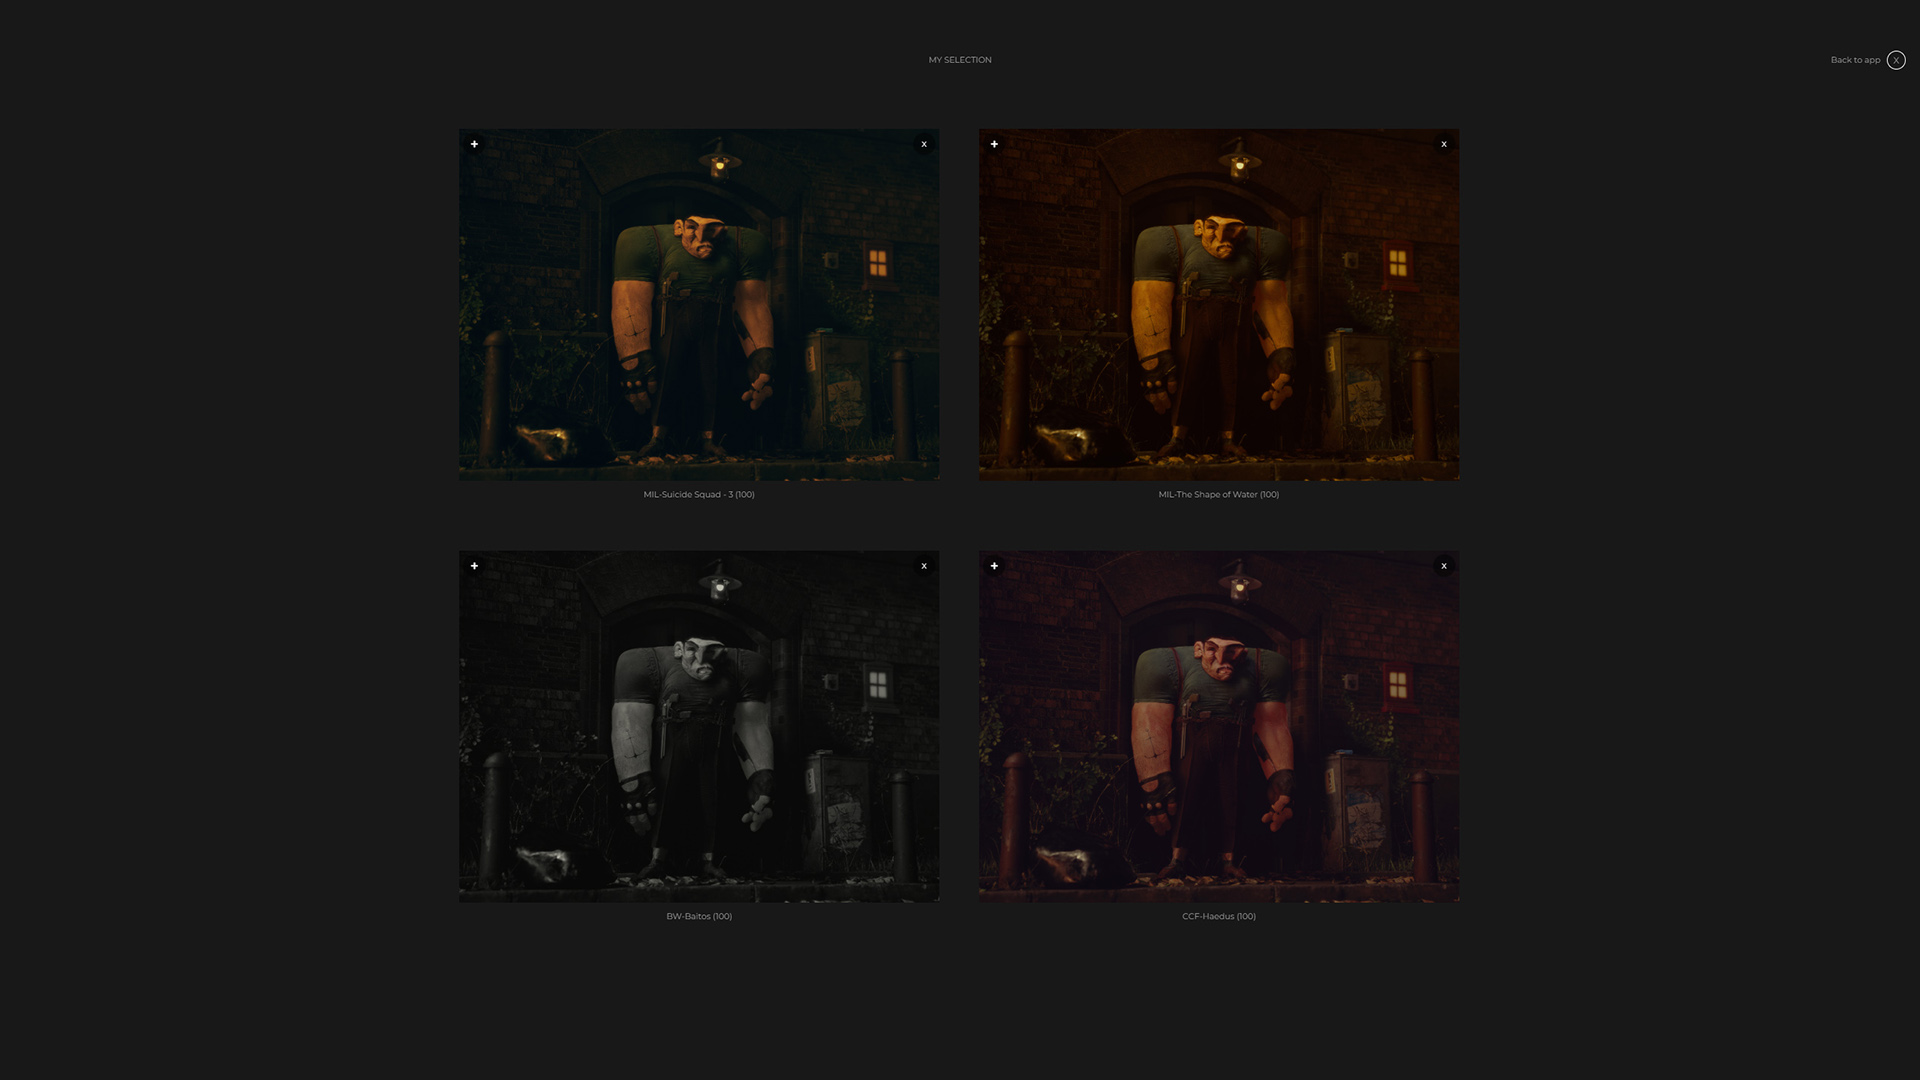
I find my LUT’s on Lutify.me. They have a great amount of really nice LUTs and it’s a very powerful online tool that lets you compare and choose different LUT types very quickly. It’s definitely a great addition to my workflow and I highly recommend it. After finding one that you like, you can download it for your preferred software for later use. In my case, I used Photoshop to apply the LUT. Check out Lutify’s documentation to find out how you can apply an LUT in Photoshop.
Photoshop
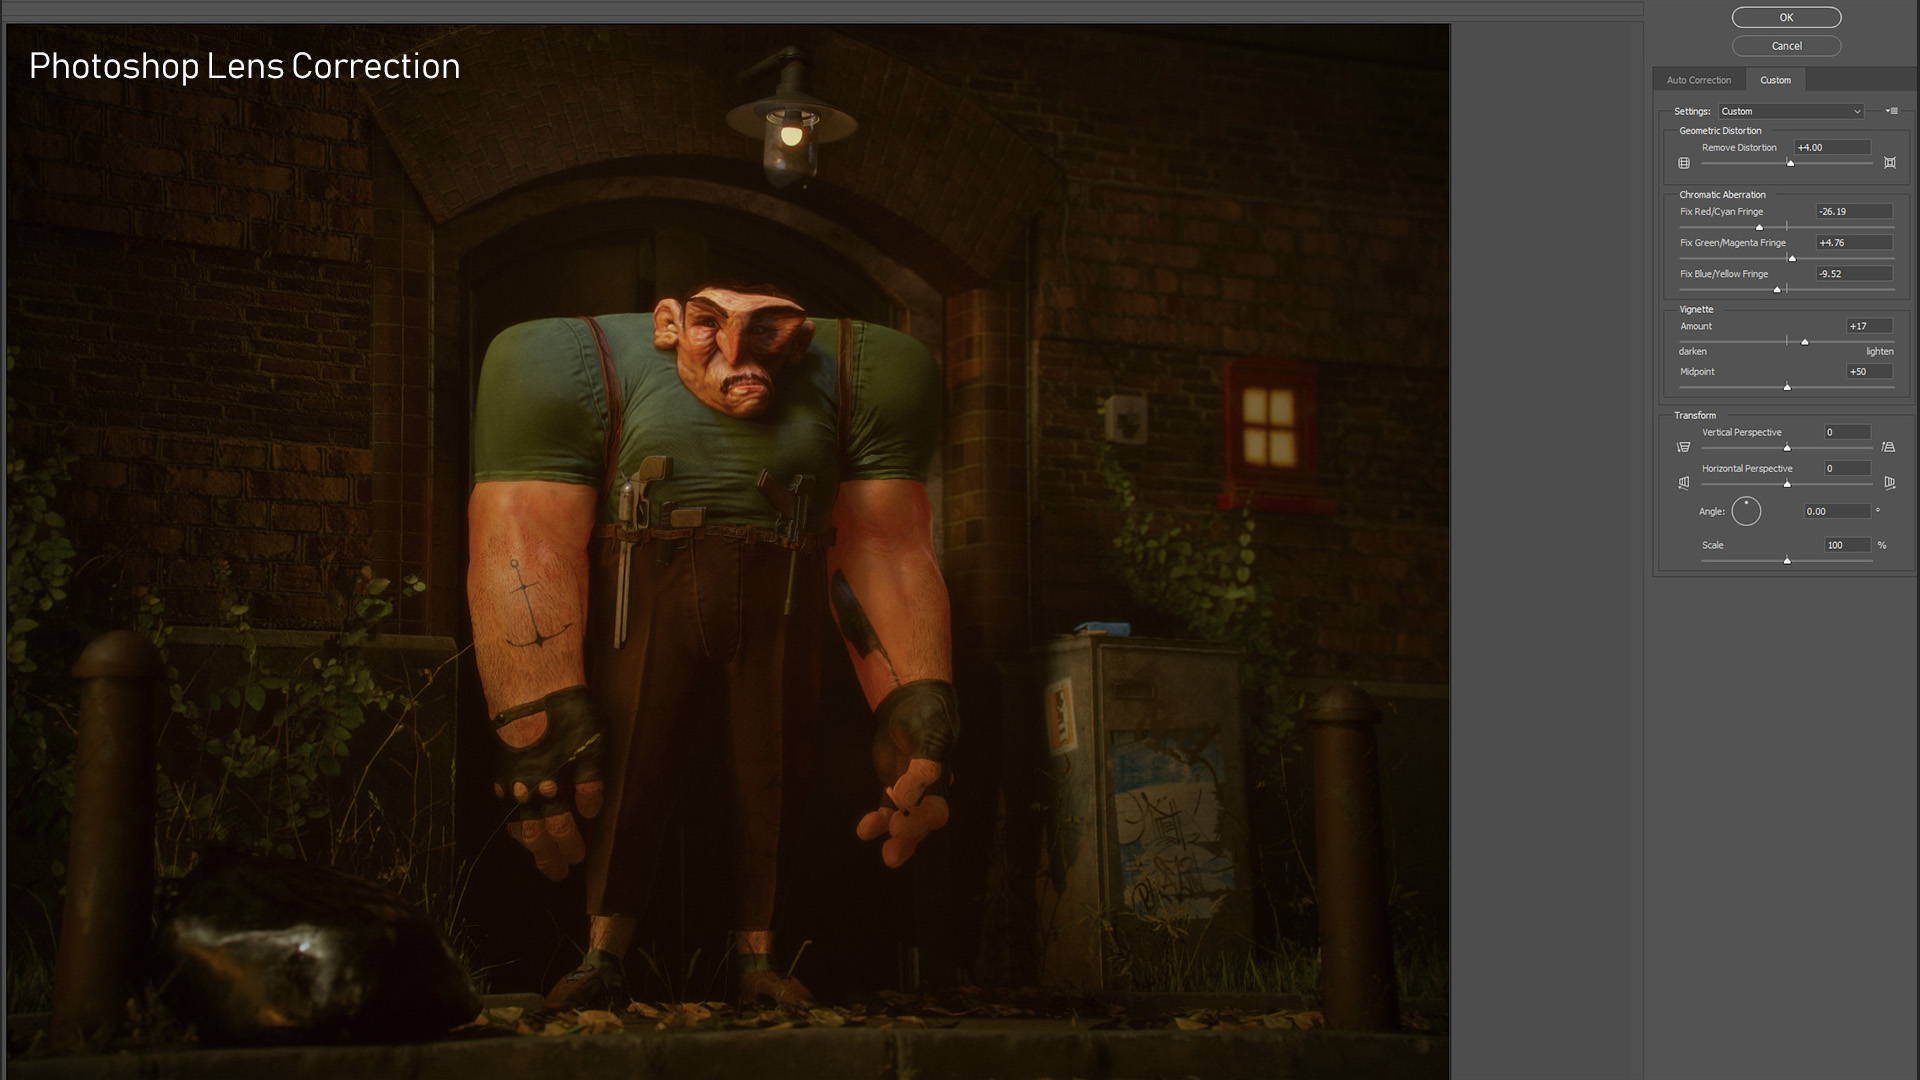
The first step in Photoshop is to add a Lens Correction Filter (Shift+Ctrl+R), which will help make the image look less digital and a bit more analog. This smooths out some of the sharp edges and blurs the border of the image, giving it a scanned photograph aesthetic. Additionally, I like to add a bit of a vignette and some chromatic aberration.
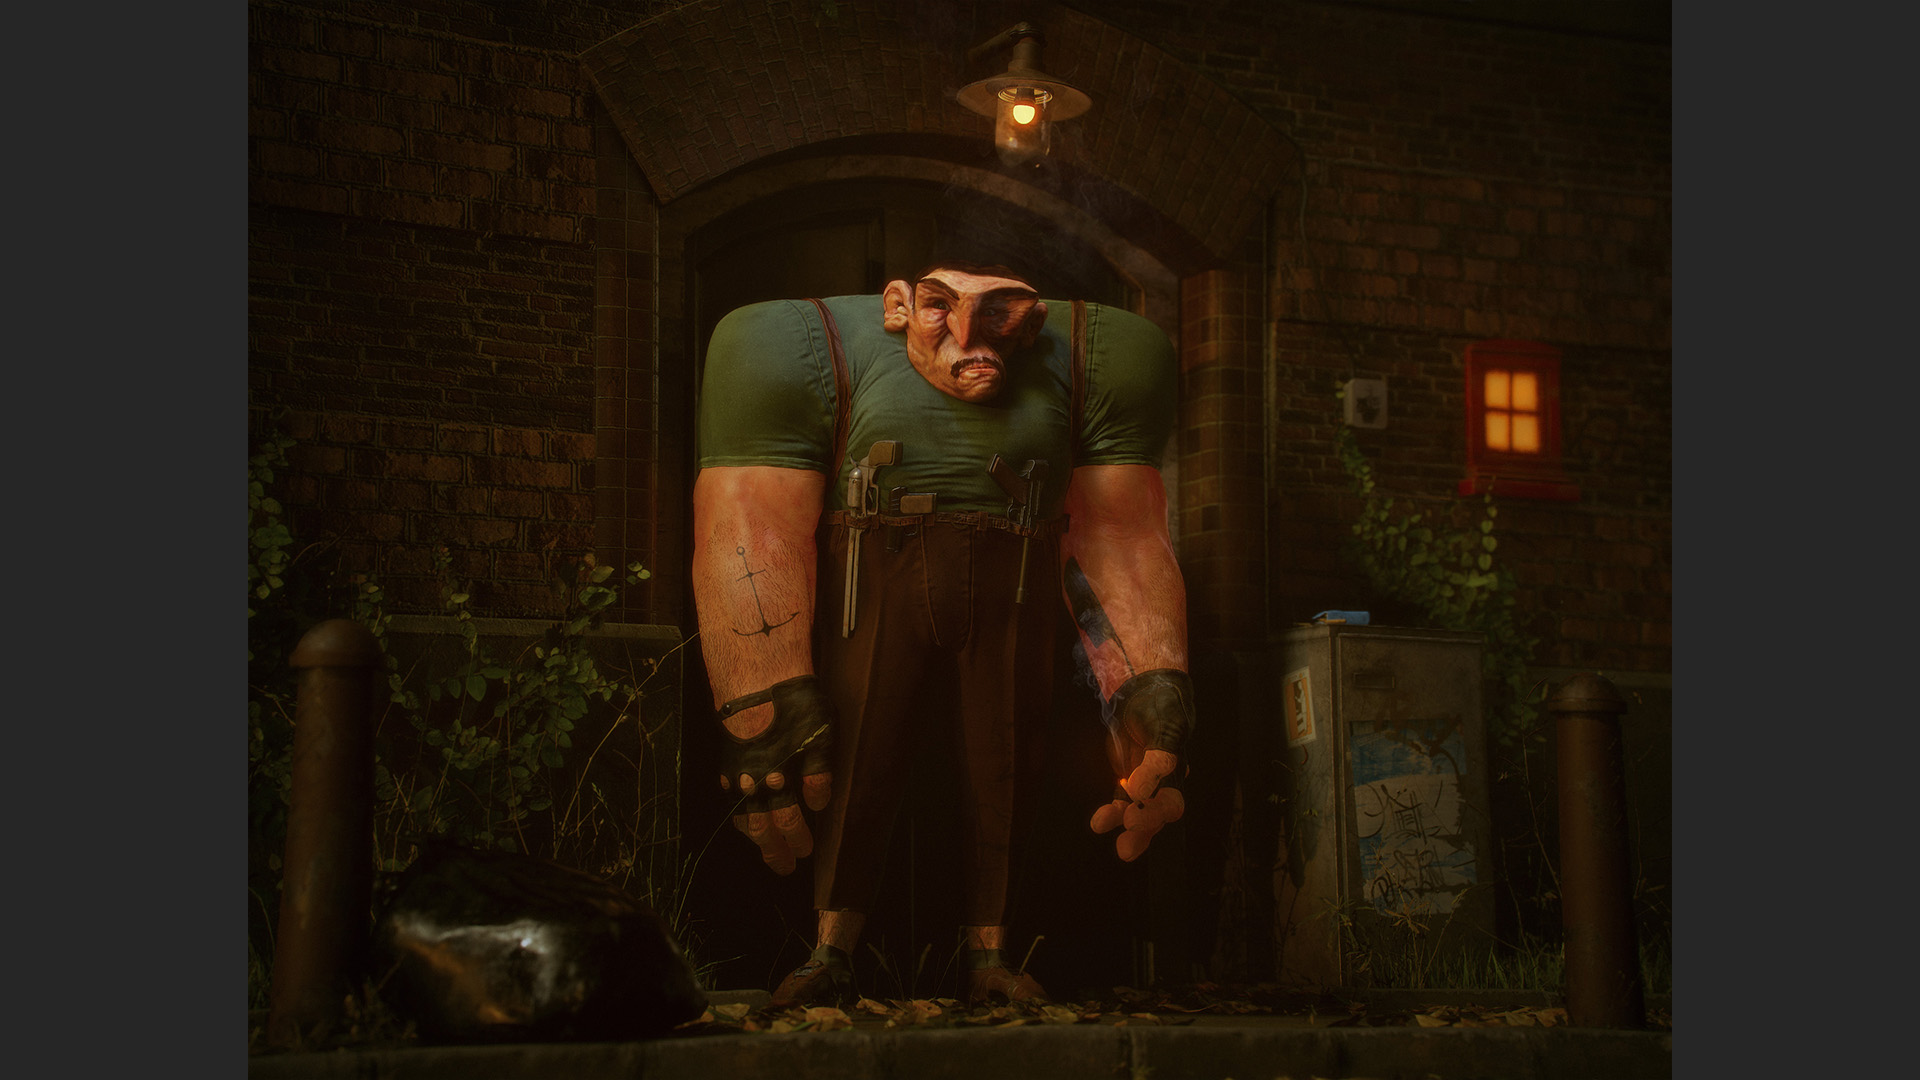
Next, I add some smoke and light glow which is easier and quicker to make and change in Photoshop.
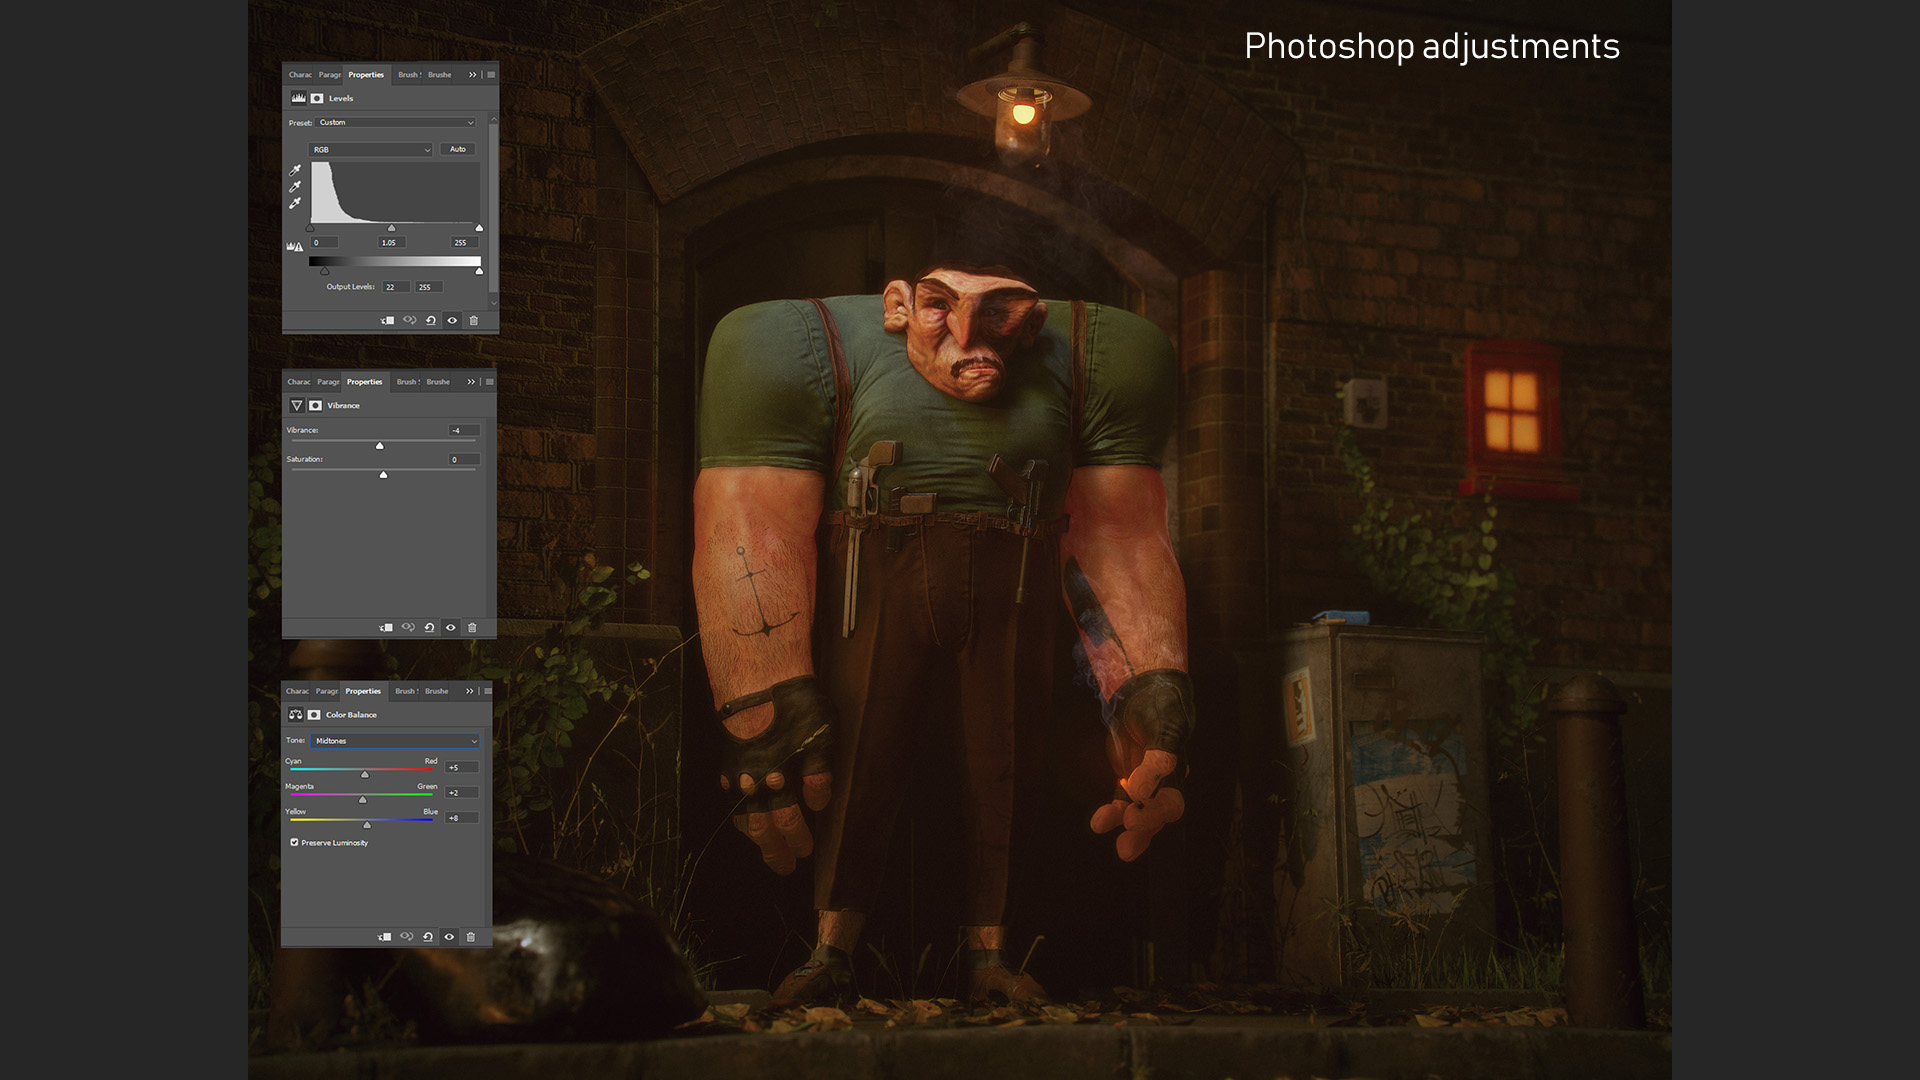
We’re almost done. The final touches involves leveling out the black levels a bit, because pure black makes the image look too digital. I add some slight Vibrance and Color Balance adjustments as well as Sharpen and Blur parts of the image to balance out the elements of the picture. I personally like to sharpen the area around the face, shoulders, and prominent features like the gun. This will help a bit with guiding the viewer’s eye to the focal regions.
Branding Element
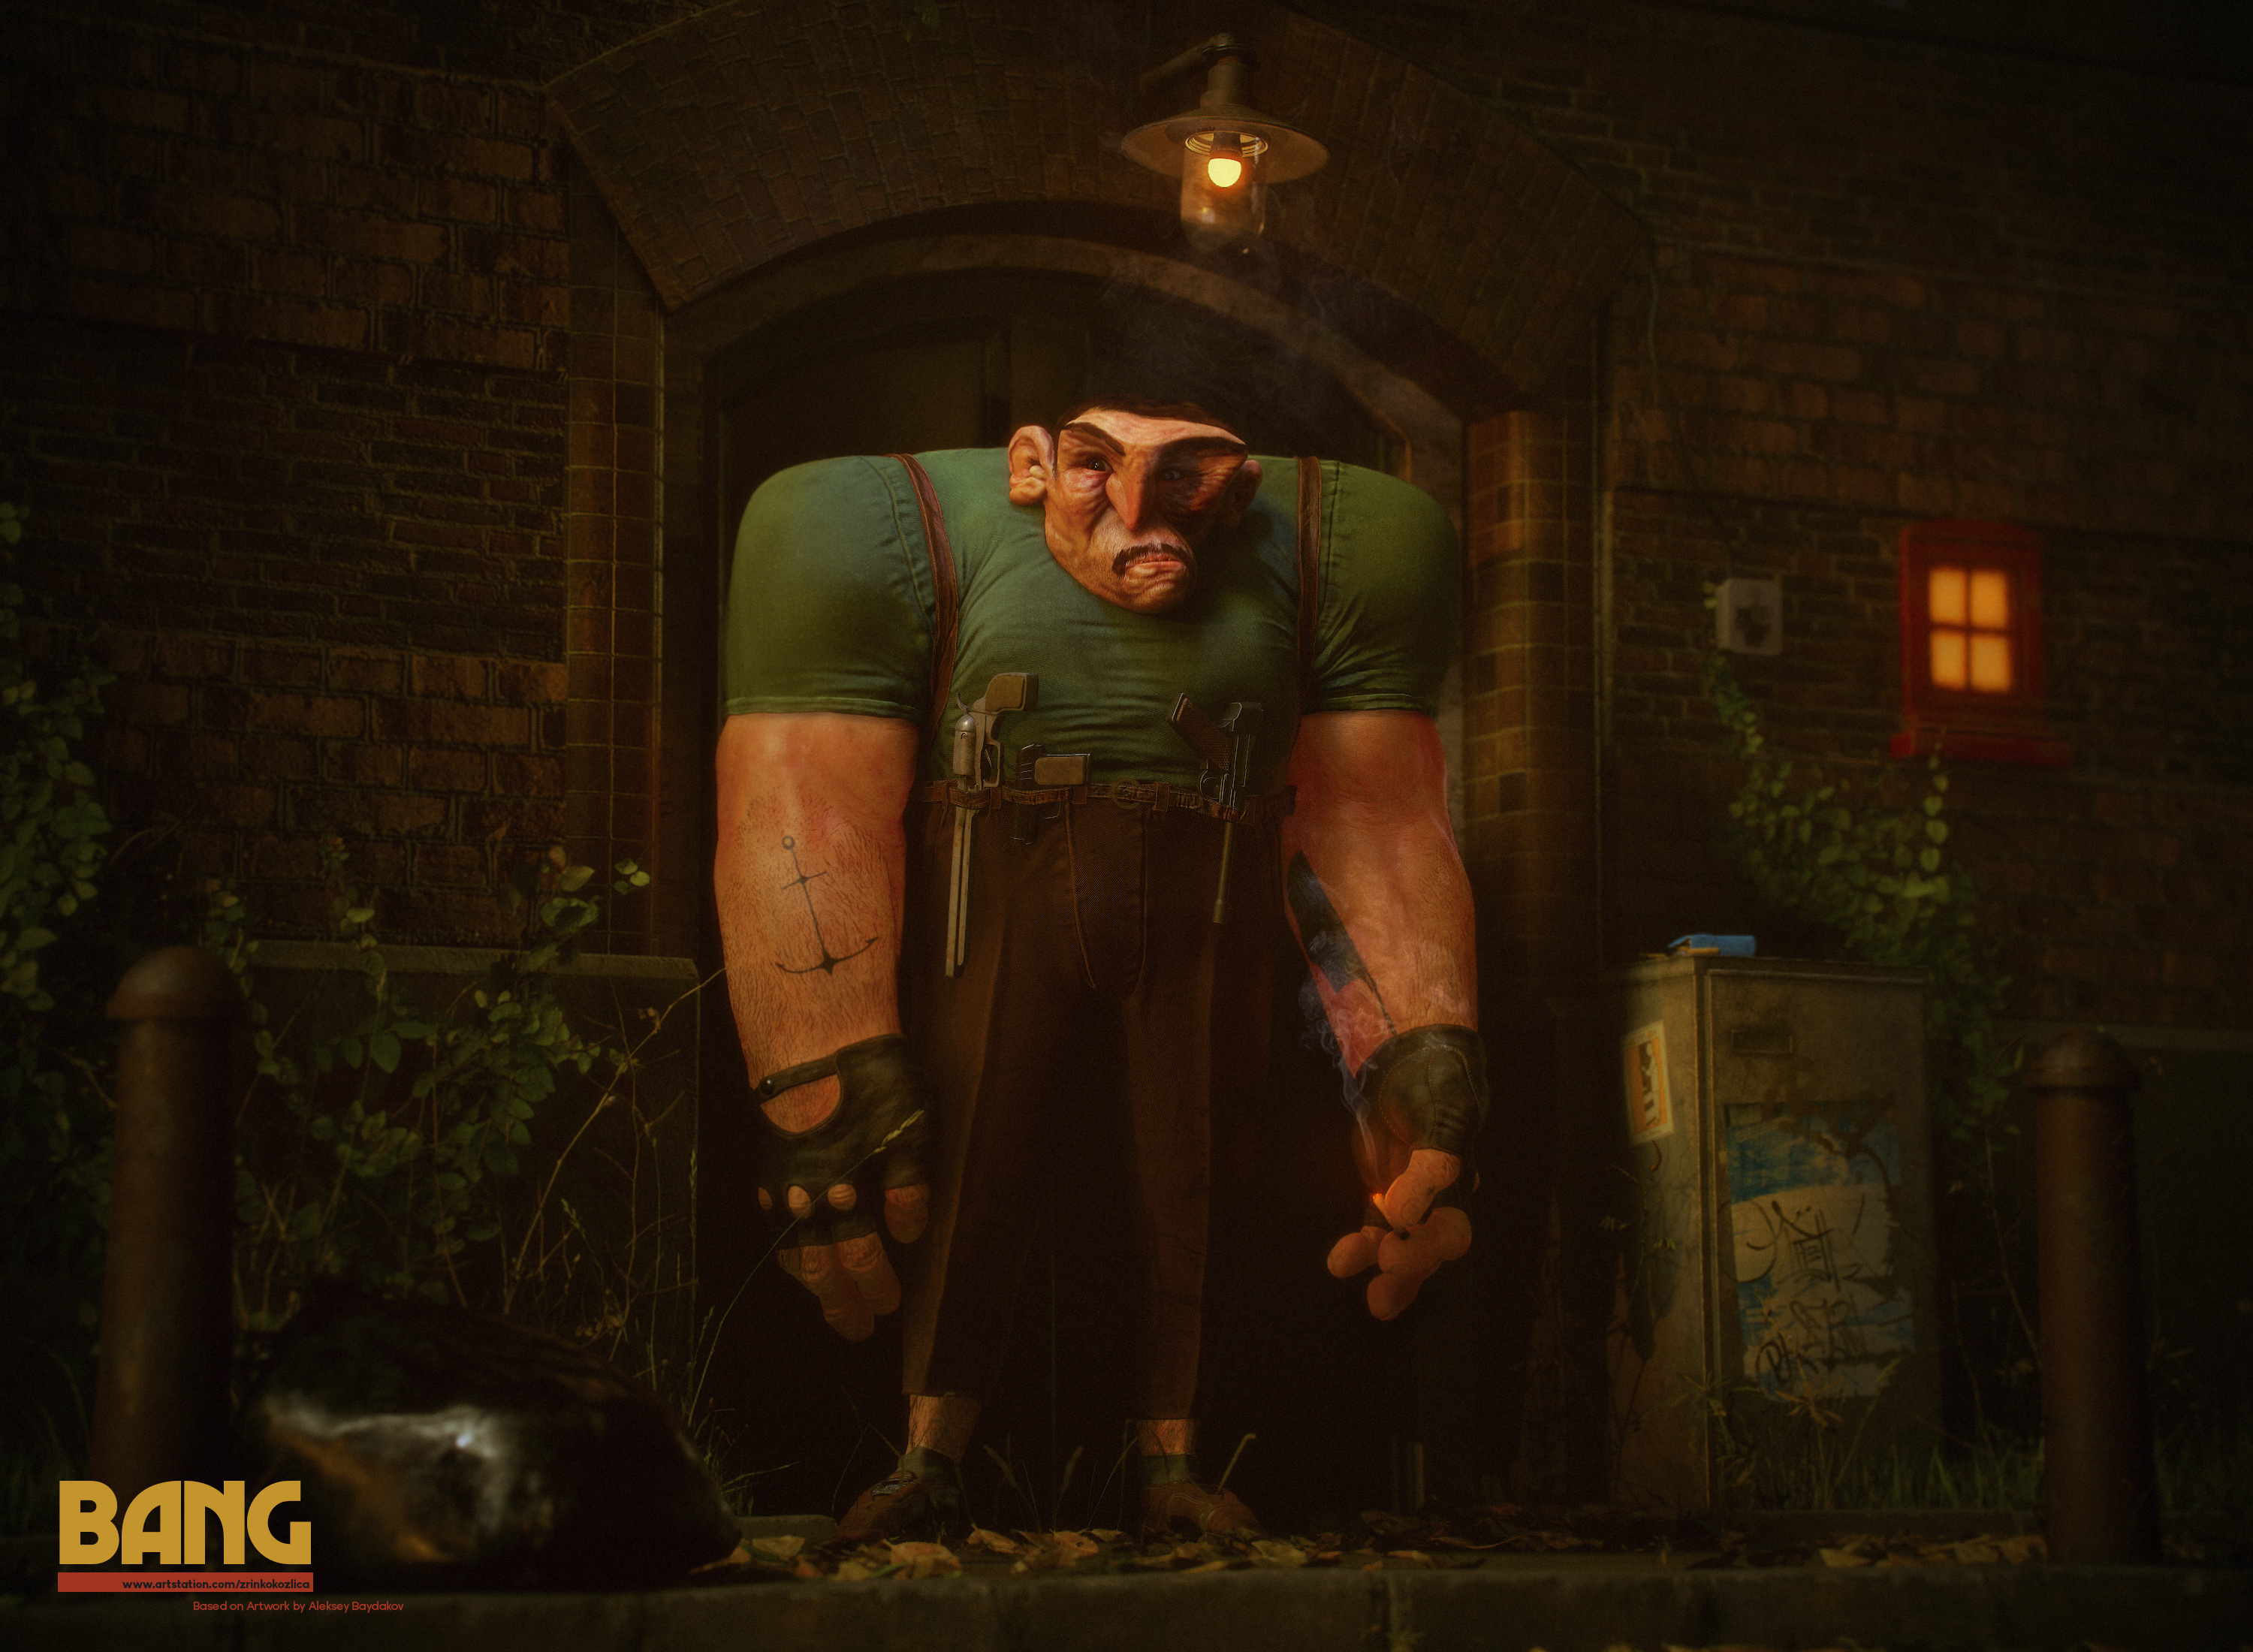
I like to add a branding element to a project. I prefer this over simply adding my name and website as flat text in the image. In this case, I tried to make the typography and color palette resemble a 70s vinyl cover. Check out freebiesbug.com, designspiration.net, and behance.net for some inspiration and nice free fonts.
This wraps up my style exploration up and gives me the confidence that I can achieve a quality level that I am happy with. The next step is to apply this whole process to all the additional renders for the project.
Conclusion
Thank you very much for taking the time to read this and hopefully it gave good insight into my personal journey inside Toolbag and beyond. And a big thanks to Marmoset for sharing this article and all the other authors of previous tutorials and breakdowns, which greatly help the community!
We’d like to thank Zrinko Kozlica for writing this breakdown article. You can find more of Zrinko’s work on Artstation.
Create bespoke diorama renders using Toolbag’s free 30 day trial. If you’re interested in collaborating on a tutorial or breakdown article, please send us your pitch, along with a link to your artwork, to submissions@marmoset.co.


