
What are Tile Strips?
What if you could add details to your 3D mesh like tubes, shoelaces, or jewelry, in Toolbag just by drawing a line?
Tile Strips, part of the Vector Layer system of Marmoset Toolbag’s Texture Projects, allow you to create modular tube shapes with start, middle, and end tiles. With them, you can build preset design elements, such as straps, shoe laces, snakes, feathers, vines, jewelry, decorative borders, and any other elements with a start and an end.
A key aspect of modern digital design is modularity, the concept that complex objects can be constructed from segmented, repeatable components. Tile Strips are a perfect example of this concept in action. Each strip has a start, middle, and end tile, allowing you to assemble intricate designs from reusable pieces that connect seamlessly. Just like a construction kit, you can swap, extend, or repeat sections without disrupting the overall structure, providing flexibility and creative control at any point.
In this guide, you will learn how to use Tile Strips from the Toolbag Library and how to create your own Tile Strip designs from scratch in 3D and 2D.
The use cases for Tile Strips are limited only by your imagination, so let’s dive in!
Using Tile Strips from the Library
Tile Strips, at their essence, are brushes driven by 2D sprite sheets and Vector Layers, and you can find many existing Tile Strip brush presets in the Library. We’ve built a number of them for you to use freely in your Texture Projects, so let’s walk through how to integrate them into your workflow.
In the Library window, select the Brushes folder, and then type “Tile Strip” in the search bar to list all Tile Strip presets.
Open the Layers window, create a Vector Layer, and double-click a Tile Strip brush preset in the Library window to load it.
Vector layers drive Tile Strips, keeping them editable and non-destructive. You can easily adjust their length, placement, or pattern at any time. Open the Layer Settings window, increase the Features count, and use Randomize Features to add variation along the strip. Tile Strips can be precisely adjusted with vector editing tools – move, add, or delete points to reshape the spline, smooth curves for natural flow, and fine-tune thickness, spacing, or rotation so the strip follows your model exactly as intended.
Designing Custom Tile Strips
Creating Tile Strips from scratch gives you the most flexibility, letting you design custom patterns and explore more opportunities for creative expression. You can achieve this by modeling each tile individually and baking it down. Or you can build them from hand-drawn 2D alphas, using profiles to add depth, if needed.
Tile Strips require a sprite sheet layout to author the distinct, interchangeable elements. The start and end tiles are placed automatically, while the midsections can be customized with a configurable number of unique elements. Each tile can also have variations, and you can use the Tile Strip GUI in the viewport to configure the placement of each feature tile and tile variation.

Each Tile Strip sprite sheet has the following features:
- Start (required tile) – Defines the beginning of the element (like the buckle of a strap or the head of a snake).
- Middle (required tile) – Infinite repeatable tiles that form the body of the element.
- Feature (optional tile) – This can be placed anywhere between the Start and End tiles. There can be any number of Feature tiles set between the Middle and End tiles.
- End (required tile) – Closing the sequence with a natural finish (i.e, a shoelace knot, or a feather tip).
Variations can be created by adding additional columns to the tile sheet and defining the number of Frames. This lets you mix different versions of a tile, such as small changes in shape, pattern, or detail, to reduce repetition and make your strips look more natural and easier to customize.
Tile strips automatically update as the length of the vector shape changes, too. The taper settings let you control how the tube narrows or widens at the start and end, giving you smooth, natural transitions. This is especially useful when creating elements like straps that thin toward a buckle, vines that taper at the tip, or feathers that gradually slim down along their length. You can adjust the length, width, and other parameters in the Vector Layer’s Profile settings. Because Tile Strips are non-destructive, details stay crisp at any length, size, or path complexity.
Creating Tile Strips in 2D
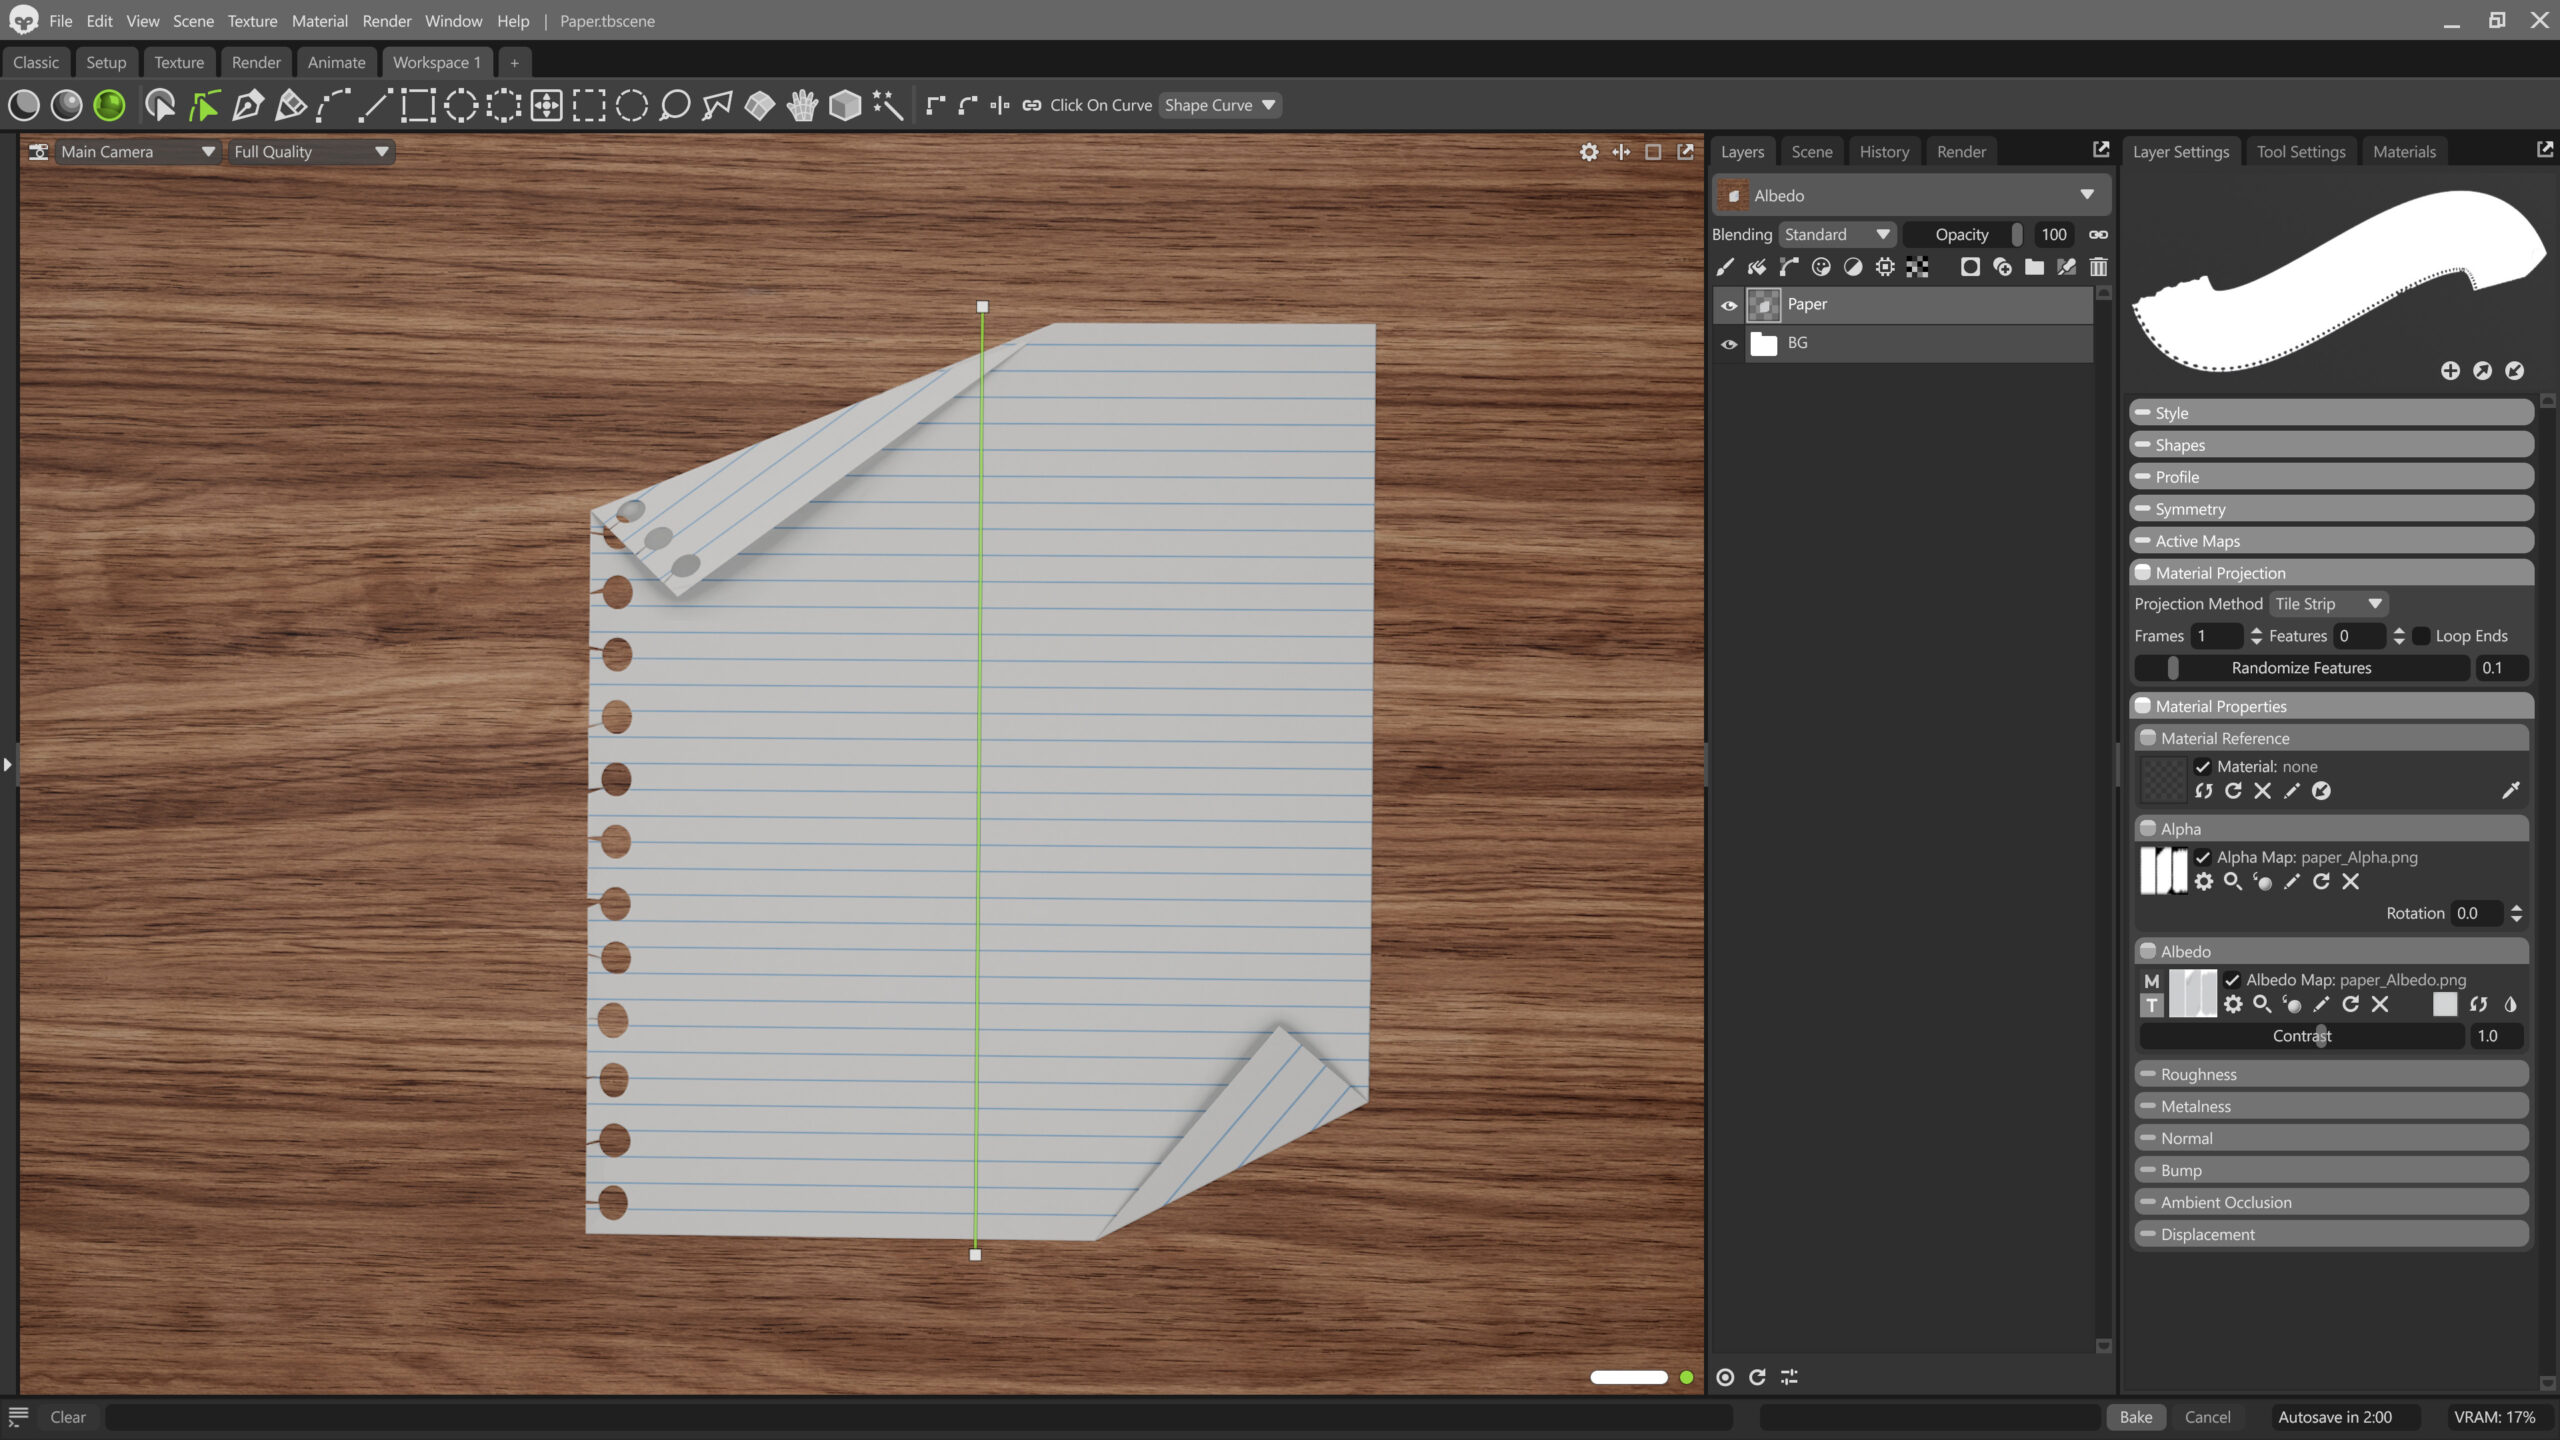
The first method involves creating tile strips in a 2D editor, either by hand-painting or using vector shapes, with each texture map created manually. Make a shape that has a start, an end, and a repeating (Feature) section, then set it up in Toolbag as a Tile Strip. Ensure the middle tiles connect seamlessly, not only with the top and bottom, but also with itself when you duplicate and shift it up or down.
Here’s an example of how it can look:

Make an Albedo and a Mask texture. Then, create a Vector Layer in a Toolbag Texture Project, and switch the Projection Method in the Layer Settings to Tile Strip. After that, add the textures into the layer’s appropriate material slots and use the Pen tool to draw splines on your object.
Creating Tile Strips in Substance Designer
If you are more comfortable with procedural generation, you can design a Tile Strip using tools like Substance Designer.
For example, below are three generated textures: Albedo, Mask, and Roughness. However, you can create any textures supported by Toolbag, such as Normals, Height, Metalness, and others, to achieve the desired properties.
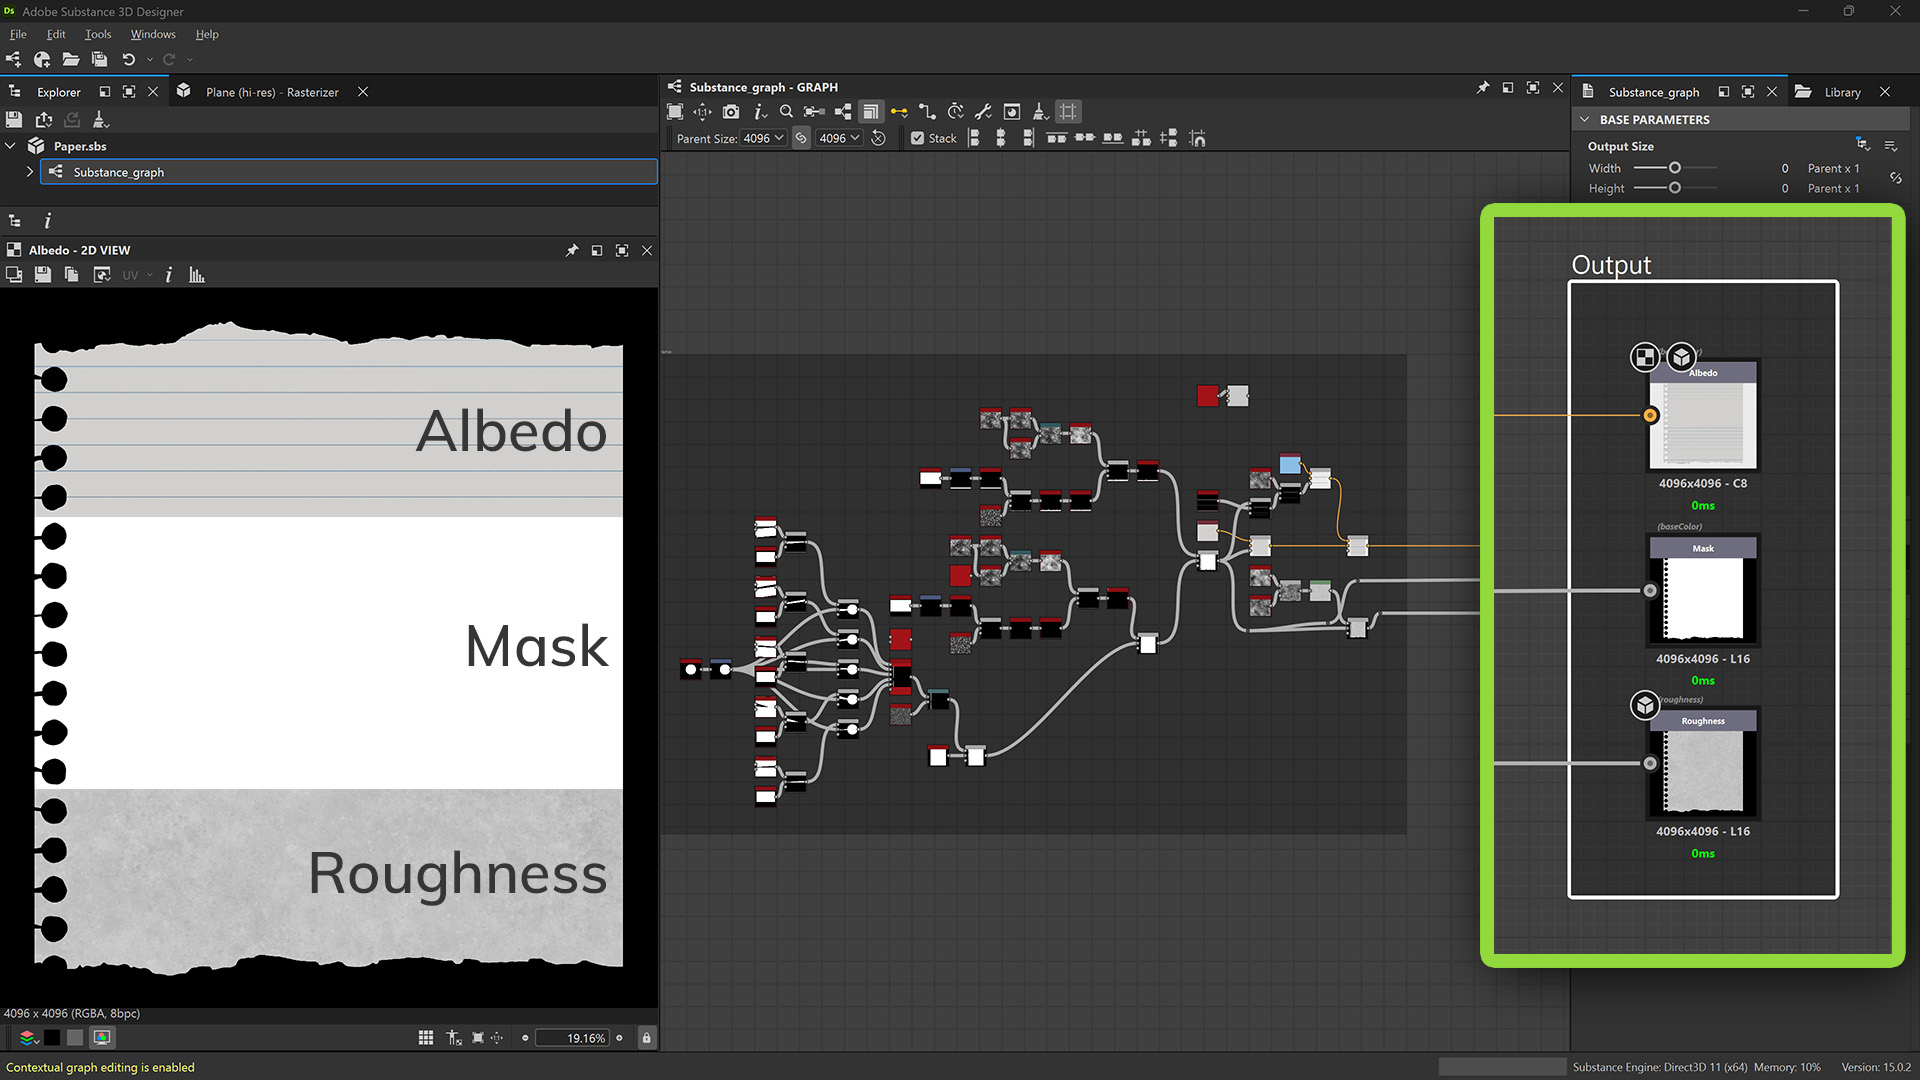
The main advantage of this method is that you can quickly create different variations of your Tile Strip. However, it also has limitations — Substance Designer does not support arbitrary output resolutions, which in some cases may result in larger exported file sizes.
Creating Tile Strips in 3D
Creating Tile Strips with 3D modeling software involves more steps, but it makes it easier to achieve detailed shapes and realistic texture maps, such as normals or ambient occlusion, resulting in a more polished final look.
Model the Shape
The first step is to model the base 3D shape of the Tile Strip, then add a background and a low poly plane, which will be used for baking in Toolbag.
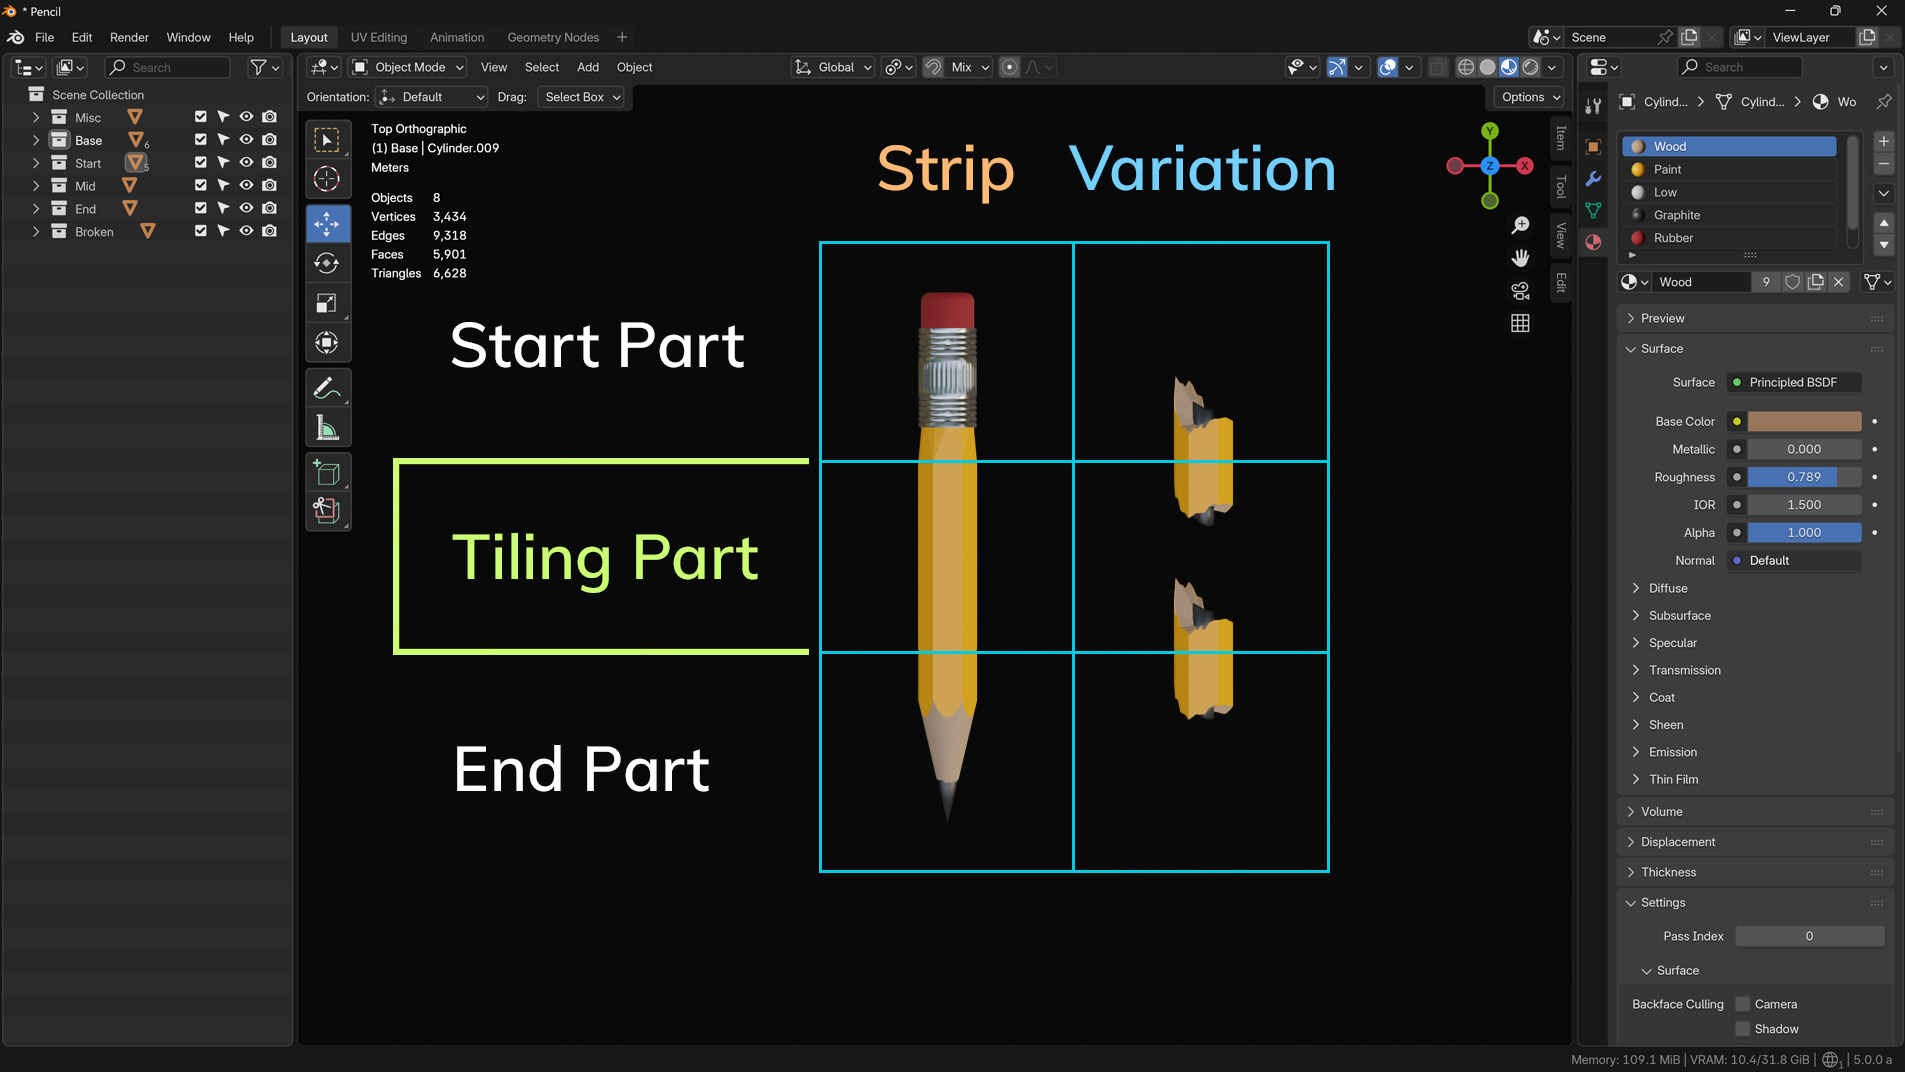
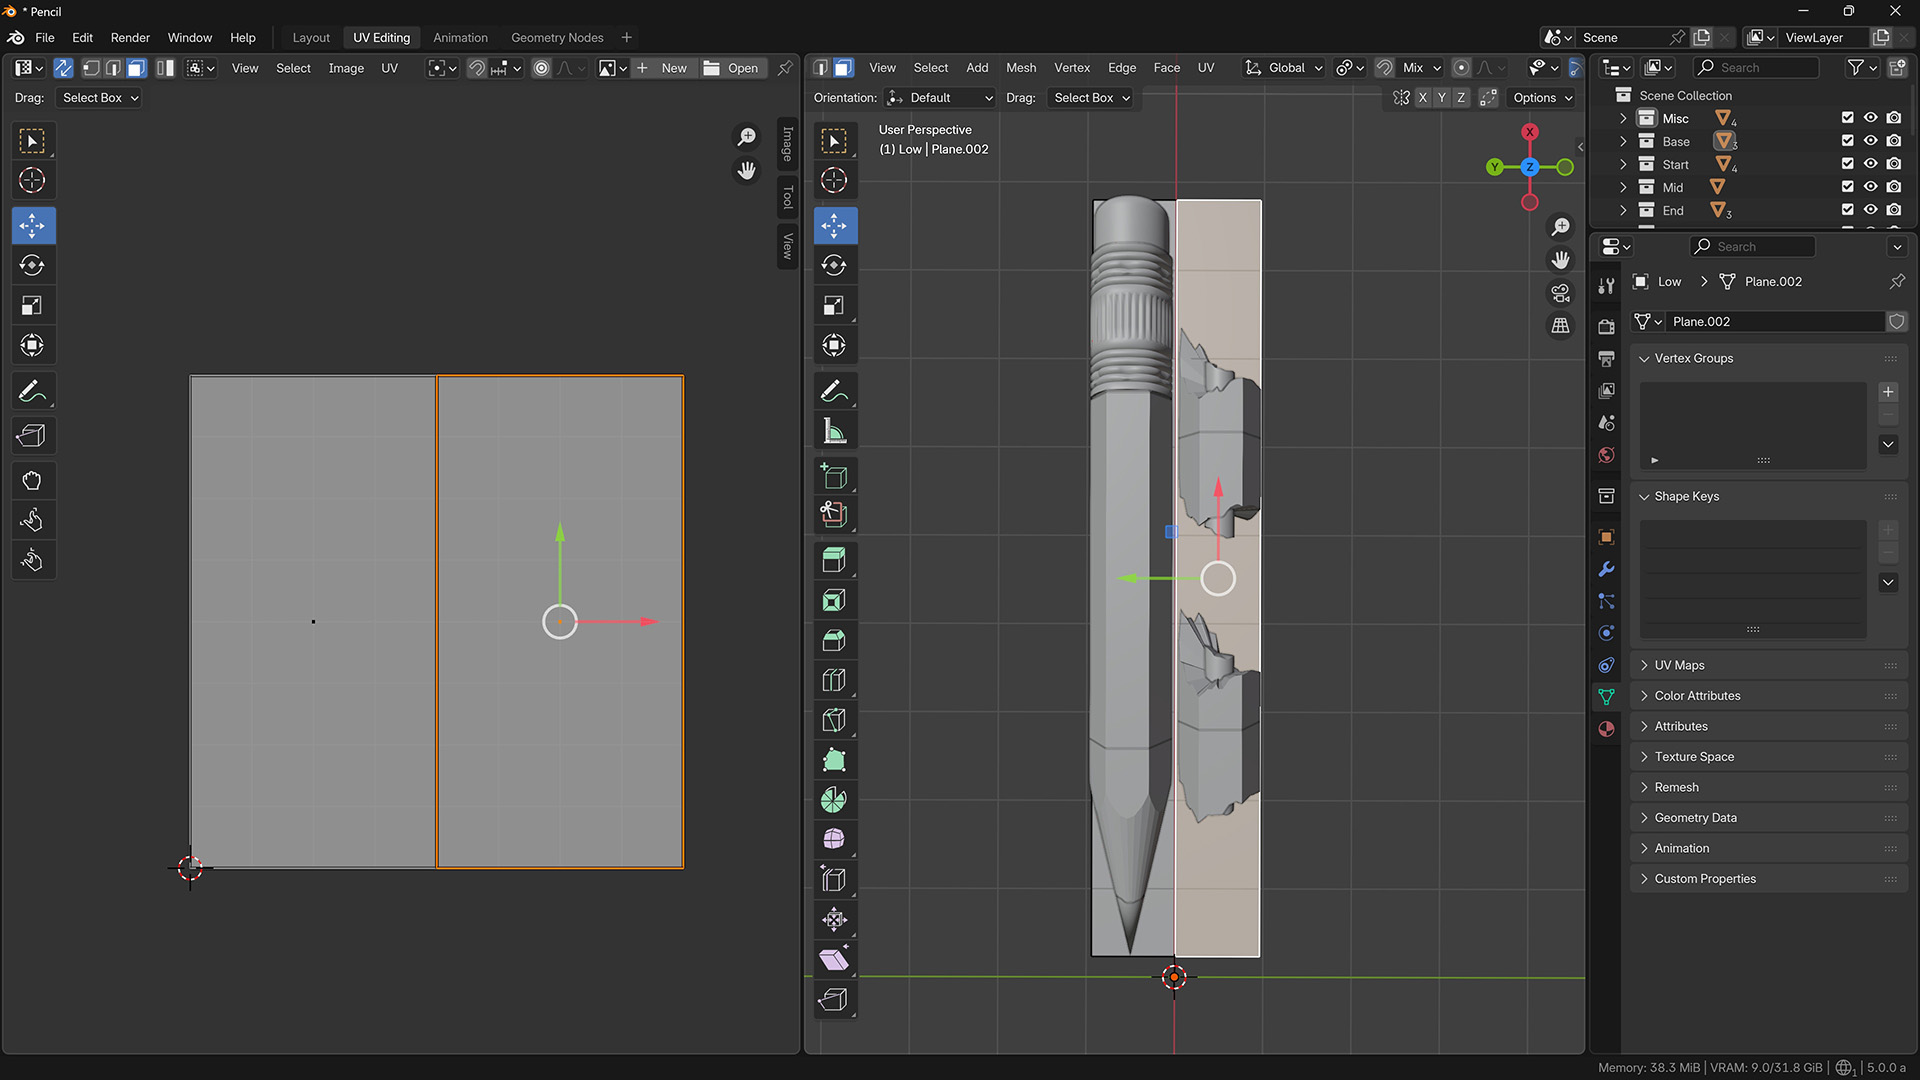
When modeling, set up a grid that aligns with your tiles, as this makes it easier to match the final texture resolution. In this example, each piece is composed of three vertical squares, each measuring 1 × 1 m. To balance detail and resolution, we can set each square to be 512×512 pixels. This means one element is 1 × 3 units and 512 × 1536 pixels.

The grid-based modeling technique helps solve a tricky problem–making seamless connections between elements for invisible tiling. We need to make sure the middle (tiling) part connects with itself without any artifacts. To check this, duplicate it with an offset up and down, as shown in the image below. Next, ensure the middle part doesn’t create artifacts when connecting to the start and end of the Tile Strip. If variations or additional features are included, perform the same checks for them as well.
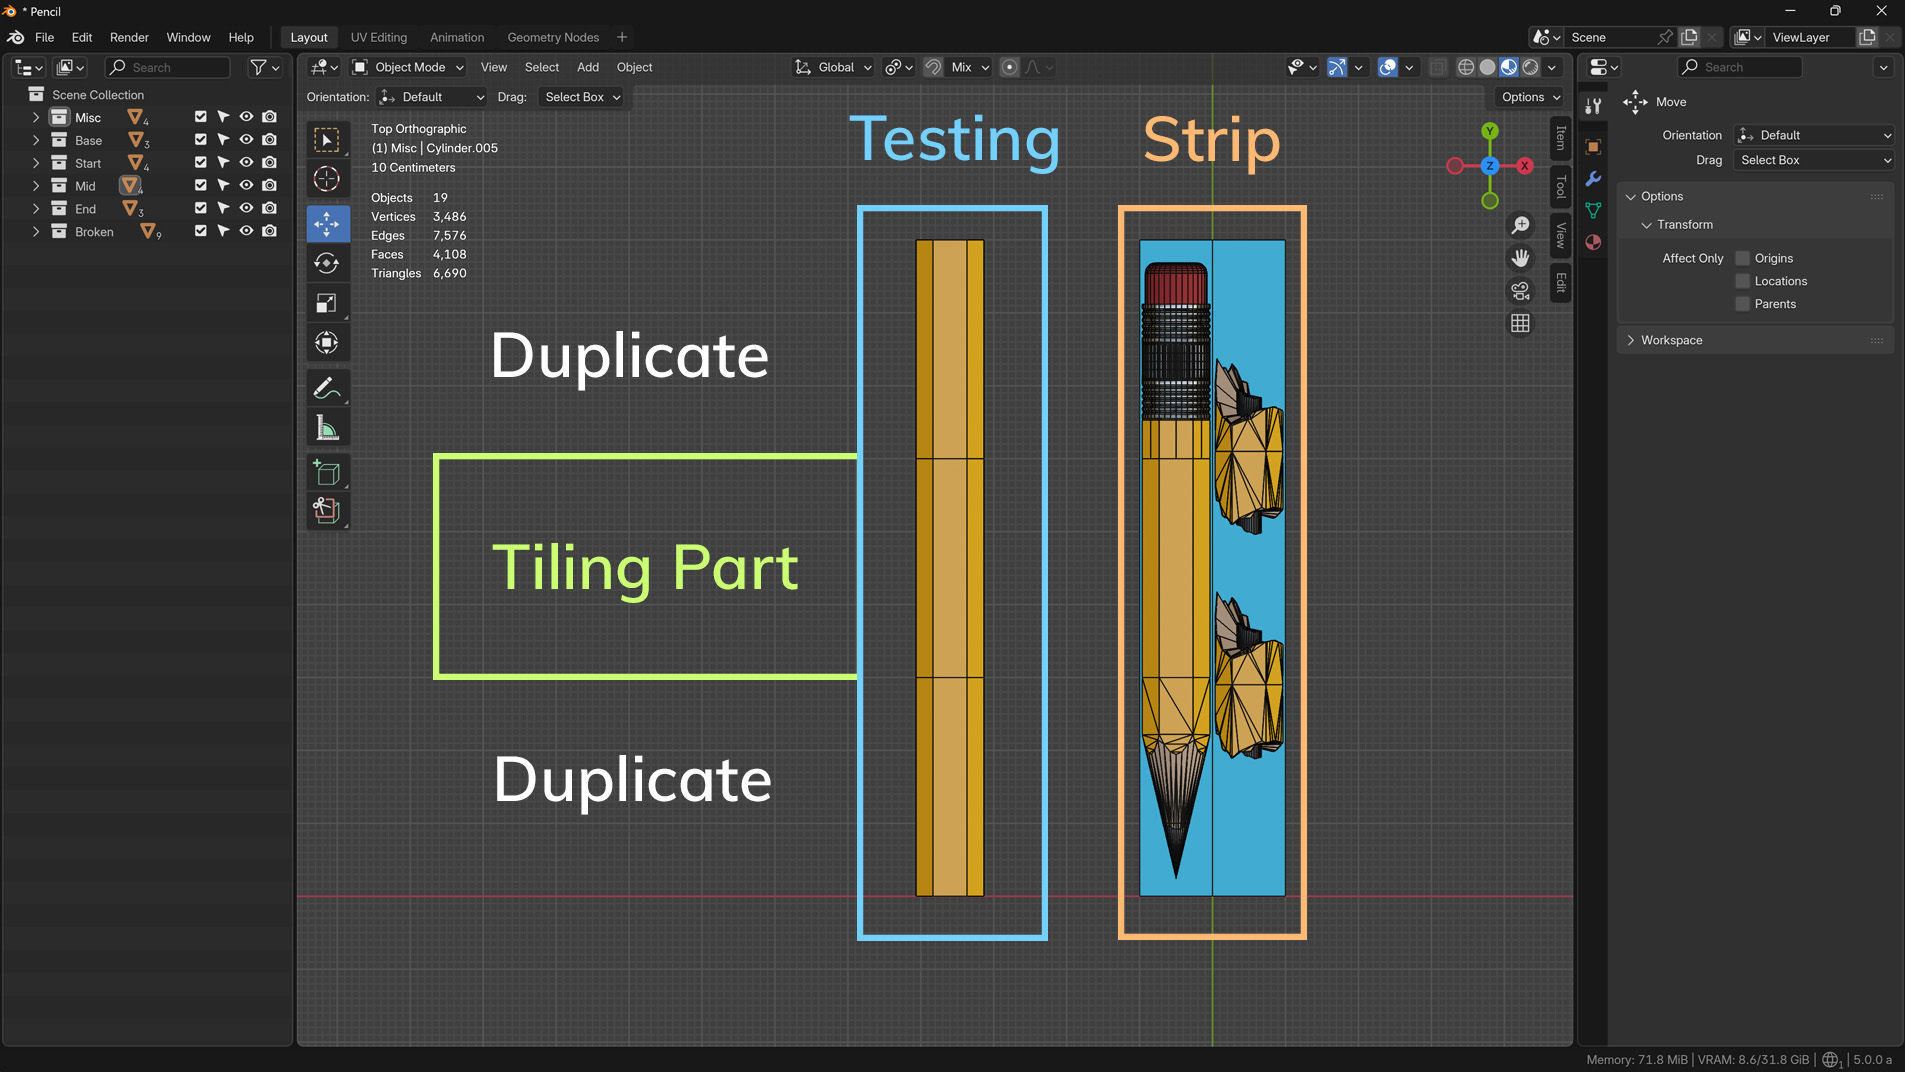
For easier UV mapping of the low poly model, we can stretch it across the full width of the UV space. This is useful because UV space is square, and without stretching, we’d have to do more complex calculations for each element’s resolution.
Bake to a Plane
Once the model and UVs are ready, we can start baking onto the low poly plane.
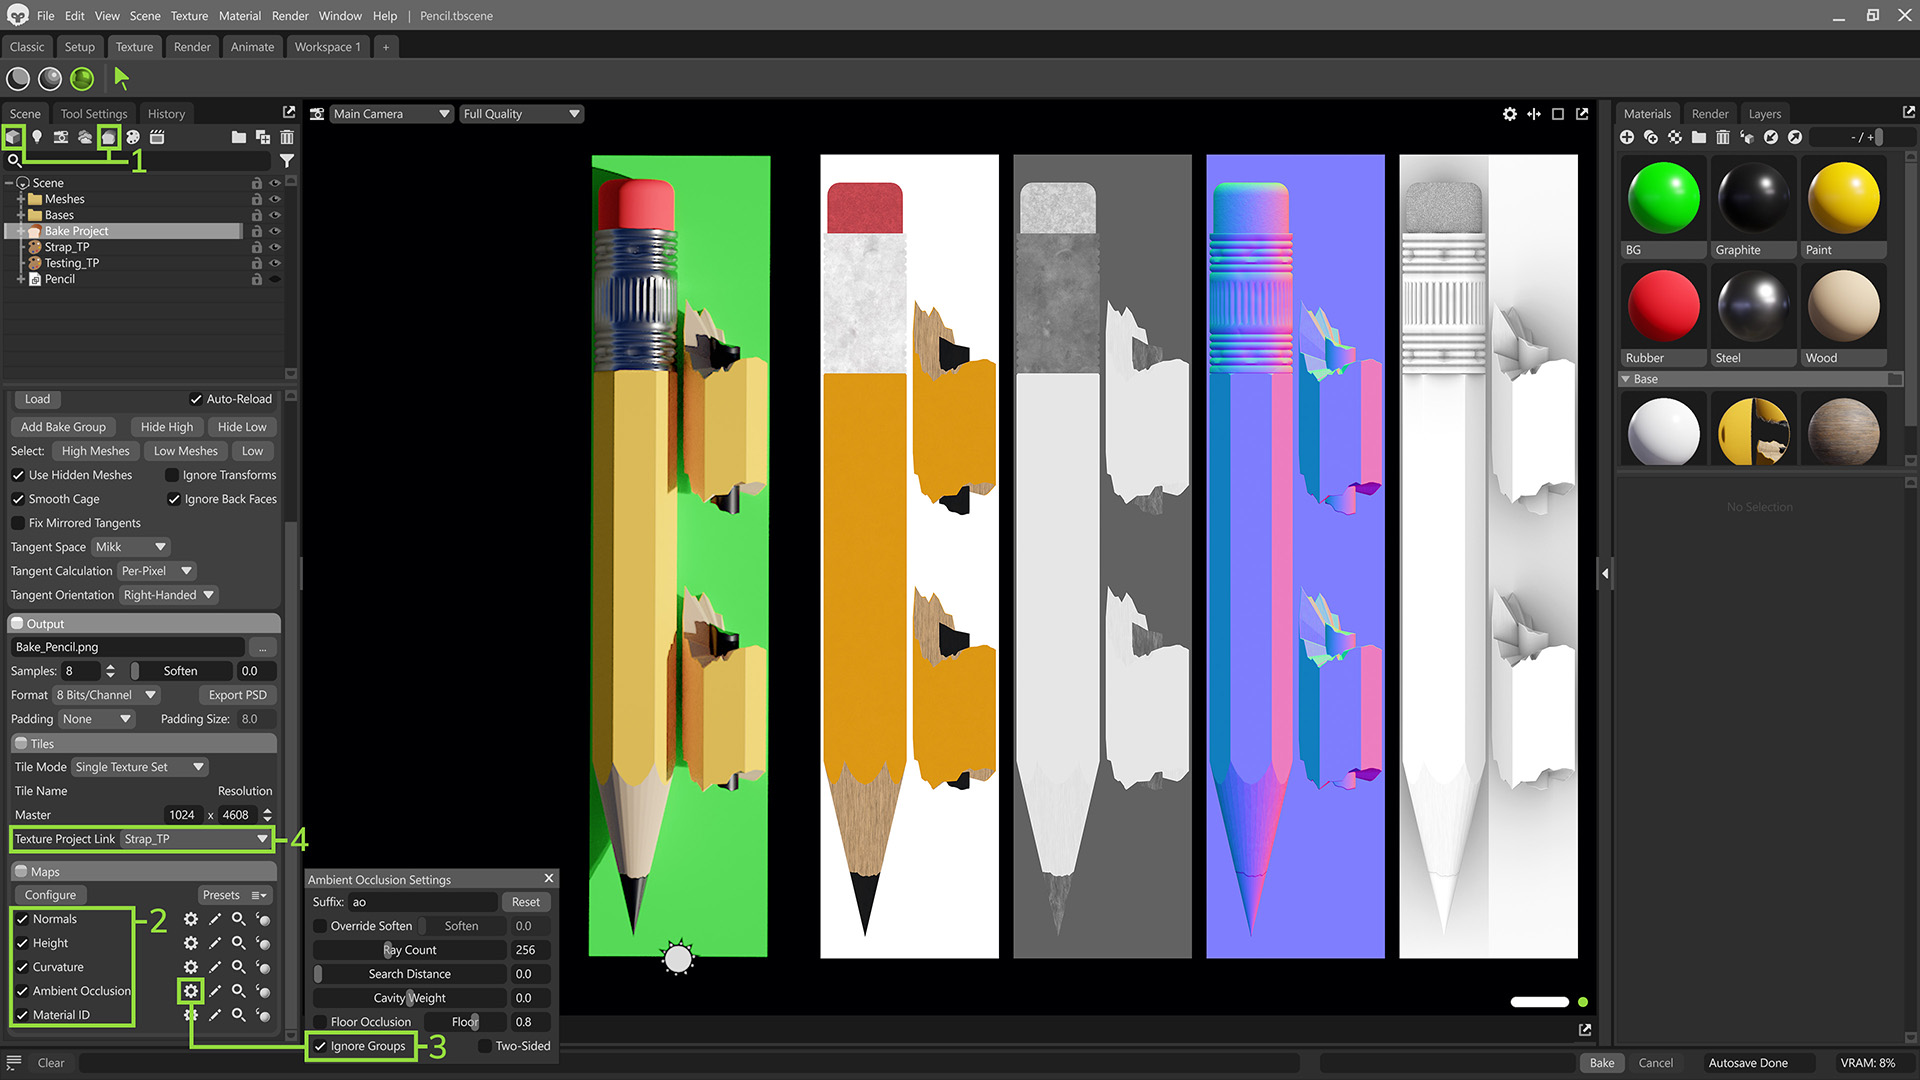
- Start by importing your mesh into Toolbag and creating a Bake Project.
- Configure the maps you want to bake, and set the resolution calculated earlier.
- Use the Texture Project Link in the Tiles section of your Bake Project to have your baked maps automatically load into a Texture Project.
- Bake!
Note: When baking Ambient Occlusion maps for Tile Strips with multiple variations, nearby objects may cause artifacts on each other. To avoid this, bake each variation in a separate group and enable Ignore Groups in the Ambient Occlusion Settings. You can also limit the Search Distance to reduce the spread and prevent seams around details near tile edges.
Learn how to use Bake Projects in Toolbag
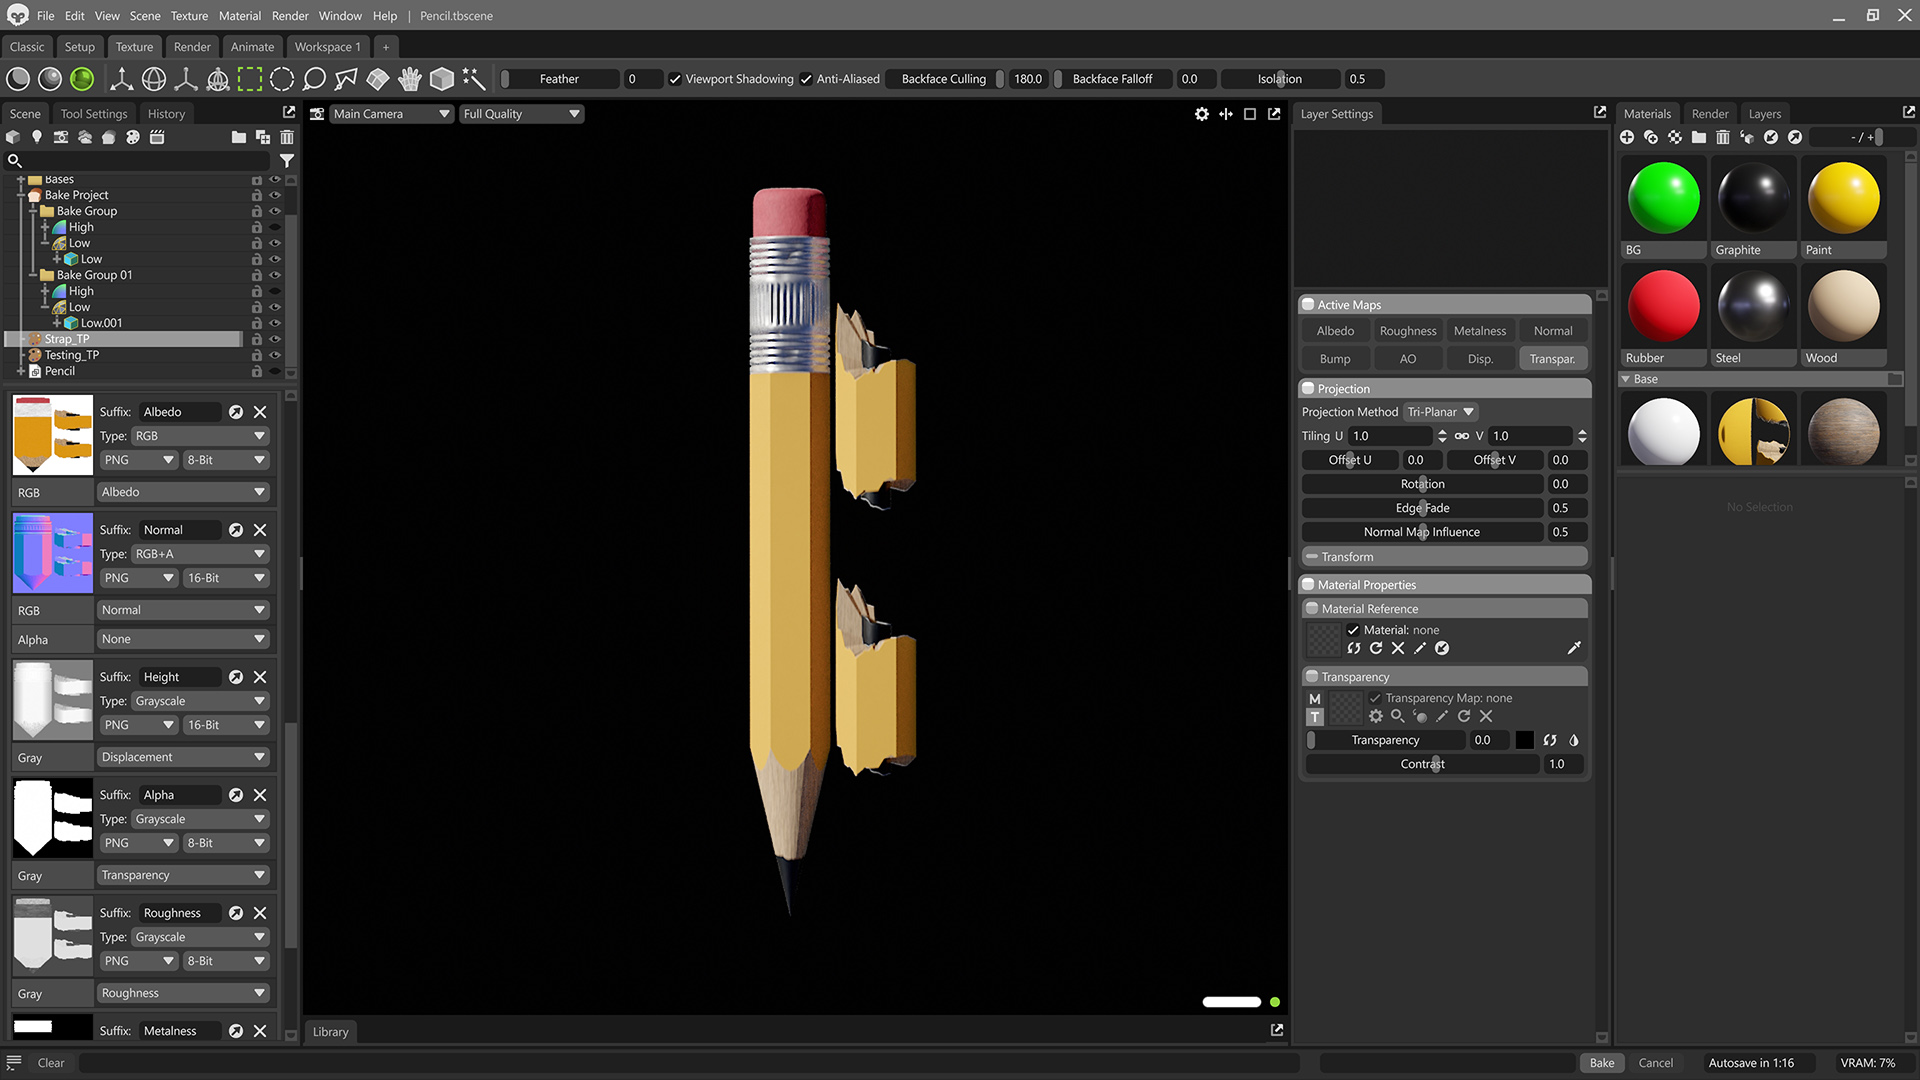
Texturing
Toolbag allows you to texture Tile Strips directly within the app, providing flexibility to paint, apply materials, and instantly preview how your strips will appear on the model before exporting. This speeds up iteration and ensures your textures match the final render environment. Once texturing is complete, you can export all the necessary maps.
Learn how to use Texture Projects in Toolbag
After exporting your Tile Strips textures, start a new Texture Project. Add a Vector Layer, switch its Projection Method to Tile Strip, load your baked textures into the proper slots, and then draw lines on your model to apply the strip.
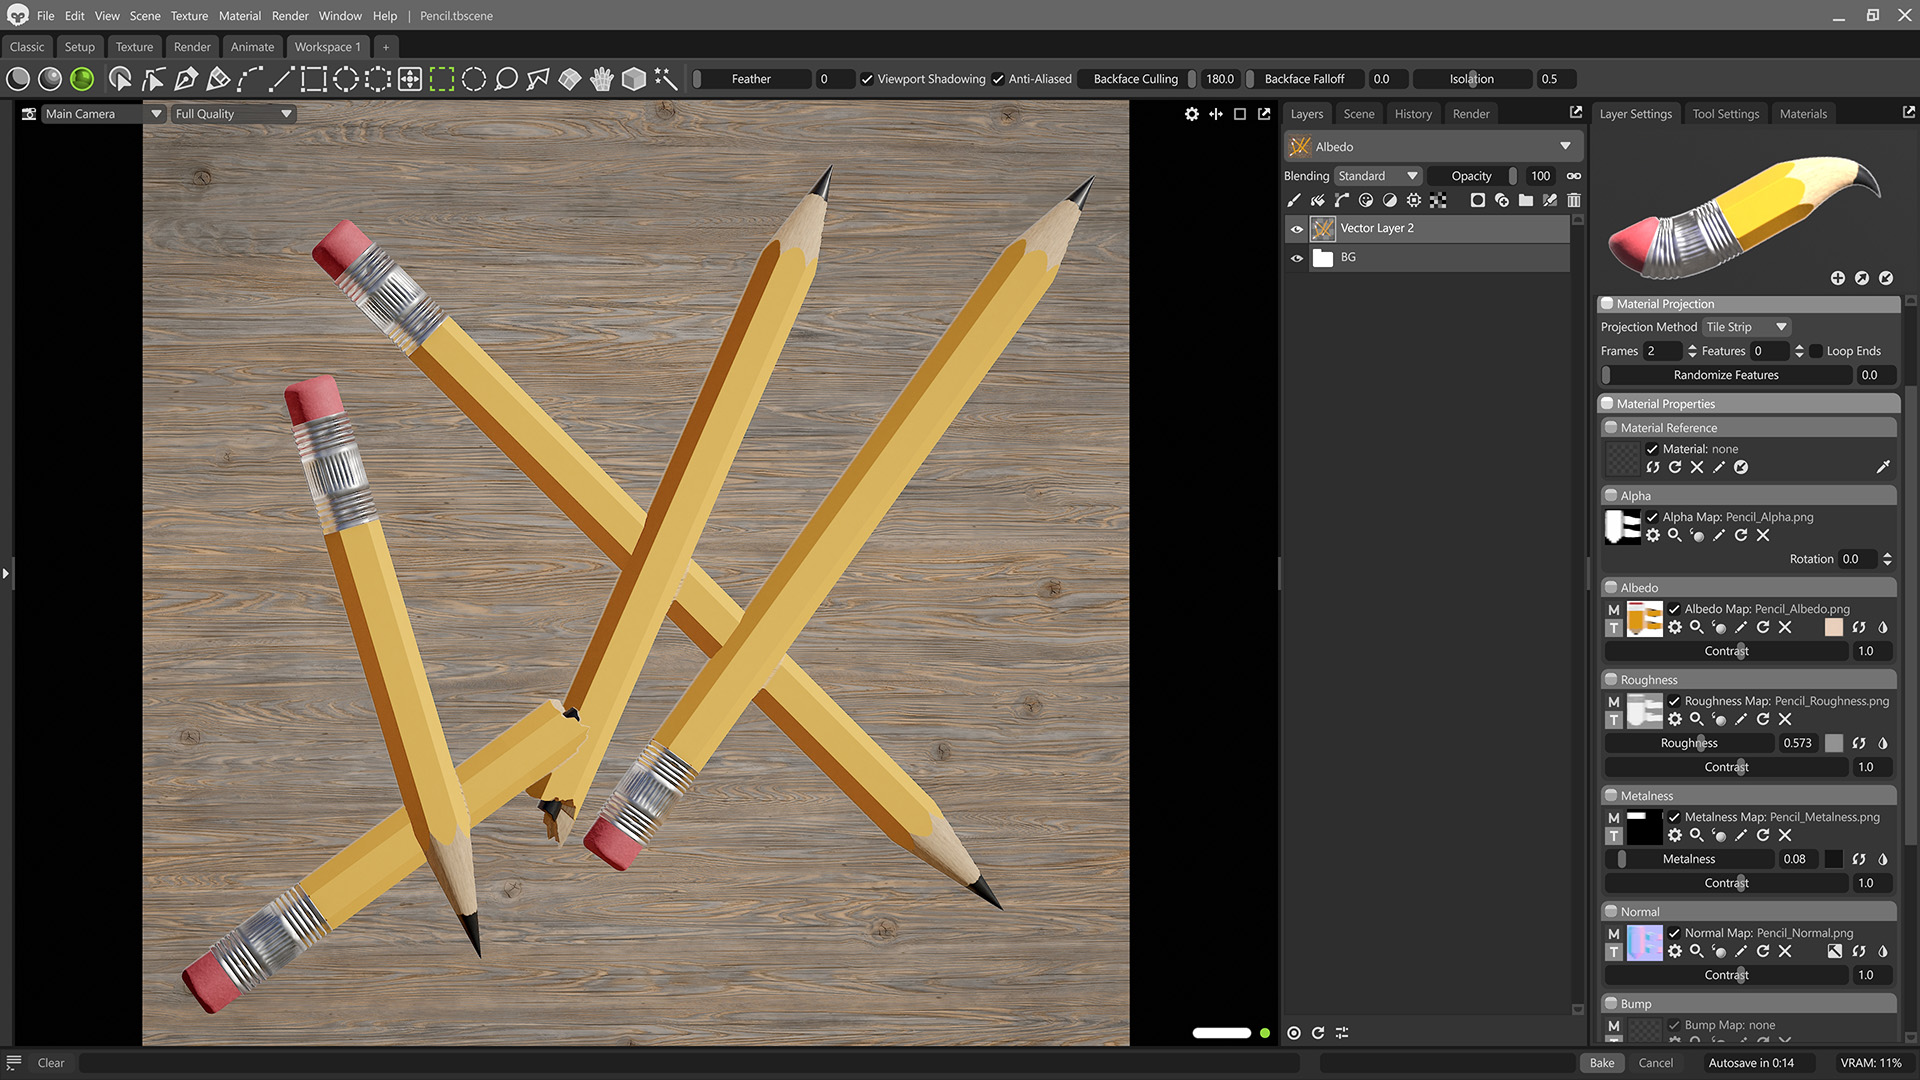
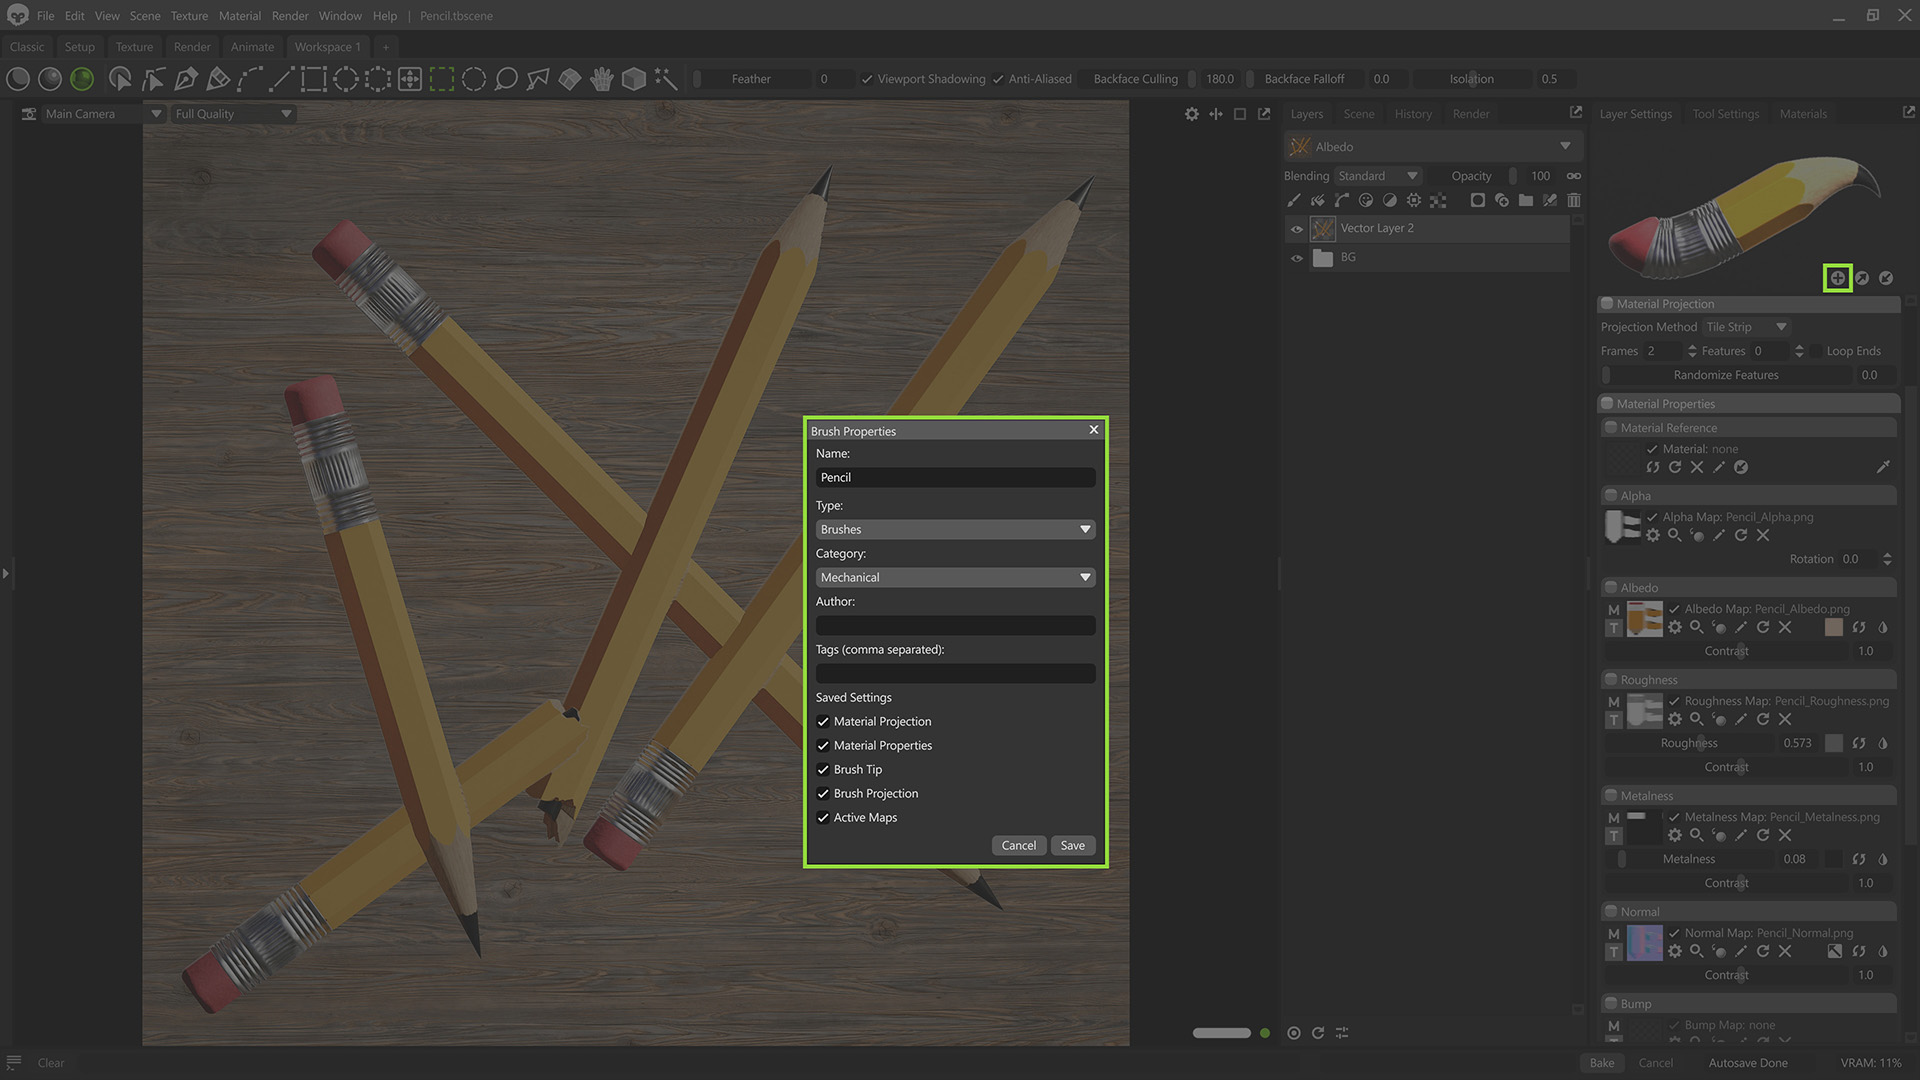
To make each Tile Strip line unique, you can experiment with Vector Layer settings, such as Taper, Warp, Random Width, and Randomize Features. Once everything is set up, you can save your Tile Strip for future use.
In-Project Use
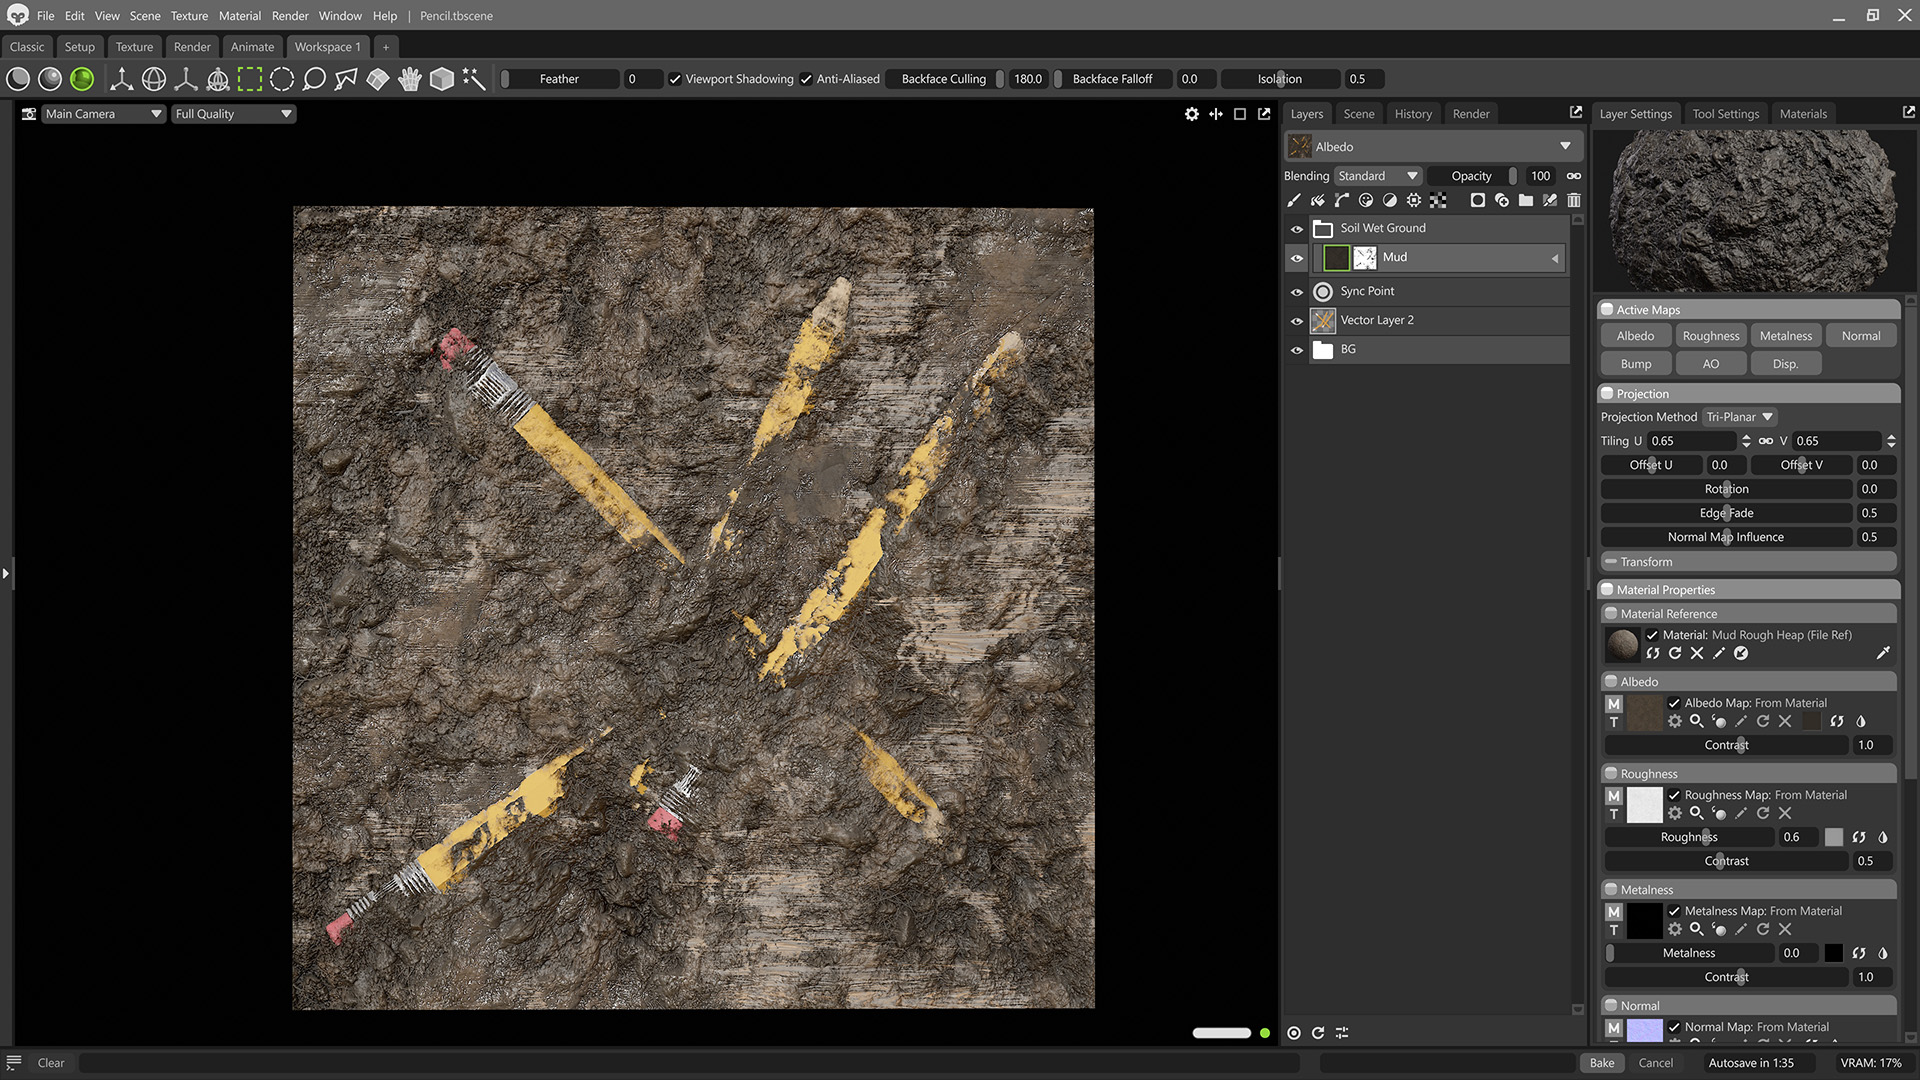
Once your Tile Strips are added to a Texture Project, you can enhance them by layering extra detail directly on the Vector Layer. A good practice is to use simple materials for texturing a Tile Strip, and then add dirt, scratches, or wear with tools like Sync Points, Carve Groups, and other Texture Project features, to layer in variation and create interesting effects.
Thanks for reading! To start painting with Tile Strips, start a free 30-day trial of Toolbag. For more Toolbag tutorials and quick guides, check out our Resources section.


