
Article by Joe Wilson
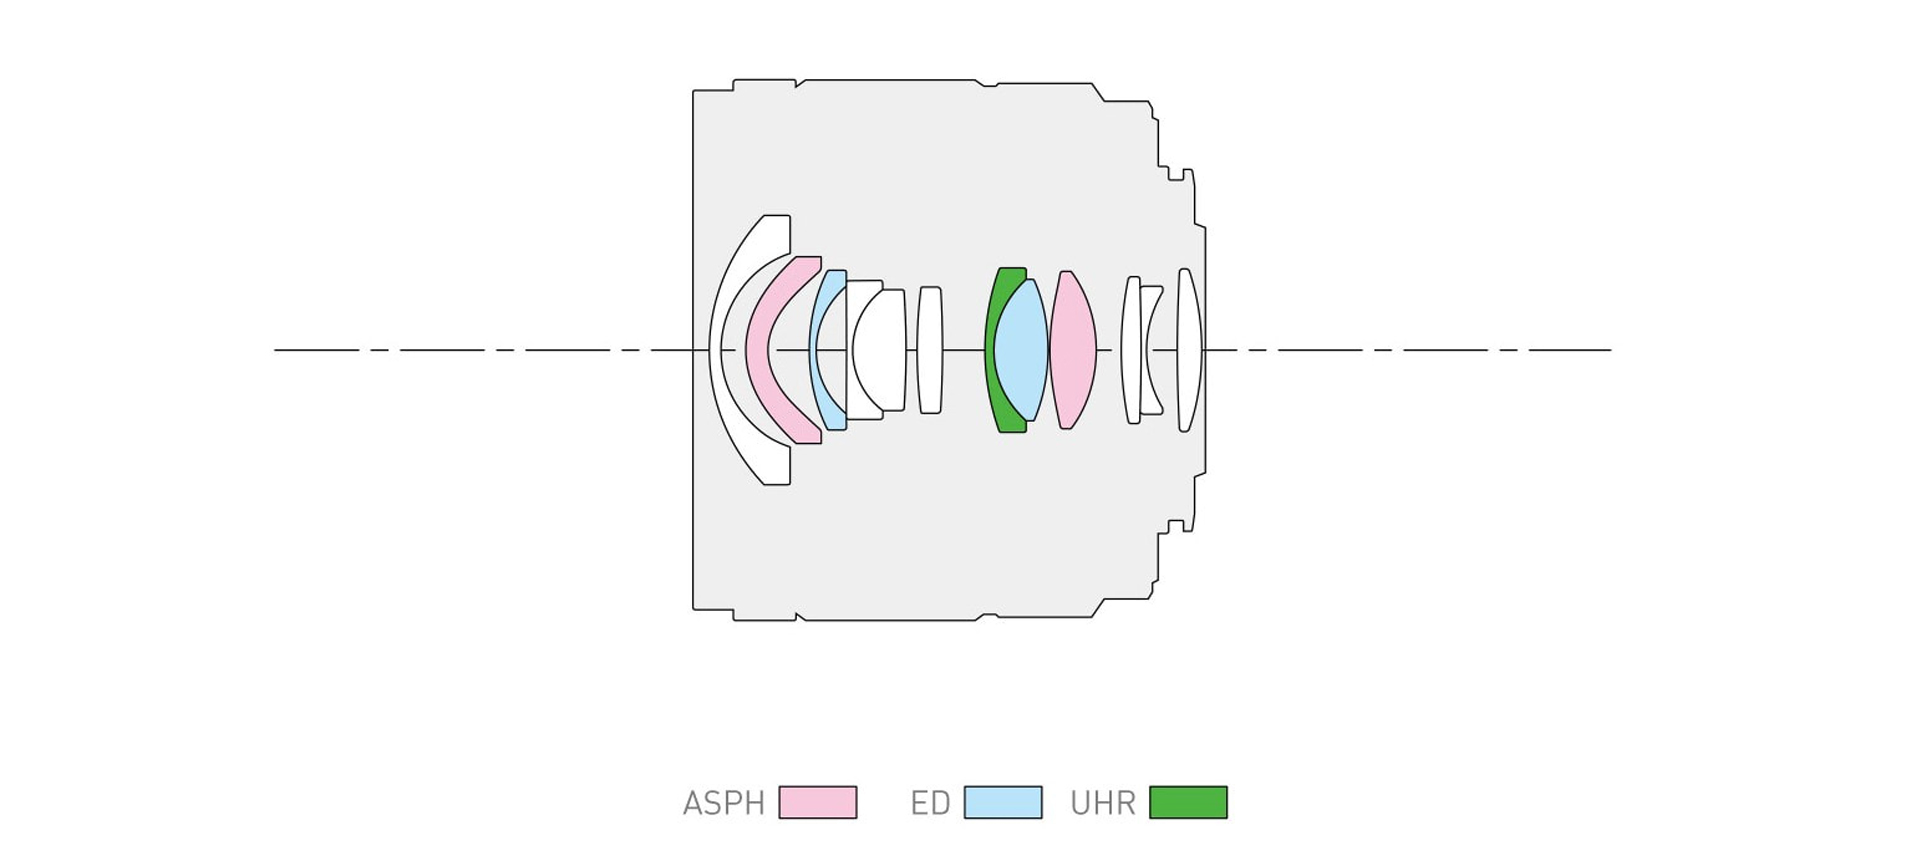
Physical Anatomy of a Lens
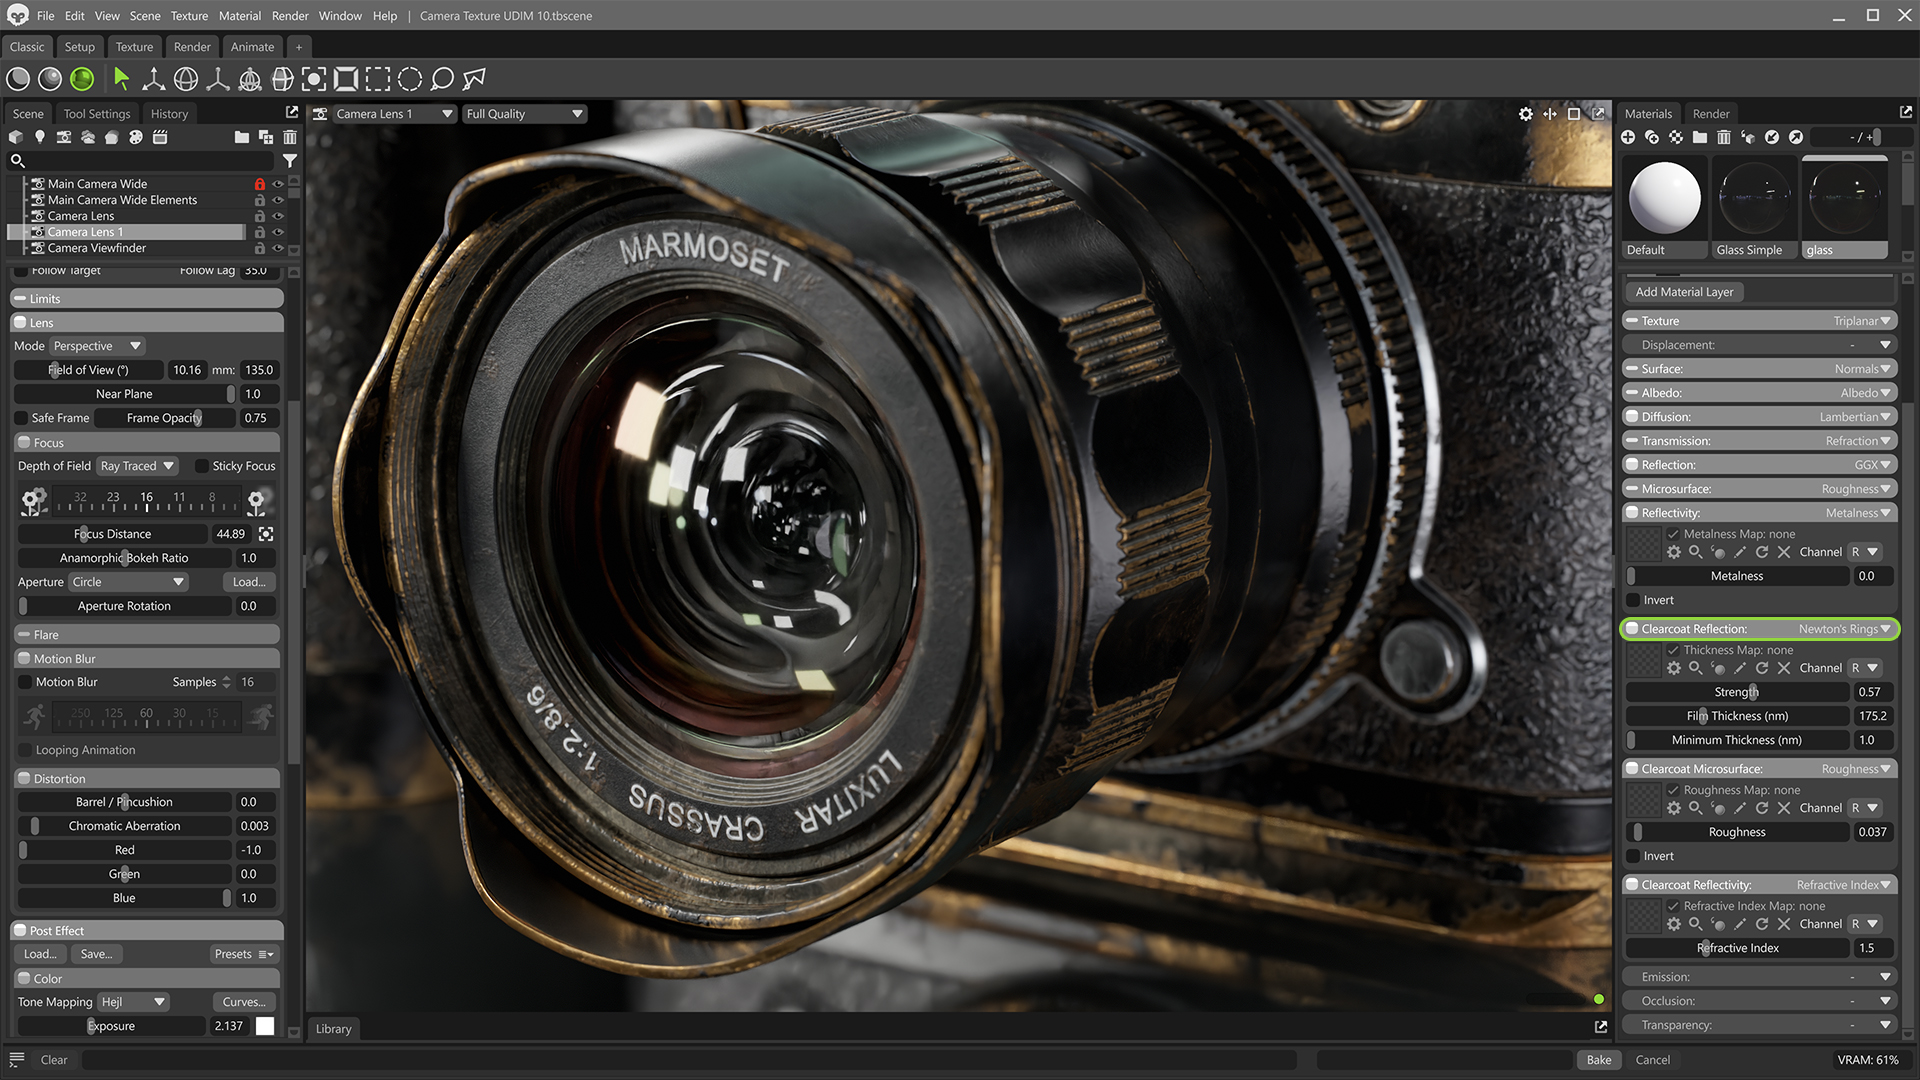
This article explains how I created the lens material for my camera in Marmoset Toolbag, covering how to add texture variation in the glass’s roughness and accentuate lens reflections with lighting.
The first thing I did was physically model all of the lens elements, which makes it easy to simulate light rays refracting through the lens in Raytraced rendering mode. You can find lens element breakdowns from the camera company’s product pages.
Glass Material Setup
Next, you need to apply a refractive material with an IOR of 1.5 to the lens elements. You can manually configure the Transmission > Refraction and Reflectivity > Refractive Index models in the Materials window, or simply load the Glass material preset from the Library.

You might notice the glass looks a little dark; this is because the default Transmission Bounce setting in the Render window is 4. I have 16 lens elements; that’s 32 surfaces that the light needs to bounce through, so I needed to increase that setting.
Camera lenses typically have a coating on the front element to protect it and reduce internal reflections (increase contrast). The coating colors the element in a complex, view-dependent kind of way. We can use Newton’s Rings in the Clearcoat slot to mimic this.
Adding Imperfections & Variation
Glass is rarely perfectly clean, so I added some variation in roughness, using a subtle image with specs of dust and, on a second material layer, another to add a slight fingerprint effect with a grunge map from the Library. I didn’t have UVs, so I used triplanar projection. To use triplanar projection in Toolbag, change the Texture shader module to Triplanar.

I used the Mask material layering mode (without a mask texture), set the Roughness map blend mode to Add, and used the Brightness slider in the Layers panel to quickly mask/blend the second layer in. A low Brightness value keeps the effect very subtle.

Light Setup for Glass Reflections
To get nice, clear reflections, you can add a Spot light and use the Rectangle mode in the Area/Shape panel. Adjust the size to make the reflections larger.
You can use the Light Controller Tool to easily place reflections by clicking the lens surface.
That’s a Wrap!
If you want to learn more about texturing and rendering transparent materials like glass in Toolbag, check out Cem Tezcan’s guide.
Thanks for reading. For more quick guides, check out our Resources section.


